Transcripts
1. Introduction: You ever tried to
crochet a circle and ended up with something
like this? To wavy. This one curls up like a bowl, and this one looks more like
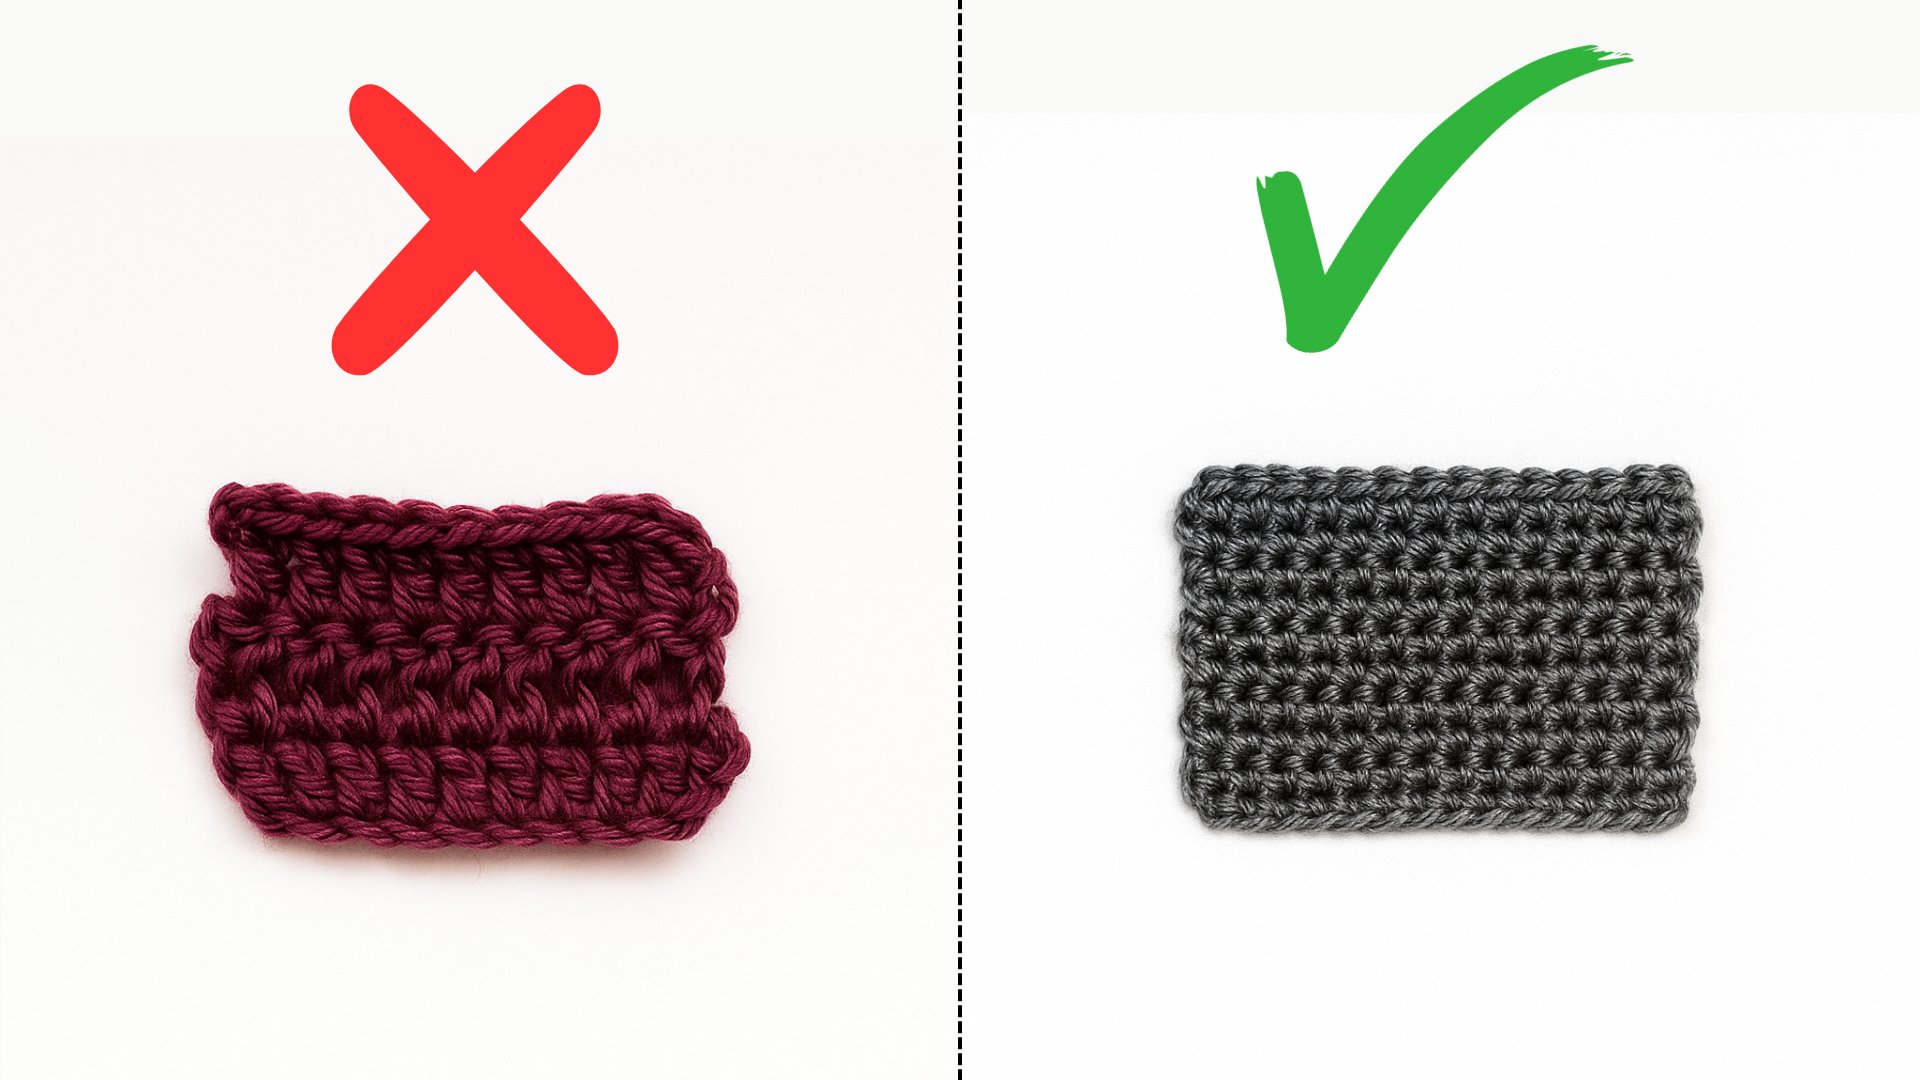
a stop sign than a circle. But this is the perfect circle
we are going for smooth, flat, and evenly shaped. If your circles look like
this, you are not alone. These mistakes are super
common, especially for bigners. I made them too when I
first started. Don't worry. You are not doing
anything wrong. These problems happen because crochet circles follow
a certain pattern. If that pattern is
off even slightly, things start to go wrong. But I will show you how
to fix that step by step. A V circle usually means you have added
too many statches. You are increasing too fast. A circle that curls up like this means you didn't
increase enough, so it is too tight. If your circle looks more
like a hexagon or a polygon, it's because you are increasing in the same spots every round, which creates points
instead of a smooth edge. In this class, I will
guide you through everything you need to
crochet a perfect circle. I will show you two easy
ways to start your circle, one using a magic ring and
the other using chains. Then we will go step by step
through how to increase your stitches evenly to keep your circles flat and smooth. No curling, no
waves, and no edges. Finally, we will
put your skills to use by making a cute
little mug rug, the perfect beginner project. So grab your yarn
and hook and let's get started on your
perfect crochet circle.
2. Starting a Circle with Magic Ring: This lesson, I will
show you how to start a crochet circle
using the magic ring, also called the magic
loop or adjustable ring. It's a favorite technique
for crocheting in the round, especially when you want a tight closed center
without a hole. So start by taking
the yarn tail. We are going to wrap it around the index and middle
finger of the left hand. Crossing over to form an X. Now insert your hook under the first strand and
grab the second strand. Pull it through the loop, twist your hook
slightly if needed. Now chain one or
chain two if you are working in double
crochet to secure the loop, now we will crochet
directly into this ring. For this demo, I'm using
single crochet stitches, but the same method works with double crochet or
half double crochet. Work six to seven single
crochet stitches into the loop. So insert the hook, yarn over and pull through. Yarn over and pull through
both loops on the hook. That is our first single crochet continue in the same
way to make five more. So we have made six
single crochet. Now what we are going to do, we are going to gently
pull this yarn tail. You will see the center
close up neatly like this. Now slip stitch into the top of the first stitch
to close the round. So insert the hook. Make sure to insert
it under both loops. Yarn over and pull through the stitch and the
loop on the hook. You have just completed your first round
using a magic ring. The magic ring can
feel tricky at first, but it gets easier
with practice. It creates a clean,
professional looking center, and it is ideal for any project that starts in the
round like amigramy, heads, coasters, and more. Next, I will show you an alternative way to start
a circle using chains. This method is easier for some beginners and still
gives a nice result.
3. Starting a Circle with Chains: The magic ring feels too
tricky, don't worry. There is a bigner
friendly alternative. In this lesson, I will show you how to start a
circle using chains, also called the
chain ring method. This method is easy, works well and is often used in traditional
crochet patterns. So start by making a slip node. Adjust the size of the knot. Then chain five, one, two, three, four, and five. So I have made five chains. Now to form the ring, I'm going to insert the hook into the first chain we made. Insert the hook, yarn over and pull through the chain
and the loop on the hook. You can pull this tail
end to tighten the chain. Now we will work
our first round of stitches into the
center of this ring. So chain one if you are using a single crochet or chain
two for double crochet, This acts as the
starting height. Then begin placing
stitches into the ring. We will keep this tail
end along our work. So insert the hook into the ring yarn over
and pull through. Yarn over and pull through
both loops on the hoop. So that's the first
single crochet. Work a total of seven single
crochet into this ring. Once you have added
your stitches, it's time to close the round. So insert the hook
into the first stitch. Make sure to go
under both loops. Yarn over and pull through the stitch and the
loop on the hook. You circle may have
a tiny hole in the center that is totally
normal with this method. It's not as tight
as the magic ring, but it is easier to handle and still makes a
beautiful circle. Now that you know both
starting methods, let's learn how to build
up a perfect circle.
4. Making a Perfect Circle: This lesson, I will
walk you through the exact steps to crochet
a flat even circle, one that does not ruffle, curl or turn into a hexagon. We will use simple math
and even spacing to help your circles come out round
and smooth every time. So start your circle
with a magic ring. In one. And now we are going to make seven single crochet
into the ring. After completing
seven single crochet, pull the sine to
close the center. Now we are going to join it with a slip stitch into
the first stitch. So inside the hook, make sure to go
under both loops. Yarn over and pull through the stitch and the
loop on the hook. We have completed
our first round. Now for the second
round, chain one. In this round, we will
increase in every stitch, so make two single
crochet into each stitch. So insert the hook into
the following stitch, yarn over and pull through. Yarn over and pull through
both loops on the hook. Now make another single
crochet into this same stitch. Again, make two single crochet
into the following stitch. Complete this round
in the same way. So I have made two single
crochet into each stitch. Now let's count these stitches. One, two, three, four, five, six, seven, eight, nine, ten, 11, 12, 13, and 14. So we have 14 stitches. Now join with a slip stitch
into the first stitch. In one, now we will start
spacing our increases. So in round three, do one single crochet
into the first stage. Two single crochet
into the next. Then again, do a single
crochet into the next stitch. And two single crochet
into the following stitch. Repeat that all the way around. I have completed this round, and we have 21 stitches. Then join with a slip stitch
into the first stitch. For round four, chain one. Make two single crochet. Then two single crochet
into the same stitch. Repeat the spectron
across the round. This gives 28 stitches. It is important to count
the stitches after each round to ensure that
our circle is perfect. Now join it with a slip
stitch into the first stitch. For round five chain one, the rule is simple
with each new round, increase the number of
single crochet stitches between the increases. Round five will be
three single crochet. Then two single crochet into one stitch for a
total of 35 stitches. I if your circle
starts to ripple, you are probably
increasing too much. If it starts to curl
up like a bowl, you are not increasing enough. Stick to the formula and check your stitch count at
the end of every round. Sometimes circles
turn into hexagons because you are increasing in
the same place every round. To fix this, simply
stagger your increases, shift them slightly
each round so they are not stacked
on top of each other, and that's a perfectly
round flat crochet circle, ready to be used for coasters, wag or anything you like. The key is even increases, counting your stitches and shifting where you
place the increases. Now that you have mastered
the perfect circle, let's put it to use
in our next project, a colorful fruit
inspired Mug rug.
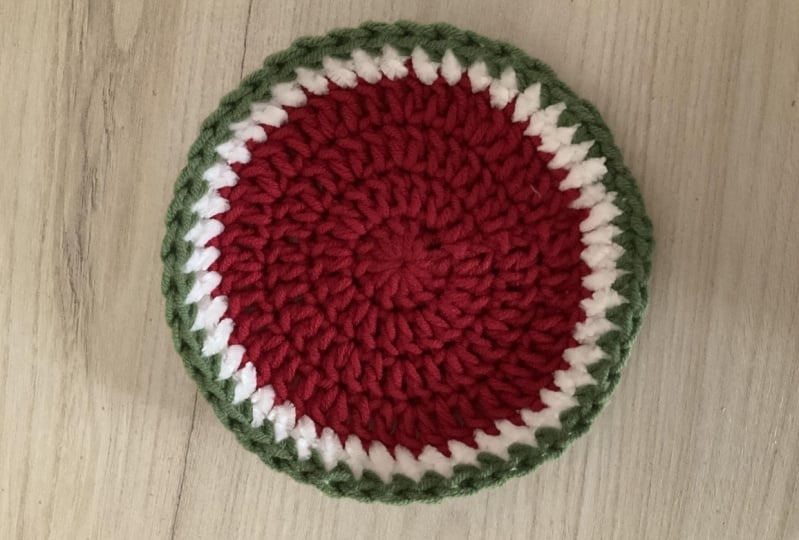
5. Project: Creating a Watermelon Mug Rug: This final lesson, we will bring everything
together and make a colorful fruit inspired mug rug using the circle technique
you have just learned. You can make it look
like a watermelon, Kiwi, or any other round fruit or just use your
favorite colors. Start with a magic
ring or a chain ring, whichever you are more
comfortable with. Chain two. Then make 12 double crochet
stitches into the ring. Pull this tine to
close the circle. And join with a slip stitch
into the first stitch. Now chain two. In each round, increase evenly to
keep the circle flat. I'm using this basic
increased pattern. So here I have completed four
rounds of double crochet. Now we will switch
to white yarn to add the bottom for
the watermelon rind. So cut this yarn and pull
this all the way through. Insert the hook into
the same stitch from the back and pull this
tail end to the back. A Now take white on
and make a slip node. Insert the hook into the
stitch where we have ended and pull
this note through. Chain one. Now make
three single crochet. Keep the staine along your work. And then two single crochet
in the same stitch. Repeat this pattern
all the way around. You complete the
round, wine with a slip stitch into
the first stitch. Now cut this yarn
and pull it through, insert the hook into
the same stitch from the back and pull the
tail end to the back. Now take green yarn
and make a slip knot. Insert the hook in any stitch
and pulled is not through. Gene one now simply make a single crochet in each
stitch all the way around. Finally, weave in all the yarn
tails using a yarn needle, and your mugreg is
done. You did it. Your fruit inspired crochet
mugreg is ready to use. Try experimenting
with other fruits or color combinations, oranges, lemons, and even dragon fruit, and don't forget to share your finished project
in the class gallery. I would love to see
what you create.
 Nida Younas, It's me :)