Transcripts
1. Introduction: Hi, dear, and welcome to this PignerFriendly
crochet course. I'm so excited you are here. If you have ever looked at a beautiful crochet
piece and thought, I wish I could make that. You are in the right place. This course is made
for absolute bigners. No previous
experience is needed. Whether you are picking up
a hook for the first time or you have tried a few
stitches and felt stuck, I will guide you every
step of the way. Roche is such a wonderful
skill to learn. Not only is it
relaxing and creative, but it also gives you
the ability to turn a ball of yarn into
something beautiful. In this course, we will build your crochet skills
from the ground up. We will begin with the basics, starting with how to choose the right yarns and
hooks for your projects. Then I will introduce you to other essential crochet
tools that helps make your experience
smoother and more enjoyable. You will also learn how
to hold your yarn and hook in a way that feels natural
and comfortable for you. Once you are set up, we will dive into the
foundation of crochet, beginning with how to make a
step knot and chain stitch. From there, we will
move on to the course stitches used in
almost every pattern. You will learn how to
do the single crochet, half double crochet,
double crochet, and treble crochet stitch. You will discover how
to use the slip stitch, which is helpful for finishing gross or joining your work. Next, we will learn
how to read patterns. You will get comfortable with crochet samples
and abbreviations. Then learn how to read sample charts and follow
written instructions. You will also learn how to shape your crochet by increasing
and decreasing stitches. Then we will use
those techniques to create a simple
crochet triangle. Rennie squares are
a crochet classic, and you will learn
how to make them using one color and
then with two colors. I will show you how to
join granny squares to build larger pieces
like blankets or bags. And when it's time to get
creative with colors, you will learn how to change yarn color at the end of a row and even switch colors mid row while keeping
your work neat. To wrap it all up, we will apply everything you have learned in two
final projects. We will make a small and
cute drawstring pouch and a simple crochet bookmark. Are you ready to turn some yarn into something
handmade and special? Let's begin your crochet
journey together. I will see you in
the first lesson.
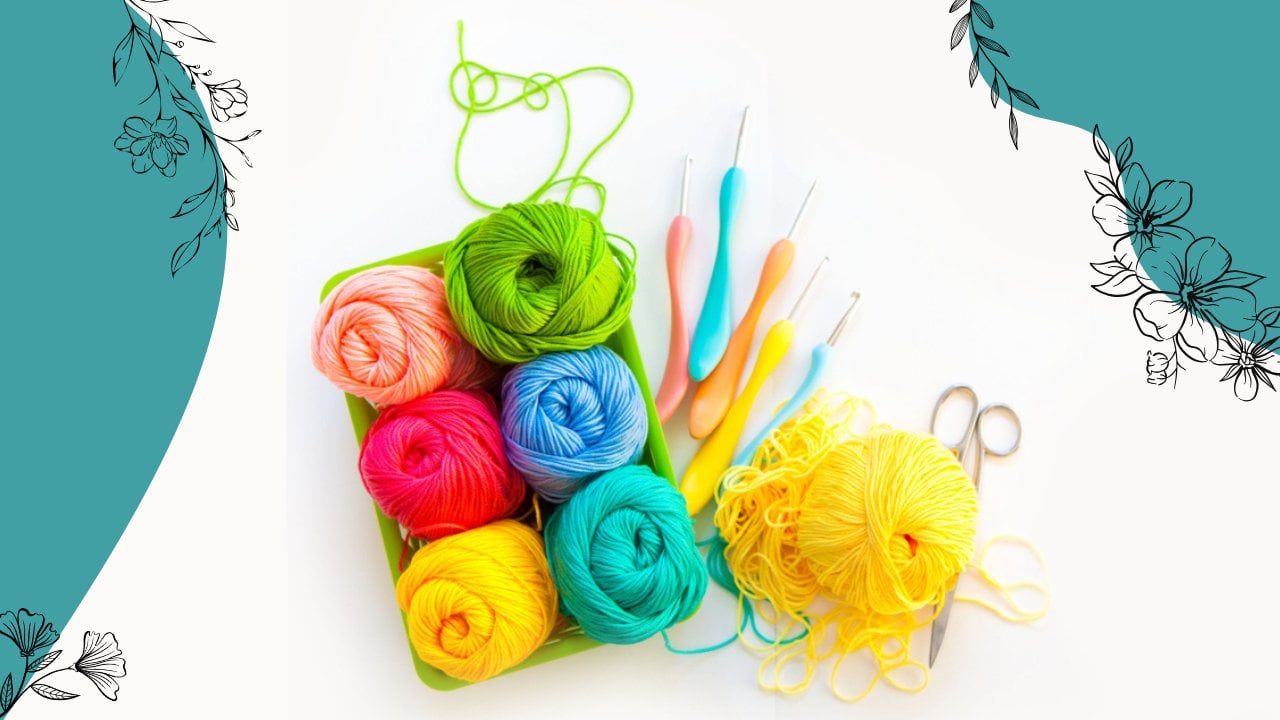
2. Yarns and Hooks: Welcome to this lesson
on yarns and hooks, two of the most important tools you will need for crochet. As a beginner, choosing
the right yarn and hook can feel a
little overwhelming. There are so many sizes,
materials, and textures. In this lesson, I will guide
you step by step so you will know exactly what to look for when starting
your crochet journey. Let's start with the yarn. Yarn is the thread we use
to create crochet projects. It comes in many different
weights, fibers, and textures, and each will affect how your project
looks and feels. Yarn weight refers to how
thick this strand is. Yarn weight is determined by the thickness of this strand, not by the weight of the skin. Here are the basics from
thinnest to thickest. Super fine. It is
very thin yarn, great for laces, socks
or delicate projects. Fine. It is slightly thicker, often used for lightweight
garments and baby items. Lightweight yarn, it is soft and verstilePerfect for shawls, light sweaters and accessories. Medium or worsted yarn, the most common yarn weight, great for blankets,
scarfs and everyday wear. Then bulky yarn. It is thick yarn that
works up quickly, ideal for czzyhats,
scarfs and sweaters. And the last is
super bulky yarn. It is extra thick yarn, perfect for chunky blankets, rugs and warm winter projects. For Bg nurse, I always recommend starting with
worsted weight yarn. It is easy to see your
stitches and not too slippery. Next, let's talk about fibers. Yarn are made from
different materials like acrylic, cotton and wool. Acrylic yarn are affordable, widely available, and
easy to care for. These are perfect for beginners. Cotton yarn are
smooth, breathable, and great for dish
clothes or summer wear. Then wool yarn, it is warm and soft but may require
special washing. Some beginners find
it a bit tricky. As a bigner, acrylic
or cotton yarn is a great choice because they are inexpensive and
easier to work with. Now let's look at crochet hooks. Like yarn, they them in
different sizes and materials. Hook sizes match your yarn. The thicker the yarn, the
bigger the hook you will need. Sizes are labeled in
letters like H or J, and millimeters like these. Smaller hooks like
two to three MM are used for fine yarns. Medium hooks like
three to five MM are perfect for
worsted weight yarns. Larger hooks like five MM and above are perfect
for bulky yarns. If you are just starting out, I recommend a four MM or a five MM crochet hook
with worsted weight yarn. This is the easiest
combo for bigners. There are two main hook head
styles, inline and tapered. Inline has a flat, sharper edge, good
for precision. Tapered is rounded, easier for bigners and smoother motion. Hooks can be made of aluminum, plastic, wood, or even resin. Aluminum hooks are
smooth and durable. Plastic hooks are
lightweight and inexpensive. Wood hooks are warm to
touch and eco friendly. One of the most important
things to remember is that your yarn weight
and hook size should match. If your hook is too
small for the yarn, your work will feel
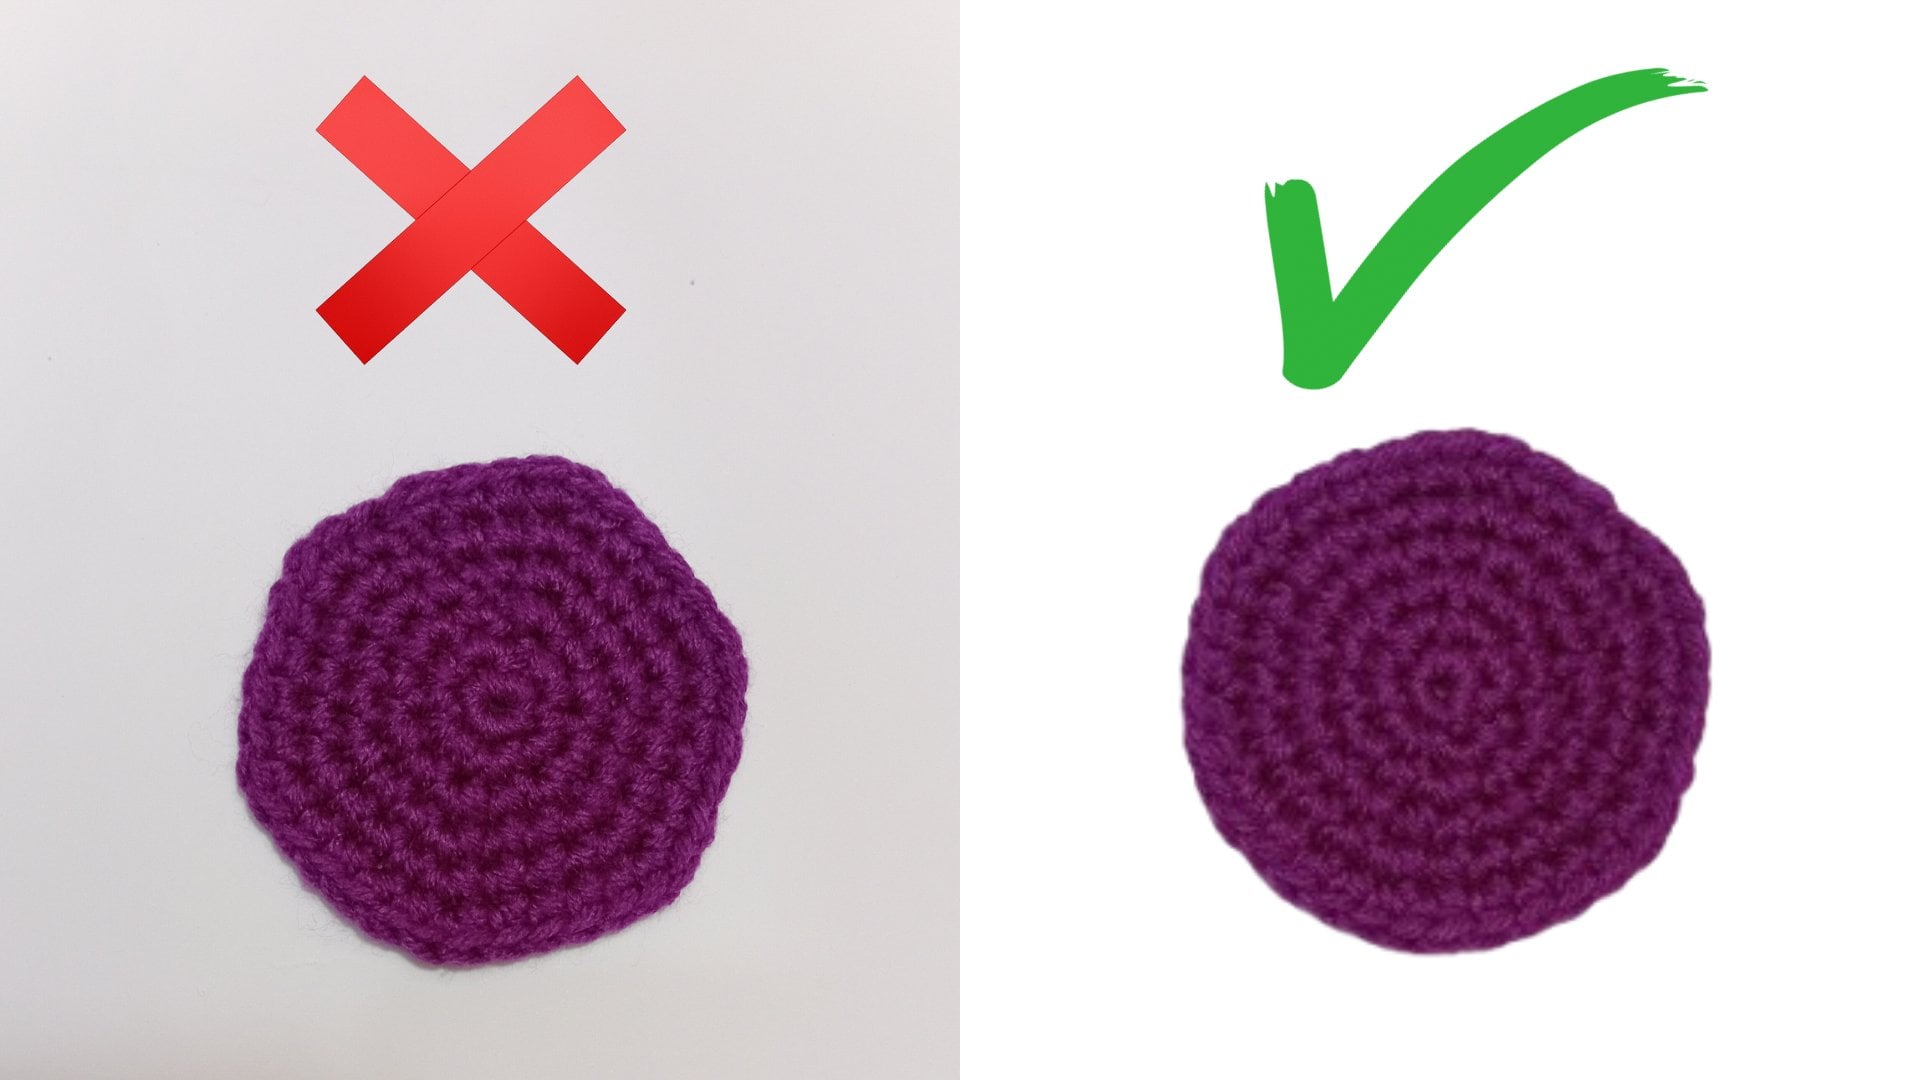
stiff and tight. If your hook is too big, your stitches will look loose. These watches are made
using same yarn and they have same number of
rows and same stitches. But I have crochet this
one using a 1.5 MM crochet hook and this one
using a four MM crochet hook, so you can see
declared difference. That's why yarn labels often
recommend a hook size. It is a great starting point. So if you are just starting out, here's what I suggest. Use a worsted weight, acrylic yarn preferably in a light color because dark yarn makes
stitches hard to see. Along with a four MM or
a five MM aluminum hook, this combination makes learning
crochet much smoother.
3. Other Essential Crochet Tools: The last lesson we learn
about yarns and hooks, the two most important
essentials for crochet. But to make your crochet experience smoother
and more enjoyable, there are a few extra tools and accessories that you will
find really helpful. Don't worry. You don't need
to buy everything right away. I will show you the basics, explain what each tool does, and share which ones are
most useful for beginners. First up scissors, you
will need a small, sharp scissor to cut
your yarn neatly. Regular household
scissors work fine, but many crochets prefer small embroidery cissers
because they are lightweight, precise, and easy to carry. The key is to have cissers
that give you a clean cut, which makes finishing
your project much easier. Next is the tapestry needle, also called a yarn needle. This is a large needle with
a blunt tip and a big eye. We use it mainly for weaving
in yarn ends after finishing a project and sewing pieces together like graniqares
or emigramy parts. They usually come in
plastic or metal. Another tool you will
love is stitch markers. When you are working in
rounds or on bigger projects, it is easy to lose track of
where a row begins or ends. Stitch markers help
you keep your place. You can buy plastic
ones that open and close almost like
tiny safety pins. Or if you don't have
stitch markers, you can even use a scrap
piece of yarn as a marker. These are especially
helpful when making hats, amigramy or anything in D round. A simple but essential
tool is a measuring tape. Crochet patterns often give sizes in inches or centimeters, so you will need a tape
to measure your work. This ensures your project
come out the right size, especially for
garments, blankets, or home decor items. Now you know all about the simple but helpful tools
you can use in crochet. In the next lesson,
we will go hands on. I will show you how to hold your yarn and hook comfortably, so you are ready to start making your very first stitches.
4. How to Hold Yarn & Hook: Hello, everyone.
In this tutorial, we will be learning how to hold your yarn and
hook properly. First, let's begin with yarn. Holding the yarn correctly is essential for
maintaining tension, which directly impacts the size and consistency of stitches. There are several methods of holding the yarn
that you can try. So for the first
method, take the yarn, wrap it around
your index finger, letting it to glide
smoothly as you work. Now let's move on to
the second method. Wrap the yarn over
and under your pinky, then bring it behind
your ring finger, under your middle, and finally
over your index finger, allowing the yarn
to glide smoothly. For the third method, take the yarn over
your ring finger under your middle and wrap it twice
around your index finger. So these are a few methods of holding your yarn
while crochetting. If you are a complete beginner, you might also consider using at tension ring to help
maintain consistent stages. You can find these
rings on Amazon, Etsy, or at a local craft store. Now let's talk about
how to hold the hook. There are two common grips the pencil grip and
the knife grip. For pencil grip, hold
the hook between your thumb and index
finger as you are writing. The knife grip on the other hand involves holding the hook like a knife with your thumb on the hook and your
fingers wrap around it. Now that you have learned how to hold your yarn and
hook separately, let's try using them together. Hold the hook in your right hand and yarn in your left hand. Start by making a slip
note. Don't worry. We will cover how to do this in detail in the next tutorial. For now I'm just showing you how to hold your yarn
and hook together. You can choose to
hold the hook like a pencil and working like this. Or like a knife. Practice holding the urn and hook until it feels
natural to you. Keep practicing and I will
see you in the next tutorial.
5. How to Make Slip Knot & Chain Stitch: Hello, everyone.
In this tutorial, you will learn how to make a
slip note and chain stitch. First, let's start
with the slip note. There are so many different
ways of making a slip note. I'm going to show you
the easiest methods. So for the first
method, age the yarn. This end of the yarn is
known as the tail end while the rest of the yarn is
known as the working yarn. So to make a slip node, create a loop by crossing
the working yarn, the yarn that is
attached to the ball over the tail end like this. Next pinch where the yarn crosses to hold
the loop in place. With your other hand,
reach through the loop. Grab the working yarn and
pull it through the loop. Gently pull both
ends of the yarn to tighten the loop,
forming a knot. So this is our slip knot, and it is the very first
step in crochet projects. Adjust the size of the loop
by pulling on the yarn ends. Now let's try the other method. Take the crochet hook and
the tail end of the yarn. Fold the end of the
yarn like this. Now place the hook in the loop. Make sure the tail ine of
the yarn is behind the hook. Now bring ditaline to
the top of the hook. Here you can see this
a loop is formed. Now pull dtaline through the loop with the
help of the hook. So our slip node is ready. Adjust the knot by gently
pulling the yarn ends. So now our slip node is ready. We are going to start
our chain stitch. So take the hook. You can hold the
hook like a pencil. Or like the knife. Now take the slip node
that we have made, insert the hook into this loop. Pull the ends of the yarn to
adjust the size of the loop. Hold the yarn in
your left hand and wrap it around your index
finger to control the tension. Use your thumb and index
finger to hold the slip node, keeping the tension
steady and making it easier to pull the
yarn through the loop. Now wrap the yarn over the
hook from back to front. It is known as a yarn
over in crochet. Now with a slight
twist of your wrist, pull the hook through the loop. This creates a new loop, and your first chain
stitch is ready. Again, wrap the yarn
from back to front on the hook and pull it through
the loop on the hook. So this is our second chain. Then again, yarn over and pull it through the loop
to create a chain stitch. When you are making chains, use your thumb and middle
finger of the hand holding the yarn to grip
the previous chains. This helps maintain
consistent tension, making your stitches more even and easier to
control as you work. Continue to wrap the
yarn over the hook and pull it through the loop
to create more stitches. Don't worry if your stitches
are a bit uneven at first. That is totally normal. The chain stitch
is the foundation for many crochet projects, so take your time practicing. Once you are comfortable, you will be ready to move on
to more advanced ditches. Congratulations.
You have just made your first slip note
and chain stitch. With these basic skills, you are now ready to explore the wonderful word of crochet.
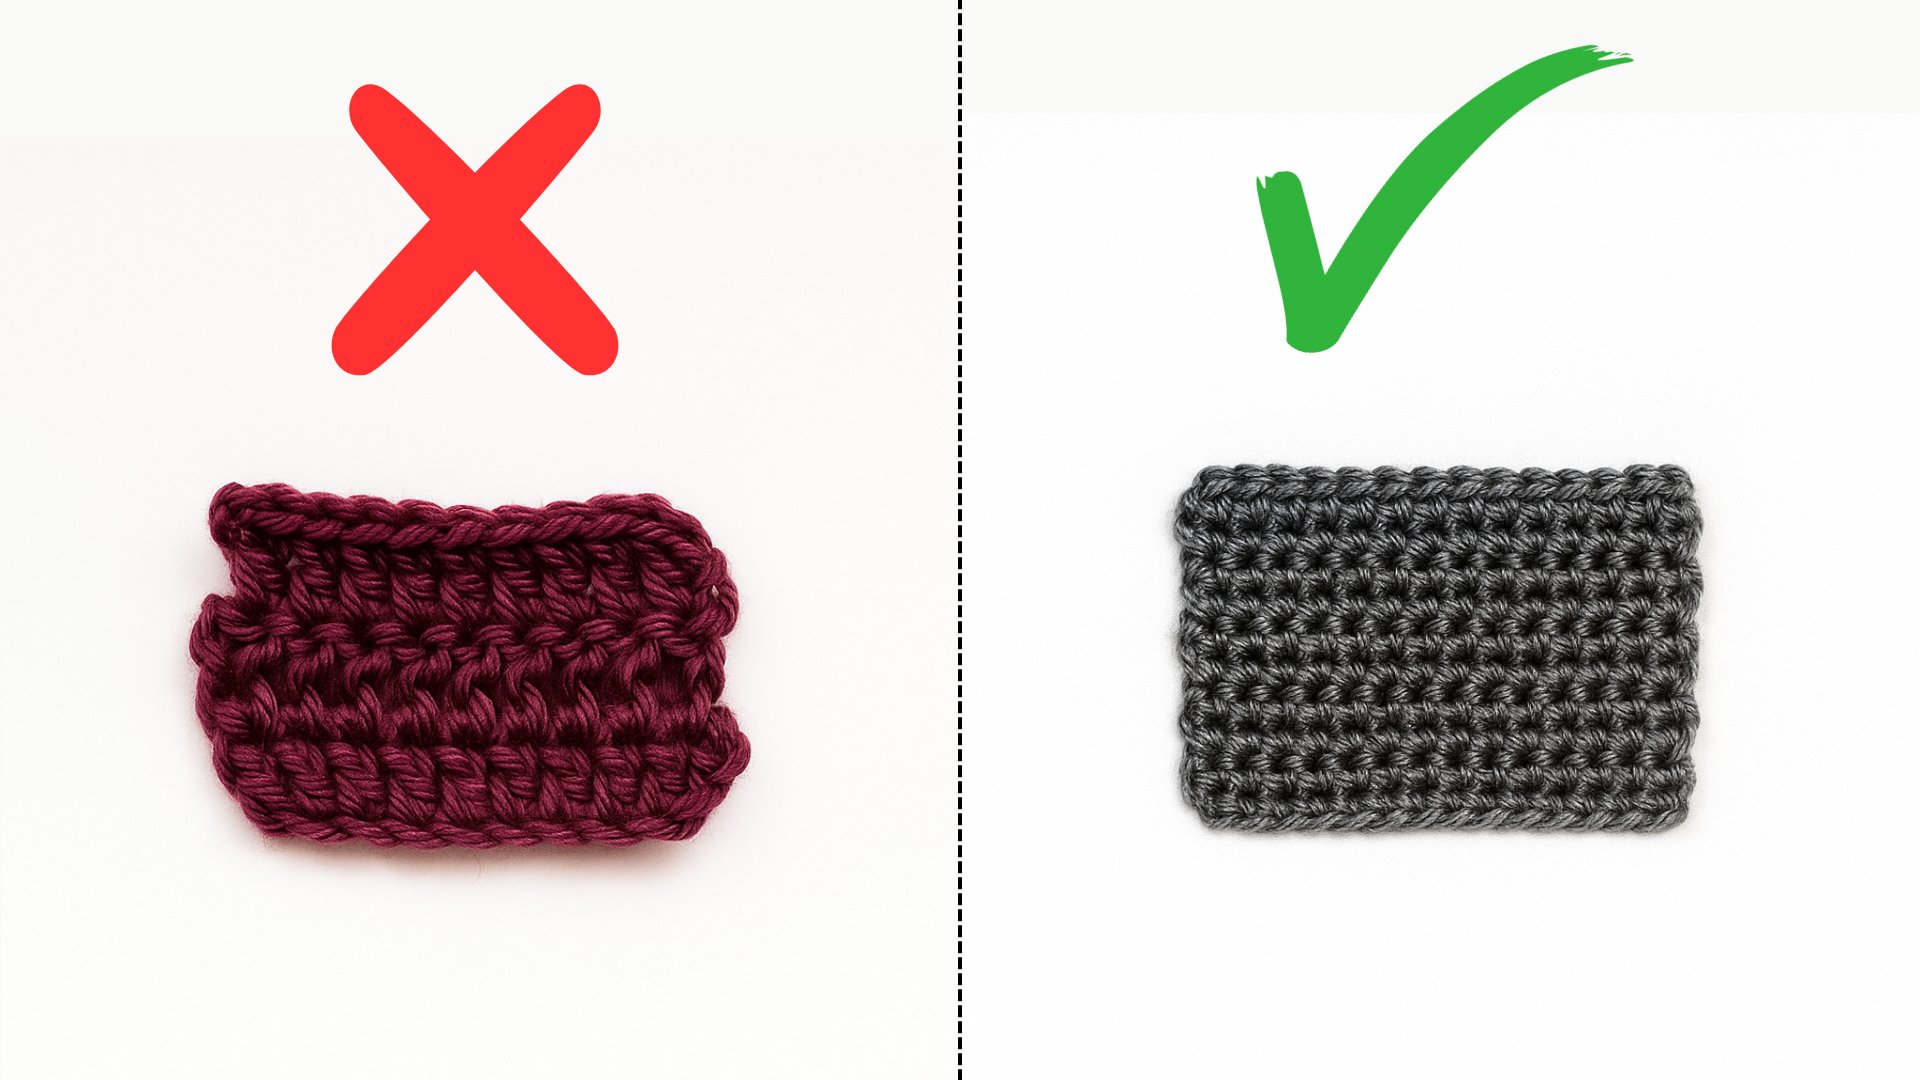
6. How to Do a Single Crochet Stitch: Hello, everyone.
In this tutorial, we are going to learn how to
do a single crochet stitch. So let's get started. Take your hook and yarn. We will begin by
making a slip node. If you are not familiar
with how to make one, you can revisit the
previous lesson. Now that our slip knot is ready, we will create a
foundation chain. You can use your thumb and middle finger to
hold the slip knot. So let's begin the
foundation chain. For this demonstration, I'm
going to make 12 chains. So that's 123, four, five, six, seven, eight, nine, and 11 and 12. If you lost count
while chaining, here's how you can check. Each chain looks like
a small V shape, and each V represents one chain. So let's count one, two, three, four, five, six, seven, eight, nine, ten, 11, and 12. Now we are going to
start single crochet. As you can see, each
chain has two loops, we will insert the hook
into this top loop. We are going to skip
this very first chain and insert the hook into the top loop of
this second chain. So insert the hook, yarn over means wrapping
the yarn from back to front on the hook
and pull through. We have now two
loops on the hook, yarn over again and pull
through both loops on the hook. So here we have made our first single crochet.
Let's try again. This is a chain where we have made our first single crochet. So now we are going
into the next chain, which is right here.
Insert the hook. Yarn over and pull through. Again, we have two loops. Yarn over and pull
through both loops. Make sure your hook is
always facing down. So here we have made
two single crochet. Again, insert the hook
into the next in. Yarn over and pull
through the loop. Yarn over and pull through
both loops on the hook. Continue single crochet
in each stitch in the same way until you
reach the last in. So I have reached to the end, and here is the last in. We will make a single
crochet into this in. So insert the hook, yarn over and pull through. Yarn over and pull through
both loops on the hook. You can pull this yarn end
to tighten this last in. So here we have completed our first row of single crochet. And now I'm going to show you how to count these stitches. You can either count
these from here, but it might be quite
difficult as a beginner. You can also count
these from the top. So let's count from the top. Here each we represent one
stitch. So let's count. That's one, two, three, four, five, six, seven, eight, nine, ten, and 11. So we have 11 single
crochet stitches. Now to move on to the next row, chin M means yarn over and pull through the loop and
then turn your work. So to make a single crochet, we are going to insert the hook into this very first stitch. Here you can see
these two loops. We will be inserting our
hook under both these loops. So insert the hook Yarn over and pull through. We have now two loops, yarn over and pull
through both these loops. Again, we are going to
make a single crochet into the following stitch,
which is right here. Insert the hook. Make sure to
insert it under both loops. Yarn over and pull through. Yarn over and pull through
both loops on the hook. Continue single crochet in
each stitch across the row. When working, use your thumb and middle finger to hold the previous stitches
for better control. So here I have reached
to the last ditch. It might look a
little different, but be sure to insert the
hook under both loops. So insert the hook, Yarn over and pull through. Yarn over and pull through
both loops on the hook. Here we have completed
our second draw. And now let's count
the stitches. One, two, three, four, five, six, seven, eight, nine, ten and 11. Always count your stitches at the end of each row to avoid adding or
skipping any stitch. Now let's move on
to the next row. Gene one, and turn your work. So to make a single crochet, insert the hook into
this very first statch. Yarn over and pull through. Yarn over and pull through
both loops on the hook. Again, insert the hook
into the following stage. Yarn over and pull through. Yarn over and pull through
both loops on the hook. Continue single crushing
in the same way, and then I will show
you how to fasten off. So here I have
completed six rows. You can make as
rows as you want. I'm just showing
you how to fasten off and weaving
yarn end securely. So after completing your
last single crochet, chain one yarn over and
pull through the loop. And now we are going
to cut this yarn. So take the casar and cut it by diving a
few centimeter tear. And then pull this yarn
all the way through. So that is how you
fasten off your work. Now we are going to
weave these yarn ends. So for this, you can
either use a yarn needle, but since it is quite large
and could damage my work. So I'm going to use a one MM crochet hook
instead. Let's weave it. Insert the hook into any state and pull
this yarn end through. Again, insert it
into another stage. The pull the yarn
end through that. Continue weaving in the same way pulling the yarn end
through stitches. And now we are going to cut
off this remaining yarn. So take the casar and cut it. Now we've this starting
yarn in the same way. So here our single crochet
swatch is complete. Congratulations. You have just learned how to do a
single crochet stitch. Keep in mind that
mastering crochet takes time and practice. So don't be discouraged if your stitches are not
perfect at first. The more you practice, the more even and consistent
your stitches will become.
7. How to Do a Half-Double Crochet Stitch: Hello, everyone.
In this tutorial, we are going to learn how to do a half double crochet stitch. This stitch is a bit taller than the single crochet and is known as half double
crochet in UK. So let's get started. First, create a slip node and a foundation chain
of 12 stitches. Here you can see I have already created the
foundation chain. If you are not
familiar with how to make a slip node
and chain stitch, you can rewatch the tutorial on it for making a half
double crochet stitch, the first step that differs from a single crochet is that we are going to yarn over before inserting the
hook into the chain. So yarn over, and now we are going to insert the hook into the third chain from the hook, that is the first chain, second one, and it
is the third one. Insert the hook into the
top loop of this chain. Yarn over your hook and
pull through the chain. We have now three
loops on the hook. Yarn over and pull
through all three loops. So here we have made our first
half apple crochet stitch. Let's try again. Yarn over, insert the hook into
the next chain, which is right here. Yarn over and pull
through the chain. Again, we have three loops. Yarn over and pull
through all three loops. Then we are going to make a half double crochet
into the next in. So yarn over, insert the hook. Yarn over and pull through. Yarn over and pull
through all three loops. Make sure your hook
is always acing down. Continue half double crochet in the same way in each chain. So here I have reached
to the last chin, and we are going to make a half double crochet
into this chin. Yarn over, insert the hook. Yarn over and pull
through the chain. Yarn over and pull through
all three loops on the hook. Pull this yarn to
tighten the last chain. So our first draw is complete. Now we are going to
count these stitches. Let's count from top. Here, each we
represent one stitch. So let's count this. One, two, three, four, five, six, seven,
eight, nine, and ten. So we have ten half
double crochet stitches. We move on to the
next row, chain two, that's one and two, and then turn your work. We are going to make
a half double crochet into this very first stitch. So yarn over, insert the hook. Here we have two loops. Make sure to insert the
hook under both loops. Yarn over and pull
through this stitch. Again, we have three
loops on the hook, yarn over and pull
through all three loops. This creates our first
half double crochet in the second row, and we are going to make a half double crochet into the next stitch,
which is right here. Insert the hook, yarn over
and pull through this stitch. Yarn over and pull
through all three loops. Yarn over again, insert the hook into
the following stitch. Yarn over and pull through. Yarn over and pull
through all three loops. Continue half pebble
crochet in the same way. So here I have reached
to the last stitch and let's make a half double
crochet into this stitch. So yarn over, insert the hook. Make sure to insert the
hook under both loops. Yarn over and pull
through the stitch. Jar over and pull through
all three loops on the hook. This completes our second row. Now let's count these stitches. One, two, three, four, five, six, seven,
eight, nine, and ten. It is important to count
these stitches after each row to avoid adding
or missing any stitch. So for the next row chain two, And turn your work. Now, we are going to make a half Apple crochet into
this very first stage. For this row and
each row onward, we will repeat throughout. No. So here I have completed four rows of half
double crochet. Keep in mind that
mastering crochet takes time and practice. So don't be discouraged if your stitches are not
perfect at first. The more you practice, the more even and consistent
your stitches will become.
8. How to Do a Double Crochet Stitch: This tutorial, we are going to learn how to do a
double crochet stitch, a stitch that is twice as
long as single crochet. In UK, this stitch is
known as treble crochet, so let's get started. Here I have already made a foundation chain
of 14 statges. If you are not familiar with making a slip node
and chain stitch, I recommend reviewing the
tutorial on those basics first. Now let's begin our
double crochet. Start by yarning over just like we do for a
half double crochet. Then we are going
to insert the hook into the fourth
chain from the hook, so that is the first chain, second third, and it
is the fourth one. Insert the hook into the
top loop of this chain. This skipping of
the three chains is important because it counts
as the height of this stitch. Now yarn over and pull
through that loop. We have now three
loops on the hook. Yarn over and pull through
the first two loops. Use your thumb and middle finger to pull
the foundation chain. This helps in pulling the
yarn through the loops. So now we are left
with two loops, yarn over once more and pull
through both these loops. And that's it. You have just made your first double
crochet stitch. Let's try again. Yarn over, insert the hook into
the next chain, which is right here. Yarn over and pull up a loop. We have now three
loops on the hook, yarn over and pull
through two loops, yarn over and pull through the remaining
two loops on the hook, and that is the second
double crochet. Again, yarn over, insert the
hook into the next chain. Yarn over and pull
through the chain. Yarn over and pull through
the first two loops, yarn over again and pull through the remaining two loops on the hook to complete
the double crochet. Then again, yarn over, insert the hook into
the following chain, yarn over and pull up a loop. Yarn over and pull
through two loops, yarn over and pull through
the remaining two loops. Yarn over your hook, insert it into the next chain, yarn over and pull through. Yarn over and pull
through two loops, yarn over again and pull through
the remaining two loops. Continue double crohing in each chain until you
reach the last one. So here is the last chain, and we are going to do a double
crochet into this chain. So yarn over, insert the
hook into this chain, yarn over and pull through. We have now three loops on the hook yarn over and pull
through the first two. Yarn over again and pull through
the remaining two loops. And there we have completed our first row of double
crochet stitches. Now what we are going to do, we are going to count
these stitches. You can count these from
here or from the top. So first, let's count from top. One, two, three, four, five, six, seven, eight,
nine, ten and 11. Now let's count from here. One, two, three, four, five, six, seven, eight, nine, ten, 11, and 12. Here we have an extra stitch. This is because we have
counted this turning chain as a stitch as well.
So don't worry. If you count from the top, you will see 11 stitches, and if you count from the post, you will find 12 stitches. Now let's start our second row. Chain three, you bring our ar to the height
of the next row. And then turn your work. These three chains will count as our first double crochet. So whenever we are working the second row and each row
after in double crochet, these three chains will
be counted as a stitch. This means we will skip
the first stage and place our first double crochet
into the second stitch. So yarn over, insert the
hook into the second stage. Make sure to insert the
hook under both loops. Yarn over and pull through. We have now three
loops on the hook. Yarn over and pull
through two loops. Yarn over one more time, and pull through both
loops on the hook. Here we have a small gap because
we skip the first stage, but that is completely normal. As we add more rows, it
will straighten out. So go ahead and do a double
crochet into the next stitch. Yarn over inside the hook. Yarn over and pull up a loop. We have now three loops yarn over and pull through
the first two loops. Yarn over and pull
through two loops. Again, yarn over, insert the
hook into the next stage. Yarn over and pull up a loop. Yarn over and pull through
the first two loops, yarn over and pull through
the remaining two loops. So continue double
crochet across zero. Now we have two stitches
left in this row. The first one is a
regular double crochet that you can see clearly. Then we have the chain three that we skipped
at the beginning. We will also make
a double crochet into the top chin of
that three chins. So don't forget to include it. Make a double crochet
into the next stage. And then into the
top of chain three, yarn over, insert the hook into the top of
that three chins. It might be a bit tight, but just work your hook through. Make sure to insert the
hook under both loops. Yarn over and pull through. We have now three
loops on the hook, yarn over and pull through
the first two loops, yarn over and pull through
the remaining two loops. So here we have completed two rows of double
crochet stitches. Now let's count these stitches. One, two, three, four, five, six, seven, eight, nine, ten, 11 and 12. Again, we have 12 stitches. It is important to count the
stitches after each row, avoid adding or
skipping any stitch. Now let's start our third row. Chain three. That's one. Two and three, and
turn your work. These three chains are counted as our first double crochet, so skip this first stage and do a double crochet
into the second stache. Continue double crochet
in the same way. H so here we have completed three rows
of double crochet stitches. You can make as
rows as you want by simply repeating the
steps of two or three. Today's challenge is to create a small swatch using the
double crochet stitch. This is a perfect way
for beginers to practice and get comfortable with
this essential stitch. Your goal is to make a swatch that is at least four rows tall. Here's how you do it. Start by making a foundation
chain of 15 stitches. Then work one double
crochet for four rows.
9. How to Do a Treble Crochet Stitch: This tutorial, we
are going to learn how to do a treble
crochet stitch. So let's get started. This stitch is the tallest of the four basic stitches and is known as the double
treble crochet in UK. Now let's see how to
make this stitch. I have already made a foundation
chain of 16 stitches. I hope you are now familiar with making a slip node
and chain stitch. Now to make a treble
crochet stitch, we are going to yarn over twice. And like double crochet, where we only yarn over once. So this is the first yarn over, and we will do that once more. Now we are going to insert the hook into the fifth
chain from the hook, so we have to skip the
first four chains. That's one, two,
three, and four. Skip these chains
and insert the hook into the top loop of
this fifth chain. Now yarn over and
pull up a loop. We have now four loops on the hook yarn over and pull
through the first two loops. We have now three
loops on the hook. Yarn over and pull
through two loops. We still have two
loops on the hook. Yarn over once more and
pull through both loops. So this makes our
first treble crochet. Let's try again. Yarn over twice, insert the hook into the next
chain, which is right here. But yarn over and pull through. We have now four
loops on the hook. Yarn over and pull through
the first two loops. Yarn over and pull through
the next two loops. Yarn over once more and pull through the remaining
two loops on the hook. So that is our second
trouble crochet. Again, yarn over twice. Insert the hook into the
top loop of next chain. Yarn over and pull up a loop. We have now four loops. Yarn over and pull
through two loops. Yarn over and pull
through next two loops. Yarn over once more and pull through the remaining
two loops on the hook. Continue trouble crushing in the same way until you
reach the large chain. So here is our last chain, and we are going to make a treble crochet
into this chain. So yarn over twice. Insert the hook into this chain. Yarn over and pull up a loop. We have now four
loops on the hook. Yarn over and pull through the first two yarn over and pull through
the next two loops. Yarn over once more and pull through the remaining
two loops on the hook, pull this tend to
tighten the last chain. So here we have completed our first row of treble crochet. Now we are going to
count these stitches. So that's one, two, three, four, five, six, seven, eight, nine, ten, 11, 12, and 13. So we have 13 treble
crochet stitches. Once we have finished
the first row, it's time to start the next one. Chain four to bring yarn up
to the height of next row. So that's one, two, three, and four,
and then the work. Remember, this chain of four counts as our first
treble crochet stitch, so we will skip this
first staitg and make a treble crochet
into this second stitch. So yarn over twice, insert the hook
into this stitch. Make sure to insert the
hook under both loops. Yarn over and pull up a loop. We have now four
loops on the hook, yarn over and pull through
the first two loops. Yarn over and pull through
the next two loops. Yarn over once more and pull through the
remaining two loops. We have a small cap here because we skip
that first stitch, but that is completely normal. Now yarn over twice. Insert the hook into
the following stage. Yarn over and pull up a loop. We have now four
loops on the hook. Yarn over and pull through
the first two loops. Yarn over and pull through
the next two loops. Yarn over once more and pull through the
remaining two loops. Yarn over twice, insert the
hook into the next stage. Yarn over and pull up a loop. Yarn over and pull through
the first two loops. Yarn over and pull
through two loops. Yarn over once more and pull through the
remaining two loops. Continue triple crushing in
the same way across the row. Now we have two stitches
left in this row. The first one is a
regular treble crochet. Then we have the four chains that we skipped
at the beginning. We will also make
a treble crochet into the top chain
of that four chains. So make a travel crochet
into this first stache. And then a triple crochet into the top chin
of that chin four. So an over twice,
insert the hook. Make sure to insert the
hook under both loops. Yarn over and pull up a loop. We have now four
loops on the hook. Yarn over and pull through
the first two loops. Yarn over and pull
through two loops. Yarn over one more time and pull through the remaining
two loops on the hook. So that is the second row of
trouble crochet stitches. Now let's count these stitches. One, two, three,
four, five, six, seven, eight, nine, ten, 11, 12, and 13. So we have 13 stitches. Now to move on to the
next row, chain four. That's one, two, three, and four and turn the work. These four chains
will be counted as our first travel crochet. So we will skip this
very first stitch and make a treble crochet
into the second stitch, yarn over twice,
insert the hook, yarn over and pull up a loop. Yarn over and pull
through two loops. Yarn over and pull through two
loops Yarn over once more, and pull through the
remaining two loops. Continue trouble crushing
in the same way. So here I have completed
three rows of treble crochet. Today's challenge is to create
a treble crochet square. Your goal is to make a four by four inch square using
trouble crochet stitches. Here's how you do it. Start by chaining enough
stitches to reach 4 " in length. Then work trouble crochet
stitches across row and continue for several rows until your square measures 4 " tall.
10. How to Do a Slip Stitch: In this tutorial, we are
going to learn one of the most essential and
basic stitches in crochet. Slip stitch. So
let's get started. So what exactly
is a slip stitch? The slip stitch is the shortest and simplest stitch in crochet. It is used to join stitches, finish off projects, and even
create decorative edges. Though it is small, it plays a big role in
your crochet work. Now let's learn how
to make one begin. You will need a
foundation to work into. This can be a row
of chain stages or any crochet piece
you are working on. For this demonstration,
I'm going to use a row of single
crochet stages. Now to make a slip stage, chain one, and turn the work. Then insert the hook into the stitch where you want
to make a slip stitch. I'm inserting the hook into
this very first stitch. Make sure to go
under both loops if you are working in a
single crochet row. Now yarn over and pull
through the stitch. And the loop on the
hook all in one motion. And there you have it. You have just made
a slip stitch. Notice how it creates a small, nearly invisible stitch that
lies flat against the work. Let's try again. Insert the hook into
the next stitch, yarn over and pull through the stitch and the
loop on the hook. This creates second slip stitch. Again, insert the hook
into the next stitch. Yarn over and pull through the stitch and the
loop on the hook. So that is the
third slip stitch. Let's make a few more together. Insert the hook, yarn over
and pull through the stitch, and the loop on the hook. So here I have completed
a row of slip stitches. Now that you know how
to make a slip stitch, let's talk about
some common ways you might use it
in your projects. Slip stitches are often
used to join rounds in projects like heads
or Denny squares. After completing a round, you can use a slip stitch to join the last stitch
to the first. Slip stitches can also
be used decoratively. You can create lines or
shapes on the surface of your crochet piece by
working slip stitches across. This technique is known
as surface crochet. And finally, the slip stitches can be used to join
granny squares.
11. Crochet Symbols and Abbreviations: You have ever opened
a pattern and felt like you were
reading a secret code, don't worry, you are not alone. Today, we are going
to learn the mystery behind crochet symbols
and abbreviations, so you can read any
pattern like a pro. Crochet patterns often
use abbreviations and symbols to save space and
keep instructions clear. Whether you are reading a
written pattern or a chart, understanding the will help
you follow along, easily, customize your work, and
even design your own pieces. Let's start with
written abbreviations. These are the building
blocks of most patterns. C H tends fourth in. This is usually the
very first stitch you learn in crochet. It creates a foundation
row for your project, and you will see it
a lot in patterns. SLSD is short for slip stitch. It is the smallest and
flattest stitch in crochet. SC means single
crochet in US terms. It is one of the
most basic stitches and creates a nice
and tight structure. In UK patterns, this stitch
is called a double crochet. So always check
whether your pattern is using US or UK terms. HDC is a half double crochet. It is a bit taller than a single crochet and gives
a more flexible fabric. It is known as double
crochet in UK. DC stands for double
crochet in US terms. It is taller than a
half double crochet and perfect for scarves, blankets, and lace projects. In UK patterns, this ditch
is called a treble crochet. ER is short for treble crochet. It is even taller than a double crochet and great
for open aire designs. In UK, it is known as
double treble crochet. SK means to skip a stitch. Patterns might say skip one stitch and single
crochet in the next. That means don't
crochet in that stage, jump to the next one. Sp stands four space, usually between stitches
or under a chain. For example, do double
crochet in next chain two space means work to double
crochet into that chain space. ST means stitch and
SDS means stitches. You will often see
something like single crochet in
next five stitches. That test means 25
single crochets, one in each of the
next five stages. INC stands for increase means you will add extra
stitches in the same place. Usually two stitches in one
spot to widen your project. DAC is four decrease, where you turn two stitches
into one to shape your work. REP means repeat. E or G means together
usually with decreases, like single crochet two together means single crochet
two stitches together. Yo stands for yarn over. You will do this before making any stitches like double
crochet or half double crochet. FO means fasten off. That's how you finish your project and
secure the yarn tail. Now let's look at the symbols. These are what you will
find in crochet charts. Each stitch has a special
picture that represents it. An empty or a circle
represents a gin. You will often see a row of
them at the start of a chart. A little fileding dot
usually means slip stitch. Since it is small and flat, the symbol is tiny, too. A plasge or an X is
a single crochet. A E shaped symbol with
just the stem and top stands for half
double crochet. A T with one horizontal
or diagonal line through the stem is
a double crochet. If the T has two slashes, that is a treble crochet. So when you see abbreviations in text and symbols in charts, remember, there
are just two ways of saying the same thing. Keep a cheat sheet nearby
when you are starting out. Over time, these will
become second nature. In the next tutorial, we will learn how to read
a crochet sample chart.
12. Reading Crochet Symbol Charts: This lesson, we
are going to learn how to decode crochet
symbol charts. A crochet symbol chart is
a visual representation of a pattern using symbols instead
of written instructions. Each stitch is drawn
using a specific symbol. Placed in the order,
you would crochet it. Think of it like a map. It shows you where to place each stitch row by row
or round by round. Symbol charts are super
helpful for a few reasons. They are universal, no matter what language
the patron is in, the chart symbols
are mostly the same. You can see the whole
pattern at a glance, including how the
stitches interact. They help visual
learners understand complex stitch placements
better than written text. For rows, charts usually
start at the bottom, moving left to right, then right to left, just like how you crochet. For rounds, charts
begin in the center and work outward in a
spiral or circular motion. Let's break down this crochet
sample chart together. Looks a bit like a grid, but each shape here
tells you what stitch to make and
where to place it. We will read it from bottom
up and from right to left for odd number rows and left to
right for even numbered rows, just like how we
crochet flat rows. At the very beginning, you will see these
are small owls. Each one represent
a chain stitch, and together they form
the foundation chain. In this chart, we have
12 chain stitches, so let's make 12 chains. Begin by making a slip node. Now let's make 12 chins. Here I have completed 12 chins. Now you can see that there are three chins that act
as the double crochet. So let's make three more chins. These three chains will act
as our first double crochet. The next row shows a
set of tall T shaped symbols with one slash
through the vertical line. This is the sample for
double crochet stages. You can count that there
are 12 double crochets, one worked into each chain. And if we count deterning three chains as a
double crochet, so we have 13 double crochet. So we are going to insert the hook into the fourth
chain from the hook, skip three chains and insert the hook into
the fourth chain. Yarn over and pull through. Yarn over and pull
through two loops. Yarn over and pull through
remaining two loops, continue to make
a double crochet in each of these chains. So here I have
completed first straw, and we have a total of
13 double crochets. Now let's move to
row two, which is, again, made entirely
of double crochets. Those three ovals
at the beginning means we have to
make three chains. That is another turning chain which counts as
the first stitch. So that's one, two, and three. And now turn the work. This row starts from
left to right because we are working in flat rows
and we turn our work. Make a double crochet
into this first stage. Continue to make
a double crochet in each of these stitches. The third row again started with three chains and then a double
crochet in each stitch. You will notice that every row
begins with a chain three, which helps us maintain the height and keep
the edges straight. This is a great Wigner
chart for practicing double crochet rows and understanding how
symbol charts flow. So here I had completed
my third row. Once you get the hang of this, you will be able to follow
more complex diagrams. Now let's learn how to read this crochet chart step by step. It is basically the
pattern of a flower. Don't worry if it
looks complicated. We will go step by step. As you can see, the center of the pattern starts
with six chains. This oval shape is the
symbol for a chain stitch. So to begin, we are going
to make six chain stitches. Here I have made a slip note, and let's make six ins. So that's one, two, three, four, five and six. Then you form a ring, wind the last ditch to the
first one using a slip stitch. This will give us the center of the flour to build
the petals on. So insert the hook, yarn over and pull through the chain and the
loop on the hook. Now we will start
the first petal. Each petal follows
the same pattern. Let's read one petal together. First, we will make four chains. Then this T shaped symbol
represent a treble crochet. So we are going to make two treble crochets
into the ring. Yarn over twice. Insert the hook into the ring. Yarn over and pull through. Yarn over and pull
through two loops. Yarn over and pull
through two loops. Yarn over once more and
pull through two loops. Repeat the same to make
another trouble crochet. Next, you can see there are four chain stitches
shown by four ovals. Now chain four. That's one, two, three, and four and join it with a
slip stitch into the ring. Insert the hook, yarn over
and pull through the ring, and the loop on the hook This
completes our first petal. We are going to repeat
the same pattern for a total of six petals.
So chain four. Make two trouble
crochet into the ring. Again, make four chains and join with a slip
stitch into the ring. Continue the same pattern. So here I have made six petals, and now I'm going
to cut this yarn. So take the casar
and cut the yarn. Now, let's weave these yarn
ends so our floor is ready. I hope you have now learned how to follow crochet semble charts. In the next lesson, we will learn how to read
written instructions.
13. Reading Written Instructions: You ever opened a crochet
pattern and thought, Wait, what does all this mean? With all those
abbreviations and brackets, written instructions can feel overwhelming. But don't worry. In this lesson, I will
show you how to read and understand written crochet
patterns step by step. Crochet patterns
are written using standard abbreviations
to save space. Once you learn these, reading patterns become much easier like learning
a new language, but just for crochet. Now let's look at the
structure of written patterns. They are usually
organized by rows or rounds and tell you exactly
what to do step by step. Here is a sample. Now, this line means start by chaining 13. First, make a slip node. And then chain 13. So here I have made 13 chins. The first three chains will count as your first
double crochet. So you will place your
first rear double crochet in the fourth chain
from the hook. So skip three chains, yarn over and insert the
hook into this fourth chain. Yarn over and pull through. Yarn over and pull
through two loops, yarn over and pull through
the remaining two loops. Then continue to make
one double crochet in each of the next chains
all the way across. In total, you will have
11 double crochets, including the starting chain. So here I have completed
double crochet in each stitch, and here I have a total
of 11 double crochets. Now let's read this small
Wigner pattern together. Chain four join with a
slip stitch to form ring. This means first we have to make four chains but before
that, make a slip node. Now, chain four. That's one, two, three, and four. Now we are going to join it with a slip stitch into the
first chain to form a ring, insert the hook, yarn over and pull through the chain
and the loop on the hook. According to round
one in the pattern, chain two, ten double
crochet into the ring. So let's make two chains. That's one and two. Then we are going to make ten double crochets
into the ring. So here I have made ten double
crochet into this ring. Now we are going to join it with a slip stitch at the top of the beginning chain
to close the round. So insert the hook
into this stitch, yarn over and pull through the stitch and the
loop on the hook. So here we have completed
our first round. Now let's begin
the second round. According to the pattern, first, we are going
to make two chains. So that's one and two. According to the pattern, there are two double crochet in each stitch. So let's do this. Make two double crochet
into the very next stitch. Then make two double crochet
into the following stitch. Continue to make two double
crochet into each stitch. Now that I have
reached to the end, I'm going to join it with a slip stitch into
this first stitch. So inside the hook, yarn over and pull through the stitch and the
loop on the hook. So here our circle is ready. When reading a written pattern, always remember, take it slow. Look up abbreviations
if you are unsure. Use stitch markers if needed, and don't worry it gets
easier with practice.
14. Increasing Stitches in Crochet: This lesson, we
are going to learn how to increase
ditches in crochet. Specifically, I will show you how to increase in
single crochet, half double crochet,
and double crochet. Increasing is essential for shaping your
projects like heads, circles, amgramy,
shawls, and more. An increase in crochet means you are adding
stitches to your work. The most common way to
do this is by placing two stitches into
the same stitch from the previous row or round. You will often see this
written in pattern as two single crochet in same stitch or single
crochet increase. The same applies to half double crochet
and double crochet. Here, I have already
created a row of single crochet
to use as our base. We will start increasing
from the second row. The first step is to determine where you want to
increase your stitches. In this demonstration,
I'm going to increase stitches in the beginning
and end of my row. So chain one and turn the work. Make a regular single crochet into this very first stitch. Now, we are going to
increase in this stitch. So inside the hook, Yarn over and pull through. Yarn over and pull
through both loops. Now to increase, make another single crochet
into the same stitch. So insert the hook, yarn over and pull through. Yarn over and pull through
both loops on the hook. Continue working one
single crochet in each stitch across the row until you have two
stitches left. Here I have two
stitches remaining, and I'm going to increase
in the following stitch. So make two single crochet
into this same stitch. That is the first
single crochet. And that is the second one. Now make a single crochet
in the final stitch. So we have completed a row with increases at both the
beginning and end. Your work should now start to expand outward for the next row, chain one, and turn your work. Make a single crochet into
this very first stage. Then we are going to
increase in this stitch. So simply make two single
crochet into this same stitch. So that is the first
single crochet and make another one
into the same stitch. Continue working single
crochet across zero. When you reach the
last two stitches, make two single crochet into
this second last stitch. So that is the first
single crochet. And that is the second one. Then make a single crochet
into this final stitch. So this is how you can increase stitches
in single crochet. And here you can see our
work has started to expand. Now let's look at how to
increase in half double crochet. To increase in half
double crochet, you do the exact same thing. W two half double crochet
in the same stitch. So I have made a row of half
double crochet as the base. Chain two and turn your work. Make a half double crochet
into this very first stitch. Now I'm going to increase
in the second stage, so I will simply make two half double crochet
into this same stitch. So that is the first
half double crochet and make another one
in the same stitch. So that is the half
double crochet increase. Continue making one
half double crochet in each stage until
two stitches remain. So here is the
second last stitch, and we are going
to increase here. Make two half double
crochet into this stitch. That is the first
half double crochet. And that is the second one. In the final stitch, make one half double crochet. A that's where half double crochet
increase row completed. Increasing in double crochet
follows the same principle. Here I have prepared a row
of double crochet stages. Now I'm going to chain three and turn the work. Skip this first stage, and let's make a double crochet
into this second stage. I To increase, make another double crochet
into the same stitch. Continue working one
double crochet in each stitch across until
two stitches remain. To increase, make
two double crochet in the second last stitch. So that is the first
double crochet. And that is the second one and finish with a double
crochet in the last stache. A and that's your double
crochet increase, two double crochet
in one stitch. You will use increases in
all sorts of projects. In amigramy we use single crochet increases to
shape rounded fleches. In hats, we often use
half double crochet or double crochet increases
when working in the round. In shawls and sweaters, increases shape the
fabric beautifully. Here are a few tips
to keep in mind. Make sure you only
place two stitches, not more or less into
the increased stitch. Always count your
stitches to make sure you are not accidentally
adding or skipping any. Use a stitch marker
to keep track of your increases if you are
working in the round. If you add too many increases, your work might trifle or
ripple unintentionally. I hope this helped
you understand how to increase your
crochet stitches. In the next lesson,
I will show you how to decrease
stitches in crochet.
15. Decreasing Stitches in Crochet: This lesson, we are going
to learn how to decrease stitches in crochet
using single crochet, half double crochet,
and double crochet. Decreasing is essential when
shaping crochet projects. Whether you are narrowing
fabrics for sleeves, closing up heads, shaping amgramy or scurping
curves in garments. A decrease in crochet means
you are reducing the number of stitches by combining
two stitches into one. It is sometimes written
as single crochet, two together, half
double crochet, two together, and double
crochet two together. I have already created a row of single crochet
stitches as a base. Now chain one and turn the work. Make a regular single crochet into this very first stitch. Now to decrease, insert the hook into the
following stage. Yarn over and pull through. We have now two
loops on the hook. Insert the hook into
the next stage. Yarn over and pull through. We have now three
loops on the hook. Yarn over and pull
through all three loops. We have just turned two
single crochet into one. That is a single
crochet decrease. Continue working one
single crochet in each stage across zero until
three stitches remain. Now let's do one more decrease. Insert the hook into
the following stitch, yarn over and pull through. We have two loops. Again, insert the hook
into the next stitch, yarn over and pull through. We have now three loops, yarn over and pull
through all three loops. Now make a regular single
crochet into this last statch. Et's complete a row
with two decreases for the next row chain one
and turn your work. Make a single crochet into
this very first stitch. Now, to decrease, insert the hook into the
following stitch. Yarn over and pull through. Now insert the hook
into the next stitch. Yarn over and pull through. Yarn over and pull
through all three loops. Continue making a
single crochet in each stitch across until
three stitches remain. So we have three
stitches remaining. Insert the hook into
the following stitch, yarn over and pull through. Then insert the hook
into the next stitch. Yarn over and pull through. Yarn over and pull through
all three loops on the hook. Then make a regular
single crochet into this final stitch. As you can see, your swatch is starting to narrow
due to the decreases. Now let's look at the half
double crochet decrease. Here I have already created a row of half double
crochet as a base in two and turn the work. Make a half double crochet
into this very first stitch. Now we are going to
decrease a statge. So yarn over, insert the
hook into the next stage, yarn over and pull through. We have now three
loops on the hook. Again, yarn over, insert the hook into
the following stage, yarn over and pull through. We have now five
loops on the hook. Yarn over and pull
through all five loops. This merges two
half double crochet into one and creates
a smooth decrease. Continue working one
half double crochet in each stitch until
three stitches remain. So here we have three stitches
remaining to decrease, yarn over, insert the hook
into the following stitch, yarn over and pull through. We have now three loops. Again, yarn over, insert the
hook into the next stitch. Yarn over and pull through. Now we have five loops. Yarn over and pull through
all five loops on the hook. Make a half double
crochet into this stitch. We have now completed a row with two half double
crochet decreases. Lastly, let's look at the
double crochet decrease. Here I have already made a
base row of double crochet. Gene three and turn the work. Yarn over, skip
this first stitch and insert the hook
into the second stitch. Yarn over and pull through. We have now three loops yarn over and pull through
the first two loops. Again, yarn over, insert the
hook into the next stitch. Yarn over and pull through. We have now four
loops on the hook. Yarn over and pull through
the first two loops. Now we have three loops. Yarn over once more and pull
through all three loops. This merges two double crochet into one and creates
a smooth decree. Continue working one
double crochet in each stitch until
three stitches remain. So let's do one more decrease. Yarn over, insert the hook
into the following state. Yarn over and pull through. We have now three loops. Yarn over and pull through
the first two loops. Again, yarn over, insert the
hook into the next stage. Yarn over and pull through. We have now four loops. Yarn over and pull
through two loops. Now we have three loops. Yarn over once more and pull through all three
loops on the hook. Now make a regular double
crochet into this last stitch. We have now completed a row with two double
crochet decreases. For the next row gene
three, and turn. Follow the same
steps of row two. Yarn over, skip the first stage and insert the hook
into the second statch. Yarn over and pull through, yarn over and pull
through first two loops. Again, yarn over,
insert the hook into the next statch yarn
over and pull through. We have now four
loops on the hook. Yarn over and pull through
the first two loops. Now we have three loops. Yarn over and pull
through all three loops. Now continue making
a double crochet in each stitch until you reach
to the last three stitches. So here we have three
stitches remaining. You decrease, yarn over, insert the hook into
the following stage, yarn over and pull through, yarn over and pull through
the first two loops. Again, yarn over, insert the
hook into the next stage. Yarn over and pull through. Yarn over and pull
through two loops. We have now three loops. Yarn over and pull through
all three loops on the hook. Then make a regular
double crochet into this final stitch. Here are a few tips
to keep in mind. Always insert your hook
into the actual stitches, not gaps between them. Count your stitches at the end of each row
to ensure accuracy. Keep consistent
tension, especially during decreases to
avoid holes or gaps. Use stitch markers to help track where
you have decreased, especially in rounds
or complex patterns.
16. Shaping a Simple Triangle: This lesson, we
will learn how to crochet a simple and
versatile triangle. You can use these
triangles to make shawls, blankets, scarves, and more. So let's get started. Begin with a slip note. Adjust the nought.
Then chin two. So that's one and you make a single crochet
into this first chin. So insert the hook, yarn over and pull through. Yarn over and pull
through both loops. Gently pull this yantil
to tighten this chin. Now, chin one and
turn your work. Here we have only one stitch. So make three single
crochet into this stitch. That is the first
single crochet. Second one. And the third single crochet. Gene one and turn your work. Here we have three stitches. Simply make a single crochet
in each of these stitches. So make a single crochet
in this first stage, then a single crochet
in the second stage. And finally, make a single
crochet in this last stitch. Chain one and turn your work. This row will increase at
both the beginning and end. So make two single crochet
into this very first stitch. That is the first single crochet and make another one
into the same stitch. Make a single crochet into
the following stitch. Then again, make
two single crochet into this last stitch. So that is the first
single crochet. And that is the second one
for the next row in one, and turn your work. Here we have five stitches. Make one single crochet in each of the five
stitches across. For the next row
in one, and turn. In this row, again, we are going to increase in the beginning and
end of the row. So make two single crochet
into this very first stitch. That is the first
single crochet, and that is the
second single crochet into the same stitch. Then make single crochet into the following
three stitches. In the last stitch, again, make two single crochets. For the next row, gene one, and turn. In this row, we have
seven stitches. We are going to make
a single crochet in each of these stitches. So we have completed this row chain one
and turn the work. Again, we will
increase in this row. So make two single crochet
into this very first statch. That's one and two. Then make single crochet in
the following five stitches. You increase, make
two single crochet into this last stitch. For the next row, in one, and turn your work. In this row, we
have nine stitches, so make a single crochet
in each of these stitch. Now chain one and turn your b. Make two single crochet into
this very first stitch. So that is the first
single crochet, and that is the second one. Now make a single crochet in the following seven stitches. And finally, make
two single crochet into this last stitch. As you can see, the triangle
shape has now formed. You can continue growing it to any size by simply
repeating the same pattern, increasing at the
beginning and end of every alternate row. Here I have completed 15 rows, but feel free to make as
many as you would like. Now it's time to fasten off. Take your casar
and cut the yarn, leaving a tail of
a few centimeter. Then pull the yarn through
the final loop to secure it. Next, weaving the
tail ends using a yarn needle or a crochet
hook to finish neatly. So here I have weaved
the yarn tails, and our triangle is ready.
17. Making a Granny Square Using One Color Yarn: Tutorial, we are going to learn how to make a classic
Renese square, even if you have never
crocheted before. So let's get started. Start with a slip node. Now chain four, that's one, two, three, and four. Now join the last
chain to the first one with a slip stitch
to form a small ring. This is the center of
your granny square. You can also start
with a magic ring. Now chain three, that's one. Two, and three. These chains counts as
your first double crochet. Now make two more double
crochet into the center ring. Keep this tailine
along your work. Yarn over, insert the hook. Yarn over and pull through. Yarn over and pull
through two loops, yarn over again and pull through
the remaining two loops. Now make another double
crochet in the same way. This creates a group of three stitches
called cluster. Chain two that forms a corner. Now make another three double
crochets into the ring. So that is the first
double crochet. Second. And the third one. Again, chain two and make three double
crochet into the ring. Uh, So that's one. Two, and three. So we have made three clusters, and let's make one more. So chain two and make three
double crochet into the ring. To finish this round, Gin two. And slip stitch into the top of the
starting three chains. So insert the hook
into the third chain, yarn over and pull through the chain the loop on the hook. So we have completed our
first round of Granny square. We cannot start our
next round from here. We have to start it
from this corner space. So slip stitch in the
following stitch. Then a slip stitch
in the next stitch. And finally, in this space. Now in three and work to double crochet
into this same space. Chain two for the corner. And make three more double
crochet into that same space. That is your first full corner. Then we are going to make three double crochet
into this next space. But before that, make one chin and now make three double
crochet into this space. Chain two for the corner and make three more double
crochet into that same space. Then chain one and make three double crochet
into the next corner space. In each corner space around, repeat this three
double crochet, chain two, and three
double crochet. You will have four
corners when done. So here you can see
these four corners chain one and finish the und by slip stitching into the top of the
starting three chains. So insert the hook, yarn over and pull through the chain and the
loop on the hook. Slip stitch over to
the next corner space. Now we will expand the square, begin the same way, chain three. These three chains will act as our first double crochet and work to double crochet
into this same space. Then chain two and
three double crochet into the same space. But now you will notice side
spaces between the corners. In each of these, just
do three double crochet. So chain one and make three double
crochet into this space. That's the first double crochet. Second, And the third one. Then again, chain one and make three double crochet
into this corner space. Chain two for the corner and make three double
crochet into the same space. Then chain one and make three double crochet
into the following space. Repeat this pattern around. In every corner,
three double crochet, chain two, and three
double crochet. In every side space, make three double crochet. Now to complete the round, join with a slip stitch into the top of the
starting three chains. So insert the hook, I yarn over and pull through the chain and
the loop on the hook. You can make as
rounds as you want by simply repeating the same
pattern of round three. Now we are going
to cut this yarn. So take the casar and
cut it by leaving a few centimeter tail and pull this yarn end
all the way through. Now let's weave this tail end. You can use a yarn needle, but it is too big, it might damage my work. So I'm using this 1.5 MM
crochet hook instead. So let's weave this. And that is your
first granny square. You have just learned
a timeless technique. You can use these granny
squares to make bags, blankets, and even more. In the next lesson,
I will show you how to make a square using
different colors.
18. Making a Granny Square Using Two Color Yarn: Tutorial, we are going
to learn how to make a classic n square using
multiple yarn colors. So let's get started. Start with a slip note. Now chain four, one, two, three, and four. Join the last chain
to the first one with a slip stitch to
form a small ring. This is the center of
your granny square. Now chain three, This counts as your first
double crochet and make two more double
crochet into the center ring. Yarn over, insert the hook yarn over and pull through. Yarn over and pull
through two loops, yarn over again and pull through
the remaining two loops. Now make another double
crochet in the same way. This create your first cluster, chain two for the corner, and now make another three
double crochet into the ring. So that is the first
double crochet. Second. And the third one. Again, chain two and make three double
crochet into the ring. We have to make a total
of four clusters. So here I have completed
four clusters now chin two and slip stitch into the top of the
starting chain three. Insert the hook into
the third chain, yarn over and pull through the chain and the
loop on the hook. So we have completed our
first round of cranny square. Now we are going
to cut this yarn. So take the casar
and cut this yarn. Pull it all the way
through to secure it. Now insert the hook into the
same stitch from the back. And pull this yarn
tail to the back. Now we are going to
join the new yarn, so I'm using this
brown color yarn. First, let's make a slip knot. Now insert the hook
in any corner space. Place the note on the
hook and pull it through. Chain three. These three chains will act as our
first double crochet and now work two more double
crochet into the same space. Keep this an and
along your work. So that is the first
double crochet. And that is the second one. Chain two for the corner and make three more double
crochet into that same space. That is your first full corner. Chain one, then we are going to make
three double crochet into this next space. Gene two. And make three more double crochet
into that same space. Chain one, M three
double crochet into the next corner space. In each corner space around, repeat this three
double crochet, chain two, and three
double crochet. So here you can see
these four corners chain one and finish the round by slip stitching into the top of the
starting chain three. Now, take the caster
and cut this yarn. Pull this yarn all
the way through, insert the hook into the same stitch from
the back where we have finished and pull this
yarn tail to the back. Now we are going to
attach the new yarn, so I'm using the same
yellow colour yarn. Begin the same way, make a slip node. Now insert the hook
into any corner space. Place the note on the hook and pull it through this space. Chain three. This counts as our first double crochet and make two double crochet
into the same space. Now chain two and make three double crochet
into the same corner space. Gene one and make three double crochet
into this space. That's for double crochet. Second. And the third one gene one, and make three double crochet
into this corner space. Chen two for the corner and make three double
crochet into the same space. Then gene one and make three double crochet
into the following space. Repeat this pattern around in every corner three
double crochet, gene two, three double crochet. In every side space,
three double crochet. Complete the round, join with a slip stitch into the top
of the starting chain three. Insert the hook, yarn over and pull through the chain
and the loop on the hook. Now we are going
to cut this yarn. So dig the casar and cut it by leaving a few
centimeter tail. And pull this yarn all the
way through to secure it. You can make as
rounds as you want by simply repeating the same
pattern of round three. Now weave in all
these yarn tails. So I have weaved the yarn tails, and my granny square is ready. In the next lesson,
I will show you how to join these granny
squares together.
19. Joining Granny Squares: This lesson, I'm
going to show you how to join Granny
squares together. There are many different
ways to do this, but I will walk
you through two of the easiest and most
bigner friendly methods. Start by ling two
grani squares side by side, just like this. Take your yarn and
begin with a slip node. We will be working into the back loops only
of each stitch, and it is important to
insert your hook into the same statch on both
squares for an even join. Let's begin with
the corner chains. There are two chains
in each corner. Insert your hook
into the back loop of the second chain
on first square. Make sure your working yarn stays behind the
squares throughout. Then insert the hook into the back loop of second
chain of the other square. Yarn over and pull
through all three loops. I like this. This is how we start
joining our ****** squares. Insert the hook into the
back loop of first square, insert it in the back loop
of the second square. Wrap the yarn and pull
through all three loops. You can gently pull
on the tail end of your yarn to tighten
that first stitch. Again, insert the hook in the
back loop of first square. Insert it in the back loop
of the second square. Grab the yarn and pull
through all three loops. Let's do it again. Back loop of the first square, then back loop of
the second square, yarn over and pull through
all three loops on the hook. This is exactly what
we will be doing. Just keep repeating this process
until you reach the end. Once you are done,
your joint seam will look neat and flat, perfect for blankets,
bags, or garments. Now let's move on to
the second method. Take the yarn and begin again with a slip
note on your hook. Place the granny
squares on top of each other with the backsides
facing outward. Insert the hook into
the first loop of the corner stitch of
first cranny square. Then insert the hook
into the back loop of the second granny
square at corner. Like this. Yarn over and pull through all
the loops on the hook. Insert the hook into the front loop of
first granny square. Then insert it into the back loop of the
second granny square. Yarn over and pull through
all three loops on the hook. Again, into the front loop. Then in the back loop
of the second square. Grab the yarn and pull it through all the
loops on the hook. Now continue this pattern, insert into the front
loop of the first square, then insert into the back
loop of the second square, yarn over and pull
through all three loops. Repeat this for each
stitch along the edge. So here I have joined
the Granny squares. And here's how these look like. These methods creates a slightly raised
seam on the front, which adds a decorative touch to your project, and that's it. You have now learned two
simple and effective ways to join Granny squares. These techniques are perfect whether you are making
a cozy blanket, a stylish bag, or
even wearable items.
20. Changing Yarn Color at the End of Row: This lesson, we are
going to learn how to change yarn color at the
beginning or end of a row. So let's get started. For this demonstration, I will be using the single
crochet stitch, but the same method applies
to any other stitch. Here I have already crochet
a row of single crochet. I'm currently working
on the second row, so let's finish this row. But in the last stitch, I will not complete
a single crochet. So here is the last stitch
of the row insert the hook, but make sure to insert
the hook under both loops. Yarn over and pull through. We have now two
loops on the hook. At this point, stop. We won't finish this stitch
with the current yarn. Now we are going
to change color. Take the new yarn. I'm going to use this maroon colored
yarn for the next row. Go ahead and fold this
new yarn like this. Pinch the folded part between your thumb
and index finger. Place this folded yarn on the hook and pull it through
both loops on the hook. We have now finished
the last ditch of diro using the new yarn color. Gently pull the yarn tails
to tighten this stitch. So after pulling the
new yarn through, just take your casar and
cut this previous yarn, leaving a few centimeter tail. Chain one with the new color
to start the next draw. Pull both yarn tails to slightly tighten the
chain if needed, and now turn your work. Grab these ends of the yarn and hold them together
on the back of your work. We are going to single crochet over both of these
strands of yarn. So insert the hook into this
very first stage. Right. Yarn over and pull through. Yarn over and pull through
both loops on the hook. Then make a single crochet
into the next stitch. Continue making single crochet, crocheting over the yarn
tails for several stitches. This helps secure them and
saves time on weaving ladder. Once you have crochet over
Dan ends for a few stitches, you can snip off any remaining
tails with your scissors. Then continue making single
crochets to finish the row. So here I have
completed this row. Let's make another row
with the same color. So in one, and turn. Make a single crochet in
each of these ditches. So here is the last stitch, insert the hook, yarn
over and pull through. Now let's change color again. So take the new color yarn. We are going to follow
the same method, fold the yarn and pinch it. Place it on the hook and
pull it through both loops. Pull the previous yarn
to tighten the loops. Now take the casar and
cut this previous hunt. Chain one and turn the work around. Pull these ends together. Again, hold the yantils to the back and crochet over
them in the new row. Make a single crochet into
this very first stitch. Continue to make single crochet in each of these stitches. So here I have
completed two rows of single crochet using this
yellow colored yarn. Now chain one. And
let's cut this yarn. Pull it all the way through
to fasten off securely. Now we win these
yarn tails as well, and that's how to change
yarn colors in crochet. In the next lesson,
I will show you how to change color in
the middle of the row.
21. Changing Yarn Color in the Middle of a Row: This lesson, we are
going to learn how to change yarn color in
the middle of a row, also known as a mid
row color change. So let's get started. Here I have already completed
one row of double crochet, and I'm currently partway
through the second row. Let's say we want to change the yarn color right
here in the middle. So before we change color, let's finish one more
double crochet stitch using the current yarn. Yarn over, insert the hook
into the following stitch, yarn over and pull through. Yarn over and pull
through two loops. Yarn over and pull through
the remaining two loops. Now we are ready
to change color. Pull up the loop slightly and carefully remove your hook
from the working loop. Take your new yarn. Now insert the hook into the
top two loops of the stitch. Like this, grab the new yarn, fold it like this, place it on the hook and
pull it through the loops. Then continue to
work your stitches. So yarn over, insert the hook, yarn over and pull through. Yarn over and pull
through two loops, yarn over and pull through
the remaining two loops. Continue double croching across the row using the new color. Now, what we are going to do, we are going to simply
pull this yarn. Gently pull the new yarn
to tighten that stitch, and there you have your
really neat colour change. Now cut this previous yarn. Complete double crochet in
the rest of these stitches. So I have made a row
using that color yarn. And now, again, I have reached
to the middle of the row. Let's try changing
the color again. Pull up the loop and
take out the hook. Take the new yarn, fold it like this. Now insert the hook into the
top two loops of the stitch. Take the yarn, place it on the hook and pull
it through those loops. Continue making
double crochet in the following stitches
with new yarn. Now we are going to pull this
previous yarn, like this. Take the casar and cut it by leaving a
few centimeter tail. Now continue to make double crochet in the
remaining stitches. So here I have completed
a total of five froze using double crochet
to finish chain one. And now let's cut this yarn. So take the casar and cut it. Pull this loop all the
way through to secure it. Now let's weave in
all these yarn ends. I'm using a 1.5 MM
crochet hook for weaving. You can also use a yarn needle. So here I have weaved
all the yarn ends, and that's how you change yarn color in the
middle of a row. I demonstrated this using
the double crochet stitch, but the same method works
with other stitches, too, including single crochet, half double crochet,
and treble crochet.
22. Making a Cute Drawstring Pouch: Distritorial, we are going to make this cute crochet pouch. So grab the yarn you
would like to use. I will be using a
lightweight yarn, but I will work
with two strengths together along with a
three MM crochet hook. Begin with a slip node. So our slipknot is ready. Now we are going
to make 15 chins. That's one, two,
three, four, five, six, seven, eight, nine, ten, 11, 12, 13, 14 and 15. So I have made 15 chins. This is about how white
our pouch is going to be. Now we are going to make a double crochet into the
third chain from the hook. That is the first chin, second and the third. So yarn over, insert
the hook into this chin yarn over
and pull through. Yarn over and pull
through two loops. Yarn over and pull through
the remaining two loops. Then make a double crochet
into the following stitch. Do a double crochet
into this next stitch. Continue to double crochet
in each of these stages. So here is the last stitch, and let's do a double
crochet into this stitch. So yarn over, insert the
hook into this chin, yarn over and pull through. Yarn over and pull
through two loops, yarn over and pull through
the remaining two loops. So we have completed this row, and here we have a total
of 13 double crochet. Now what we are going to do, we are going to rotate
our work like this, and we are going to work along
the bottom of the chains. We are going to make
a double crochet into these same stitches that we just went into
the opposite side. So let's do this. Yarn over, insert the hook into
the stitch where we have made our
last double crochet. Yarn over and pull through. Yarn over and pull
through two loops, yarn over again, and
pull through two loops. It is the stitch where we have just made the double crochet. Now we are going to make a double crochet into
this next stitch. So yarn over, insert the hook, yarn over and pull through. Yarn over and pull
through two loops. Yarn over and pull through
remaining two loops. That is the third
double crochet, so we are going to make a double crochet into this stitch. Continue to make
one double crochet in each of these stitches. Here I have reached to
the end and I'm going to make a double crochet
into this last stitch. So we have done a total of 13 double crochet on the
opposite side of the chains. Now I'm going to join with a slip stitch into this stitch. So inside the hook, yarn over and pull through the chain and loop on the hook. So here is our first round. And if your round is curling up, make sure it is curling down. So push it like this. Now we are going to
start our second round. So chain two,
that's one and two. Again, we are going to make one double crochet in
each of these stitches. So yarn over, insert the hook
into the following stitch. Yarn over and pull through, yarn over and pull
through two loops, yarn over and pull
through two loops. Continue to make
a double crochet in each of these stitches. I don't I don't So here is the last stitch, and let's make a double
crochet into this stitch. Yarn over, insert the hook. Yarn over and pull through. Yarn over and pull
through two loops. Yarn over and pull
through two loops. Now we are going to join with a slip stitch into
this first stitch. So insert the hook. Yarn over and pull through the stitch and the
loop on the hook. So here we have
completed two rounds. You should have 26
stitches in this round, 13 on one side, and 13 on the other. Do not count these two
chains as a double crochet. Now let's begin the third round and round three is exact
same as round two. Start with two chins. That's one and two. Make a double crochet
into this first stitch. Yarn over, insert the hook, yarn over and pull through. Yarn over and pull
through two loops. Yarn over and pull
through two loops. Then make a double crochet
into the following stitch. Yarn over, insert the hook, yarn over and pull through. Yarn over and pull
through two loops, yarn over and pull
through two loops. Continue to make
one double crochet in each of these stitches. Here I have completed
third round, and again, we have 26
stitches in this round. Continue repeating this until you reach the desired height. So here I have
completed seven rounds, and now we are going to make the round for the draw strings. So chain two that's one and two. Make a double crochet into
the following stitch. Yarn over, insert the hook, yarn over and pull through. Yarn over and pull
through two loops. Yarn over and pull
through two loops. Then make another double crochet into the following stitch. Chain one, we are going to skip this very next stitch and make a double crochet
into this second stitch. Yarn over, insert the hook. Yarn over and pull through. Yarn over and pull
through two loops, yarn over and pull through
two loops. Chain one. Skip the following stitch and make a double crochet
into this next stitch. Again, chain one. Skip one stage and make a double crochet into
this second stache. Repeat this until we have
six of these spaces. So here we have six
of these spaces. And now we are going to make a double crochet into
this next stitch. Yarn over insert the hook, yarn over and pull through. Yarn over and pull
through two loops, yarn over and pull through
two loops. Chain one. Skip the following stitch and make a double crochet
into this next stitch. Again, chain one, skip one stage and make a double
crochet into the next stage. Repeat this until the end. So here is the last stitch, chain one, and we are going to join it with a
slip stitch into this stitch. So insert the hook. Yarn over and pull through the stitch and the
loop on the hook. So the round for the draw
string has been completed. Now we are going to start
our ninth and final round. Chain two, make a double
crochet into this first stitch. Then make a double crochet
into the following stitch. Now we are going to make a double crochet
into this space. Then we are going to make a double crochet
into this stitch. I Again, we have chain one space, so make a double crochet
into this space. Then a double crochet
into this stitch. Continue double crochet in the same way until you
reach to the left side. Here we have these two stages. Make one double crochet in
each of these stitches. And then we are going to repeat the same a double crochet
into this chain, one space. Then a double crochet
into this stitch. So here I have
reached to the end, and we are going to join
it with a slip stitch. So insert the hook into
this first stitch, yarn over and pull through the stitch and the
loop on the hook. So we have completed
our final round. Now we are going
to fasten off in one and let's cut this yarn. So take the casar and cut it by leaving a
few centimeter tail. Pull this loop all
the way through. Now, let's weave
in this yarn tail. So I'm going to use this 1.5 MM crochet hook for
this. Let's weave this. So I have weaved
the tail end and our main body of
the pouch is ready. Let's measure its size. So the width is
seven centimeter. And the height is
about 8.5 centimeter. Now we are going to make
draw strings for our pouch. Each string should be about twice the width of the
pouch plus a little extra. So take the urn, start with a slipknot. A and now we are going to make 40 chins. Here I have completed 40 chins, and now we are going
to cut this yarn. So take the casar and cut this. Pull this loop all
the way through. Let's mere its length. I here you can see it is approximately
19 centimeter long. Repeat the same
for second string. So now we have two draw strings. We are going to put
them into our pouch. It is the right
side of the pouch. Take your hook, insert
it into this space. And behind this double crochet, over the next stitch, then under over the folwing statge and finally,
under this stitch. Grab one draw string. Place it on the hook and pull
it through these spaces. Now turn the pouch upside down and repeat the same
process on the other side. Inside the hook behind
the first stage, over the next, under
the following one, over the next, and finally, under the last one. Here are two double
crochet stitches. Place the drawstring on the
hook and pull it through. Now we are going to
put our second string, but from the opposite side. Inside the hook under
these same stitches, grab the string and
pull it through. Now insert the hook
under these stitches. Grab the string and
pull it through. So we have put draw
strings into the pouch. Let's trim these ends. So now our pouch is ready.
23. Making a Bookmark: This tutorial, we
are going to make this beautiful and simple
crochet herd bookmark. For this project,
I will be using medium weight yarn and a
three MM crochet hook. Begin by making a magic ring. If you are not familiar with
how to make a magic ring, you can revisit the
tutorial on it. Now chain four. That's 12, three, and four. Now make a treble
crochet into the ring. So yarn over twice, insert the hook, yarn
over and pull through. Yarn over and pull
through two loops. Yarn over and pull
through two loops. Yarn over once more and pull through the
remaining two loops. Repeat this process
two more times to make two more trouble
crochet into the ring. So that is the second
trouble crochet. And that is the third one. Now we are going to make three double crochet
into the ring. So yarn over, insert the hook, yarn over and pull through. Yarn over and pull
through two loops. Yarn over and pull through
the remaining two loops. So that is the first
double crochet, M two more double
crochet into the ring. So that is the second
double crochet. And that is the third one. Next, make three trouble
crochet into the ring. So that is the first
trouble crochet. That is the second one and
make one more trouble crochet. Then we are going to make three double crochet
into the ring. And So that is the first one. The second and the
third double crochet. Lastly, we are going to make three treble crochet
into the ring. So that is the first
treble crochet. That is the second one. And that is the third
trouble crochet. Now chain four. That's one, two,
three, and four. And join with a slip
stitch into the ring. Insert the hook, yarn over and pull through the ring
and the loop on the hook. Then chain one Now pull this yarn tail to close
and tighten the magic ring. Your heart shape
is now complete. Now we are going
to cut this yarn, so take the casar and cut it by leaving
a few centimeter tail. Pull this loop all the
way through to secure it. Now that we have the herd part, we are going to make the tail that will become the bookmark. At the bottom of your t, you will see there are
three trouble crochet. So we are going to work into
this middle trouble crochet. So take your hook, insert it into that stitch. Take the yarn fold it like this and pull the folded end through that stitch
to form a loop. Now we have these
two strands of yarn. So yarn over and pull these
both through the loop. Now pull out this tail end. And let's continue to make chains with this
working yarn only. You are just going to chain however long you want
the bookmark to be. Here I'm going to make 35 chins. So here I have
completed 35 chains. Now I'm going to cut this yarn. So take the casar and cut this. Pull this loop all
the way through. Now it's time to weave
in all these yarn tails. I'm using a 1.5 MM
crochet hook for this. So let's weave this. Now got any remaining yates. And let's weave
this tail as well. So I have weaved
all the yarn tails, and our crochet hurt
bookmark is ready.
 Nida Younas, It's me :)