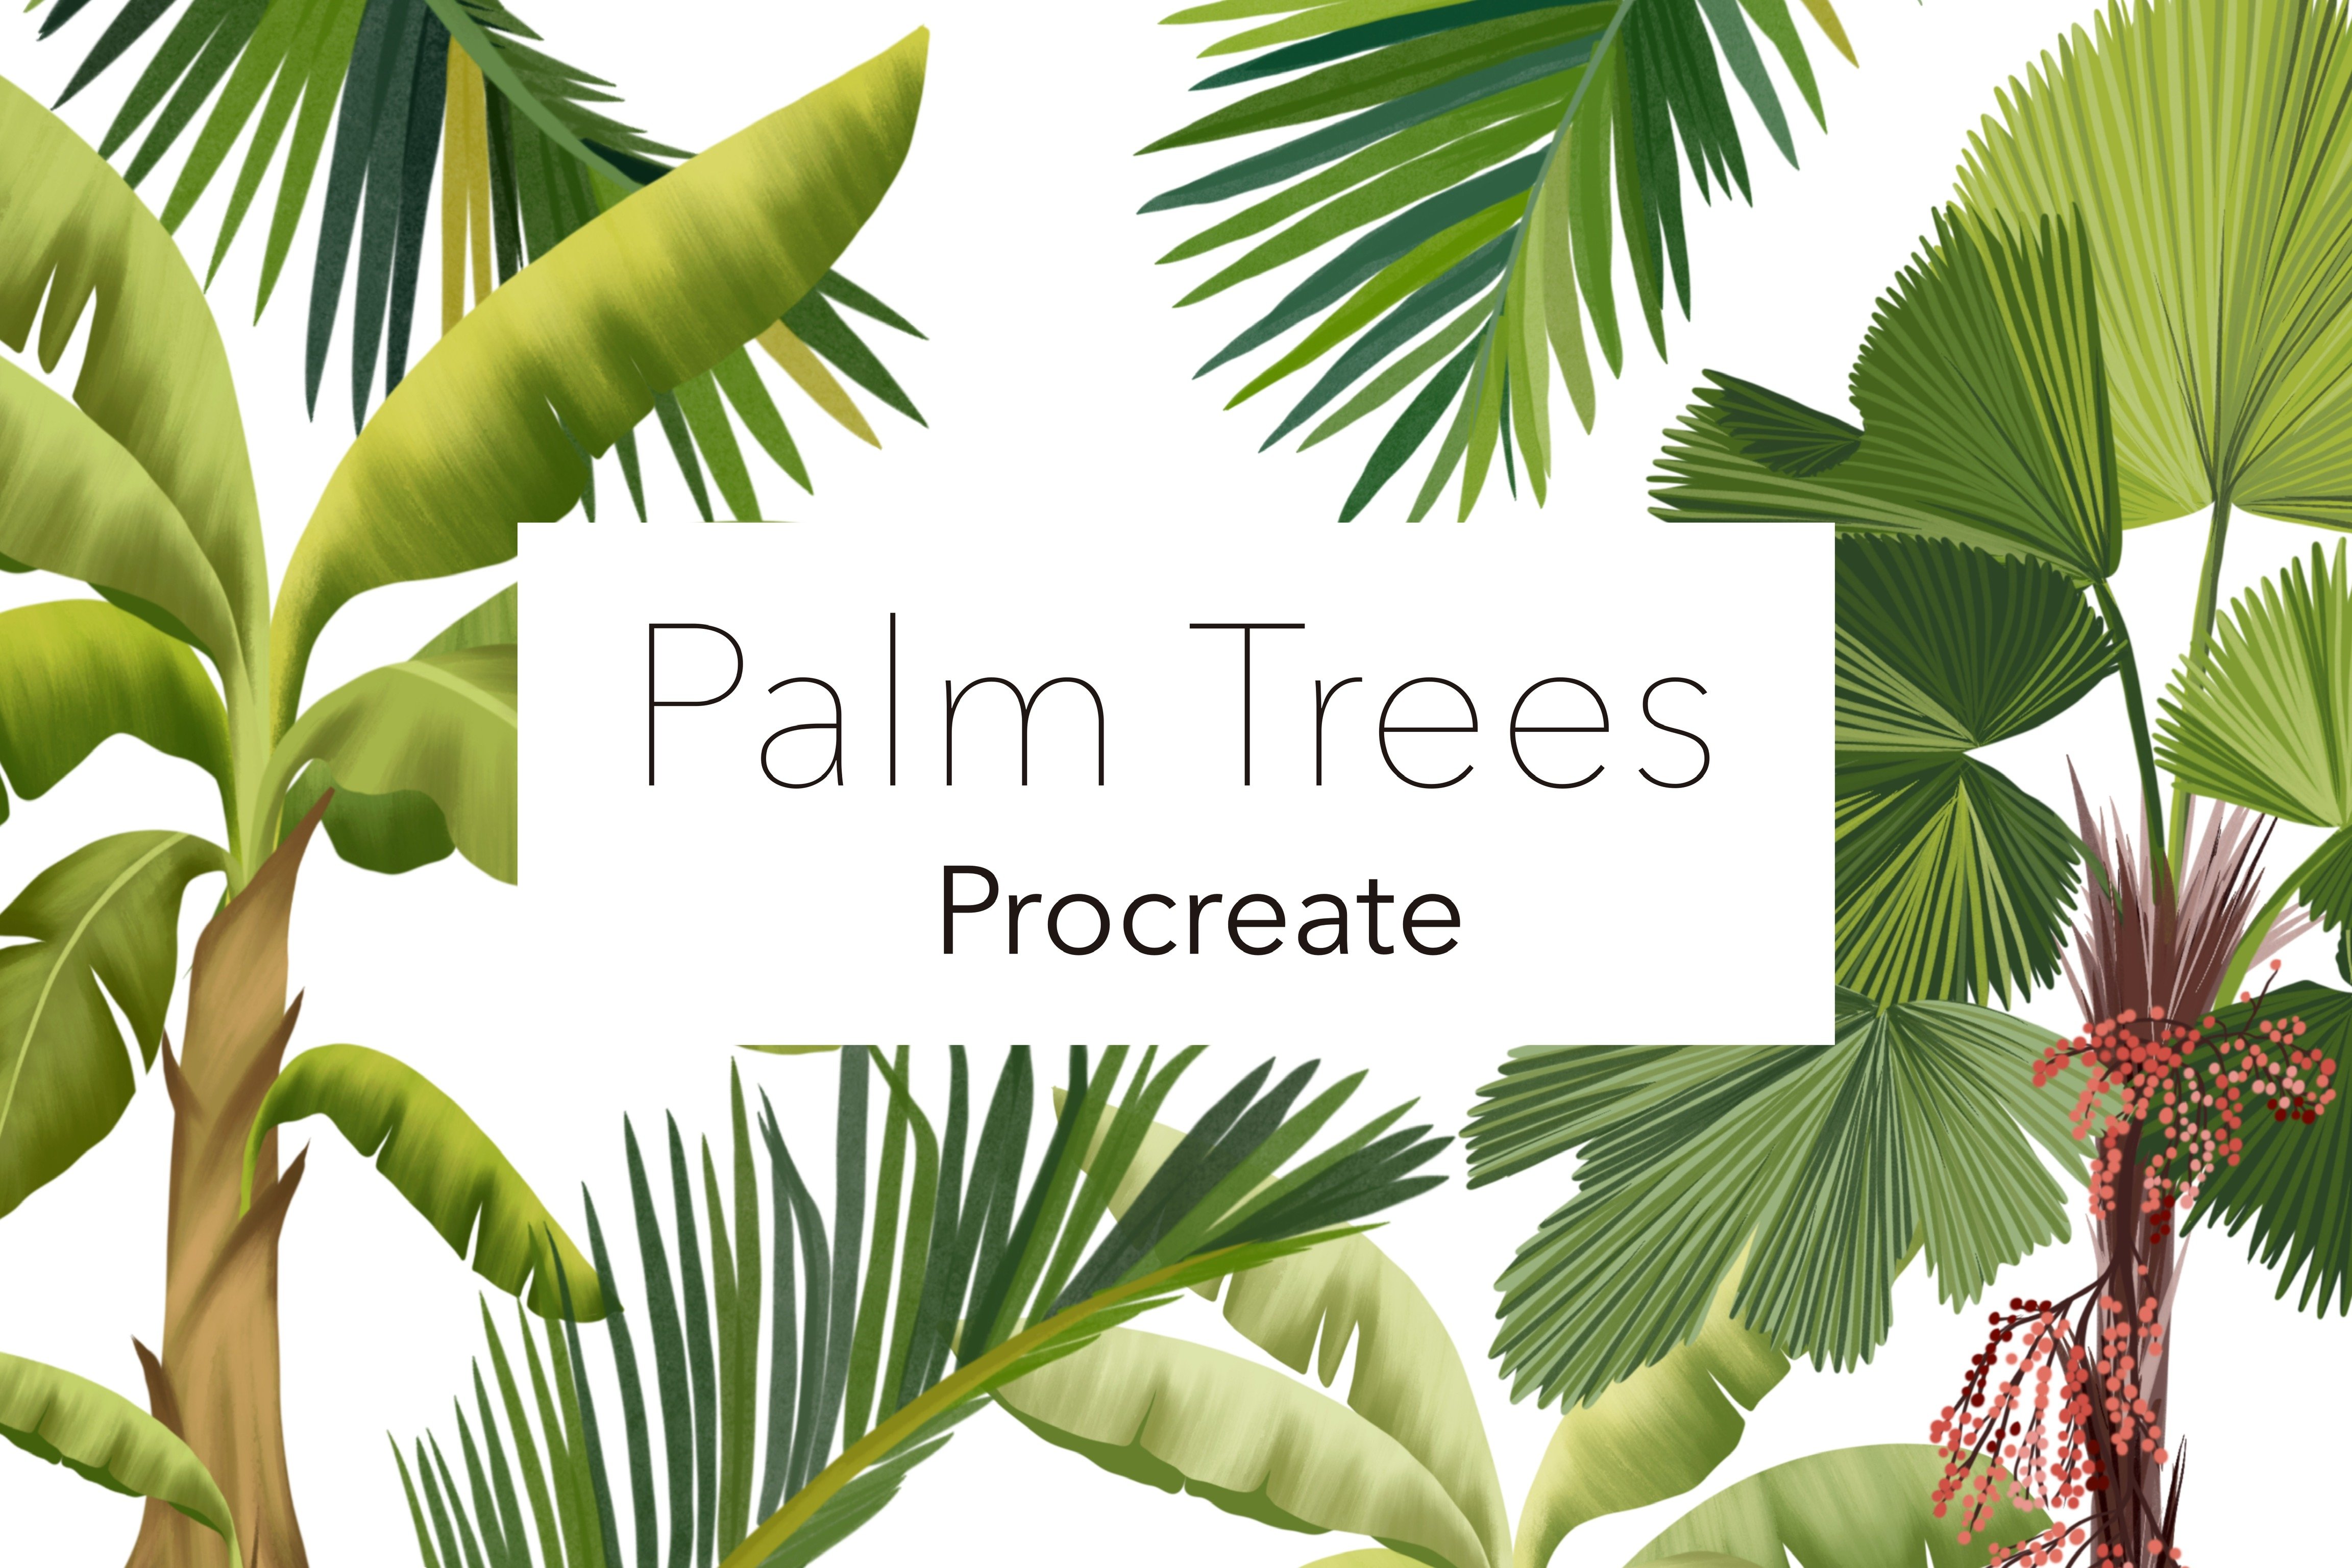
Transcripts
1. Introduction & What You’ll Learn : Hey guys, My name is Vinita. I'm an illustrator and pattern designer
based in Singapore. And in this class I'm going
to show you how you can create a sequin
brush in Procreate. Start by creating a shape. To create this brush, I will be showing you
step-by-step all the settings you don't this shape
in an oblique. They are also few examples
of similar sequin brushes. I will also explain
you in detail how likely they are going to select. Showing you how you can
use these brushes to create an artwork or
Seamless Pattern. These Brushes can be
sold on online platforms like marketplace or even
on your own website. By the end of this class, you will have a lot
of tips and tricks on creating any custom
brush on future. Thank you for taking this class.
2. Creating Sequin Brush: Let's start with our
first sequin brush. We'll start by
creating a new canvas. To create a new canvas will
tap on this plus sign. Again. On this tiny plus sign. We keep our canvas size
as 3,000, 3,000 pixels. You can even type in your size. And my DPI is 300. And tap Create, this will
create a new canvas. Next I'll tap on
the Color panel. I have this color palette in the resource section
of this class. The top row on this palette, or these shades of
black and white. I'll select the first
black from this column. Next, we'll move on
to the brush library. Under Calligraphy. I'll select the
brush more newline. Now under layers,
I'm on my layer one. And we'll draw our full
shape for the sequin brush. Draw a circle in the
center of the canvas. Hold your brush and your fingertip on the canvas
for the perfect circle. Fill it with the
same black color. Make sure you cover the
maximum area of your canvas. Now, we need the so-called exactly in the center
of the canvas. For that, I'll
select the circle. Make sure you select
your uniform. Here under snapping. Make sure your magnetic
and snapping is on. And the distances around 21. And my velocity is max. I resize this shape and
make it a little bigger. Now, we need to adjust
the circle until we get these golden lines,
vertical and horizontal. This means the circle is exactly in the center
of the canvas. And I'll deselect this shape. Now, our next step is to create another smaller white circle in the center of
this black circle. For that, I'll go to layers, duplicate our black
circle layer. Now to turn this circle
into white color, I'll tap on this layer, alpha lock this layer. Go to your Color panel,
select quite Color. Go back to your layer, tap on the layer
and tap Fill Layer. Select this circle. And I'll make it smaller. This in the center of the circle until you
get these golden lines. Now we'll start with
our second shape. For that, I'll go to layers, duplicate our black
circle layer. Tap on this layer
and tap Alpha Lock. Make sure your monoline
brush is selected. Next, we need our
Drawing Guide. For that. I'll go to actions canvas
that on Drawing Guide. And next tap on
edit drawing guide. This will open your setting for the drawing guide will see these four options
at the bottom. We will need symmetry.
The symmetry. You can tap on options. You will get four options here, vertical, horizontal,
Quadrant, and Radial. We need quadrant from this. Now, another setting
that you might need is to change the color
of your guideline. You can see this tiny note
that you can slide and change. You can change the opacity and even the thickness
of your guideline. And we can tap Done. Next, I'll go to Layers. Make sure the drawing guide
is on, on this layer. The layer shows assistant means the drawing guide is
on, on that layer. Next, go to Brushes. Make sure your monoline
brush is selected. Now under Color panel. I'll select the gray
from the color palette. We'll start to Illustrate
the shape for the sequin. I'll draw a slant line. Hold your fingertip and
the pencil tip together. Another vertical line. Again. Repeat your fingertip
and the pencil tip. Try to create a
proportionate hexagon. Another line touching the
point to the outer circle. Make sure it passes
through the circuit. There's no gap between. Our next step will be
to fill in colors in these tiny shapes that
will go to the Color panel We will be filling in
different shades of grace. I'll start with the
lightest gray first. And I'll drop this color in
the center of this hexagon. When you drop your color, don't leave your pencil tip. Keep the pencil
tip on the screen. You can slide and
adjust your threshold. You can leave your
pencil tip when the color looks
perfect in your shape. Next, we need to switch off the drawing guide
for this layer. Go to this layer, tap on the layer and
tap Drawing Assist. Next from the Color panel, I'll select the
second gray color, and I'll drop this
in one of the shape. If the drawing guide
is on for this layer, it will also start filling the other symmetry
side of this shape. I'll select another darker gray and drop it in
one of the shape. It's going to be
better to follow the same exact color
that I am using. If you want the result to look exact same as my sequin brush. Now selecting the
fourth shade of gray and drop it in
one of the shape. Now selecting the
last shade of gray, the darkest one, the second one, and drop it in the shape. Now, our next step is to add a shadow in the center
of the sequin shape. For that, I'll go to Layers. Select my white circle. Next to add shadow
to this layer, we need to make sure our
layer is Alpha logged. Tap on that layer and make sure your alpha
lock is selected. Next from the Color panel, we'll select a jet black color. Make sure your monoline
brush is selected. I increase my brush size. I'm going to make a
curve on one corner of the circle and
hold this whole, your pencil, tip the screen until you're satisfied
with the girl. And I'll fill in this shape looking
like a crescent shape. Now, our next step is to
add shadow to this shape, will be adding it on
this side of the shape. For that, I'll go to Layers. I'll duplicate the first shape, the black circle be made. Select the layer at the bottom. Select this shape. And we'll move this
shape out from one side. Next, under adjustments. I'll tap on gaussian blur. With this tool, you can blow your object with
your pencil tip. You can slide right
and keep moving right until you're
satisfied with your result. I'll keep mine as around 7%. I'll select my shadow layer. I want my shadow to be
a little more thicker. I'll put a shape out and
I'll deselect the shape. Now, another detail
that I want to add to this shape is to add
highlights and shadow. For that, I'll add a new layer and add clipping
mask to this layer, the layer with the hexokinase. Next I'll go to Brushes. Go to airbrushing, and I'll
select the soft brush, the first brush, and
select white color. Now I'll be adding a highlight
on this part of the shape. I'll increase my brush size
to around nine per cent. And a little detail
on the other parts to this will give
depth to your brush. It will help you Brush
look more realistic. You can even smudge using
the same soft brush. Wherever you feel it looks
too dark or too sharp. And we're done and ready
with our shape here. Let's move on to
creating our brush. Next, we can go to
the Brush Library and create our
Sequin Brush folder. For that, you can tap
on this plus sign. This will create a new folder and we can rename this folder. I'll rename this
as sequin brushes Now our first step to create a new Brush is to
copy the shape, to copy our secondary shape. For that, I'll be hiding
some of our layers. The first one is
the shadow layer, and the second one
is the shape layer. This is how your shape should
be looking before you copy. Now to copy the canvas, we'll go to action. Add and tap on Copy Canvas. This will copy the shape that
you can see on the canvas. Next, we'll go to the
Brush Library tab, understand the plus sign. This will open all the settings we need to create a new brush. Next, we will type
in the spacing. It is always better to type in. Instead of sliding
the tiny node. I'll keep mine as 55%. Next go to stabilization. I'll type in the
amount as 90 per cent. For the streamline. For the stabilization, I'll type in as 30%. Next will go to shape. Tap on, Edit, Import and paste. This will paste your shape from the Canvas tab with two
fingers on this image. This will invert your image
and tap Done. Move down. Your rotation should
be hundred percent. Move further down. Here the tilt roundness
should be 100% two. Next step on rendering here will be selecting
uniform glaze. Next, go to Color dynamic. Here you have to scroll down. Under Color pressure. The saturation will be 50%. Brightness will be 100 per cent, and secondary color
will be 100%. To. Another setting on the secondary color
is tap on this max. You get these two options
as numeric and pressure. Tap on pressure. Hold and pull this
tiny node at the top. This will help your
secondary color to be consistent all over the brush. Next, moving down
under Color tilt, your saturation should be max. Your brightness should be -100, and your secondary color
again will be max. Next step on Dynamics. Sure, the size should be 100%. Next, under Apple Pencil, reduce the opacity to none. Next step on properties. Here, the maximum size will be 100 per cent and the
minimum will be 4%. This is one of the
very important step on this page is to switch off your audience to
screen and tap done. We're done with that
primary brush here. Let's move on to the
secondary Brush. For that will go to Layers and unhide our shape and
the shadow layer. Now our next step is
to copy this Canvas. For that, I'll go to action, add and Copy Canvas. Once you've copied the canvas, we'll go to the Brush Library. Duplicate our primary Brush. For that will swipe
left and tap Duplicate. Tap on this brush. That will open the Settings. Go to Shape, Edit,
Import and paste. This will paste
our primary shape for the sequin and tap Done. Next under Color dynamics,
Let's scroll down. Under stroke color jitter, the secondary color will be max. Under Color pressure. Saturation will be max. Under Color. You can make everything
zero per cent and tap Done. Next step is to combine
both are Brushes. Swipe left and select
both the Brushes. And there's an option
called Combine at the top on Combine. And we're done with
our sequin brush here. Let's try out on the canvas. It's tried the gold color first. I'll select the
light yellow color and darker as my primary color. Make sure your secondary
color is selected at the top. And that's how the brush
looks for the gold color. Let's try out More Colors. I'm trying green for this time. I'll select the light green, forced the darker green. Again, select your
light green so it shows on the tiny
circle at the top. Let's again try
out another color. I'll try blue this time. Let's move on to
the next lesson.
3. Explaining Dual Brush & Color Combinations: In this section, I'm
going to show you how a Dual Brush can work. When you tap on
your Color panel, you can see few
options at the bottom. When you tap on these options, you can see different ways. You can use your Color panel. For our Dual Brush. You have to be on
the first option. Here on the right corner you
can see these tiny boxes. These are four primary and secondary color for your brush. When I tap on any books, you can see that
Color Changing on the top and that becomes
your primary color. So whichever color is your primary color
will show on the top. I have this color palette in the resource section
of this class, where I have few
Color Combinations with primary and
secondary colors. I also have this table attached
in the resource section showing you how the brush will look with each
color combination. For example, if I want my
primary color to be bookie, I just tap on the box and just select the color I
need to write down. My primary color is
light bulb because it is showing on the
dog in the circuit. But I want my primary
to be the dark one. So I'll tap on the dark
one before using my brush. This is how the brush looks with the darker purple
as primary color. Now to see how it looks
with the lighter color, I'll go back to the panel and just select the light color. And automatically the darker
becomes your second peak. And this is how the Brush tool. Let's try out new
Color Combinations. Next I'm trying the
golden yellow color. I'll select the
dark, the light one. But make sure before you leave. Your primary selected. If there is any
confusion with the Brush or the color palette
or how to use it. Please post in the discussion
section of this class. I will definitely help
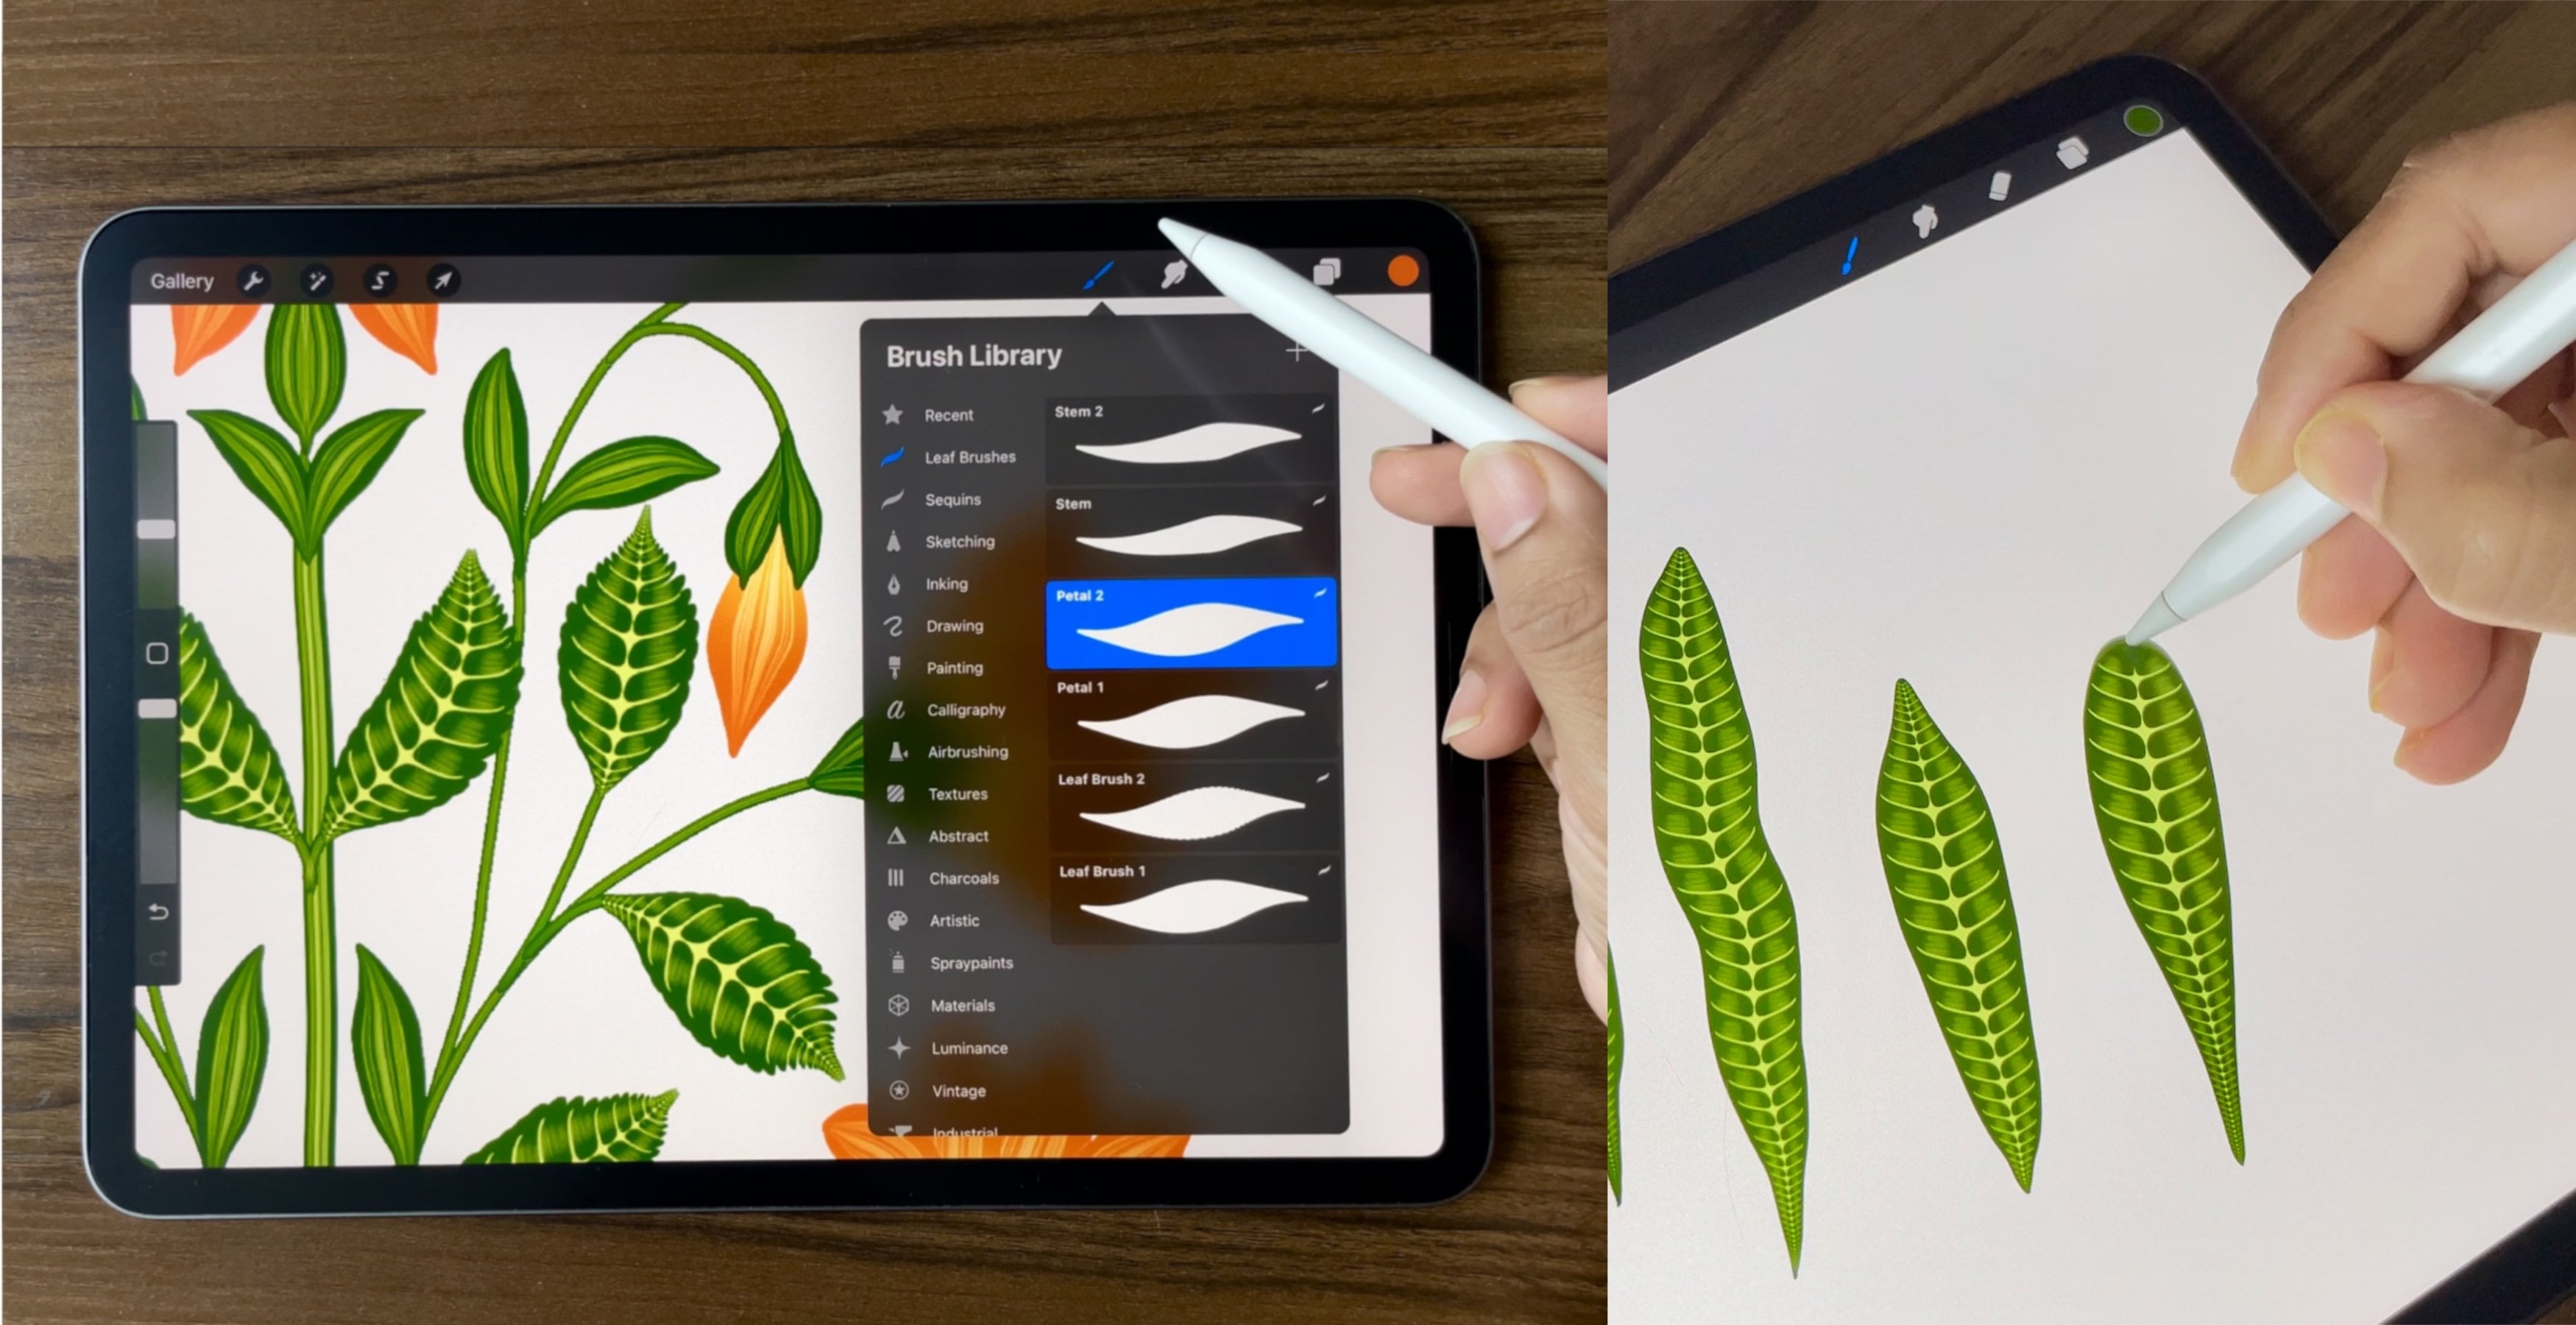
4. Tips & Tricks: Let me show you few
tips and tricks to make this brush look more
realistic and effective. The first step is to
add a stitch detail. I will be adding stitch detail to the brush we already made. I will add a new layer. Select monoline brush. On the new layer. Make sure you're
drawing assist is on. Call to action Canvas. Edit drawing guide. Here I need the Drawing
Guide to be vertical. So I'll change that to
vertical and tap Done. I will start by drawing
a curved line from the another curved line
to close the shape. Fill this with the
same black color. Next, I'll go to action. Add copy canvas to
the Brush Library. Go back to the brush
we already made. I'll duplicate this brush. Will add on the new brush, dab on the new gush. Here we had combined to brushes. So we'll take the first one, we'll take the shape one
and not the BS1 who do shape added, input and paste. This will paste your shape, be copied from the
Canvas and tap Done. Scroll down in the same section. Delete roundness should be max. Next under properties orient to screen should be
up and tap Done. Let's try this brush
with the stitch detail. Next one is to add shadow. Adding shadow will make
it look more realistic. I'll just draw
this basics Biden. Next, we'll go to Layers. Duplicate despite a layer. The bottom one, select
the bottom one. Tap on the layer,
tap Alpha Lock. And we'll fill this
with the black color. I'll select a black color, go to Layers, tap on the
layer and tap fill layer. This will fill your shape
with the black color. Select the layer and tap
with one finger on the side. You want the shadow to fall. You can see the black sheep
coming on the right side. Next, we need to switch off
our alpha lock on this layer. You can slide with two-finger
to go to Adjustments. Gaussian blur, and slide your fingertip all your
Pencil towards the right. When it goes right,
It's too bloody. I'll keep it to around, you can see the percentage here. I'll keep it to around 2%. This will make your sequin brush look a little raised
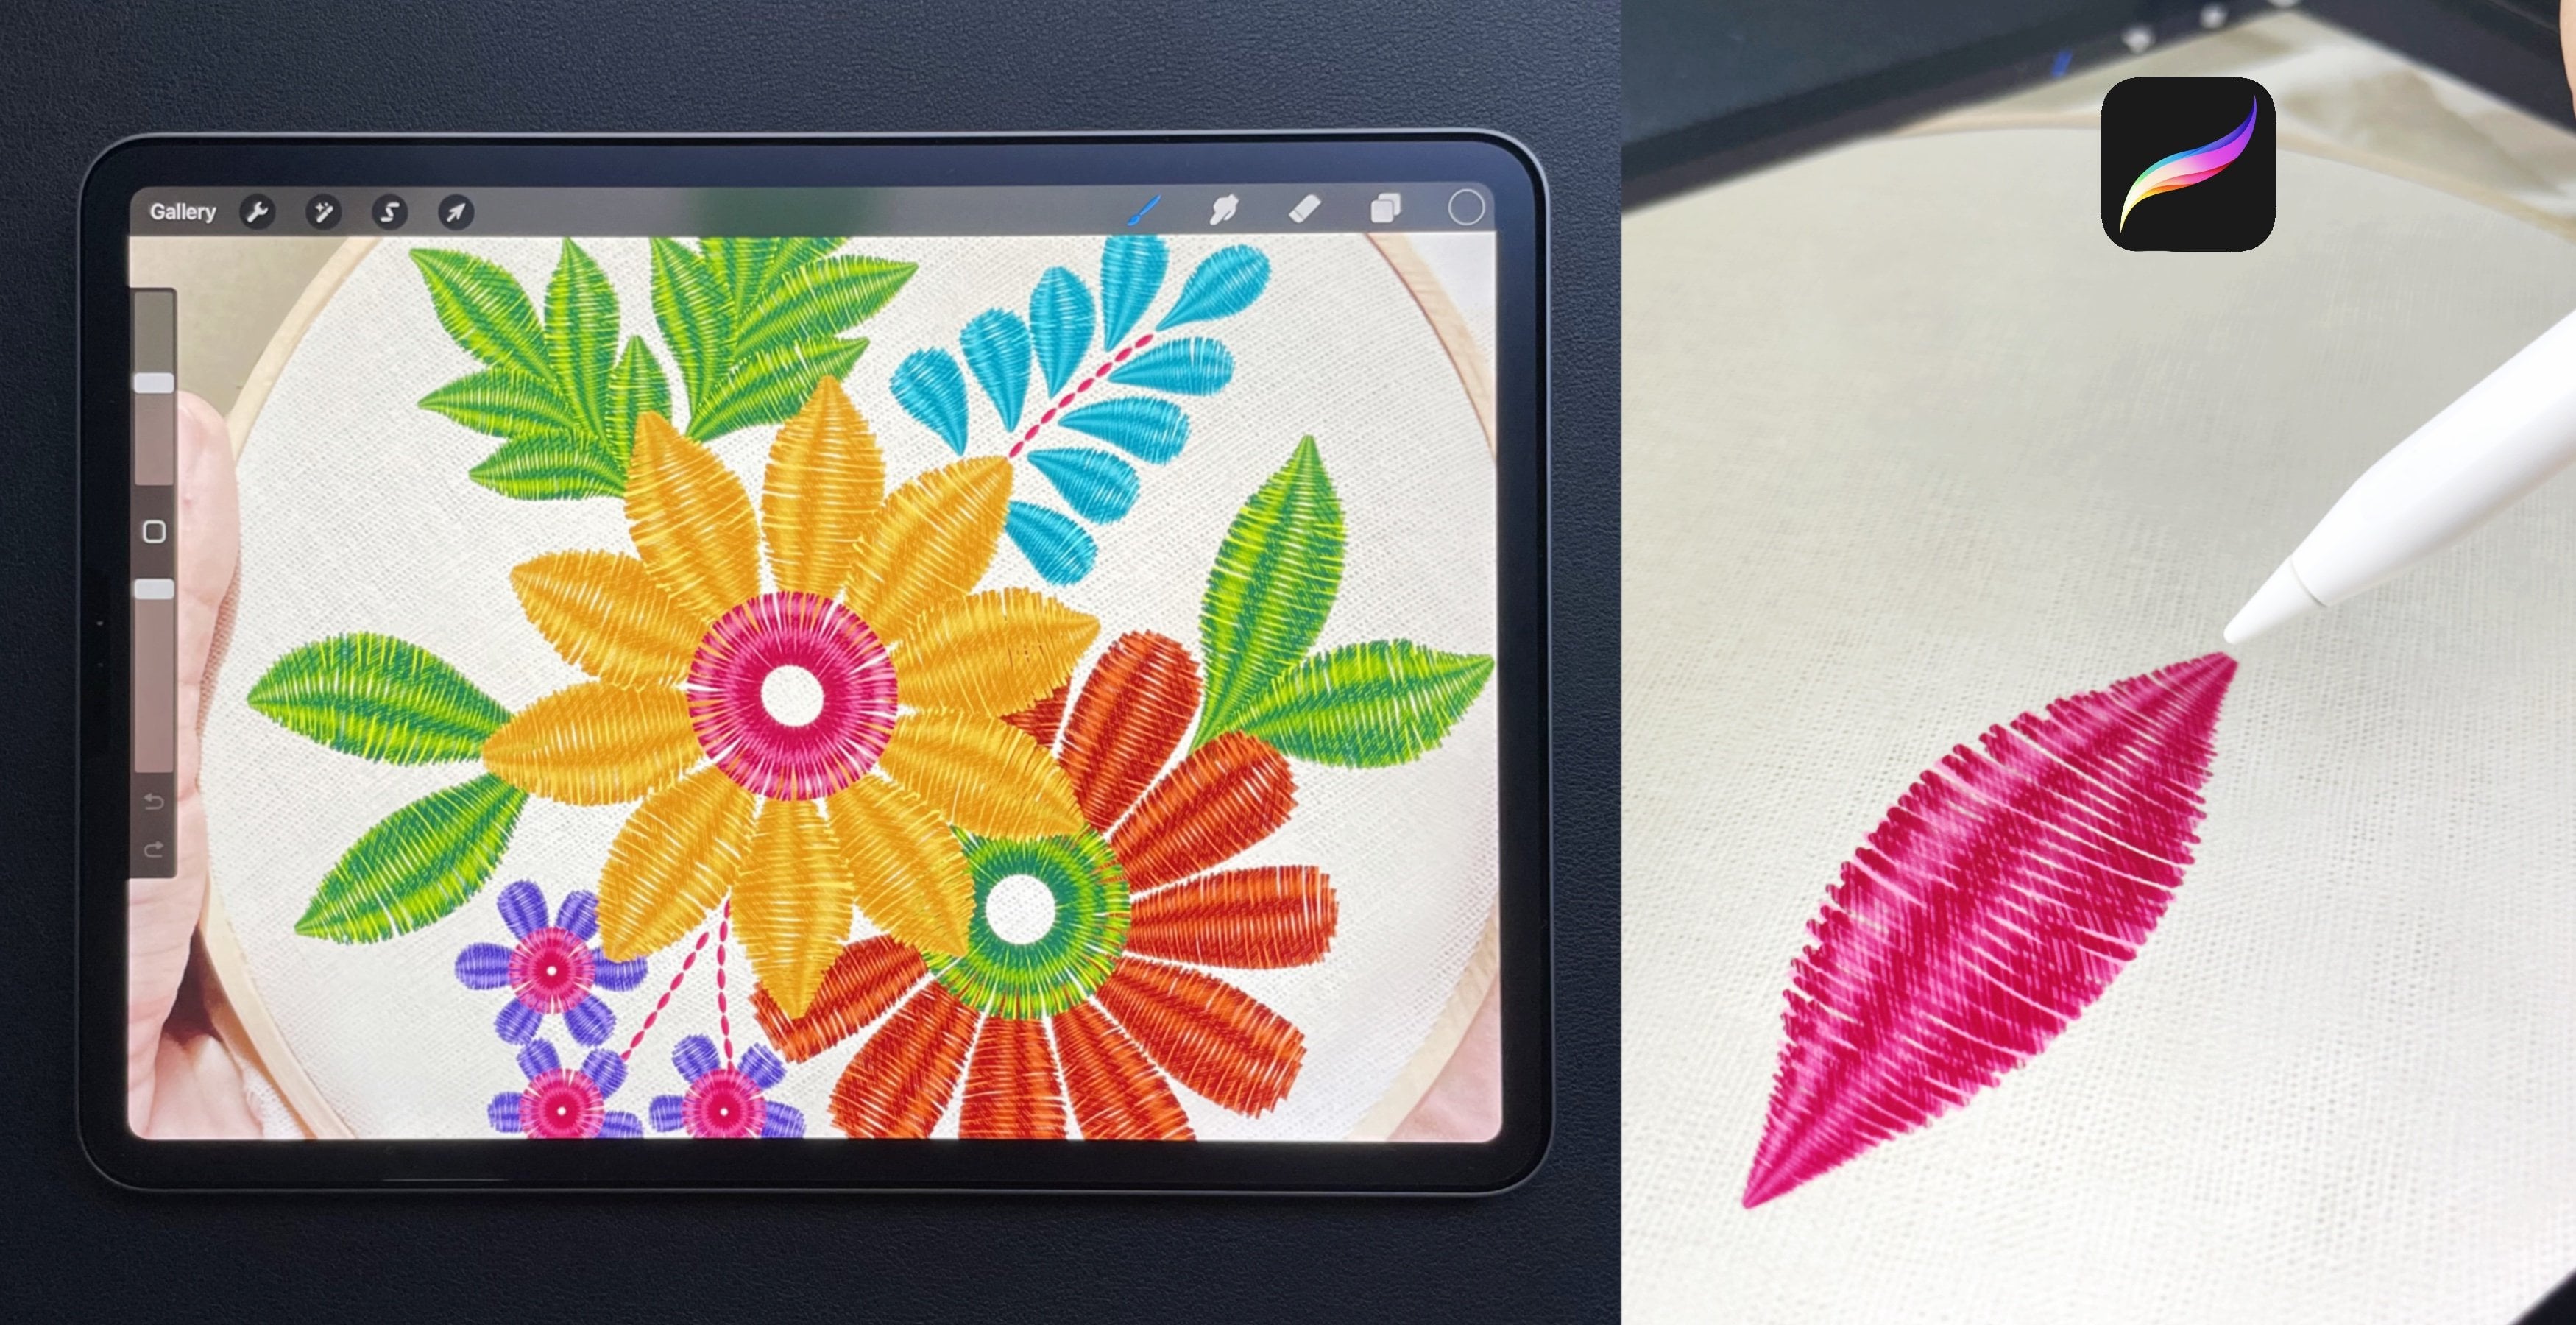
from the Surface. My next tip is to add fabric
detail to your artwork. You can download a
high-quality fabric image from any royalty-free website. This is unsplash.com. I'm on the app here. You can just search fabric
in the search panel. I'll type in fabric. You can find a lot of fabric
images and fabric options. Like for example, this one. The image quality is really
good on unsplash.com. Like for example,
even if I zoom in, you can see the texture purely. I'll search for a denim fabric, type in denim fabric. And you can find a lot of
options here. I like this one. I'll download this
image and I can show you an example
of the brush. The brush looks on this fabric. This is in my procreate canvas. Now, you can insert the
image by going into action and dab on
Insert a photo. Here on my canvas. I have to LEO. One is with the denim fabric and one is with a star sketch. I'll add a new layer. Select one of our Sequin, Brush. Select a nice bright gold color. We'll try this brush on this
fabric. With this dossier. I'll add a shadow to the star. I'll go to the layers, duplicate the start layer, fill this layer with
the black color. I'll select this layer and
tap on the right side. You can see the
black color showing. Next with the Gaussian Blur, I can make this layer
a little more lighter. Slide to right around
two to three per cent. Let's move on to my fault dip. That's trying different spacing. Trying different spacing
between these sequence. I'll duplicate our force brush that we created in the class on the duplicate brush here under first
option that stroke. But it's always better
to type in the space. Instead of sliding
the little dot. Typing will give you
an accurate result. I'll go to the base
layer two and type in the same space I did
for the first one. Let's try out this brush. I will show you how it
looks with different space. She is a quick example of a floral design on
a denim fabric.
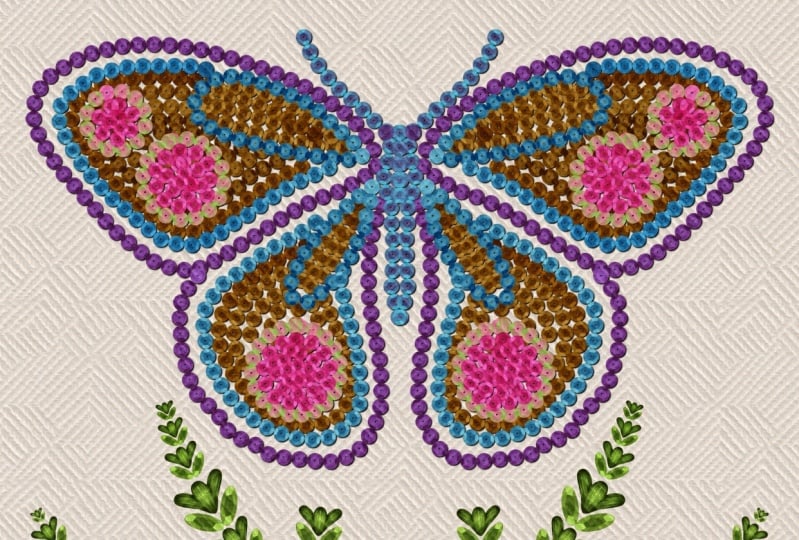
5. Project & More Brush Examples : Project and few more
examples of sequin brushes. Now the project for
this class will be to create any sequin brush of your choice using the
technique shown in this class. Once you're done creating
your sequin brush, you can even Illustrate a Motif, An Art Print, or even a Seamless Pattern
using these brushes. I've created a Pinterest Board with few more examples that can help you with
the inspiration for the Design and styles. Have the link to this board in the project section
of this class. You can simply click on
the link and that will help you open this
Pinterest board. In these examples,
you can clearly see the sequin world that is
printed on the fabric. Now let me show you few more
example of sequin brushes. This first brush is slightly different from what
we did in the class. This doesn't have
toucan in the center. This is the shape I'm using
to create this brush. This is how it looks
with the stitch detail. The second one is a
starship sequin brush. This is how the shape looks
with the stitch detail. The last one is the flash
shape sequin brush. This is how the shape looks. With DMS stitch detail
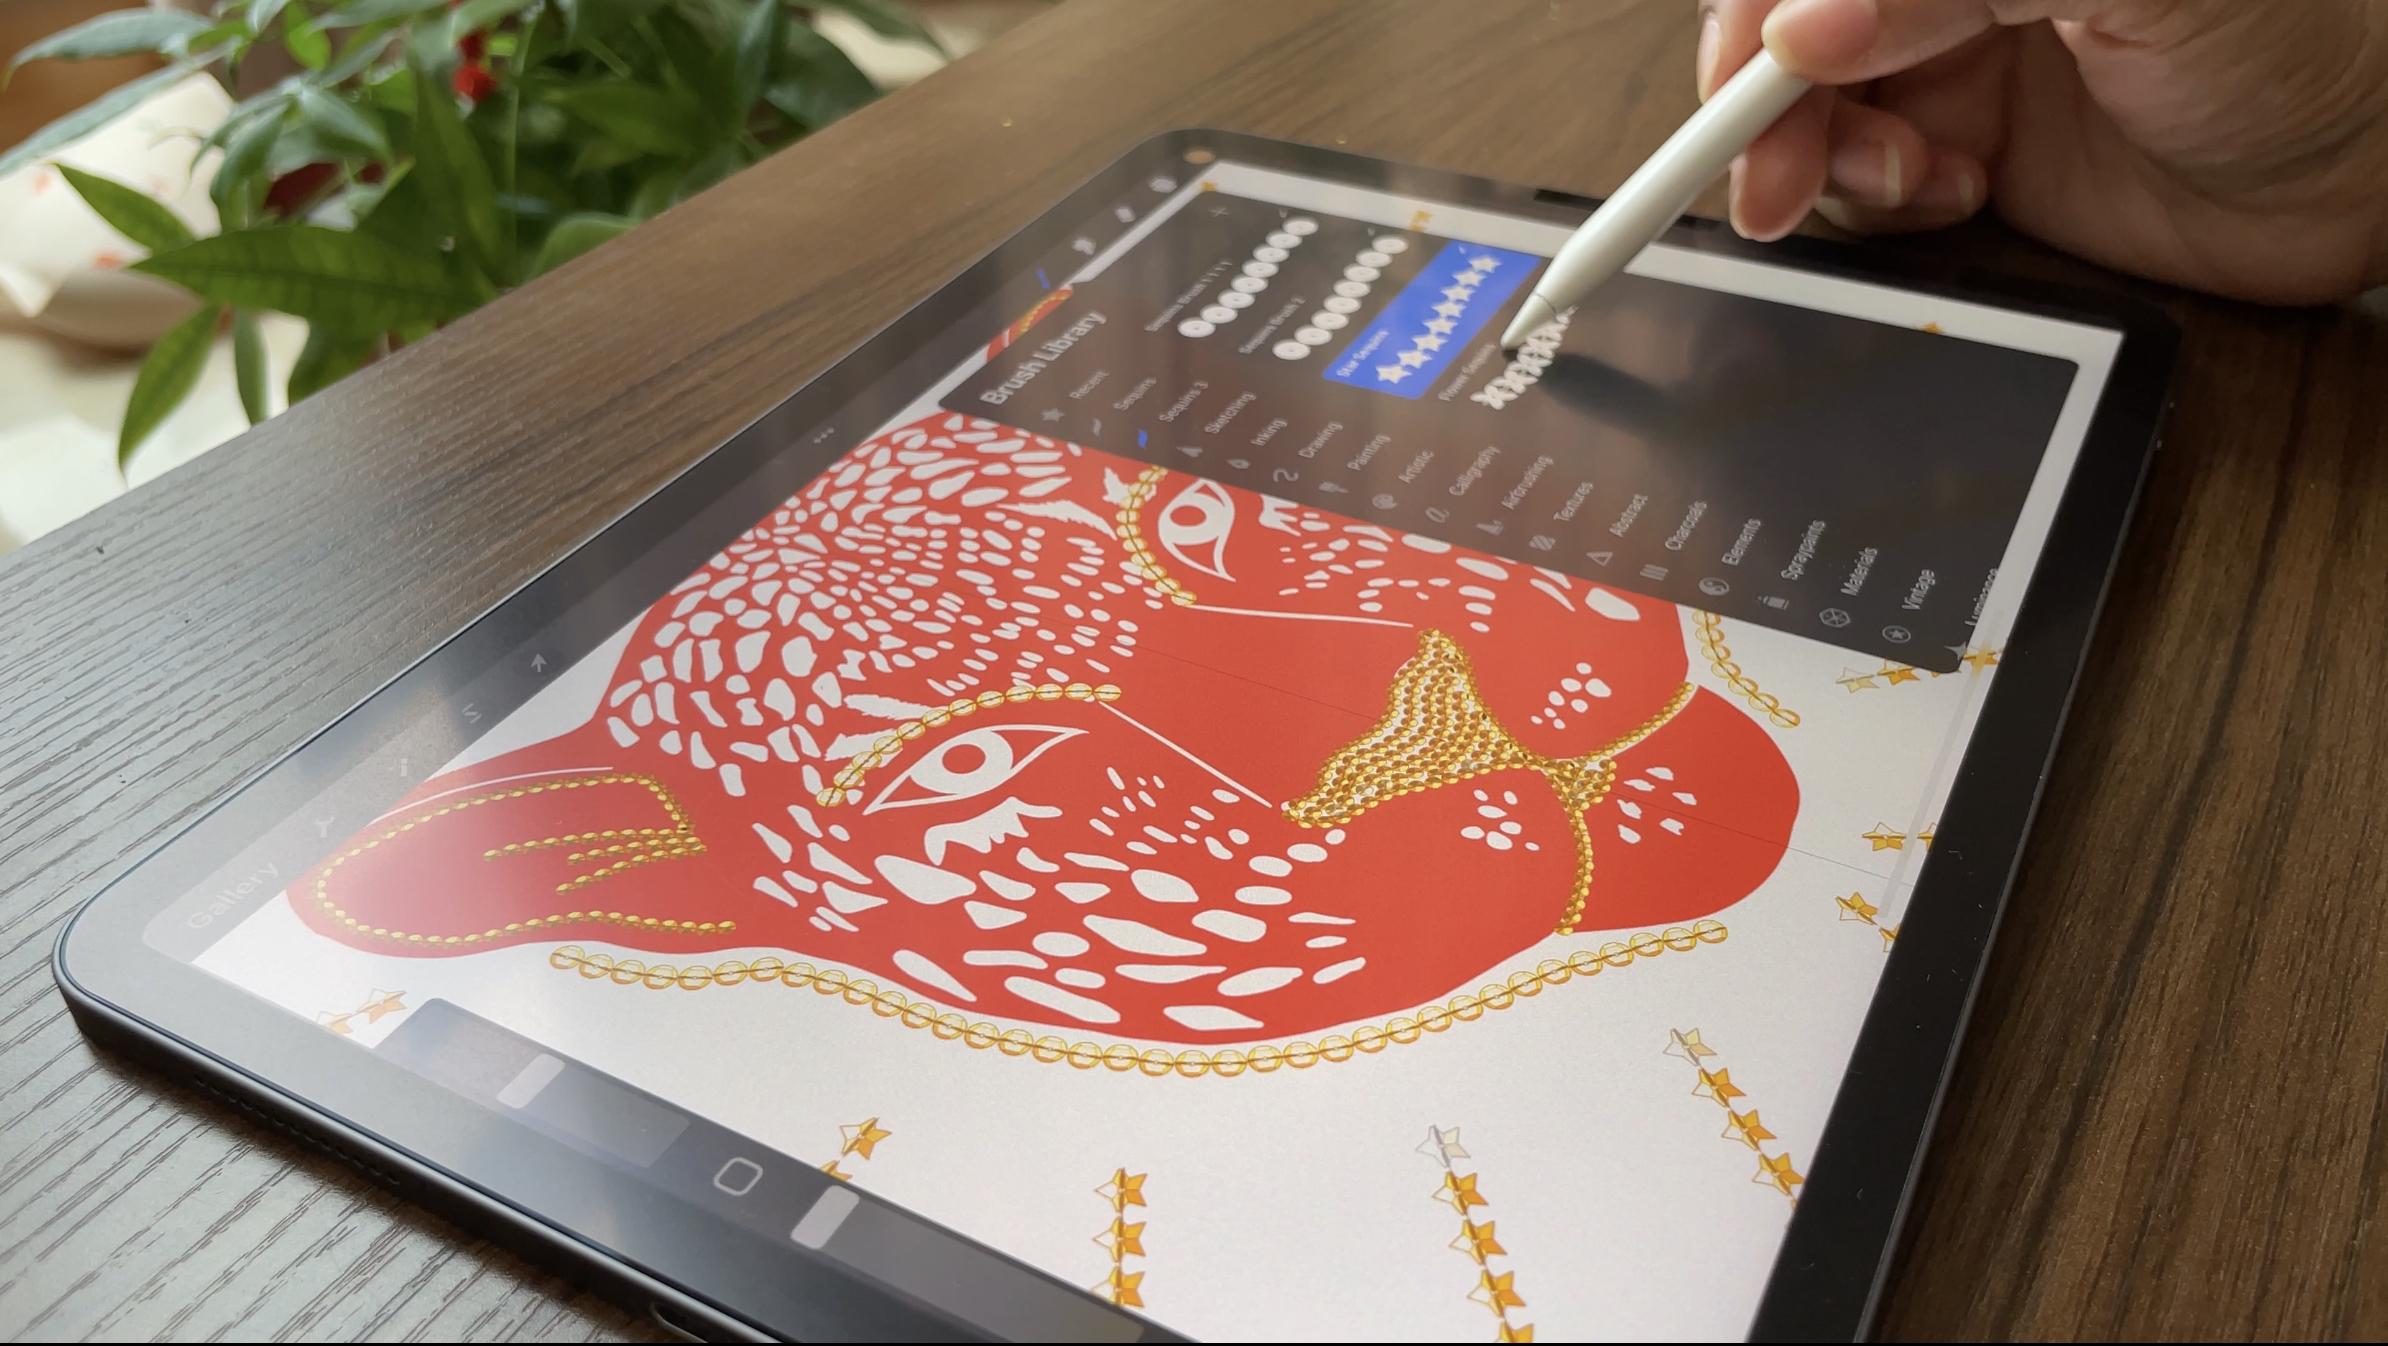
6. Leopard Art Print : Let's add some Sequin
detailing to this leopard Art. Right now on my canvas. I just have one live with
this clip, the place. Now to add some Sequin. Adding, you'll go to
my Brush Library. Select one of the brush and start adding
some fine details. Now, under Brush Library, I have this section called
embroidery stitches. I have a class about teaching. You can create these brushes. You can check out the class
in my Skillshare profile. I'm using my running
stitch brush to add few details on
this leopard face. And I'm done with
my article key. Here is decaying
Color Combinations. When I zoom in, you can see the shadow effect that
makes it look more 3D. In my next lesson, I'll be illustrating
can Seamless Pattern
7. Toucan Seamless Pattern : Toucan Seamless Pattern. I just have one layer on this
canvas, the bookend sketch. I will add a new layer to add some Sequin, be dealing two. This two can go to
my Brush Library. Select one of our Sequin Brush. Select a golden yellow color. And I'll start illustrating
with our Sequin Brush. I will also be using my
Embroidery stitch brushes. I have a class on how
to read these brushes. You can check out the class
in my Skillshare profile. I'm going to select my
doubled running stitch. Add a new layer for this
layer below our Sequin layer. Next, I'll select
a bright red color and start adding some stitch
detail to this toucan. Adding shadow to this toucan. Next, I'll turn this
into a Seamless. This is how the
button looks like. Thank you for taking
this class with me. I hope this class
inspires you to create some sequin brushes
 Vinita Upadhya, Illustrator & Pattern Designer