Learn Realistic Hair Painting in Procreate: A Basic Beginner Guide | Yasar VURDEM | Skillshare

Playback Speed


1.0x


  • 0.5x
  • 0.75x
  • 1x (Normal)
  • 1.25x
  • 1.5x
  • 1.75x
  • 2x

Learn Realistic Hair Painting in Procreate: A Basic Beginner Guide

teacher avatar Yasar VURDEM, Creative Art Director

Watch this class and thousands more

Get unlimited access to every class
Taught by industry leaders & working professionals
Topics include illustration, design, photography, and more

Watch this class and thousands more

Get unlimited access to every class
Taught by industry leaders & working professionals
Topics include illustration, design, photography, and more

Lessons in This Class

    • 1.

      Introduction

      1:41

    • 2.

      How to Sketch Hair

      2:56

    • 3.

      Start Base Painting

      3:11

    • 4.

      Adding Details

      3:35

    • 5.

      Complete Details

      2:21

  • --
  • Beginner level
  • Intermediate level
  • Advanced level
  • All levels

Community Generated

The level is determined by a majority opinion of students who have reviewed this class. The teacher's recommendation is shown until at least 5 student responses are collected.

2

Students

1

Project

About This Class

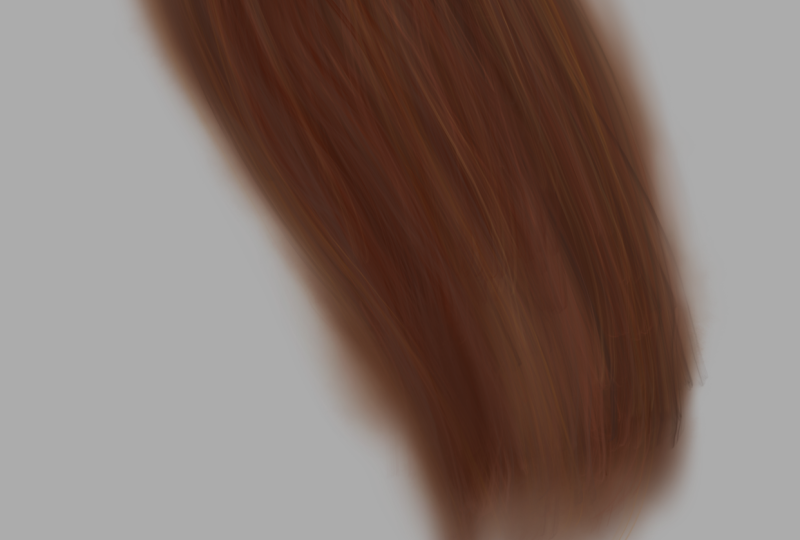
In this class, you’ll learn the basic process of painting realistic hair in Procreate in a simple and beginner-friendly way. We’ll break down hair into manageable steps, from understanding shape and flow to building strands, depth, texture, and highlights so you can paint hair that looks soft, natural, and believable.

This class is perfect for beginners, illustrators, and digital artists who want to improve their character painting skills without feeling overwhelmed. You’ll learn how to observe hair as forms instead of random strands, how to choose brushes and colors effectively, and how to add light and detail for a more realistic finish.

By the end of the class, you’ll create your own realistic hair study in Procreate and share it as your class project. All you need is an iPad, Procreate, and a basic understanding of the app.

Meet Your Teacher
Teacher Profile Image

Yasar VURDEM

Creative Art Director

Teacher

Check my Etsy Shop

Welcome! I'm Yasar Vurdem a digital artist, illustrator, and passionate instructor.

I've spent years developing a vibrant, expressive portrait style that blends realism with bold, painterly energy. Over the years, my artwork has been featured in collaborations with global names such as Billie Eilish, Adobe, Prime Video (The Lord of the Rings: The Rings of Power, The Wheel of Time, Citadel), Wacom, Logitech, XPPen, and many more.

As a professional designer and illustrator, I work across digital painting, character art, concept design, and stylized portraiture. My goal as a teacher is simple: to share the exact techniques, workflows, and artistic mindset that I use in my professional projects in a clear, practical, and inspiring way.

Every ... See full profile

Level: All Levels

Class Ratings

Expectations Met?
    Exceeded!
  • 0%
  • Yes
  • 0%
  • Somewhat
  • 0%
  • Not really
  • 0%

Why Join Skillshare?

Take award-winning Skillshare Original Classes

Each class has short lessons, hands-on projects

Your membership supports Skillshare teachers

Learn From Anywhere

Take classes on the go with the Skillshare app. Stream or download to watch on the plane, the subway, or wherever you learn best.

Transcripts

1. Introduction: Hi, everyone, and welcome to this class on hair painting in Procreate Basics. If you ever felt overwhelmed trying to paint realistic or stylized hair, you are not alone. Hair can seem complicated at first with all strands, textures and movement. But in this class, we will be going to simplify the process and break it to clear manageable steps. This class is designed especially for beginners who are new to procreate and digital painting in general. You don't need any prayer experience with painting hair. We will start from very basic understanding how to see hair, not as individual strands, but as larger shapes and forms. That means that shift alone can make huge difference in your work. Throughout the class, you will go step by step as we explore essential techniques such as creating volume, building layers, choosing the right brushes, and adding highlights and shadows to make your hair look more natural and dynamic. I'll also share practical tips that you can immediately apply to your own illustrations. By the end of this class, you will have solid foundations for painting hair in procrdGrab your iPad, open Procreate and let's get started. 2. How to Sketch Hair: Welcome. In this part, I will talk about how to sketch hairs much more effectively. For sketching hair, you need to define the general shape. For example, if I paint this hair model like this, it will be just like this. And don't think detailed. For example, if you paint wavy hair, try to define the general shape. And after defining general shape, you can give it a volume. And for volume, your lines should be like water waves. And for example, if you painting curvy hair, again, just try to define the general shape. And after it give the volum just like this. And for example, if you paint hair on the head, imagine it is a human head just like this, and you need to paint hair on it. So hair will flow over head like this because it is fudent and have so many particles. And if it is flat, it will down like this. Everything has its own unique pad. And for creating the realistic hairs, you can paint every line special. For example, I paint one hair stroke like this and we'll add small highlights over it. For make it much more dynamic. For example, imagine if you have black background, just like this and you are painting hair into it. So you can paint like this and give highlight over it like this. This kind of small details will bring your illustration much more realistic. Thank you again and see you in the next video. 3. Start Base Painting: Welcome. In this class, we will paint hair and realistic one. At first, you need to switch the background to gray scale because painting with pure white makes shadows and highlights less visible. At first, donut brush and just try to define the main shape of the hair, like how it flows and try to get momentum just like this with simple lines. After it, select smooth shading brush and select middle colors like this and apply over the old base. Just like this. And after this, select brush much more darker. And try to make some parts much more darker and some parts much more lighter, just like this. I'm making these parts much more visible and creating the shadows much more visible at this point. And after it, select some moot line brush and try to create the texture of the hair. Do not rush. Just try to create the brush it look for the hair. And at some parts, it is darker and some parts much more lighter. Just like this, I'm making this part much more darker. Just like this. After this, collect the two layers again and select so much tool and apply over your painting densely. With this method, we made our painting much more smoother. And after this point, you can go to the curves 4. Adding Details : Give it a bit much more dark tones just like this and select the two sided brush I have. You can use any hair brush or some textured brush for this part and apply all over the details. At light parts, these parts will be look much more lighter, and you can add much more detail over the light area just like this. I will continue to adding details and we'll do same process for this part, too, just like this. Yeah, it is looking pretty good right now, but I will make the color much more lighter at this point and will keep adding light highlights just like this. At some parts, you can make the brush stroke much more visible, much more stronger, and some parts will be less stronger, depending on your choice. Just like this. Yeah. And highlight areas will be much more vibrant color. Just like this. And for making this painting much more warm, you can use a bit yellowish highlights, not directly pure white. And I will keep adding the tails just like this and we'll add much more br stroke here. I will use line brush and zoom. And after you put all the tails, you can create separated hair strokes. 5. Complete Details: Just like this. At some parts, it is much more lighter. And if you dive in to Zoom, you can add small details just like this and will continue to create much more hair stroke, especially at the right side because of the flow of the hair. And at these dark points, you can use much more darker colors just like this and like this. And these parts are darker. And these parts will be darker, just like this. And for these parts, you can use much more saturated colors at the points the dark points. You can use much more saturated colors just like this. And this part will be lighter, just like this. And I will add really small details and we'll finish this class and hope you enjoy the process. I will add slowly here and maybe we can make much more here stroke here. Just like this and like this. Thank you again for joining me in this class, and can't wait for see your projects.