Transcripts
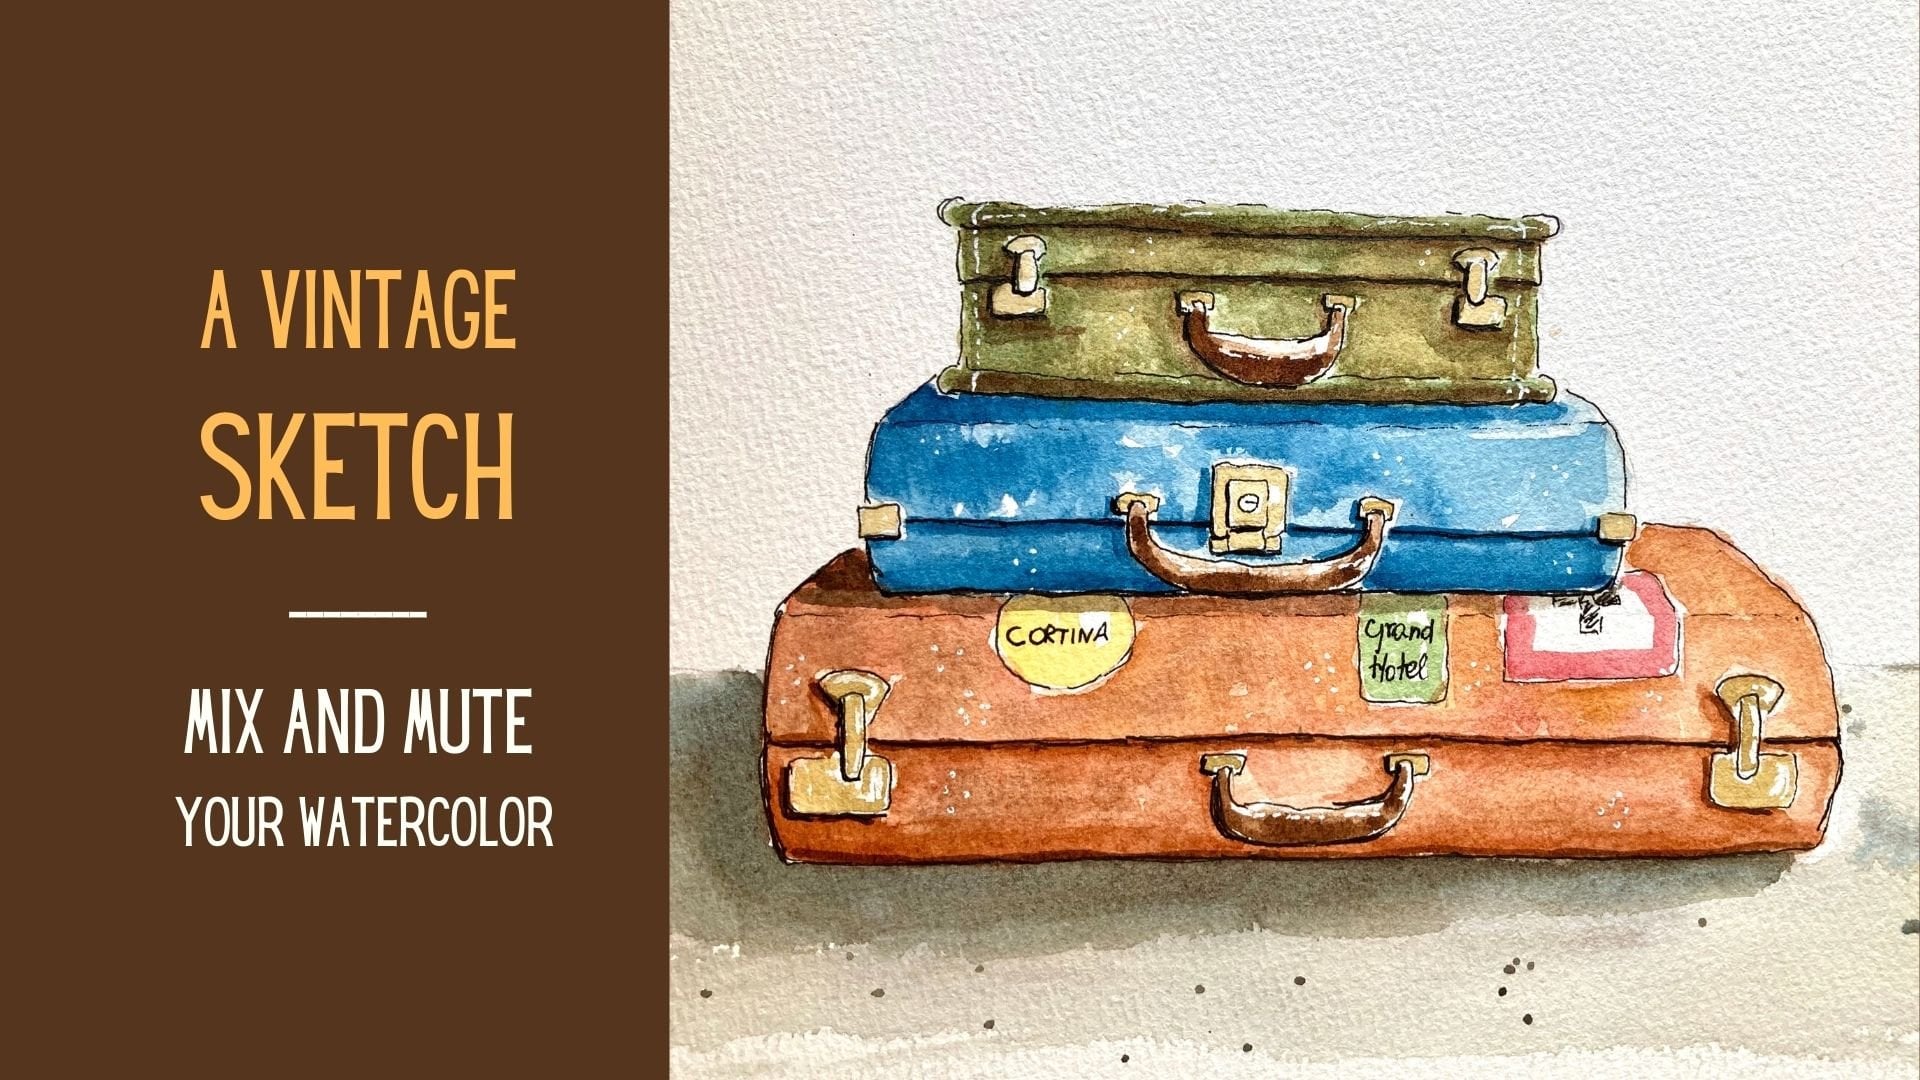
1. Introduction: Hi, I believed it, I tell you on watercolor artist ID love for either with color and supplies. And I'm always cued us to discover and
practice new skills. That's why today we are
discovering and you are supplying new for many of you
buttons very old actually. Sketching, we've
done deep abandon. The simpler dependent
with the Fed boulder in the book of the India. If you roll security it to
find out how to use them, you can take this part. In this class. I will explain to you what type of art
supplies to buy, what kind of time
bolder or nepa. So you don't get those stuff. I was lost in the beginning
of this adventure. The how to use them. There are some very
easy basic rules. And then we'll be
sketched together. An easy fun sketching, which is the stack of books
where you can practice sip of the basic
rule set and your new painful there
and you're new in. Once we have a sketched
our drawing with ink, we will add the
watercolor together. We're going to
have fun together. Going through the Lindy
was killed. Stay 34. I there. I think
that the ones who try to sketch the neat, but you never go back
to a fine liner because it's really easy and it's
a lot of fun with me. And joined the class with me.
2. Supplies: For this class, so you will need some basic supplies that you can easily find an art
supply store or online. First of all, for your sketches, you will need a pencil, HB pencil, or to be
pensive preferably so that you can easily erase
once you apply urine. But I never draw
directly with the inker. I like to sketch a rough the
outline with the pencil. And then I will add the details within NCAA and then
erase depends heel. So you need an eraser.
Pencil sketch. You will need a ruler, a small one or even a
longer one, can be heads. Then you need a pen holder. I suggest these touchy cow
Japanese spent holder. It's very comfortable. It's in Buddha's very pretty. It's also very affordable. And it was originally
created for a manga by specific for
drawing and for the knee, but I suggest this
G nib by zebra. It's also Japan and he said, and it is also created
for manga and comics, but it is ideal for drawing, especially if you're a beginner, because it is too
flexible, not too rigid. And you can vary
the thickness and the width of your line, varying the pressure that
you apply to your paper. Also in other NAEP that I like very much is this cold
so-called blue pumpkin nib, but it is very flexible. But if you're a beginner, it is too flexible. It is made in Germany, it's very easy to
find in Europe, I think that you can
find it worldwide. Generally for calligraphy, but sauce willingness
for drawing. These has a different
pen holder. But my first
recommendation would be these Japanese that she
can't walk with kappa, which is also very useful, so dangerous because
loops are very sharp. So aphasia. Then you will need
some Inca. For ink. You have many options. I will let you know
which is my favorite. You can have India ink. These one by Pelikan
to drawing ink. I like sepia because it gives these vintage feeling
that they really like. Another option in round
would be an acrylic ink, which is slightly
less transparent. It's stronger, it's thicker. It is also very
good for drawing. Still in sepia. Liquitex acrylic ink
is another option. But maybe you can start from
these pelicans drawing ink, or you can have Winsor
and Newton also. Non waterproof so you cannot
use it if you want to add the watercolor
layer afterwards, but you can add it
as the last stature. But there is also waterproof. They're shown these one with
the spider instead would prefer it's black Indian
ink is waterproof version. I prefer a smaller
board or like Lisa, I can keep it in my hand while
I draw and deep my knee. I don't spill it. I don't I am always
afraid of spilling it. Or you can use a small
empty bottle and put some ink every time you draw so you don't spill ink all over, then you will need some paper. I do not suggest cotton
paper for this project. And because cotton paper
is a bit rough and you will need some
cellulose paper like these. 1264 Fabriano, which is
twenty-five percent cotton. It's ideal for this project, or maybe also Canson
XL, which is cellulose. But so, so very good for
drawing with the pen. And then you will
need some watercolor. You choose your
colors so you can follow my colors
or use your own. Because we will be
drawing some books and books can be any color, but some colors that
you wouldn't need. If sienna, yellow,
ocher, four pages. You can use some
paints gray or just mix your gray if
you don't heavy too with blue and burnt sienna. You will need some
earth tones, some reds. But just use what you
have available with you. It would be fine. And then you will need the
palette to mix your colors. You can have it integrated
in your watercolor set. Or you can have separated the pilot ceramic or plastic
or even a dish dish. The important thing is
the background is white, so you see the color
that you are mixing. Then last but not least, you will need some brushes. I always like to use
different sizes. You will need them. One, maybe this is too larger because the size is not too big. A larger one for larger areas, one for smaller areas, and then some very
pointy ones for details. If you have a 0 is perfect, but even these, it's a five. But the point is so sharp that
I can use it for details. But for details, we've
also be using the knee, but with our incus
out that we we still have some favorite
towers and some water. And you always have
two jars of water. One for clean water and one. Use to rinse my
brushes are many, but that becomes thirsty, but always keep jar
of clean water near you so that you can use
it to dilute watercolor. And that's it for supplies.
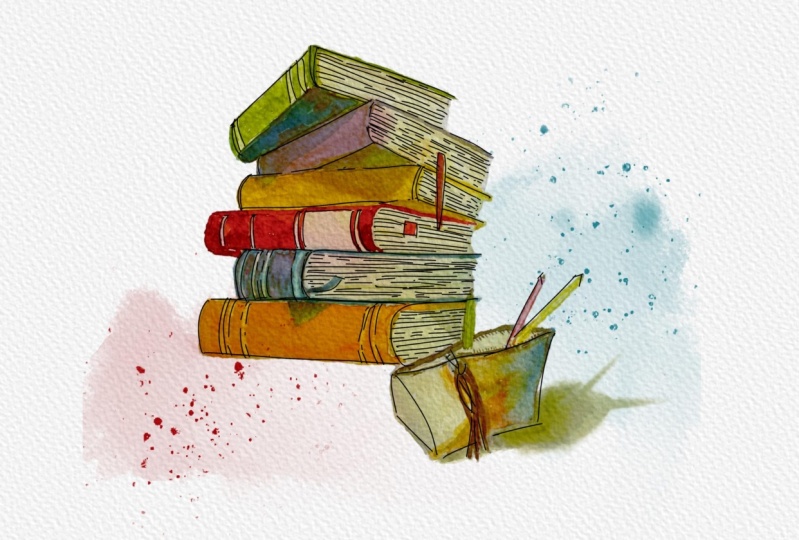
3. 3 Pencil Sketch: I will use an A4 size for paper, but you can use a smaller
format if you like. I will always keep reference
image near to me on my iPad. I will leave this image
in the resources section. Saw, no problem if
you wanted to use it. I will use it for our
perspective and proportions. I will start sketching. For the first book. You put the C line more or less in
the middle of your page. From the synth, you use your ruler to parallel lines for pages slightly upwards. And then you put the C line. You go upwards perspective here. You put the C line, the same height of these
one of these parallel line. You draw another parallel line, parallel to this one. Then you drove it fairly line. You can hand draw and then you can straighten it
up with your ruler. In any case, these cell lines in the Becker won't be visible once you put this
stack of books. These are the fancy lines. They must be very light because
we will be erasing them. Here. I can start. I need to put the shift and
thickness for the cover. Here. By the way, we will
be putting our East. We can do straight with
ink. You don't see it. Don't lose too much time
on the back of the book. Here we have another
book which is slightly and other direction. From here. Same method. I would put some certain thickness. Okay. I can also raise the unnecessary lines when my proceedings or
don't get confused. Now another group, which
is another direction, again, pointing
slightly towards here. Same here. Let's erase unnecessary lines was a thin comes slightly forward. Slightly forward. Here. I would put two, the last one. One console, so just play with angles. You can eyeball them. Try to keep lines
are perpendicular. Then last one. Sequence here. Opposite direction. You're always tie them on shape. Now, I erase the
unnecessary lines. And my suggestion
is that you take pictures of your
stack of books now. You see if there is
something wrong with their perspectives and you
can always erase and redraw. I'm not happiness. I would put the cup of
tea on top of the stack. For these, I draw a box
with a rounded bottom. Here. On my box I would put an oval handle. Once again, I raised the unnecessary Alliance. I'm not confused and I
can start working my ink. If there is too much
graphite around, you can make it lighter. We've done a kneaded eraser. Just trick if it is quadratic. And if you don't like it, you can always
correct something. Here. The balance is difficult. I might slightly
correct to this one. Let me bring it here. The book. You can erase as
much as you want. If you are in the pencil stage. More stable now. Sorry, I take my
kneaded eraser and I take away some
excess graphite. In any case, erase
everything later. These are for any pencil sketch.
4. Ink Outline: If it is the first time
that you use an IEP, but if it is new from the boxes, you need to prepare
it to because it is always coated
in some oil or wax and the ink will not stick
properly to the nib best, so you need to prepare it before you use it
for the first time. There are many methods. What I do is that
the IEEE bernie, with the lighter, it burns, it becomes very hard
to remember to do it while the whole journey
it on your pen holder, just burned it a little
and then you wash it. Maybe we send SOPA
in the hot water. Some other people use some space with a
toothbrush, you can do so. Also, many people use acetone, which is nail polish remover, and it removes the coating
very, very whaler. Some other people use Speed, they say works very well, but I have never tried the end. I will not show you to you, but you can use some speed
with the paper tissue. Patterning works really well. But what I suggest, you just take your
actor and you hold it there for some
seconds on the flame, your knee, but just be careful that it becomes
very, very hot. And this must be done
before starting. My name is already used a lot. We can start using our income. The first thing that
you have to do before inking is to give it a
good shake it to your ink. Especially with India ink, because it has carbon
particle and you needed to spread them in an ethical
manner homogeneously, the button keep
some water near you because with the
waterproof Inca, you need to wash it
once in a while. He left the one stick
to your nib but also some paper towels drive to
fatigue dry when you print it, remain with the result. One simple thing, when inking, when you ink lines that are
closer to you are thicker. The ones that are farther
away are much lighter. Also, that lines that are
in shadow will be thicker. The ones that are in light
can be much lighter, soft. This is very easy subject. Let's start inking. Good shake. And that we start inking, keeping my bottle
in my left hand. I just do half of my knee but not depend holder
in the bottle. And just to get rid
of the excess against the remote about tone and start
from the top left corner. I will not smudge my ink. Also remember to be
consistent in light. I always imagine my light coming from the
top right corner. So I will have shadow on left. On the left side. We have shadow here and
light here on the side. Let's start with the slightly thicker here because
it's away from light. You can always, always
lift to your ink. Seek here because
it's in shadow. Laughter on this side. Also. Knitr, seeker here, seeker here. Have some dotted lines here. Then you have this line, this line, and a thicker line here
because you have shadow. It's the bottom of
the book cover. Here. We'd be slightly thicker
because it will be in shadow. And this is also adopted because they are just applies
the not real. This is farther away, so it's very inner. So here also we can have
some tea or coffee here. Maybe above board here. We can physis t, You can just vary
your thickness. It's nice to see it. Let's write d here. I continue, same method
with the other books. Sticker here. You don't need to use
the ruler in this case, because it wouldn't be nice. Slightly. This obvious
strategies, a hand drawn underline here, very light. Also, you can draw some very
light lines for pages here. Some of these
books, you can put, some every bond
holder like this. You can also put
maybe like a car. Here. It is. You have to do it before you
draw the rest of the book. Paper book holder, a
paper book colder. If you make a mistake,
just perfect. Imperfect. It is just nicely. Here. There's excess lines. Very light pages. Sickness. Churn your new colder before, because otherwise it was
difficult to do this space. Like many as you feel, just so you don't have to do exactly what I do
is just an example. You can draw more or less the ribbon. After that. I break the lines to make the
drawing more interesting. I think I'm finished
now I let these dry and then erase the pencil. Remember to reinsert the
farm to your neat but water. Immediately dry. Some picker tau1. And I see you when I try. Now that everything is dry, we erase the pencil and also verify if we need
some further details, any, I start erasing. I have erased all
the pencil lines. I realized that I had
forgotten to draw this slide. It may be, I cannot sum for their small details
with my ending. I start by shaking these lines. Very, very fine line. And also I cannot some lines on the books
had these factors. Here also. Must be curving. See lines. Maybe one more here.
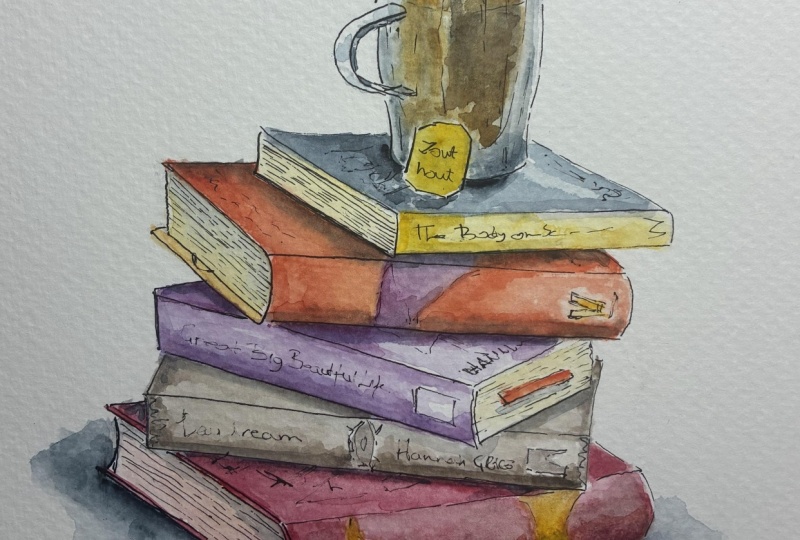
5. Add Watercolor: Now the exciting part, we could add color
to our sketch. We must make sure that
the ink is very dry, so inspected to wait a couple of minutes
if you're not sure. But we start painting from
the kappa and going down, spray my watercolor pans. They activate them. Then I stopped just choosing
some colors. For the Kappa. I love her pink or
capsomeres say, I will make some Alizarin crimson and using colors
that I guess you all have. Some Alizarin crimson. Van **** brown for instance. To give vintage look. We make some more
Alizarin crimson and Van **** brown
or a burnt umber. I start from laughter, as we said, is from right. So we have some shadow here. My graph go towards
the light here, leaving some white space. Here. I paint the
inside of the handle. And then we'll leave some
white towards the light. Also. I will add some pain on this side because
it would be in shadow. Flight comes from here. This part will be in shadow. Paint here. I add some paint
in a messy manner. Here. Remember, this is not Captain, It's a cellulose with a
small percentage of cotton. We don't need to
add too much water. And also will not be
a detailed sketch but just a wall shirt
on our ink lines as I will skip one book
because this is still wet. I will go to this.
And I don't touch with the second book carefully. It can be green. If you have an earth green, you can use it straight
from your pan. But let's create the term. I will take some viridian. Have some viridian, which is a cold, greener here. And then I will warm it up. Once again, we say
Van **** brown that I have used for my pink before. The addition of Van **** brown. And we'll mute and turn
down our green bar. We start from the COVID, the bank, the bottom
of the cover. Then I will also put some, here. We have some cast shadow, I will put some paint and
then I will push up pain. Also leaving some white space. Here also we have some green. We need a smaller detail. Brush for cover here. I add some color here. Flower. We'll add something to later. I skip one more book, and I go to this one. We can use some
purple for these. For instance, I have these. I can take some purple that would like to
mute it down as well. I lie, I don't
want these bright, vibrant purple straight from pan because there can
be maybe old book. After I take my purple, the complimentary color
is yellow because per police mixture between red and blue, primary
colors yellow. So I add some yellow. Immediately, it's toned down. You see these lines? I take my detail brush would probably need the second
layer towards the bottom, because here it will
be more in shadow. Now, skip once again a book and I go to
this book and we can make it red, for instance. Go to write the thicker, bright cadmium
red, for instance. Put it here, my violet cadmium and they mix it with the violet. I can turn it down a little. I could add some green
to turn it down. I can take some of these gradients that
you've used before. Always try and use
the same paint. And I avoid this area. I always start from bottom. You can leave some
white dots and it's pretty nothing wrong. I just use some clean water with my perfect in
my kitchen paper. You can leave similar right
near the corner. Here also. We can add some more
color here on the bottom. Now we go back to our
cap and we can add t. For t, I use a smaller brush. I would add some orange. For instance, I have a beautiful
orange or burnt orange. It's called quinacridone,
burnt orange. It's a mixed between
orange and bunch piano. But you can put
some normal orange. I would start with
the some Indian yellow to dark yellow here, where it's supposed
to be lighter. And continue with my
aren't not too watery. Otherwise there we bleed. Small brush. That's our t. We can also hour. I'm the label of the teabag. And we can use also the
same Indian yellow. We got to these books. Then we go back for a
second layer of the cap. We go to the first book and we can make it a bunch
piano, for instance. Mixin, think someone, Shanna. And I can put it here, sorry, it mixes with my previous
cadmium red thing except we had some
color variety. Some colon. The larger brush
for larger areas. Leave some white here and there. It's nice to see the white of
the paper showing through. Darken the bottom part
of the back cover. Now this one, we can use blue. Blue will probably pop out. I can use some cobalt
blue for instance, but use any blue, the light blue, you can
tone it down with orange. I have already some orange here, so I'll put it here. And automatically these Cadmium, we turn it down. So I go see cobalt is
strongly granulating usually, which is nice in this case
because they are books. The granulation will
add the summer charm. Maybe I use a smaller
brush for detail, brush with a smaller brush. This corner and this book. For this book, I can also use
brown and maybe I can use some Van **** brown and add
it to my burnt sienna here. So again, I have
some color variety. Avoid the two stripes. Some patients use any
color that you like. If you have some colors
and your favorite. Please don't hesitate
to use them. For instance, like
quinacridone gold, very match. But not anyone has it. I'm not using it in
this sketch here, but if you have, it, could be a good idea to
use it for one book, such a beautiful color. You can use it for
the ribbon here. I would show you
later the effect of quinacridone gold
on the free-body. Now, let, let everything dry
and we need to add a second.
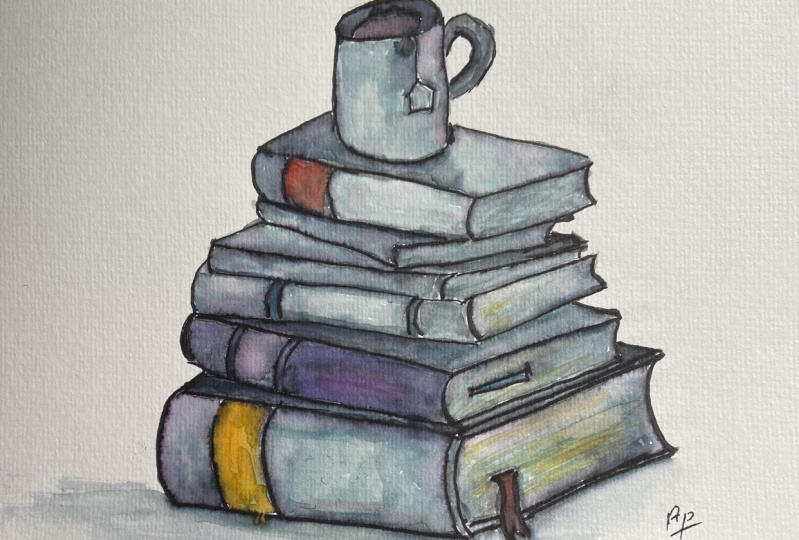
6. Watercolor | Second Wash: Make sure that
everything is dry. I'm not sure still drying, but I can touch with the
back of my little finger, the kappa and I can see
that the cap is already drive so I can put
some shadow here. I take my medium brush, recreate some Alizarin
crimson with the, some Van **** brown, but I didn't water
it down this time. Select the stronger. Some shadow here.
Then I blend it. Maybe too much water. So I try with my brush too. Use some of these water. Some corner here. While it is still wet. They just blend,
delete all the edges. Now let's go to the green book. With the breed green. We try another technique
to darken the color, which is adding some gray. I think some Payne's gray. Payne's gray is my go-to
color for it, shadow. Or you can use some
purple shadow, which I also have. She's very nice about. It's more, you're more likely
to have some Payne's gray. If you don't have Payne's gray, you can just mix some burnt sienna and
some ultramarine blue. And you will have
the very nice gray. I will put some shadow
here along the book. Here. Slightly blend. I continue with my skip one
book and I continue here. Here also will have some shadow. Here to here we have our brown. So maybe we can take some
change method and have some stronger less
than you to Brown. For shadow, you can experiment. You use the shadow that
you think would be more. Treating your drawing. Just skip experimenting. Here. We had some cadmium.
Take some cadmium. Now we cannot add
shadow on top the book. I take some of my Payne's gray because they
need the cast shadow. There, Mike. I will put a small circle here. Small. My shadow for the market. And I take the same
paints, gray maybe. And I go like this. The blue one, same method
here, cast shadow. Here also some shadow. A second layer of our books. Next, we need to color pages
and these little details, sometimes you can use some
complementary colors or that golden color, light. Gold ocher or yellow ocher or raw sienna or quinacridone gold. I will use quinacridone gold in some points so that you can appreciate that the
quality of the scholar, but you can use the
yellow ocher here. I will use yellow
ocher, for instance, very useful color to
have a yellow ocher. Here it must be darker. So I put more. Also, I can paint
the three bond, but I can make it in red later. Let's skip these because
it's maybe let's try. Let's go to the purple,
the purple book. And I can do it in
blue for instance, I'd take some my cobalt
blue that I used before, contrasting color like this. Now we go to this book, which is slightly wetter, so we wait and we can color
the pages, four pages. You can use either a
very light yellow ocher or even better if
you have it Russia, because Russia is more
transparent than yellow ocher, I will use Rosanna, but if you didn't have it, you can really use a very
watered-down yellow ocher. Watery down. I must not be yellow. Just to feeling of old page. We'd be lighter when
he tries to worry. Be careful here, there
is a piece of paper. Here again, you can use
some blue, some whiter, you can leave some white
dots here and there. Now we can fill that out. This one. This one, we will use quinacridone gold, so you can see it if
you didn't have it. Maybe it's a good investment
to buy it. It's beautiful. Beautiful gold, fairly
warm and very intense. If you didn't have
it, you can do it by with some yellow and some burnt sienna.
How pretty it is. Also, I would like to
add some darker here. On T. On t, I can take these. Just accentuate the dark here. Now, I need to color
this piece of paper that can take a blue for this
piece of paper, cardboard. And here I can use
some pure red. I take my cadmium red
that I have used before. I mix it with my
Alizarin crimson. There is a certain
color harmony. I go like this. I can use the same red here and here. Great. Now I need to add shadow. The pages below the cover and cast a shadow
where I need it. I liked everything right, and I'll see you
in a few minutes. Okay. The camera
didn't unfortunately, the camera records the shadow, the cast shadow under the
cover and behind the book. I will show it to you on a
separate sheet of paper. I take some paints gray. If you have a different gray, you can use it or you can make it with blue
and burnt sienna. It's called Jane's gray. So it makes some Payne's gray. We got smaller brush. Just paint the shadow
below the cover here. Behind the ribbon. Here. Following the
shape of the ribbon. Behind the book. Even angle. Like the sun. You can blend the
service some water, or if you have it,
some Naples yellow. Naples yellow will
give a nice blending. And we'd rule to the book. If you want to, you
can drink force here. More paints gray. Just behind the book. Here you are. Just blend
it so it's not too hard. Here you are. The shadow below the cover. You must do it for each book. And these shadow only
for the bottom book. For each book, or
you will paint, these paints gray or
It's gray shadow. At some further shadow. If you think that there is
not enough and blend it. You can add small shadow. The blend with some
Naples yellow. Here around the shadow you
can just below the bouquet. Then with the Naples yellow. You can blend out some shadow around the book, so just blends away
in the Naples yellow. You have a base for your book. Make sure that everything
is as you like. For instance, I think this could be darker the
back of this book. So I got Kenny. Kenny tweet some burnt sienna. Nicer if it is the back compared to the
rest the same here. We can have it back here. So I take some blue and some paints gray and type
fact in the back. This spec could also
be a little DACA and I put some burnt
sienna here also. What the color is
transparent so you will still see the
cadmium below. I said if you haven't,
that's kind of backup. Let's add some **** brown here. So very nice. Brown. Also, you can darken
the red here. You just take some
Alizarin crimson. Your dark in here. Here also. You can take somebody
in a darkened, the spark that go towards I see that that
conducting these two, it was our purple here
where I have some of my burnt brown tone down slightly there. And you just blend. Why they've kind of variety, we have stronger shadows.
I'm happy with it. Now let's go to the statute.
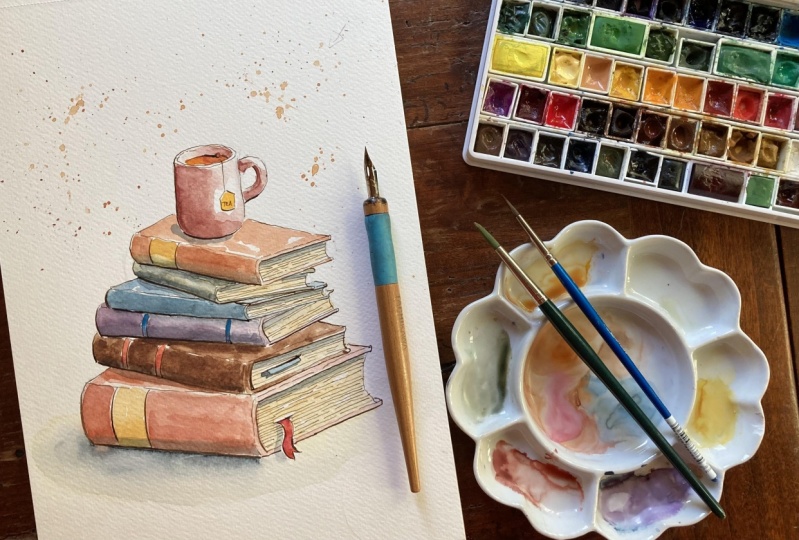
7. Final Touches: The last statue made sure
that everything is dry because you need to protect your drawing with
some paper for splat. First splatters are you will use colors that I
have on my palette. I can use the golden. Also, maybe some burnt sienna. We can have some more closer. Golden. I would leave it like this ONE, go further. So these are our books. You see that the Inca, the Inca gives a beautiful vintage
feeling to the drawing. And it just pops out. Now once it's dry air, if you feel that you can devise some details with ink or
you can always do it. For instance here, I can
accentuate better these lines, so I do it till the
last attach with ink. Here, for instance. I would like to see that
centroid to this slide. We have a corner that
doesn't show here. I wouldn't touch it anything
when it's finished. I hope you are happy with the results of your
stack of books.
8. Wrap Up: Hello, congratulations for being finished your project with me. I think you must be
very proud of yourself. It is class that you have
learned and you ski lift. This new skill which
stay with you forever, would be very happy to see your projects in
the project gallery. So do not hesitate to upload them so I can
give you my feedback. Also, if you post your
project on social media, don't forget to tag me. I will be delighted to share
your project in my stories. And you can find
me on Instagram. And I mean, it's easy to
see you in my next class. I will put today.
 Elisabetta Furcht, Anyone can paint!