Transcripts
1. About the Class: I really like that. Any
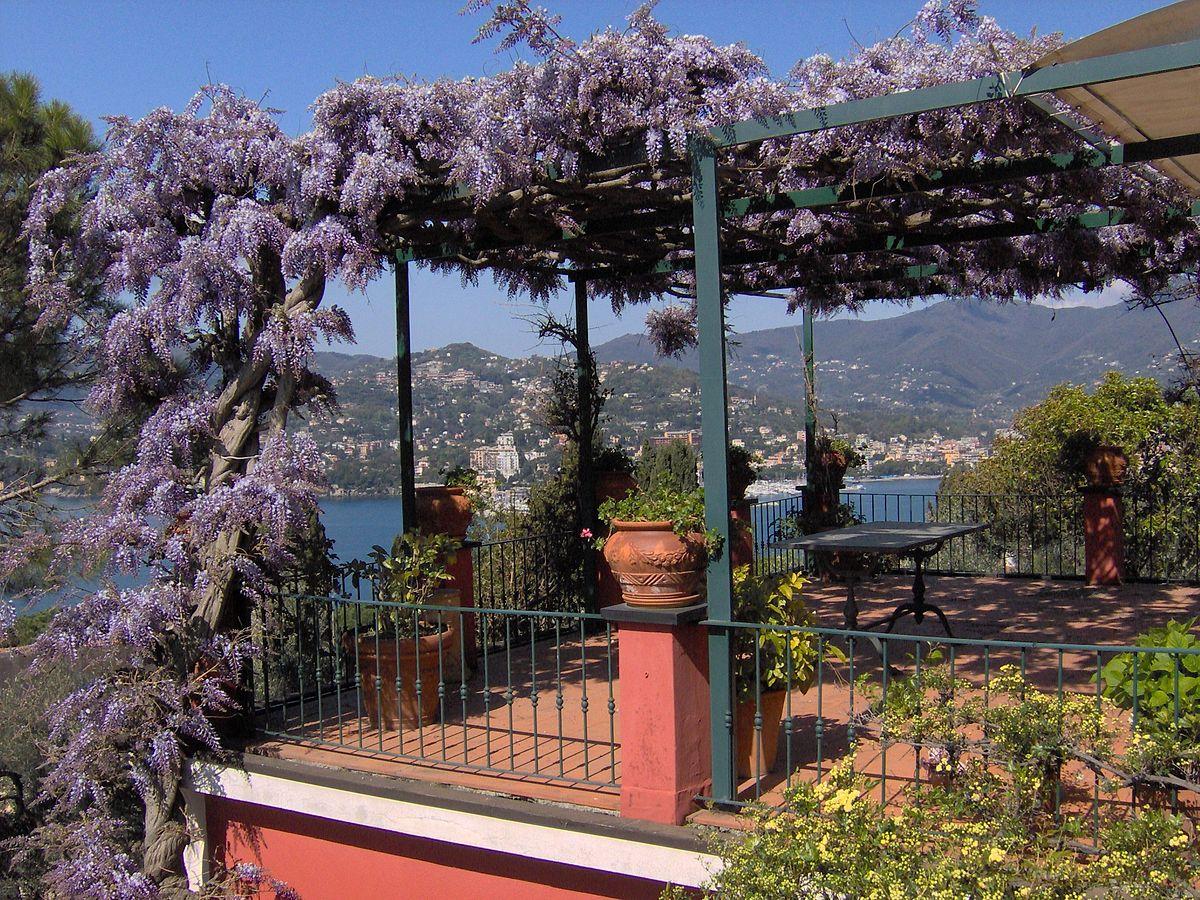
watercolor artist here in Italy, we know it's spring when we see we still have the correct
happiness eating. I along with serious. I love painting them. Not only the very beautiful, they also smells like heaven. I can't stop painting studios in the draft to it
with you today. Mysterious might be daunting
to paint unless you break them down in simple steps
as we do today in my class. You just need some
basic supplies and you will keep painting wet on wet. Painting wet on dry. Creating a glowy background. Painting. Receive your petals. Painting exterior leads. And just go and paint. I think this class is
enjoyable and friendly. And I also think you would
be very proud of things out. Don't worry, if your project
will be different from mine. Water color, I'm predictability. Every time I paint with Syria, I get two different results. It's really exciting to
see petals and leaves, shadows and light shaping
under your brush. You just need some basic
supplies in mucus. Right now, join me in my class.
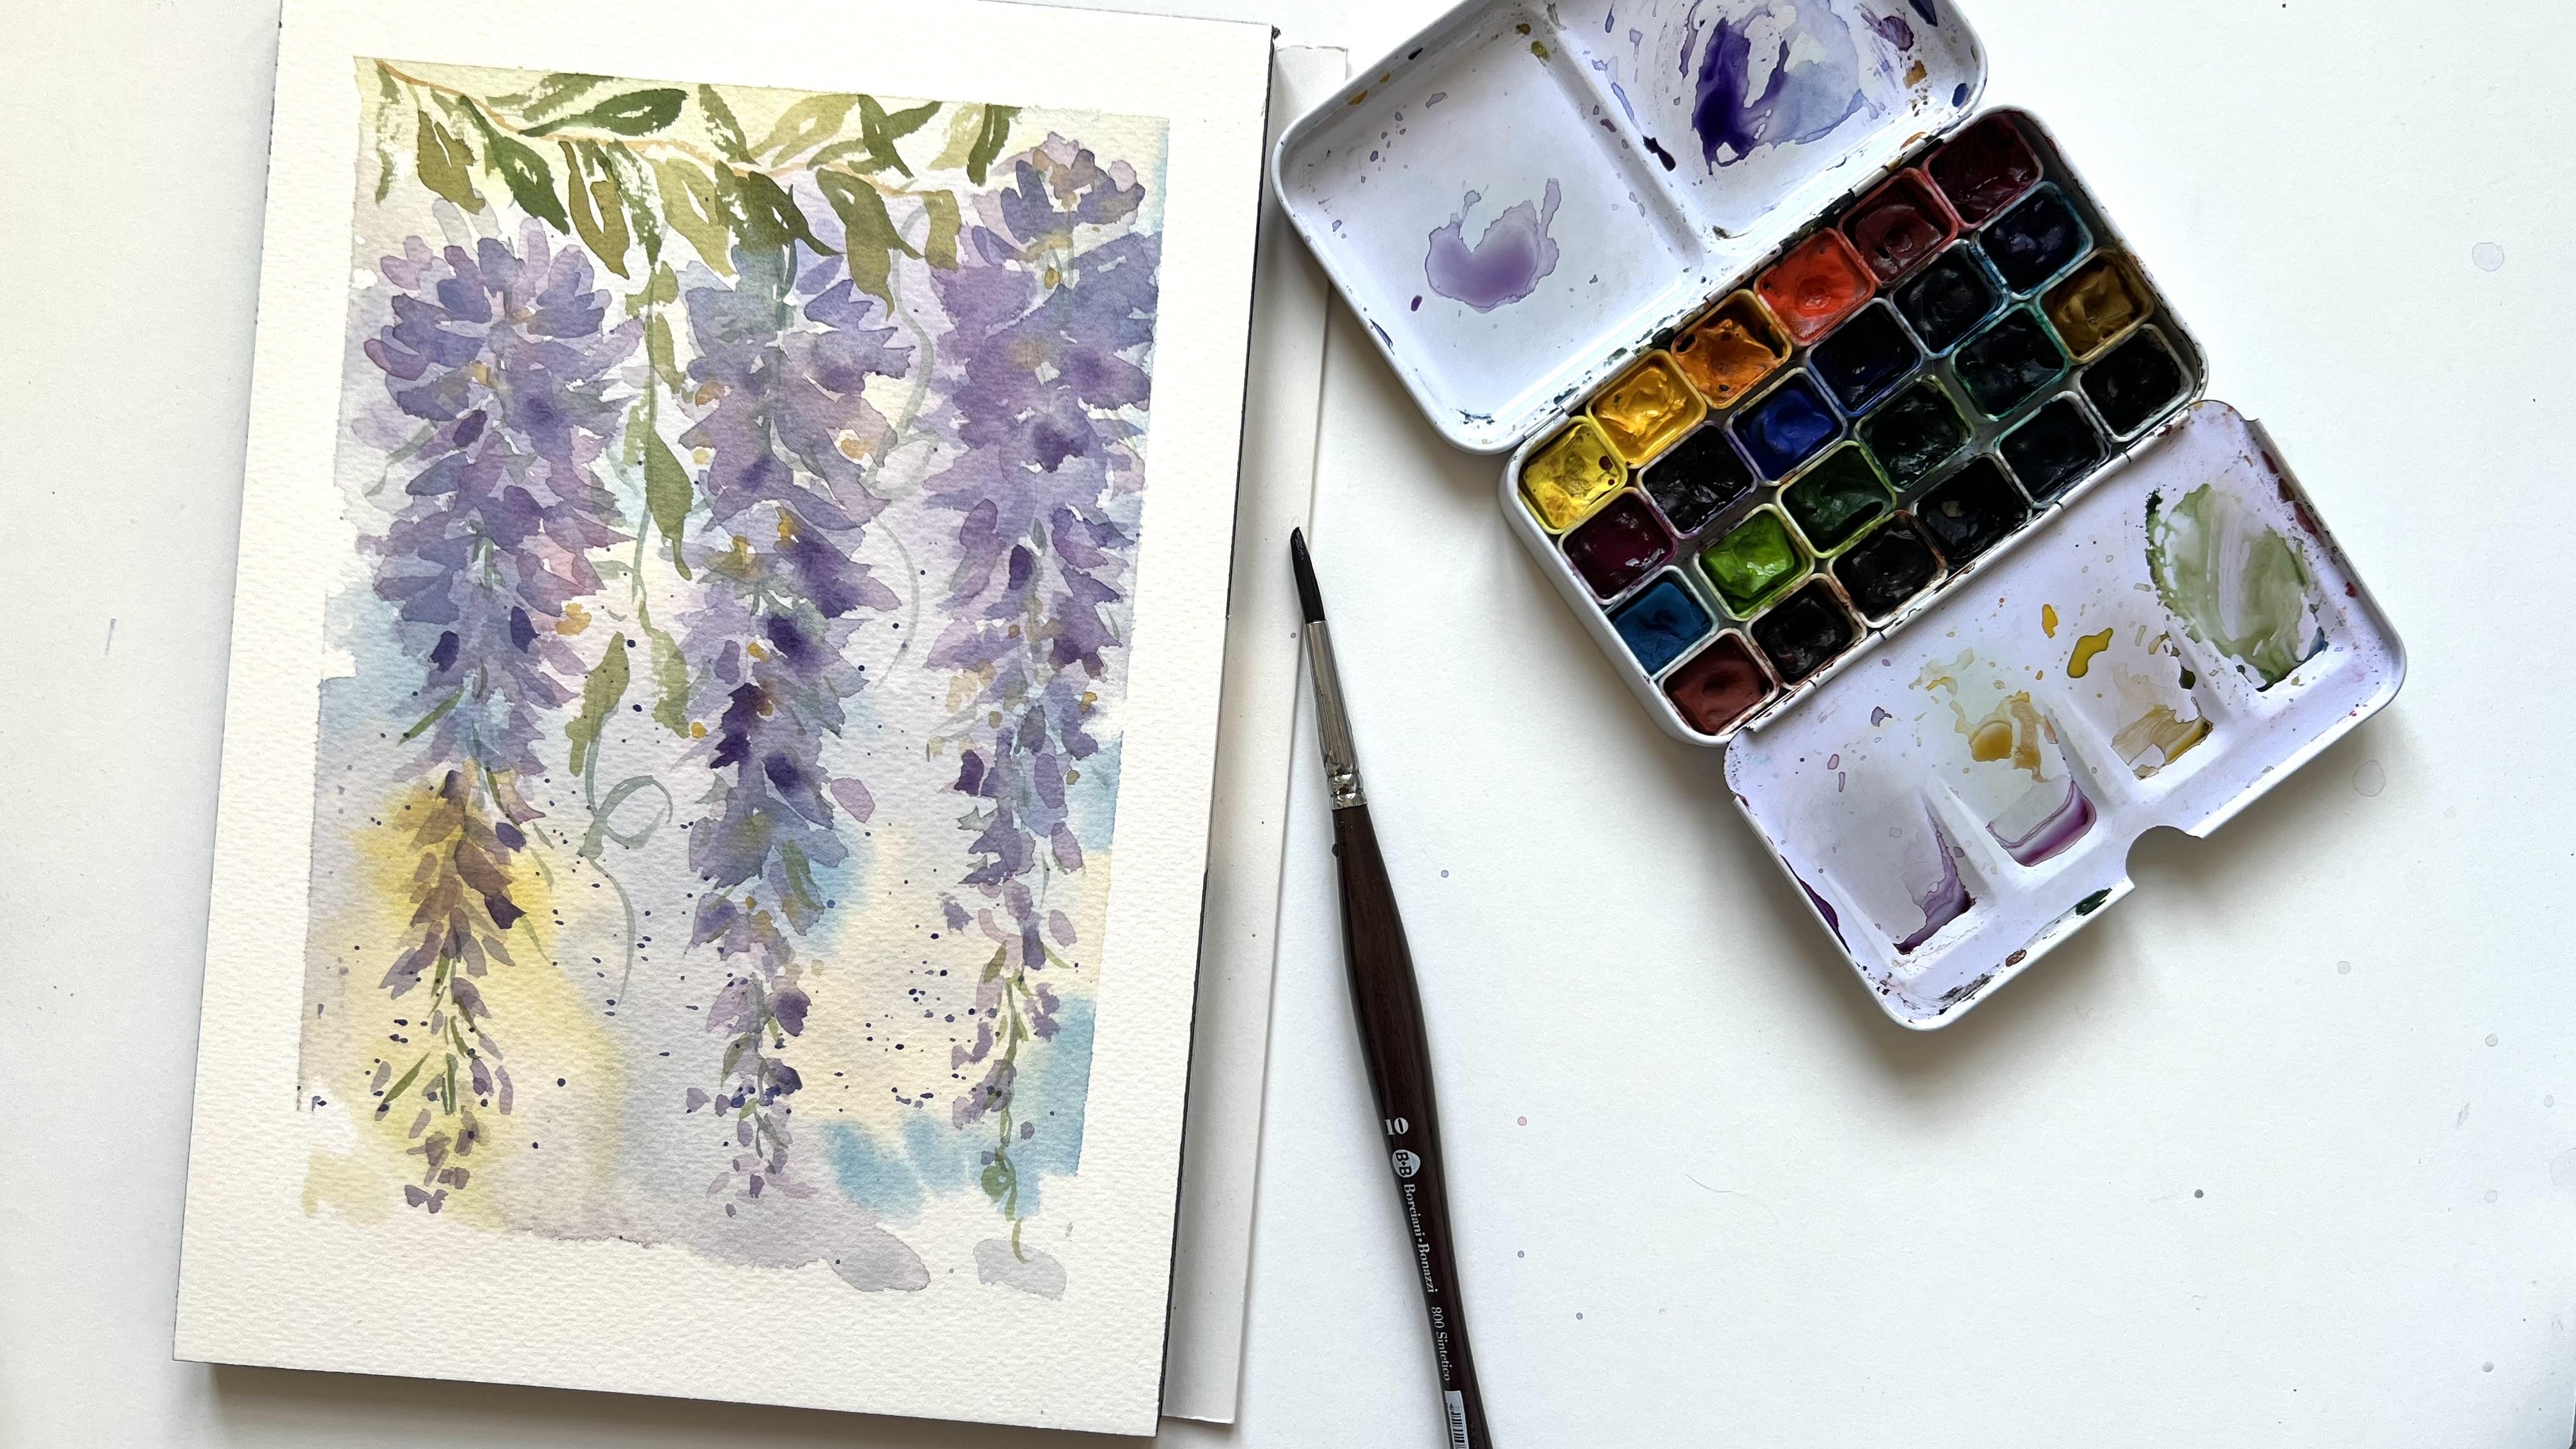
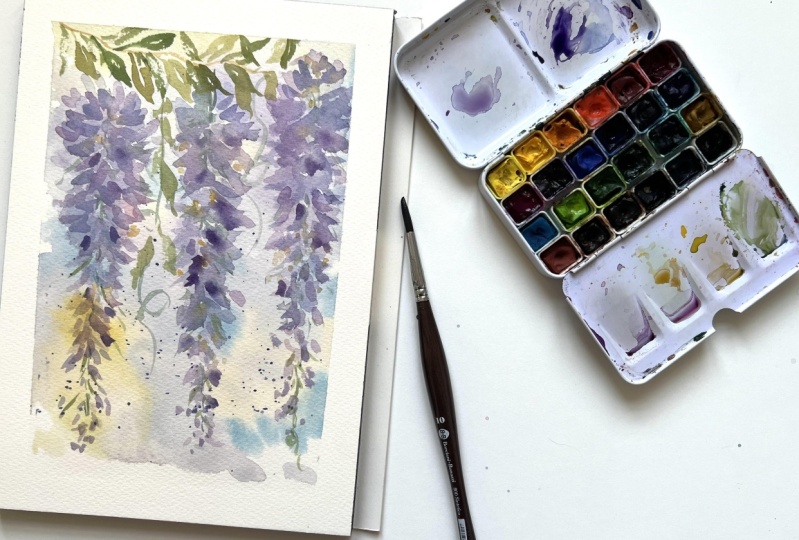
2. Supplies for your Project: Let's talk about supplies now. A very minimum for this class. The most important piece
of supply is paper. It's much better if you use 100% cotton paper
for this project. Because we need to work a
lot with a lot of water, a lot of wet on wet. I don't always use
cotton, watercolor paper. But for this particular project, I would strongly recommend it. I'm using this fantastic or Saunders Waterford cotton paper, or even 50 per cent, at least content
of cotton will do. It must absolutely be 300. Gsm watercolor
paper. Quite seeker. It must say watercolor paper. If this got is better, then of course we
will need some pain. For this project. You could use this summer
interesting paint, like via a blue or lavender. They would do a very
nice final project. But for this class, I have preferred using
a standard watercolor set using colors that I know
everyone of you will have. So this is a set that
I have made myself. Squeezing tube was a 24
tubes by Paul Rubens. But any standard set will do. The colors I have used you
can find in any sector. And the French ultramarine
or ultramarine blue, a permanent violet, bluish
violet matter relative. So this is a mature
n towels so you can use or red violet. Here they're calling matter, read the small and magenta. So if you have a magenta, use that one, otherwise. Dark pink or alizarin, crimson, red, reddish violet. Then I have used, this is a tree green, this green and hookers green. So if you have a sap
green that will do, we will darken it with some burnt sienna and
ultramarine blue. The other thing that would be
lovely to add is a yellow. I've used these,
the cadmium yellow, it's a warm yellow, not too warm, not too cold. If you have quinacridone gold, you can use that one. That's my favorite, yellow, but I'm not using it here
because not everyone has it. So use your meat. Yellow, primary yellow. Let's see it four colors. It can really use what you have. If you don't have a Powerball, you can mix it with the red
and blue and will be perfect. Then you need the brushes. I have used a larger brush
to apply clean water, but you can use any
brush for this. It's just a brush that I keep only for water so that
is never paint on it. Then I have used a mop
brush for the background. And some synthetic
round brushes. One medium size
with the petals and one finer with the
nicer sharp point. For a t for details, or you can use for details. The rigger brush if you have it. These ones were just makes
it a lovely verified point. Look. Can you see that? For branches? Stamps thesis idea. So this is our supplies then of course you
will need some water. So two jars like this. We'll do one for clean water
and one for dirty water. You can use just one in this project because
basically they're all variants of the
same color, purple. And some kitchen
paper, very useful. And some artist's tape, but it's optional,
but you can use it. I'm using neat. Let's see. Let's start sketching.
3. Paint the Background: We can put some artist
tape or paper tape around our papers so that
once we're finished, we have some crispy lines, so a very neat edge. I like that. The second
thing we have to do, we apply some water with a
large brush or any brush that you have it
evenly on the paper. Without fear. Clean water, just clean water. I use this brush because it's large and I only use it
for water non-directional. Why the water settled style. I am mixing my colors. I'm using some
French ultramarine, permanent violet, red,
deep cadmium yellow, and some greens that you had. I take them a mop
brush. Like this. They will dilute some
valid with a lot of water. Some French ultramarine violet. If you don't have a violet, just take some cooler. Red. I also take some
cooler red, alizarin, crimson, red. This is magenta. These mothers, they
both have perfect. Then you take some yellow. And you might take also some
Herodian or tallow blue, some lighter blue for sky, lighter blue like this. Or you can take some
shallow channel is Pb Fifi, you recognized by these
some vivid blue, sky blue. Now I start applying
in random places. My colors, purple, violets, blues, some yellow. Yeah, hello. Control supply some green here. Some light to Pluto. Some more yellow. Now I can mix some violet,
ultramarine blue. Just for my color
to be as similar as possible to the
color always Syria, which is a very
deallocate, lighter blue. Not using white. We could use white, but I'm not using white. Just diluting it
very much because, you know, it's a pastel color. And you can obtain
a pastel color, just diluted, watering down
your colors in watercolor. Now when we let these dry
and grab a cup of coffee, that's you in about 10 min. If you see Paul says Not really important because you
can pull the water, you can really soft paper. You can either collect
it with some paper. They don't make blooms.
4. Paint the First Layer: Now we can place our learners. If you prefer. You can also use a
pencil to lightly trace. Very likely, where you
place your flowers. A branch here, maybe
a flower here. And here, another flower. Why three? Because in a composition
is always much more pleasant if the objects
are in a nod number, not in an even number. So I wouldn't put two flowers, but either 35, we have
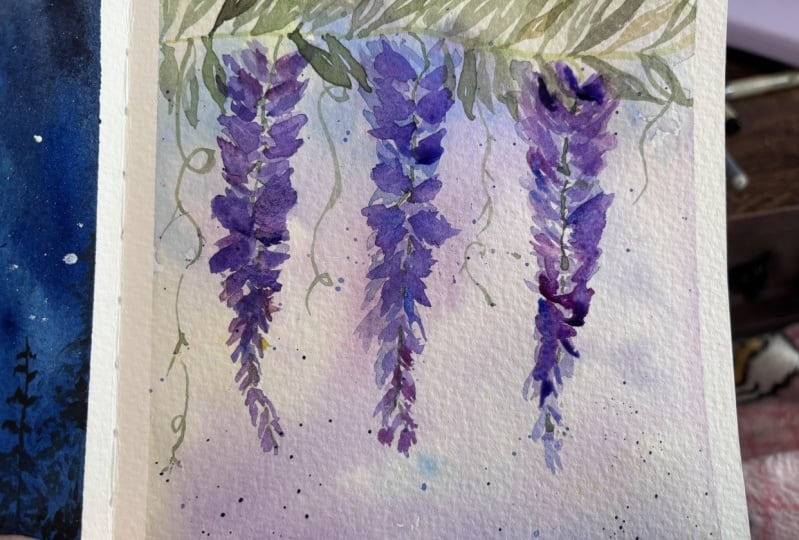
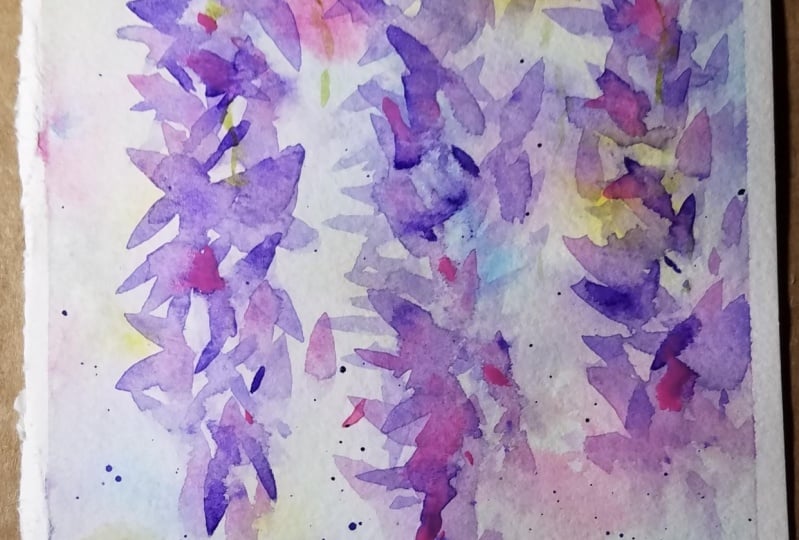
a small piece of paper. So three is ideal. We start painting our flowers and remember that
it's very light. We're not using wind to sell, we need to use the colors
that are really watered down. And that would start with
this shape of the wrist area. Fuller on top and center below. And I will start placing
some around my run. I will start placing petals using my colors and
alternating them. Always watered down. Mixing purple and blue. Ultramarine blue, some
violet, some magenta. Messy is perfect. Petals will be facing upwards, on top, then horizontally
in the Meta. And they would start facing downwards in becoming smaller. When we reach the end. Now I will take some,
maybe some rows. We'll add some touches of rows. We go to the second flower. I start with my
mix of purple and ultramarine blue facing upwards. And then I alternate colors. Maybe this can be
a little shorter. Just to be more organic. I mix the three colors. I go back so I create
a color variety here. Here is not shorter, actually is longer,
but it's okay. Now, I can start now with
the rows. Start to hire. Remember to be
messy and have fun. It's just the first layer. Then you will add
more definition. I go back to my light. Lavender, which is
ultramarine and purple. Very watered down. Now this is a little darker. Some in the previous flowers, just to add some color
variety. Some rows. Remember to vary your
color. Be messy. So forget to have fun. India. Smarter. Always
alternate colors. Okay. Now we should
let these dry. But what I would like to
do while these dry is to splatter some color,
slightly more concentrated. Blue, purple, lavender. And that will splatter here. Especially here on the bottom. Just to load your
brush with paint in tap with your finger
onto the brush. Let this layer dry.
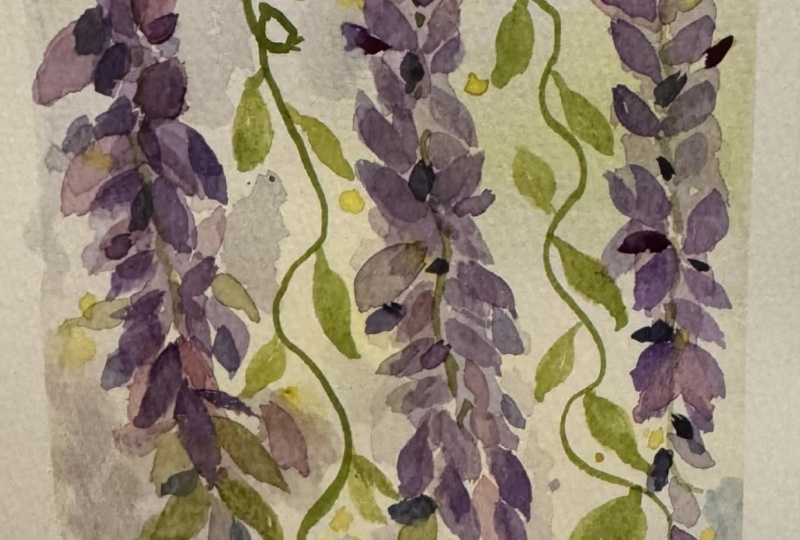
5. Paint the Leaves: I have sped up the process with the heating tool like this
and then adding brand here. For your branch, I will
use a rigger brush, this one that goes down
to a very fine line. And I can add it either
in green or even in yellow ocher. If you have it. Just like this, then I
will add some stems. You can see through
the flowers that would take a sap green
with the ticker, sap green with some blue to
make it slightly darker. Can also add if you have it some burnt sienna you muted though. Actually it's better
to mix colors. We can normal brush,
burnt sienna, and sap green, blue. This was a bit wet. Correct? My mistake. If you do it immediately, it's perfect. Here and there. Just maybe you see
that there are some voids. You can feel it. And he had to below. Because we will add smaller
blooms here. Same here. We cannot do one here. B with a variety. Yeah. You see broken
lines just to heat. It's a realistic sketch. It's semi abstract. Because if we want to, semi realistic, would've
taken it photo. This is not what I want to
want to semi abstract flower. Then we add leaves. Here. For leaf, I will take a
smaller brush, round brush. And we'll mix some
green, my sap green. But it's true, vibrant. And I like to mute it down
with some burnt sienna. So it's much more
natural. Here also. We can vary the color. But basically what we
can do is doing these elongated leaves us with
two or one brush stocks. I repeat these. First brush stroke. And then just very close, small point here in
different directions. Now slightly darker. I have a slightly
darker hookers green, but you can just add some
ultramarine blue to another. Just to add column variety. You cannot some
yellow ocher to vary to get you can overlap them. Just feel it sound would be definitely downwards
from another branch. Just a fund like this. Maybe we can add a couple
of leaves here too. Just to break the pattern. Here, you can connect some of these dots are the splatter. Some green lines she leaves sit down and we add a second layer on
to our flowers.
6. Paint the Final Layer: Now we take our
brush and we will apply some slightly
darker flowers. I take some more purple, bluish purples,
some ultramarine. So I have this
slightly darker color. You can also add Todd of these magenta that we lacked
definition with some more petals, too many. Here also remember
to vary the color. Leave some spaces so
you can come back. You the different color
than smaller here. The pit us who did magenta go back. Some pizza, sold sides. To give these
atmospheric feeling. Semi here, I started with my lavender color of purple
and ultramarine blue. I start with upward strokes, horizontal and then downward. Smaller here, smaller. My rosy color, magenta and very diluted. Just to add some
color variation. You can even some yellow where you see some
white here and there. I see white holes. I add some yellow. Because three is yellow. Center of flowers. Not too much. Just like this. And I continue here. Purple, ultramarine blue. You see a slightly
more definition compared to the first layer. Can even slow. Darker in some
points that I embed. Smaller petals here. Some yellow. Sparingly,
your yellow. Okay. We need some more color. Just finish with some dots here. Some Duck, Duck, Duck, add some darker petals. And I would say that
we are finished. I couldn't resist. I had to use my heating tool
because I was too curious to see the final result. So here I am. I'm taking off the tape. Always remember a way from
the drawing like this. And I think we are done. I wouldn't touch this anymore. It's very loose
drawing, but lovely. I think I love Wistia. I hope you share this love
always still here with me too. And that's it. I sue the conclusions.
7. Wrap Up: So we have finished our project and I will
show you very proud of your Listeria flat while I encourage you to
upload your projects so that I can give
you my feedback. And also other students can see what type of results you
can achieve in this class. It would also be very
important for me. If you leave overview
about the class. It helps me to understand
what I can improve. It. It will also help
other students to pick my glass and find
it in Skillshare. Thanks a lot for having
joined the clouds. And being here with me
today has humanists class. And I'm so proud of
you. I'm terrible.
 Elisabetta Furcht, Anyone can paint!