Transcripts
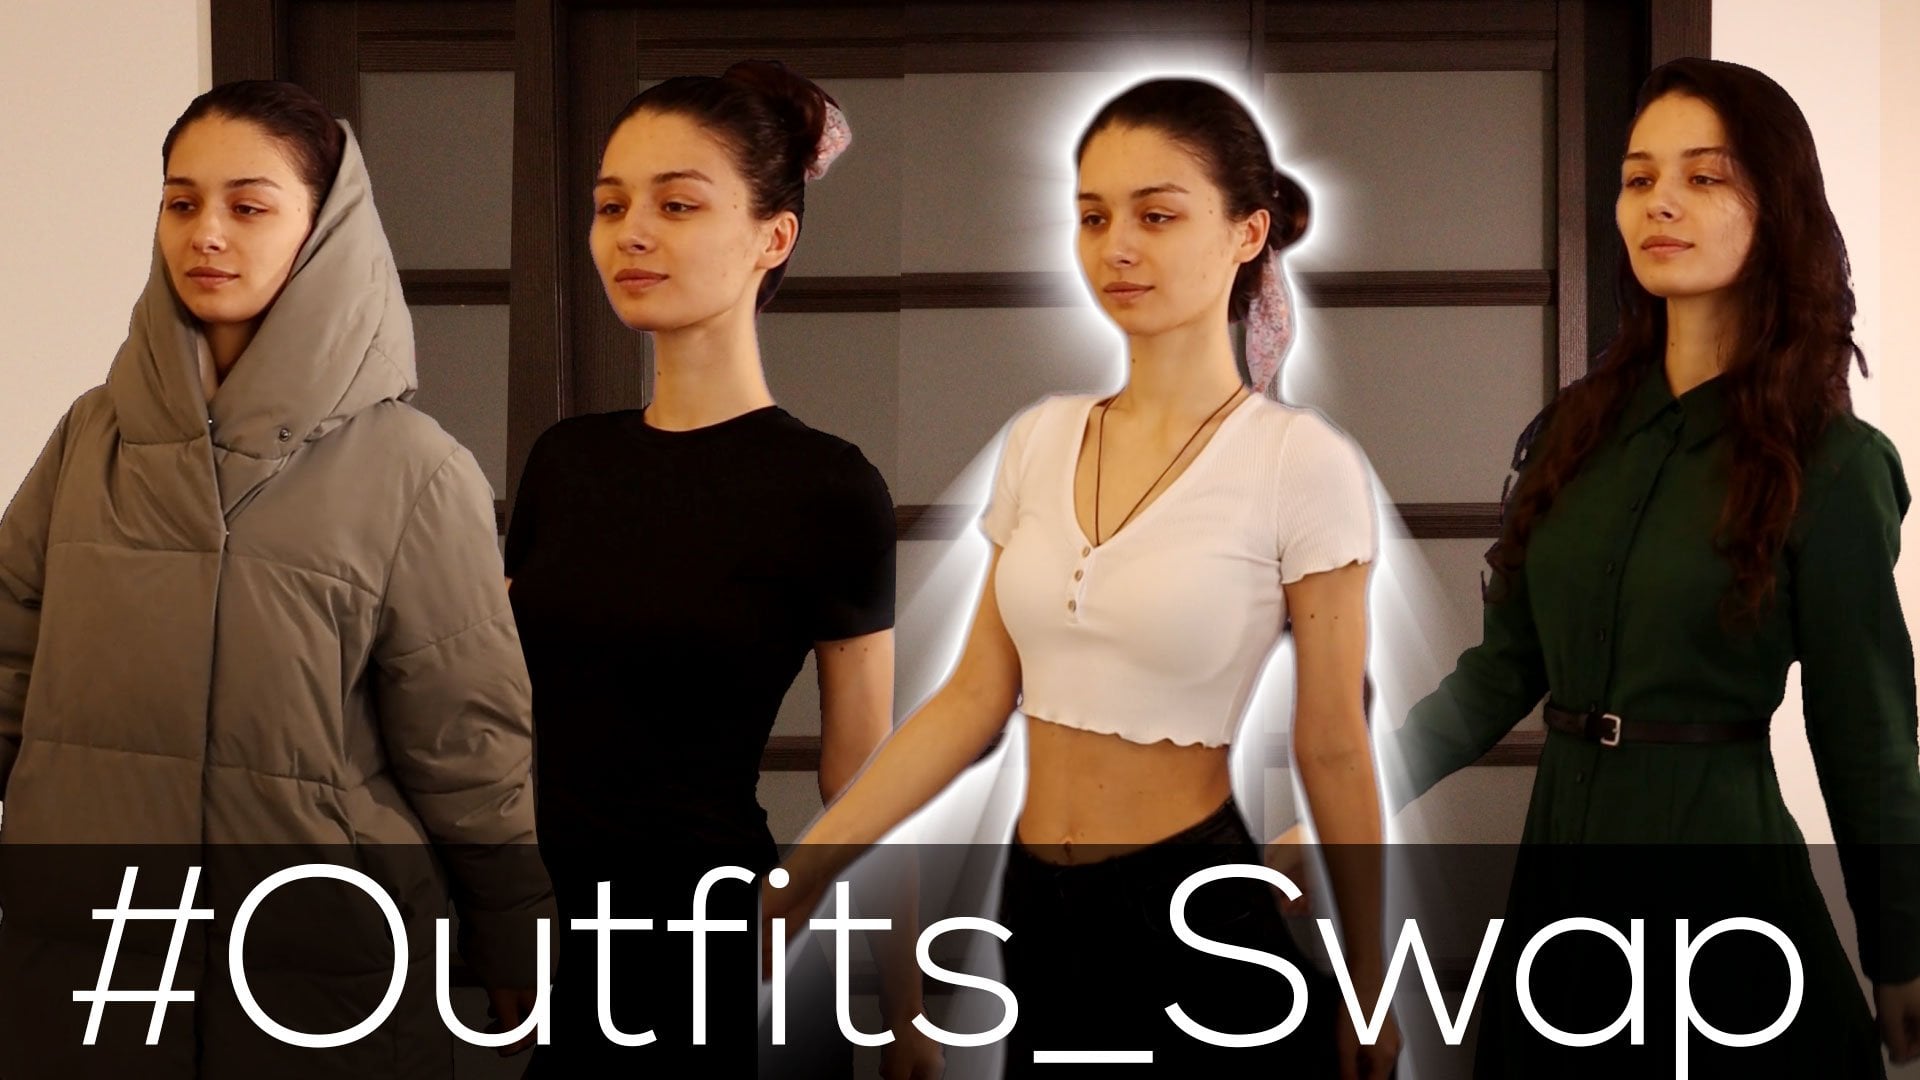
1. Introduction: Hi, I'm Jake. And in this class, we
are going to create this popular social
media affect. The best part of this class
is that you don't need to have any experience
in VFX or filming, or even using any editing apps, I'll provide you all
needed knowledge on how to film your own video. If you don't want to
record your own videos, then you can download already
recorded to raw footage from the resource tab to this class so you could
start practicing. Right now. I'll teach you all needed
skills to complete this effect. You can just download
the free trial version of Adobe After Effects. If you don't have
the software yet, we will start right away. I'm excited to see your projects after completing this class. I'll be happy to see
it in my class as also your result after
following all the steps. So let's get started.
2. How To Film Your Footage: So I'm using Adobe
After Effects 2021, but you can use any version
of Adobe After Effects. It will work fine. Also, as you can see, I'm
using a standard layout, so you can click here. So your layout should
be similar to mine. If for some reason
you cannot see some of the panels which you
can see on my screen. You can always enable
it from window e.g. character, character. Okay, so let's
import our footage. You can go to file, import, file or just leftmost double-click
here in project panel. This foolish will be available in resource step to this class. So for our effect, we need cart raw footage. You can just download from
resource step to this class and import to your
project panel. So now we need to
create new composition. We can just click here to create new composition are
on this icon here, or go to composition,
new composition. But the best way to create new composition is just to drag your forage here on your
composition or on timeline. It will take the same dimensions and properties of your video. So now it's important to
shoot your footage properly. For this effect, it
will be better if you'll shoot your
polish from tripod, your camera, it should
not move at all. Next thing we should want to
remember is that your hand should be at the same
place as your future pose. So if I'm going to press
Control R on keyboard, we can take this roller
and set it here. So now we can see
that hand is right here and future pose
is just about here. So basically, the best
way is when your hand will be at this
line of the edge of your future pose in which
you are going to freeze. So as you can see, this future posts outline is about here. If I'm going to scroll through
my forage on timeline, you can see that it
matches with the hand. While you're
shooting your video, you need to remember
where your hand was and then just
pretend like you are taking this cardboard
of yourself and put it out of the screen and
stay the exact same pulse. So you would be able to
grab yourself on the loop. So as you can see,
this is pretty much the whole video for
this effect is crucial. Where your hand should be. You can even set a marker here. So as you can see,
the girl watches at her feet because she knows she
needs to stand right here, so her pose will match
the hand right here. The most important thing here is to film yourself
from tripod and make sure that your hand and your final pose will
match at the same place. The next video, I'm going to
show you how we can cut out ourselves and move
with our hand. See you next video.
3. Masking: So now we have this clean plate. We are walking into the frame, taking ourselves out and
standing right here. So first thing which we want to do is to duplicate this layer. So let's select it and press
Control D to duplicate. And make sure that
your time courser, this one is set to a very
less frame where you froze. And then you just want
to right mouse click on this layer and go to
time freeze frame. It will allow us to make a
freeze-frame from this video. So basically an image, as you can see, I'm scrolling
and nothing changes. So now we can just basically
cut out ourselves. Just make sure that you've
selected this layer here and select this pen tool. With this pen tool,
we can just cut out ourselves and also make sure to save your
project because After Effects can crashed
from time-to-time. So go to File and Save, and save to whatever location you want to save it
on your computer. Let's click Save. Now, make sure to select
your forage, which we froze. We can even press Enter
or Return to rename it, Let's call it freeze and also press Enter and then
select this layer, survey, this pen tool. And using scroll on the mouse, you can zoom in or zoom
out in your picture. We can also switch off this ruler because
we don't want it. So let's click here to View, Show Rulers and disables. And also on your keyboard
you can press a tilta key. This is this one. It's usually right below
the escape button, which allows us to move
your cursor on top of any panel and open it in
full screen as you can see. So let's use it. You just move your
cursor on top of this screen and press
the steel deck here, it will show us in full screen. It's not necessary, but it makes navigation in Adobe After
Effects a lot easier. Then you can just scroll
with the wheel on the mouse to the
main or the mouth. And also you can use this hand tool to move
around your image. But simpler way is to just hold Spacebar and just couldn't see your cursor changes
to this hand tool. And with the left
mouse click and drag, you can just move around
your image just like this, are basically just switch to this and move around and
then back to the pen tool. So let's click on our
forEach to create first dot. And then you can click
here to continue with this mask and leftmost
click and hold. In this way you can create
this kind of busy a curve. Once again, zoom in
and using spacebar. As you can see, I'm
holding spacebar, navigate our image and just
simply create another dot. And your goal is to carve out
yourself like a cardboard. I'm going to do
this a bit faster. So I would not
spend too much time on this class, on this part, but you can spend
as much time as you want to catch yourself properly. Here at legs, I
will recommend to take a bit of the shadows. It will help to look a
bit better in the future. So make sure to take a
bit of shadow around your feet and just continue calling yourself
out from your video. By the way, you can
zoom in as much as you want if you want to
get a clean cut out. And finally, when you
completed your mask, you need to close it at the
point which you started. As you can see on my cursor, it has a little circle. It means that I'm going
to close my mask. So let's look here. Now we've finished our cutout. I'm going to press Tilda key to exit this full screen mode. And then we can just
select the Selection Tool. Now, if we are going
to select our layer, we can just move around. And as you can see, we
have this kind of cut out, which is perfect for us. And it's good idea to press F on keyboard and
change this feather. Because if I'm going to
de-select this layer, you'll see that we have pretty rough edge here
and two smaller drought. We can just change it to three and it will
feather the edge. You can play around
with this value. But it's good to keep it low
because here at the skin, you don't really want to have a big value because
as you can see, it will fade out. So let's keep it two or three. I'm going to set it to three. And we have now clean cut out.
4. Tracking: So our next step
will be to match this position of our
cardboard to our hand. So let's find the moment where our hand is touching
ourselves. Here. We just press P on keyboard
to see the position of this frieze player and create a keyframe.
What is key-frame? Key-frame is basically
point in time, which you remember is the
value of certain property. In our case, this keyframe, remember this value of the
property position. So e.g. if I'm going to move this time coarser and change this value, you can see that it's
created a new keyframe, the same position property. And now after Effects will
connect these two values, basically I've moved
it to the left. So if I'm going to scroll it, it moves to original position, then to the left as they moved. So this is basically the
principle of animation. Let's delete this keyframe
because we don't want it. Basically we want to
match the movement of our cutout with the hand. And it's a good idea to
use this pen behind tool, which allows us to move
this anchor point. We can change this anchor point
to the place of the hand. Why is that important? Because if I'm going to press
R on keyboard and we'll try to rotate this image like this. You can see that it rotates
around this banker point. So if it would be here, it would rotate from this point. And in our case, we
would want to rotate our cardboard and we want
to have it around our hand. So it would look like she's
holding it right here. Also, we can switch this layer to a 3D layer by clicking here. It will allow us to rotate
it in 3D like this. In our case, we will
have this little tilde. So we would have this
feeling of 3D dimension. But first of all, let's
animate our position. So select this layer, press P on the keyboard
to see the position. We can see our
position keyframe. We can change the
selection tool. Then we can just
skip a few frames. We can also press
Control Shift H. It will remove all
of these outlines. And now we can see
ourselves a lot better. And basically we want
to remember this point around our armpit and
this part of the finger. It's important to remember
where it was attached. Because by skipping a
few frames like this, we can basically
select this layer and use arrow keys on my keyboard. And holding shift. We can move our image
just like this. Now we can just remember
that at this moment in time, we could see this part of the finger and it
around our armpits. So we can just keep your frames and make sure that we still see this part of the finger at it should align with our
armpit landscape. You frames also change the
position a bit and you can just move around to
see if it looks like IT. Tract to our hand. Skipping frames. Move it a bit. Align your armpit, your finger. Then once again, let's see if it looks right as keyframes, align it and check
if it looks right. As you can see at
this moment, it moves a bit faster
than our hand. So we can just skip few frames and move it back like this. So it would look like
it's stuck to our hand. The more time you
will spend on this, the better track you'll get. Just make sure that you
are aligning some point of yourself with the fingers
which you have here. I'm going to measure
it a bit roughly, but you can spend more time. So it would look a lot better. And basically we're moving until it goes out of the
screen, just like this. Now, if I'm going
to see this part, you can see that we have
this position tracking, which is pretty good. Then we want to have rotation. So at this moment, we can
press Shift and hold on keyboard and press R on
keyboard is against you. It will allow us to see the position and rotation
at the same time. If you click here and turn
your layer to 3D layer, you'll see these x, y, z dimension of rotation, which will allow us
to rotate it in 3D. So I want to add a bit of
rotation in X axis like this. So here at the beginning, it will stay at zero. Let's create a keyframe. Here I asked the girl to
tilt the hand like this. If you'll pay attention
to this hand, you'll see that ****
waste in it a bit. And now we can measure
it and rotate it, an x rotation like this. So as you can see, we have
this kind of animation. We can also select this
keyframe and press F9, which means that this
motion will start fast and slower
to this keyframe. But we'll give this
more natural look and slow it down so it will
match better with our hand. Same thing we want to
do with this keyframe selected and press
F9 and equivalent. Click here to go
to graph editor. You will see this kind of graph, which means that
this motion starts slow and then fast
and then slow again. And as you can see, it meshes with our
hands a lot better. So now we have this
cool rotation in 3D. So it would look more
like a cardboard. We can control how much
we want to rotate. Maybe it's something like
-25 will be optimal, but you can pretty
much sure dates to any degree you want. Next thing which you
want to do is to rotate in z rotation. Because now if you'll see,
it looks pretty good. But it still doesn't
look natural. And to add a bit more
weight to this cardboard, we can just create a
keyframe to z rotation just before we are going
to move to the left. So we've created
this keyframe here. And towards the end, we can just rotate
it a bit like this. Now, if we are going to take
this keyframe and press F9, this motion will start a
bit slower at the start, and then faster here. And maybe less rotate, even more like -20 or -15. You'll see like we have
some kind of inertia. We can even delete
this keyframe position and move it a bit more. So it will go out of the frame. And as you can see,
we have this kind of feel like this cardboard
has some weight. We can even select this
keyframe and go to graph editor and make it a bit even slower at the
start, faster at the end. So this motion would
look a bit more natural. Let's go out from
this graph editor and press zero or numpad
to see the preview. Okay, so basically we
have this main idea down. But if you're going to
see our final result, you can see that we have
this changing of light, which we want to add. So it will sell more
like this 3D cardboard. And also you can see that we
have flawless transition. In our case, we will preview. You can see that we don't
have any changes in light. Here at the end, it will jump. If I'm going to press Shift F5, we will take the screenshot. And let's compare with
this first frame. And you can see that it has
a lot more shadow here. So these minor issues we're
going to fix a next video. This effect would look lawless. See you in the next video.
5. Adding Lights: Okay, so now let's fix this
issue with this shadow. The easiest way to
fix this issue is basically to take this
background foliage. We can even call it BG, just press Enter on
keyboard and call it BG. Then press Control
D to duplicate it, place it above, and
move it to the left. So we would have only
this last frame. Basically the same thing which we did with this pre-screen. And then right mouse
click, press freeze-frame. Now we can just extend
it this layer and just about 20 frames and
press T on keyboard. This allows us to
see our opacity. We can click here to
create a keyframe. And over time, we can set
this opacity to zero. And this will create this
kind of fading animation. And if we will press
zero or numpad, you'll see that we
don't have any more, any jumping lighting
in our shot. So here you can see that it
has this smooth transition. So pay attention about here. It has this really
small transition and it looks much
more professional. One last thing which
we want to add is the change in the lighting. This is also pretty easy to do. You can just go to
layer new light. We will use two lights. One would be point light. Let's click. Okay, we added this kind of
light somewhere around here. If we will press
Control Shift H, we will see the slide and
we can even move around, which looks pretty cool, but it doesn't really
fit with our image. So this is why we want
to use another light, go to layer new light. Now let's add ambient light. Basically this ambient
light, let's click Okay. We'll preserve original colors. So if I'm going
to shut this off, this point light,
you will see that we have this original
colors which we had before. But with this point light, we can add additional
light to our video. So let's set this slide
around our light source. In my case, it's right here. But in your case, it could be at any other place in your image. So make sure to place this light wherever you
had light in your scene. Then you want to press
P on keyboard to see the position and move it a
bit farther than ourselves. So it will affect only at
the point of rotation. Here, as you can
see, we rotated it, introduce our light
with this Z position. We can control where
this light will appear. Let's try at zero. And as you can see it
zero, it will introduce, right, with our rotation, which is perfect for us. And you can play around
with these values to see where you want to
introduce your light. So as you can see, I've purposely moved my light
to this light source. So it would look
like we are caching light from this light source
on top of our cardboard. And as you can see,
it looks pretty good. We can also press
T on keyboard and reduce the amount of light
which we are introducing. So let's set it to 55. So it will be not so noticeable. And now it looks much
more believable. If for some reason
you can see that your image gets too saturated, you can just simply here at
the beginning of rotation, select your layer and go
to effects and presets waited for load up and
apply this tint effect. Just right here, tent and
leftmost click and drag on top of this freeze-frame layer and set it this amount to zero. Then we want to
create a keyframe. And a bit later here, where we got our footage
a bit too saturated. We can set it to them. So you can see now colors
matches our colors better. And you can play around with this amount to get
exactly the same colors. In my case, something
like nine works best. It doesn't get too saturated. And it also looks a bit more professional and less
thing which you want to add is to select
this freeze-frame and apply some drop
shadow effect. So type here and effects and
presets panel drop shadow, leftmost leak and drop
it on this freeze-frame. Now, if we will
move this distance, you will see this shadow. This direction. We can change the
direction of our shadow. And also we want to
change the softness. Let's set it to high value. And maybe let's change
this opacity to 25. It will be subtle, but we will still
have some kind of shadow from our cardboard. And also we'll add a little something to make
this effect more believable. And you can play around
with this opacity to make sure that this shadow
is not too visible. Now let's press zero
NOPAT to see our result.
6. Adding Finger: One last thing which we need
to do is to create a mat so our finger will go on
top of our current board. So let's do exactly this. For this, we need to take our original footage,
which is Vg, press Control D to duplicate it, set it above, use
write a brush tool. So to use Roto Brush tool, we need to select our layer. We can call it finger and just press Enter on
keyboard and type finger. Then let's enable this layer. And also let's show
this row brush tool. Then you need to let
mouse double-click on this finger layer to
open end layer mode. And here we can use
our brush tool. We can zoom in or zoom out
using wheel on the mouse. Also, you can press
Space-bar on keyboard. And it will allow us
to use this hand tool. And with the left
mouse click and drag, you can move around your image. If you hold control. And let me just click and drag to the left
or to the right. You can change the brush size. And if you release control, now you can paint over our
footage, which just like this. In our case, we want to
track only our finger. So with this green brush, we want to tell to the software, Adobe After Effects that we
want to keep something n, that this part we want to track. If you hold Alt key on keyboard, it turns to red. So it means that when we are
brushing up our footage, we delete in unwanted areas. In our case, we
want just to keep our finger and that entire hand. So make sure to select
something like this. And then just keep frame by frame and make sure that
it stays on your finger. If it doesn't stay, you just need to cut
out unwanted parts like here and add our finger if
we deleted accidentally. So in our case we just want
to have this finger tract. Then skip a few
frames and just make sure that you're
tracking and goes well. If trekking is trying to get this part of the hand
is not a problem. Just make sure that this part, which will go on top of our cardboard is
tracked properly. So it only will stay
on your finger. So e.g. here you can see
that it loses track. You just need to cut out the software that
you want to keep only this part and then just simply continue this process. So in my case, I don't want to waste any time of this class and I'm going to cut out
this part of the footage, but you can basically carve out your finger throughout
all of this video. Then once you get your cutout finger up till
the end of the video, will need to press this button. It will freeze all the
process which we got. So let's click here. As you can see, it
saves our progress. After this, you can just
simply go to composition and see how it stays exactly
on top of our footage. And here we have a bunch of
settings which we can use. Basically we can
use this further. We can add some feathers so
it will smooth the edge. We can lower contrast so it will smooth the
edge even more. We can also shift the edge, make sure that it's
only covers our finger. Something like this. This is basically how we
can add a finger on top of our cardboard so it
would look even better. And final thing
which you can see, we have some lighting jiggle. We can fix this is just, we're taking this
phrase cardboard layer and press Control
D to duplicate it. Let's place it on top. And let's call it
fingers shadow. Because we want to use the shadow only on
top of our finger. And just basically
change this drop shadow. The shadow only in this case, we will get only the
shadow from our cardboard. And then we will
use this finger, let's call it shadow, and then use this
finger as a mad. So let's press Control
D to duplicate it. Place it on top,
take this shadow, and click here on toggle
switches and modes. Here we can change
the track matte. So let's change it
to alpha matte. And as you can see, now we
have basically uniformed completely same lighting on our finger as it was
with this little ticks. We can get rid of
this unusual lighting and get this
professional-looking footage which looks seamless. Feel free to follow me
here on Skillshare. I post classes every week. I have a lot of classes
on VFX using Adobe After Effects is also am creating classes on motion design texts, animation, basics of animation. From time to time,
I, I'm posting more complex classes of creating sparks and 3D animation
and also logo animation. I recommend you to watch
this 12 min class. If you want to try
some VFX stuff, this one, don't hesitate
to create projects. After watching my classes, I always check your work and give you some comments
if you need help. Also, feel free to ask questions
below any of my classes. And you can also suggest
what you want to learn next. So once again, feel free to
follow me here on Skillshare, and I'll be happy to see
you in my next class. Thank you for watching.
 M Jake, Lets Create VFX & Cool Stuff Together