Transcripts
1. Intro: Hello everyone.
My name is Ahmed. I'm a digital artists and creative director working
from past seven years. I've been very lucky to
work with major brands including United Nations
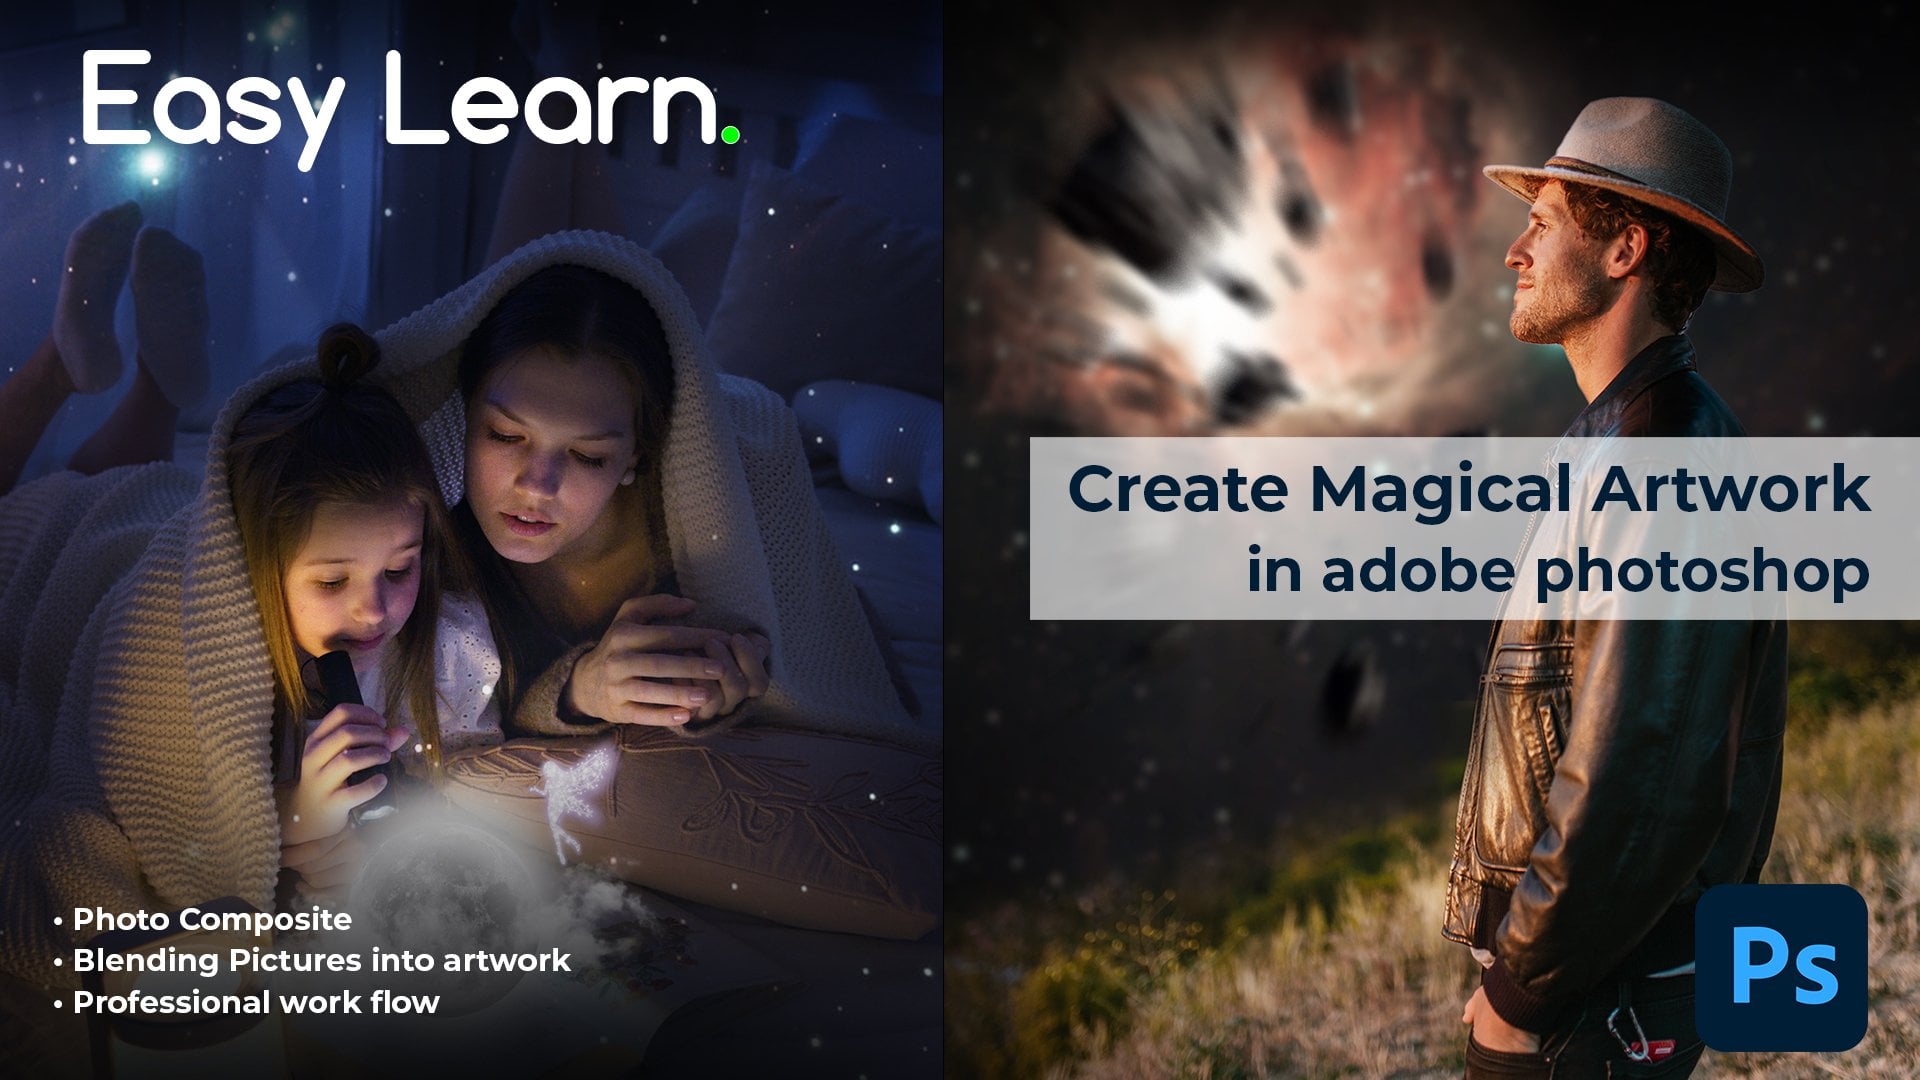
Real Madrid academy, Pepsi, Government of Canada. In this lesson, I will teach you about Adobe Photoshop
compositing. You will learn, explore from idea how to create digital
art and photo artwork. We will experiment a space sweet compositing in Photoshop. In this class you will learn blending the photos
in the artwork, creating light and shadows,
brushing, color blending, use of advanced Photoshop tools like masking, custom brushes, environment condition
for the class is divided into parts. Introduction,
sketching the idea, finding images,
compositing, shadow, and highlight that and filtered by the end of class
you will have enough skills you can
use for a number of photo manipulation and
photo compositing projects. So let's start the class.
2. idea & sketch: So first of all, we have to create or
generate our idea, e.g. you have to develop an idea, what you are planning to do and make a rough sketch
about it if you can, you can just to visualize
in your mind, that's okay. But if you want to go
through the process, you have to just develop the idea or sketch
the idea, e.g. here I just roughly
sketch does face men. And my idea is we will apply spaceman all
over in the grass. The spacemen will be lying
in the grass ground. So we will just randomly
sketch our idea. So we can just find
out the exact images, which kind of images we are required for our spaceman, e.g. here, I just randomly sketch
the space man and the grass, and then we can title the areas. We can type whatever we
require on the second e.g. we need cross, I
will type the grass. So we can search these kinds
of images on the Internet. And then we can apply
it for the compositing. E.g. here, if this is the graph and this is our space shoot. So we need grass and we
need a spacesuit images. And we need a grass image
from that top angle, and we need the spacesuit
image from also the talk. I'm going to keep
the class short. I already researched the
images and this is the, our spacesuit image
that we will use in space with photo manipulation
or photo compositing. And this is our gross image. So let's start compositing.
3. Pre Composite: Now, first of all, we have to make the shadows on the space sweet and
also on the graph, so it will look more realistic. And after that, we will
play with the highlights. To create the shadows. Just go to the selection and
just click on the curves. And it will be applied
and now change the curves and
decreased highlight. It will get the dark
and then we will use that dark tones
as a shared goals. So after that, just select the black color and apply it all over your picture so you're our mask curves
or disappeared. After that, we will again use the white background or
white foreground color. Mask start appearing after that. Use the smooth brush to
create the effect of shadows. Just zoom in your portrait, Zoom in your character and start highlighting them slowly. Take some time to develop
the very realistic shadows. But the more detail
you will show, the more realistic
approach it really that you can increase or decrease the size of brush
to develop the shadows. So this is pretty much our
outer shadows are developed. You can also decrease
the opacity a little bit to smooth out the
shadows a little bit. And this is our outer
shadow of the grass. And now we will apply a little bit more shadows
on our face, sweet. We will go to that curves again and lower the curve
share dose again. And then we will just press Alt key to clip it to
our space suits picture. And after that, just
fill the mask with black color or just use the shortcut Command
and backspace. And our mask is hideout. And after death, just select the white color
is foreground and start applying the
mask on the space. We'll just take your
time and you can increase the opacity just a
little bit, develop them. I think we need to
increase the opacity a little bit more, 200 per cent. Now, we just developed
the shadows off our mask. After that, you can also anytime change the curves that we are developed according
to the requirement of our compositing manipulation. You can use always
the black or black as my foreground to smooth out or to delete the mask sections. I think so far we are developed the shadows of our space suit. And now we can
apply a little bit highlights to make it a
little bit more receivable. For the highlight will go
to the levels or curves again and increase
the curve above side. And after that, we will simply make it a
clipping mask again. And after that, just hide
the layer or hide your mask. After hiding the mask, you can apply the brush key and start highlighting the areas
that you want to highlight. Whenever you are doing
playing with the mask, you have to keep your
foreground as white. When you want to show
something visible something, and keep it black when you
want to hide something. So this is our
highlights section. I think it's enough, we develop the pretty much
highlights in our space. Sweet grass have no need
to apply any highlights.
4. Composite: So after that, I am
planning to apply my picture in the helmet
section of the space suit so it will look more realistic
and it will look more artistic and give the idea
of a man in the space suit. So I will choose my this picture and drag
it into the art board. It will sometimes takes
time to drag the pictures. I will drag it again
and edit straight. After that, I will just apply the layer
mask on my picture. I will go to the
Layer, Layer Mask. Hi doll. After that, I will just select the brush tool to make
Layer Mask just reasonable. And I need to make it visible
only on the helmet section. It will just visible
on the helmet. And then I will select
my picture and decrease its size so it fits
in the handle much. Before doing resizing, I need to disconnect my mask
from the picture. I will do it by clicking on that gene that will be
linked with the mask. After that, I will just Command D to decrease the picture size. Just keep decreasing. And I think I need to rotate
it a little bit more. And I need to resize it a
little bit more, I think. And we'll look perfect. I will just try to resize
it a little bit more. And I think it looks
fine after that. To give it more
realistic effect, I need to change the layer
style of my picture as well. I will experiment it by
applying multiple own it. Or maybe I think we
can use the screen and then we can decrease the
opacity of our portrait. And here it's looking a little bit more perfect,
more realistic. After that, I need to erase the white background
from my picture. It will show us
that the picture is only portrait inside the helmet. There is no light for it. I will just use the
eraser tool and I will erase background or my portrait. For the quick procedure if you
want to do it more detail, we just use the basic
razor tool and zoom in the portrait and do
it more decently. And you can use a smooth, it is a tool to smooth out the
edges of portrait as well. And I need to also, it is the so it will
just focus on my face. After that, I think we need to change our style
into the overlay. Yes. And it's looking a
little bit more realistic. And we will decrease our
opacity to 50 per cent or 45%. Yes, 45 per cent is
looking perfect. And it's giving the very perfect
view of our compositing. After that, we can try
to resize or just little bit play with the
location of the portrait. I think here it's perfect. And this is our pretty
much compositing. And now we will add some
different elements in our pictures to make it more
enhanced, more cinematic. And before doing it, we will see if we need any
changes, any detailing. E.g. we will use eraser tool to remove
all these white parts. So it will look more detailed. And also we will just make
another curve layer to overall touch the lights and
shadows of our composition. After that, I have different
dust layers available. We will use this dust layers to make it a little
bit cinematic. Just apply this layer. And I will apply the layer
style to screen instantly. It's looking a little
bit cinematic. I will increase your
size little bit. Look just more cinematic. And I can refine each situation is location by using
the eraser tool. Remove it from my portrait. After debt, I have
another layer. I think this one will
look more perfect, glutes little bit more detail. And I will make it
to screen also. So this is how we
can develop a little bit more enhanced, more
cinematic feeling. In our portfolio. We can hide and unhide both layers to see which
one is nucleus. Perfect. I think both are
looking perfect. Just we have to do little
correction in the picture. I think we need to
raise from this side just a little helmet from this. And here it's looking
a little perfect. And after that, we will
use some brush tool to apply a few effect
on the space, sweet. So it will look a
little bit crashed. For it. We will just go to
our brushes and we will select the dark red color, same as the blood color. And we will use our brushes. We will experiment
few brushes which are going with our portrait. I have here this
splatter brushes. We can use them. After that. We have to make this layer also associate with our space suit. For it, we will just
clipping mask this also with our space sweet and
make it multiple. Then we will just apply it. And we can increase or decrease the opacity
of our layers. And I think we need to decrease the prestigious little bit. And after that, we can use different brushes
we have available here. E.g. we will use this
brushes to just give little bit digital cracked feeling the body
of our space suit. And then we can use the
eraser tool definitely to smooth out the
unwanted areas, unwanted places, which
are going with our theme. After that, we can use the
difference vector brushes. We can change the
direction of the brush. And it will just give it a little bit
more realistic effect, more detail, more crashed
feeling in our space, sweet. And also, I think we need to decrease the
highlights a little bit. So we can just make our
portrait mode focus. So, so far we also
added the crash defect, crash feeling in our space suit. So this is how we can use
different techniques in the compositing of
Adobe Photoshop to create the space suit effect, we need to also just apply a little damaged effect
in our spacesuit. So I will select for
double line brush. Apply, just zoom
in and apply that very detailed effects
on the spacesuit. So it will, it will look
like it is crashed. And it will give it the
feeling and detailing. The sweet, sweet. You can change the direction
of your brush anytime. So it will give more realistic healing and give more heirarchy
in their design. After that, we can
just decrease the size of our brush a little. And now it's looking
perfectly crashed. So this is how we can
develop the show. We can do compositing.
5. Extra Elements & Cinematic look : Let's start the compositing of our spacesuit photo
manipulation. So I will drag this
image and enlarge this image to fix
the total area. And then I will just drag the spacesuit image
on our Photoshop. So now we have to, first of all remove the
background of our spacesuit. For it, I will just
select the shortcut. Just go to the Select
and click on subject. And it will automatically collect our subject
and crop it out. We can also use
different tools to just separate the mean
of our area, e.g. we can use the Quick
Selection Tool. And with the Quick
Selection Tool, we can just select
the spacesuit area. Depend on you. You can take your time and focus on the details
of spacesuit. You can also use the pen tool to very closely select the area. But for the, this kind of
images which have less detail, you can just go to Select
and select the subject area. It is very shortcut. After selecting the subject, just duplicate the layer, e.g. I. Will repeat it for you guys who just click
on the space suit, go to Select and
click on the subject. And the subject will be
automatically selected. It will just take little time sometimes according
to the system. And after that, just click on this object selection tool and Create Layer via Copy
or shortcut commodity. We can use shortcut anytime and it will be
beneficial for you. After that, we need to some
clear out some details. We will use the
Magic Eraser tool and we'll develop our details. Also. We need to
decrease the tolerance. So far it is. It's just got out
the area that we are required to cut out
also on this side. So now our development
is almost compositing. Design is almost complete. Long. We will just do
refigure our character. We need to increase the
size of our space, sweet. So it will just look
little more realistic. I think it's perfect. Or maybe we can increase
its size a little bit more. So we have to increase its size because we have a very
close-up picture of the grass. So we also zoom
in the space suit little bit so that it started giving a
realistic approach. I think this is perfect here. And after that, we
have to now develop the shadows and lights play with the light and
shadow so that we can make a realistic
effect in our compositing.
6. Final Project & Results: So here is the final
result of our class. If you have any question
regarding the class, you can ask it in that
discussion section of the class. For the class project, follow my procedure
and editor space, sweet picture of yourself
or your friends and create. Also show before and
after of editing. You can use different pictures, are pictures from the
project resources or from your own country. You have to follow
a few procedures. First of all, select
the picture and then select the competitive picture
and spacesuit fixture, apply effect and upload it and submit it as
a class project. So I can give you feedback and critiques and get
a chance to win Amazon gift cards or Instagram corridor show preset. Thank you.
 M Amir Naseem, Graphic Designer / Creative Director