Transcripts
1. Introduction: Do you struggle with approaching the blank sketchbook page? Have you ever wanted
to learn how to incorporate collage into
your sketchbook practice? Or are you curious about different mixed media
approaches and techniques? If you answered yes to
any of these questions, then this is the class for you. Hi, I'm Elizabeth and
welcome to my class. Layers of Inspiration to craft your own mixed media
collage sketchbook. Although I'm a professionally trained artist and art educator, much of what I currently use in my artistic practice has
come from my own desire to continue to learn and
experiment and explore and seek out new ways to challenge myself artistically, creatively. And constant drive
to find new ways to inspire that artistic energy that comes when you're in
that moment of creating. In 2020, I began teaching for skill share teaching
classes that explore a wide range of media techniques and
art making approaches. As I share my
creative journey and artistic process
with my students, I love all things art. And any chance that I have to combine media and
techniques, I take it. Collage gives me
a new approach to my schedule practice where
I get to incorporate it in ways where it is inspiration
and a jumping off point for the mixed media
techniques that I then go into my practice with. It's like if I were
to like scribble on the page or apply
a splash of color, or had when I was
starting a new sketch. But in this case, that, oops, is a really beautiful
and inspiring piece of collage material. It might be a torn
magazine page, it might be some decorative
paper that I've created. But that collage
piece then takes away my fear of messing up or
not knowing where to start. Because the collage piece is the start, it's
already there. And I can then use that to inspire pieces that
may have never come alive in my art practice if that little piece
of paper hadn't been there to spark curiosity and excitement and
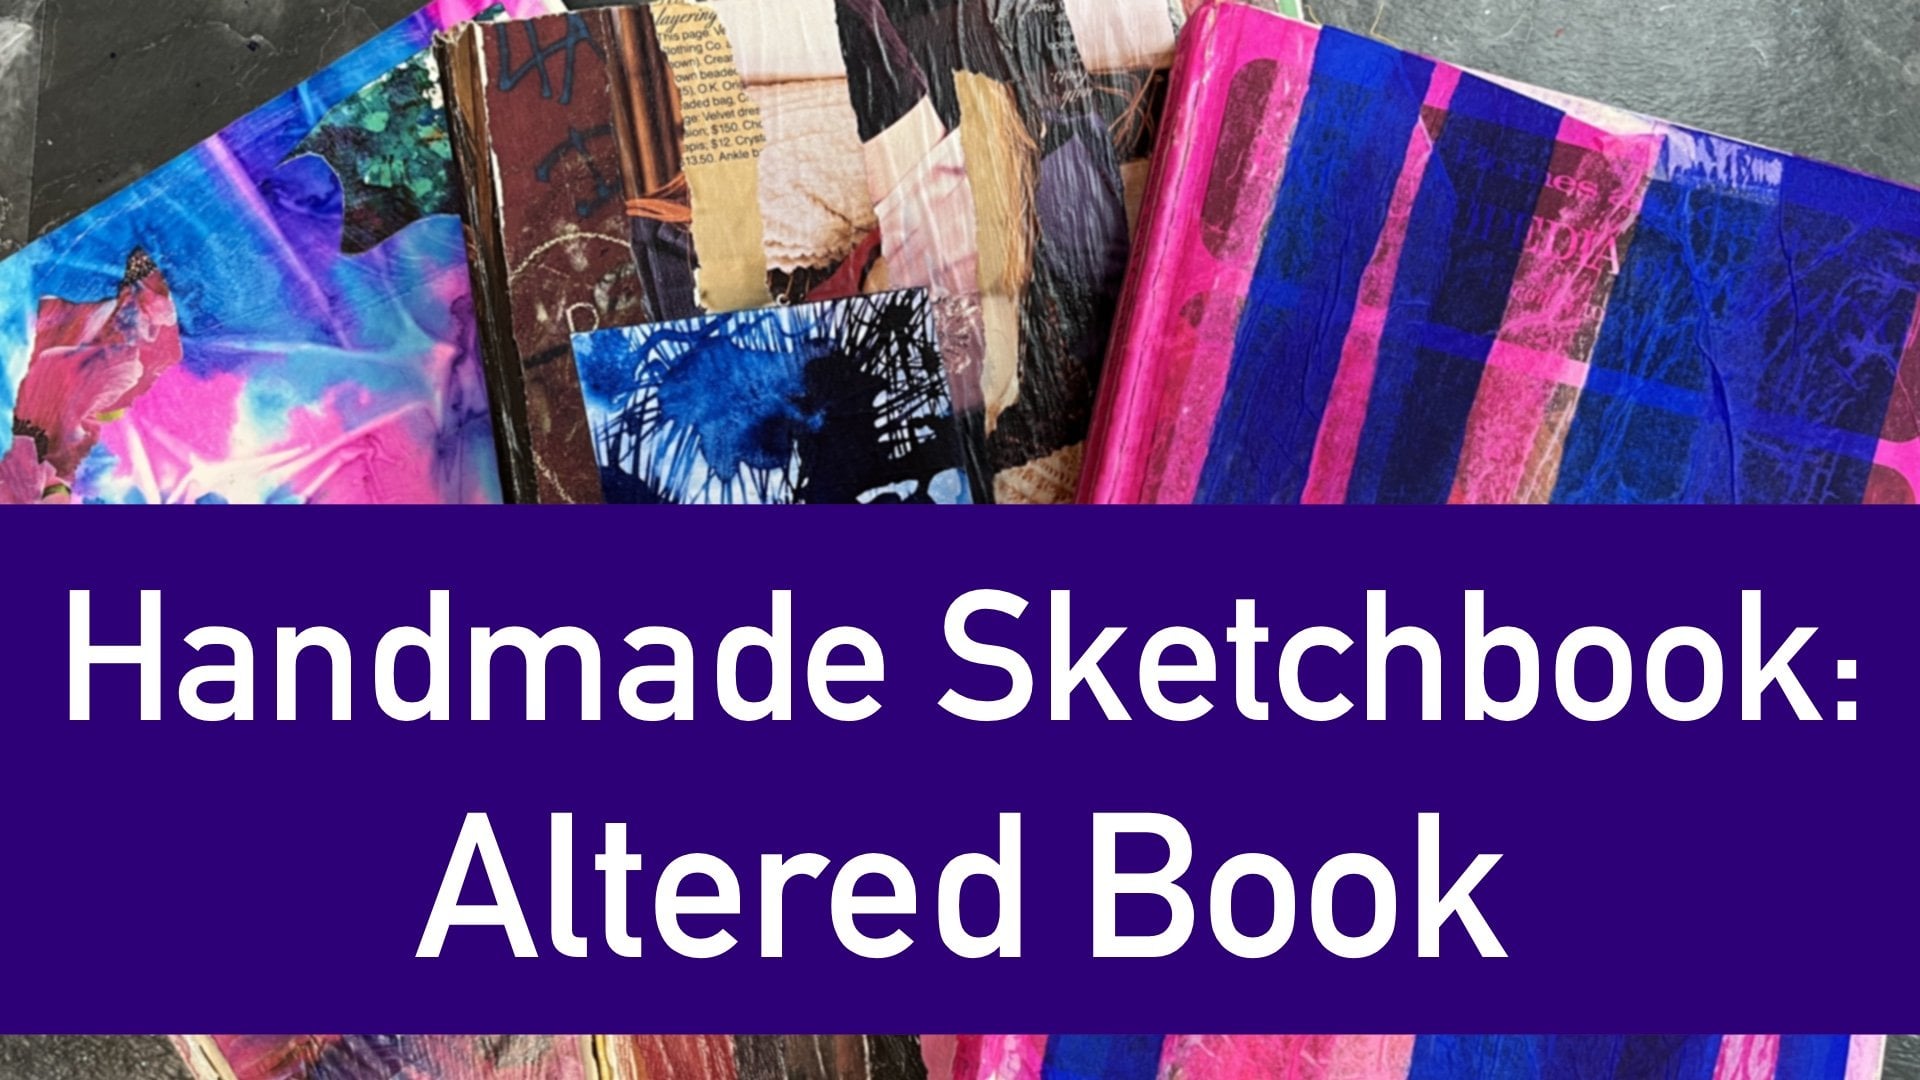
really got me going. In this class, we'll be creating a small handmade
sketchbook that will be made from pages
that we collage on. Then we're going to cut that
up to create the sketchbook. And then go back
into those pages and discover the wonder of collage inspiration and mixed media techniques
and approaches. If you're new to create
decorative papers, I have several
other classes that explore this topic
using watercolor ink, acrylic paint, and
a wide range of ways to apply those
materials to your paper. If you're interested
in checking those out, you can find those classes on my skill share profile page. This class is intended for
creatives of all skill levels, as it's a simple way to create a personalized
handmade sketchbook. And then start using
the fun of collage and mixed media techniques to
really expand your creativity. Explore your curiosity and help to get you creating faster. By the end of this class,
you will have a beautiful, inspiring collage sketchbook that will
allow you to approach a mixed media sketchbook
in a relaxed way. I hope you'll join me in
this fun class as we combine collage sketch bookmaking
and mixed media techniques. Heading over to the next
lesson to learn more about our class project.
I'll see you there.
2. Class Project: Thanks for joining me
for our class project. We will be collaging on large sheets of paper,
cutting those down, and creating the
pages that we will then assemble into a
handmade sketchbook. Our sketch books are going to be 4a26 inches in size
and pretty thick. This is an artistic practice
that I learned from artist Henrik Dresser
and it was so inspiring to learn how he filled his pages with inspiring
bits of paper, both from materials as well as his old
sketches and artworks. And it's a really great way to take earlier art
experimentation and repurpose it so that it becomes a meaningful part of your artistic
practice yet again. And isn't just something that you set aside or throw away. And it's really fun to see
those old sketches and artworks turn into new,
interesting artistic pieces. After we collage our pages
and assemble our sketchbook, we will then work
back into our collage spreads using those
as inspiration as we apply a variety of mixed media techniques that I will demonstrate in
our later lessons. Along with the video
demonstration, you can find directions
how to create your handmade sketchbook in the projects and resources
section of our class. If you are watching this
class on the silter app, be sure to pop on over to the schools website to
access those resources. They are listed beneath the class project
description on the website. It's always so fun to see how everyone approaches
a class project, especially one like this. I really hope you'll consider sharing your
sketchbook and some of your sketchbook
mixed media collage spreads in the class
project section. You can upload those to the
student gallery and share your thoughts on what
kinds of papers you use, the techniques that
you most enjoyed, and ideas you have for future mixed media
collage, sketchbooks. Let's send it over to the next
lesson to talk more about what materials we'll be using in this class. I'll see you there.
3. Materials: Now let's talk
about art supplies. There's no limit to what
type of decorative paper you might want to incorporate
into your sketchbook pages. I use a combination of decorative papers that I have created with
watercolor techniques, inking different
exercises that I did as part of other classes and workshops that I have
taken and taught, as well as some magazine pages that I've collected
over the years. As far as magazines go, I look for inspiring colors and patterns and implied
textures and shapes. Anything that makes me go, ooh, that has possibility. So if you don't have a lot of
collage materials on hand, grab some free magazines from your library or we ask
a friend if they're done with their
magazines or go into your own magazine stash and start tearing out some
interesting pages. As well as some
sketches or doodles or abandoned artworks that were
wonderful in the moment, but I don't really serve
a purpose anymore. Those when torn up and cut up, can make really
wonderful additions to your mixed media
collage sketchbook. I've included a list of necessary and
optional art supplies in the class description. We are going to be starting
with large sheets of paper, so I'm going to
be using a mix of my large Canson
mixed media paper. This is 18 24 ", which is about the size that you're going to want
to have initially. This is 160 gram
paper, 98 pounds. It works really great
because it isn't too thick, but it can also handle
a lot of media. I'm going to be using a
couple sheets of this. I also really love working with pastel paper for this project. I couldn't find pastel
paper larger than nine x 12 " that I could get when I
wanted to work on this project. And my original book
used up most of it. I have a couple sheets left
that I'm going to work with. I'm also going to test out how my black mixed media
paper works from Strathmore. This is 184 pounds. It's 300 GM's. It's a little too thick. But because I do need to be able to fold it at some point
and it might crack, I'm not sure, but I'm going
to test this as well. I also picked up a pad of
artist loft toned paper. This is just for
drawing, so we're going to see how it
handles its medium weight. It's actually pretty
thin and very smooth. This is another experiment. I wanted the tone paper
because I wanted to have that variation from page spread to page spread
in my sketchbook. It'll be an experiment,
but this isn't 18 x 24 ". What I'm going to
do is I'm going to tear out four sheets
of the paper, and then I'm going to
assemble a larger sheet. If you don't have
18 x 24 inch paper, this is what I recommend you do. I'll show you more
as we get started in the project about how to do this in a way that makes sense. This way, I can put
together four sheets of paper to mimic an 18 by
24 inch sheet of paper. If you only have nine by
12, that will work great. We're not really going to
be doing much measuring, actually, we're not really
going to be measuring at all. As long as you can get
papers together to give you a nice big surface area for each of our initial
collage spreads, you'll be in great shape because we're
working mixed media. You want to think about
paper that can fold easily. We are going to be folding
our cutdown pages. You're going to want to
be thinking about color. Perhaps if you have
some toned paper, some black paper that
isn't too thick. This pad had, I think, four different colors
in it initially. This pastel paper worked great
for my initial sketchbook. You can see when I open it up, I have that toned paper
behind the collage, which was really a fun
element to work with. In some cases I
ended up using it, in some cases I ended
up covering it up. Completely white paper
will also be fine. Think about what papers
you have on hand, what papers can handle,
collage and ink. Maybe you're going to want to
paint back into your pages. You're going to want
to have a collection of decorative papers. I like to keep mine in boxes. This is a little chaotic because I've been collaging
a lot lately. I've got various magazine
images that I've pulled out. I like the old graphics from
the cookbooks that I've collected and gutted different
handmade sketchbooks. The color pages, I've got scraps from other collages
that I've worked on. I've got some of
my texture papers. This was originally part of my mark making class where I was experimenting with what marks could be made with
kitchen supplies. I have begun repurposing
those practice sheets. Lots of other fun stuff. There's more of
that, some artworks that I decided to abandon. But rather than throw them out, I like to keep them for future inspiration
and repurposing. There's a, there's really no
limit to what kind of papers you might want to have on hand
if you only have collage. Sorry. If you only have
magazine images, that's fine. But you might have
some other doodles or scraps of paper
lead through that. Maybe this could be considered something I'd
throw away, but who knows? That little block can turn
into something amazing. A lot of decorative paper, collage materials, not too
thick, I wouldn't go any. This paper, this is pretty
thick watercolor paper. It might need to bend if it's on the crease
of my sketchbook. You might want to
think about going with your thinner
collage materials, but you're going to want
a lot of glue sticks. We're going to be
gluing down a ton of collage materials before we start assembling our sketchbook, I recommend glue sticks of
any variety that you have. The I'm going to be tearing
my collage materials, but you may want to
cut yours instead. You probably want to
have a pair of scissors. And then we're going to
be working back into our sketch books with various
mixed media materials. I like having colored pencils. I love paint pens. I'm really obsessed with
brush pens these days. So I've got a whole
pack of brush pens. This is my Go tube carrying kit. This has my fountain pen. This has some ballpoint pens that have a bunch of
different colors in it. A couple of different
colored fountain pens. Sharpies, I love a good Sharpie, so I've got some metallics
and some blacks. Any of those supplies are great. We're going to need a surface
to cut our large sheets on. I would either use a
scrap of cardboard. I love to save the backs of
my sketch books for that. This canson paper
book is almost empty. This would make a really
great cutting surface for me if you have a large cutting
mat that is also great, but cardboard works wonderful to cut our paper down
from the 18 by 20 to the nine by six in sheets that
we're going to start with for assembling
our sketch book. You're going to want to have
a heavy duty Exacto knife or a box cutter. I don't have a box cutter
in the art studio, so I've been using
my Exacto knife and that has been working great. You're also going
to want to have a heavy duty long ruler. Here's my Exacto knife. I've got my metal ruler, which works really great for
cutting the papers down. We're going to do
a lot of gluing, so you might want to
have a damp cloth because your fingers
are going to get a little sticky in the
construction stage of this. A damp cloth works great
because I can rinse my white, my fingers off and then set it aside really having
a wet section and a dry section because we're not doing a ton of
ton atomic gluing, But we're doing enough where
we want to be able to keep our fingers from
getting too gluey. You could also use
graphite pencils. You could think of different
ways to apply inks. I have a bunch of
different dip pen inks and these are some FW Pearlescent, these are my acrylic inks. And then I also have some
more water color based inks. Liquid water color pencils
will be really fun for this. If you're going to
have inks on hand, you're probably going
to want to have a dip pen or a paint
brush or a skewer. The great thing about
these sketchbooks is that they're really
wonderful for creating. On the go, I take this sketchbook with
me all over the place. It's so small t heavy because
this one's pretty thick. But I can easily open up a
spread and start working on it if I'm waiting for my kids
or if I'm at an appointment, or if I'm sitting in the car
waiting for the next thing. I did a lot of these
pages while we were traveling throughout
Michigan this summer for family vacations
and to go visit my parents in the northern
part of Michigan. I would just grab
the sketchbook and grab a small bag of whatever, a couple brush pens, a couple paint pens
and fountain pens, sharpies, and then I
was ready to create. Anywhere you could also think about that as your working
on your sketchbook, where might you
want to take this? This does not have
to only live at your art table or in your home. I've probably traveled
and art in this more outside my home than
I have inside my home. It really anything goes as
far as the mixed media part. So take some time to gather up your art materials and
I will see you over. In the next lesson, we'll begin collaging into our large sheets
of paper. See you there.
4. Collaging Pages: Let's start collaging into our large sheets of paper
as we begin putting inspiration into
what will become our handmade mixed media
collage, Sketchbooks. Collage is a technique
where you've cut up or tear materials and papers and then glue them
down to a surface. For this class, I will be using a mix of old sketches,
doodles, artworks, decorative papers that I've
created ahead of time, as well as scraps from
other collage projects and magazine images that I have torn out and
collected over the years. The key is really to not
think about where it goes, because you want it to be
as random as possible, but there's no reason
you can't collect and gather up collage materials
that you find exciting. Because after all, these are jumping off points for
our mixed media pages. I like to tear up
my papers because I really love the decor
edge that it creates. But you are more than
welcome to also cut them up, let it have the crisp edges. It's also good to
have a mix of go with whatever technique
appeals to you. But one of the
best ways to start off is to just tear and cut and create a whole pile of really fun and inspiring
collage materials. As I said, I couldn't find the paper I wanted in
large enough sheets. I'm going to try my mixed
media Lack Strathmore paper. And then I also
picked up some drying toned paper and we're going to recreate an 18 by 24 inch sheet and then
collage into that. I'm going to start with
four of those pages. I'm going to lay them
out so that they become pretend upper turn
to 18 24 in sheet of paper. And then I'm going to
use collage techniques, collaging materials and washi tape to assemble them
into a large sheet. Now why if we're going to cut
it up into smaller pages, are we putting it together
into a large sheet? Well, let me tell you by focusing on it as a large
sheet that then gets cut down. We are giving ourselves more creative freedom and
flexibility and more surprise when we open up our
assembled sketchbook and see what spreads
we've actually created. We're definitely going to
be cutting this apart, separating it back
into 912 inch sheets. We're also then going to
be cutting it down even further to make our 96 sheets, because in the end our
finished sketch book is going to be four a
two by 6 " in size. It's going to be rather thick, but ultimately
it's pretty small. Every page is going to
be considered a spread. We're going to be addressing
it as one flat, bigger page. But ultimately, we're
making a small sketchbook. But we want to go from
big to small to get the creative surprises we're going to need a
lot of glusticsn. I also described my
fun washi tapes. I think to get myself started, since this drawing toned paper is pretty slippery
against my art table, I'm just going to stick down
a couple pieces of tape. Now you could do, I could
tape the back and then cut this apart because really all of that's going
to get hidden anyway. But I want a reason to use some washi tape because I have a lot of it and
it's really fun. But I don't ever remember
that. I have a lot of it. We're, I'm going to get a little clever and throw
some of this in there too. Then that will become
part of my collage, which will be pretty great. I'm just going to tear off
a couple small pieces. I don't want it to go on the seam because remember
we're cutting the seams, whatever actually I
could do masking tape, I could do any tape, and then have that
get incorporated into the artworks in the end. I'm trying this a different way. When I did this the first time, I used collage elements to hold the pieces together
and see my tape. That's okay. It worked, okay. But I want to try something new. I want to challenge myself
and I want to explore what adding this collage
material to my process. A couple of sheets. A couple of sheets. Just a couple pieces
of tape, Hold it down. Then I'm going to begin tearing, and collaging and gluing
random pieces of paper. You could even create
a pile ahead of time. Why don't I do that? I'm just going to start tearing
up some other pieces that I have so that I don't have to get caught up thinking
about it in the moment. Lots of these ones
come from different. I think I was doing an abstract, October 1 year shaving
cream marble in paper. This was painting with
plastic dinosaurs. I don't want to create
a bunch of rectangles. You want to make sure if you're
going on a tearing spree, that you let it be
a little random. You want big pieces
and small pieces like this is a tiny section
from a watercolor piece. But then I also want to get
some larger pieces in here. This is where it
gets fun because everybody is going to have different collage materials that they get excited by
that they have on hand. You're going to have access
to different magazines. You're going to have
different sketches and things that you have
created that you're now going to give new life
to notes from a glass. All right, that's a
good starting point. I'm just going to shove
these off to the side. Now the other fun thing to
do is to put some pieces of a torn up page on one giant
spread and some on another. Because then you end up
approaching them different ways depending on how they incorporate with the
rest of the spread, as well as how they look
when they're cut up. You just start gluing them down. You don't want to
think about it. You don't want to start working on composition. It
doesn't matter. Pages truly change so much when you go back
into your sketchbook that you don't want
to be limited in the beginning
stages by anything. You can put on some really
great music when you're doing this step and just start
laying down random bits. Now we don't want to fill up
the whole page because we're going to be mixed
media, mix media. Mixed media, We're
going to be using mixed media techniques to
work back into our pages. We're going to be going
over the magazine images. In some instances, we're
going to be working in the empty space and
connecting the two together. You don't want to overfill it, but you also don't want
too much negative space. You really want to
let there be enough. Because remember, these
are little bits of inspiration that we're going to stumble across as we go
back into our books. You want to have
enough of that so that you've got some great
jumping off points to begin your
sketchbook spreads. Keep collaging until it
feels relatively full. I like to spread all my papers out around me on the floor and then jump back and
forth as I find interesting pieces of paper
that I want to collage in. That's my pro tip is
if you have the space, do all of your pages at
once so that you can truly just go wild and have so much fun laying
down magazine pieces. This one is not done, but I'm going to set it to the side, see it's attached enough because we know we're going
to be cutting it apart. I'm going to jump
to another page and get that one started. And then I'll come
back to this one. I'm going to go
ahead and get out some more paper and
set up another one. This one I won't
do the Washi tape. I'm going to show you how I
originally approached this. I just laid out my papers
and then I grabbed whatever glue stick is jumpy. Today, I just started getting
the glue on the pieces. And then I would line
my paper up and I might try to get it relatively relatively centered and stick
one in the middle. Again, it's going to wibble, wobble, And it's
going to be fine. We're going to cut these apart. If you two are also working with smaller pages and pretending
that they're larger, you're going to have,
it's not going to matter. There's no way to mess up
this step, which I love. I know this one's going
to get cut on the seams. Sometimes I like to line
it up with the edges and sometimes I like to let
it just go across this one. I'm going to go ahead
and let it go across. Plus it also helps stabilize
my pages, which is awesome. Then I'm going to grab a
couple other fun sheets from my stash. I have too many, far too many stashes
of collage papers. The other great thing
with the big pages, those are great sections to put across where
you know a Sam is going to be because then you know it's going to end up
on more than one page. Which will be super fun
and surprising to see how it changes your view of it when you look at it chopped up from a different angle or
whatever the case may be, more of these pages in. You'll also notice that I'm not putting down a scrap
paper to glue onto. It doesn't really
matter if I get glue on this background
because ultimately we're gluing all over it and we don't need to be
precious about this at all. This is the wet rag
is handy because We're going to get sticky. That's just the
nature of collage, no matter how careful you are. And I'm just going
to keep going, I'm going to keep adding collage bits and
working back and forth between the two pages that I started as well
as the other two. I'm going to do at
least four pages. And that's what I
recommend you do too. I recommend that you have at least four pages
of giant sheets. Four big sheets that
you're working with. Just keep going, keep adding
bits to your big sheet. I have a mixed
media drawing sheet that I started earlier. I've got a couple
torn up sketches. This is a great use for those pieces that are pieces
I no longer want to work on, or they're done, but I've
moved on artistically. What do you do with them?
You throw them away, not me. I save them and then
I give them new life. You do want to make
sure that you are pretty good about
googling down your edges. I like to work abstractly. I tend to go for
patterns and colors. And shapes go with
whatever speaks to you. Now, this sketchbook is from a different class that
I did with Heinrich. And the cool thing
was eventually dismantled it to
make stop motion, which means it's
already falling apart. It makes for great materials.
That's pretty good. That's probably as much as
I need to put in this one, but we'll see when
they're all done. I want these drawings
to carry over. Before I go to another one, I'm going to jump back
to that first one that I started and I'm
going to lay some of this stuff down now
that I've started adding some other
collage elements. I love the repetition
and when things pop up again in other pages, and then I get to treat
them in a different way. All right? I think this one
needs a little bit more. Something. A little something. I love that purple. At this point, I'm
just going for things that strike
me as interesting. Do one more thing across
that same, I think there. Okay, this page is good. Let's do one more then. I've created a couple
more on the side that I'm probably going
to work with too. We'll see how big the
sketchbook is. This one. I'm going to go back
to my washi tape. I just love this donut wash
tape. It's not hilarious. Washing tape is so neat, going to dry wipe off some
sticky fingers at this stage, it looks pretty bizarre. These are not things that I would put together consciously. I've been very happy with
the results of this process. I've definitely made some pieces that I would not have been able to without having a collage
bits as a jumping off point. This one I have this one, this one that's
not very colorful. Maybe I will add a
little bit more into this because if it's
looking sparse now, it's going to look even more sparse once I'm
looking at the spread. Once it's cut down, that's my cue to add a little
something else. Well, that one done, this one could use
a little bit more. Then I have a couple others
that I started earlier. I'm going to throw it
on some washi tape because I love this peacock
feather one so much. I'm going to treat it more like it's a torn piece of paper. You only need four.
But I have 1234567, which is great
because it'll give me a couple extra things
for our demos later on. This may end up actually being
two books, but we'll see. Go ahead and collage together
your 18 24 sheets of paper. Remember, do not think about
what you put down there. Just cut, tear, rip, and start gluing it down. Once all of our pages have been spiced up with collage areas, we're going to begin
cutting them using an exact knife for a box cutter. Heading over to the next
lesson to learn more about our class project.
I'll see you there.
5. Cutting Pages: Welcome back. The ones
that are like this where I created them in 18 way 24. ", I'm just going to go to, go ahead and take my scissors
and just reseparate them. That is the easiest
way to do that. If you did like I did just
take your scissors and kind of cut along the
collaged over edges. And it's okay if they have
a little roughness to them. This got taped a little funky, you might end up having
some bizarre edges. Yep, I overlapped there. So now I'm going to go
ahead and separate these, which also overlapped
a little bit. I'm going to use the
top paper as my guide, and then I'm going to clean up my collaging edges and it's
going to be just fine. Okay. That's okay. That one
got a little chopped up. Not a big deal at all. This one's okay. Now I have these down into their
912 original sizes. I'm going to keep going and
separating my sheets again. If you use a written
912 inch pages also, then all you have to
do is cut those apart. These white ones were
done on full 18, 24 inch papers, the
ones that are toned, we're done on nine by 12. I can just quick trim those apart where the
collage overlaps them. Then for the larger sheets, I'm going to get out my
ruler and my exact knife and my cutting mat to
trim those down. If you can't really see, you can flip it over and I can clearly see the seam
on the back there. Great. Flip this one over. I can quickly cut that apart. Everything else is
mixed media paper. These are the ones that were small pages that I
turned into pages. I'm going to set
those in my side. Then I'm going to
cut all of these at the same time because this is large And I'm just going
to go ahead and use my sketchbook pad as
my cutting surface. I'm going to line these up. Then I'm getting my metal ruler. I am going to mark my middle. You might want to have a
pencil on hand for this. Get my Exacto knife or your box cutter,
whatever you have. Make sure your blade
is sharp though, but be careful with
a sharp blade. Actually, maybe I'll
make two marks. Make mark at the bottom. Mark at the top. I've
measured it halfway. I've lined up my ruler. I'm going to go ahead and
start slicing through. I'm going to go slow and I'm going to
keep going until I get through all of the pages. Now as they separate, I can start moving them aside. Side, that one side, that
one, any of this stuff. Just don't worry
about it. Keep going. You're not going
to get it all in one cut. Just take your time. Keep working your
way down the stack. Can you do readjust your ruler. That's fine. Don't cut yourself, please. Now, I'm going to stack all
of these back up again. Now we're going to cut
them in half again. I'm going to go ahead and
mark the middle again. I always worry that I don't get the middle of
things when I mark. I like to do it twice. Now we're working with 18. " half of 18 is nine. Put another mark down here. Line up, mark my ruler. Hold it down non firm,
and do the same thing. Slowly cut through
the whole stack. Don't worry if the papers
come up, it's okay. Scoot to the side
as they separate. All right. Stack I'm back up again. Now we're down to nine x 12. If you like me, we're working with
smaller papers. This is where we add
those to the stack. Now we have a giant
stack cutting it again, so half of 126. So I'm going to go
ahead and mark six. There we go. Okay, make sure they're
stacked up nice and straight. Line up your ruler, hold
it down really tight, don't let it wiggle and
start cutting through again. This will be our last
cut for our pages. We have a bunch of
this happening and just pull it out of your way. At this point, I'm really just cutting along the
edges of the paper, but the ruler is nice to
make sure you don't bump yourself as we keep
cutting through. All right, now we're going to
stack up all of our pages. Again, this is a very
thick sketch book. Now remember I use seven
or 81824 inch pages. This could also very easily
become two small sketchbooks. And that's probably what I'm going to end up doing so that I can show you these techniques a couple
of different times. I mean, the next lesson
where we will begin folding and attaching
our sketchbook pages.
6. Assembling Sketchbook: Now we are going
to begin folding our sketchbook pages
and then gluing them together to assemble
the interior of our mixed media
collage sketchbooks. The first thing we
want to do is we want to take our stack of nine x six inch papers and we are going to
fold them in half. I'm going cross them
over like that. I want to really make sure
I have a nice crisp fold. To get that fold, you can
use a Boon folder or you can just use the edge
of a pencil or pen. Either works great then I'm just going to keep folding
and stacking. We want to fold it so that our collage side
is on the inside. You also want to make sure
that you keep your pages separate if you've
got thicker paper. I tried that mixed
media paper and actually it's a little hard to fold but
it's not cracking. That thicker paper
worked out fine. I'm just going to keep
folding and stacking until everything has been folded in half with a nice crisp badge. Now, if you have
some thinner papers, you could do a couple at a time. Most of mine are pretty thick. And then I've got some
of this collage piece at the crease is thicker. I have to negotiate with it a little bit to
get it to fold there. I could cut like this. If it starts popping off, I might just cut this part of it off and let it end at the fold, but we'll tackle that when
we get into our pages. Now, just keep
folding and stacking. And I'm going to go ahead
and speed up the video so that you don't
have to watch me fold and stack all these pages. I will see you soon for the next step of our
sketchbook construction. All right. I'm on my
last page folded. This is how thick
our sketchbooks are going to be, give or take. If you did about four pages, your sketchbook will
be about this size. Once all the papers are folded, it's time to start
gluing them together. Don't open your pages
to see how they look. That's part of the fun. I'm
going to go ahead and flip the first page so that it
opens on the left side. And I'm going to get
my glue stick to my exact knife so I
don't stab myself. Put that off to the side, you
won't be needing it again. All right. Now this is when it's good to
have a scrap sheet of paper because now
I don't want to get glue on the outside. My sketchbook page is going
to be opening to the left. And I'm going to go and glue all around the edges a
little bit in the middle. Now I'm going to keep going. Sketchbook pages
opening to the left. I'm going to put that
down and I'm going to really rub it to get
all the glue to stick. Now we have pages that open, so we're going to keep going. I'm going to go ahead and
glue all around the edges. Our cover is not going to be
going over the outside edge, it's going to be a
rough edge sketchbook. It's opening to the
left. Make sure this one's opening to the left. Go ahead and stick it down. Now we want to make
sure that it's okay if this part
gets a little funky, but you are going
to have a binding. You do want to make sure
that this edge stays, even as you squash these pages
down and the stack grows, it's very easy for
this edge to start to go at an angle,
which is okay. I already have one. Well, that glue is still wet. I'm going to scooch the
silver a little bit, but this is the one part where it just looks
a little nicer. If you make sure that
that edge is there, we can clean this edge
up if we want to. We can't clean up
the folded edge. It is going to get hidden. We are going to wrap
it with a cover that's not such a big deal, but try to keep your pages
lined up on the fold side. I'm going to go ahead
and keep going. I've got my, make sure
it's opening to the left, lay it down, line it
up on the folded side, squash that side first
and then you can smooth over to the next one
and repeat again. I'm going to go ahead and speed up the video here so that you, so we can get to the
next step in this. But keep folding your
pages until everything has been attached into one
big sketch book block. All right, there
is my last page. Now that all of our pages
are glued together, we're going to put a scrap
sheet of paper on top. And then we're going to stuck a couple of heavy books on top. And we're going to leave it to dry for about an hour or so. We could go ahead
with the next step, but I highly recommend
we let the settle. Plus we want to make
sure that all of our pages stay together. So I'm going to go ahead and
move that scrap paper over. Actually, I'm going to
put one down underneath. I don't want my table
to get glue on it. I'm going to go ahead
and put that down. I'm going to put another
scrap paper on top. And then I'm going
to get a couple heavy books to stack on top. And then I'm going to let
this sit for an hour. Now let's head on over
to our next lesson, where we will attach
the cover paper to finish off constructing
our handmade sketch books.
7. Attaching Cover: Now it's time to attach the
cover of our sketchbook. We're going to keep
this pretty simple. We are going to have
you can go with a decorative paper or you can
go with a plan paper if you want to work into it later
or you just want to keep your sketchbook exterior plane. That's completely up to you. I really love decorative
paper and I have a lot of it. So this is a really good
use for it and it gives my some personality and makes it fun to pick up and take
places an art into. I have a sheet of paper that is bigger than
my sketchbook, and I'll show you why
in the demonstration. All right. Our book has
dried. It is secure. It might be a little
funky on the sides. I don't mind that if
that bothers you. Don't know if you can see
this. There's a couple of the pages that just got
cut a little rough. You can go ahead and
clean that up with an exacto knife or a box cutter. I'm not going to worry
about it, I'm going to let it be now. Everything's attached, all of our pages are secured together. But we want to make this look
a little bit more finished. You might have some glue that snuck around the edges
onto the collage sides, but that will resolve itself as you open up
your pages and start exploring the inspiration that you have collaged into
this sketch book. Let's add a cover. I have a couple
different pieces of decorative watercolor paper
that I have cut down. I didn't measure them
in the sense that, like, I knew I
needed to be bigger. I knew I needed to
be able to wrap. But I'm going to go
ahead and glue it, and then I'm going
to trim it Now, There's other ways to make book covers where it folds
over the edges, but we have all of the pages you would end
up collaging over this. I'm going to go ahead
and let the cover end at the book edge itself
and not wrap for that really crisp finished
look that is nice in other sketchbook
construction. When we glue this, we want to make sure that this
attaches really well. We really want to
focus on the spine of the book because this is where it can pop
off a little bit. And then we want
to fold it over a, I'm going to start
with top cover edge and then I'm going to glue
and keep wrapping it. You'll see as we go, I'm
going to go ahead and lay on my glue all around
the outside edges of the top page and across the middle I
want to really have a nice amount of glue down because I want my
cover to be very secure. We're going to be working
into this book a live then my paper is bigger
than I need it to be, and I'm not going to
worry about that. I'm going to go ahead and you could put it up to the
edge if you want to. I like just trimming
that off after the fact. I'm going to attach
this part down. It's a little way with the glue. That's why it's nice to have some extra space that
border works well for that. Now the top is attached, then I'm going to go
ahead and put glue along here just to give it a
little edge to glue to. This also helps reinforce the
gluing that we did inside. I'm also going to
go ahead and put down some glue on
the paper itself, roughly the height of the book. Then I'm going to
start to wrap it up. Really Spend some time. Go ahead and increase
that a little bit. I'm really going to spend
some time burnishing this so that the
outside paper sticks. Now you don't have
to use pretty paper. You could just use plain
paper and work back into it. You could keep it just plain because you like a plain
covered sketchbook. I really enjoy giving my
sketch books personality and I have a lot of
decorative paper around. This is a nice use for
the bigger sheets. All I'm going to flip this back over and I'm going to
crispin up this edge. I'm just going to pinch and
run my fingers along it and pages into that cover paper. And then also just spend
a little bit more time pressing down the paper to the section that
I already glued. Now, the other really cool thing about these sketchbooks is that there isn't a front and
there isn't a back. They just are, they just exist. However, I happen to grab it
and pick it up and open it, that is the orientation for
that moment of artwork. Now I'm going to go ahead
and put some glue down. This last cover. It's
okay if that comes off. This is why we're
going to take some time to let the glue set, there we go, and then
wrap this back around. It's a lot of glue and a lot
of moisture from that glue. Unfortunately, we're
going to let this dry again for about an hour. Overnight's even better. You're going just
leave it and then come come back to this
lesson in the morning. That is even better. All right. Now our paper is attached. I recommend waiting to trim
it until the glue has set, because then you're not going to have the sketchbook body inside. This big register in the
middle isn't going to slip. But if you want to
do it ahead of time, you're more than welcome to just know you might end up with
a little less clean edge. I'm going to go ahead
and let this sit. I'm going to get my, actually I won't need
scrap baker of this time because all of the
glue is on the inside. I'm going to put a couple
of books on top of this. I'm going to let it dry for about an hour and then I'm going to come back and I'm going
to trim off the edge then. And then will be all set to begin working
back into it with a couple fun mixed media
techniques that I'm going to share with you
in our upcoming lessons. Let this dry, go make a cup
of coffee or a cup of tea, and I'll see you back here
in about an hour. All right. The final step in constructing
your sketchbook is to the excess cover paper. Now that our glue is dried, we are ready to do that. I do want to be a little bit
careful as I crease and fold my front and back
covers because it is possible for the binding
part to pop open. It's okay if it does,
if this comes detached and this cover are so well secured that it's not
going to be a problem. But if you do want to be a
little cautious of that, then just give it
a little crease that you're working with
it and not against it. I'm going to go ahead and use my exact knife to trim this up. If you want to, you can grab a ruler to really help ensure
that your cut is neat. I'm just going to
line it up with the edge of my sketch book cover and carefully cut through
a couple of times. Then I'm going to save
this excess paper for collaging because
that's what I do. Then I'm going to go
ahead and spin it around. Going to get these two
side edges cut first. Again, line up your
ruler, hold it down, The sent tight a couple times through to
cut off that excess paper. Then I'm going to
do the same thing and open it up all the way, let the binding break low. Now I've got the thick
edge of my sketchbook, so I don't need my ruler. I'm going to very
carefully gently cut through until that strip
of extra paper comes off. And then I'm going to spin it around because I'm right handed. And I'm going to do
the same thing on the other side there. Now my sketchbook is covered
and beautiful on the outside and filled with collage
inspiration on the inside. But we are going to start going into with our mixed
media techniques now. We're going to be working
on this sketch book a lot. You might find that like this page has come
up a little bit. I can sneak a paint brush with glue on there in
there to secure it. Or I can just let it be might work on it down the
road, the binding is. That's okay. That
happens sometimes. Again, if instead
of the glue stick, I could have gone in with
some liquid white glue and painted that binding first. But I know that this is secured with how well I glued down the front
and the back cover. So I'm not going
to worry about a popped binding because
I know I'm going to go back into this a lot and I'm
okay with that popped edge. But if that bothers
you, go ahead and drop in some liquid glue and
give it a nice squish. And you might even want to
put some weight on it this way to help your paper
adhere to the binding. Now that our sketch
book cover has dried and our sketchbook
is nice and secure, it is time to begin
working back into them. Let's head over to
the next lesson to begin learning about the mixed media
techniques we will be exploring in this portion of the class. I'll
see you there.
8. Mixed Media Techniques: Now let's begin diving back in to our mixed media
collage sketchbooks. And take them from a
collage sketchbook to a mixed media
collage sketchbook. We're going to explore
different ways that you can approach using ink. As well as colored
pencil, paint markers, brush pens, color and value
as well as Nat and shiny. Let's dive in and I will show
you some of the ways that I have been inspired in my mixed
media collage sketchbooks. All right, now it
is time to begin working back into our
mixed media sketchbooks. Here is the one that I created.
I'm still working on it. I've got a lot of unfinished
pages left to go. But here are some of the
pieces that I've worked on. The great thing is these books, like I said, they
don't have a front. They don't have a back. They don't have a top or bottom. Just you open it up and you go. Which is one thing
that I really love it. Just there's no pressure to it. It's just incredibly fun. And you just dive in and create as you're inspired
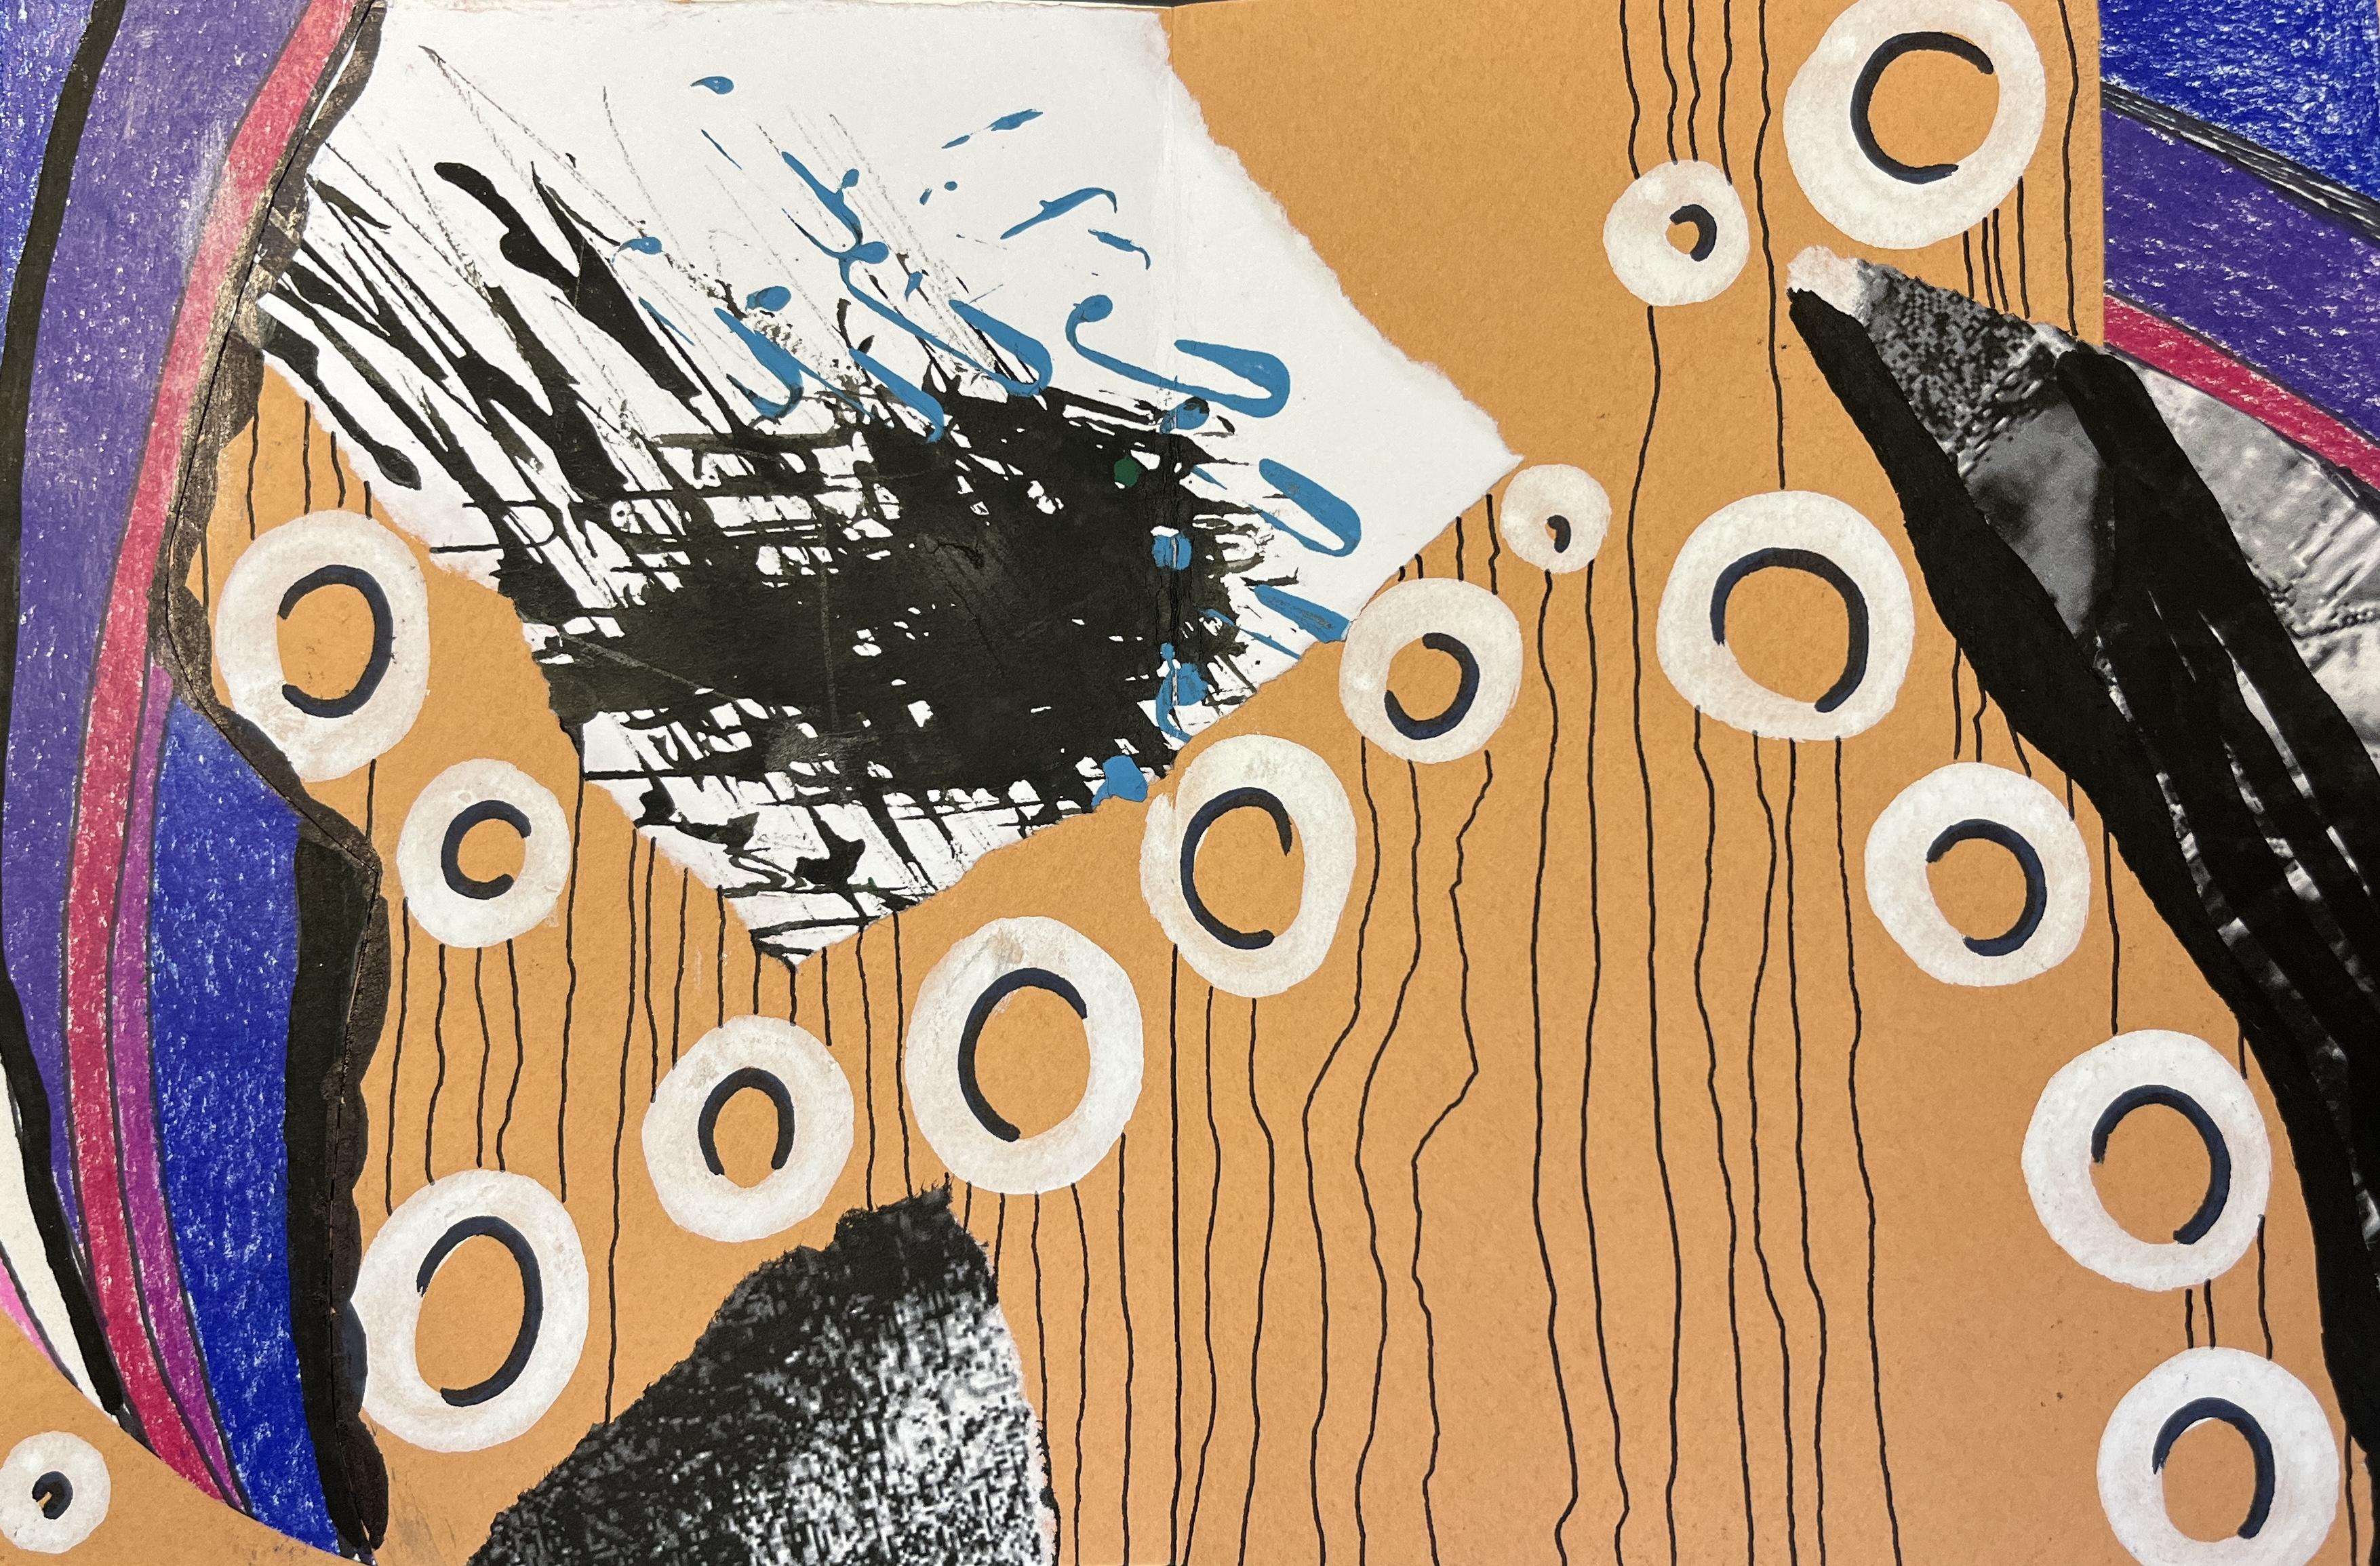
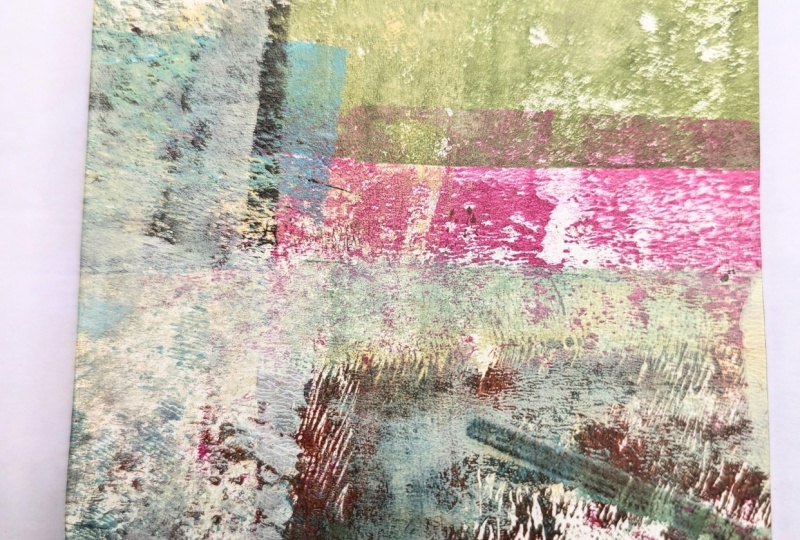
by your collage pieces. This one is a combination of metallic watercolor ink
and some fine liner. That's it, I think everything else was already on the page. This one is a work in progress where the collage pieces
where this red section, this little bit of
white and this corner of shaving cream marbling
that I had done. I'm working back into this
one with brush pen currently, and then a little bit of pasta. This one was brush
pen and fine liner. This one is a work
in progress using pasta for the white
and the black. Everything else was co, the red, Everything else was
collage already. A lot of times what I like
to do is continue the color and continue some of the line quality or the
shape quality that I see. Sometimes I like to
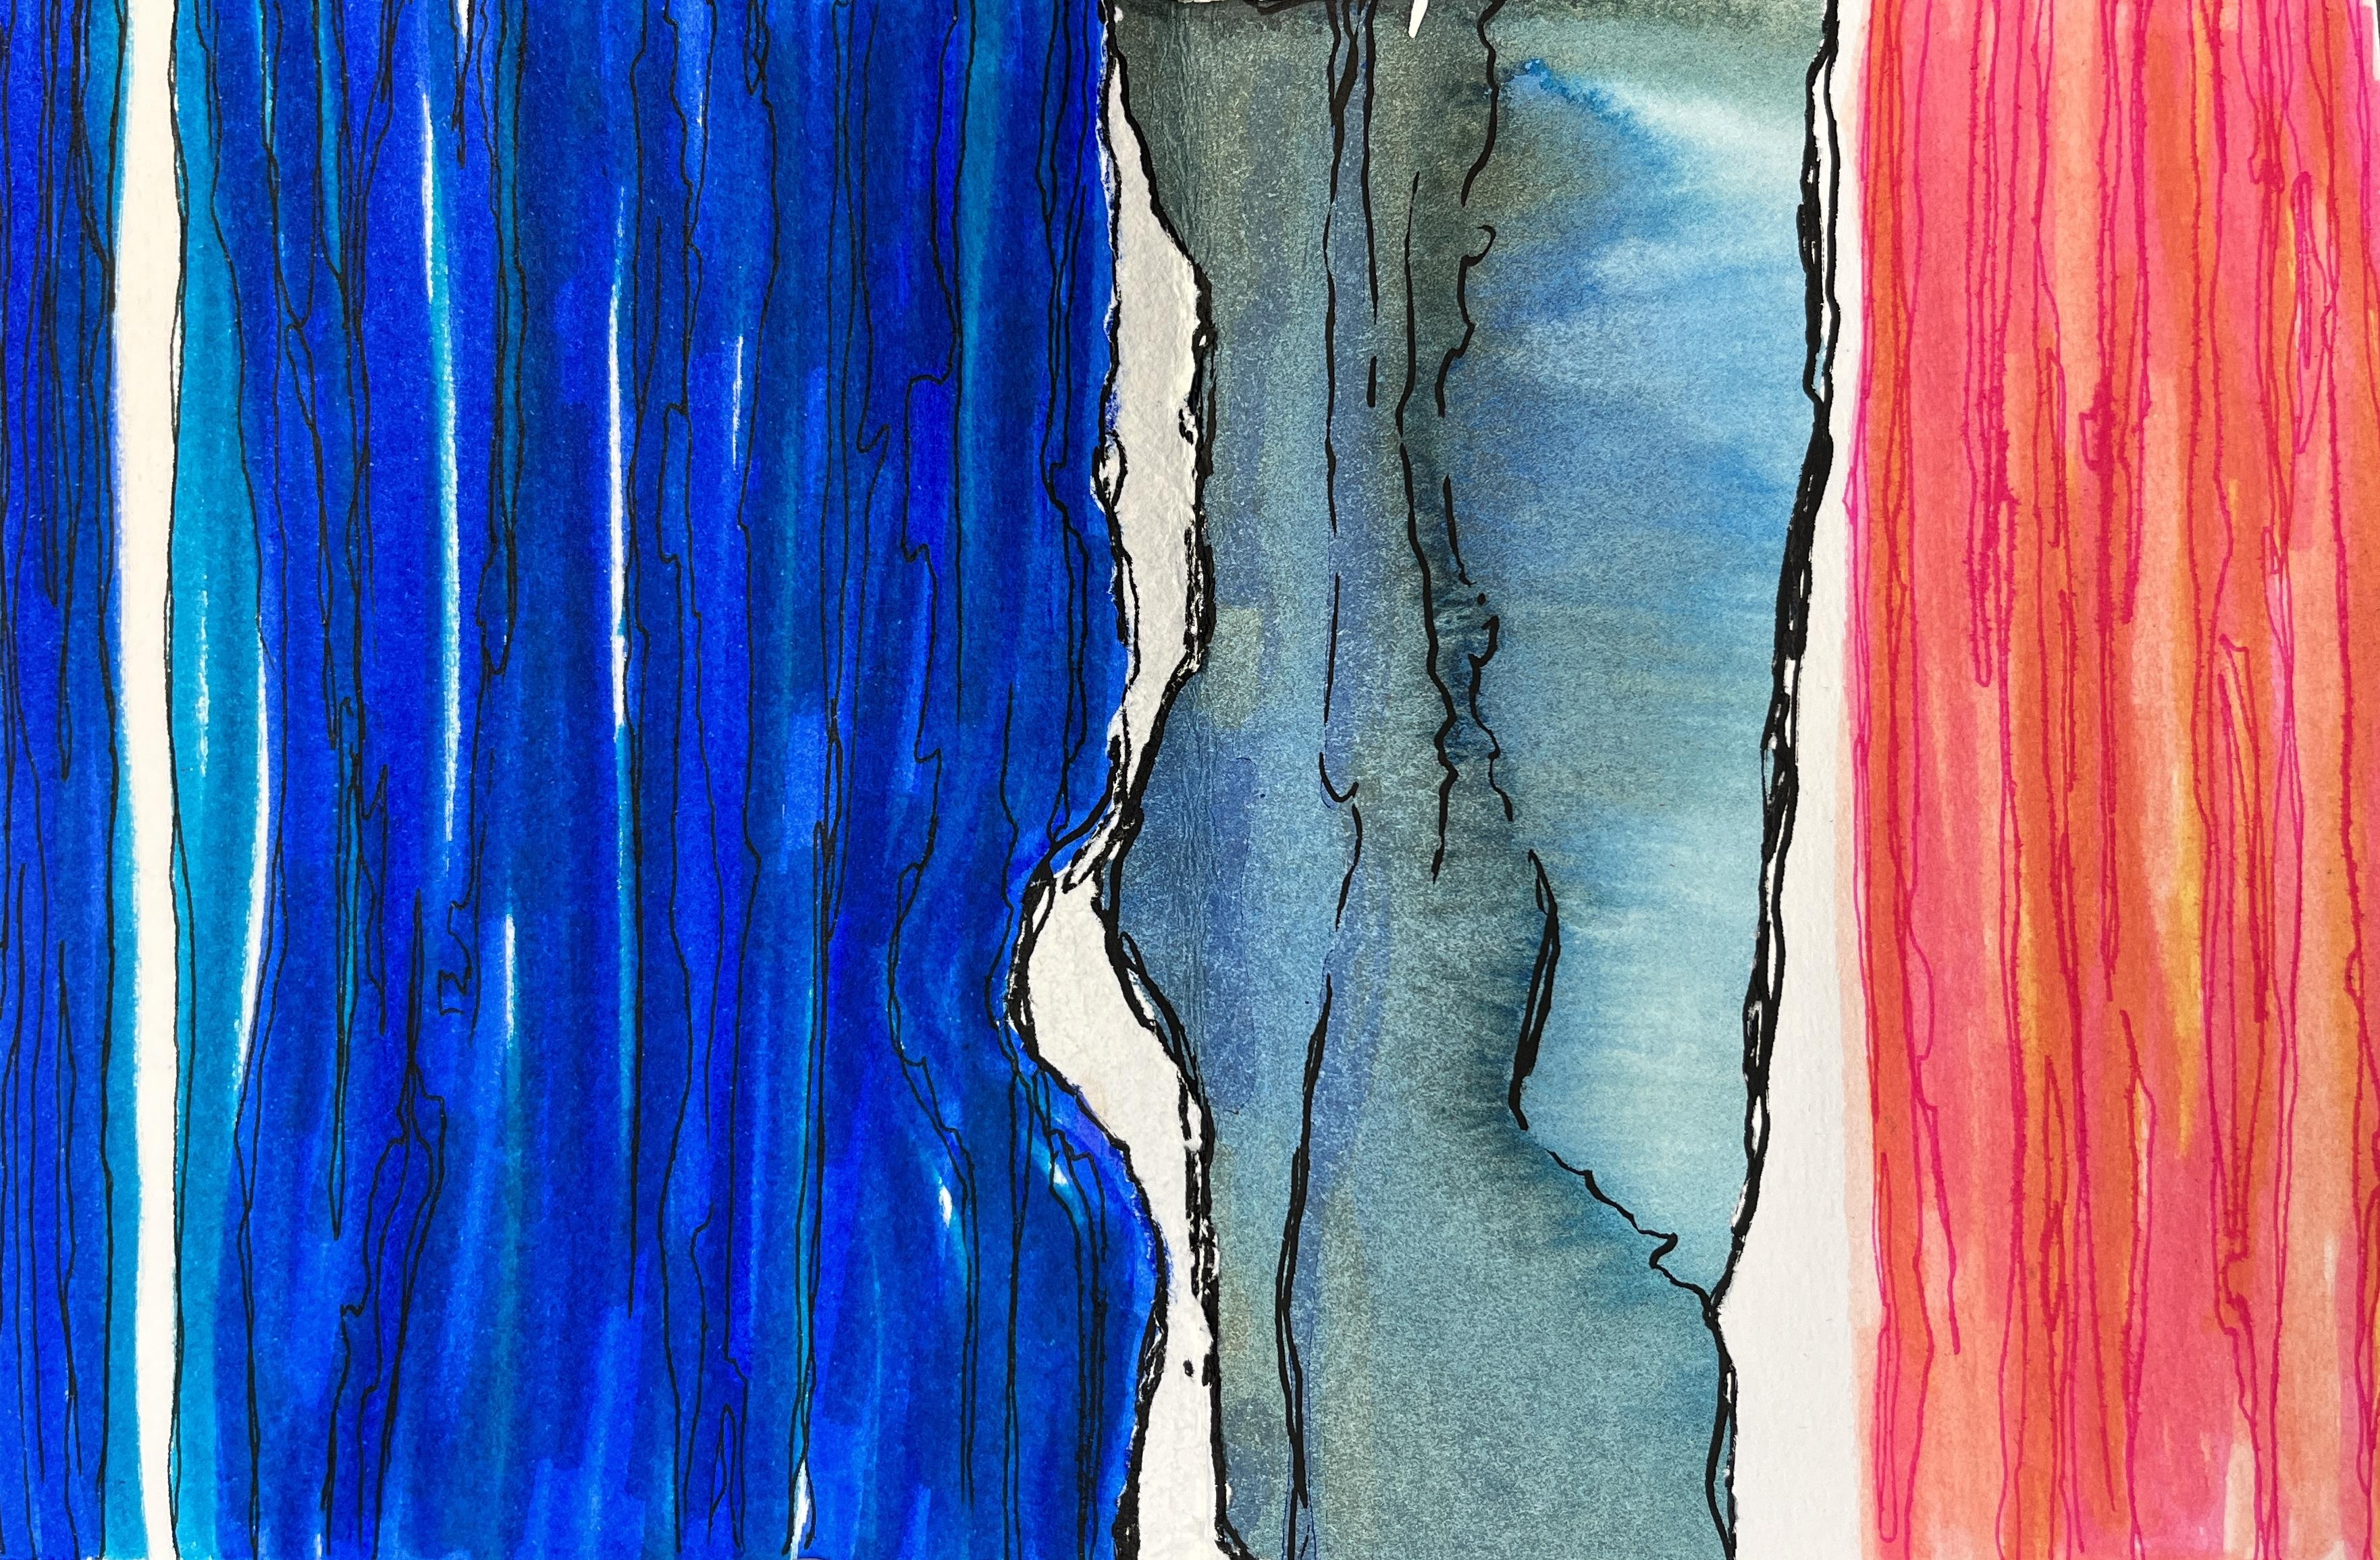
change it completely. So this one I've gone in with some of the color inspired by the pinks up here, but otherwise I've left it. I've just continued
the black line expanding out from
shapes that I saw in some of the
watercolor details Or continuing this rectangular
motif over here on the left. Sometimes what I put into the
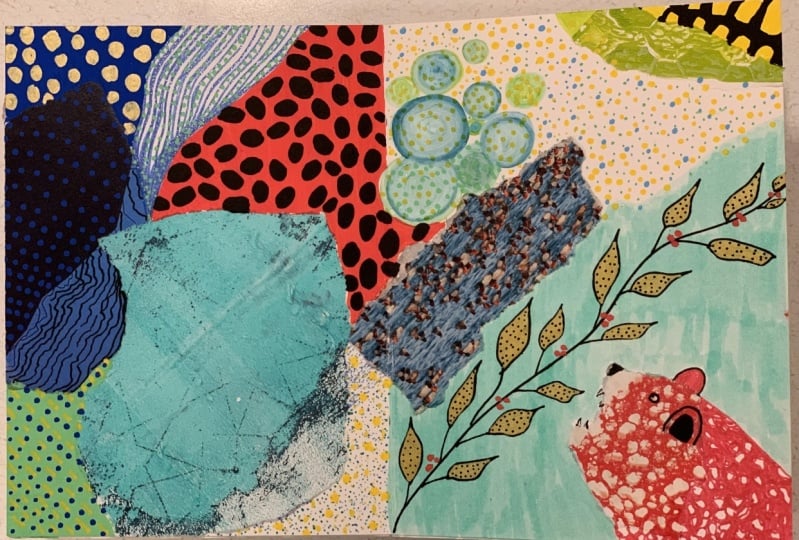
piece is relatively simple and sometimes it gets a
little more complex then, like in this piece where
you can't really tell where the collage begins and ends and the mixed media
techniques begin and end. It's very important to just have fun with it and really play. I do a lot of inspiration
from the color scheme of the collage materials as well as the textures
that they might have. Just continuing out with the materials, this
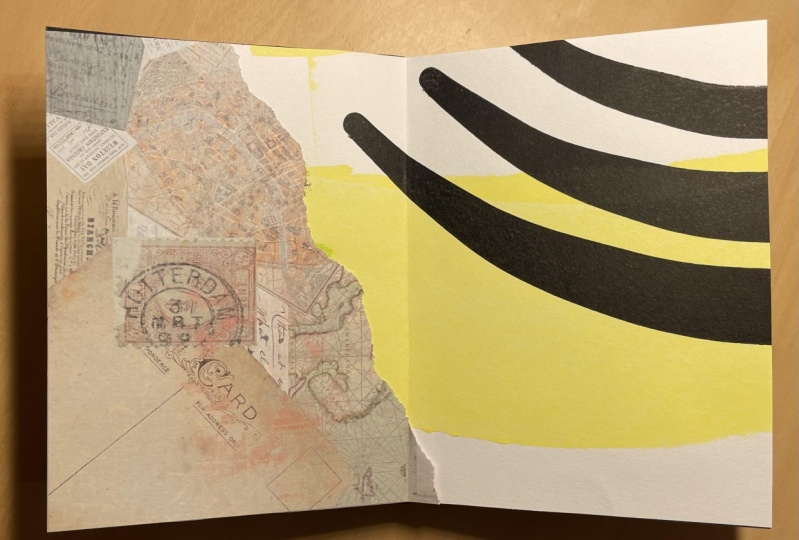
one was all done. This was brush pen.
A little bit of extra work with
some blue fountain pen and some fine liner. We're just going to
have some fun and see what inspirations we can draw from the books
that we created. Sometimes you collage
materials might pop up. I use this book a lot. I take it all over
the place with me. Sometimes I'm going to need
to go back in with some glue and just clean up some
of my collage areas. Let's work back into our book and start getting
inspired by what we see now. The great thing is your book, other than the size and
how we constructed them, the interior of
your book is going to be completely
different than mine. But the application of
mixed meaning materials can relate across any
sketchbook spread. In any cosh, sketchbook
that you or I, or anyone else might create. I'm just going to start
flipping through, looking for some inspiration, seeing what draws my eye, like the openness of this one. The other thing is you
can also decide when a page is finished and when
it's finished For the moment, this one is probably going to be something I work back into
over and over and over again. But this is a great way to start showing you how I begin to incorporate the details
of the collage with the negative space on the page to make it
all come together. Here's my travel art kit bag. This is almost always with
me in my purse or in my car. I always like to have a couple of different brush pens with me. I like to have a fine liner. I really love my pastas. I usually carry a
black and white. At least I'm really interested in different
ballpoint pen colors. This is a great way to get
four colors out of one pen. I really love my fountain pens. I've got my, My
Sailor Food Day One. I've got my Zebra fountain pen. And then I also really
love colored inks. As I said, I have some very inexpensive
colored fountain pens. And then just some other, whatever else I happen to
have around for this piece. I really liked what I did in
that other section where I, for this same sketchbook
page popped up. I want to do what I did there
and continue these lines across and start bridging
these two pieces. The other great thing is I
can paint back into this. I can use colored pencil. I can use any kind of inking
materials I might have. There's really no limit to
what materials you can use. I consider this whole
entire sketchbook to be an exploration of process, and technique, and media. It completely removes the
pressure of what I'm creating. I'm just going to start
continuing those lines. This is a very intuitive
process for me, which is the way
I prefer to work. I like to just let the materials and the moment and the marks and whatever happens along the artistic journey
guide what I create. There might be some
awkward moments in your book that's
happened to me a lot. Just know that he gets
just a sketch book. And it may remain
awkward in the end. But chances are what I've discovered is that it
always resolves itself. I just have to let the materials and the
sketch pages guide me, and then I can find my
way and make it happen. Now, there's a way to
continue the inking. This piece was only
done in pencil. The sketch I tore up never had anything
more going on there. I'm going to go
ahead and just start laying down some color and blocking that in because it's essentially a
mostly blank section, which doesn't happen often
in my collage sketchbooks. I want to take advantage of it, really let that become something that evolves
into something new. I like to go beyond
the collage page. I also like to mirror different colors on
different sides, but I'm going to
come back to that. That red will make
another appearance. But I'm going to come down here. I like to jump around too
because I have a new ideas. And just to start blocking
in some things I said, I tend to lean towards
abstraction in my work. But that doesn't mean that you can't get some
figurative work in here. Some different subject matters. A lot of it's probably going to depend on what you collaged in this color doesn't
really match that. That's not a problem, really. What I want you
to take away from this part of the
process is a sense of play and experimentation and wonder because you're going to discover things
that you never, ever would have made
otherwise through this book. And I think you're
going to happily return back to it
time and time again. Isn't that the best just to
be in the moment of creating? There's no pressure. There's no, there's
no expected outcomes. It's just a, just a chance to play and explore and
see what happens. You're always going
to be surprised and it's going to be wonderful. Sometimes I like to
have colors repeating. I've got this pink going through and I'll come
back in and mirror that brighter pink on the other side then let's see, now
it's time to go. I can have some fun just going
in with my paint markers. So I'm going to
grab my larger one. I also really enjoy metallics. I'm grab some metallic
sharpies and I've got some prisma color markers
that never get enough. These giant pastas are just
so much fun because you can just fill a section so fast if you don't
have any paint markers, but you want to get yourself
a little supply treat. I highly recommend picking
up a black and white pasta. That's what I started with. I just had black and white. And that has been great. It's nice to go
across the pages. That is a great unifying thing. How can you bring
those together? Go ahead and go in with some metallic filling in these lines. Ideally, I don't
want you to spend a ton of time
analyzing your page. I want you to be
really in the moment and aware you're creating. But I really just
want you to have fun and just let the collage and the art supplies
that you're adding for your mixed media just
guide what happens next. This page is turning into
a lot of color blocking, unifying the design
across the sections. The other great thing
about a book like this is that we don't really
have to worry about what our art skill is. That's why it truly is for
creatives of all levels. Because you don't have
to be able to draw, you don't have to be able to, you don't have to
know composition. You can just create
whatever makes you happy. If you do have more art
experience, work that in. Incorporate any subject
matter you like. Whatever materials
you have on hand, even if it's just going in
with some ballpoint pen. This is not done, but this is a way to show you
how you can go in. You can continue the lines, you can mirror the colors. You can unify everything
by going across and connecting across
your collage pieces so that it truly
becomes a whole spread. This is very much a work in progress to the other
book that I made. Pretty random, but I love it. So I'm going to
go ahead and just continue some of these shapes and make them more
tall verticals. Go ahead, go right over
that green collage piece, see what happens after that. Now we have a lot of
white space in this one, so I'm going to go
ahead and get out some different colored inks and do some painting into that. Let's I've got some FW
Pearlescent acrylic ink that I'm excited to
use and then I also have some Liquitex
acrylic ink also. Let's see, I don't have any, but I can make some to make
some. Let's make some green. If you're going to
do any color mixing, if you're new to mixing colors, you want to start with
your lightest color. Grandma Yellow. A little bit of blue.
Now I have green. Keep it very loose, playful. The watercolor section
of paper that is collaged here has some of the
yellow showing through too. So I'm just going to play
with that a little bit. Jump back and forth
between the two. Mix them right on the page. This just gives me even more to work from because
I keep going back and forth between media
because I'm using a wet media, I'm going to have
to let this page before I do other things to it, paint right over it. Made it really pretty.
It's gorgeous. That's the other
really fun thing about mixing right on the paper, you end up with colors
that you weren't trying for that are
just so beautiful. I love that. I threw
some over here to throw in some of
the pearlescent. It doesn't have to make sense, right? Because
we're just playing. This page very much
is one where I'm just embracing the play
and the materials. This is also great to do with pages that you're not
super excited about. Inevitably, because
we randomly collaged, there will be pages where
you're just like, yeah, I just don't know, chant. Those are the best pages
because then you are, you're not attached to them. Whatever happens is fine. If it ends up being a
nice experiment page, then move on and never open that section
again. That's fine. But it could end up being
something you really love. You just never know some
of the pages where I was really not terribly excited
about going into it, but I wanted to work in my book and just went forward anyway. Ended up being some
of my favorites. Don't count an artwork out
until you're all done. You just never know what
it's working its way toward. But coming all right, I'm going to go ahead and let
this one dry and then I will work back into
that one a little later. All right. Now that the water color
is dried on this piece, I want to go back in
and do some art inking. I've got my pastas, I've got some prisma
color markers. This is the point where you
just keep continuing to get inspired by everything
that's going on in this piece. Now I want to take some of this pink and carry
that through. This is a great
opportunity to use these. The cool thing is
prisma Color markers, unlike pastas, don't completely mask out what's happening. I can still see
some of the shine through from the
metallic watercolors. I used metallic acrylic
inks. I love that. I've never actually layered
these two together. Now in an instant obsessed
what's happening here. I'm definitely going to
be doing that again. And I think that has
been the most fun thing about keeping a mixed
media college sketchbook. It's just all of the amazing, inspiring moments
that I've stumbled upon by just focusing on play and experimenting
and seeing what happens. Let's go in with some pasta, add a nice harsh edge. The pasta will completely block
out what's underneath it, but I also want to
just kind of keep it loose so you just
keep having fun. If you're enjoying
something, keep going. If you're not, keep
changing it up like that. And now I want to
add some white jump around, flip it around. There's no set
direction to our books. Whatever feels right
is right here. I think that's all
that one needed. I could go further, but I'm really happy with how
this one turned out. Then I would just keep going to another page and
keep exploring, play around, flip
through your book, see what pages speak to you. Experiment with whatever art
materials you have on hand. Everything I have
tried has worked, and I've had some
really fun discoveries such as the newest one where the reaction of
prisma color over acrylic ink or the
metallic specifically. I would love to see how these turn out and the
different spreads you create. I hope that you will
share those along the way and in the student gallery on
the class projects page. If you have some inspiring
combinations or Aha moments, please be sure to share those
in the discussion section. That is such a wonderful
way for our class to become an even more vibrant community
of creatives and artists. By learning from one another, sharing your project is
really fabulous and including some notes there about what you did and what you think
and how it went, and maybe some ideas you
have for the future. But it would also be
really fun to talk about it and be able to interact
more with each other. Heading over the
discussion section, if there's anything
you want to share, any questions you have,
I'm here to help. And I really love the
community that we have skillshare and that I get to
celebrate all the amazing, fun stuff that is art with you. I hope you are feeling
incredibly inspired and excited to get into your mixed media
college Sketchbooks. Let's head it over to our
final lesson where we wrap up the class before
I send you off to keep creating in what
will hopefully become a long term new art
practice for you. We'll see you in
our final lesson.
9. Final Thoughts: Thank you so much for taking
this class and exploring handmade sketchbooks as well as collage mixed
media techniques. I hope you are feeling
inspired and energized and that you just can't
wait to keep working back into your mixed
media collage sketchbook. I'd love to see how your
sketchbooks turned out and a few of your mixed media
collage sketchbook spreads. So I really hope
that you will head over to the class
project section and upload some photos
of what you are working on to the
student gallery. Remembering that you
can come back any time and add as many
more photos as you like. This type of class is one where the learning and the experience
go on and on and on. I really hope you will come back several times and update
your class project so that we can all get inspired by
each other and excited by what we're all creating and continue on this artistic
journey together. I'd also really appreciate it if you took the time
to leave a review. Student feedback is the best way for me to continue
growing as a teacher. And it means the world to me to hear what my
students think about my classes so that I can continue to improve
them and grow. As here on skill share as well as in my other
teaching opportunities. Thank you in advance for your time and I
really appreciate, and I'm excited to hear what you think about how this class went. I really enjoy sharing my artistic journey on my social media
channels and Youtube, but I also love celebrating what my students have created
in their classes. If you are interested
in your class project, you can add your social media
handle to your text and then I can as I share
your work on line, celebrating all of the
beautiful sketchbook spreads that I know our
class is going to create. If you post your work on line, I really hope that
you will tag me, a Elizabeth underscore welfare, so that I can see all the
fun that you're having as you continue to work back into
your mixed media collage, sketchbooks and continue
this artistic practice. You can also join
me over on Youtube where I share art
process videos, time lapses of what
I'm working on, different art adventures
that I go on, and what I'm up to. If you would like to stay up to date on my newest classes, be sure to click the Follow
button below till next time.
 Elisabeth Wellfare, Artist, Art Educator