Transcripts
1. Introduction: The, Hi, I'm Elizabeth, and welcome to my
class Savador Dali inspired Mixed Media
collage Landscapes. In this class, I focus on
the artist Savadar Dali, who is one of my favorites. And I think the artists that
got me most excited about the possibilities of creativity and art making as
a young artist. Dali has 1 million
different ways that he explored
creativity in his work, and the amount of work that
he created is exhaustive. We are going to be taking
the ideas of surrealism, surrealistic dreamlike
imagery in the style of Dali to get inspired in our
own mixed media art practice. We are going to be working with landscapes and then collaging in different magazine elements to give that surreal
feeling to our pieces. Then we're going to go back into our collaged drawn
landscapes to add different drawn details that
will really kind of provide a way to layer in some of the symbolic imagery
that Dolly explored, as well as some symbolic
imagery that relates to you personally as we create our own surrealist mixed
media collage artworks. This class is intended
for creatives that love exploring art
history and the work of different artists and
art movements as we get inspired and weave those into
our own artistic practice. This is a great class
to kind of take a dive into a really fun art
movement from long ago, kind of create a more
contemporary twist as we use magazine imagery, and to explore different ways that we can incorporate
this practice into our own art making as we
continue to challenge and grow creatively and through
different inspirations. I hope you'll join me in class as we learn a little
bit more about the surrealist imagery and
symbolism of Salvador Dali. Over to the next lesson
to learn a little bit more about our class
project. See you soon.
3. Materials: The projects for
our Salvador Dali inspired mixed media landscape
collage are pretty basic. We are going to have
our background paper. So I've got some white
mixed media paper because I know that I'm
going to be working into this with soft pastel to capture the essence
of my landscape. So we're going to use
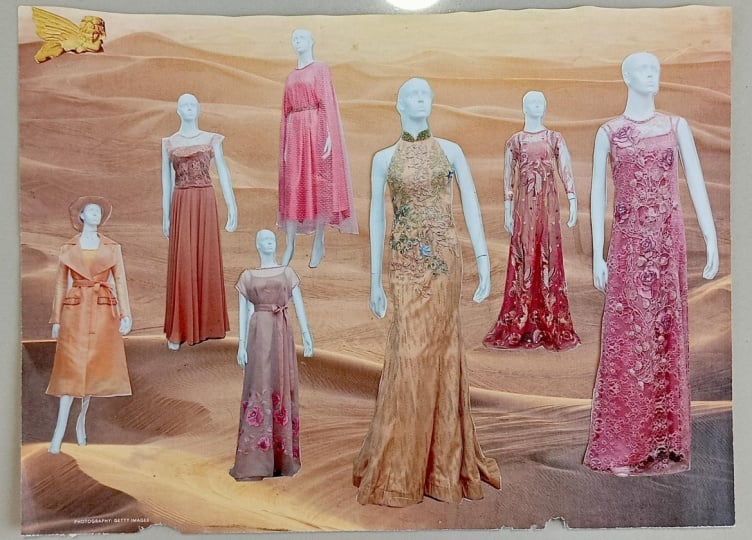
magazine images for the collage elements and then we're going to be
cutting and gluing, so we need scissors and a glue. So I've got different
images that I've pulled from
various magazines. These ones happen to come
from National Geographic. Really fabulous imagery that I'm curious to kind
of work in there, but you could really
pull your imagery from any magazines that
you have access to. And if you don't have magazines, what you can always do is, I know at our local library, people are always
putting magazines in a donation box for anybody to kind of come
along and grab some more. That's how I came across
national geographics recently. You could also ask at maybe
your doctor's office. Usually there's magazines
out for people to look at. So maybe when they're
done with them, you could ask them to kind
of hang on to or I've also noticed our hair salon
in town has magazines. That would be
another place where you could consider asking, could I have them
when you're ready to kind of refresh the options. You can also find, especially
national geographics, usually at thrift stores. I know in the US, I've
seen them available there. There's lots of different
places to find magazines, if you need to get
some and don't have some subscriptions or
access to them already. And then after we create our soft pastel imagery
and collage back into it, we're going to go back in
and do a little bit of more additional drawing
details to really kind of elevate the cereal
elements of our artworks. So I've got a fine liner on hand for some nice delicate
black line work. You could also use a
Sharpie if you wanted to. But I found for this one that the fine liner really is the better way to go
just because it kind of blends a little
bit better and has kind of a nice aesthetic
line quality when you're merging it with soft
pastel and collage elements. And then I've also got
some color pencils on hand that I might incorporate just to kind of
give some pops of color. I might also kind of grab
some of my paint pens, too. It just depends on where
the collage takes me. What I'm going to do is
I'm going to go through my magazine images and
source out inspiration. Then I'm going to create
my soft pastel landscape. Then I'm going to work in my collage elements and kind of build up the
composition as I go. And then I'm going
to kind of assess where do I want to go with adding even more
surrealism elements through the drawing portion. So that's kind of an
important key here. So it's going to feel very incomplete at
different stages. The soft pastel is really just to kind of loosely
map in a landscape similar to the Catalan Spain landscapes that Dali did in a
lot of his pieces. The collage element really starts to bring in the
surreal aspects of it, but I find that the mixed
media drawing element of this class project is really what takes it full circle and really unifies the
pieces there's a bunch of resources
over on the projects and resources section of class for surreal inspiration and looking at the different imagery
that Dali worked with. He did a lot of repetitive
symbolic imagery and explain what those
symbols meant to him. If your class project,
you can think about, do you want to go and create a Dali ask surrealism
collage landscape or do you want to
make something that's a little bit more personal to you and incorporate
symbolism that really speaks to
your sensibilities and what you want to
express in your project. It'll be really fun to see
what route everybody takes. These are all the
supplies that you need, You're welcome to add any other additional materials
that you want to, but this is what I will
be using to create my Salvador Dali
inspired class project. Let's head over to
the next lesson and we'll begin going through our magazines to source some surreal inspiration.
See you soon.
4. Choosing Magazine Images: So the first thing
that we need to do is we need to kind of create a collection of magazine images that we might want to
incorporate into our project. For this one, I like to do
a mix of some land masses, some different elements of nature that I can
work in to kind of take my basic soft
pastel landscape and really kind of start
defining it a little bit more. And doing that with the collage portion is a really great idea. So I might look at this image and I might tear
off both pieces. Because this would
be a great thing to use in my collage
because I can just use I can cut out the island there and then
kind of add that to my piece. And then actually,
natal geographic is great because it often has
some double fold out one. So this gives me two
different options. I can work them together, or I can use just one or both
of them in some other way. Figures like this are
also really great. It's kind of nice
to have some people or animals in my piece, so I'm going to actually
grab that one, too. Let's see. What other would
be some other good ones? When I find people, I like to
find them doing something. So someone who's actively
engaged in something versus someone like this gentleman who has posed for the
camera. You can do that. You can absolutely
have a figure that's, you know, kind of
confronting the viewer. That would be a really
interesting element to do, too. I just personally like
to have someone who's kind of in the act
of doing something so that it creates
kind of like we're observing the scene versus we're engaging with it directly. Kind of like a boat like
this would be really nice, and we really want to think
about variety for scale. But at this point in the
process, I'm really, truly just kind of flipping through pages and seeing
what's inspiring to me. You can absolutely incorporate buildings in there
if you want to. Actually, this wall
is really interesting and maybe even keeping the
palm trees is pretty cool. There's no rhyme
or reason to it, and surrealism is
very much about realistic dream like imagery
and the subconscious. So, the more
bizarre, the better, but we're also kind
of playing with the normal, too, kind of, how do we weave in
things that aren't kind of shocking and surprising and then giving them
kind of that feeling. Like, these rocks
are pretty great. And then maybe you even look
to some other magazines. The national geographic
ones are really awesome, but even ones like this, you've got some pretty
great stuff happening. This is an architectural
digest magazine. So there's a lot of fun
architectural details from interiors and exteriors, might be fun to see
what's happening here. You can decide how tedious
you want to get with cutting out your
collage options. I'm not sure how
tedious I want to be, so I might lean away from
some of the images in here, although it'd be
really interesting to throw a green couch. In a landscape,
kind of play with that inside outside
element. You're really fun. So you can kind of start
curating as you pull or you can kind of
just start pulling images that are
interesting to you. You'll have images
that work really well that make sense
with this project, and then ones that when you kind of get
down to it and you keep narrowing
down your options, won't make any sense at all. But you can absolutely find
other ways to incorporate them into future
projects of some sort. So don't limit
yourself just yet. But the goal is to find some interesting I don't know why this wine glass
is interesting. To find some
interesting pieces that then might work well
with what we're doing. And if you happen
to find some other great collage elements that you can incorporate into something else in the future,
that's a bonus. I'm always kind of looking
through magazines to source images for future
unknown artworks. It's really fun. Tend to
flip through and kind of just collect various things. All I also have a bunch of other images that
I've already chosen. So I've got some different
landscape elements that I can kind of pull
pieces out of. I love this idea
of this glacier, kind of the floating thing. I may keep the sailboat,
I may not. Who knows? I also love these
really tiny guys, you know, these
different military men. This shipwreck that happened. Then it's always
really fun to get the different
historical elements too because we can play on the different periods
of history and the fact that merging them together
doesn't make a ton of sense. Then once you have your
magazines picked out, then if you want to, you
can start sorting them. I've got landscape elements
that I might put in one pile. I also grab some other
ones that aren't photos. They're illustrations within it, but that's another
fun thing to do. It's kind of have
these different ones. I might separate my figures from my objects and then I
have my animals, too. I'm probably just going to
throw those in with my people. For the sake of it. I'm just kind of keeping it simplified. This car would go in objects. I got location. Got people, more people. You kind of just keep going
like that until you get everything sorted so that you can pick and choose through. The sorting process kind of helps you really
see what you have, and then the more
you see the images, the more you kind of get
inspired by what's going on. You also might find
that like, Oh, I wish I had more objects or
I wish I had more people, whatever it might be,
then you can kind of go back to your
magazine Sash. I've got landscape elements. I've got people and animals, and then I've got objects. So now what I'm going to do is I'm going to start
cutting them out. And kind of really seeing what they look
like when they're separated from their background because that will
kind of change it. I'm going to kind of
cut out a couple of them that I know I'm going to
want to use in the future, and then I might leave some other ones that
are a little less exciting to me off
to the side because I can always go back
and cut out more. So let's cut out
some of these so we have our collage
elements ready to go. Some of the elements that we're cutting out are kind of small, so you can absolutely use an
exacto knife if you prefer. Again, it kind of
just depends on how close of a cut you want to get and how tedious you
want to be about it. I think the more elements
you add to your picture, the more interesting
it's gonna be. Like, I'm not gonna cut around
all of his folded fingers. It's just not really
necessary. And I can always clean
it up later too. So I'm gonna not worry
about going in too close where his arm comes up. I'm just going to
get most of him. Sometimes it's easier to kind
of cut off that excess and then go in and cut
the closer bits. I do like that he's kind of got this rope that's keeping him anchored as he explores the waters. So I'm
going to leave it. I'm going to leave
him just like that. And I'm going to keep
going and cut out some more parts to my cliche. So after I get a pile
of things cut out, I will be back to talk more about the next stage
of the project. That's a good amount. So I'm going to go ahead and set my other pieces
off to the side. I'm gonna throw away my scraps, and I am going to head it over to the next
lesson to start doing my soft pastel
landscape background. I'll see you soon.
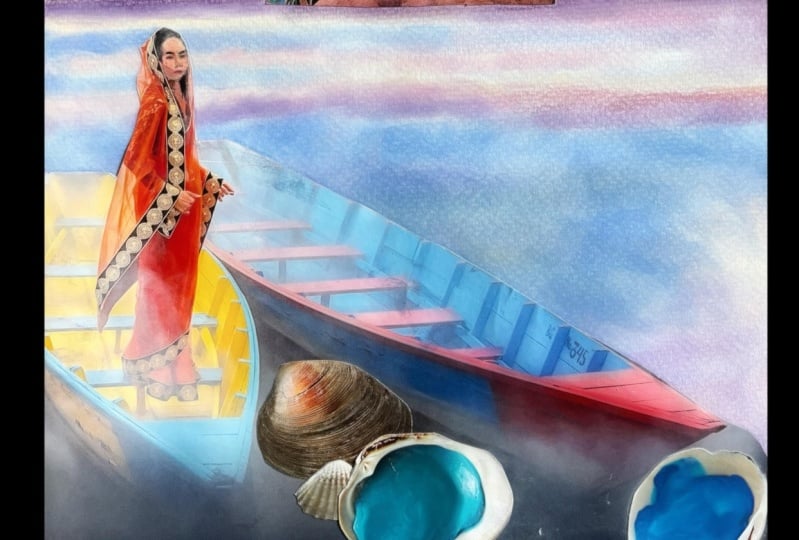
5. Pastel Landscape: So now I'm going to create the surreal, very simple landscape. So we're looking at the
work of Salvador Dali, and we're getting
inspired by what he did. And a lot of his pieces are kind of the foundation
of them are these really kind of
open barren landscapes that are inspired by the
landscapes of his childhood. And he ended up living the bulk of his life in the town
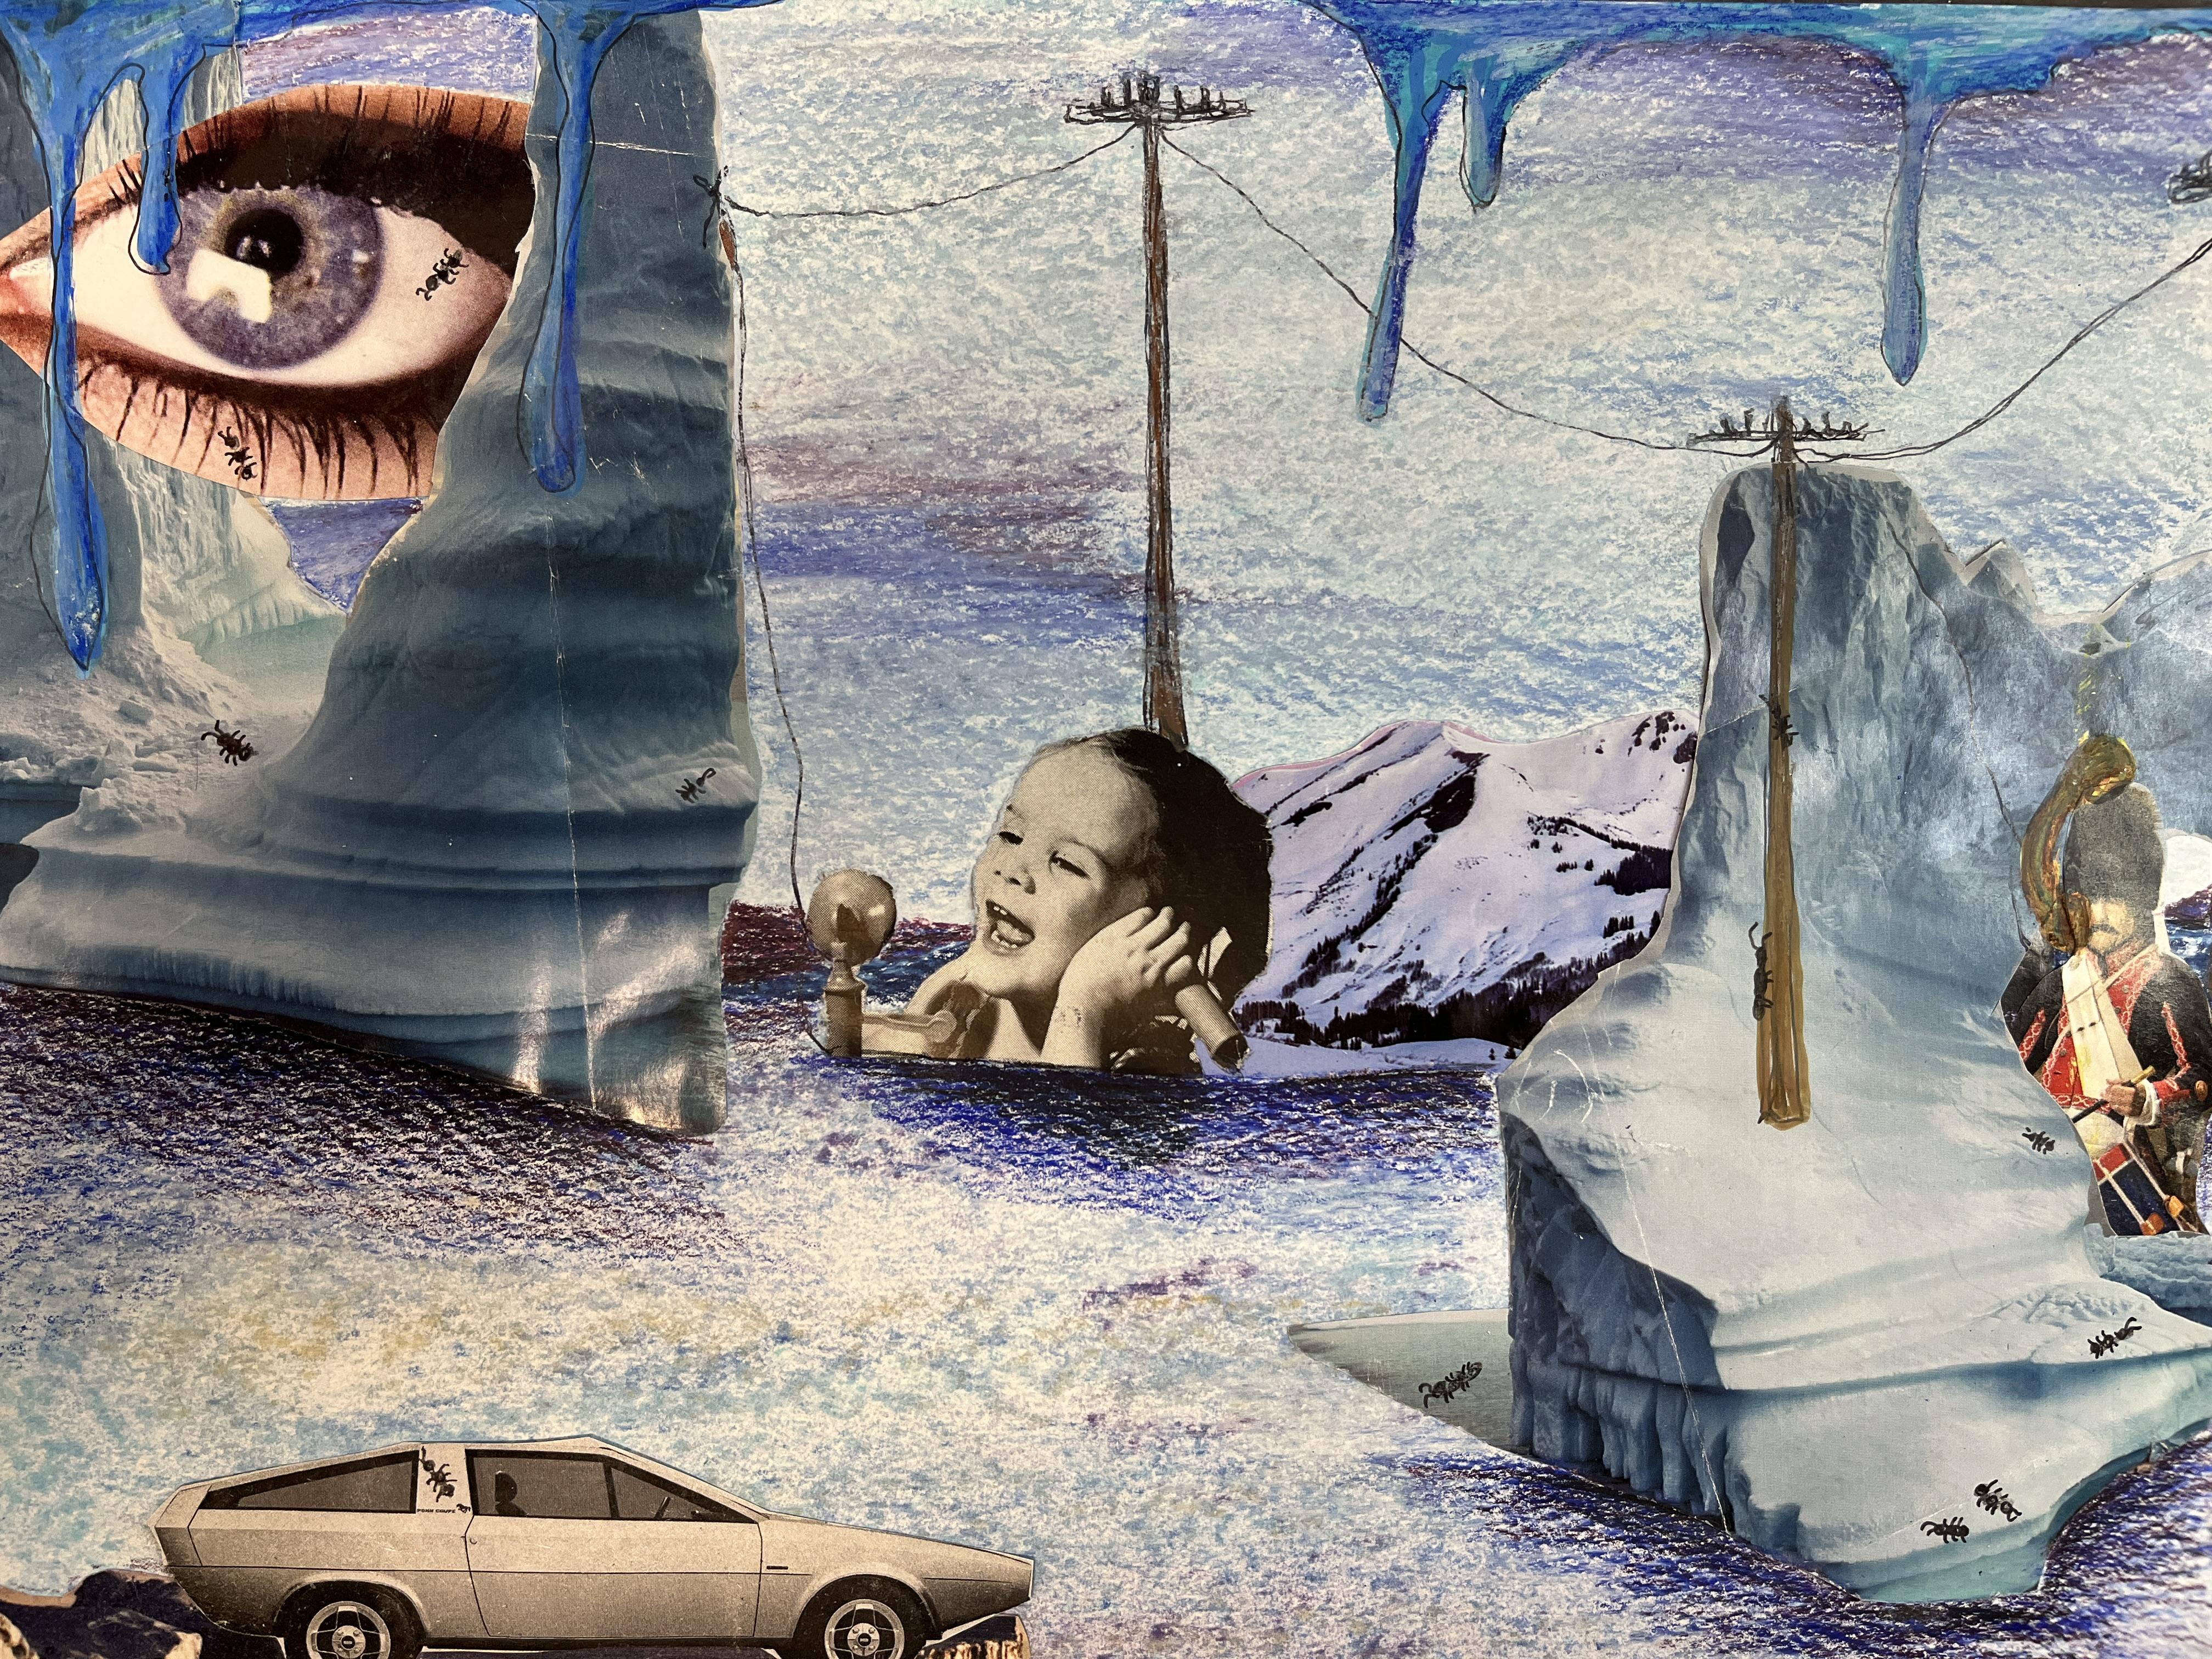
that he grew up in. So what I want to do is I
want to kind of map that out. But I have a lot of images that kind of I really
want to use the icebergs. So I'm going to kind of do more. I'm going to modify
it a little bit because we're getting
inspired by the artist. We're not trying to mimic them. So I think what I
want to do first is kind of map out sky and ground. But I think I want to
play with the idea of it being more of a snowy landscape and then I can play with
the surrealism there. I'm going to lay down a
dusting of this light blue, and then I'm going to put in some little bits of darker blue. Want to maybe this
will be my ground. Maybe it's water,
maybe it's ice. I don't know yet. Then I'm using soft pastels that are
well loved and dirty, but I also want to let
the color mixing happen. I'm going to lay lay
some white down to do a little bit of blending and also mute my
colors a little bit. I don't want a ton of
pastel necessarily because this is just the
first step in my piece. But I do also want to
play with some color. I'm going to put a
little bit of purple in and see what that does. A lot of this is going
to end up getting hidden behind our collage
pieces and then drawn over. If you are someone who
doesn't enjoy the feeling of soft pastel or charcoal
or chalk on your fingers, you can absolutely blend this with a Kleenex
on your hand. I feel like you add the day
and you have some art on you, then it's been a good day. I also don't mind getting
messy for my process. I'm going to just go
for it and embrace it. The more you push
down with the pastel, the darker the color is going
to be the more vibrant. And then you can
just play with it. This is just essentially some patches of
color at this point. I could maybe put in a little
bit of land if I wanted to. Maybe there's a little
bit of land happening or just another color to warm it up and define the
space a little bit. I'm really just playing
and having a good time. I do want to a little bit more value definition to my sky. I'm going to go ahead and go
in there with a little bit. More pastel. I want to have a crispness to where my
earth meets my ground. This is really loose. We're really just starting
to define the space. But that's all I want to
do for my soft paste. I can show you on some of
the other pieces that I've done for this project,
how that changes. This one is alluding
to the soft one. I'm going to go ahead
and quick, clean up my art table and get
the extra dust off, and then let's talk
about this piece versus some of the
other examples. So here's the foundation for where this next piece
is going to go. But let's talk about
where I started. The very first piece that I did for this class was this one. In this piece, all I did
was I took my two blues, my light blue, my dark blue, and I just roughed in some sky, and then you can still see
a little bit of the land. I just put a little bit of
my dark and light browns to map that out, and
that's all I did. So it's going to go from something this simple to
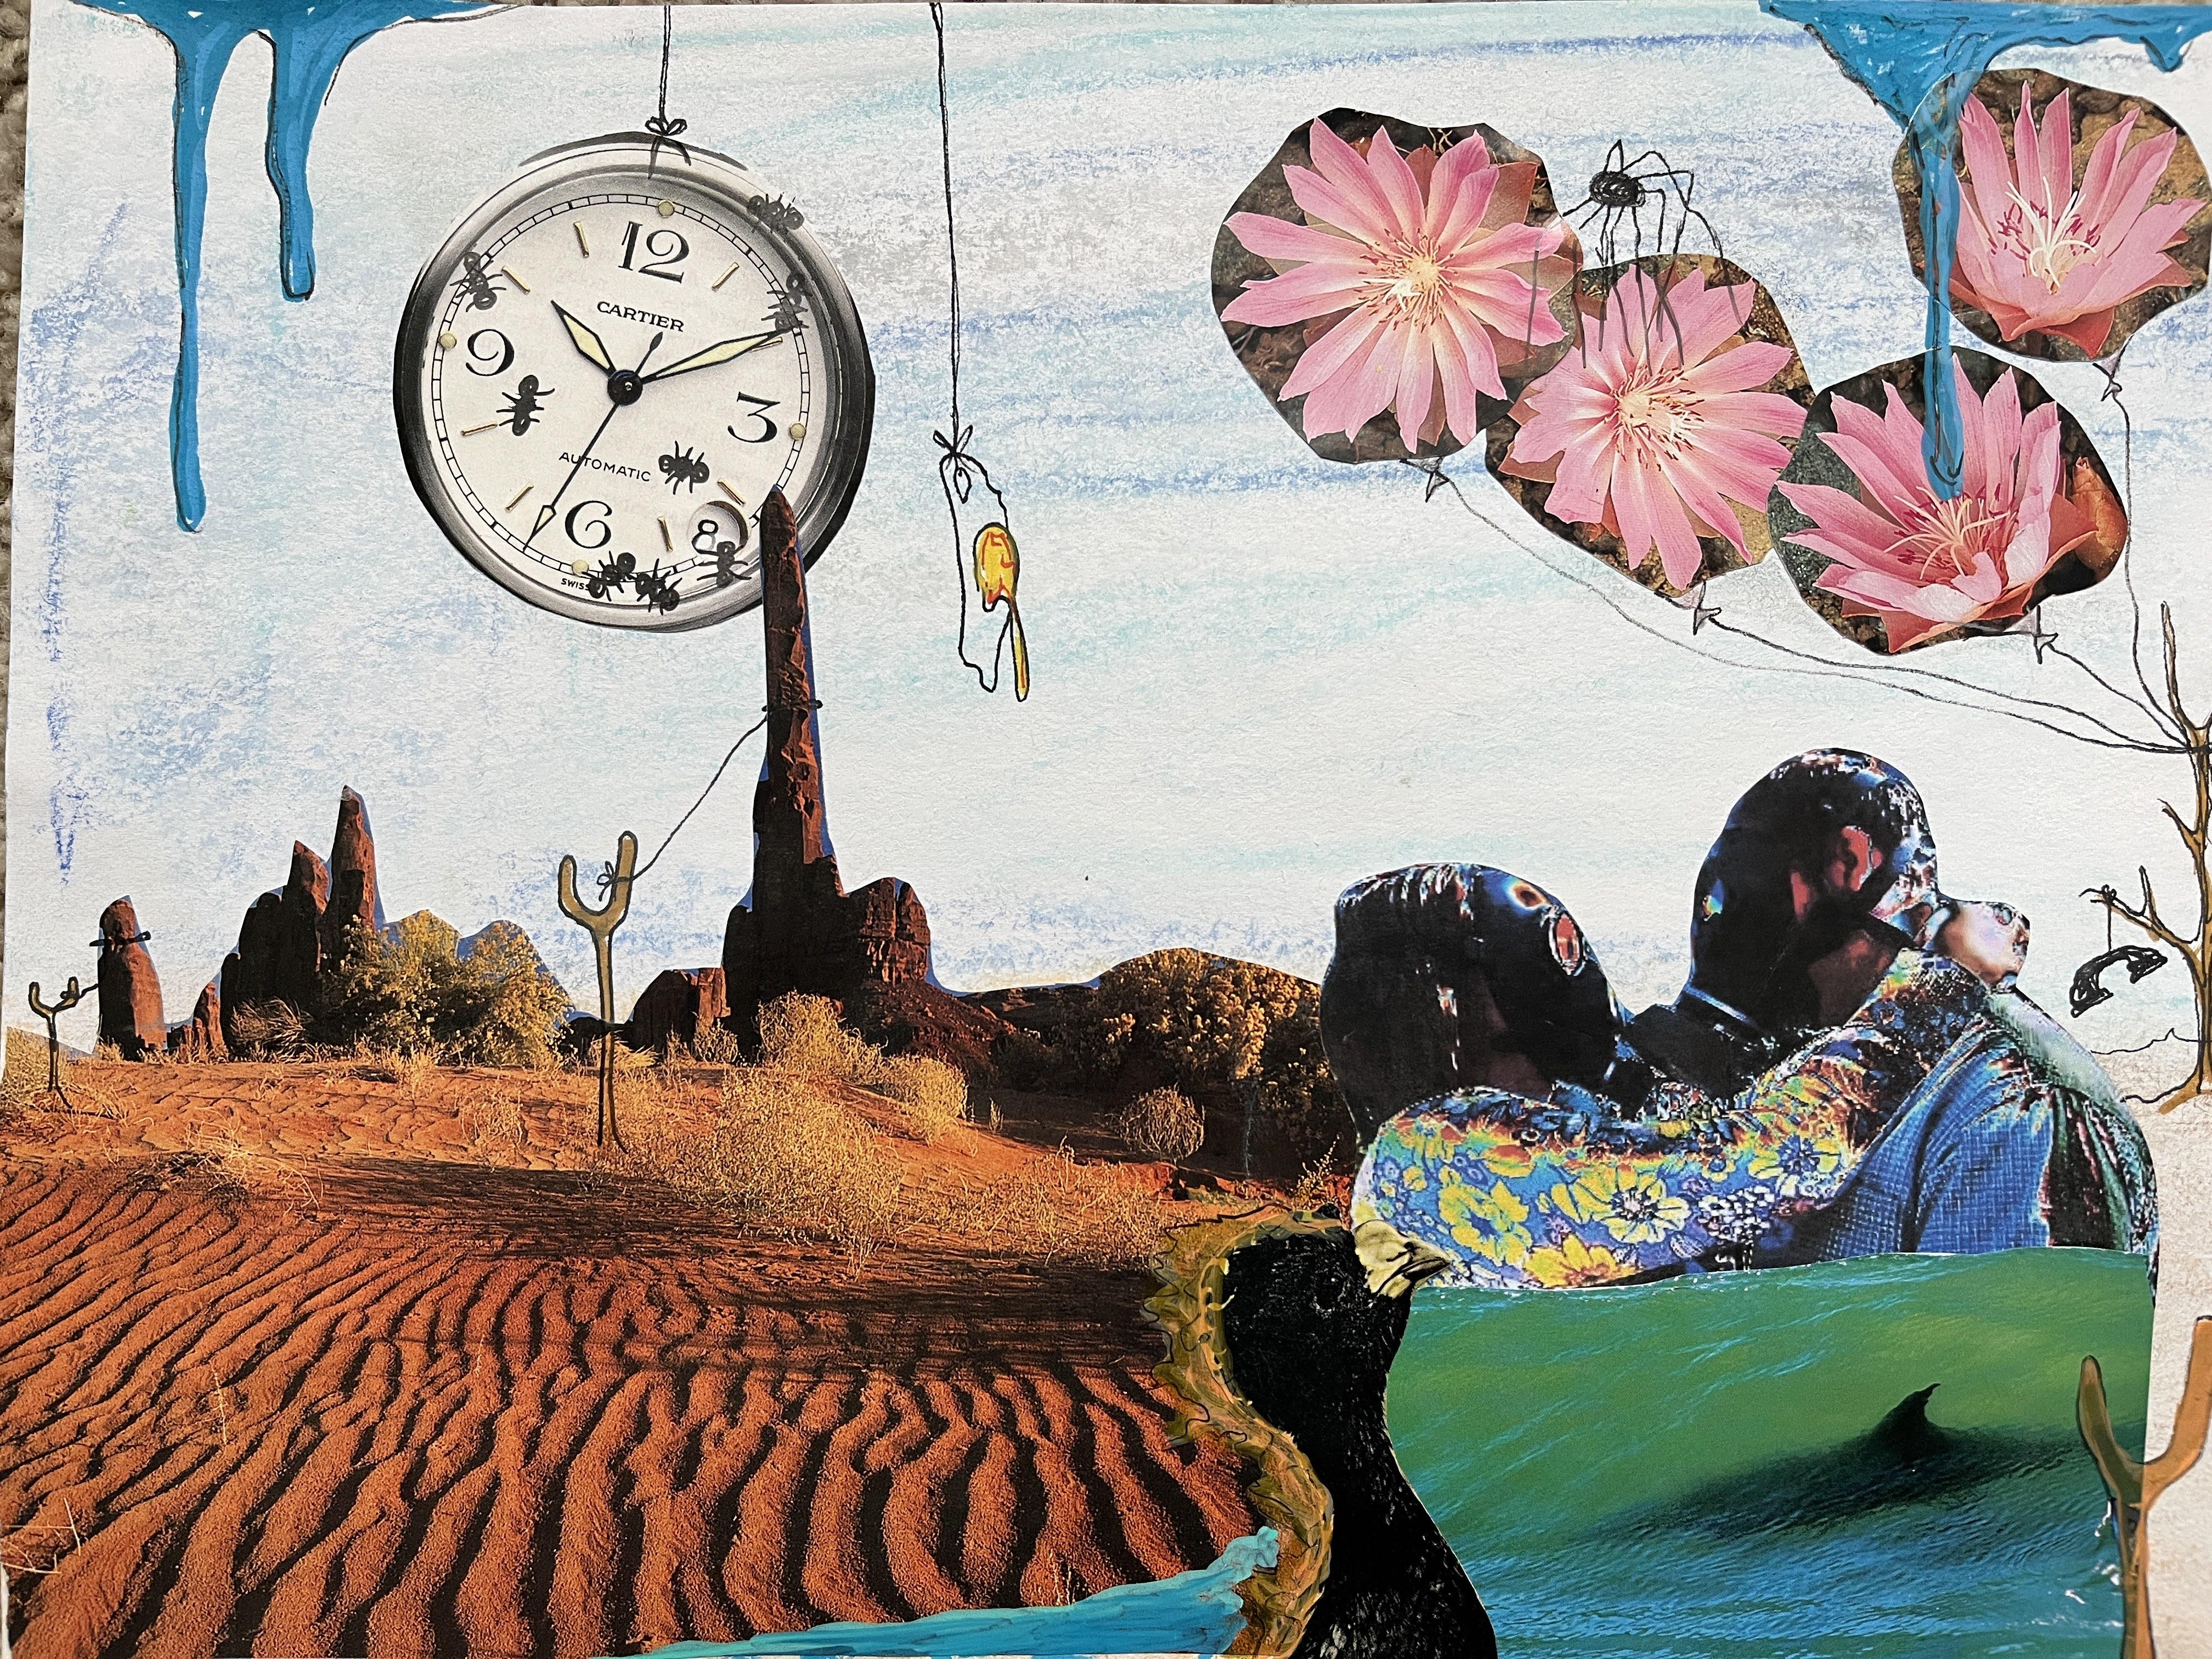
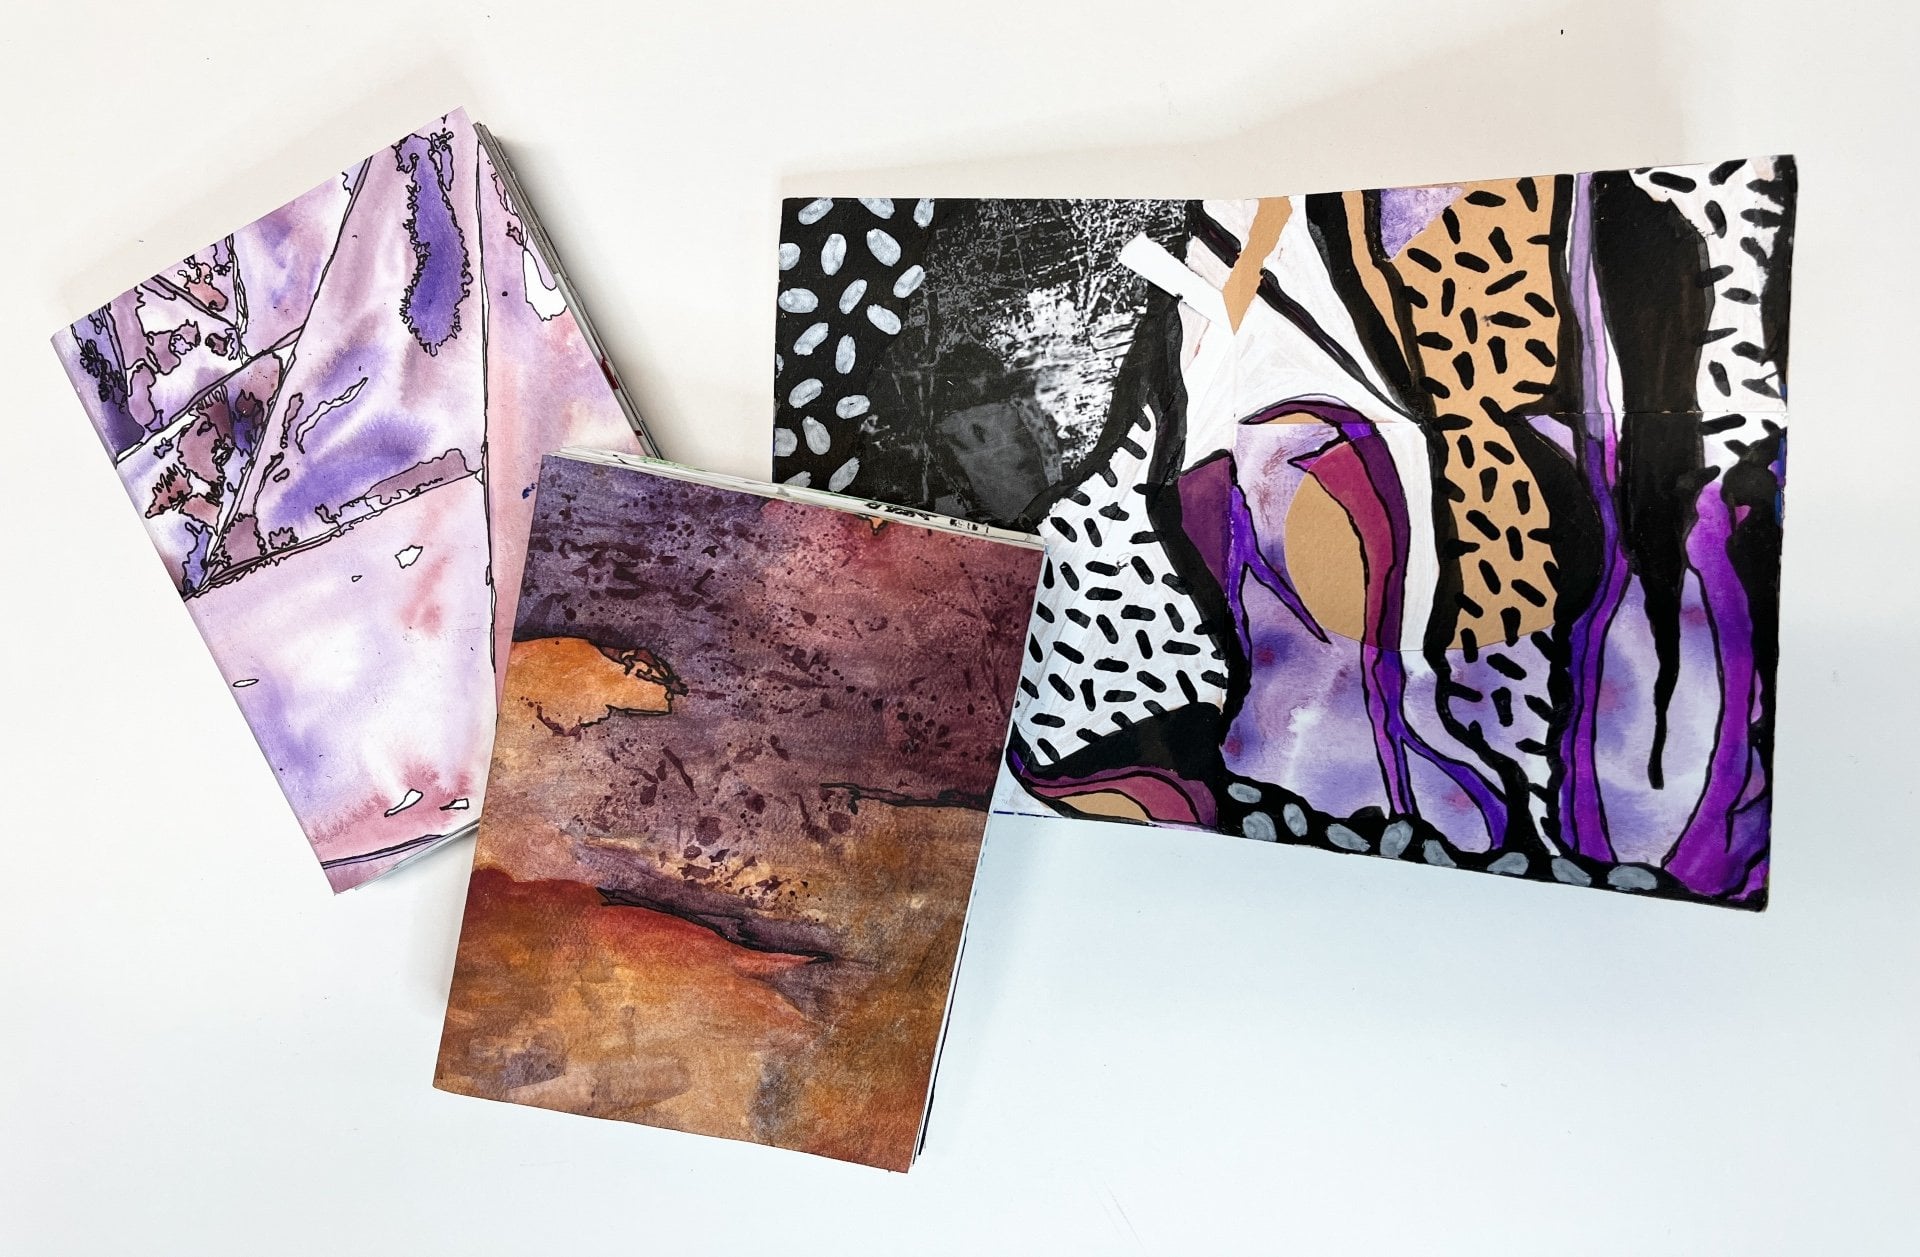
something this intricate. Now, if we look at
another example, this one is completely done. I've done all of the
different steps. This was the very first one I created as part of this class. Here is one that is in the
process of being work done. So the colors are
much more vibrant. We look at compare the sky and this sky and this
ground and this ground. I went a little bit more intense with my colors because
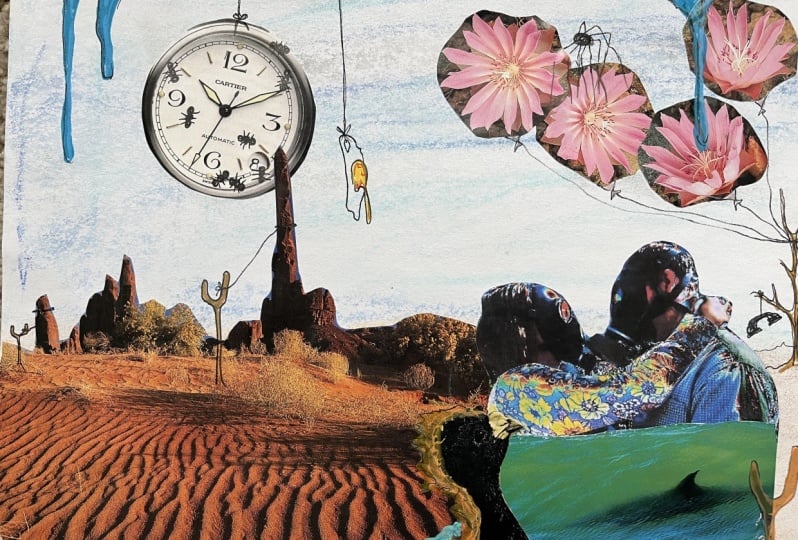
I felt like it. And then this one is at
an incomplete stage. I've collaged in my bits and then I've started going in with brush pen for this one, which is really you can use whatever drawing
materials you want to. This one still needs
the fine liner and some colored pencil and
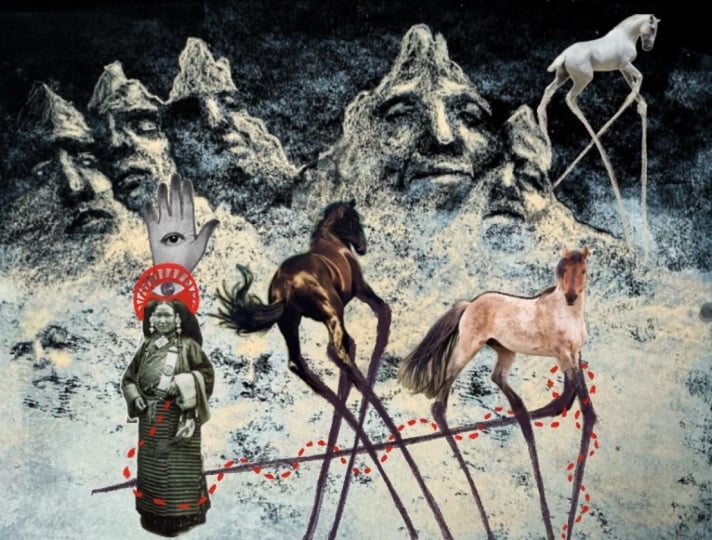
some more brush pen details. I'm just starting to define the landscape a little bit more. This one I relied more
on the collage pieces. To define the different
elements of the land. Then I have just tiny bits of the original soft
pestil showing through. This one is a lot more
open and has more of a balance between the collage
and the drawn in landscape, and then I'm doing more
in the background. Then I can decide
where I want to go, but it's very much
going to be informed by the collage
pieces that I use. We're going to head it
over to the next lesson to show how you go
from this to this. I'll see you soon.
6. Collage: So now I'm ready to start
collaging my piece. So I've got my pastel
background just to kind of give an illusion of sky and ground.
I've got my glue stick. I've got a scrap piece of
paper because I like to do my gluing here so that my
art table stays clean, and I've got my giant pile of options with a couple
more that I've added on. So now we get to play
around and kind of figure out what is
going to go where. And remember, the goal is
realistic dream like imagery. So because we're working
with magazine images, we're going to get the realism, but it's obviously going to
be random and kind of wild. And then this can be kind
of fun and whimsical. This can be bizarre. There's really, you know, there's no rules to this point. You just kind of have fun and play around with
layering things. And it actually might
have been kind of cooler to have done
some earth tones. So this part is really, you know, having some fun, experimenting,
playing around and see what makes sense to you. Or what doesn't make sense
to you for that matter, because, you know, realist
or dream like imagery. So anywhere I've got,
like, the straight cuts, that tends to be what I
try to kind of put off to the side like that because then it's where it
came from in the magazine. Just kind of fun. And then you can play around with what
comes peeking through. This could be really fun. So
that giant frog is there, and then positioning this, so he's kind of peeking out. Scale is something that the surrealists had a
lot of fun with, especially some of the other
surrealists like RenemaGrt. But Dolly too, Dolly also
definitely played with scale. That's a pretty fun way and an easy way to have
something go surreal on you. The other thing you can
do is you can define your landscape a
little bit more. You just have to figure out
what makes the most sense in this nonsensical collage
system we have going on here. And then I'm going to be drawing in a bunch more elements, too. So it takes a little bit of
imagination to kind of figure out how to put this
stuff together. I like these two
pieces together. I think what I might do is
attach that so I don't forget. Then I use my glue over
here on my scrap paper. That way, the mass
is fairly contained. Especially since we're
working mixed media. I don't want to get any glue in the soft pastleUntil I'm ready to glute things
down permanently. Actually, I might
take this guy out. Looks nice and random. Then maybe this
iceberg comes down. It can also get completely
cut off. That's kind of nice. I can also then use
my brush pens or my brush pens or colored pencils or paint markers to kind of, like, fill in, like, if I wanted this sheet of ice or like this section where I can kind of see the ice
underneath to continue. I can draw that in,
which is pretty great. It's a pretty great option. He also can cut out more images. I think we need the
car and the boat? This is kind of where
you start editing. What is gonna go away? And then kind of keep taking things in and taking things out and kind of deciding What's
working, what's not? And, you know, what's
your ultimate goal? And it doesn't have to
make any sense at all, because I'm thinking about
realistic dream like imagery. Alright, let's find some
more images to add to this. I can always go back
to my other ones. I have a stack of ones I
haven't trimmed up yet, but I'm just not sure where
I want this to go quite yet. I'm going to use him sometime. Not in the ties, but I can see his giant scale and this perspective being something really fun for another idea. I've been collecting magazine things for a very long time. We used to do this as part of my high school art class
when I was a student. We would have a visual
diary, I guess. The idea was to have
references to we could go through a draw
from and get inspired by, it's something that was also
continued when I was in school to become an art teacher. And then I did it
with my students. And so I have a lot of magazines I've
collected over the years. Although these
often I'm drawn to patterns and implied textures. So I don't have a
lot of what I need. Alright, let's figure
this out here. Alright, I like I like the man. I like him on this iceberg. I like the frog. I
like that giant scale. And I like the car on the ice. I don't think I want the ship. I feel like I want something
in the background. That's a collage Dloment. And then this guy
could be down here. Like we're going through the
ice and that could continue. I could even continue that too. I have to remember that I'm
drawing in elements too. So actually, I know. This is going to right, I'm just going to start committing to
something otherwise, I will never make a decision. So the car with a little bit of land sliding along my table. I'm going to stick
this down here. My idea when I did
the other ones, I kept all the media separate. So South Bestle then I collaged, then I drew into it because that was just kind of the
logical way to go about it. Sometimes that's not
what a piece needs. Sometimes a piece needs
some other elements. So what I'm going
to do, I'm going to collage I'm going to
collage what I've collaged, and then I'm going to I'm going to do a little
bit of drawing to kind of map some things
out a little bit here. So I'm just going to I just need a little
bit more definition. Right. So I'm gonna go in with
some colored pencil and just kind of define bring this landscape
out a little bit, even if it's just roughed in
so that I can kind of tell what I'm planning to do
here. That's defined. So now I can kind of make
some decisions here. This is gonna go up there and
it's gonna go off the page that creates kind
of a cool peekaboo up there for drawing. Sometimes you just
kind of have to take it just the next little bit, and then it all starts to click. I'm trying very hard
to not overthink this. Okay. That that's gonna
go off the page there. And gluing on top of soft pastel is not the easiest thing to do. So be generous with your glue and take your time to really
stick down your pieces. So I'm going to sneak him
under, figure out his position. Oh, he could pop up like that. 'Cause we're trying very
hard to get all of this to really be cohesive, even though it's surreal and then place him
and my iceberg. Now, at this point, I do want to trim off what's going beyond my borders 'cause that helps
me see what's going on. It's a small thing, but kind of helps me visualize
where this is headed. Oh, I do like Is it too late? It's not too late. Okay. Alright, now
we're getting surreal. Okay, so I'm gonna stick this
I in that peekaboo spot. It's gonna be awesome.
Now it's coming together, and I'm getting excited. Alright. Random floating I. That's great. And
then re glue this. Yeah. That girl's kind of fun. You almost have to
wait for the moment when your brain just
says, Okay, do whatever. Because then it all
starts to kind of click. Because for some reason,
the way that she is shaped makes it feel like the continuation
of this mountain, even though it's completely
random and bizarre. I do really love all of
these snail slug things. These are super cool. But I
don't know if I need them. I probably don't I need them. I'm going to leave it
like it is. Okay. So I'm going to call this portion
of the collage done. Now we're going to head
over to the next lesson to start adding in some
more surreal elements. This is a really good
time to take a look at the projects and resources
section of class and start to see what are the way revisit some of the ways that Salvador Dali worked
with surreal Images. What things did he combine
and take a look at the list of what images he used and what they represented for
him and think about if any of those speak
to you or if they bring to mind some different
representational imagery that you might want to
draw in to your piece. The last lesson for this class as far as the project goes, is to start bringing this
all together and kind of unifying it in
its randomness. So I'm going to be
kind of playing with, how do I make the
various collage elements make sense in this
surreal landscape? And then what else do
I want to add to it to really beef up
the surreal imagery? I'll meet you in the next
lesson where we will start drawing into our
surreal landscapes. See you there.
8. Final Thoughts: Thank you so much for joining
me in class as we explored the surrealist and symbolic
imagery of Salvador Dali and created our own surrealism inspired landscape collages. I can't wait to see
what you created. So please be sure to pop on over to the Projects and
Resources section of class and upload images of your project to
the student Gallery. Again, take some
time to check out the surreal images
of your classmates. It's really fun to see what different images
everybody chose, the type of landscape
we created, and then how we elevated our mixed media collages
a step farther with even more mixed media techniques and really kind of pushed the imagery and the symbolism in our own pieces and
the pieces of others. I'd also really appreciate it if you took the time
to leave a review. I'm really enjoying creating
this artist inspired series, and I would love to
hear your thoughts about how it's going
for I would love to hear other artists
that you would love me to share in future classes. I would love to hear
what you thought about this class, what
got you excited, areas that I can tweak, and just anything to kind
of help me continue to grow as a teacher and
a fellow creative. And you help other
students who are considering taking the
class in the future. I would also love to continue
to connect on Skillshare. So if you haven't
already, be sure to click the Follow button so that you get notified of future classes, I have tons in the works
and so many more ideas. It's going to be a
really exciting of creating new content for
my Skillshare students. And I would also love to
connect off the platform, too. Be sure to pop on over
to Instagram if you use that platform and
follow along there. I share projects that my
students have created. It's your in person classes. So if you happen to be
in Michigan and you'd love to join one of
my in person classes, I would love to connect
with you. In person. And I also just kind
of share whatever I'm up to both as a
teacher, as a student, as a creative, as an artist, all of the things that are
involved in my art universe. I would also love to
connect over on YouTube. I am really putting a lot of energy into growing my
YouTube channel and providing even more content for
my subscribers and those interested in
artistic exploration, creativity, different
approaches to art making, sneak peeks about
Skillshare classes, how I'm using what I
teach in Skillshare in my own artistic process and
art adventures that I go. So it would be amazing
to connect in all of those different
ways with you as we continue our creative
journeys in the future. Thank you so much for
taking this class. I really appreciate
you spending the time with me to learn about
Dolly's surrealism and how to incorporate it into your own artistic practice.
I'll see you next time.
 Elisabeth Wellfare, Artist, Art Educator