Transcripts
1. Introduction: Hi, I'm Elizabeth,
and welcome to my class Abstract
Mixed Media collage. I have been having so much fun exploring different ways to combine collage and
mixed media approaches into single artworks, both in my sketchbook and
in some larger pieces, as well as in some mini projects that
I've been working on. And I really wanted
to create a class that shared that
excitement with you. Also help you see some ways that you can elevate
the idea of cutting and pasting to create
collages by working back into them with different
mixed media approaches. For the mixed media piece, you can use any type of
materials that you have on hand. I have been really,
really excited about the possibilities
of going back into my abstract collages with colored pencil because you
can play with bold color, you can play with value. You can create
whatever colors under the sun you want to as you mix your colored pencils together. You can have fun
with different marks and make exciting
patterns and textures, and then you can take that even further by adding in
some ink details. You could even paint back
into your abstract collages. There's really no limit to how you can go about approaching the project for this class. This class is intended
for creatives of all skill levels who kind
of want to see what ways we can elevate collage and
kind of shake up and get some excitement going in your creative practice
through some very low stakes, stress free, fun
approaches to art making. I hope you'll join me in class as we explore ways to approach abstract collage and
mixed media approaches. Let's send it over to the next lesson to
talk a little bit more in detail about our class
project. See you there.
2. Class Project: The project that
we're going to create for class is really fun. You can decide to do it in
whatever scale you want to. I'm working rather small because that's kind of where I'm feeling comfortable these days and
kind of what I have time for. So scale of artwork
really kind of depends on the materials that you have on hand and the time that
you have to work on this. But the great thing
about collage is, it's very easy to pick
up and put down if you need to work on your project
in small spurts of time. So you're going to
want to have some collage materials on hand. I'm using just construction
paper to create my geometric abstract collage, focusing on the scraps of
paper that I have on hand. So that's a big
piece is we really want to play with scraps. You can either have those scraps on hand or you can
create those scraps, and it's really fun to do both. I do a lot of projects both in my own art making, as
well as in my teaching. Person where we do collage because it's one of
my favorite things to do. So I keep all those
scraps and then find new ways to incorporate the scraps into my
projects in the future. So a big part of this class is giving new life to scrap
construction paper, but you can use any kind
of paper that you have on hand or creating scraps to get inspired by kind of the unique color combinations
of that leftover material, as well as some of the unique
and interesting shapes that you end up with when
you cut out other things. Then after we
create our collage, we are going to be working back into it with colored pencil. You can use any art materials
you want to have on hand. So there's no
limitation other than what your paper can handle
and what you have access to. But colored pencils are what I'm going to be demonstrating
in this class. Let's head over to
the next lesson to talk a little bit more about what materials
you're going to want to have on hand for
class. See you there.
3. Materials: So the materials for class
are relatively simple. We're doing collage and
we're working back into it, so we need to have some paper. For this class, we're
using paper scraps. I teach a lot of different
classes to a lot of different ages from
kiddos to adults, and I am notorious
for collecting the scraps when it's something involving collage and
just hanging onto them. You can't hang on to
everything always, but these are some
pretty fabulous scraps that can be different
color inspirations, different, artistic
inspirations, and we're going for abstract
collage as our foundation. So scraps like
this are fabulous. But if you don't have scrap
paper, you can make it. So let's say you need
to make scraphs. So the fun part of that is that you're going to grab any color paper that you have. It could be patterned,
it could be solid. It could be found papers. It really, truly doesn't matter. I love the bold
graphic nature of construction paper
or any kinds of paper that are like
construction paper so that you have that fun boldness
to play with, and then you have the solid flat color because we're
going to work back into it and create pattern
and line and mark and value, and it's going to
be really awesome. So you just kind of start cutting and taking
interesting shapes out of it. This can be very
therapeutic and enjoyable. I highly recommend it. And the scraps can be
big, they can be small. You can just kind of cut some
strips, whatever you want. By around with
different ways that you can take that paper
and change it. So now I have a ton more scraps that I can incorporate
into my piece as well. So either collect some scraps. If you have some kiddos at home and they're going
to do some art projects, save their scraps or
make some of your own. Just have a paper cutting
session in front of your favorite show where
you're listening to some great music and go to town cutting up a bunch of
different colors of paper. If you're making
your scraps, don't edit yourself for color. Just grab random colors and just start cutting because part of the fun of it
is digging through your scraps and looking
for interesting shapes, as well as interesting
color combinations. If you start editing
the process too soon, in the scrap making stage, then that can really
limit you later on. Not that that's a bad thing, but I really encourage you to play and just create a lot of different colored pieces
of paper scraps to go with if you need to make
some scraps for yourself. And then we're going to
obviously need scissors because we can cut these
down even further. We're going to be collaging, so we're going to
be gluing them, so we need some
glue sticks around. And then I'm going
to work small. I love to do this on white paper and I love to do
it on black paper. This is black mixed
media paper that I have on hand from some other
projects that I was doing. This is just white
drawing paper, but you can use watercolor. You can use mixed media,
you can use anything. You just want it to be
a heavy enough weight that you can collage onto
it without it tearing. But pretty much any drawing paper weight up will work great. And then I love having
a scrap of copy paper. So this is my glue mess area. So this is where I'm going
to be sticking the glue on my scraps so that my table
doesn't get covered in glue. And then after we do
the collage portion, we're going to work back into
it with colored pencils. If you don't have
colored pencils, you can use ballpoint pen, you can use Sharpies,
you can use really any drawing supplies
that you have on hand. You could even paint back
into it with acrylic paint. But for my examples,
I'm going to be pulling a couple of
different colors of colored pencils that
speak to me after I've created my collage and I know what color scheme
I'm working with. I tend to go for
colors that connect. With the collage so that there's a color relationship
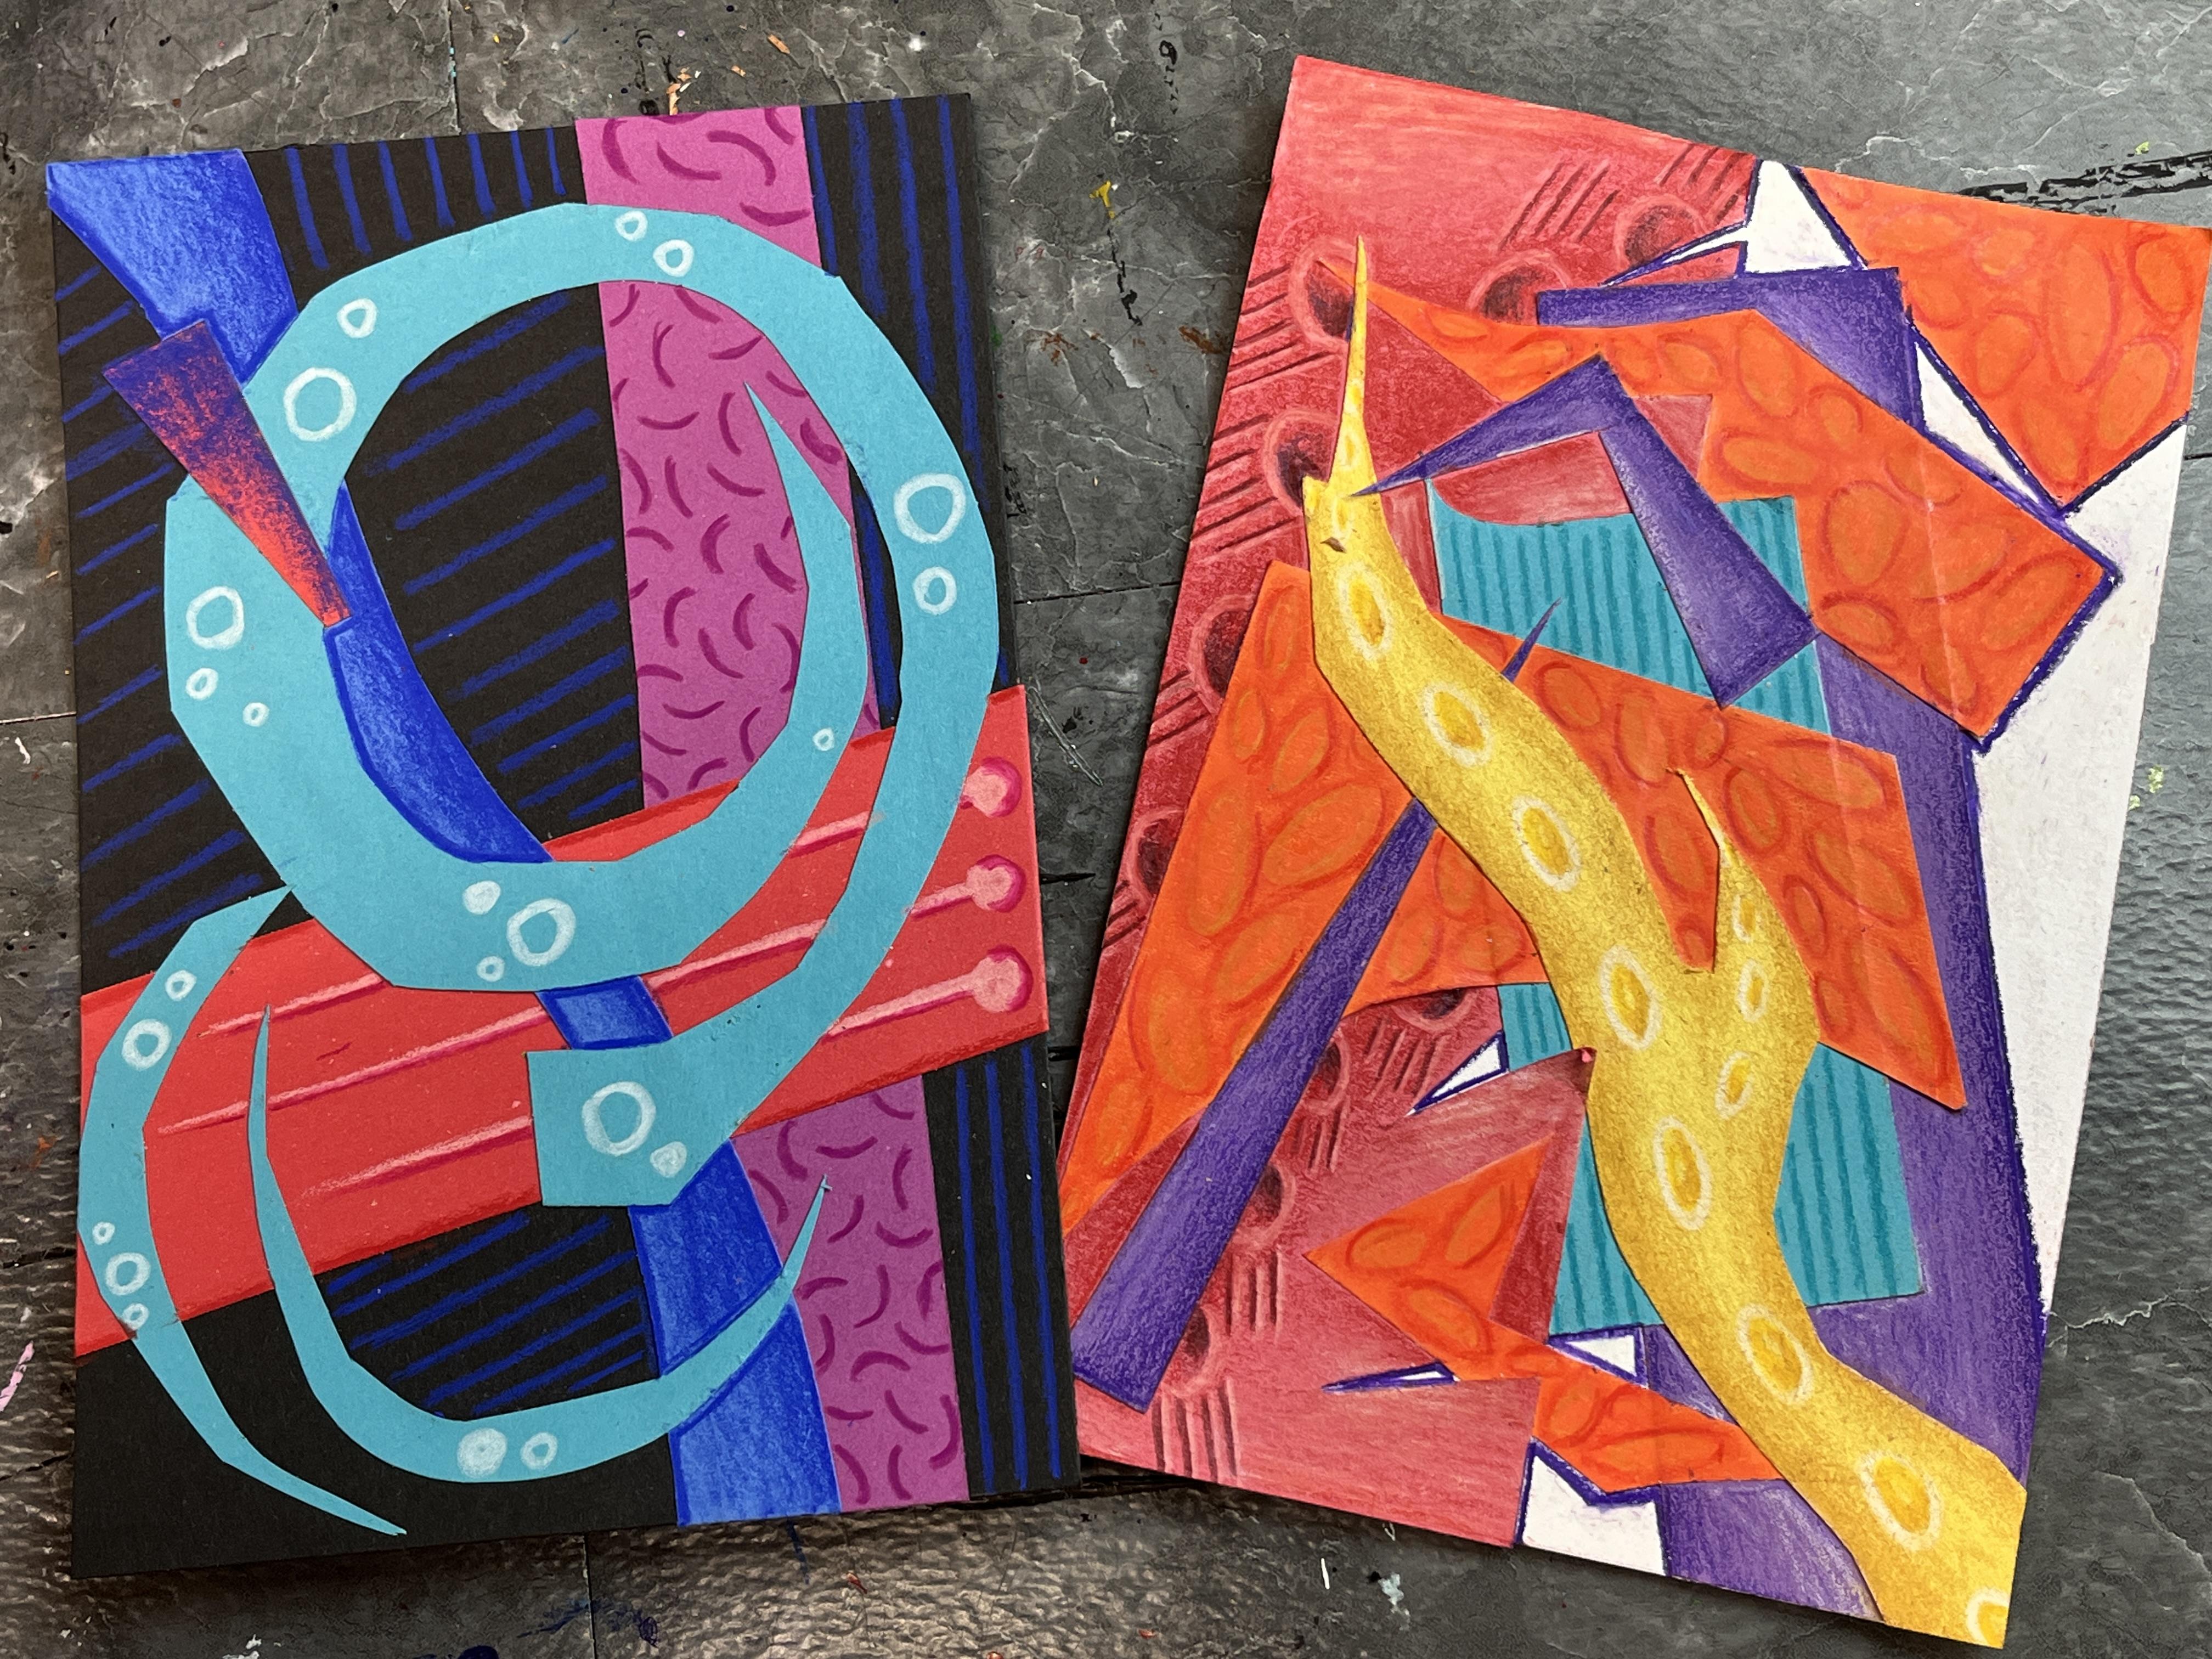
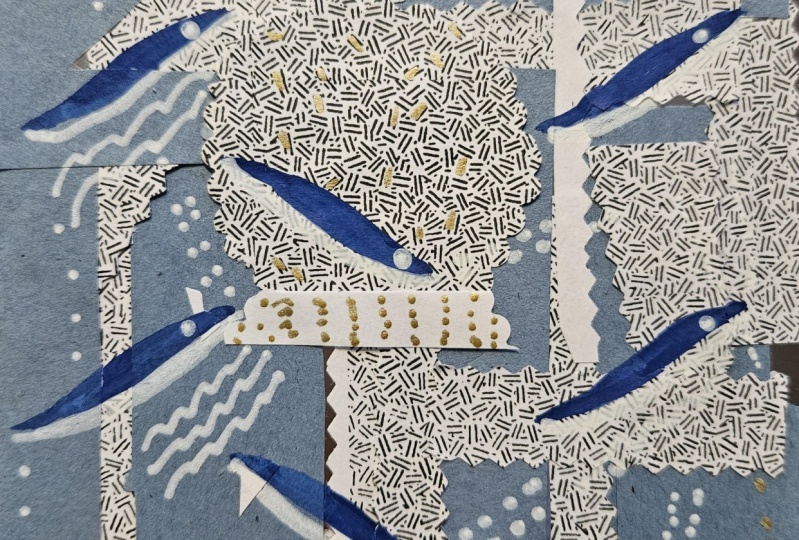
happening there. So for example, this one that I made,
it's on black paper. I worked with mostly cool colors with some pops of red in there. Color pencil wise,
I only used four. I used five. I used a light
pink, I used white. I used a magenta, and I use an ultramarine blue. The colors that you use can be very minimal as far as
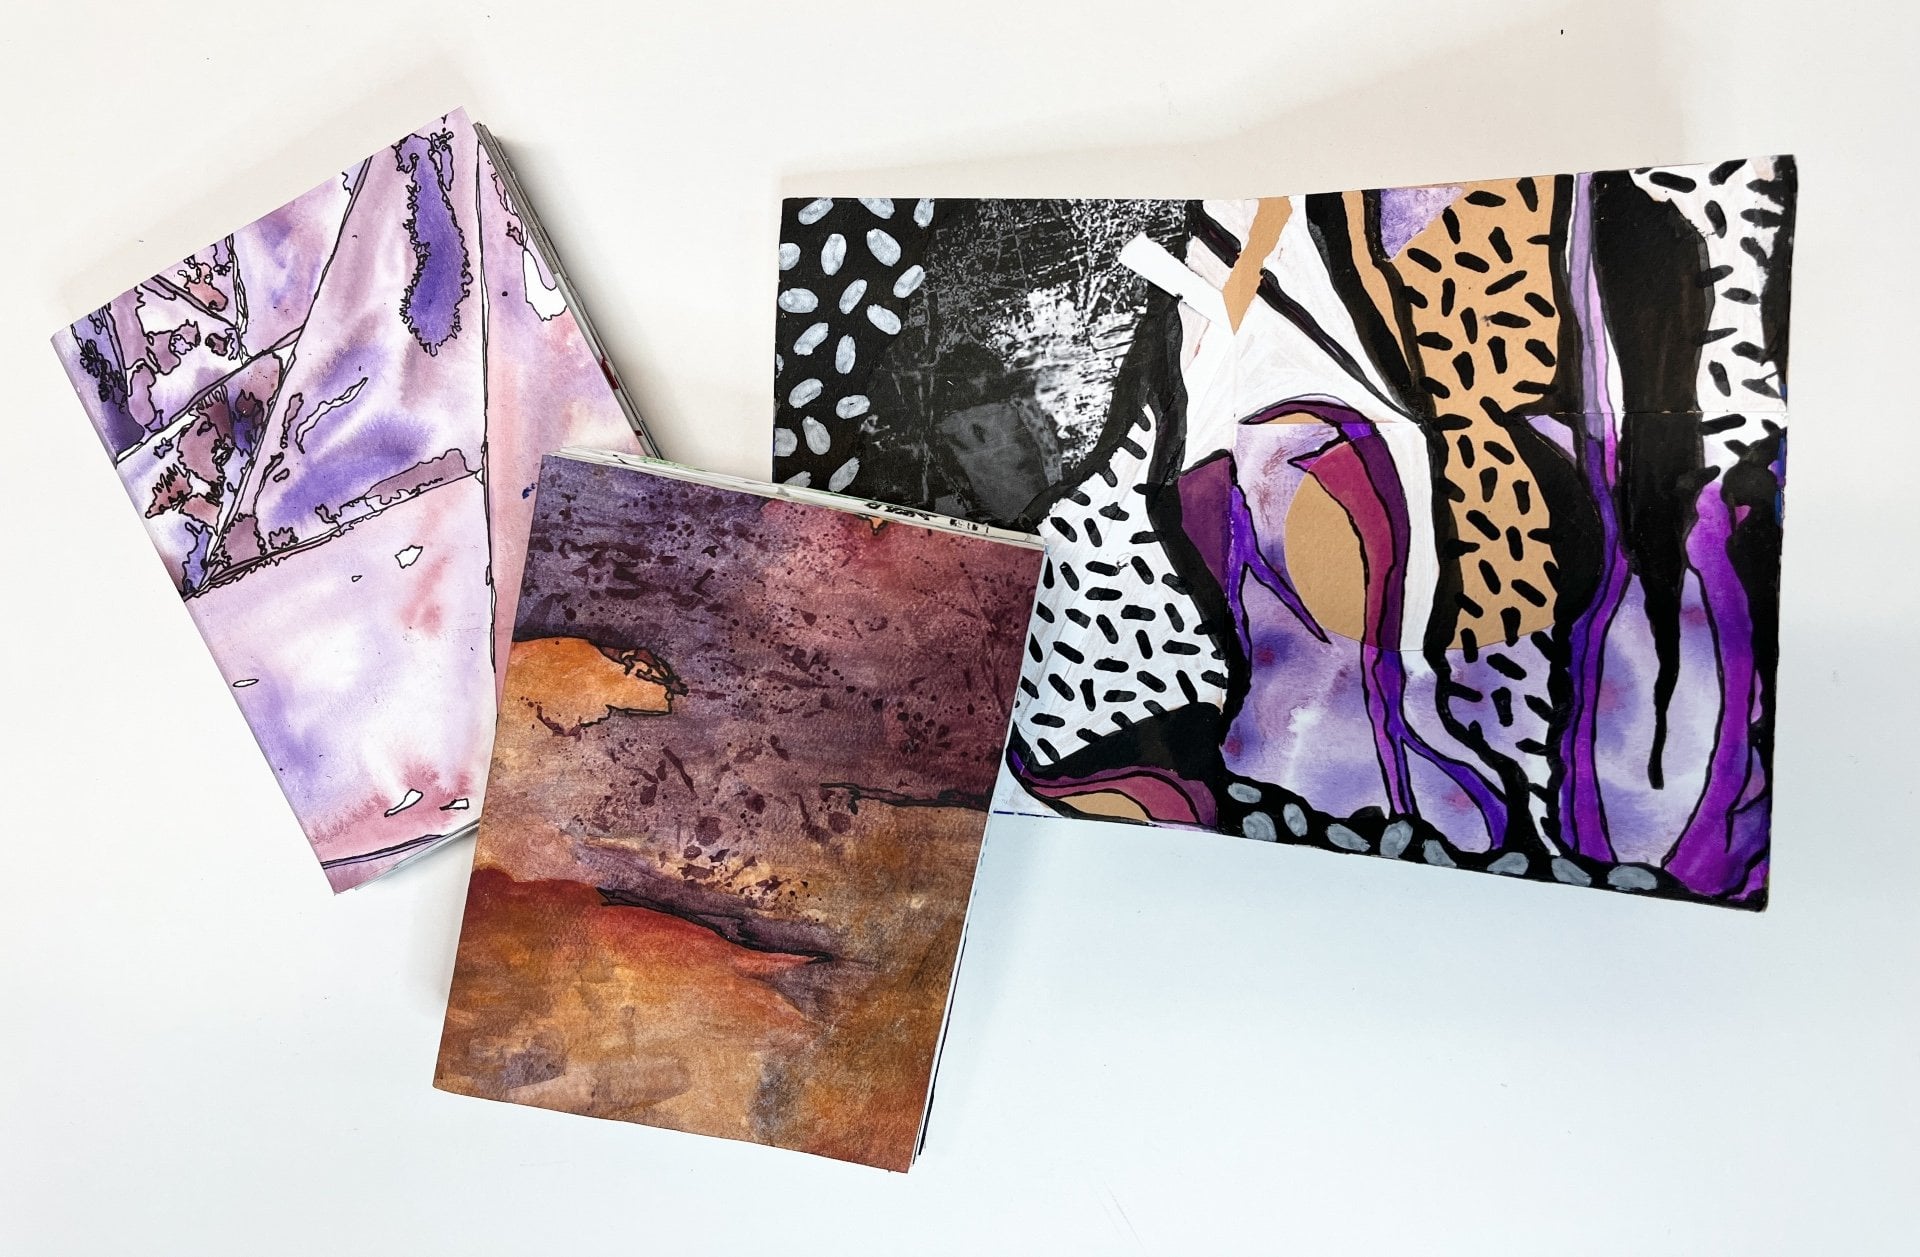
the color pencil goes. This example I used a bit more. Let's see, I have white. I have light pink. I
have a very dark red. I have yellow ochre
and a brighter yellow. I've got some orange in there. I've got violet. Maybe
some other ones. I don't know. This one has
a little bit more going on. So as much colored pencils as you want to
corporate into it, and then I'm going to show you these are two
of the ways that I'm going to show you
to create your piece. But these are the
basic materials that we are going
to need for class. Go ahead and gather
up some scraps, make some scraps, have
some fun doing that, get all your materials together, and I'll meet you in
the next lesson to start our first
college. See you soon.
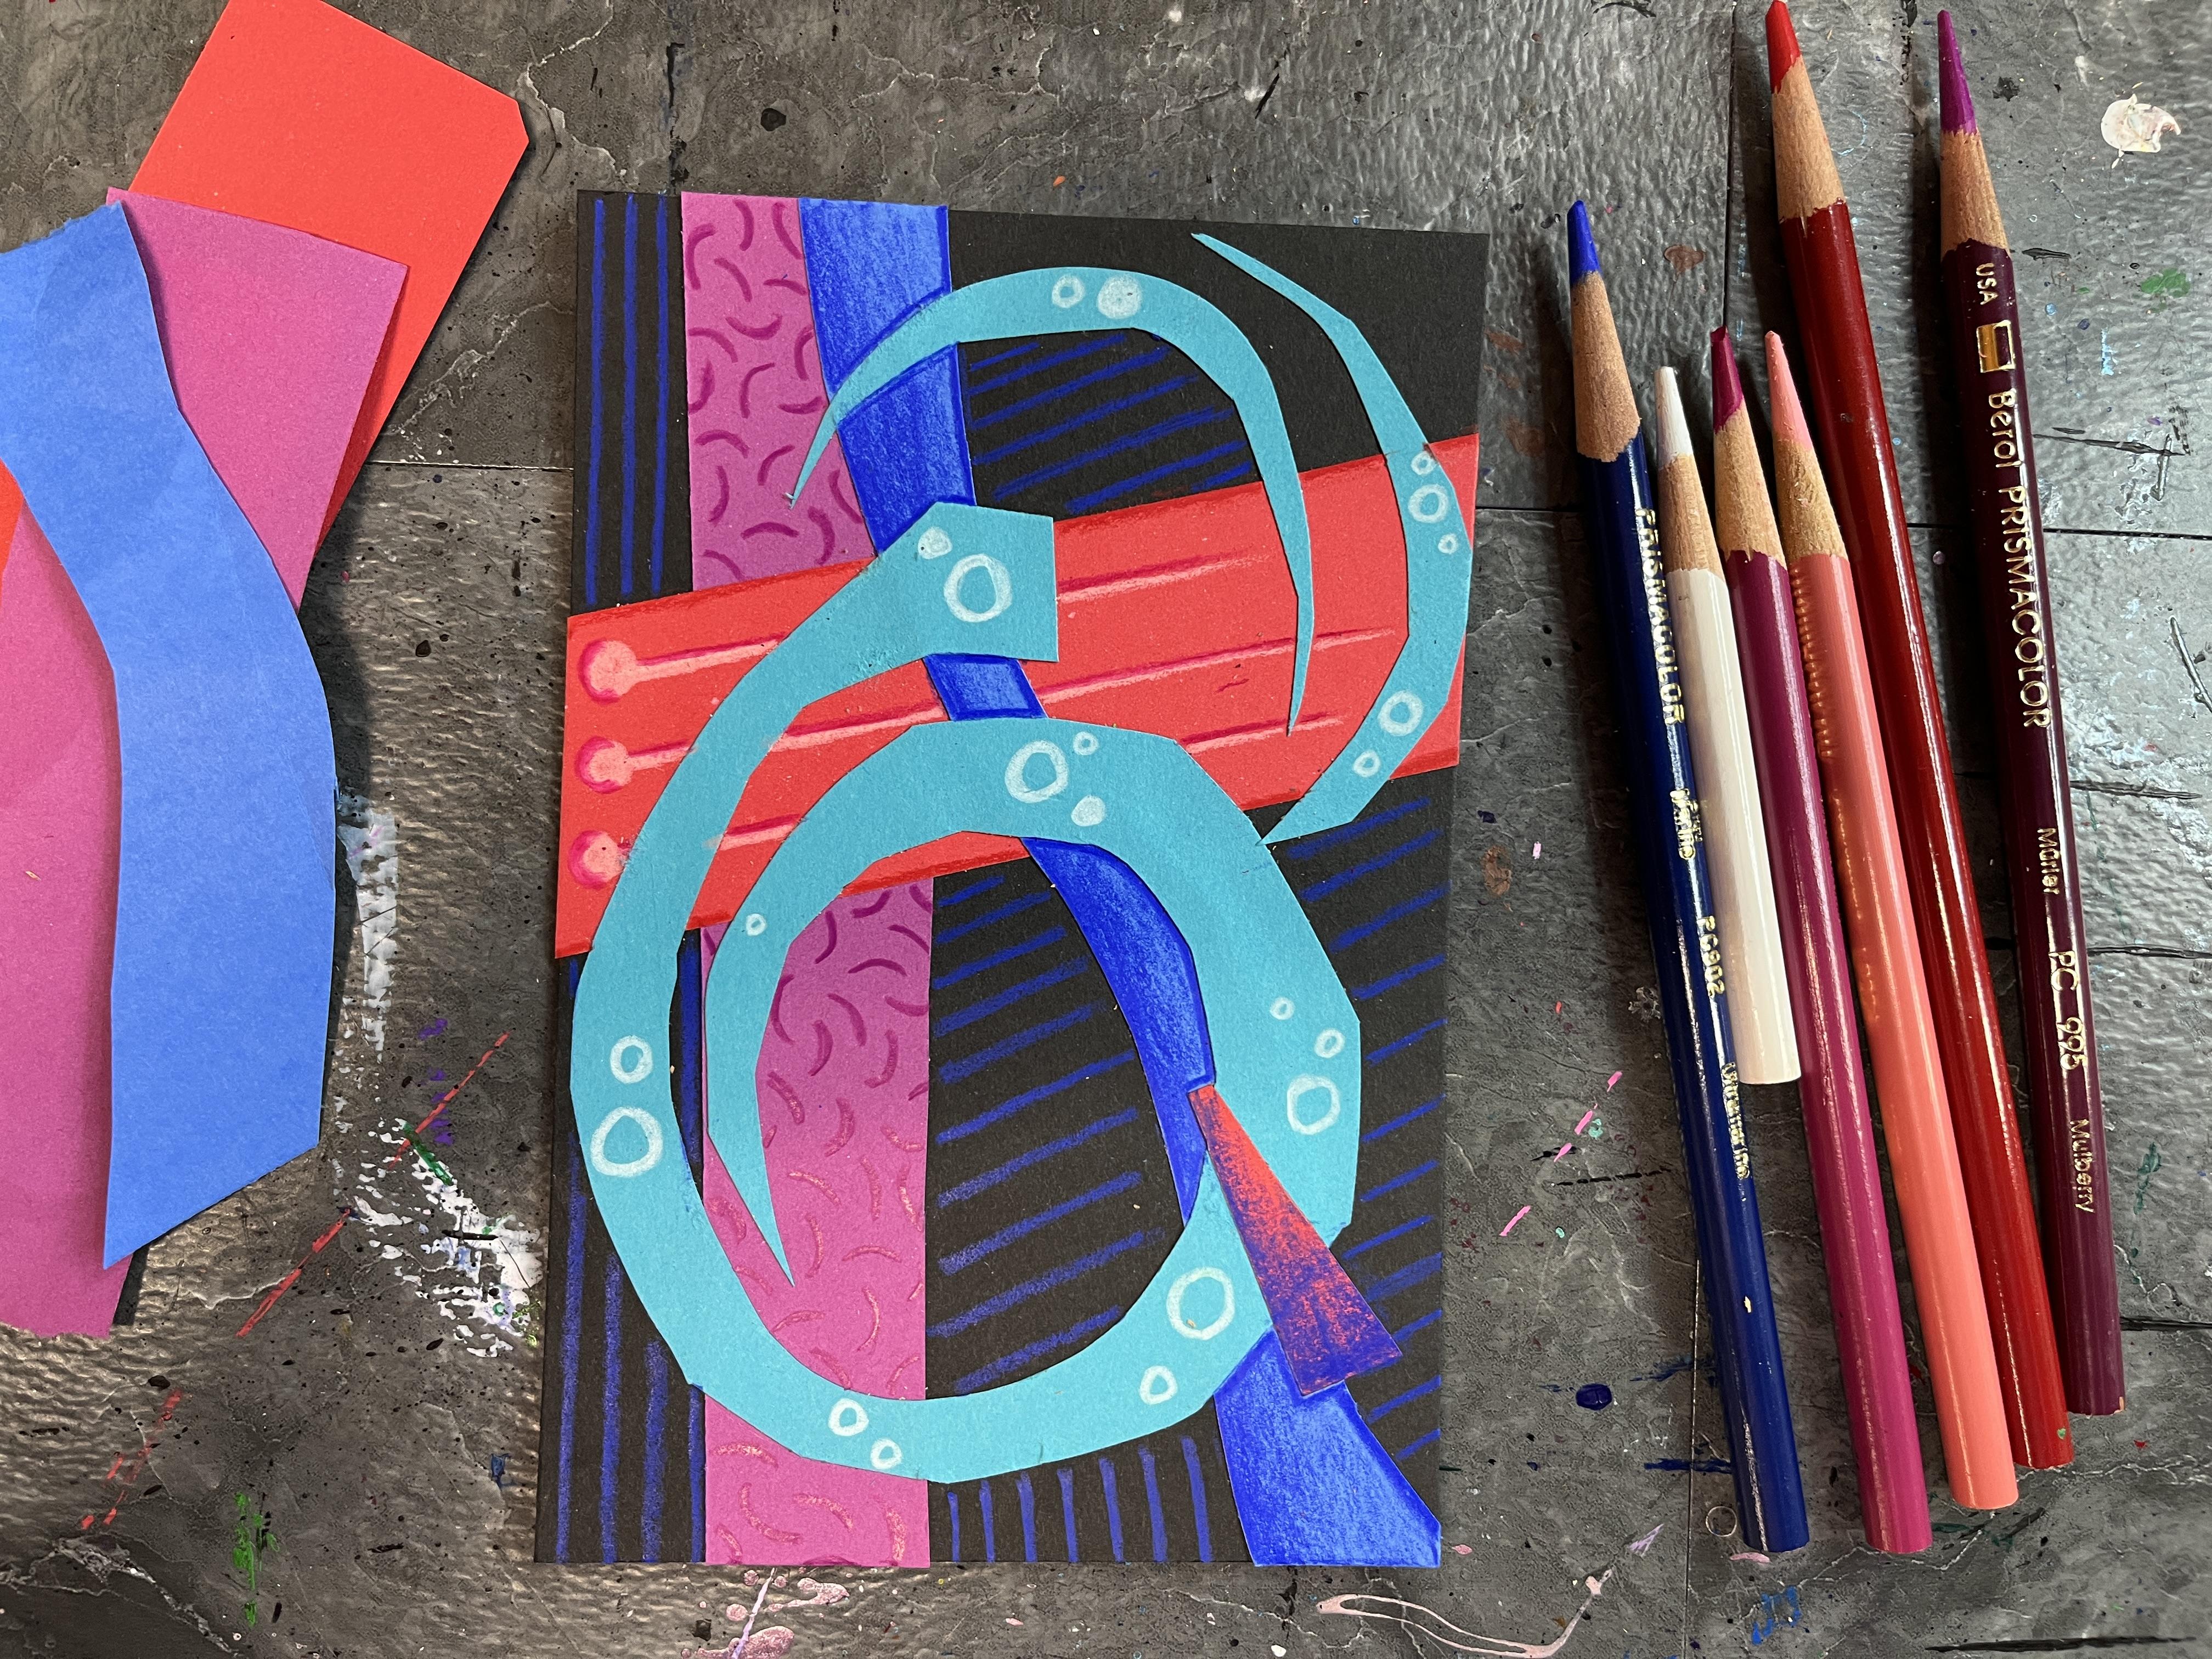
4. Collage: So what I did was I went
through my scrap pile, and I pulled out colors and scrap shapes
that just kind of got me excited and that I felt aesthetically would
look good together. And for this one, I wanted to
work on a black background. So I was really going for
colors that were going to pop off that background. And now, bit by bit, I'm just building up
my collage and kind of deciding what goes where as
each new piece goes down. I often love to work in this intuitive manner
where I just kind of go with my gut reaction and kind of figure it out as I go along. I'm being very
intentional in setting up my composition and working with the limitation of the
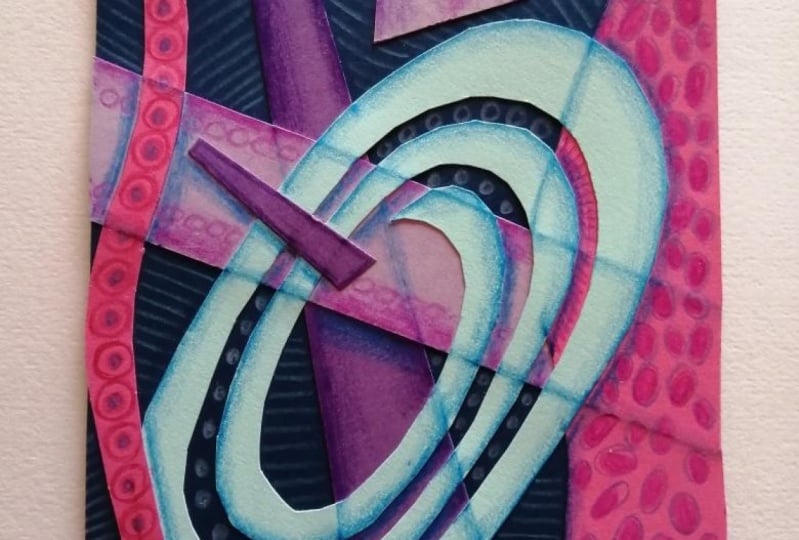
scraps that I've chosen. Now along the way,
you can absolutely modify your scraps, tweak them. There I was doing a
little bit of trimming to the spiral that
was left over from cutting out some circles for a different project so that I
can really make that scrap, do what I wanted it to do
visually on the paper. Then I always have a
scrap of copy paper laying next door so that I
can have that be where I apply the glue to
the papers that I'm gluing down and then my
work table stays clean. And I can make sure that I can get really
good glue coverage on the scraps that I'm
going down and that my piece is going to
be nice and stable. I decided to use even the scraps that I was making in
the process of this. So that's where
these extra kind of half circle blue
pieces come from. They're the scraps
that I cut off the original kind of
spiraling lighter blue piece. So it's really fun to just continue to get inspired
by your scraps, keep building up the
piece little by little, and making decisions as you go. I really want to keep
this one fairly simple, knowing I was going back into it with mixed media details. And then the last
step I like to do for the collage portion is
to trim up the edges so that everything stays
within the picture plane that I've established. But
you wouldn't have to do that. You can absolutely
have them hang off the edges or even glue
this mini collage onto a bigger
background and really play with breaking out of
the sides of the paper. And then for the final step, I'm just kind of looking
to see if there's any other scraps that I want to incorporate at this stage, to really kind of
make this step of the project feel
resolved and finished, and then I will get ready to move on to the colored
pencil section. So have some fun playing
with your scrap pieces, really kind of explore
the possibilities, move your collage
around, spin it around, change the orientation of your scrap pieces and have some fun creating this
step of your project. I'll see you in the
next lesson where we add the colored pencil details.
5. Colored Pencil: Now that my collage is done, I want to go back in and add some different elements of
colored pencil to really elevate the collage portion
and kind of help unify the piece and add
some nice contrast and some more
interesting details. So here I'm just kind
of pulling colors that reflect different elements of the collage colors
I've already used, but playing around
with different values, too, because I have a really
dark black background. I've got pretty
bold colors here. So I'm kind of
playing with a mix of lighter colored pencils
and then some darker ones, too, just to kind of push the
value variety in my piece. And a lot of this
can be planned in advance if you wanted
to kind sketch it out. You absolutely could.
You could make this as planned and structured
as you wanted to. I really prefer to kind
of just be in the moment and let all of the elements kind of
come together as I go. I do have certain motifs
and design elements and marks that I really love
returning to in my projects, but I'm also kind of really pushing myself to come up with new ways to work back into my pieces so that I'm
continuing to grow, too. So in this piece, I
feel like I'm doing things that aren't part
of my general go to, but I'm also making this on a day when
I'm in a place where I'm feeling comfortable with pushing myself and
experimenting. And the great thing about
doing something small like this is that there isn't
a lot of pressure. Like, granted, it would be very challenging to recreate
this and start over. Also, the possibility of
how far I can take it in working on it
and continuing to challenge myself
is very exciting. I'm just kind of going back in. I really intentionally
worked a lot with structuring the layering
of the collage pieces, and was very mindful about what overlapped where and
how things intersected. And I want to have
different elements of the collage continue on that. So for this plummy purple piece. I've got a pattern that I'm creating with some half circles. I could keep going
over the pieces that are on top and kind of let the marks ride
as their own layer. But here I chose to have them stay where only the paper was. So wherever that same
color paper was, that is where that pattern went and then kind of building
it up from there. So each decision
is all about kind of helping bring the piece
closer to a resolution. And knowing when a
piece is done can be very challenging, but
at the same time, if you just kind of keep taking pauses to look at
what you're doing and make very mindful choices
about what you add next, I think you'll
naturally just kind of know when a piece is done. But here I'm playing
with repeating colors. I'm plating with
repeated elements. So kind of elements
that are similar. So there's a lot of different
line work happening, even if there is
some variety within the line because variety
is also very good and just kind of seeing what this piece feels
like it needs as I continue to move forward with the colored
pencil sections. And really, like I
said, focusing on the layers and how do I carry through different
design elements on the layers to really
kind of push the idea of this stacked collage piece
that I've created initially. And I really love
putting value back in. So that's kind of
something newer that I'm doing in my pieces
is kind of adding the values and the gradients and different ways
that I can play with. How can I manipulate
the colored pencil so that I get a
lot of bold areas, but that I also kind of have
dustings of color, too. Because the other
really fun piece to approaching art like this is that layering the
colored pencils on top of the paper
is one thing. But we're layering colors of colored pencils on top of
different colors paper. The colors that you choose
for the mixed media element, if you're using something
like a colored pencil where there's going to
be some transparency, then you have to think about how is this color going to
look on top of that color? You absolutely could test
this out ahead of time on some similar color paper
scraps if you wanted to. You would do a whole
brainstorming session where you played up around with what colors do what on top of other colors
and kind of testing it out. It would be incredibly
fun to create kind of a whole library of resources as you think about
color combinations of things watercolor
or colored pencil, you know, transparent
mediums on top of other colors because
it changes everything, and it gets so fun and exciting to kind of
see how far it goes. I did want to go in with the white absolutely to kind
of figure out what can I add with white so that I continue to kind of
build up more layers. And so really play around with different ways
that you can apply your mixed media drawing
materials so that you kind of add some more interest
and design fun and some unique characteristics to your abstract mixed media
collage. And don't be afraid. Just go for it.
When you're going back in like this,
you can't erase. Be bold, be committed, and if something goes awry, then you'll figure out how to turn it into
a happy accident, I promise. Have fun. No matter what happens,
have fun working back into your abstract
collages and seeing how far you can push them when you turn a collage into a
mixed media collage. One thing you can do is if you get colored pencil from, like, one section into another section
where you don't want it, you can take an exacto
knife and just kind of very gently scrape away
the colored pencil wax. And chances are the
construction paper is going to be thick
enough where to lose a little bit
of that fiber where the colored pencil is on it,
it's going to be just fine. I'm so incredibly happy with how my abstract Mixed Media
collage turned out, and I can't wait to see
what yours looks like. So let's hand it over
to the last lesson of class to wrap things
up. See you soon. No.
6. Final Thoughts: Thank you so much for joining me in abstract mixed media collage. I hope you had so
much fun getting inspired by the scraps
that you had on hand or the scraps
that you've created to create the collage
foundation of your project, and that I hope you continue
to have fun as you layered in colored pencil application in a variety of different ways. I know I sure had fun
creating this class, and I'm very excited
to keep incorporating this sort of artistic approach
into my creative practice. I would love to see how your abstract collages turned out. So please head on over to the Projects and
resources section of class and upload images of your project to the
student gallery, and don't forget to
stick around and take advantage of
looking at the projects of other students and circling back to see what new
projects get uploaded. It is incredibly
inspiring to see what color combinations,
what types of scraps, and what colored
pencil application or other mixed media
application folks explore in their own art making. There's nothing more exciting than seeing the art of others. So I really hope you'll
take advantage of the student gallery to share your work as well as to
celebrate the work of others. Addition to uploading
your project to the student Callery, I would really appreciate it if you took the time
to leave a review. I love leaving
student reviews as a student myself on
Skill Share because it gives me a chance
to kind of think back through the process
of taking the class, the application of that to
creating the class project, and how I might incorporate what I've learned in the future. It also allows me an
opportunity, which I hope you'll to give the teacher feedback on what I really enjoyed
about the class, some suggestions I
might have for ways to tweak the class or
for future classes, and just ways to connect
with each other in a really great way as we share not only our experiences and
classes with the teacher, but also with
students who might be considering to take the class
on the Skillshare platform. After you are done with that, I would love it if you click the Follow button below so
that we can stay connected. I have lots of great classes
already up on skill share, but I have so many
more that are in the works currently and
coming in the future. So I don't want you to
miss a single minute of creative inspiration and
artistic exploration with me. So if you click
the Follow button, you will get notified
every time I upload something new
to the platform. We can also connect
outside of Skill Share. You can head on over
to my Instagram to follow along on that journey. And if you share your
projects on Instagram, please be sure to tag me at
Elizabeth Underscore Welfare. I love celebrating what
my students are up to. I love connecting on
and off the platform, and I love continuing to share this artistic journey
with my students. So it would be really amazing to stay connected
on Skill Share, on Instagram, and over
on my YouTube channel. My YouTube channel is an
extension of my art studio. I share everything
that's happening both in my role creatively
and artistically, from art adventures
that I go on, sketchbooks out in the wild, different artistic practices
that I'm exploring, demonstrations, ways that I'm applying things that I
teach in my own artistic so I really hope that
you'll connect with me on Skillshare Instagram
and over on YouTube as I continue to grow all
three of these platforms in my mission to connect with as many creatives in
the world as possible. Thank you so much for
taking this class and spending this time with me. I really enjoyed having
you along for the ride, and I can't wait to see what you created and stay
connected in the future. So until next time,
 Elisabeth Wellfare, Artist, Art Educator