Transcripts
1. Introduction: [MUSIC] Our planet Earth is truly a breathtaking place. There's something special
about getting out in nature with the challenge of
capturing its beauty. Have you ever tried
to photograph the most spectacular scenario, but you felt that
you're not able to show the real spirit of the
place through the photo? Landscape photography
is a science. In this class, you'll
learn anything you need to know about taking great
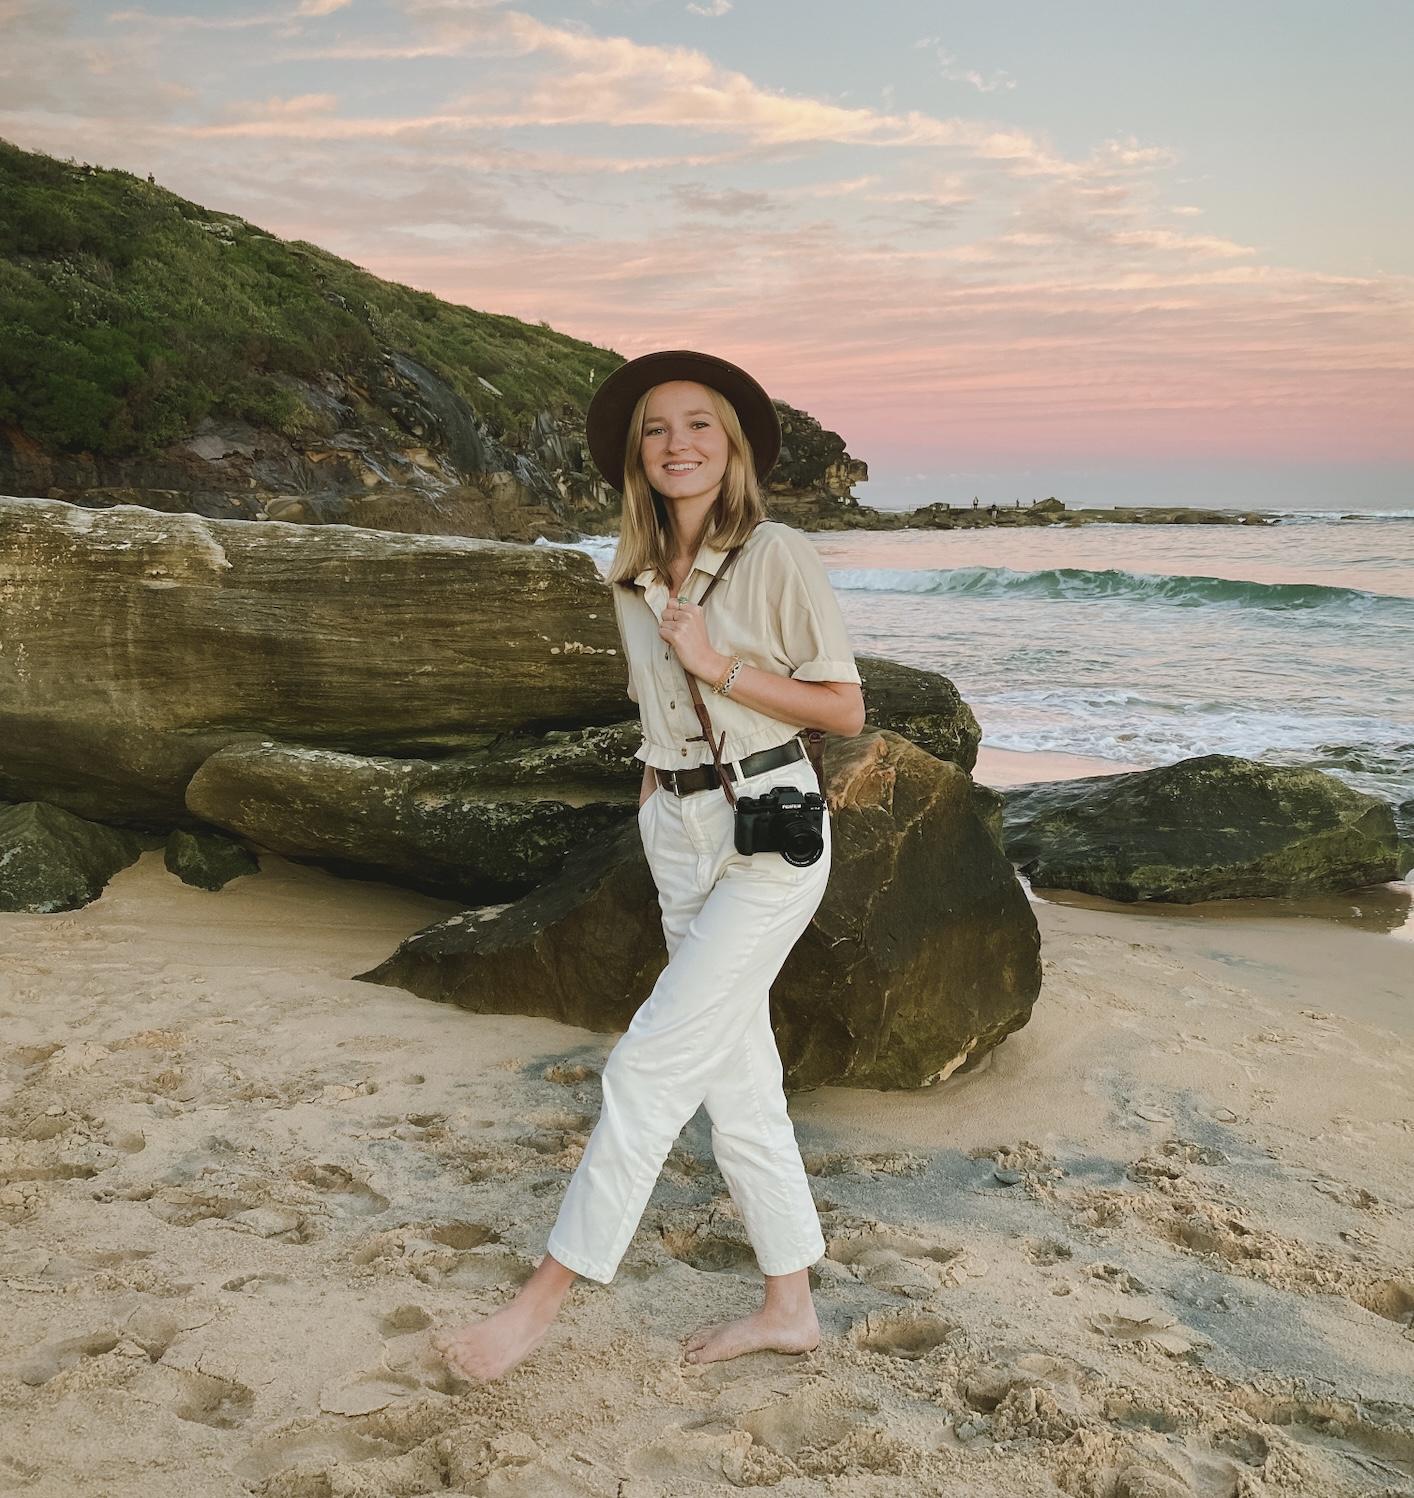
landscape photos. [MUSIC] Hey, guys. I'm Clara, and I'm
a photographer and videographer
who's been traveling the world and capturing its stunning places
for the last 10 years. Traveling and exploration of unknown places are
big parts of my life, and that's also how my passion
for photography started. I wanted to share
all the places I've been to with my
family and friends. There were always a lot
of positive comments, not only about the
beauty of the places, but also about the
photos themselves. That made me think about all the magic a
camera could create. I started to learn more about how to capture
nature even better. My photos and travel articles started to be published
in magazines, and it was a great satisfaction. [NOISE] Landscape photography
is my real passion, and I'm so excited
to be teaching this class and sharing
my knowledge with you. By the end of this class, you'll be able to capture any landscape
setting creatively. No more boring travel photos. Even if knowing the
theory is important, what's going to make your
photos better is practice. As your class project, you will head into
nature and take a landscape photo following
the tips in this class. To take the most
out of this class, you should already understand
photography basics and how to work with your
camera and manual settings. If you're not confident
in photography yet, my previous class sums up all the essential
tips for beginners. I would recommend you to
check out that class first. In this workshop, I'll
start by introducing the gear that is useful
in landscape photography, and continue by explaining the basic camera settings
to achieve sharp images. After you understand
the technical side, I'll spend a little
bit more time talking about composition. I believe it is one of the most important parts to
make your photos stand out. If you were wondering
how to blur the movement of running water, I'll dive into it as well
in one of the lessons. At the end, we'll talk
about the weather and light conditions that are
best for stunning photos. After finishing the class, you'll be able to take 10 times better landscape
photos than you did yesterday, and that I guarantee you. I hope you're as
excited as I am. Let's get started.
2. Project: Before we jump to
the first lesson, let me introduce you
to the class project. As a final project, you'll take one landscape photo that follows the steps
we will talk about. When shooting you
should consider the composition include
foreground interest, and also if you have
some moving element try to use long exposure
and blur the movement. After completing the class, check out the project description
and have fun shooting. Upload your best photo that
you're most proud of in the project section to share your creativity
with everyone. I can't wait to see
what you will create, and now let's dive right in.
3. Gear for Landscape Photography: [MUSIC] Starting with
landscape photography can be pretty expensive
because you will need to buy extra gear
that you normally don't need for other
types of photography. For the beginning, I
would suggest that you just rent the
gear instead of buying especially all the
expensive stuff like lenses. When you're going to
be sure that this is something you really
want to get into, then consider buying
your own gear. In this lesson,
I'll share with you the most essential
gear items that I use all the time in my
landscape photography. Camera is the first and most of the best
item that we need. It can be any
interchangeable lens camera. I prefer to use
mirrorless cameras over DSLRs because they are
smaller and much lighter, which is especially
useful when traveling. I think you'll realize
it really soon. I dare to say straight after
you climb your first hill at 3:00 AM in the
morning to catch some stunning sunrise shoots, every gram that you're carrying
in your backpack counts. [NOISE] Tripod is item that you don't want
to mess around with. Tripod is designed
to keep your cameras steady in the muddy, rocky, and sandy [inaudible] and to protect your camera
setup from sudden falls. This requires, we'll just select construction which
doesn't come cheap. It only takes one good gust of wind to knock over
unstable tripod. If you buy a nice
camera and lens but mount it on
entry-level tripod, it's dangerous for the
rest of the setup. Good tripod will outlive
the rest of your kit. It's worth is to
do a research and invest into a good-quality one. In landscape photography,
you'll want to maximize your depth of
field most of the times, which means you'll be using a narrow aperture and therefore
longer shutter speed. For that, you will
need a good tripod that we'll be able to stabilize your photos and
keep them sharp for seconds or minutes
long exposures. With cheap light
and wobbly tripod, you would end up with
blurred images for sure. In fact, even if using
faster shutter speed, tripod can still be beneficial. It will force you
to slow down and consider your composition
more carefully. Lenses are where the fun begins. Lenses are one of the
most important piece of landscape
photography equipment, but also the most expensive one. You can have the
finest camera, tripod, backpack, memory cards,
and accessories available. But if you don't have
good quality glass, you'll struggle to
take a great photo. When it comes to
landscape photography, I prefer to use prime lenses
rather than zoom lenses. With a zoom lenses, I tend to get a bit lazy, standing on one spot and
just zooming in and out. But there is nothing better
than actually moving your feet and seeing the
composition with your own eyes. You miss the special
perspective if you zoom instead of walking around
and considering your scene. But it is really about
your preferences. I would say that before buying
any lens prime or zoom, just rent it first because you can't really
know how the lens will work for you until you try to use it in various situations. In landscape photography, some filters are almost as
essential as good lenses. I will keep it brief here
and tell you just about the basic filters that
I always travel with. Filter that I use most of
the times is UV filter. I want to do everything
that I can to protect my lenses
from scratches, so I have UV filter
on every lens I own. UV filter doesn't help
to improve your photos, but it does a great job
protecting your lens from dirt and dust or from breaking
when you knock it over. Another filter I love to use in landscape photography is
a neutral density filter, also called ND filter. ND filter basically
acts as sunglasses for your lens because it blocks sunlight from reaching
the camera sensor. There are different
strengths of ND filters. From one stop to 10 stop filter, which will allow 10 stops less light coming into
the camera sensor. With these filters, you can make the running water silky smooth. You can blur the clouds or
turn people into ghosts. I use variable ND filter because for me it is much easier to have just one filter than carrying five different ND filters
for different situations. I highly recommend
variable ND filter, especially if you're
at the beginning of your journey to become a
landscape photographer. There is another type of ND filter which is
graduated ND filter. It has only one part
darkened and is used in conditions when the sky is much brighter than
the foreground. For example, during
sunrise or sunset, it will help you to
darken the sky while keeping the horizon
nice and bright. I wanted to show you
my remote trigger, but the truth is that
I don't have one, at least not one of those
fancy and special ones. Instead, I use the app in
my phone that allows me to control my camera without
actually touching it. Remote triggers are very popular by landscape
photographers. Without a remote, you have to physically press
the shutter button on top of your camera and no
matter how careful you are, this will introduce some shape, which is problem with long exposure
photography because you will end up with
blurred images. Rather than pressing the shutter button
with your finger, buy a reliable remote
shutter release, or if your camera allows it, you can download a special app to control the camera with. If you really don't
want to invest into another piece of equipment, you can set a self-timer
on your camera. To avoid touching the camera after the shutter is released, you need to have your camera
as steady as possible. Self-timer will work pretty well in most of the scenarios. But if you want to try
time-lapse photography, you would need the remote
trigger to make sure that your camera will not move
at all between the shots. Always without exception, carry extra battery
for your camera, extra memory card, and extra
batteries for other devices. Chances are that you
will not need them, but better be safe. Once you take long exposures
or time-lapse photography, your battery will
die pretty quickly, especially if you have
mirrorless camera like I do. Compact size and lighter
weight come at a cost because the batteries of
mirrorless cameras are much smaller than in DSLRs. That's why I always carry at least three fully
charged batteries when going for a
shoot. This is it. This is all the gear that I use in my landscape photography. Now and get your
backpacks ready, and let's go out to shoot. I'll see you in the next lesson. [MUSIC]
4. Sharp Images: Maximize Depth of Field: [MUSIC] For me, photography is a great opportunity to see the world from
different perspective. Shooting landscapes
always makes me slow down and appreciate
the nature around. There's usually a lot
of planning ahead and considering what equipment
I have to carry. I know the list is quite long, but I hope the
previous lesson helped you to pack your
gear more easily. Now, it is time to reveal
your camera and format your SD cards because
we are about to start. [MUSIC] In this lesson, I want to talk about basic
camera settings that will help you to nail your
landscape photography. When shooting landscapes,
a deep depth of field is almost
always the way to go. In other words, you want as much of your scene in
focus as possible. The simplest way to do this is to choose a small
aperture setting, which means a large F-number
such as F11 or F16. Because the smaller
your aperture, the greater the depth
of field in your shots. Landscape photography is not
like portrait photography, where we want to achieve
the blurred background. In most of the cases, shooting landscape is
quite the opposite. We want to have everything
sharp and in focus. Do keep in mind that
smaller apertures mean less light is hitting
your image sensor. So you will need to compensate for the narrow
aperture either by increasing your ISO or
lengthening your shutter speed. I would rather keep lower
with ISO because we want to avoid unnecessary noise
occurring in our images. So the best idea is
to put your camera on tripod and set
longer shutter speed. Using long exposure
times give you not only possibility to
brighten up your photos, but it is also a powerful
tool of how to blur the movement and give your landscape photos
well-needed dynamics. [MUSIC] To sum up, if you're starting with
shooting landscapes and you're not sure about all the
different camera settings, start with using
[inaudible] aperture, you have all the
elements in focus. If your photo is still dark, try to avoid raising your ISO, but rather use
longer shutter speed with camera settings
on your tripod. I believe these are the best camera
settings to start with. Now let's move around
a little bit to find some amazing locations where we can take our first
landscape shot.
5. Composition: Focal Point: [MUSIC] Shooting landscapes
can be challenging. Slowing down and thinking
about your composition is a vital part that separates beginner photographer from
the professional one. In the next few lessons, I want to talk about
composition in more detail. Composition is one of the
most important parts in landscape photography that can help to make your
photos stand out. That's why you shouldn't keep snapping one photo
after another, but rather try to slow down and look for the
right composition. Walk around the scene
a little bit and look at the place from
different perspectives. You should also consider the light and
position of the sun, which will affect your
shooting angle as well. Most importantly, did
you already think about what the main subject
of your photo will be. [MUSIC] There's a lot to consider before you actually
press the shutter button. In terms of composition, let's first talk about why is it important to include a main
subject in your images. Pretty much every shot needs some focal point and landscape photography
is no different. In fact, a landscape photograph without the focal point ends up looking rather empty [NOISE]. It will leave your
viewer's eyes wandering through the image
with nowhere to rest. Focal points can take many
forms in landscape photos, they can range
from a building or a structure to an
eye-catching tree. A boulder or rock formation, silhouette, or something
entirely else. The point is to include
at least one element in your photo that the
viewer can grab onto, something that's sucks them into the frame and creates interest. [NOISE] If you don't have anything lined
up in your photo, viewer will become confused. They won't be sure
where to focus, so they will move on to a different image
and never look back. You have to think
not only about what the main subject of
your photo will be, but also where should you
position it within the frame? What will help us here
is the rule of thirds. Let's move on and
talk about rule of thirds in the next
lesson [MUSIC].
6. Composition: Rule of Thirds: [MUSIC] I like to talk about the rule of thirds pretty often because I think it is the simplest
key to master composition. When teaching photography,
rule of thirds is usually one of the first things that I talk about
with beginners. It is one of my favorite
composition tools and a great way how to get
started with composition. Rule of thirds will
give you idea how to easily arrange
key elements within the frame like your
main subject horizon and other supporting elements. For those of you who are not familiar with the
rule of thirds, here's a quick explanation. The rule of thirds tells
you to split your frame into vertical and
horizontal thirds. So you end up with
series of grid lines, more specifically
four grid lines that divide the frame
into nine pieces. If you have your
camera close by, have a look in the menu now
and turn the grid line on. Maybe you're wondering what
is the grid line good for? Rule of thirds says that for the most powerful compositions, you should place the
key elements along those grid lines and at
their intersection points. For example, this
often comes into play when working
with horizon lines. [MUSIC] [NOISE] Instead of putting the horizon in
the center of the frame, you can put it along
one of the grid lines. Top grid line is a good idea if your foreground is
especially interesting. On the other hand, if the sky is dramatic or full of colors, place the horizon along the bottom grid line
to emphasize the sky. You can also use the rule of thirds to position
your main subject. You might put the
subject along one of the vertical grid lines or even better at intersection point. [MUSIC] So next time before you place
the main elements to the center of the photo, remember rule of thirds, and try to play with
the composition a little bit more to make
it more interesting. Before we jump onto
the next lesson, I want to mention one
more point why turning on a grid line in your
camera comes in useful. There is nothing
more annoying in landscape photography than
image that is tilted. It is one of the basic rules to try and keep your
horizons straight. Even if you can
always straighten images later in postproduction, I think it's much easier if
you get it right in camera, and grid lines can be
super useful with that. Needless to say, the rule of thirds is a helpful technique, but despite its name, it's not a rule, but rather a guideline. So you don't need to
follow it at all times. Instead, use it when it works and break it
when it doesn't.
7. Composition: Foreground Interest: [MUSIC] Good composition can make or break a landscape image. Understanding composition in photography is something that people need to learn and
experiment with over time. The more you get out
and practice shooting, the more you will
start to recognize major elements and where to place them within your images. Composition is
something that cannot be changed in post-processing. That's why I wanted to
cover this topic in detail. There are so many
beautiful images out there that you may think, how can I make my
photos standout? Here's one key tip that
can help you with that. The trick is that while
others focus only on capturing the main
subject in the background, whether it's a mountain
or a waterfall, you will think carefully
about the foreground as well. When you do this, you will give viewers a path into the image. This is a powerful tool, one that's insanely
popular among today's professional
landscape photographers. The reason it's so popular, it helps to create illusion
of depth in a scene. For instance, if you snap
a photo of waterfall, it can look nice, but it often appears
rather flat. [NOISE]. But at some grass or leaves
close to the camera and the whole composition
immediately deepens. The viewer first focuses
on the foreground leaves, then moves into the mid-ground, and then finally sees the stunning waterfall
in the background. So by including foreground, we lead the eye of the viewer. You can also lead the eye
with lines in the foreground, and you can make leading lines out of pretty much anything, out of rivers, roads, voluntary lines in the dirt, and much, much more. Sometimes you can also run
into foreground elements that can sit around the edges
of your photo as a frame. For instance, you might include overhanging branch over
to the top of the image [NOISE] in order to
guide the viewer towards the subject in
the middle of the shot. In wide-open spaces, finding
frames can be tough. But if you're shooting in
more chaotic landscape, you can often find trees or
rocks to create a frame. In fact, it's often
these simple frames that take a good composition
to the next level. They not only provide
much needed focus by showing the viewer
exactly where to look, but when positioned carefully, they can also block out
distracting elements. I have another helpful tip. If you don't know what to
include as your foreground, what always helps is if
you take your camera to the ground and shoot
from a lower angle, there's always something
on the ground that you can use as a
foreground interest. Remember that the foreground doesn't have to be
anything special. It can be a discrete subject
like a patch of grass, rock, branch or
anything else really. In our case, I have
included the rock and some more water flowing
in the foreground, which are interesting
extra elements. [NOISE]. So the next time you find
a beautiful backgrounds subject like the mountain
or stunning sunset, take a few moments to look
for foreground interest and include both foreground and background in a single shot. Just keep your eyes wide open
and always have a good look around and move with your camera before you
press the shutter button.
8. Long Exposure: Capture Movement: [NOISE] When most people think
about landscapes, they think of calm, serene, and static environment, but landscapes are
seldom completely still. If you try to capture
this movement, you add drama and
mood to your images. Look around and you will see
the nature and movement. You can focus on the
wind in the trees, waves on the beach, water running in a mountain
creek, or moving clouds. Capturing this
movement generally requires longer exposure times. It can be anything from parts of seconds if you try to
blur the running water, to minutes long exposures, if you want to
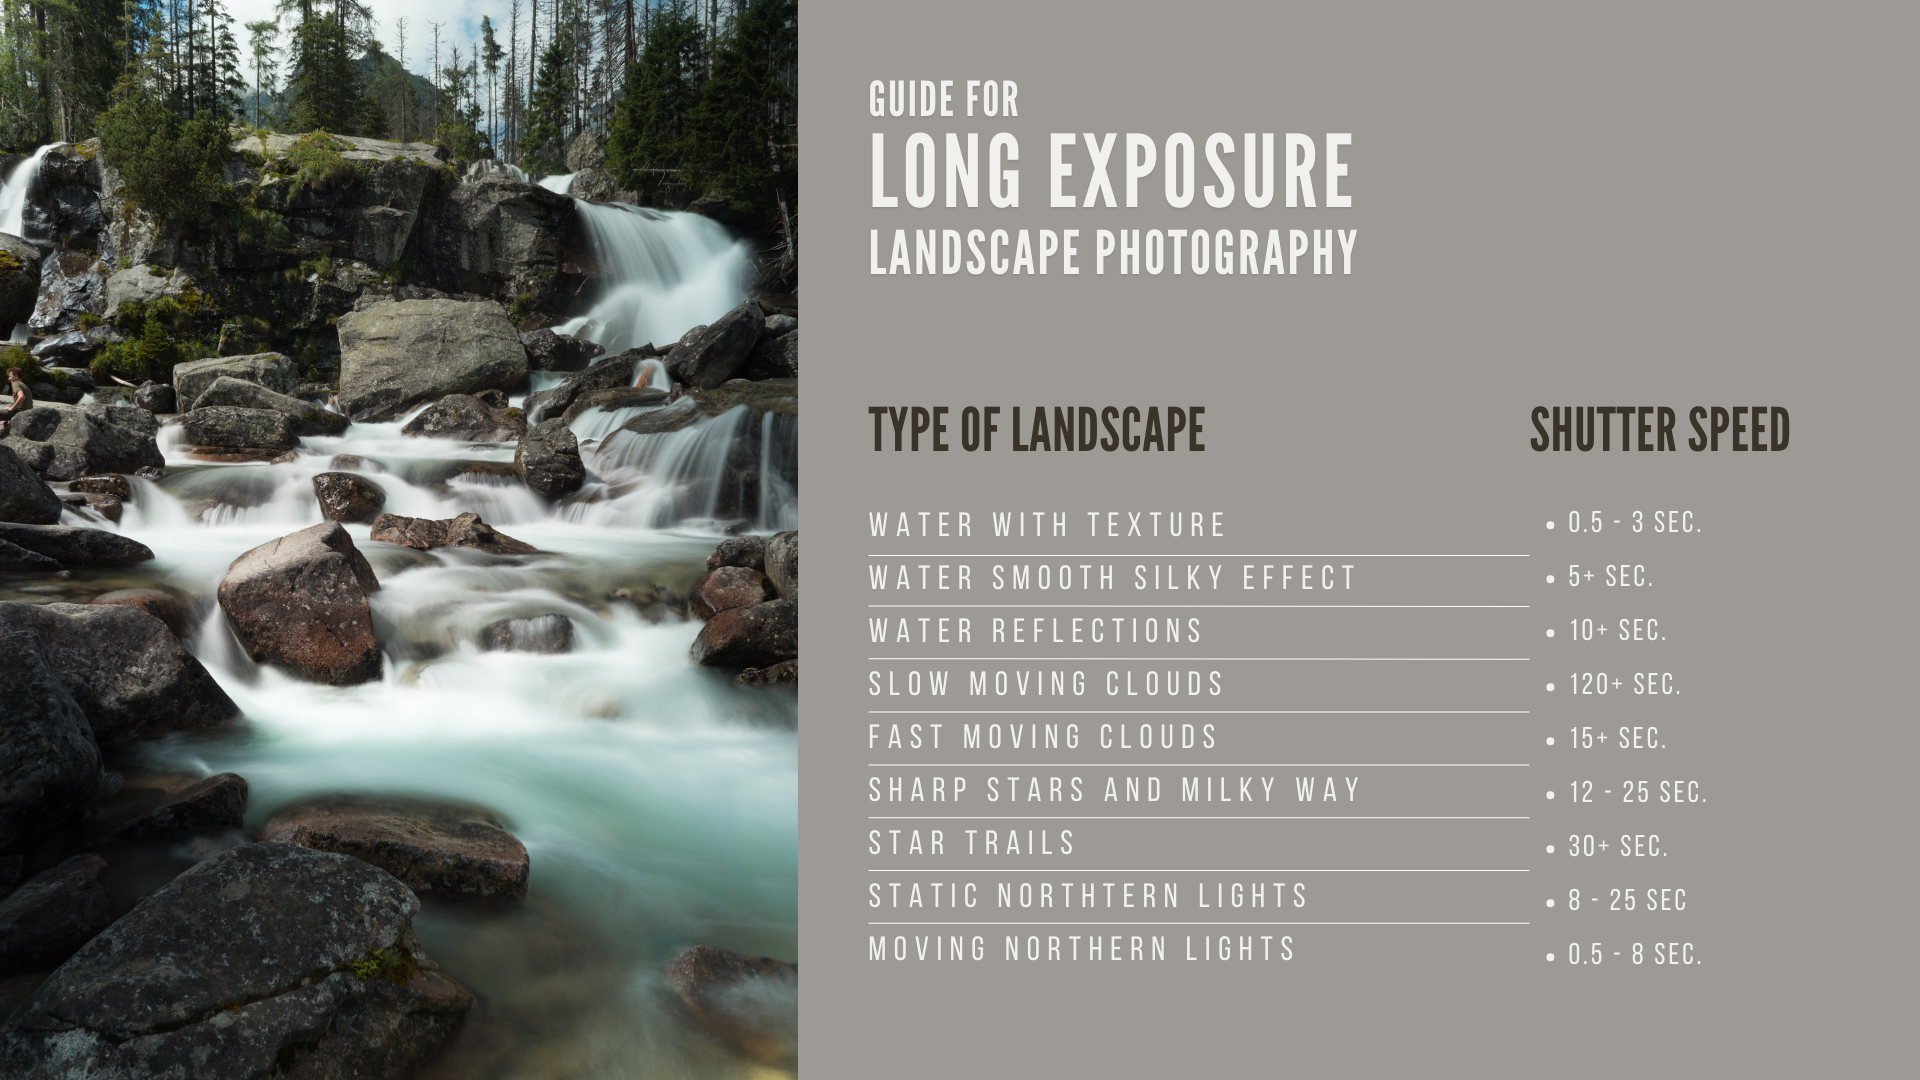
capture star trails. For better [MUSIC]
understanding, I have written this basic guide which will give you better idea what shutter speeds to use when capturing different
moving objects. I will share this guide
in the class description so you can download it
and study it better. If we shoot at slow
shutter speeds, it means that more light is
hitting the camera sensor. To avoid having to
photos overexposed, you will either need to set a narrow aperture or
if it's not enough, use ND filter that we talked about in the
previous lessons. You might also choose to
shoot at the start or the end of the day when
there's less light. In any case, keep trying to capture the movement
because it is one of the easiest way how to make your photos look
truly professional. [MUSIC]
9. Change Your Point of View: [MUSIC] I will tell you one scenario that could sound
familiar to you. You drive up to scenic lookout, get out of the car, and grab your camera. You walk up to the barrier, raise your camera to your eye. Rotate left and right a little. Zoom a little, and
take your shot before getting back in the car and driving to the next
scenic lookout. We all have done that but
as we all know deep inside, this generally doesn't give us the best results that
we're looking for. First of all, standing behind
the barrier doesn't give us many opportunities to
shoot from different angles. Moreover, this is probably
the most well-known view that thousands of people
before us enjoyed as well and took the same photo. Here's my advice. Instead of shooting from
the viewing platform, take a little more time with your landscape photos and find more interesting
point of view. Try to look around to
see how far you can get. Of course, that there
are some places like in national
parks where you don't have a chance to step out of the tourist path to keep
the local ecosystem safe. But if you try and walk around
with your eyes wide open, even there, you might capture
something truly unique. You might start by
finding a difference both to shoot from then
from the scenic lookout. You can also look
for new angles. This could mean getting down onto the ground to
shoot from below, or heading up high to gain
a nice vantage point. Experiment with different
viewpoints and if possible, leave the well-known
tourist paths and explore. There's also another
way how you can take unusual image that will
stand out from the crowd, even if shooting from
the well-known lookout. That is if you visit the spot at a unique weather
conditions and capture the place in a moody atmosphere even if it sometimes
means discomfort, it's worth the unique shot. Because I think
that the weather is such a powerful tool in
the landscape photography, I think it deserves
its own chapter. I will see you in
the next lesson. [MUSIC]
10. Work with the Weather: [MUSIC] Nature can change dramatically depending upon the weather, so choosing the right time to shoot is of major importance. Many beginner photographers
see a sunny day and think that this is the best time to go out with their camera. However, overcast day that
is threatening with rain, might present you with a
much better opportunity. You can create image
with real mode that will make the
viewer feel emotions. Look for storms, wind, mist, dramatic clouds, sun shining
through the dark sky, rainbows, sunsets and sunrises, and work with these variations
in the weather rather than just waiting for the
next sunny day with blue sky. Remember that bad weather, is a good weather in
landscape photography. Clouds and rain are not the most encouraging
weather conditions, but they often present
opportunities far more exciting than
those of a sunny day. In landscape photography, you should always think
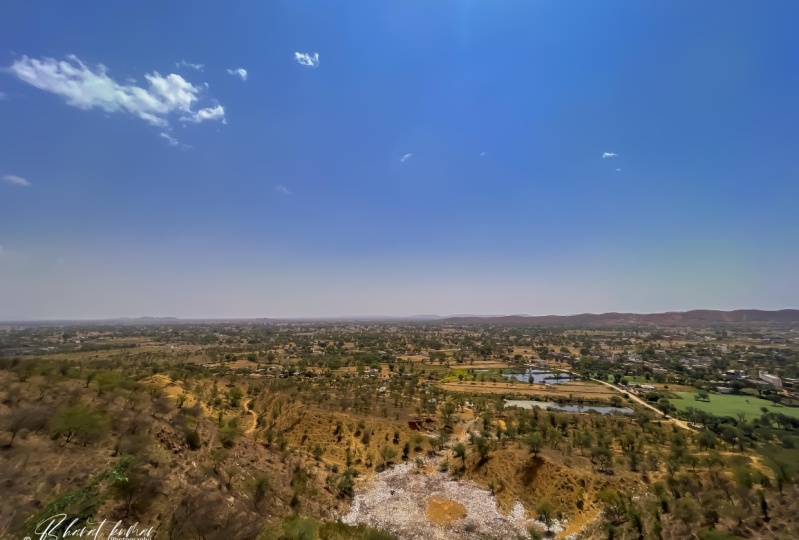
about the sky. Most landscapes will either have a dominant foreground
or dominant sky. Start by observing the sky. If it's lifeless,
don't let it dominate your shot and place the horizon in the upper
third of the image. But if this sky is
filled with drama, interesting cloud
formations or hailers, then let it shine. Place the horizon
in the bottom third of the frame to
emphasize the heavens. Also consider enhancing the sky by using filters on your lens. Polarizing filter will add more colors and
contrasts to the sky, and ND filter can make
our scene look darker. You can always fix things in post-production if
you shoot in raw, and you shouldn't
have problems to add more colors or details
to the sky later on. If you're not sure what
the exposure always rather underexpose your image with
main focus on the sky. Because it is much easier to fix underexposed photos
in post-production, than to recover blown
out highlights. What should you take
from this lesson? That if the storm is coming and everyone else is
running home to hide, you will do the opposite. Grab your camera and capture it. The moments right
before the storm hits all those dramatic
clouds and rainbows, this is the time
when you will have the best opportunity to take extraordinary short
with real mode in it. Again, remember that
in photography, bad weather equals
a good weather. [MUSIC]
11. Light: Golden Hours: [MUSIC] It is well-known among landscape photographers that
when chasing a great photo, you should be shooting
at times of the day that will present you
with the best light, which are generally times
around dawn and dusk. That's when the
landscape comes alive. These golden hours, as
they're often called, offer great landscape
photography opportunity for a number of reasons. First of all, you'll get
gorgeous golden light, I also loved the low
angle of the sun, which creates interesting
shadows and textures. Another reason is that, especially if you
shoot in the morning, it is a great way to
escape the clouds. If you want awesome experience, don't be lazy and wake up early. When exploring, I try
to go to the same place multiple times during
different times of the day. For example, when
I was traveling in the Red Center of Australia, I was so excited to see Uluru, which was my childhood dream. I knew since the beginning
that I want to photograph it during sunset with the
sun behind our back, which made Uluru changing colors from brown to orange
and dark red. But I also wanted to
see if during sunrise, when the sun appeared
behind the rock out of nowhere painting this
beautiful silhouette. I was standing on exactly the same spot to
watch sunrise and sunset, and it was truly
different experience. While hundreds of cars
came to watch the sunset, there was only
about five cars in the park at 6 am in the
morning to watch the sunrise, which made it much more
enjoyable experience. Dawn light is always surprising, you never quite know
what you're going to get as you wait into darkness. Dawn light can range from
dusky pink to a warm yellow, and if you're lucky enough, you can sometimes get wonderful
mist and vapor effects, which will disappear by the time that the rest of
the world is awake. I know that waking up
early can be pain. Anyone being on a holiday you think you
deserve to sleep in. But try to gather all your
determination and wake up for the sunrise at least once on your next
travel adventure. You won't regret it.
12. Conclusion: Thank you guys for
staying with me through the whole video and congratulations on
completing the class. You are now ready to capture some stunning
landscape photography. If there's one thing
I hope you take from this class is that the next
time you're out to shoot, you will slow down and explore the place before pressing
the shutter button. Consider different angles, compositions,
foregrounds, and light. Be creative and have fun. Also, don't forget to share your best photos with us
in the project section. If you like this class, it would make me really
happy if you leave a review and follow me
here on Skillshare. Or feel free to connect with
me on Instagram where I post photos from my travels
all around the world. You may find some travel
inspiration there as well. Now, grab your camera, head out and find a beautiful landscape
to shoot. Have fun.
 Klara Zamourilova, Photographer/Videographer