Transcripts
1. Introduction: Hi, I'm Yes, and I'm also commute to this class on
acrylic landscape painting. In this class, you learn the techniques to
paint interesting, realistic and artistic
landscapes on your own. I demonstrate each brushstroke, color composition and color mixing. So what are
you waiting for? Go ahead and continue watching
this step by step class, and I'm super excited to teach you a cerlic landscape painting. I'll see you in the
upcoming lessons.
2. Materials: I'll come back to a new video. In this video, I'll
be showing you the brushes you need to
paint this landscape. First one is a fan brush. This is a regular fan brush, and this is number
two fan brush. You can use just paint textures on grass, paint
the grass itself, and you can paint the
textures on far off mountains and you can also
paint foliage with this. And this is also a fan brush. This is also a fan brush, but it's wor now
after a long usage. So you can use this
to paint the sky. Of course, if you have two fan brushes which are brand new, it's fine. It's well and good. But this I can use it only
for painting the sky, the blue part of
the sky like that or something like that, which is very generic. And I also painted the
clouds and with this one, this is the wrong brush. But of course, now it's
flat because it's wet. And with this, you can
paint in the foliage. You can paint in the waterfall, the highlights of waterfall, and moreover, you can
paint the rocks. The highlight for those rocks, the paste coating
of those rocks, the blocking in of
rocks, all that. This is a very useful brush. And last but on the least
is the modified flat brush. Let me show it to
you from the side. It was a flat brush
once upon a time. I just cut it, and
I kept on using the pressure whenever I painted a landscape or anything
else, and it opened up. The main thing is you have
to open up the pistils. That's it. Thank you.
See you in the next one.
3. Sky Painting: Hi, and welcome. In this video, let's go and see how paint
sky, very interesting sky. So I have a cup of water,
which you can see, and I have some cobalt
blue and some white. Now, I'll dip my brush
in water just a bit, not too much, and I'll go in
some white and some blue. M a beautiful little
sky blue color. Let's take in some more blue
so we get a vibrant sky. Set the palette aside and
it's come right over here. And drop in a beautiful sky. If you feel you're
falling short of paint, you can definitely
go and dip in water, go back to the palette and play around with that about the consistency
and the color, the values, the
saturation, of that. That's paint beautiful sky here. We'll have some clouds as well. And maybe the sky comes
all the way down there. It's good to have a
restaurant picture so that we get some
accurate results. And you can translate
this technique to any of your
landscape paintings. So it's a very
useful technique and calm painting which
I can demonstrate because this will include
most of the elements, which most of the
landscapes will have. Okay. And by the way, this is worn fan brush. It was a fan brush,
but it's worn, you can see, simple. Let's sort of blend
them together. Okay, so less than half of
this canvas is covered, somewhat like 45% because the rest is remaining,
55% is remaining. I always usually go ahead and
paint the sky as below as possible so that I can just go ahead and have other
elements blended in. Okay, so now we have this
beautiful little sky. The sky is not completely dry. So in the meanwhile,
we'll taking in some black and this color. Be very careful when black
and green mix together, we got a beautiful
little greenish cast. So be careful. So I've taken very little
black, as you can see, and this color, let's sort of thing in some cloud
action right over here. I'm doing this when
the sky is still web, play around with circles. Maybe these are stormy clouds. Move towards the top and make
them a bit soft as you have seen make them soft simply
especially the bottom, let the top be a bit or a
bit defined, well defined. That's okay. But make the
bottom a bit blurred. Now I've taken a round brush and let's go into some
white, pure white. This is a morning scene. We can go with pure white, of course. Whatever color is there beneath
will get next to white. That's okay. It's going
to balance the situation. Come on, here. Drop in beautiful highlights on these clouds a bit
of circular shapes. Make sure that you
leave a little bit of gap between each stroke. For example, one stroke, another stroke like
that's just an example. But usually do that so that you get a bit of textured clouds. Yeah. That is what
I was looking for. It'll make things look
even more natural, as you can see. Yeah. So you got this beautiful
little cloud that? I make sure the color underneath, and here
it's a bit dright. I like it. Let's go
to improvise that. Bring in this outermost
layer of the cloud. Simple. One, we don't have one cloud in this
landscape painting. We want to have some
interest in the sky as well. Let's go ahead and blend it. And when I'm blending it,
look at the way I blend it. It's just sort of
tapping in like that, pushing the
paint. That's it. And this is going to be
effective when the underpainting is kind of tacky or white.
So it'll work like that. And this is normal bend, but I don't want to get that it becomes completely smooth. But we want some textures. So we'll take in some of
this color, more of white. Yeah, that is what
I was looking for. And something over
here just not too much because we'll have
a huge tree here anyway. So let's go ahead and
blend this by tapping it. Also, get some textures simple. Put a lot of textures and sort
of blend it at the bottom. Sort of leave in
some of those gaps, which will make it
more realistic, interesting, and professional
painting as well. Okay? So here we have the sky. So the next video, we'll go
ahead and see how to paint basic mountains and
some pine trees here. Okay, see you in the next video.
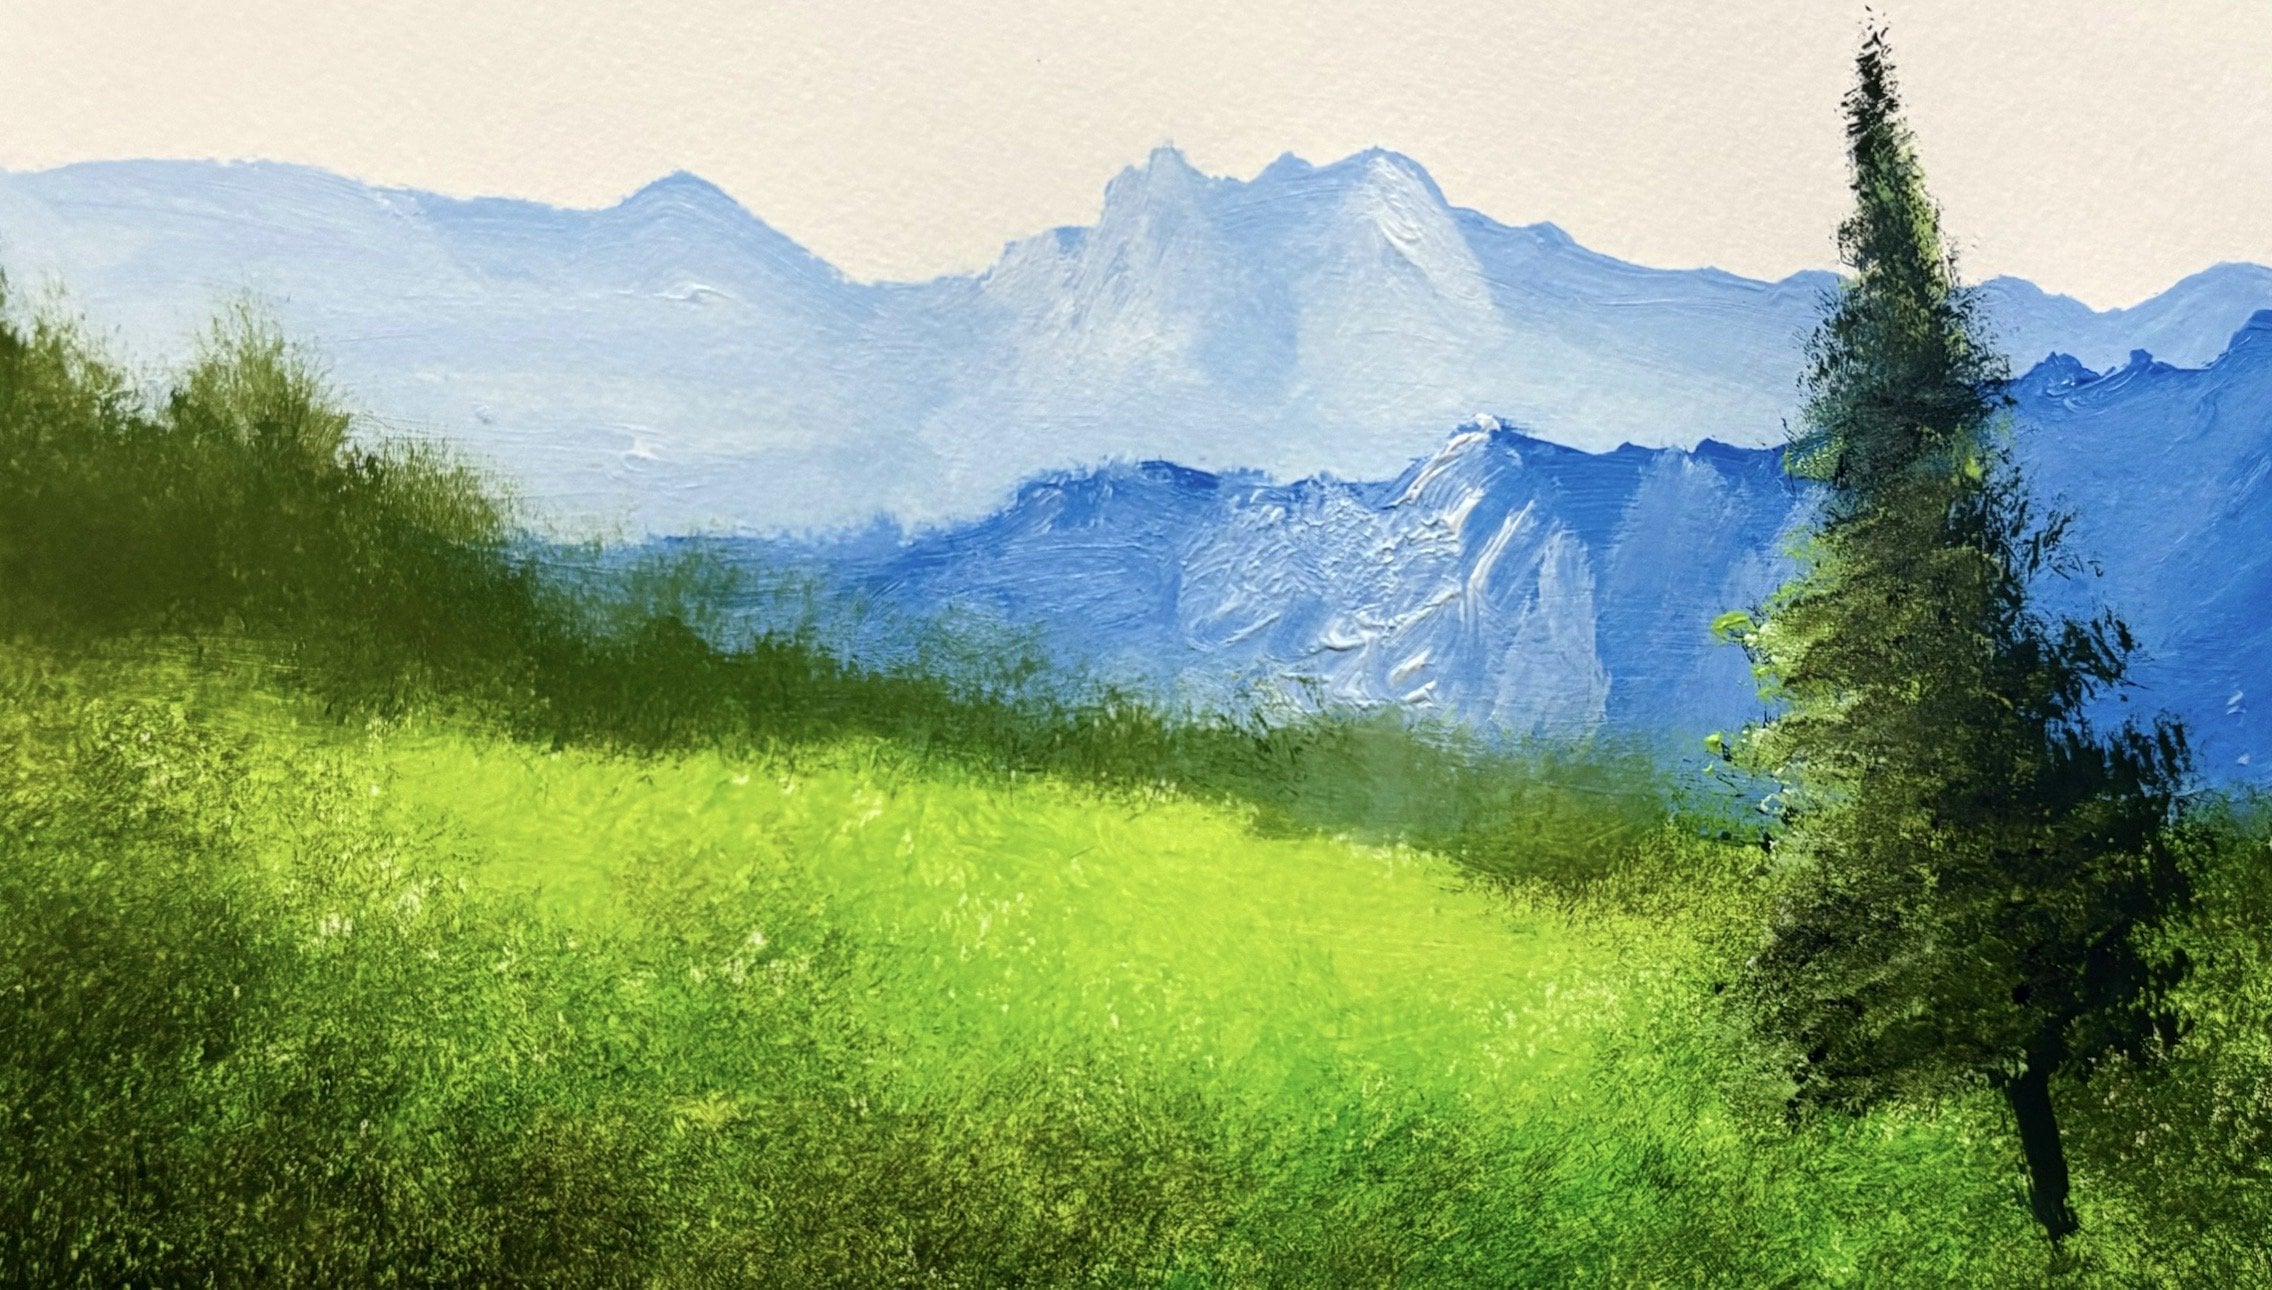
4. Painting Mountains And Pine Trees: Hi, and welcome to this video. In this video, let's
go and paint in some mountain drenches
and a few pine trees. To paint the
mountain, of course, I'm using the same palette, but you can ignore the colors
except brown and white. Salt in some white from there, a little bit of
blue mix just fine. It's totally fine. Okay,
so we'll take this color. And let's sort of come
right about in here. Of course, you can add in
some water to that mix. And this is going to be
somewhere in the background. Not too much in the background, but still look at the
sky is still white, and you can bring it
to your advantage, and it helps you to
blend the color. That's a trick. And that is a very effective way to paint misty mountains
or misty trees. And let's just go all
the way till there. And that fade away. Simple. And let's sort of get this color going on and blending it because we don't want
a lot of detail ings. And now I've loaded some
white on palette and I'll get some brown from this old palette and
just sort of blend it. Let's come here at the bottom. Always shut off from the bottom
whenever you're going to paint the mist. We'll
come right away here. I paint and blur the bottom and it'll create
the illusion of mist simply. Okay. That's it. Simple. And to paint the pine trees, I've taken in some blue, same white colour, dirty, white color, and some black. This is not pure
black, as you can see, it's almost a darkest
shade of gray. I can work out from here. This is black, and
that's a shade of gray, beautiful little shade of gray. And dip the brush tip of
the brush in water for this for painting the
pine trees. Okay. That's sort of big spot and
yeah maybe this is a spot. Okay. Cool. Let's
get some shape. Shape of some leaves,
some foliage. So we want to make it look realistic as well
at the same time. Painting in there? Yeah, almost. Maybe the sharpness is
not that defined on the tip of the tree. Okay. And maybe it's too thin on
the left and the right side. Let's go and make
it up. Painting it. This will sometimes increase the size of the tree
unintentionally. That's it. Yeah. Something that
we have to just a bit. And you can have any
shape for this tree. Except that it should be in
a conical shape or a tip. Okay? And let's paint
in another one. For that, I'm going to dip
my brush in water again. Just tip off that. Brush
on the entire brush. And let's come right in here and fill the
emptiness there. And also lock the views
view towards this painting. Simple. Let's get in this. Maybe this is a huge one. Usually, I don't
recommend adding water for when you want to
have some texture, but this is acrylic. You have to add in some water
to get that smoothness, otherwise, you'll
get a dry effect. You can't apply the proper
texture as intended before. And this is, yeah. Cool. Yeah. Let's come over here
and fill this gap as well. We need another tree, let's sort of go over
there and paint in a beautiful little tree. Yeah. In this video, we've painted
the mountains and the trees. Now let's go ahead and add some highlights to those trees. To paint the details on
these trees or highlights, what do you want to
call it, I've taken some green and ochre. Of course, I'm using the
modified flat brush. It was a flat brush once upon a time and I modified
it according to my convenience and just usage it got opened up the
bristles got opened up. You can try it, it
will work as well. The success rate is high. You can work on this. Let's come over here
on this little tree and is in some highlights. This will be on the
outermost part of the tree, you have to decide from which
side light is coming from. The light source is coming from. Here the top as well,
when paint. Yeah. Okay. And let me take you more slcuan green for this tree. It's over there. You can do this when it's
very less tacky or it's completely dry because
you don't want underneath painting to mix
with the highlight color. Yeah. Look at that. Now I'll take in some yellow,
give it some variety. You can even add lime low for this and that will
work good as well. But I'm looking for a
very subtle painting. I'm going to go with this. I let the top be a bit dark. I stick in for that trip but it will be very less because that's not interest because
that's in the corner. Now I'll wipe off my brush, the modified sat brush, take in this black, grayish black, cur and green. That's not pure black. You can add that
as shadowy colors. Those colors will
act like shadows. Maybe we'll come again and
add another layer of hinte. But as of now, you're good. Now, to adding highlights, is just been 2 minutes
since I've left to try. Let's with limel and some green. Me limlo. This is limel or sometimes
sometimes you hear it as lemonlo as well.
Let's tick in this. And let's come over here. Excuse me, Hali, simple, super effective and time
saving as well. Look at that. My we need more angelo. I'll take that on my same
modified flat brush. Look at that? Yeah, I'm
good with that tree. Let's come over here as well. Chairs at the bottom
and some in the middle to attract the viewers
attention towards his painting. Yeah, that's the way I want it. And yeah, that's to be
professional as well, as you can see. Look that looks
more professional. Let's give it some
more highlight sis and it'll automatically become more contra it'll increase the contrast the
warmth, all that. Okay. With this tilt in water
will paint his left out. That's not to have
too much textures. Simple. Yeah. Okay. Next video, we'll go
ahead and see how to paint the four crown elements
with a waterfall and some rocks. Thank you.
5. Painting Waterfall And Rocks: Hi, and welcome
back. In this video, we'll look at how to
pad the foreground. For that, I'll dip
my brush in water, and I'll let you know
which brush it is as well. So it's the fan brush, wornut fan brush and super
effective to lock in. And I have some
black, pure black. And let's stick in that color with a brush dipped in water. Let's come over here
and create a horizon. Okay. Don't just be too thick that it'll take a lot of
time to drive. Yeah. B there. That makes it look
interesting, isn't it? Brush again, water, and
get the black paint. Look at that B this
is the blocking in, I can afford to add in water
because anyway, it'll dry. But whereas apply
some detailings or textures when it's
tacky or when it's wet, then it's hard to get that
effect, even in acrylics. Something like that. That? I in just 1 minute, we can lock this in
with the help of water and A lot of black paint. Yeah, cool. And
in the meanwhile? Let's go ahead and add in some textures on this
piece of mountain, just to make it look, you know, a bit more realistic. This is not going to be
everywhere, as you have seen. So this is going
to be just there. Not too much of textures. Sometimes textures are the key for making the painting
more realistic. Painted very subtle. I'm avoiding to add the texture to the
peak of this mountain. Yeah. This is almost dry. I think we can go with this. Let's wait for two more minutes. I'll see you. Sorry to
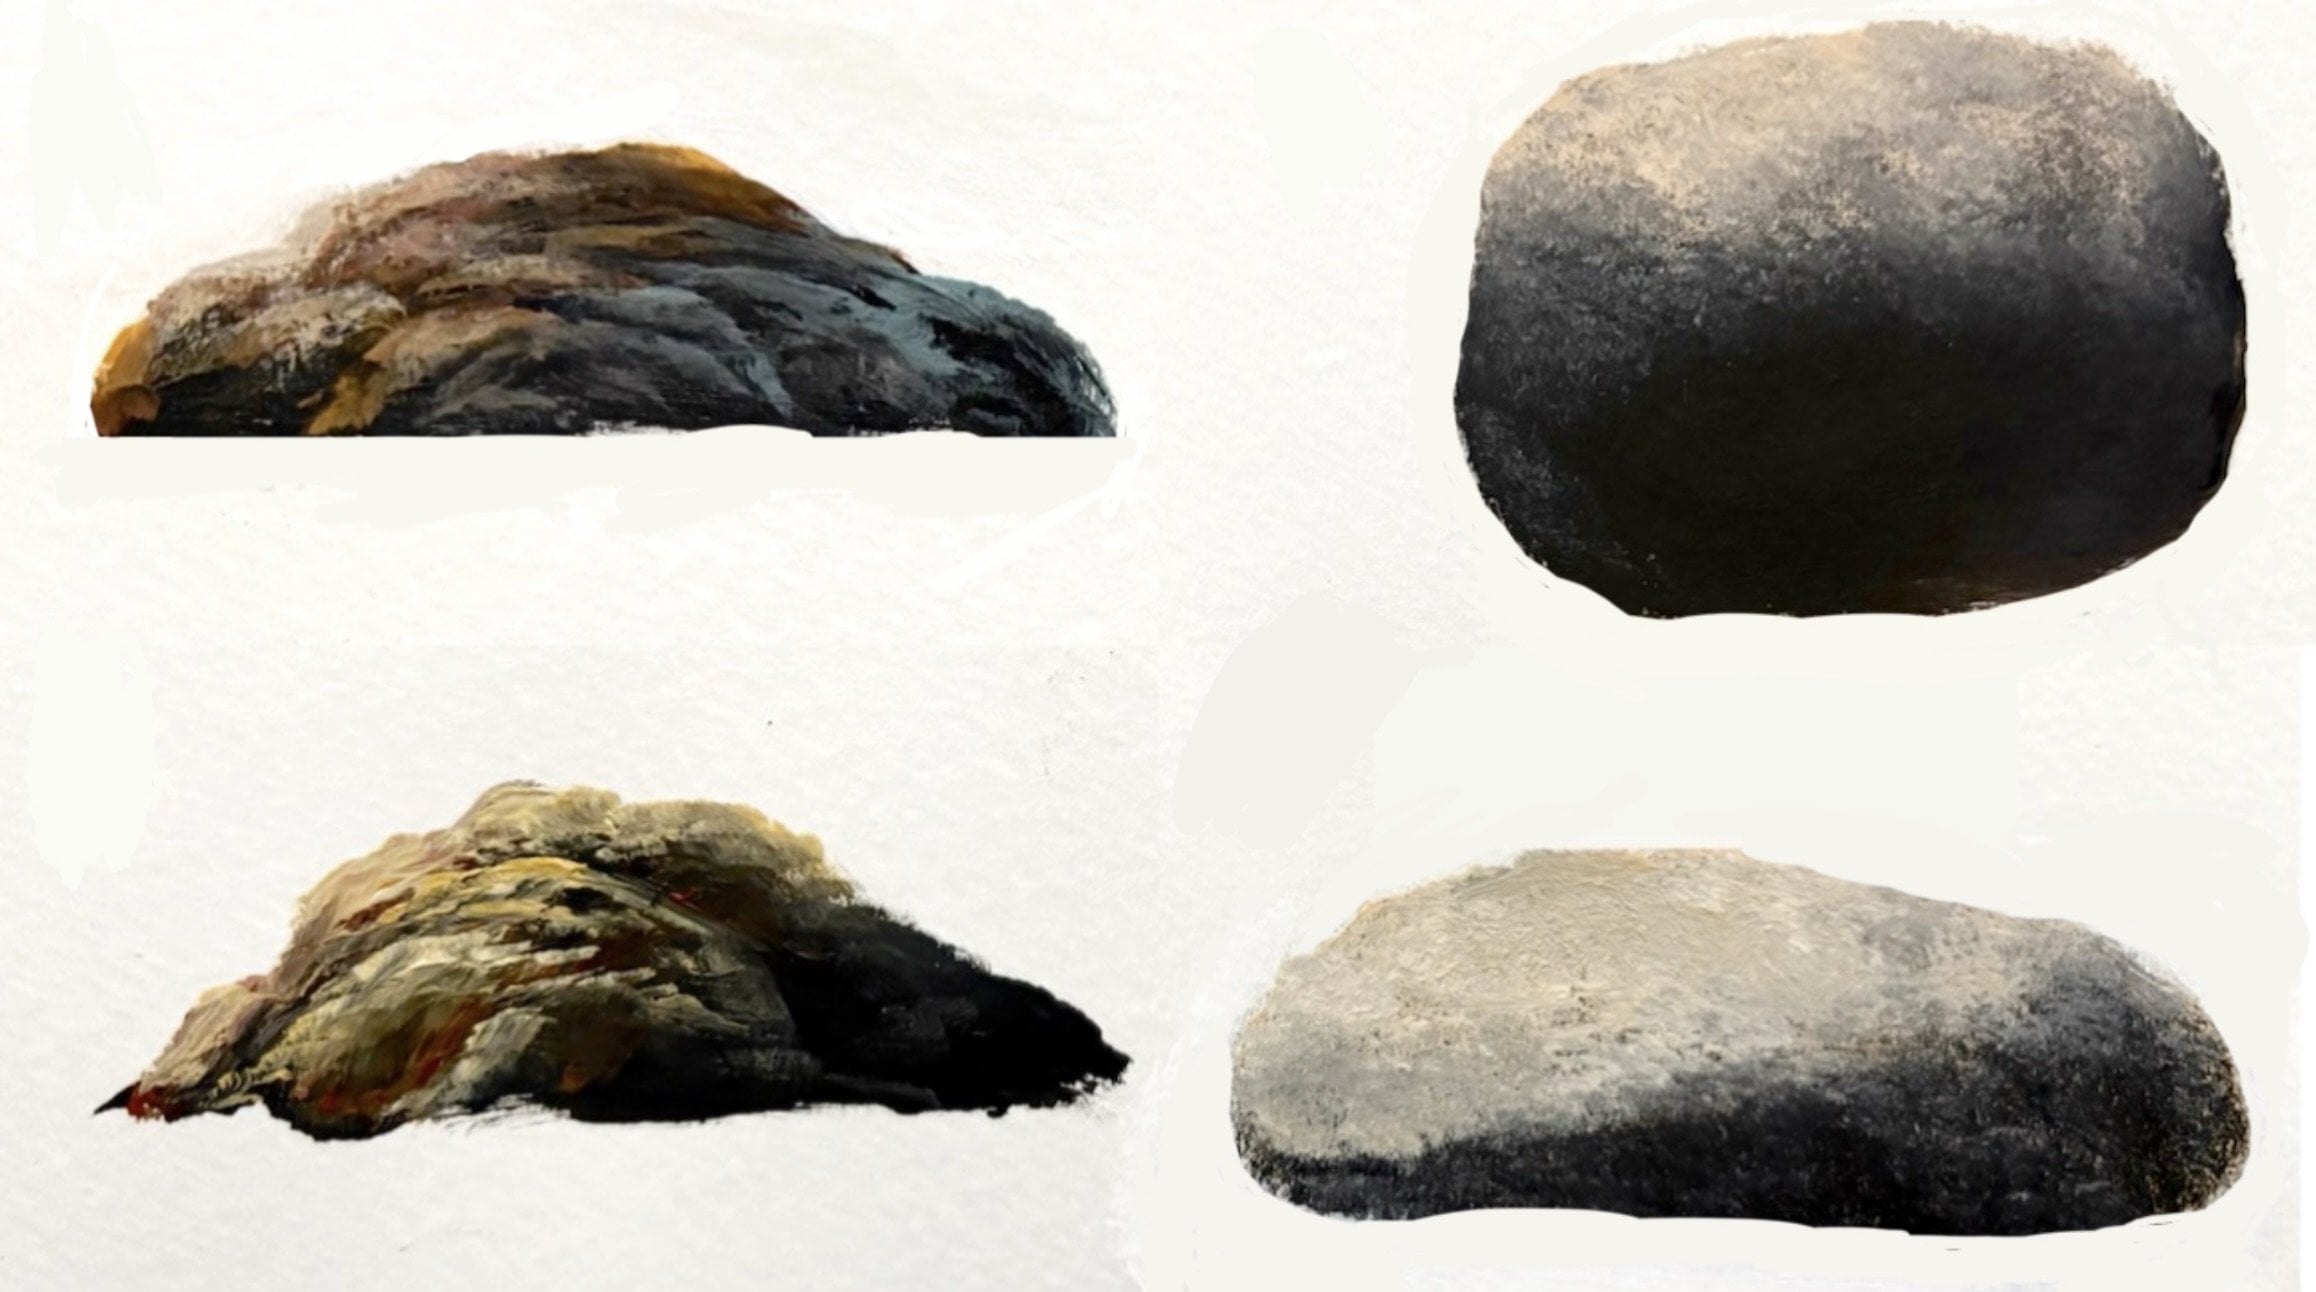
paint in the rocks. I've give in some
Yellocre and some brown. Let's take in some new loco. Of course, I have some
blue on this brush. This is the same brush which
I used to paint the clouds, the highlighting of the clouds and the textures of the clouds.
Let's take in that color. Let's come in here. Now, look. Brown is
darker than yelloca. So the moment I add in
some yellowca to brown, it will automatically
become lighter. I can't add white because
I lose to saturation, but I can add yelloca
for more flavor. So the brown, less loca, will give you lighter brown
compared the original one. So let's take in this,
and we have to plan ourselves for the rocks. Okay? And let's think of
rocks over here. There there. Co still wet. You can always part of the brush or you can chest that color. Accordingly, let's
come at beneath that. Okay. Yeah. My take in more open and try it with the highlight
color just a bit, not much, just a bit. As can just blend this. It's simple to blend because
this is a water based color, so you can blend in
there itself, simple. I'm using words simple lot of times because landscape
painting is very interesting. It's very easy if
you know the basics. Okay. And something
youtube, just not much. Yeah. On a lot of
textures as well, if you're painting
this on a cannon, you can make use of
the palette knife. Simple. I mean something. Okay. We're losing the brown,
let's get back into the brown This will be
something like that. Have some yeah. And obviously, this
is a colors Acrylix. So this will dry
a bit shade less. This will not be the original value by the end
of this painting. So for that, we need to go ahead and add in some more highlights. Yeah, so it's going over here. Cool. And we'll take some brown. You can take brown or in
burnt Siena for that matter. Both will act as the same in acrylics majority of the time. Okay, so we have that.
I've not added water. Prote. Don't add water for this because this itself is
not completely dry. Look at that. But we can
manage to place in some rocks. And we don't overdo
that everywhere. If you overdo that, you'll see the paint or the shade or
the blocking in underneath. So don't apply too much pressure or don't keep on overdoing
on the same place. Just keep on moving.
That's the trick. That's the trick. You've
got to keep on moving. Let's come over here and don't get too carried
away by these rocks. Because also we have to add in the highlights this will be
a huge rock comparatively. Over here. Sort of another one. My will not have a
lot of these rocks. In a sense, let's not overdo it because it will become the painting will look too busy. I've cut to maintain
that balance. Okay, so when these are wet, I'll take a dry cloth and
just wipe off my brush. Let's comp over
here on this rock. Let's sort of blend
this simple and easy, not applying too much pressure because if you apply
too much pressure, you'll see the black
color underneath. And we already know that
there is some black. So we have to go ahead and repaint this,
which is not the case, I should not happen because you won't finish your painting
with a professional effect. Here and do not add water
again. That's another protein. Don't add water at any cost go this when you're painting the basic highlight
of the rocks. Never add water. And even for these highlights, I
did not add water. I kind of dipped my brush, the tip of the brush now, the entire brush for painting the paintings from this
color. I sort of blended. And don't let this to
dry completely because, you know, right, you
require minimum two colors, wet colors to blend, and later on, you
can, of course, use the dry brush blending technique that
will work as well. Okay, so this is what I want. Simple, and you guys can achieve it easily after
watching tutorial. And you can pretty
much translate this into any filansc paintings. Okay. Look at that. It looks realistic because
it blurred the bottom. Just apply the paint
and blur the bottom. Simple. Let's go ahead
on with this side. This side, be honest, we have very little
rocks because, of course, had a rock here. Okay. We'll have some
waterfall going on there. Let's paint in another rock. On the opposite side, maybe
lost some brown and get it. Let's come over here instead
of piece in another rock on the other side of
the waterfall. Okay. So this will act like a support or this will define
the waterfall. What I mean is,
according to the sheet, you can have the waterfall. It's another one. Maybe another. Yeah. Maybe this one the
biggest on the left side. Little bit of and just toss it. Touch of that here and
there. Not much, just a bit. Sort of random placements. Again, I'll go back
to my dry cloth, wipe it off for the blending and I'm using a seam brush which I used there. It blend. You can use a finger as well, but finger, you might accidentally apply
a lot of pressure. So you might use that as well. Yeah. I can leave this a bit
dark because light is coming from the side the trees, light is from the left side. Okay. Landscape painting is fun. So you can rearrange these elements and
you can go ahead and clay on the colours or
the different shades. Like, for example, a used brown. You can add in some loca,
get that flavor like this, some brown, some lend it too much into the backdrop which will make it realistic. You can try it at
your convenience. Okay? You're sort
of blending this. As of now, it looks good. Yeah. In the meanwhile, let's go and add
in the waterfall. Now I'm taking some white, blue, and whatever colour was
left on this fabsh. Let's come right here and
always start off some top here and pull it down. Put straight. Please, very straight as straight as narrow. Okay. That's enough. So I'm relying on the
texture of this paper. Okay. And beneath that, you'll
have some ripples. Little ripples on there. You can have some
water, dip this brush. All remember most of the times when you're
using a fan brush, dip the brush just at the tip. Not too much. Leave in a lot of
those gaps. Simple. We use this finger from
left to right. Yeah. Now, I'll take in
some pure white. Simply pure white and
leave it like that. And over here too. Okay. And let the top be
not that sharp. Just and pull it Okay. So that's doing beautiful. And I'll off my brush
that dry cloth. Let's come over here
and sort of blend them. Yeah. Because we can't
rely only on white colour. You've got to play
around with the colors. Okay. Let's come over here
with what white paint is left. This is a narrow area, and the water flows like that. And in order to paint the
highlights on these rocks, I've taken some limel, white, and some brown. Okay, more of limel and some black and some
brown and some ochre simple. Just go ahead and
play around with colors and this is completely
dry, to be honest. Yeah. Using in there. It blending it,
then there itself. Look at that. It's super easy and it's super
effective as well. Just pulling it down, blur that. Blurrihness will make
a huge difference. Maybe this will have
more aninsT less. Add in some more white. Please
sit in. This looks cool. More discolored. I'm very
excited to play around with this reddish brown colored rock. Of course you can
just paint this by playing the highlight and of the brush which I will do now. Blurring this make
it look realistic and effective and professional and more artistic. Look at that. Maybe you can try
that over here too. Great. Over here
something over here. On these big rocks, it's very easy to blend the highlights because
you'll have a lot of room. But if it's small rock,
it'll be challenging. Okay. Something like that. Yeah. A lot of those cracks. So bend it. Yeah. This one, we will have
very little highlights. I'll take some
white, some white, some limelo, roca brown. And mix them all together. Let's just slic that. This one also
defines the shape of this rock. Straight
into some white. Slice it in that. Of course, you can take a bit of a risk. Okay. Might have to brush again. Let's come right over here. I can use my hand because my
hand is free, there we go. Somewhat over here to
maybe that's xs paint. Let's take off that
x paint and have this beautiful very bright rock. They do exist in nature. Something over here
too, just a bit. We have a sub rock here.
Sharing some interest. Go to this color and
place it over here. Just like that,
something like that, and pull it. Yeah. So pretty much satisfied
with that and maybe, you know, just balance painting just according to artistic work. We can add in some over here
as well, but not that much. Yeah, we can add and
slightly blend it away even with finger itself. Maybe some top. Yeah. That's it. Let's go to blend this or blur this so that the focus stays
right there at the center. And this should look balanced
because this is a painting, and the viewer should
like it for that, we have to ensure that attention stays right there in
the middle simply. Yeah. And now we'll go back
to this palate again. I'll take in some green and some limelo and some lack. Okay? Most of it's going
to be black to get a natural grayish green effect. That's sort of the here. Place in some interesting
little grassy areas. Just here just going to tap it. Sort of skips and spots. That's very important. Loki. And we might not add
that much of highlights to these grasses or
some of these mosses growing here on these wet rocks. Of course, you can
just bring this down. Bring this tree a
bit down. Yeah. And we'll take in some
highlight colors soon, pity and co here. I don't see the angle of
the fan brush also matters. And this is a regular fan
Brush, the normal one. I'm not using worn fan brush
which I painted this time. So this is just a normal one. Maybe we can add
in more highlights a bit more highlights on these. Change the color of
the fool or the grass. Yeah, having a
variety will help. There. I observed that there
is some here as well. So required here as well. Yeah. So these colors, especially the colors with
loca will look realistic, green and locre or let's
say white and lochre. Not too much of white like that, but decent amount of
white. It look good. Sometime, okay. Go back
to that old color, the grayish skin color, and it beautifur there. That. It's s easy. She bit over here and there. Not trying to eat too much. Yeah. And something
over here too, bit not going to
have it too much. So the less pressure
you're going to apply, we'll get the finest of the
textures and it'll work. Okay. Simple. So the next video, we'll go ahead and
have a huge tree trunk here. Thank you.
6. Tree Trunk Painting: Hi, and welcome. In this video, let's go to paint a tree bark right over here, the tree trunk. I'll dip my brush in water. Not too much of water.
It's going to some black. Even though it's going to be the darkest colors of
gray, that's totally fine. Let's come right over here. Let's drop it in simple. Let's skip it right over here. The other side of
the beat tree trunk. And the root will always
be thicker than the top, usually, for these trees,
especially in forest. Yeah. So we'll go and added
some highlights to this piece of wood. So I've mixed in some white, burnt sienna and yellow.
No lime ll time. That's kind of taking some
highlights for the stream. So it's going to
be from the left. Place in one right here. Automatically get those effects. And I've not added
any water for this. It's a good way to start painting the tree. You
get a lot of cracks. You got a lot of textures. Don't add too much paint. Okay. Let's come over here shape
of the brush is important. Let's come over here at the top. It's not totally dry. I just on the fan for
five or 10 minutes, but still it's wet and we can
take that to our advantage. I could chest over
here and there. Yeah. Let's add in some
shadows for this tree. Add some white and
cobalt blue, simple. We will add more blue this time it help us to
balance the warmth, the contrast, and melitens. Automatically, it'll take care, so we don't have to
wait for everything. Yeah. And something over here
too just a bit, not much. Is just to indicate that this
will give some contrast. It playing around
with the colors, with wet paint, adding some
dry paint, experimenting. Okay. And now I'll take in some limo and white to give
this highlight for the tree. So I'll take in some
white and limel. More of white? Let's come this should be the
thinnest of the highlights. Yeah. That's the reason I
painted this tree a bit thin. Not that tall, sorry, not tall. It's not that thick. Yeah. Something like that. It's very little pressure. I'll wipe off my brush. By the way, this is round brush. Instead put it in
order to blend it. That works. That totally
works. Blend these things. There we have it. One final quote of highlight
in some missing areas. Sort of pleasing that much. Yeah. Okay, so with this, I come to the end
of this painting. I hope you've enjoyed it,
and thanks for watching. Leave your feedbacks and reviews after we've completed
this class. Thank you.
 Yashas G, Paint With Yash