Transcripts
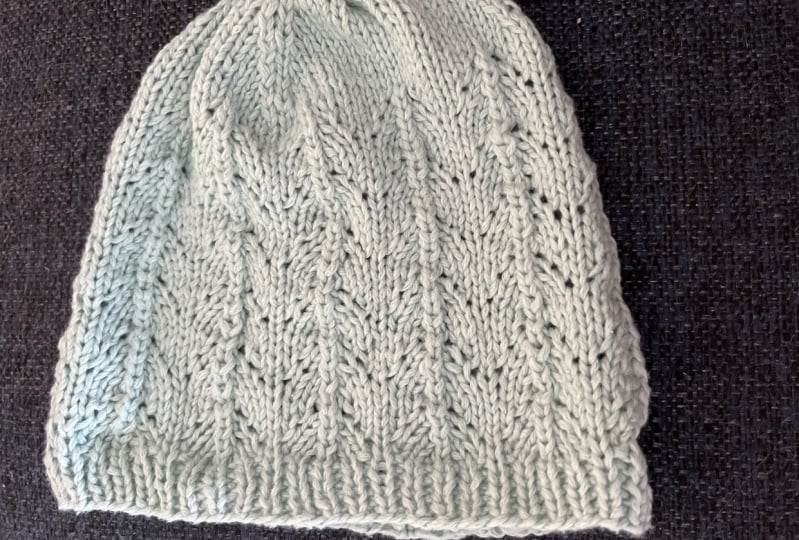
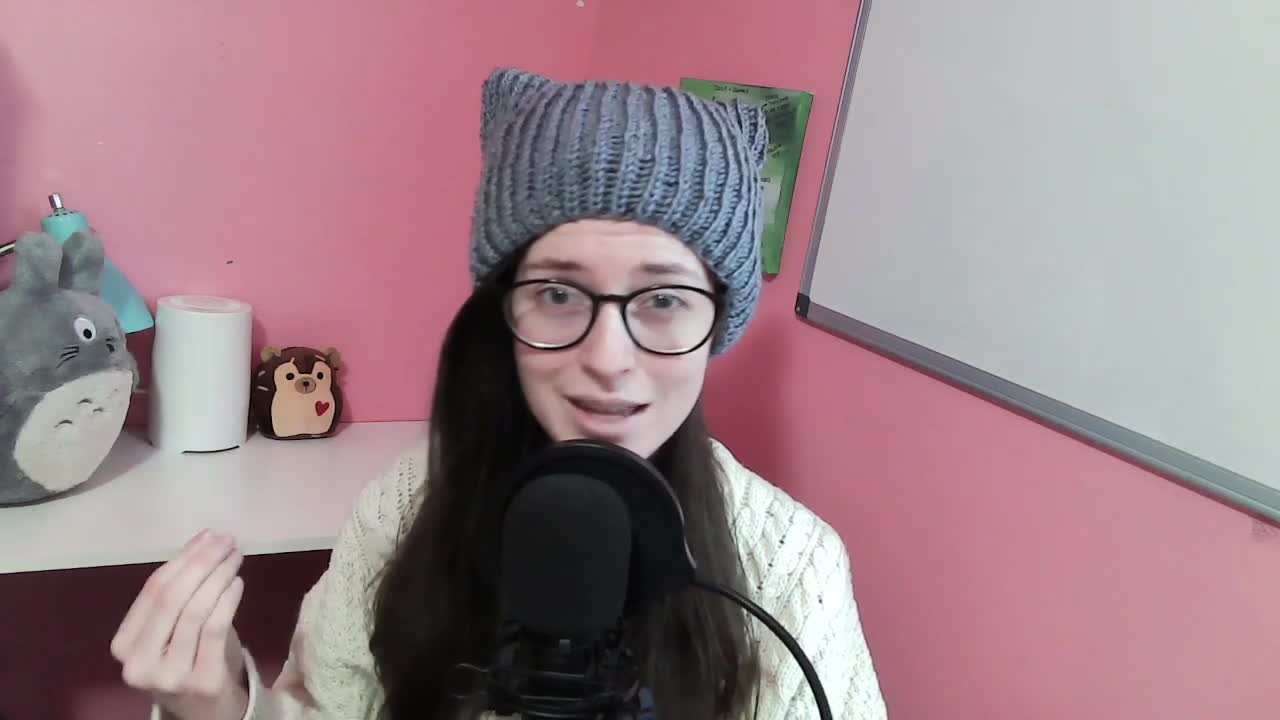
1. 00 Introduction: Hi everyone, I'm Sara, and in this course I'm going to be teaching you how to make this Fishbone stitch hat. It's also been called
the horseshoe stitch, so I'm going to call it the wishbone stitch because that's what I grew up
being called up but it's also called the horseshoe, if that's what you know, it is. Thus this stitch and
this is a lace stitch. So it works really well
for something like a hat or mitts or Sachs, where you have
something where there's a side that no one's
gonna see it as a super great for things like
scarves that you are going to see the backside
of it that isn't as pretty, but it's a pretty
straightforward lace pattern and you can use
bulkier wool for it. So that is why I'm
gonna be teaching it to you in this course. Before going into this, you're going to need to know
the basics of making a hat. So that is everything from
casting on your stitches to binding off and weaving in your ends and
everything in-between. If you don't know any of that, I have a course here
on Skillshare already, where I walk through
all the steps of how to make a simple hat, everything you're
gonna need to know. So go and check that
course out and then you can come back
and watch this one. Other than that, I'm
going to be teaching you the full repeating
six row pattern of the wishbone stitch going through every single
one of those rows, such you know exactly
what you're doing as well as going over proactive lifelines so that if you do mess up the pattern, you can pull your work
back and keep going so you don't have to worry
about dropping stitches and having to
start all over again. Be sure to put a picture of your finished hat into the project section of this
course so I can check it out along with any
questions that you have or difficulties that you ran into so that I can
help out with that. But now let's get into
the first lesson.
2. 01 Project Materials: In this project, you're
going to need some, a wall, preferably something
that is a little bit thinner since this is
a lace patterns with going to look a lot nicer with a thinner wall then like
a medium bulk wall, but feel free to pick
something that is a medium because it'll be
easier to work the pattern. So if you want to go the easy
route for your first lease, then you can always stick
with a medium weight, but going with a thinner wall is going to make the
pattern stick a lot better. You're also going to need a set of five
double-sided needles. I'm using four millimeter ones, but you can pick bigger
ones if you have a, a thicker wool or you can pick smaller ones if you want to get a really Lacey looking pattern. You're also going to
need some scissors for the end as well as
tapestry needle and a flexible measuring
tape to make sure that you have the length
of hat that you need. You may also want to have
a row counter like this. So this is a six row
repeating pattern. So having a row counter is a really helpful
for just keeping track of which row you're on so you don't
get all mixed up, but you can also go without, again, it's only six rows. It doesn't have a lot of
space to get super confused, but a row counter is a really
nice way of just keeping track of where you are and that's what you
need for your hat.
3. 02 Casting On Stitches: Of course, the
first thing we need to do is cast on our stitches. I'm gonna be using a
long tail cast on, but you can use whatever
method you prefer. And I'm going to be
casting on 24 stitches, her needle, I'm going with 24. That's gonna be on
four of my needles, but you can pick a different number if
that's what you want. The only thing to
keep in mind is that this is an eight stitch pattern. So as long as you have
something that is a multiple of eight
and it's easier if you end the pattern on
whatever needle you're using and then start the pattern over
again with each one. So a number dividable by eight on each of your needles is the easiest way to keep
track of your pattern. I'm doing 24 and I'm just going
to cast that onto four of my needles and then I'll have my fifth needle free to
actually work the stitches. But that's why you need to do
for the setup of your hat.
4. 03 1x1 Ribbing: Once you've cast on
all of your stitches, you can close the
round up and start working the ribbing around the bottom of your hat to make sure that it's
nice and stretchy. I'm going to be doing
one-by-one rubbing. So that's one knit, one parallel stitch
all the way around. You can also do
two-by-two ribbing, which is going to be
to knit two pearl. It's really up to
what you prefer. I like the one-by-one. I just think it looks neater and it's a little bit
more delicate looking, which I think works
with the lace pattern. And you're just going to
repeat that pattern until you have an inch of ribbing. I like to keep it at an
inch because I think a smaller rib around the
outside looks nicer. Again, the lease is a
very delicate pattern, so you don't want anything
that looks really chunky while you're
making this hat. So just keep doing that
one-by-one ribbing until you have an inch and then
we'll get started on the actual wishbone pattern.
5. 04 Rows 1 & 2 Pattern: I'm going to be showing you
how to do this lace pattern. I'm gonna be doing it
in sets of two rows at a time because
every other row is actually just knitting
in the round. So it makes sense to have the videos and two
rows at a time, but I knit a couple of the
rows of this patterns. You can get a little bit
of a look at what it looks like and you can sort of see what
we're working with. One of the biggest things about this pattern is you're
going to be getting these rows that have
just knit stitches. So that's actually where
we're going to be decreasing. And those are really
good at keeping you on track of where exactly
you are in the pattern. So there are some little markers for you to kind of
keep track of it, but you can see that it has
this wishbone pattern to it. So the first row is probably the hardest part
of this pattern. So at least we are
going to be getting, get out of the way. But keep in mind
that it's gonna be a little bit tricky when
you're first starting out. One thing that I like
to do right after I'm done with the
ribbing is I like to just do a knit round all the way just to loosen
it up a little bit. And that way I'm not dealing with a wonky and His of having a knit and Perl
that I'm trying to work this pattern
with because it can be a little bit tricky. So to start off this row, we're going to knit one. So the first stitch, we're just going to
admit it and then we're going to do a yarn over. So this is basically
you're just taking your yarn and pulling it over, like you are going to Pearl, but you're actually wrapping the yarn over and that's how you're going
to create a stitch. We're going to be
creating stitches by doing this yarn
over a technique. And then we're going to be
decreasing by stitches. And that's how we're
going to get those lines in the pattern, but you're just going
to pull the yarn over. So I'll show you one more
time or we're just taking our yarn and it's like if
you were going to Perl, we're pulling our yarn
over to the front of our work and then wrapping it around the rest
of the needle. And then you're just
going to hold it in place and then we're going to knit the next two stitches. So two more stitches knit. And then you can see that because I've done
a couple of rows. I'm at that part where
we have this ridge. So you're always going to
have one stitch and then the next stitch will line
up with that orange. And that's how you know
you're on track for when you're gonna
do this decrease. To do decrease, you're going to take two stitches as if to knit. So usually when you knit you
pick up your one stitch. So instead of that, we're
going to pick up two stitches. If you've ever done
a knit two together, it's sort of a similar thing. So we're going to take
those two stitches and slide them over to
our other needle. And then we're just going
to forget about them for a second and knit into
the next stitch. So we took those two stitches over and then we're going
to knit the next one. And then we're going to take the two stitches that we just slid over to our working needle and pull them over the
stitch we just net. So taking the needle with
the rest of our stitches, we're going to pick up those two stitches that
we just slipped over and we're going to pull
them up and over that stitch that we just knit. And that's how you're
gonna get that kind of ridge pattern in the
whole knit, it'll work. And then we're going to knit two stitches and then we're
going to yarn over again. So when we decreased, we got rid of two stitches. So we're going to have to
increase by two stitches. So we've already
done one yarn over, but we're going to put
our yarn over again. And that's the end of
the repeated brand. Don't worry, I'm gonna
go over it again. So if you're confused, we'll
go over it one more time. But one of the tricky
things is that you are ending with this yarn over. So it's gonna be a
little bit weird when you get to the end
of your needle, you're going to be really
careful about not dropping that stitch because
it's just going to be yarn looped over your needle. Let's go over it, this row, one pattern one more time. So we start with one knit stitch and then we're
going to yarn over. So we're going to
take our yarn and wrap it around our needle. And then we're
going to knit 212. And then we're going to
do our decreases again. So we're back at this bridge. So what we're going to do
is take two stitches as if to knit and slide them
onto our working needle. And then we're going to
nip the next stitch. And then we're going to take those two stitches that
we just slipped onto our working needle
and pull them up and over that stitch so that
we get our decreases. And then we're going to knit two and then yarn
over one more time. So just wrapping that yarn
around our working needle, and that's the repeated pattern. So let me just do it one
more time so I can kind of show you how I
like to transition from one needle to the
next because it can be a little bit tricky sometimes. So you're going to knit
those last two stitches. And the last thing for the
pattern is two yarn over. We're always ending this
with the yarn over. But as you can see at
the end of your row, you don't have another stitch to kind of keep that
stitch in place. So it can be a
little bit tricky. I like to take my working
yarn and just hold it while I have my needle
that I'm transitioning to. And that way I can just
keep a hold on it while I'm going to knit
that first stitch and then I can just knit like normal and the stitch
should stay there. Just be really careful about moving your stitches
around because you don't want that slip
stitch to slide off. But other than that,
you're just going to repeat that pattern
all the way around. And then you're
going to just knit all of your stitches all the way round for your second row. So every other row
we're just knitting to reset for the next part of the pattern because we
have all these yarn overs. So you need to make
sure that we're actually getting into those. So their proper stitches.
6. 05 Rows 3 & 4 Pattern: Row three is going to be a little bit easier if you had
any trouble with row one. It's the hardest row. The rest of them
are really easy. So we're going to knit the first two stitches and
then we're going to yarn over. So wrapping our yarn
over our stitch to increase than knit
one more stitch. And that's gonna get
us to our ridge again. So we have one stitch and then
the stitch on that ridge, which means we're decreasing. So taking those two stitches as if to knit and
slipping them over, then knitting the
next stitch and then pulling those two stitches over. And then we're going
to knit one and then yarn over again and
then knit one more. And that's the
repeating pattern. So we'll go over
it one more time. We're going to
knit two stitches. Then we're going to
wrap our yarn around, then knit the next stitch. This is going to get
us to that ridge where we do art decrease. So we're going to take two stitches as if to
knit and slip them over, then knit the next stitch, and then pull those
two stitches over. And then we're going
to knit one and then wrap our yarn around
and then knit one more. So that is your
row three pattern. Just repeat that
all the way around. And then row four is just a straight knit all
the way around again.
7. 06 Rows 5 & 6 Pattern: Four, row five of this pattern, we're going to start by
knitting three stitches. And then you can see
that that gets us already close to our decreased, but before that we're
going to yarn over. So wrapping our yarn
around our needle, then we're going to pick
up those two stitches to slide them onto
our working needle, then knit the next stitch, pull those stitches
over that stitch. Then we're going to
wrap our yarn again and then knit two stitches. So that's probably the easiest and most
straightforward one, but I'll go over
it one more time just to make sure you
have the pattern. We're going to start by
knitting three stitches. Then we're going to wrap
our yarn around our needle, then pick up those two
stitches as if to knit, to slide them over, then knit the next stitch and pull those two
stitches over it. Then we're going to wrap
our yarn around our needle again and then knit
Two more stitches. So that's it for the
pattern four, row five. Then row six is just
all the way around like you've been doing
in-between euros already. And that is the end of
the repeating pattern. So you're just going to keep
going back through rows one to six with a
repeating pattern until you get the length
of habits you want. I recommend going
for seven inches. That's usually a good size
for an adult sized hat. But whatever measurement
you want that to be, you want to end
about an inch short because we're going to
use that inch to do r decreases to add a
bevel to the top of your head just to make
sure that it's nice and rounded and it actually
fits your head well.
8. 07 Proactive Lifelines: One thing about doing a pattern
like this is that if you drop a stitch or you do
something wrong in the pattern, there was really nothing
you can do except pull back your work
and start over again. And that can be really,
really frustrating when you're getting close
to the end of a work. And suddenly you see that
you've messed up the pattern. And trust me, you'll realize
that you've messed up the pattern in some
way very quickly. So the best way to
counter that or give yourself some fail safes, especially if this is your first time going through the pattern, is to use proactive lifelines. For this, you are going to be taking a scrap piece of yarn. It should be very
contrasting in color and ideally a thinner than the world that you're
using for the actual hat. So you're just going to
take your tapestry needle and put your wool through. And then productive lifelines
are really, really easy. So all you're going
to do is take your tapestry needle and pull it through all of your stitches. You can just pull your needle through a
bunch of your stitches. Make sure you're
not pulling any of your stitches off of the needle. I know I kind of get
into a muscle memory. I'm used to you and taking
my tapestry needle and using that to take off stitches. So you're just going to continue working
through until you have this piece of
yarn going through all of your stitches and
basically just going to hold it. When you're done with row six
and you're ready to repeat, you can put on one
of these lifelines and it'll hold your stitches. So if you ever need to
pull back your work, you can just take the
stitches off of your needles, pull back to this string, which will be holding
all of your stitches for you so it won't
undo all of your work. And then you can just
pick up your stitches, slipping them on as if to pearls so they
don't get all twisted. And then you can just
start with row one again. So that's a great way to make sure that you aren't
losing all of your work. If you do mess up the pattern.
9. 08 Decreaing, Binding Off & Weaving In Ends: Now that you have
your hat and in short of the lengthy
actually wanted, we're going to start doing the decreases to
finish off your head. Now for this, we're
going to completely forget about this lace
pattern and we're just going to use
normal knit stitches for every one of your
stitches all the way around to door decreases. This is for a couple
of different reasons. One, a lace pattern like this, it's really hard to decrease in the pattern because it's
an eighth stitch pattern. It's very strict about that. It has its own decreases
and adding on stitches. It can be really
overwhelming to try and decrease in the pattern
without getting super lost. So just using this stitches
makes it a lot easier. It also gives you some space where there's going
to be just missed touches, which means when you want
to weave in your ends, you can just do it
like you normally would for a at knit stitch. You don't have to worry about
trying to weave your ends into this lace pattern. So it's just going to be at
some standard decreases. I'll go through it so that you can have a reminder
if you need it. For the first two stitches, we're going to do a SSQ
reorient slip, slip knit. So that is basically where
you just slip as if to knit, slip as if to knit. And then we're going to knit
those two stitches together. So that's going to give us
our left-leaning decrease. And then we're going to just
knit across the rest our stitches until we have only two stitches
left on our needle. Once you only have those
two stitches left, then we're going to do a
right-leaning decrease. So for that we're just
going to knit two together. So picking up two
stitches instead of one. And then just doing at normal knit stitch to
have those two together. You're gonna do that for
each of your needles, where the first two stitches on your needle
you're going to FSK. And then for the
last two stitches you're going to knit together. And then for the
next row you're just going to knit all
the way around. So just like we were doing
with the pattern before, we're going to
decrease one row and then the next row we're
just going to net men decrease and knits
and we're going to alternate between
those two rows. You're just going to continue
to do one decrease row and one knit row until you have ten stitches left on all
four of your needles, then you can just cut off the end of your work and
thread it through with your tapestry needle and then a weeping
your ends like you normally would with
a knit stitch. And that will finish off
your hat just a normal decrease and bind off like you would have
with any other hat.
10. 09 Conclusion: Congratulations on finishing
your wishbone stitch hat. You can now go and use this stitch for lots
of other things too, because it is just a eight
stitch repeated patterns. So as long as you have
a multiple of eight, you can make lots of
other stuff with it. Make sure that you put a
picture of your finished hat in the project section of
this course so that I can check out your
beautiful hats as a well as any questions or
difficulties that you run into so that I can try and
help with that as best as I can and also check out my other courses
here on Skillshare, I post new ones are irregularly, so there's always going
to be new projects as you develop your
knitting skills. And I will see you in
the next course. Bye.
 Sarah Carswell, Fiber Artist