Transcripts
1. Welcome to the Knife Skills Course!: Okay, welcome to an abbreviated kitchen knife
skills course by Vivron. We've got a shop here
in Edina, Minnesota, where we've got
kitchen knives and professional sharpening,
and we run courses. This is just a sneak peek, the best that we know now about our course for
kitchen knife skills. People come in and just
they come in every shapes. Every shapes, all the
shapes of knowledge, comfort, fear to kitchen knives. And we'll talk through things like three ways
to hold the knife, three ways to hold the food, and we look forward to this
course doing for you what it does for so many
of the people we have come through
our doors here. It creates more confidence. People go directly to
the grocery store. They buy more produce,
and they tell us stories about making meals
for themselves, for their families on Sundays, and with more confidence, those family feasts, as well.
So welcome to the course. Alright, when I started VVront, I wanted a French word
because the French no food. And I was looking
for a product or a service or something to do to connect home kitchens
and school kitchens, where a portion of our revenue goes to support school lunch. Vivron is a mission
driven organization. How do we improve school lunch? Well, we can start by
paying down some debts, and we can help by educating. And that's just a little bit
about why we started Vivron. In our course in real life, RR IRL, takes about 90 minutes. This will go faster or slower based on how you want
to go through this. Feel free to take the
video, set it aside, throw it on an iPad, start stop, and work along with us. We're going to work
through some carrots, and then we're going to
work through this sweet stuff to make a salsa. We sub mango in
depending upon what time of season we're
at to a peach salsa. And it comes from
Emily's fresh kitchen. We'll link that
up if you'd like. And you can follow along, add more pepper,
include no cilantro, whatever you'd like
along the way. Usually, we welcome you and ask you what you'd like
to learn in this course. And we get everything from
I'd like to be faster to I was told to come
for emotional support. To I've just recently retired, I'd like to
be better at this. Whatever the reason
is that you're here for, you can include it. Reach out to us on the
Interwebs Instagram, the.com on the Contact us page, you name it. Share that with us. We look forward to being part of your story so that you can create more stories
with your family, your friends, and
your community. Should every retail shop or organization
have like a motto? Um I don't know, but ours is curiosity. We're going to approach
whatever we're doing, whether it be sharpening or
learning in a kitchen or helping a customer that
we do it with curiosity. And it came from this
moment when I was staging at one of our fancy fancy pants French restaurants, where the chef de cuisine
answered my question. Uh, my question was, how
do people learn well? Like, how does someone in the kitchen take on the
information and apply it well? And his answer was, folks will do the best they know how until they
find a better way. And what I love about it is that there's curiosity
that sits under that and that it references
a continuum of learning. The goal isn't necessarily
to be able to hone, like, the experts on Netflix. The goal is to recognize
where you are right now on a given scale and
then learn the next step. And so along the way,
this is an intro course. It's intended to
be approachable. You're going to learn some stuff that you haven't before if you like our in person staff, even, and our
customers, certainly. And if you do this, go about
this with some curiosity. That spirit of joy
and learning is what we're looking
to help you with.
2. Handling a Kitchen Knife: Okay. Okay, a couple things about just holding
and handling kitchen knives. The sharp parts on this side, and the handle
parts on this side, some blend of that is
how we use these things. If you want to, like, move them around or pass
them to people, you can certainly set them down. If you're going to pass them, you could pass them with
the handle forward. If you're working with
Japanese blade shapes, they'll typically be
sharp all the way to the end because
there's no bolster. And that's what will commonly catch people on their thumb. Maybe keep some band aids
around or some bleed stop or some finger cots in the kitchen when you
head down this path, and you'll be ready, if that eventuality
becomes your reality. But the goal would be go slow. Don't have to go fast
and enjoy yourself.
3. Using the Knife to Help With Your Task: Okay, one of the core
questions people come in, and especially here
because we have a ton of different blade shapes is what knife should I use for what task
that I'm working on? And we have two tips for this. One is the kind of two
thirds three quarters rule, and one is the cut
a flat spot rule. So, in this case,
I'm working with this carrot and I have a
knife that's about 7 " long. This Victor Knox. And if you compare
them to each other, the food product is
actually bigger. So one of the things to do
is to just cut down the food so that it's less than
three quarters or two thirds of the blade, and then cut a flat spot to
stop that food from rolling, you can have a flat spot on it before you start the
rest of your cuts. So when you're
picking your knife, some of it's about how
you're going to approach the food and what
you do to the food to make it easier to use whatever knife is in your
hand to accomplish your task.
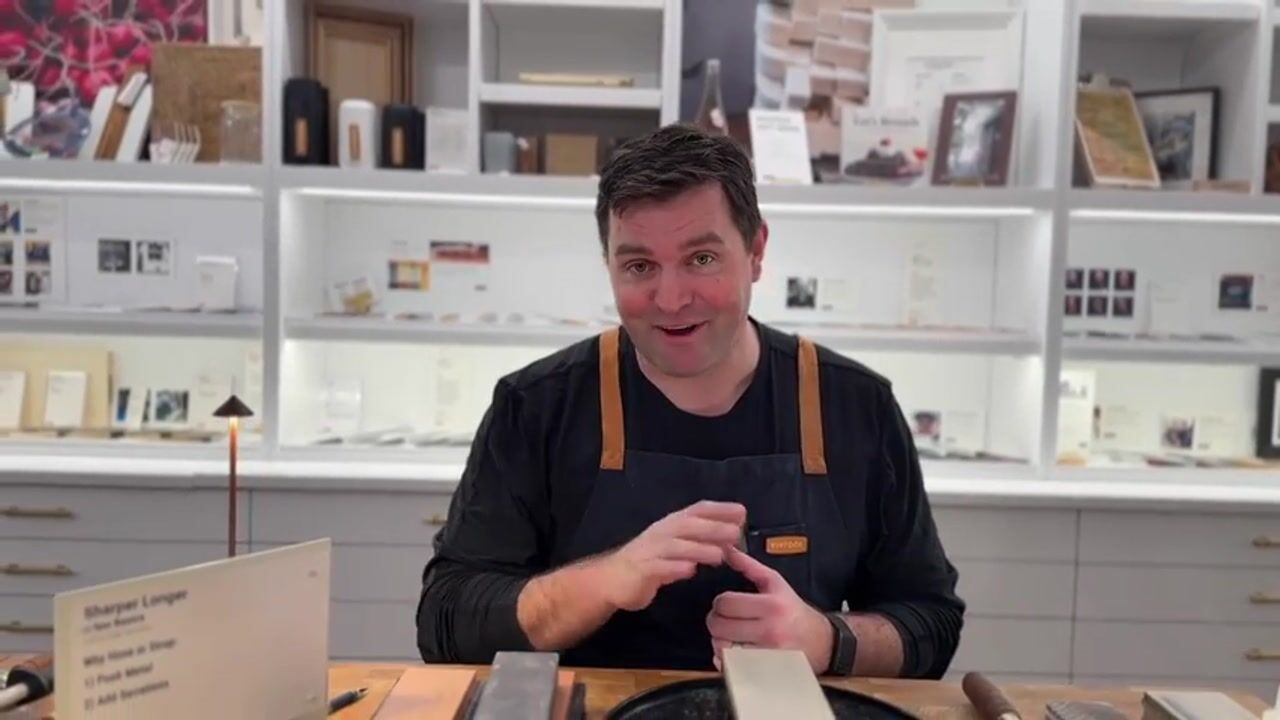
4. About the Knife's Edge -- Honing to Keep it Sharper Longer: Action. Okay, so now this knife
is pretty reasonably sharp right now. And
it works like that. If you slide the blade, you'll start to push the metal. It'll turn over like that. If you land a little bit folded out, you'll
do the same thing. If your board is really
hard, you'll do it faster. If your metal is really soft, you'll bend that
blade over faster. And what happens is, you'll start with some
kind of sharp edge here. What magnet? And then land a little sideways
and dull the knife out. And the question is,
how do you use a hon, strap to do two things. You want to push metal
and add serrations. All the blades are serrated blades when they're
serviced well. So you're using it. It's pretty reasonable. It starts to bend. It
stops being reasonable. And what we suggest is you
set these things down, and like you would butter toast, I'm just picking up a
little butter here. You slide from the
tip to the heel, your blade across to hone This is not a food
cutting hand stroke, right? That's like this. I wouldn't do that this way because it's hard on your wrist. I actually turn
my hands and push a little bit of force on the side like I'm
buttering bread, and it doesn't
necessarily sharpen. It doesn't remove a lot of material or really any material. Kind of pushes what's
there back straight. And so if you use a
tool like this or a tool like this every so often, you can keep your
knives sharper longer. Before it bends too many
times and snaps off. Anyway, dull knives are bummers. Sharp ones, they help a lot.
5. Holding and Moving Food: Okay, you probably want
to build confidence. You want to increase
speed. You want to move really fast. Ta, da. I don't necessarily think
it's the only thing, but you definitely want
to increase confidence. A lot of that comes from
the non dominant hand. I'm right handed. So in class, we take people and invite
them to hold their thumb and their pinky together and their thumb and their
ring finger together, or their thumb and the
ring finger together, all in a try pod of sorts, and then grab the food. Can you move it
forward and back? Maybe when you're doing this, your brain's starting to fire
differently than it has. Can you spin it in a circle? By using just the
ring pinky and thumb, you're allowing your middle and your index finger
to become guides. This is part of what allows those chefs on those shows to
move so fast is because the ring and the index finger
act as the contact points where you don't have to look at what you're doing
because you can feel it. And the right hand doesn't have to decide or the
knife hand doesn't have to decide how thick
everything is in a slow fashion where
you hold the knife like it's a hammer
and cut with an inch. If you're able to start at the front using the
opposed hand as a guide, you can use the whole knife from the tip to the
heel to make your cuts. The cutting confidently has a lot to do with a team sport. Use both hands, practice that effort of holding the
food in that left hand, and then guiding the
right hand's blade. I think you're really
gonna like it. Takes practice, though. It's really hard to
be good at something you practice once
or twice a year. It's way easier to do good work if you practice
it once or twice a week.
6. Holding the Knife in your Cutting Hand • Three Ways: Definitely. Okay, so you've
got food out there.'s a bunch of different
ways to hold the food to help the cutting hand. But what's happening
on the cutting hand? Most of us grab a knife, hold it like its
hammer and chop. When folks come in, they'll
ask for a good chopper. So that hammer hold is going to lend itself
to wanting a knife that arcs that's got a
bunch of ability to rock. So you don't want flatter
knives in that handhold. So that's the chopper. You can use the whole length of the blade in the
chopper motion, but just gets a little
kind of funky. Ooh. You want to protect
your blade edges, flip that over on the spine. Here's another way and
it's more extreme, like choking up on
a baseball bat. You would maybe use
this for shalets or those kinds of things where you can do
these small work. You'd hold your pinky
finger in the choil. That's that portion in the back. And then choke way up using your index finger
to make those cuts. Sometimes folks will
hold the knife like it's a hammer and then
move a thumb or an index finger to
the top to create more down force when not using the whole
blade for cutting. And that's hammer is the first this is the second kind of pointed finger grip,
different modified strokes. And then the third moves from using the wrist
for the motion. That's what the first and
the second handhold do. Use the wrist for the motion. But we'll use the elbow and
the shoulder for the motion. You'll pinch the knife,
and you can see it. It's up and down up and down. And when you pinch
thumb and index finger, the knife turns
so that it's more about sliding in the pinch grip. So you have it. Three
ways to hold the knife. Hammer, pointed
finger, and pinch.
7. About Blade Shapes: Action. A little bit
about blade shape. Sometimes they can be
called the same thing. Both of these would be
referred to as santoks. But one of them is
modified or effusion. This is called a
rocking Santoku. This one is very
traditional Santoku shape. The handhold here as
a pinch works really, really great, and it kind
of sort of works here. But because the
blade arcs so much, it's going to support more
of a heel and rock motion. So if you're more
inclined to want to hold the knife as
if it was a hammer, set the blade tip down and
use the heel for cutting, take a look at shapes that support the style of cut that
you're most inclined to. And then hold knives, if you happen to be using one, that's for one style of
cutting or the other, in the way that's most easy for the knife shape
that you're using.
8. Sticks & Cubes: Action. Okay, the French have
a bunch of crazy names for the type of food shape
that you're cutting with. In the end, it's just sticks and cubes that
you're looking for. And they could be
a half inch thick. The game would be to be able
to get to a point where you could cut down that
food into those shapes. With some Ease. So
sticks and cubes. Here, let's cut this
one. There we go. It'd be like this. Could have
peeled this, but I didn't. So that's like that one. But if you wanted them to be smaller, You can cut them
down to be smaller. Oh, boy. You can't
see that very well, but now we're here,
right? Much smaller. So these are all sticks
that when you dice out, give you different cube shapes. You might want the sticks in a spring roll or
something like that. You might want the cubes to be the same size because these small ones
will cook very fast. Apply the same amount of
heat to both of these, and one will end up mushy
and one won't cook enough. So when you're
cutting your food, you want to go from
whatever is circular. Like, our food grows
circular down into a stick of the size you
want and then into a cube. It's really just
sticks in cubes.
9. Intro to the Salsa Recipe • What You Need + What You'll Learn: A. Okay, we often pair this one with chips
'cause it's a salsa, but it goes great with, like, pork and loads of other stuff. It's a peach salsa that we sub mango in at certain
times of the year. Now is one of those times.
So we'll do a pepper. We'll do an onion, and then we'll do a mango. We'll show you a little
trick on the lemon. Sweet trick. And then
trick on the cilantro, add some olive oil, some red peppers, and you're going to have a
salsa at the end.
10. Cutting an Onion: Action. Okay, like
most other things, onions grow in a circle. We're gonna cut the
flowering side off. We're gonna leave the
root side it'll be flat. Cut through the root. Then we're going to
turn a half moon to the side after we
take off the outside. Cut it horizontally,
cut it vertically, spin it and dice it. Ready? Hope you're
ready. Root side. Cut the flour off. There we go. There's our flat spot, and I'll typically take a look at what's happening
on the inside here. Line it up so that the knife. Note, I'm in a hammer grip. I'm going to slide
through it like that. And then you can eat
this if you want to. I don't eat this
part very often. Just take that part
out with the flour. And then I'll pull the
board close to the side, slide the onion so that
it's close to the side. Hold the knife on the board so that I know
what horizontal is, pick it up a little bit and create a quick
draw through it. I start at the heel
most of the time. And for an onion this big, just two strokes horizontally. Now I'll change into that
pointed finger grip. So I have a bunch of control
and cut these verticals. Yeah. And then you turn this, hold it in a pinch grip, and create your dice. Oh, sal, here we come.
11. Cutting a Bell Pepper: Action. We'll pepper. You can use yellow peppers, but yellow is what
the mangos look like, and then maybe your food
isn't quite as interesting. Let's cut this pepper in a way where we're going
to cut it vertically, the top off, the bottom off. Then we're going to
look down the center and pick one of the big voids, cut on one side of that void, lay the pepper down flat, and then horizontally cut. So we'll use a hammer grip. Pointed finger
grip horizontally, and then the pinch
grip to the side. Lots of times folks will come in asking what the right way
is to hold the knife. And the question is always,
what are you making? What step in that
process are you at and what knife and
what food are you using? So it's less about right
and just effective ways. So here we go. Let's cut the top off. We always want to be
just a little bit inside of where that green Top is so that we
get a look see like that. We'll cut the bottom off, so we can look down
the pepper side, and then I'm going to cut this so we have a big
flap that goes flat. Look at my hand
here. It's kind of like the pointed finger grip, and we're just going
to roll the food out. And that becomes our waste. Earlier, we were
looking for sticks and cubes. Do you remember that? And so you can take this pepper and create the
sticks that you'd like. Processing that down,
flip the blade over to line it up and then
make your cubes. It's that easy. Woo. And then you can
process the tops. I do this way. I kind of pick a spot where I can get three
triangles together. Most of the time
they're bell peppers and three triangles, and then I'll take these off. This is mostly inside. Discard that, lay this down
so that you have sticks. I got sticks again. And
then we go to cubes. So happy fun time
with your salsa. Cut the top off,
cut the bottom off. Take a Loose, lay it flat. Cut the middle out. Make
your sticks and cubes.
12. Cutting a Mango: Three, two, one. Action. Mango Alright, a lot of us walk by these because
we haven't practiced. So I suggest you just buy
three or four of these. And there's a bunch
of ways to do this. I'm just going to show you a way that uses the knife to peel it. Um, and then cut the cheeks off. And then it sticks in cubes,
stick it and cube it. So there we go. Mango
will have a pit that runs it's kind of
flat and shoved together. Think about it is a similar
shape to an almond. This one is going to
run this way, right? It runs this way. So, we
want to create a flat spot. It's not super different than
other things and set it up. You can have it to you. You
can have it away from you. It's kind of
personal preference. I'll put a finger on
the side and then create a peeler here. Now, I'm looking
behind the blade. Look great about
there as I'm looking down to get a sense of where to direct the knife and
take the top off. I can tell I'm going to have
some skin on the bottom, just the way this
particular mango moves. And so I can turn that
now. Just holding this. It's less chopping and more of a slicing stroke here, right? Start at the front,
push through, and then you can see some of where that seed
is going to be. Right there, we'll slide
some of this to the side. Set the mango back up. And then there's a couple
of ways to do this. Like, you can set it to the
side and see how deep it is. Like, this one goes
about that deep in terms of where that seed is. And then you can kind of guess where to make that cut.
Now, think this through. It's like an almond.
So on the other side, you'll end up with
something about as deep. There we go. And then
because it's an almond, this shape will tell you some of because
you're close to it, where that seed is, is to cut on the outside. I'll do this at an angle to make some easier ways
towards the the seed. And then flip this over
rather than, like, cutting straight down, flip it over and just do the
same thing on this side. Now, in Op I hit it there. Oh, I was doing so well. There's some seed. Hope, I hit it there, too. Like in distilling,
not all the whiskey that goes in the barrel
ends up in the jar. So also, this would be like
the chef share of the mango. You can set that
aside if you want. Some of these pieces,
you can just think through how you're gonna
get it to sticks, right? The game is sticks uniformity. And if you can make some cubes out of
that sticks and cubes. And just execute that same thing in roughly the same size, regardless of where you start. Some of these bigger pieces Oop. Ah, where to go. There we go. Some of
these bigger pieces you can take like we did that onion initially with that pointed finger grip,
turn it to the side. If it sticks to your blade
that acts as a nice guide, I can see it from the top here. I got some sticks. Turn those all to the side and
make your cubes. If it's stuck to the
side of the blade, you always have a chance to just pick it up
and stick it there. Its a little more time, but there you go. Little mango happiness. Okay.
13. Mix It All Together + Olive Oil, Lemon, Salt, and Cilantro: S. Okay, olive oil can taste like a bunch
of different things. If it was infused with
whatever when it was crushed. You get that. These two T
one presents like butter. This one presents, like, pepper. We don't have any pepper
today, so, you know, you get to decide how much of that stuff you want,
maybe like that. And on the other liquid, you get a stem side and
a flour side on a lemon. If you take this
stem side and create a little bit of an indentation
on these Japanese knives, you can use the heel to
compromise the outer skin. That may be a chopstick or one of these
sweet little spoons. To get to all the juice. And then there we go. Get some acid in there,
a little bit of lemon. Yum, throw this in the fridge. You're good to go after that.
Maybe a little bit of salt. Kosher for the wind. And we finish with cilantro. Now, you can pick these
off individually. The reality is this part, the stem has a flavor too. So, you do as you'd like. One of the things
you could do is create a little bit of a roll that's very leaf
forward, leaf heavy. You might get some
stems in there, but with a sharp knife, you'll get these little
ribbons that come off. You might call that a chiffond. Anyway, that goes in there. We're big fans of
deli containers. We got all our stuff. Save maybe red pepper
flakes, if you want. You're looking for some
heat, and then you shake it. Grab some chips, add
that to a pork dish, make some tacos. You pick. Happy salsa day.
14. So What Did We Learn Today?: Action. Thanks for joining
us for kitchen knife skills. Maybe you call it like
one oh one or intro. You can take this course in
person at our store, and, of course, there's more tips and tricks and the
hands on learning, but we're so glad
that you joined us. We learned what's
on a cutting edge. We learned three ways
to hold a knife. We learned ways to keep
kitchen knives sharper longer. We learned three ways to
hold the food, right? Really solid ways
to hold the food. We learned that these
things that grow in circles just need to be cut
into sticks and then cubes, regardless of the circle
that you're working with. And maybe you picked up a
trick or two, the lemon trick. You'll use that one
and think of us. Again, thanks for joining us. Take these skills now, put them to work in your
kitchen and replace that fear and worry
and concern that you might have had with some more
confidence by practicing this and share it with
your friends. Enjoy.
15. Thank You!: Hey, thanks for joining us for Kitchen Knife
Skills one oh one. We have this shop just as a reminder here in
Edina, Minnesota. So if you're flying across
the country and you stop here at MSP, maybe grab a little layover and rip over to 15th in France. That's the district we're in. And you can stop in at the shop. We've got kitchen
knives from around the world behind
me, as you can see, we teach classes, sharpening
honing and strapping. Sometimes we'll see
seasonal stuff, fish and chicken and
avocados, maybe. Then of course, we do
all kinds of sharpening. As we grow this, if
you work in grocery, get in contact with
us because over time, we'll have services and products combined
with grocery stores. And what we're interested
in is you, you succeeding, you having a sense
of confidence that when you go to the store, you grab some food
and you come home, you have a path in
mind for success. So as we can make success
easier together, let us know. Reach out, give us a heads
up on your tips and tricks. Let friends know
about this and get at us with any other
content that we can make. Grab a good scissors,
too while you're at it.
16. Mmm yummy salsa: Rowing.
 Skillshare Member