Transcripts
1. Kinetic Type - Class Trailer: Kinetic type isn't just a trend. It's a gateway to endless
creative possibilities, and mastering it can elevate
your work to the next level. In this class, I'll
teach you how to bring this kinetic type to life. Hi, I'm Marcos, a senior
motion graphics designer with over ten years
of experience. We'll kick things
off by designing our visuals in
Adobe Illustrator. Then we'll bring these designs
into Adobe After Effects, where I'll show you how to
build an expression system that makes animating a
breeze. But that's not all. I'll also share
incredible techniques and workflow scripts to
speed up your process. By the end of the class,
you'll know how to create this amazing kinetic
type motion graphics and export it as
MP four and gif. Join me on this
creative journey. I can't wait to see you
in the first lesson.
2. Lesson 01 - Document Setup: First thing, let's
name our document. I'm going to name mine, kinetic, underscore
type, underscore 01. For the document resolution, we will use pixels. For the size, we
will use 1080 by 1080 in vertical orientation
and just one art board. On the advanced options, we are going to choose RGB on the color mode for
the roster effects. We are going to use screen at 72 PPI and the preview
mode at default. And with that done,
we can press Create. Nice. Before we start
our design exercise, let's have a creative exercise.
What do I mean by that? We need to choose
the word we will use for our kinetic type visual, and that by itself can be a very creative and
challenging task. In my case, I will use the word, hey, simple, just three
letters to animate. To keep the exercise simple too. You can use the same word as me, or here's a list of
words with three, four, and five letters
that you can use. Perfect. Now that we
have our chosen word. Select our type face.
This is my favorite part. Choosing a typeface is 50% of the job on a kinetic
type motion visual. I will use my two go San
Serif font, helvetic, A. If you feel like looking around
and you need inspiration, I recommend these five
excellent San Serif fonts. I'll also leave the URL
in the class description. They're all free to
download and use. Yeah, that's it for
the first lesson. I know it started slow, but these first
steps are crucial. In the second lesson, we
will start with design, and then when we finish, we will prepare our file for
after effects. So let's go.
3. Lesson 02 - Design & File Prep for Motion: Hey, it's design time. Hope you are ready, so let's go. I always start my
design with a grid. Before we design our text, let's go to the side toolbar and select the
rectangle grid tool. It's right inside the line
tool if you can see it. Click and hold it to
show the other tools. Cool. Now with our grid tool
activated in the toolbar, click twice over it to
open the tool options. And on the Tol options window, let's make the default size to be the same as our artboard. 1080 by 1080, then let's increase the number of
horizontal dividers to 15. We can leave the checkbox, use outside rectangle as frame, and we don't need the
grid to be filled, so press k. Now, if you click anywhere
in your artboard, the Grid Tool options
will pop up again, and this time, we don't
need to change anything. Press, and this will
create the grid for us. It's probably somewhere on
the Illustrator window. So we will need to select
it and center align it to our artboard.
But that's easy. With our grid selected, let's transform it into guides. The easiest way to transform
any vector graphic into a guide is to select it and press control
or command five. However, knowing how to make it via the menu
bar is essential. So we have our grid selected. Let's go to the
top menu and view, guides, and make guides. Here, you can also see the
shortcuts for locking, hiding, and releasing
the guides. However, if you want to clear the guides, you
must return here. Cool, we are all done
with the grid and guides. Let's start designing
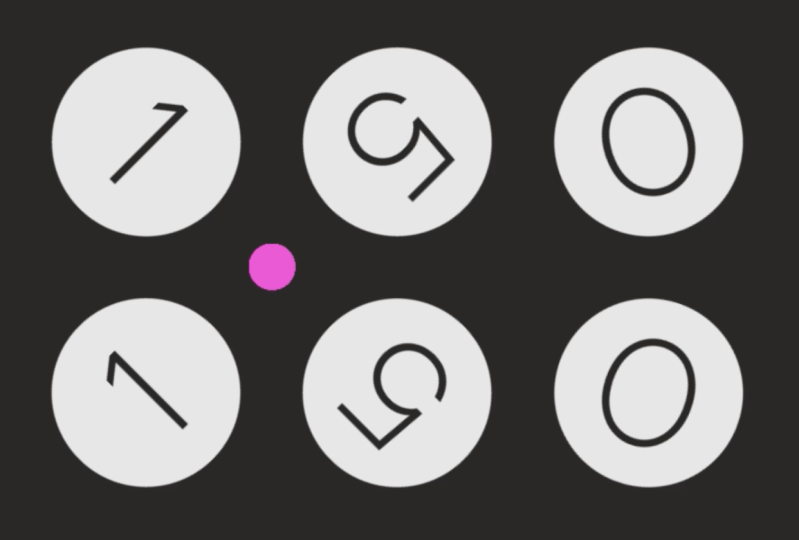
our first element. As you saw in the
initial example, our letters will be
contained inside a circle, so let's start by designing it. Let's return to the toolbar
and select the EPs tool. Now, while holding the shift
key and using our grid, let's design a
perfect circle that occupies four squares,
tall and wide. This is why grids are fantastic. Even for the simplest things,
they greatly help us. So now we need to duplicate
this circle two more times, making three circles
in our visual. So select our
freshly made circle, and while holding the
ult or option key, drag it to the side,
making a new copy. Let's repeat the same thing, and remember to use the grid to position the
circles perfectly. Nice. Now it is time
to add our letters. So let's select our type
tool and write our word. I will write H and change the type face to
helvetic a new medium. Then I'll change the
color of the text to white so it's visible
against the dark circle. Next, I'll move the
text over the circle, allowing me to scale
it with a reference. When we are happy with
the size of our text, let's right click and
select create outlines. Now let's right click again
over our graphic text. And this time, let's select
on group so we can move and position each
letter individually in their respective circles, and the center aligns them with the circle so
everything is perfect. Now select each letter
and its circle. Right click again
and select group it. Nice. Now, let's select all
the circles and letters. And while holding the
option or Alt key, let's drag it down,
making a new copy. Use the grid again to help with the positioning,
and do it again. So we have nine elements
in our art board. Great. Design wise, we are done. Now, we must prepare this file
to be imported into after effects and ready for
animation. So let's do it. One of the main
things is to have our elements
separated by layers. For that, let's go
to the Layer tab. With our layer selected, let's click on the
Burger menu icon and go down to release
to layers sequence. Then we need to select the
sub layers and drag them out, leaving layer one empty. So we can delete it.
Nice. Let's save our document, and that's it. We are ready to go
to after effects and import and animate
this fantastic visual. So I'll see you in the next.
4. Lesson 03 - Starting Motion & Composition Setup: You must be finally, we are in After Effects, and I understand the feeling. This is the fun
part of the class. So let's go to file, import, and select file. Now let's find our file and
on the import as settings. Let's choose composition. Retain layer sizes, click, create composition,
and click open. Now, we have a composition and a folder with our
illustrator file layers. Nice. Let's double click
over the composition to open it so we can see our
design inside after effects. Since our white artboard
isn't behind the graphics, we need to create a new
background for our visuals. So let's start by doing that. Move over the layer stack, and right by the little icon, right click with your mouse
and select new solid. Let's name this solid. I'm going to call it background, and let's make sure
it's comp size, change the color to
white and press okay. Now let's move it under all
the other layers and lock it. The next thing we need to
do is create a null object, so the same process as before, right click, new, null object. Now, let's give a name
to this Null two. Let's call it L at me. To keep things very clear. And before we
finish this lesson, let's double check our
composition settings. Let's do that. On the top menu, go to composition and select
composition settings. Let's make the frame
rate 30 frames per second and the duration of
our animation 10 seconds, and that's it. Just press okay. Nice. In the next lesson, we will write a small
expression to make the rotation of our layers follow the
position of this null. However, don't worry.
It will be simple, and I'll explain and guide you through every
line in detail. So yeah, I'll see you there.
5. Lesson 04 - Expression for Motion System: Hey, this is a fantastic lesson. I'll share lots of knowledge
about expression with you. However, I understand some
people have no interest in programming and
are happy copying and pasting code
into their projects. It is a valid point, as the expression can be
overwhelming sometimes, and most of us are artists, and our brains don't accept
programming very well. So, yeah, what I mean by this is that here's
the entire code. It's also available in
the class description, so you can copy and paste it. I will not have hard
feelings if you do that. Just watch the next few seconds. I'll explain where
to paste this code, then you can jump
into the next lesson. So if you are copying
and pasting the code, then select a random layer and press R to open the
rotation property. And while holding the ult key, click over the little stopwatch, and this will open the
expression editor. And here, you need to paste
the code. Pretty much it. Then you can mark a key frame
on the rotation property. Select and copy that key frame and paste it into
the other layers. And now they all will
have the same expression. And if you move the null, you will see that
the layers rotation follows the null,
just like magic. That's why I love expressions. And now you can jump to the next lesson for the
animation and keyframe part. However, if you want
to learn how to build an expression like
this, stay with me. I believe it's essential to
understand a little bit. Even if we can't write an
expression from scratch. Understanding how they
work can help us edit existing expressions and build a foundation to create
our own expression. So let's go deep divers. Let's start as we did before. Select the layer.
It can be any of them because they will
share the same expression. With a layer selected, click on the RK to open the
rotation property, and here we are
going to click on the Stopwatch while
holding the old key, this will open the
expression editor for the rotation property, and this is where we are
going to write our code. So let's begin.
The first thing we need to do is create a variable
representing our null. Let's write. Target
layer equals. And using the Pi wip tool, select our look at
me null object. Now, we need to find out where the look at me null is located. Let's create a variable
called target position to store this
information. Let's write. Target position, semicolon. Now, we need to check if the target layer
exists, so let's write. I open parenthesis, target
layer close parenthesis. Open curly brace, new line target position
equals target layer. Period, transform
period position, semi colon, and
close curly brace. Then for the part, we'll write. Open curly brace,
target position equals open bracket zero, zero, close bracket,
semicolon, close clybras. A quick explanation about
what this if and else are, the if statement checks
if a condition is true. It is true, it runs a
specific block of code. The statement provides an
alternative code block if the if condition is false. In simple terms,
it is like asking, is this true, and else, it is like saying, if
not, do this instead. I hope this makes sense to you, so let's continue next. We need to get the
current layers position, and you must be like position, but isn't this
expression applied to the rotation property?
Yes, you are right. However, we need
to find out where the current layer is
in the composition. This is important because we
want to calculate the angle between our shape and the
target layer. Look at me. To do this, we create
a new variable. Let's name it my position, and assign it the position
of the current layer. Equals this layer, period transform period
position, semi colon. In simple terms,
getting the position of the current layer helps us
determine its location, so we can calculate
the direction in which it needs to look
at the target layer. Nice. We are making progress. The next thing we
need to do is to calculate the difference
in x positions. To determine the direction from the current layer to
the target layer, we need to know the
horizontal distance between them. Let's write. Delta x equals target
position, open bracket, zero, close bracket,
minus my position, open bracket, zero, close
bracket, semicolon. In simple terms, we need to
calculate a difference in x positions to figure out how far we need to
move horizontally. Nice. Now, same as before, we need to calculate the
difference between the targets y position and the
current layers y positions. Let's write. Delta y equals target
position, open bracket. One close bracket,
minus my position, open bracket, one close
bracket, semi colon. Great. Let's keep going. We
are almost there. The next thing we need to do is to calculate the
angle in radians, so let's write Var angle
radians equals math period. Aton two, open
parenthesis, Delta y, C, Delta x, close
parenthesis, semi colon. In simpler terms, calculating
angle radians using math. Aton two allows us to determine the exact angle between our current layer and
the target layer. Now that we have our
angle calculated. We need to convert two
degrees. Let's write. Angle degrees equals
radiance two degrees, open parenthesis,
angle radiance, close parenthesis, sem cooln. In after effects, we convert
the angle from radians to degrees because degrees are the standard unit for rotations. Finally, we return the
angle degrees value. Let's write angle
degrees semicolon. By returning the
angle degrees value, we make it available for
use in after effects. And that's it. Our
expression is finished. It was probably a bit
complex in some parts, but if we think about it, we can use this
expression forever. Yeah, it's totally worth it. Anyway, the expression
is done now, we need to apply to
the other layers. The same thing as before, let's mark a key frame on
the rotation property. Select and copy this
keyframe and paste it into the other layers to which we want to apply
this expression. That's it. I hope you
enjoyed this lesson. Remember that I'll
leave the expression in the class description and
comments explaining each line. With that said, let's move
on to the next lesson, where we will start
animating our null and creating this excellent
kinetic type animation.
6. Lesson 05 - Animation & Keyframing: Welcome to lesson five. We are ready to animate
our kinetic type. So let's begin. As I
said in the beginning, grids and guides are
used for everything. And animation isn't
an exception. Now that our system is
working and ready to animate, we need to create
a small grid setup to help us. So let's do it. Normally, we would make this manually by pushing
guidelines from the rulers and trying to align them as best we can
with our graphic. Which is more than okay? However, I've done this so many times that I couldn't
do it anymore. So I decided to make a
script to do it for me, saving me those precious
seconds of my life. The script name is
the guide maker. And you, as my student,
get it for free. You can download it
in the class files. First, let's load it
into after effects, or you can install it in
your scripts UY folder. It's totally up to you.
So open the script, and you will have a tiny UY with a button that says
to make guides. So if you click this button
without selecting any layer, the script will create
guides for your composition. Great, right? But imagine you also need guides at the
center of your composition. Hold the alt or option key and press at the bottom
again. And there you go. Now, the magic for our
current exercise is, if we selected all
the illustrator layers and press make guides, it creates guides for
all of our layers. And the same thing
happens if you press Alt. How amazing is that, right? The script will create guides at the center of your layer. But it gets even crazier. Imagine you have two layers, and you need a guideline in
the middle of those layers. Select both layers, and while holding the Alt or
option key again, press the make guides button, and the script will
understand that you need a guide between
the two layers. I know how crazy is that. We also need guides between the composition edges
and our layers. For that, select
all of our layers, and while holding shift, click on the make guides button. It will do it. And
one more thing. We don't need it
for this exercise, but imagine that you need
to make some custom guides. Like you want a bit
more control over the number of vertical
and horizontal guides. For that, you'll need to hold Alt or Option plus
the shift key, and it will open a
small pop up window. Here, you can add the number of guides you want to add
to your composition. And that's it about this
script, it's handy, and it will save
you and me a lot of time today and in the
future. Let's go. We have all of our guides ready. Now we can use these
guides to help us animate our null quickly. Let's start by selecting
and positioning the null. Then let's press P to open
the position properties, and let's click on the
stopwatch to mark a key frame. Then let's move the timeline
needle to the first second, and let's move our null again. As you can see, our
null snaps to the grid, making this step super easy. Let's keep repeating
this process until we finish the 10 seconds. But be sure to finish in the
same place as you started. So our animation loop. Nice. Now, if we preview
the animation, we can see the shapes rotating. Still, as the null
object is invisible, it looks like they are
looking at nothing. So we need to add something
for them to look at. So let's go to the
top toolbar and select the shape tool and
let's choose the Elliptol. While holding shift, let's draw a small circle and
give it a nice color. Nice. Now, with our
circle selected, let's go back to the tool bar. And while holding the
ult or option key, let's click twice on
the Anchor Point tool, so it centers our anchor point right in the
middle of our shape. And still, with our
circle shape selected, let's hold the shift key and parent it to
the null object. This will ensure that
the circle shape inherits the transformations
of the null object. This means that any
scaling, rotation, or movement applied to the null object will also
affect the circle shape, allowing for coordinated
and controlled animations or adjustments
within our project. And now, if we press
preview, there we go. The letters look
at a red dot now, which is much better, but our animation is still a
little bit monotomous. This is because our key frames
are still in linear mode, meaning the animation
speed is constant, and there's no acceleration
or slowing down. Which are the things that make animations look great,
so let's change that. Select the null object, press P to open the position
property once more, and select the key frames. Then click on the Little
graph editor icon to open it. And here we have
our keyframe speed and value represented
by these lines. To make sure you are
in the speed graph, click over the graph
type and Options icon. Double check that you have
selected the Speed one. Nice. Now, let's click again on the position property to
select the key frames. Let's click on the easy
and easy curve icon. Transforming our linear
animation to a busier animation. And if you give a
little preview, you can see it has
changed already. But we will adjust these busiers to give them even
more personality. Let's push the busier points, creating a steep curve
and have another preview. Perfect. Looking much better. Let's watch it and contemplate
it for a few more seconds. This will be it for this
lesson. You deserve a break. It's been a long class so far. Go get a nice cup of water and come back
for the next lesson. We will add some minor
details and experiments. Finally, we will render
our kinetic motion and export it as a MP
four and give two. Yeah, there are inspiring
things to do in the next lesson.
I'll see you there.
7. Lesson 06 - Motion Experiments and Final Export: Hey, ya, welcome back to Lesson
six. Let's jump right in. So the first thing you notice is the class reference was
black with white circles. And right now, we have a white background and black circles. What
a disappointment? Right? Well, we are going
to change that now. Same way as we created
the null and solid. Now let's create an
adjustment layer. Nice. Let's ensure the
adjustment layer is above our main circle layers. Hence, it only affects them, not a little circle
the layers look at. Then still with the
adjustment layer selected, let's go to the top menu, go to effects, channel, and select invert,
and that's it. Now we have black background
and white circles. But imagine you are like Marcos. I want different
colors. Sure thing. Let's go back to
the effects menu. And this time, let's select
color correction and tint. And this will let you choose another color combination
instead of black and white. If you want to apply different
colors to each element, apply this tint effect to
each circled letter and customize the color for each
individual. Pretty easy. Anyway, I'm going with the classic black background
to keep it simple. So let's do another
quick experiment. This time, let's
select a little circle that the layers are looking at. Let's go back to effects, time, and select echo, and on the echo time
effect settings, let's change the
number of echos to 64, and let's divide the
echo time by 64. And if we press preview, now the Red circle will
have a nice stylish trail. It's a nice look. I believe it. I hope you like it, too. Well, I'll turn it off for now. Just wanted to show you
how to make a nice trail. And the last experiment, let's select our composition
in the project tab, and let's dragon drop it over
the new composition icon, making a new composition
with our selected comp. Now let's coincide
our new composition and select our layer comp. Then press the S key to
open the scale property. Now, on the scale value,
let's divide it by three. Then steal with the
com player selected, go effect once again, and select stylized
and choose CC reptile. And on the CC reputle
effect settings, let's increase the right, left, down, and up values until we fill up the
composition with our graphics. Then let's select one of the tiling options and
give you a quick preview. And yeah, that's it. You can play with
the tiling options to see which one you prefer, as they all offer
something a bit different. So do an experiment. Now it's time to export
our kinetic type. Typically, I export MP four
file. Let's start with it. Let's coincide our main
kinetic type composition, then go to the top menu
and select composition, and select Add to render Q. It will automatically make
the output module an H 264, the famous MP. Then let's choose where
we want to output, the place where we want
to save the video, and then we can press render. And we wait for a few
seconds, and there we go. Let's play our kinetic type. Nice, now, let's
export it as a gift. Let's go back to the render Q. Select our comp and press command or Control
D to duplicate it. This time, instead
of pressing render, we will click Q in AME, which stands for
Adobe Media Encoder. Now, with media encoder open, on the format options, we are going to
choose animated gif. On the format options, we can choose if
we want the gift with transparency or not. As we have a background
in our kinetic type, we don't need transparency. Nice. Now press the little green
play button to start exporting it. And there we go. We have an amazing gift of
our kinetic type that we can use online or share
easily on Whatsapp and so on. Anyway, this is for this lesson and for the
class. I taught you enough. In the next lesson,
there will be a small conclusion about the
class. I'll see you there.
8. Lesson 07 - Class Conclusion: Hey, first of all,
congratulations on completing this course
on kinetic type design. You've made it through
an extensive and exciting journey from setting up your document in
Adobe Illustrator to creating dynamic animations
in after effects. Your journey into kinetic
type design has just begun. The skills and techniques you've learned here are foundational. With continued practice
and experimentation, you'll be able to create even
more stunning animations. Thank you for participating
in this class. I hope you enjoyed
watching and learning from it as much as
I did creating it. Keep pushing the boundaries of your creativity and
technical skills, and don't forget to share your fantastic work
with the world. I'll see you in future classes
or online communities. Feel free to reach out
with any questions or for further guidance.
Cheers, bye bye.
 Marcos Silva, Designer & Animator