Transcripts
1. Introduction: Hi, guys, I'm a
frence illustrator. I have been painting
for 15 years, so I have a bit of
experience in this field, and I'm obsessed
with watercolor, magical things, and cute stuff. In my classes, I constantly share the
knowledge that I have about the procreate and how to create beautiful watercolor
illustrations digitally. Welcome back to my
today's class, today, we're going to learn
how to sketch in procreate in a fun
and simple way. Because I truly believe
this is summertime, and probably for many people, it will be time for traveling. Let me show you the ways how to sketch in a fast
way and what are the tricks or combine paint illustration
together with water color. So in the end of my class, you will learn more
about the procreate, how to sketch, how
to use layers, clipping mask, alfalog,
and how to create beautiful pencil and
watercolor art digitally. Today's class is also
pretty simple and fast because I think summertime
is time to stay outdoors. Let me show you the
ways how you can apply your procreate and iPad when you are somewhere
outside of the house, and you want to create some
lovely and fast illustration. So I'm here to show
you the whole process, what I do when I travel and when I want to create
lovely pencil art. And now let's talk about
our class in detail. First of all, I will
show you where to find all the freebies and how to import them into the procreate. Then I'll show you how
to create texture paper. And our next step will be how to sketch in a fun
and simple way. And then I will show you some ways how to add
some water color, and at the same time, don't
spend too much time on that. And guys, add a bonus,
I will share with you, my custom brushes,
color palette, my own pictures that I Drew. This class is great
for beginners. Of course, if you have
basic understanding about the procreate features, and maybe intermediate level, actually for everyone who
likes sketching and who would like to try some
new ways of doing that. And one more thing that I
want to mention is that your opinion and your feedback
are very important to me. So if fel free to tell
me what you think about the class in discussion
or review section, I will be glad to reply to you. My dear art fellows, I can't wait to start, and definitely I can't wait to see what you apply
to project section. Let's not wait, grab your iPad with Apple
pencil and procreate, and let's paint together.
2. About Class project: Dear art fellows, your
class project will be next. You can follow my
steps and create lovely sketching art
altogether with me, or think about your
own illustration, your own sketches that you like, and then paint it
using the tips and brushes that I provided
in today's class. I've used procreate for this
class iPad and Apple pencil. So if you have it or some other drawing pads or
regular paper and paints, please join our
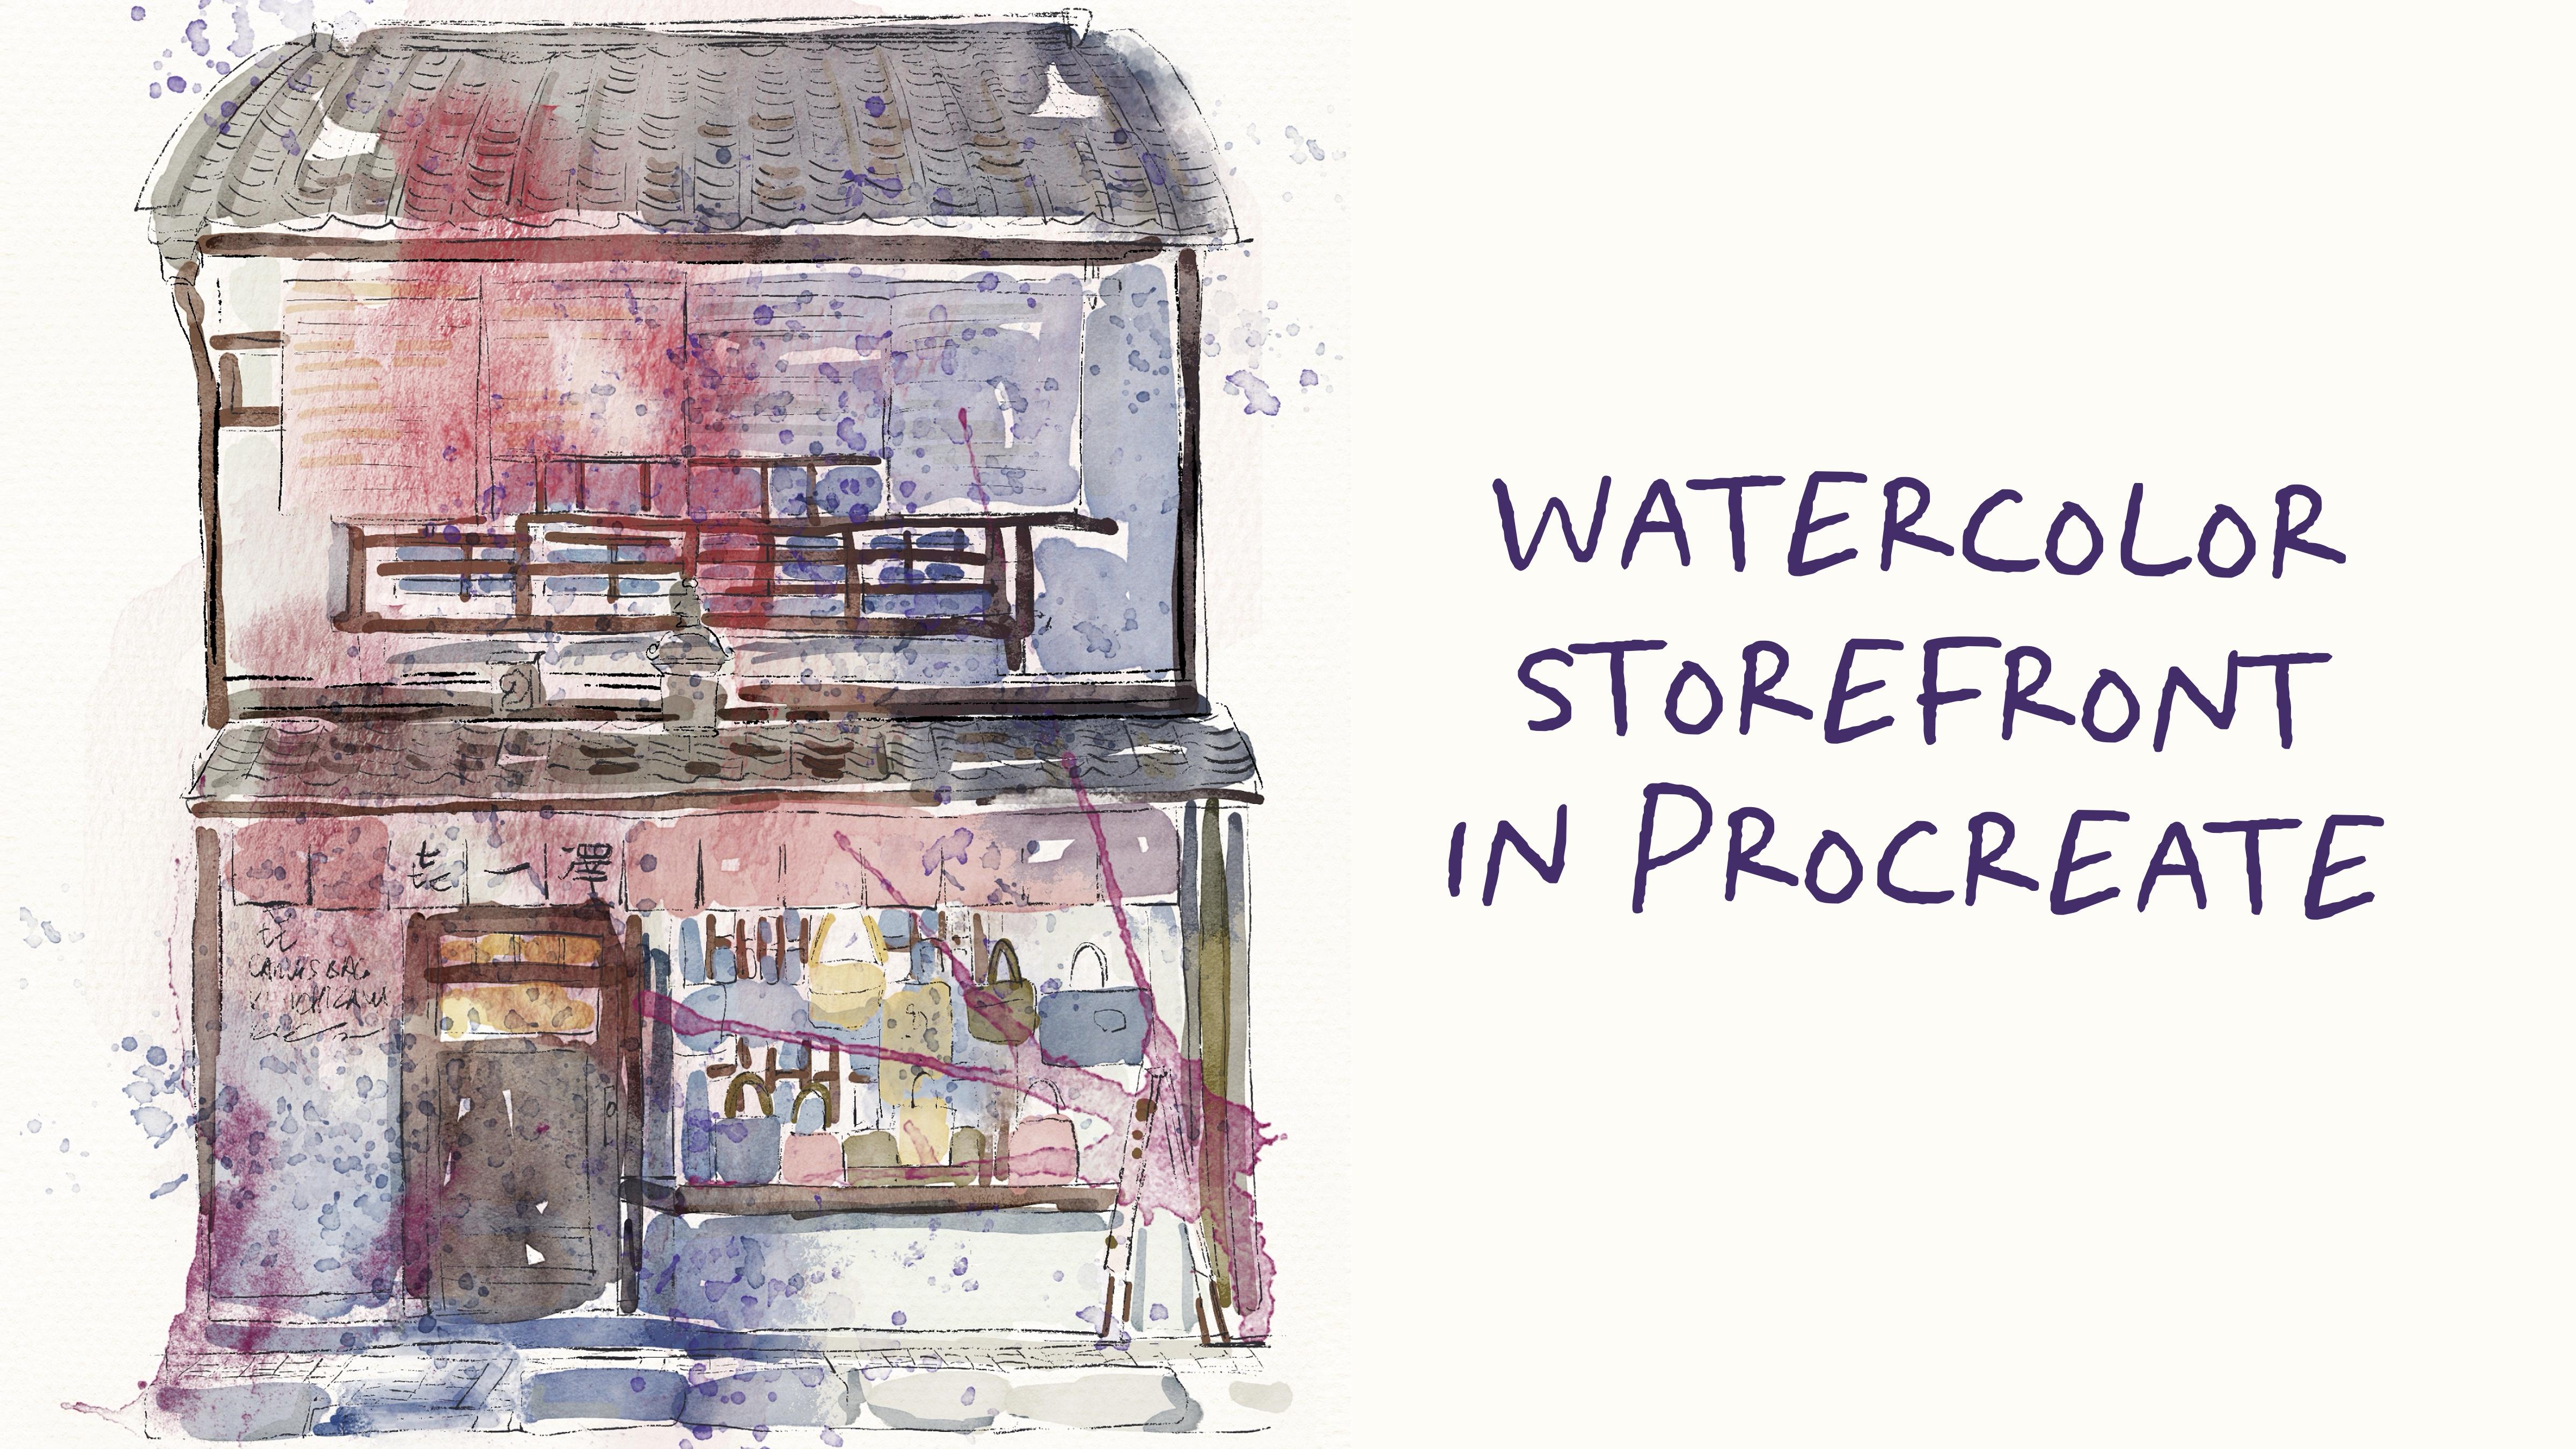
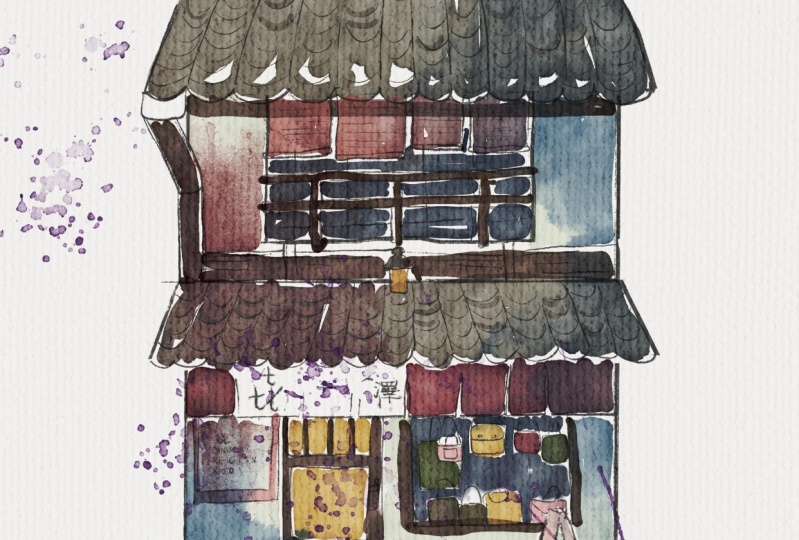
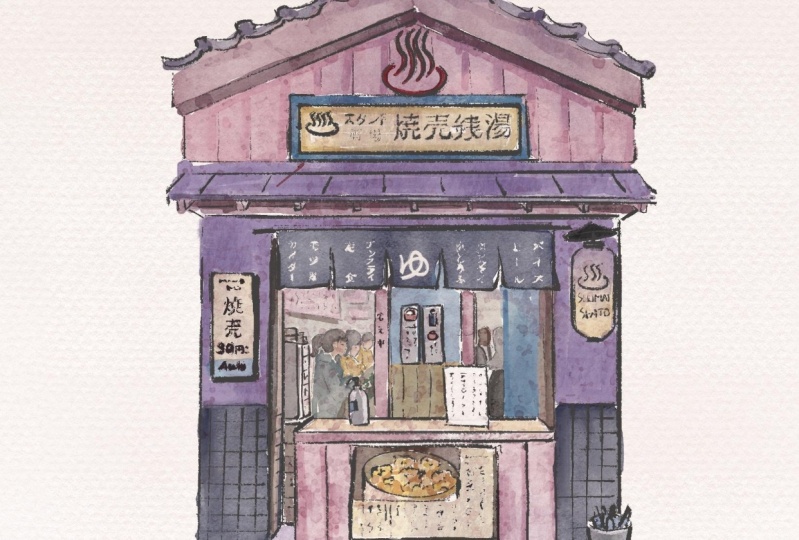
class and good luck. In today's class, we will paint very lovely Japanese
store front, and like I said, the main focus will be put on
sketching process. I will show you the ways
depending on the time that you have how to sketch it in
a fast and a little bit Extended time, if
you might say so, and how to add some watercolor
elements to our art. Once again, you can
follow my steps, or you can just get some
idea of sketching and use your own sketch for creating
lovely and unique art. Try experiment and enjoy
paint and process together.
3. Where to Find Freebies: This class, we will talk
about resources and where to find them.
It's pretty simple. Follow the steps, go to
projects and resources section, then download the freebies, go to Files app and then import the freebies
into the procreate. Also, it's hard to create watercolor and pencil art without watercolor
texture paper. We're going to fix this issue. Let's talk about that in detail. Lovely students, I think we
are ready to get started. Once again, we're going to paint this lovely Japanese storefront, and I'll show you a few ways how to paint it in a
fast and simple way. And my class is
great for those who don't have enough time
to spend on painting, maybe you are traveling and you want to sketch really fast, so I'll show you the
ways how to do it. Okay. What you need to
do is to open procreate, and then you have two ways you can import the reference picture or use it as a
reference on procreate. Let me show you how to do that. But before we jump into
sketch and process, let me tell you where to
find all the freebies and what you need to know
before we start our class. So first of all, when
you open my class, please do it in browser. It can be Home or
Safari y browser, because if you do it
at Skillshare app, my freebies might
not be visible. You go to my class and then in projects and
resources section. Under the headline resources, you can find all my freebies. Then you download
them and after that, my suggestion to open files app and go to
downloads folder, and there you will
find all the freebies. After that, you can split the screen and from
the right side, you might have procreate, and from the left side, you can have files app. Then we're going to have our brushes watches,
our reference picture. Again, I will add the picture that I will
draw today and our a month the FBC, you can find brush sets watches,
reference, picture, the pictures that I drew, and also the sketch that the click going to create
during our today's class. Again, you can create
your own sketch, you can draw a completely
different illustration. Here I just share with you
some resources that can help me to sketch
and paint very fast. Secondly, you can learn some techniques that
might be useful. Again, when we have
our final project, you can follow my steps, or you can create completely
different illustration, which is based on your
own reference picture. Then you need to drag and drop all the freebies into
the procreate like this. Then automatically, it
appears on the color palette, and then if you want
to set it as a defold, you have three dots,
you need to press on them and press set as a default. Now I'm using this
color palette. Then you need to go to disc, and here in a bottom, you will have our Japanese
storefront that you can use. Same you will do with brush set, you need to drag
and drop it, and My brush set is M on
the brush library, it's called Japanese
store front. And then when you imported
everything into the procreate, we're going to close our files. Then let's talk briefly about
the brushes that we have. We're going to have paper brush that we're going to use
inner end of the class. So unlike my other
classes where I start my painting process
with creating texture paper here
in out this class, because we're going
to use some brushes and stem brushes
that already have watercolor texture is not
that necessary. But again, can use it in the end and
it can help you to add some traditional look for our illustration. Just
wait a little bit. Then you're going to use
native procreate brush, which is called Ica brush, and I'm going to
use this brush for the sketching today because I
like this rough edge lines. Again, I give you some options, you can use six P pencil, native procreate brush to
or my own brush HB pencil, that also have some rough lines. Depending on your style
and your preference, you can decide what
suits you more. Now, let's talk about
the watercolor brushes. We have Buhard edge
watercolor brush. As like I said, already it already has watercolor
paper texture. So you don't
actually need paper. And another brushes are bue water drops.
Let's make it bigger. You might add very beautiful and lovely watercolor splashes. You see it's pretty
authentic to. So again, you don't need paper if you want to
reach watercolor texture. And then salt the
splashes again, and can help you to save
time for painted process. And also moving the
handwriting that we're going to add in end of our
painted process. And now we're ready to jump into sketching
process. Let's do it.
4. Creating Sketch: Now is time for sketches, the most important parts that we have in
our today's class. So depending on the time
or your perception, we can decide the amount of pencil that you want
to keep in your art, the way of sketching,
and let me show you what are the ways
that I use when I sketch, and you can decide which
way is suitable for you. So feel free to follow
my steps and use the sketch that I created
or use your own sketch. Let's not wait. I'm here to show you
everything right now. Okay. For today's
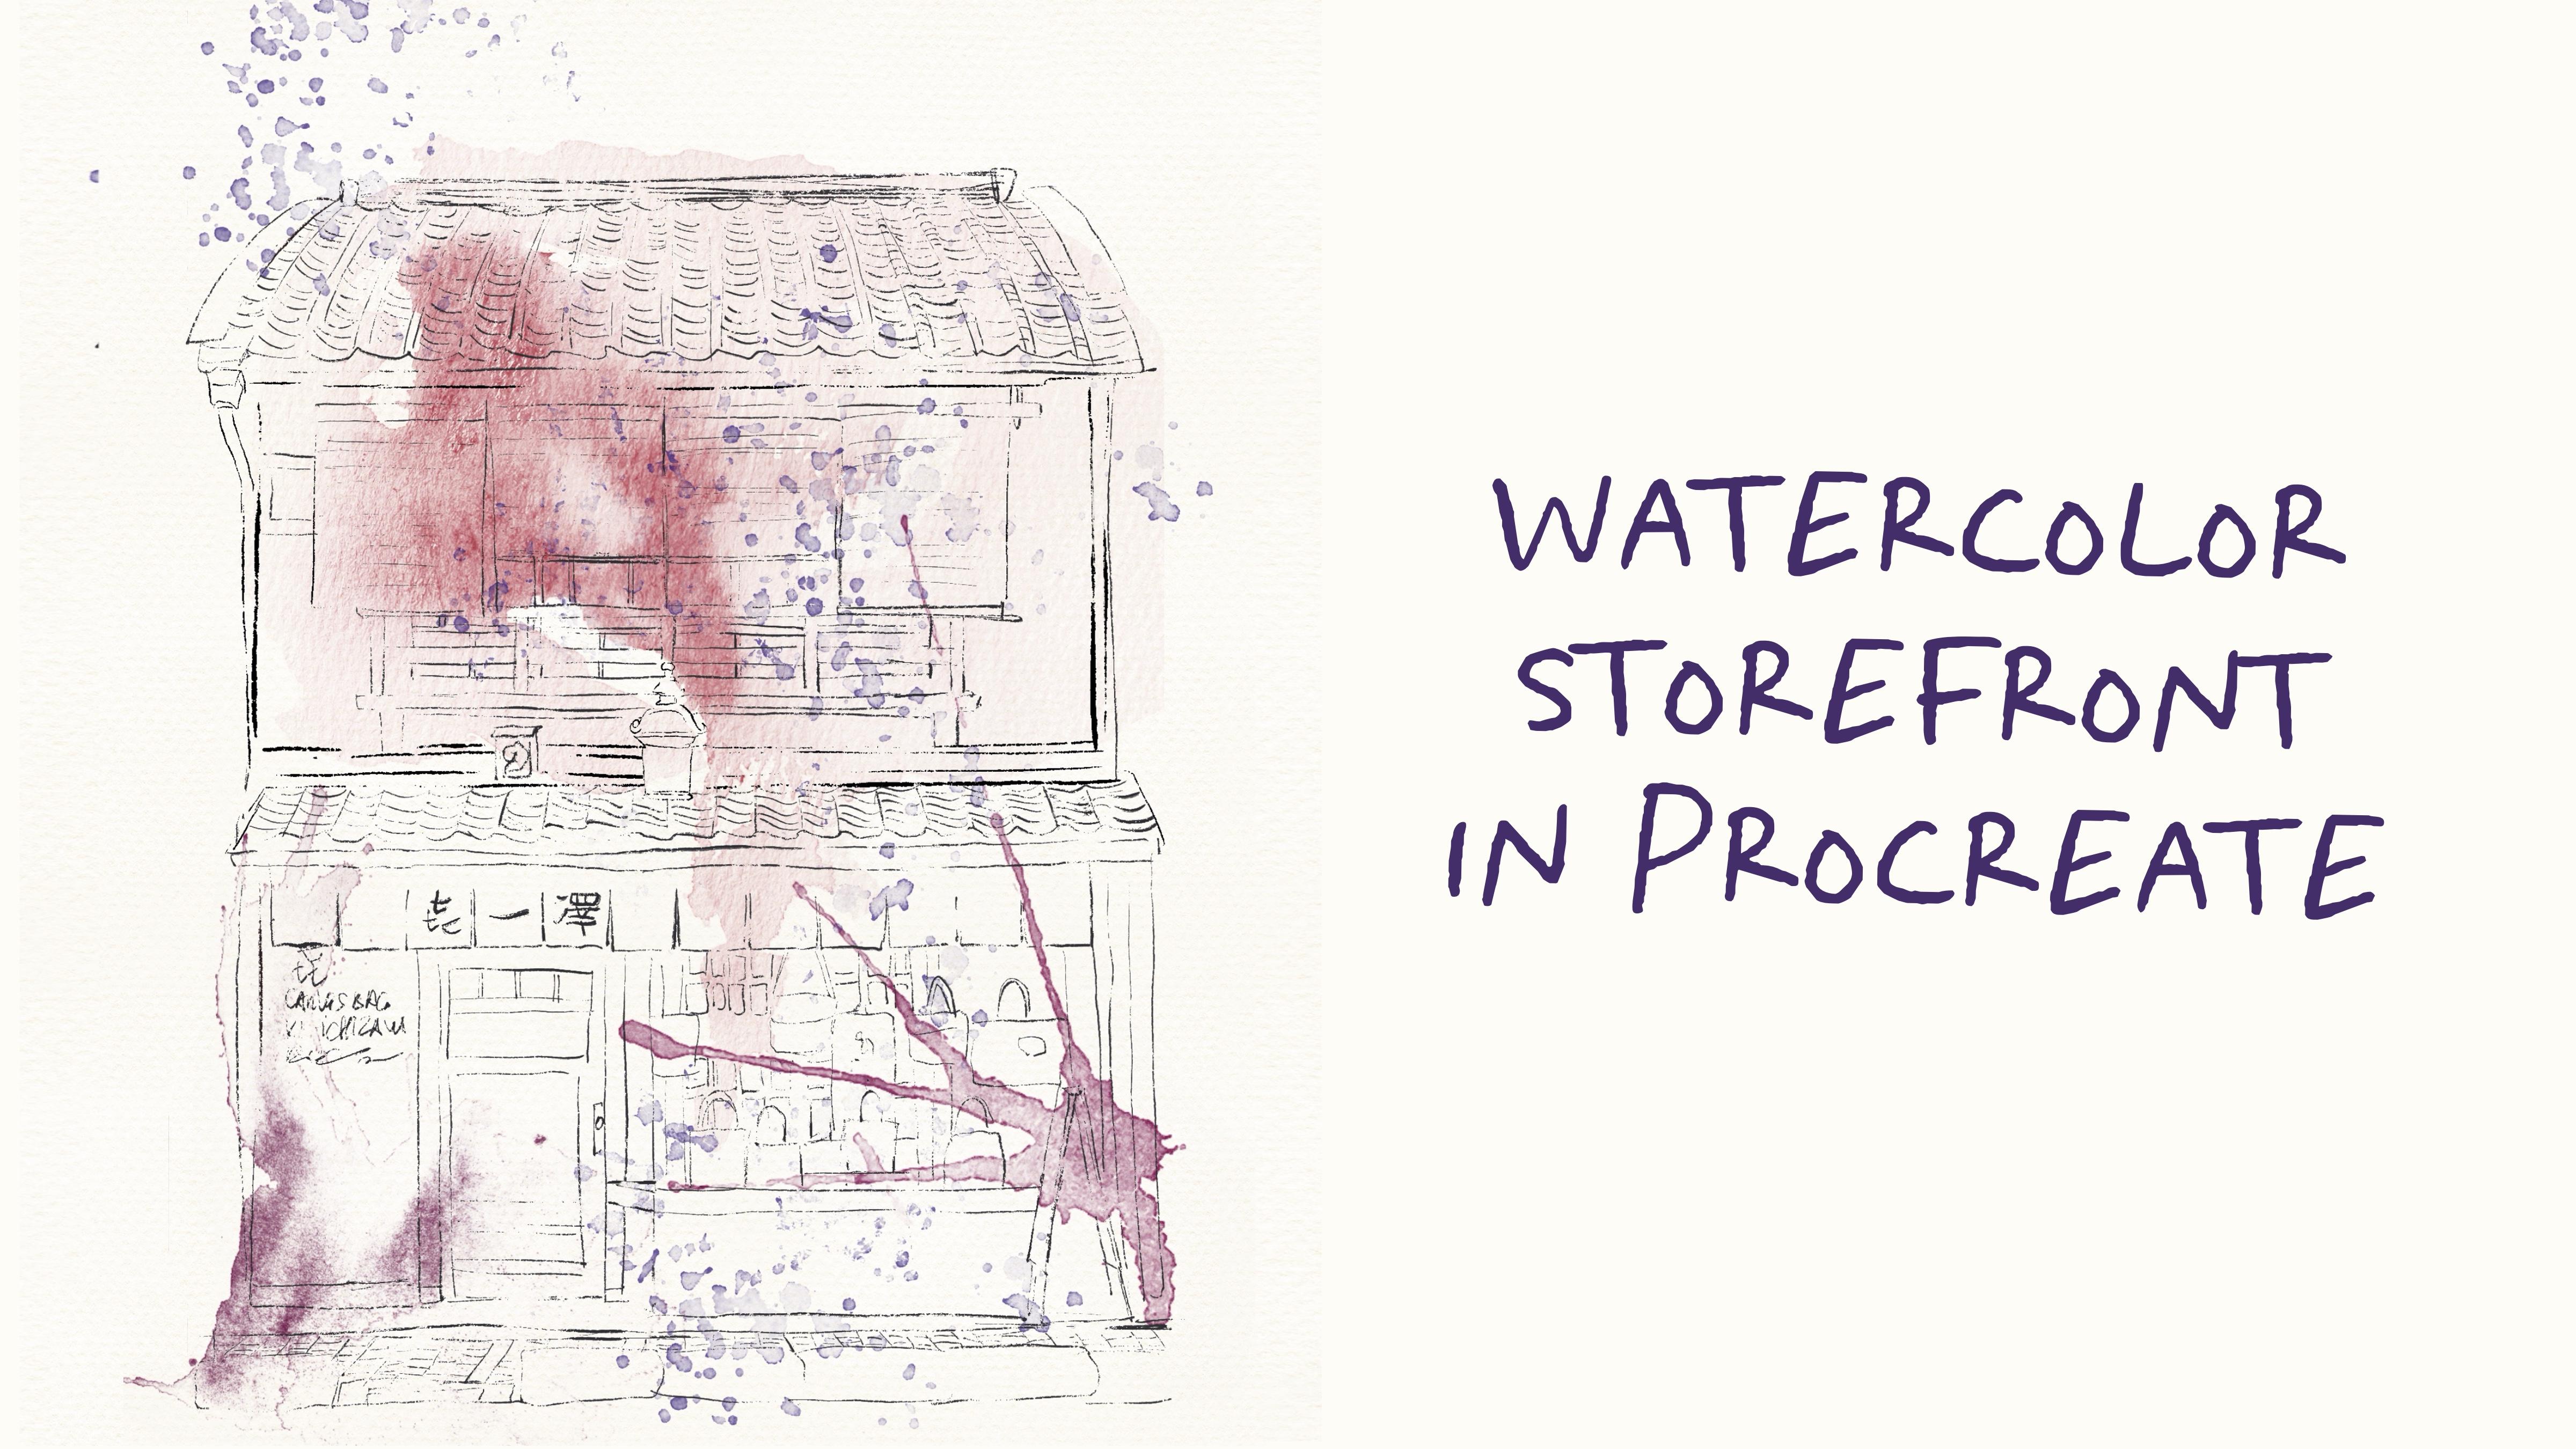
sketching process, we're going to have two options. First one is we
will look and draw. The second option we will trace the actual
reference picture. Let me show you the first way. Let's go to the sketch layer, make it visible, like that. Now let's use our
reference picture and import it into
the procreate. But in this case, our reference picture will not be placed among the
layers like this one. So we need to go
to action button, go to Canvas and
press reference. Then import the image. Okay. If you have seen
my previous classes, you probably know the
way how I sketch. When I do so, I tend to break the objects into
smaller simpler shapes, and here when we
draw the building. Usually, building
has the shape of rectangle and for the sketching, I'm going to use inc brush. Let me show you what I do. I just create the rectangle, then I need to switch
to the rectangle because maybe the
rectangle is not perfect, min is not perfect for sure. Again, this store
front has two stores. So somewhere in the middle, we're going to draw the line. Now we need to draw roof. Roof also have some shape
of rectangle poly line. I'm really bad in naming
geometrical shapes. For me, everything is rectangle. So like that. Maybe the edges
are a little bit too sharp. Let's make some smaller. Okay. Then we need to
draw the same roof, but just on the top of our building in gona
adjust the shape. I think this is the
easiest way how you can draw the lines and don't
spend too much time. And now we can remove
the overlapping. You can use mercury brush as a native procreate brush or
inco brush as an erasor. So again, you shouldn't
be too detailed. Like Now when we
draw the basics, my suggestion is to start adding more and more
details little by little. Find the biggest objects in our storefront and
paint them first, and then by little, start adding some details. What we're going to
have here, we need to draw big window like that. Then what is it? I don't want to make
it too perfect. So that's why I will
draw it this way. I'm going to speed
up the video again. We have the door, which
is the biggest object, and then like I said,
little by little, we're going to add
more and more details. Oh s. Here as you see the roof
is a little bit puffy. We need to change
the style slightly. Again, when we break the
object into basic shapes, the first thing that we do
is just for the reference. Later by little, we need to keep adding more
details, and of course, we can adjust the proportion, the size, the shape
of the objects. Just first part, you need to understand where and how
to play the objects. Because with buildings, proportions sometimes
can be super tricky. Oh This is the first option that shows you how
you can create sketch within 10
minutes or five. Now let me show you
the second way. I imported our reference
picture to the layer and I set it in a
bottom of everything, and then I have the
same ink brush. I lower the size a little bit now it has the
size of six 8%. Now let's just carefully sketch
everything that you see. But like I said, unlike
our previous art, this way looks a
little bit tier. Lines look accurate
and sharp and perfect. So, I like this way of sketching when I draw
Japanese storefronts. So here I will spent a
little bit more time. So let's put up the
video and trace. I truly believe that
in Japanese art, it can black storefront or some historical
paintings or anime. The most important is pattern. So you need to act as
much pattern as possible. For example here,
we have a lot of different pattern
elements on a roof. That's like what makes
Japanese art Japanese. We have so many bags here. Let's finish with the roof. Now we can turn off
the reference picture. And that's our lovely storefront,
looks very beautiful. Again, like I said, patterns
are very important. So let's draw the
lines on a line of what it's called x.
K. O sketch is ready. Now let's jump into the
next part where I will show you how to add
some colors to our art.
5. Adding Colors: Now we are ready to jump
into painting process. This is a part where
we're going to add tiny watercolor elements. Again, we won't spend
too much time of that. Here, like I said,
the main focus will be put on sketching. Let's not wet and let's finish our lovely
illustration together. Okay. So we have the reference
illustration because we need to see the colors, we have our sketch, and here I created a
couple of new layers. So again, we have the sketch
layer where we don't draw. In this case, you
can just look it, and then we have color layer, has layer, and watercolor stems. Let's go to color layer, and I will show you the first
option of painting process. Here you can grab board edge, watercolor brush, go with pretty light, a
little bit greenish. Here you can add a
little bit of color. Again, you don't
need to add a lot of color because this is some
of arbon illustration. We need to learn how
to paint pretty fast. Again, already, I
add some color. Here, I will go with slightly
gray shape like that, and I want to add some colors to the brick and
something like that. Now let's go to the rooftop and I will grab this
dark gray color. I will leave some blind spots. And you can overlap.
It's totally fine just go and blend some part. Like that. Now let's go
and grab brown color, maybe a little bit lighter. Again, look, I paint
everything on one layer. Now let's add some color to the door. Like that. Now, let's think what we need. Maybe slightly bluish shaped, add some color to the windows. If you want you can blend it slightly and then
add some part here. This brush is semi transparent, so be careful because you can overlap with a new
color when you draw. Come back to brown color, and I see some parts of a color. Now let's add some part here, and I think we need to go pinkish shade,
increase the size. And I like this color. I think it might look critic. Like that. So now the next step is we actually
can add some kind of shade. Let me show you how to do. Let's just add some color in
this area. Above the shades. My suggestions go to Shades
layer, which is on the tops, which blended layer
mode to multiply, and we can grab water drops. Now we can go with bluish
color a little bit, and then we need to
press clipping mask. So now we clipped
our shades layer to our color layer, you see, and it adds some diffruion
of another color, which looks very cool. Now let's go to basic
color this layer, and then go to adjustments
and press curves, and now you can play around and make your
art darker lighter, see what might
work best for you. Same, you can do with
shades layer, go to shades, go to curves, and see how I would like
it to see, like that. And my time is
suggestion, the last one. I can go to what the color
stem player, empty one, switch plane the layer
more to multiply and place this layer
under the basic color. And here, you might grab this reddish color and think what stem brush
might look good. And you see thanks
to the stem brush, the color is under
nee of our painting, so you can think where
you want to place it. Or, if you want again, you can place it on the
top of all the layers, but make sure it's not clipped, and you can place it
like whenever you want. Can be put here or here. I think I want to place
it somewhere here. L I tell you, the last step, we need to add text to paper. Let's go to the paper layer. Then let's go and grab this orange color maybe a
little bit to yellow color, and then go this paper brush, and that's just to axes. Now we have paper, and
then we need to go and change plant layer
mode to multiply. Now this watercolor paper like
bleeds into our painting. Okay, this is one way. Again, if you have
a lot of time, you can keep adding shades. The example is call
it a shades layer. Change brush to pull
hard edge watercolor. We can go and grab
this brown color and keep adding more and
more shades if you want. I wanted to make our art more
or less relaxed and easy. So I don't want to spend too much time on adding
all those tiny details. But again, depending
on your time, we can keep adding
more and more shades. Okay, this is the first way
of painting add another one. Let's just turn off
all of our layers. Let's go to color stem player. Here again, let's go
this purple shade, and we can start adding some
stem brushes. Like this. So they will show you some watercolor texture in our art like you add some color, but it's like very
loose watercolor style, so you just put a lot of water, and then you just
dip the brush into some paint and just
tap it on a paper. And like the water just spreads. Now let's go to another step. Go with a color to maybe a
little bit purple shade. Remember, beyond a new layer. That's super important. Then think where you
want to place this one. I want to keep it this
way, to duplicate, merge together to layer, and then first one, I cleared. I want to create a couple
of more stem brushes, and then I will go with
bu, salty splashes. Grab is blueish and propih. I just want to add tiny
bit of splatters, alla. Remove the ones that
you don't need, and you can lower
the pacity slightly, so it will not be so obvious. If you want, you can just
erase or blend some part. In this case, it
won't be too much. And then let's go
with another stems. Merge together, go to
the last stem brush. Layer. I just want to
show some edges xes. If you want you can use
liquefied tool and adjust some of the stem brushes accordingly to your
painting lexis. Now, I just transfer the shape accordingly to the lines
of our storefront. I think purple color is
a little bit strange. I will go to adjustment
brush, saturation. Again, I want to
change the color slightly to more reddish xs. And merge two layers
together, create one layer. Also, I will add details. Go to almost black color and
go to vintage hand write in. I'm thinking where I want
to place. Robber some here. If you don't want, you don't
need to put it at all. You already have a lot of steps. Let's just go with one. D create one moyer, multiply, go with bluish
shade, bolt splashes. I want to add some splatters
here and there, Lexus. Again, if you don't want,
you might just remove the paint in the handwriting.
I think I will remove it. That's it. Here
we have two ways, how to create lovely
travel illustration, how to sketch in a
fast and simple way, and you can decide which
style suits you more. Do you want to devote more
time and paint in details? Or you can just briefly use some stem brushes to help you to add some water color texture. This is one of the
ways. O like I said, you can glo to curse, then play with intensity
and saturation of your art. Guys, thank you so
much for being with me and let's see each
other in next class. Bye bye. But this is the
end for our today's class, and I hope you enjoyed our lovely and fast
painting process, and you learned something
new about the procreate, how to sketch, how
to use layers, clipping mask, how to create lovely watercolor and
pencil art digitally. And most importantly, you
learned how to sketch, especially when you are
somewhere outdoors. I will be happy to
give my own feedback. And I would really
appreciate your own opinion, what you think about my class, what you would like me to add. Or maybe you can
suggest me some topics. Also, you can leave the
review in review section. And let's see each
other and next class, and about my next class, I decided to keep
the topic in secret. It will be like a small surprise for you. So let's see you.
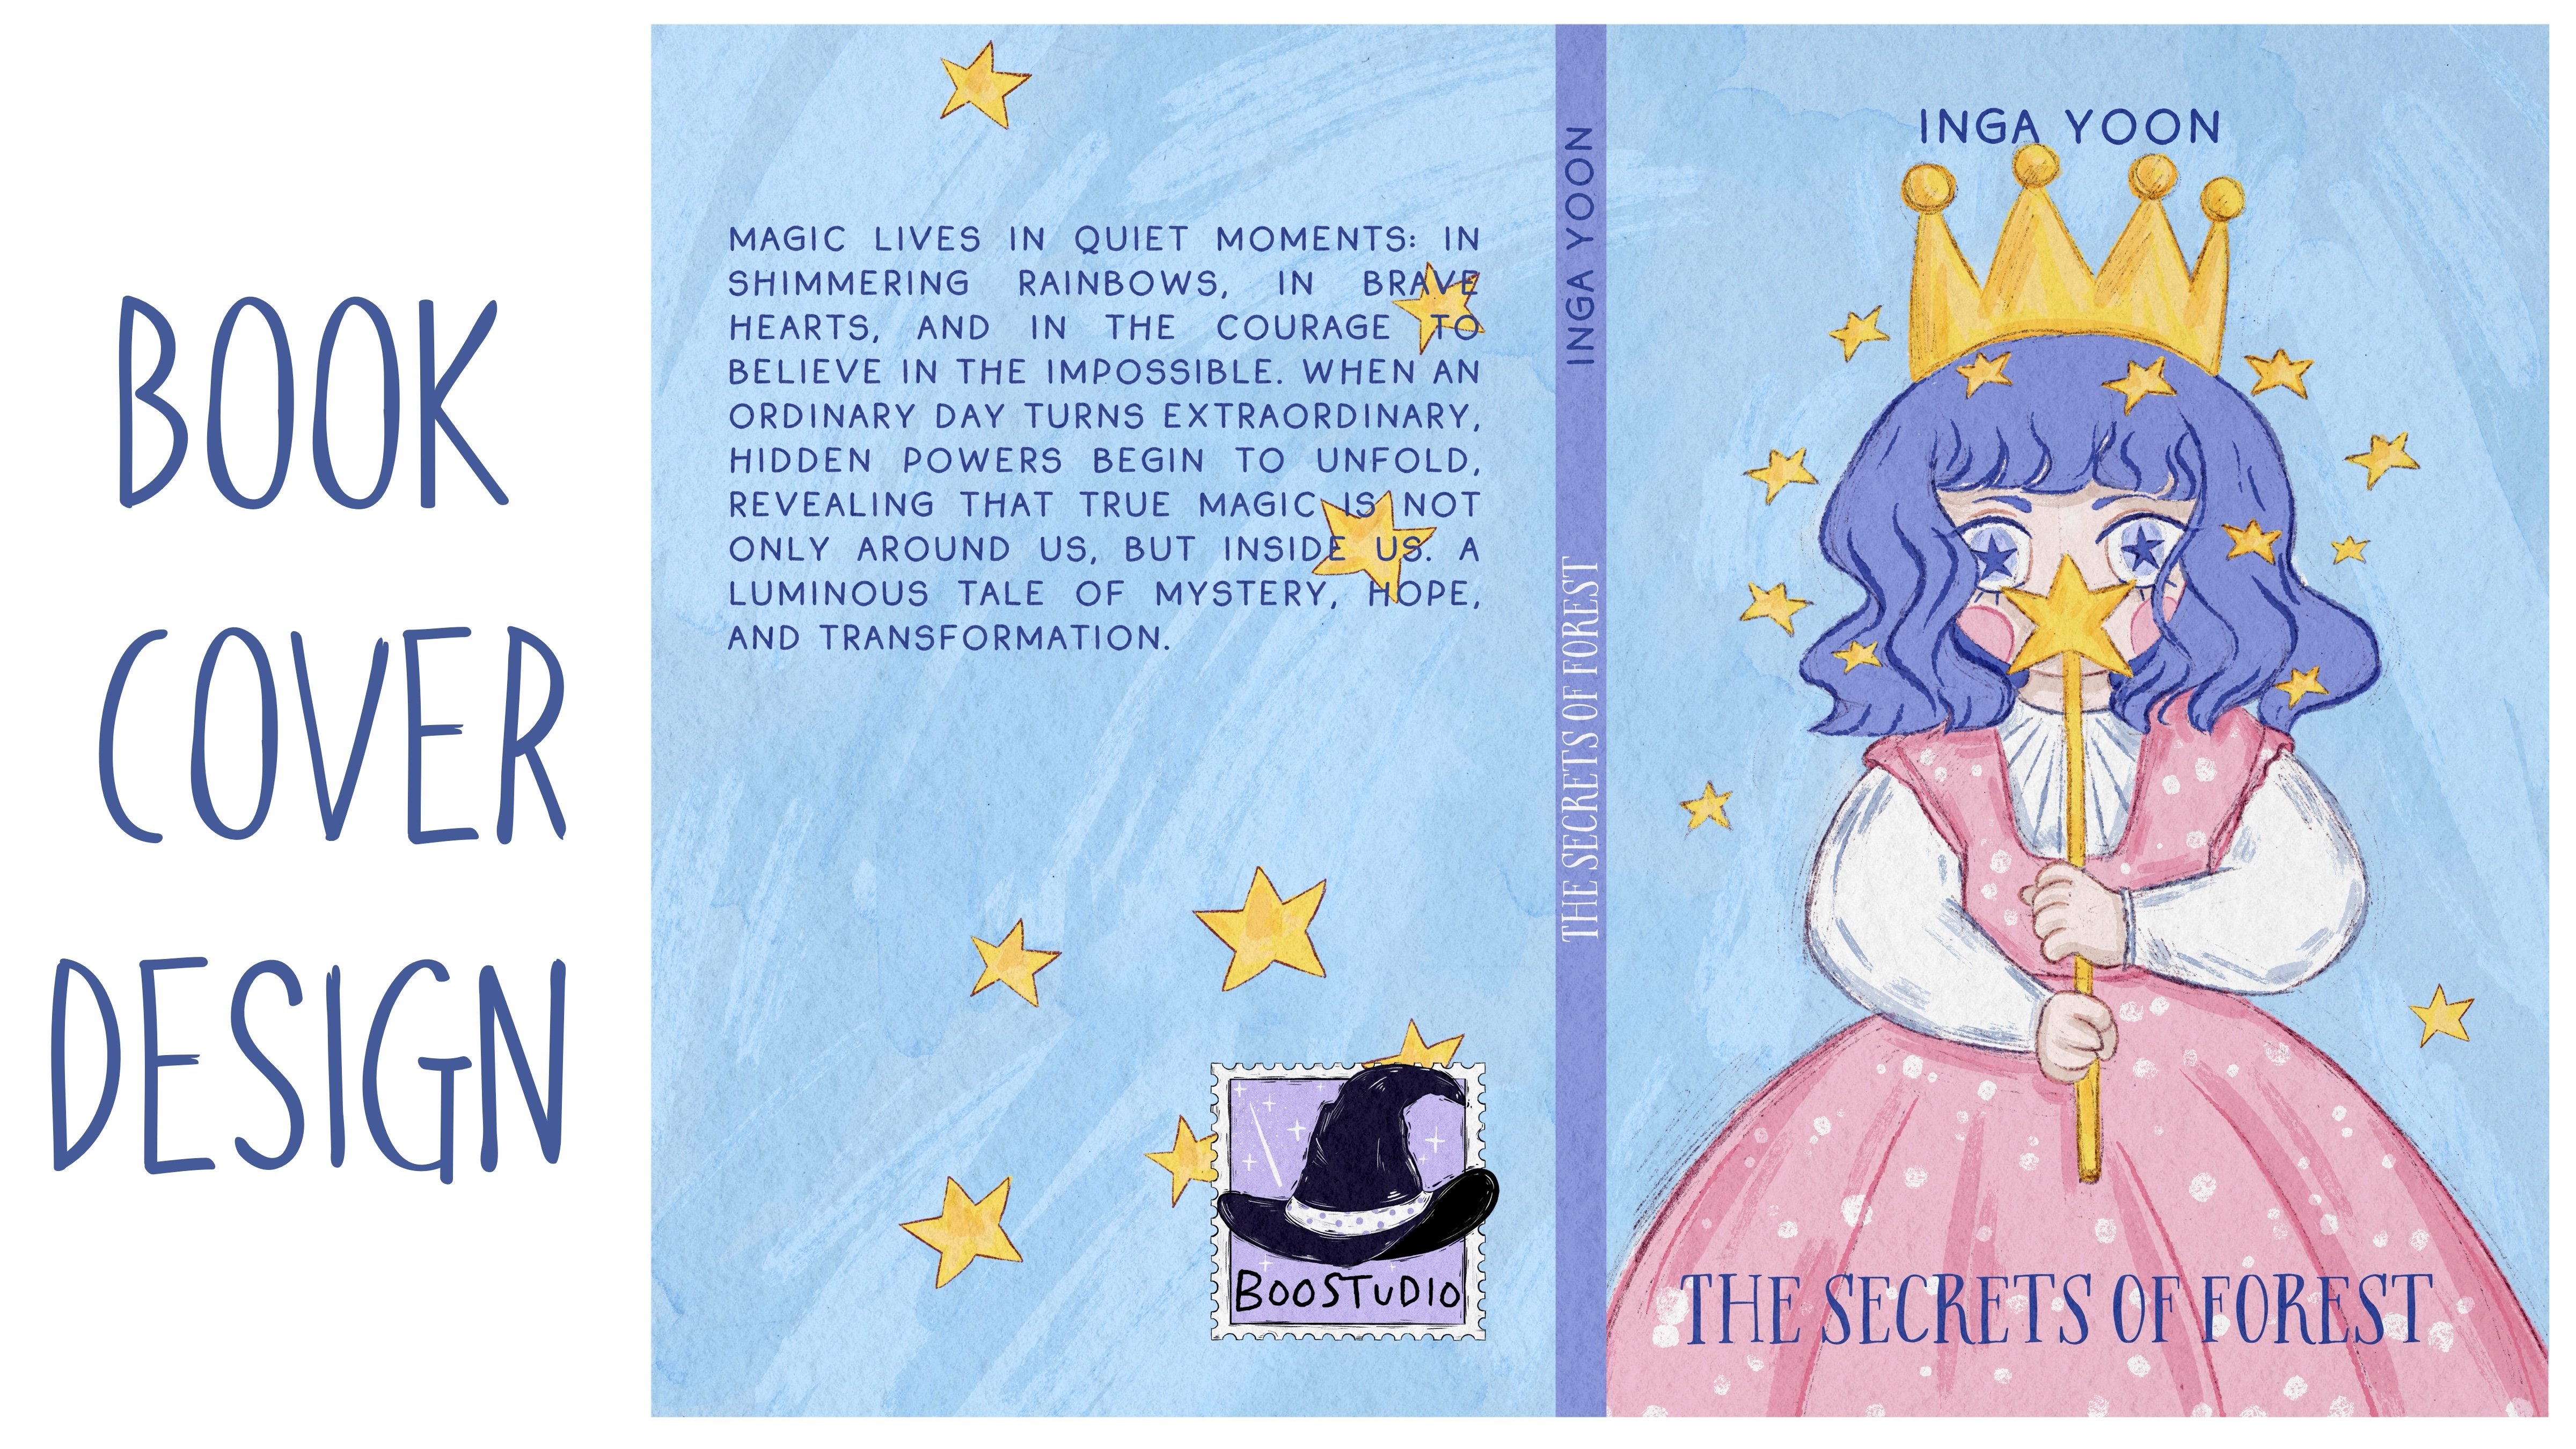
 Inga Yoon, Digital illustrator and teacher