Transcripts
1. Lecture 1 Introduction: Hi, I'm Nancy Rainer. Welcome to my studio. And thank you for joining me for this live presentation. Six ways to know your painting is truly finished. So I have a slideshow. I'm going to now share my screen. Let's see. This is that my technical test here. Today I'm going to show you how you could add ease and flow to your creative process. More clearly visualize your ideas and make creative decisions with confidence. You're in the right place. If you want to learn to finish a painting faster and with better results. Or maybe this is you. You've reached a point in your painting where you're stuck and you don't know what to do next. Whatever your motivation for being here right now, I can help. I want to take just a minute to introduce myself if we haven't met already. My art career started in New York City where I ran a puppet theater. Believe it or not, that was really fun. Painting theatrical sets, building puppets, and performing on stage lead to a BFA from the Rhode Island School of Design, then an MFA from Columbia University. Then I became a certified working artists for golden artist colors. Today I'm a contemporary abstract painter living in Santa Fe, New Mexico. I'm represented by several galleries in locations including Santa Fe, Philadelphia, and Florida. I teach workshops, create digital courses, and how to videos. I offer individual coaching packages and have written a number of books on painting. My first book, acrylic revolution, was the number one bestselling painting technique book in the US for several years and now published in three languages. But here's what I really want you to know. I've taught thousands of artists of all levels over the past 30 years. And today I'm going to share the secrets I teach my students. So you can send your paintings out into the world with confidence, knowing they're truly finished. Is my painting finished? This is the number one question I hear from my students and I know we've probably all asked ourselves this question when we're working on a painting. I'm going to share with you some foolproof ways from my new course, the art of painting beyond technique, to help you decide if you're painting is really finished. And to know for sure that your painting is visually communicating your ideas in the most powerful way possible. Let's get started.
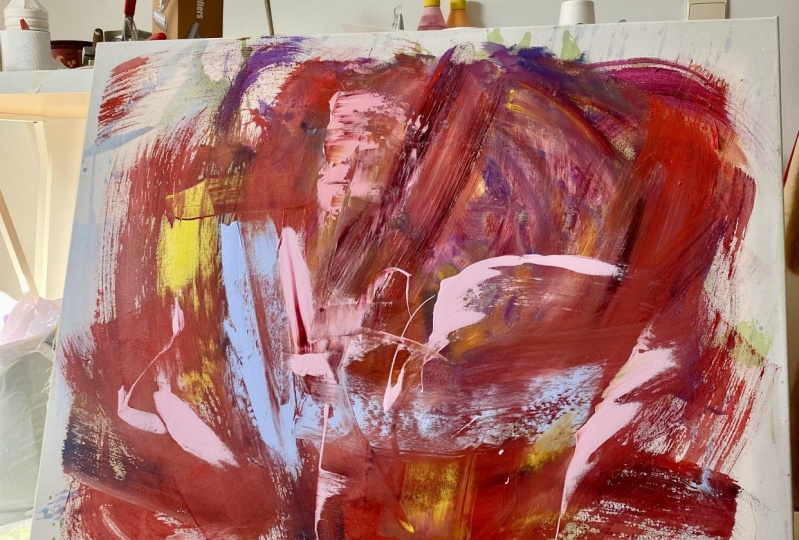
2. Lecture 2 Main Content: The idea of finishing a painting is often wrapped up with the idea of perfection. Perfectionism is the pursuit of an ideal and it can sometimes kill creativity and sabotage your ability to finish. Let's bring it down to earth. Painting is really a process of problem-solving. I love to use the analogy of a ladder, where each step in the process of painting is like taking a step up the ladder. The top of the ladder indicates that there are no more problems to resolve. To delve into the idea of finishing a painting. Let's look at the steps to create one. A painting usually starts with an idea. Something that motivates you to get painting. Next, you make a plan and this could be writing out your process or you might sketch it out or some other way to get your painting often running. Then come step three, you start to paint. Now of course, I'm oversimplifying this process. So we could spend most of our time on the finishing part. But this step three, the painting step, whatever your medium style or content is, usually involves a switch from left brain to write. Once your right brain kicks in, you are in the painting zone and painting. But what happens next? Usually there's a point where you naturally stop painting and step back to take a look. Maybe you want to just check it out, look at the big picture and see where it's going. Maybe something's happening on the canvas you like, your idea takes form and the image has presence. Is it finished? Some artists stop here and call it finished merely because of this natural stopping point. And this is the point that if you add one more step, you could bring your painting from good to great. I see a lot of good work out there in galleries, museums are chosen online. Very often I get artists that come to me asking why their work is good but not selling and asking for marketing advice. Their work may be good. But here's the problem. We are all, every one of us, not just artists, but everyone bombarded with imagery every day, in every way. There's a ton of art out there. A lot of competition for people's attention. Your work needs to stand out from the rest. Good doesn't cut it anymore. You don't need to change how you paint or what you paint. All you need to do is add one simple step to your painting process, right at the special moment where we step back to look at our painting. You've probably experienced those times when you're painting turns out amazing, way beyond what you would first envisioned. And then I'm sure there are times when your paintings never seemed to hit that level. What would it be like if you had a method that would enable every painting you make to work out just the way you wanted and probably even better. Well, that's what I'll be sharing with you today. A sure-fire method that gets you to the finish line fast. And knowing with confidence that it's not just good but great. That method involves editing your images for optimal viewing. Before we jump into what I mean by editing, I want to emphasize that everything I present here today is about improving your paintings and not only for making your work sellable. There are many reasons why we paint, not just for earning an income. Some of us paint for pure pleasure. To express ourselves, to activate our imagination and our creative side, to experience joy in seeing our visions in tangible form. There are many reasons, however, most involved wanting to communicate something of yourself through your work. Finding ways to improve how your images are viewed and interpreted is what I mean by moving your work from good to great. Yes, the ideas I presented here will improve your painting sales if that's your goal. But by all means not limited to that. So let's proceed to this idea of editing your images for optimal viewing. Here's an example of how editing helped me improve one of my paintings. On the left, I came to that natural stopping point. I liked some things about it, but my intuition told me it wasn't finished. By going through my editing process, I was able to move forward on it to its finished state. Editing involves two steps, analyzing for issues and then resolving those issues. Writing and painting both share this need for editing. While we all accept the need for writers to edit, some of you may not believe in the value of editing for your painting. You may think editing is to intellectual and fear. It might take away the spirit of your work or too heavy and will spoil your fun. You may think you're painting is finished just because paint was applied and because you made it. If this is you and you are totally happy with your paintings, then great. You don't need to hear the rest of what I have to say. If however you want better results, finishing your paintings quicker, making them more highly visible to stand out in the crowd, more sellable. Then you'll be glad to learn my simple method of editing images that will bring amazing results. Here's an example of how editing helped one of my clients improve his painting. He took my master course, the art of painting beyond technique. The left side shows the painting before he took my course. It's a good painting. It was hanging in a gallery during a show. And he noticed that people were just walking right by without even paying any attention. After taking the course, he decided to go back and revise the painting. You can see the big difference between the before and after. The revisions didn't take very long, but it made a huge difference. And when he hung it back up again and shows, he noticed that it had much better viewing response. Here's another example of how editing can improve. A painting. On the left is a painting by Steve read in process. He got to this stage thinking it may be finished, but using the courses editing process, he revised it as you can see on the right, and told me he's much happier with the result. As I said before, editing involves two steps, analyzing for issues and then resolving them. As you step back to look at your painting, to analyze it, you are looking at three possible conclusions. One, it is finished to, it's not finished. There are some things you still want to add or change to make it better. Or three, you went too far and killed it. To figure out which of these three options you're painting falls under. Let's look at two top goals for all paintings to be considered finished. We generally want a painting to draw someone's attention and keep it there. The longer a viewer's attention is held, the deeper and more meaningful viewing experience. Or simply goal number 1, get attention. Goal number two, keep it there. A friend of mine just the other day he asked me if these are still valid goals for an artist not interested in showing their work to anyone, just painting for themselves? My answer is a big yes. Painting is a visual medium. The best way to improve the quality of the painting is to understand its viewing power. Getting the eye's attention is the best test, even if you will be the only viewer. To achieve both goals, getting attention and keeping it there. You're painting needs to present something unexpected. This has to do with our two brain sides, left and right. I'm sure you all know about this idea of our brain having two distinct sides. The left is our protector. It uses words and is aware of time. The right is spatial, imaginative, and loses track of time. In other words, the right side is our way to get in the zone. Most of the time during a normal daily activities. And mind is in left-brain. Its main job is to keep us safe. Often called the monkey mind. It offers nonstop mental chatter. Our left brain starts all activities and tries to stop us from engaging in what it thinks of as dangerous. This is a good thing without our left brain guardian, we'd all be long gone like the dodo bird. The problem we have as painters is that the left brain isn't very particular about how it defines dangerous. And sees painting is something to avoid. It thinks if we get too distracted in our work, we may get eaten by a dinosaur. This is an old part of our brain. So one important tool we need to paint well, is to be able to access our right brain at will. What's interesting is that the same thing happens when someone is looking at our paintings. A viewer starts viewing paintings with their left brain, whose only goal is to keep them from looking at anything for too long. It doesn't want to divert attention and definitely doesn't want to allow for a deep viewing experience. By getting the viewer to shift from left to right brain while viewing your painting, you achieve those two main goals. I mentioned. How to do this. Here's the key. First, the painting needs to trip up the viewers monkey mind. I having something I'll call a pattern interrupter. Anything unexpected that changes a pattern will alert our left side to pay attention. Now you've achieved goal number 1. Get attention. Here. Our brain doesn't need to focus with the uniformity and pattern. Nothing unexpected to grab our attention. It's pretty, it would make lovely wallpaper as a way to add something to a wall in a room without drawing too much attention to it. Here's a painting by Bernard. It has the same floral subject matters the previous slide, and even as a similar color palette, but with a big difference, it's loaded with pattern interrupters. So what do I mean by pattern interrupters? Variation is the unexpected that creates pattern interrupters. This is what gets attention and holding power. On the other hand, aspects in the painting that appear very similar with too much repetition, uniformity, your pattern will not get or hold attention. For example, let's view these side-by-side and compare them starting by looking at the image on the left and looking at the pink flowers. The pink flowers are slightly different but so slight they really all look the same. They're all the same pink, same size, equal distant from each other and all face out. Looking at the painting on the right, the pink flowers and especially the orange ones, all differ. Focus on the orange flowers for a moment and you can see that each one's a slightly different quality of orange. Orange flowers, darker, one is brighter, one is redder. Some are hidden behind pink ones while others come forward. There are many aspects here that create variety. All aspects of painting can vary, such as color, shape, line. If enough pattern interrupters are in the work, the viewer switches viewing your painting from using their left-brain side to the right. The result is a deeper viewing experience for them. Now you've achieved goal number two. Keep the attention on the work. When painting with the left brain, which uses shortcuts, stereotypes in generalities, The result is uniformity and boring applications. While the right brain likes detail, adding personality and individuality to the work. Painting and right brain will naturally add variation. But since our mind uses both sides of our brain, it's inevitable that our left brain will at some point while painting, add some of it's boring additions into the work. When we step back for analysis, our main task is to find these left-brain additions, which we could call issues because they will reduce viewing interests and viewing movement. Let's go back to the latter idea I mentioned before. As I said, a painting is created one step at a time. The first step on the ladder is your first problem. The canvas is white and boring, That's the issue. So you do something to it, add paint, That's the solution. Each time you do this three-part process, find an issue, resolve it, move on. You climb the steps until you get to the top, the place of no more issues. Your best clue, the painting is finished. I like to say that there are no bad paintings. There are only paintings with some issues to resolve. Stuck on one of the steps of the ladder. Editing, using analysis to find issues and then to resolve them can be used throughout this climb up the ladder. Here at the top of the ladder, I added arrow options to indicate we could still move left to right, even at the top with no more issues to resolve, we could still play around with the painting, making small shifts I called tweaks to your preference. I wanted to illustrate here that there's no fixed finishing point for your painting. It's more of a loose idea, I call a window of finishing at the top of the ladder. The window has wiggle room for small shifts. If it's at this point though, recognize you're here or you may risk overworking your painting and can easily kill it. If it's at the top of the ladder, that painting could very well be finished as is. In other words, you're no longer resolving issues. Here are two phases of a painting I made for a commission. On the left is where I came to a natural stopping point of view. It there were some things I liked but felt it wasn't finished. I went through my analysis process to find any issues and then knew how to improve it. The finished version is on the right. The most obvious changes in the sky where it's now less cluttered and a more open field. If you look closely, you can see the mountains in the background are also changed, as well as many other minor changes or tweaks which may be subtle but still add the viewing strength of the piece. I'm going to take a drink break. Here's another example of a painting of mine, a more abstract one using gold leaf. Just as before. On the left you will see a photograph of it still in process where I came to that natural stopping point. Also as before, I liked some things about it but still didn't feel it was finished. It felt too flat to me. So even though I liked some things like the texture, it wasn't enough to get and hold viewing attention. I went through my editing process first with analysis for issues, then resolve them. You can see the improved finished version on the right. Analysis showed me I needed to change the relationship of warm to cool. I also realized I needed to break up the uniform field of the bottom third as well as the very top edge. Taking time to edit your painting has several advantages. The two main parts to editing, analysis, to find issues than resolving them allows you to move forward when you get stuck and improve the paintings visual impact overall, you gain confidence to know your painting is finished. So our next question, what is the best way to find issues during analysis? Your eyes, your eyes are your best tool. Did you know that your eyes have an amazing capacity to see and not just in one way, but in many ways. For instance, if I ask you to look at the image on the left and tell me where the widest whites are. You can actually feel your eye muscles switch focus. If I then ask you, Are there any hard edges on the bottom half, you could feel your eyes shift focus again. Our eyes can focus are discerned in many ways. However, just like other parts of our bodies, eyes get streamlined or automated to make life easier. But at the same time limits how we see our paintings. This means our eyes are programmed to automatically focus in one way. Your preference viewing to see. For example, some of us like to see contrast or seek out texture, while others may enjoy finding the story in an image, whichever your preferences, that is how you normally view the world. Your paintings and all images in this one way. To see not just in your one preference way and in all possible ways. Learn how to switch your viewing lenses while analyzing your painting. If you only use your one way of seeing, you will miss those issues that can only be discovered through your other lenses. View your paintings using all your lenses. Then you've got all your bases covered and will be a master at finishing how to turn on your other viewing lenses. It's as simple as asking a question. Each question tells your eyes to refocus for the answer. Ask a question while actively looking at an image. And you can actually feel your eyes change the focus. Just like what happened a few slides back when I asked you to focus on specific aspects of that black and white photo of the woman's eyes. The trick is, don't ask just any question, but instead use ones that tune your eye to important areas where issues are likely to hide. My master course, the art of painting beyond technique, offers 10 key questions to ask with many more sub-questions to take the analysis even further. From this, I've selected my top three here, which I feel are the most helpful ones. How does it feel? What do you look at first? And does movement flow or stopped? Ask these questions one at a time while looking at your painting. Wait for the eye focus or lens to shift. Give it time and you will get your answer. Let's look at some examples for each of these three questions. The first one is, how does it feel? This paintings on silver leaf? So a lot of the gray here is actually metallic. I wanted it to be minimal and abstract and habits. So the painted cover too much of the silver. I stopped painting right at this point and couldn't figure out what to do next. I actually left it like this for several months. I worked on several paintings at the same time. So if something feels stuck, sometimes I just leave it and work on others. But eventually I got tired of seeing it in this unfinished state. So I sat in front of it and looked at it for awhile and asked how does it feel? My answer? It felt depressing. So I then asked myself, not that depressing is always bad, but that's not what I intended with the painting. So I asked myself why it felt depressing and my eyes actually went right up to the sky. Heavy skies can feel ominous and depressing. Plus that yellow green in the top right just felt awful. So here's how I finished it on the right. I like this guy. I added a bunch of bright blue and the center of the horizon line. I put a glaze over the white at the horizon to soften the contrast and tweeted and several other areas, especially that very bottom edge. I asking the question, how does it feel and gazing deeply at it for the answer, I was able to move it forward and finish it. Our second question is, what do you look at first? Here is a painting by Pieter Bruegel the Elder called landscape with fall of Icarus, made in the 15 sixties. Where does your eye go first or what do you notice first? I think it's fair to say that most people would point to the central figures, red shirt sleeves. This is also known as a focal point and I like to call these items. These are shapes, forms, sorry, lines or areas that draw your attention first. In this case, it's color. Taking a moment to notice where your eye goes first is very important because this will tell you what the paintings main pair of opposites is and this is how most issues are discovered. As an example, let's revisit this painting by ross Davis. The main pair of opposites in this painting is cool and warm, or we can say blue and orange. The artist noticed it did not get much viewing attention with left in its pre editing stage on the left, analysis showed him that if blue is the predominant color than orange, when placed strategically and in small amounts, will create focal points. The finished painting on the right has more viewing power because of the addition of stronger orange colors placed around the main form in the painting, the wagon wheel. Our third question, does movement flow or stop? There are many factors that create visual movement throughout a painting. These can be angles, directional lines, contrast the illusion of space details. There is however, one significant factor that is often overlooked, and that is the visual poll created with pairs of opposites. To look more deeply at this idea, let's go back to the Bruegel painting we looked at before. We noted that the first or main focal point is the red shirt sleeve. And exciting visual movement can be created as we move from this first to the next and continuing on following focal points. I often think of the fairy tale Hansel and Gretel, where they leave a trail of breadcrumbs to follow so they don't get lost. With paintings, we could follow the trail of focal points like breadcrumbs showing us the way. Again, this isn't the only aspect that creates visual movement, but it's very significant because our brain has built-in sensors for pairs of opposites. If you want to test this out for yourself after this presentation, just stare at something red for a minute. Then close your eyes and you will see green appear behind your eyelids in the exact shape of the red. That's because red and green are a pair of color opposites. What you pairs of opposites have to do with viewing movement. Let's say you're walking along a white beach. Your eyes will naturally scan for black shells. If you are on a black sandy beach, your eyes will naturally scan for white shells. Maybe this is because we think of scarcity as rare and worthy of finding. So if you're on a black and white Pebble Beach that have these equally distributed, your eyes born even bother to scan instead you'll look elsewhere. Let's transfer this idea to the painting we just looked at. The main red focal point is created because it's surrounded by a predominantly green palette. Like the beach analogy, our eyes move right to the red. The predominant pair of opposites in this painting is green to red, mostly green with a small amount of red. We could give this an actual ratio for the relationship and say it's 80, 20 green to red, or maybe even 90, 10, whatever is smallest. And the ratio such as the red in this case, is where our eye goes. Once we land at our first focal point, we then natural look for something similar to it. Another red shape if there is one, but not as in this case. So instead we're gonna go to the warm browns. From there. The other aspects such as directional lines or illusion of space I mentioned before, will kick in To continue the eye movement. In this painting, eye movement continues to flow. No real stopping here. In this slide, the original we just looked at is in the upper left corner for comparison. The larger image on the right is altered in Photoshop. So the green to red ratio is now more of a 5050 with the green and red visually about equal. Similar to the black and white Pebble Beach I referred to before. Here it's not as clear where the eye goes first. It's a bit confusing and can stop the flow of visual movement. More focal points do not create more interest, and in this case, creates more confusion and diminishes the power of the focal points in the original. Here's another altered version with the original on the top-left. Again, for comparison. This one is altered to eliminate all the red. So now our predominant pair is still green to red. But in a ratio of 1000, this is just as difficult to view, maybe even more so without any red at all. The predominant pair of opposites, green to red, with its ratio of 1000. This is going to stop all visual movement so much so that I call this a quick exit. Or as a student of mine likes to call it a walk-away, any viewer that sees this will move on so quickly, the image won't even register. Let's review those three questions we just covered that helped you to view your painting to determine if it is finished or if there's still some issues that when resolved, can improve the viewing experience, how does it feel? What do you look at first? And does the movement flow or stop? Asking the question is one thing, but it's getting the best answers to those questions that really matters. Let's look at for sure-fire ways to guarantee honest and accurate answers for your editing process. These are different perspectives. Crop sections, stay objective and pretend it's finished. View using different perspectives. One of my favorite ways to analyze is to simply turn the painting around in all four directions, rotating it so each side gets a chance to be on top. If it's too large or heavy to move. Take a photo of it and view it rotated in your computer or other device. And you can also hold up a mirror to flip it in mirror view. So here's a painting at a point where I stopped to analyze. By using this idea, I was able to figure out what was bothering me. In this upside down position. It was easy for me to see the heavy dark strip that's at the top here, but it's actually running along the bottom of the painting. A place I may not always pay attention to when it's in its normal orientation. Here's the finished painting with the bottom edge results. So this is an example of how viewing your painting with different perspectives can give you the best answers to our main analysis questions. The next way to get good answers is to crop or isolate different areas of the painting. We don't have to actually cut it with the scissors. We can hold up sheets of white paper next to the painting to block out some sections. Now isolate others. My favorite ways to break the painting into four quadrants. As an example, here is a finished painting of mine. To analyze it, I cropped it into four equal quadrants using white paper. This is a strange-looking slide, but I wanted to give you an idea of what I meant by holding up sheets of white paper to isolate a section. This allows your eyes to just focus on a specific isolated area. Each quadrant should feel like a finished painting. And you can analyze each separate quadrant by asking the analysis questions. In addition to viewing each quadrant separately, I also like to isolate just the central area. And if it's a landscape or still-life, I'll also isolate the horizontal sections of foreground, middle ground, and background. A third way to get best answers while viewing your painting is to stay objective. Practice, non judgment. Try to catch any negative self-talk, hidden agendas or unhelpful beliefs that come up while viewing your painting, which the ones that keep you from being objective. Let's look at one common limiting belief, which is that you must like you're painting for it to be good or finished. Well, guess what? You do not have to like your painting for it to be finished and well executed. This is gonna sound odd, but it's an important point to bring up. Here's an analogy. Let's say you're a well-known chef and you're working at a five-star restaurant, you happen to prefer French cooking, but what, you're only going to cook French food, you can eliminate your restaurant audience. You need to know how to make a good painting, even if it isn't in your style or preference. If you think you have to love everything you create, your limiting yourself. Most artists want to keep evolving their work by moving out of your comfort zone on occasion, you will allow that to happen. As an example, here are two of my paintings. The one on the left is more my usual style with a subtle color palette and an abstract feel with an emphasis on atmosphere rather than a specific landscape. But sometimes I get an urge to paint differently with a richer color palette or more realistic images like the painting I made on the right. Making a painting that's out of my usual comfort zone. I may stop and think, Oh, why am I paying this? It's not my usual. Then in the analysis, I may make the mistake of thinking whenever isn't my style is an issue. Instead of seeing it objectively, to be a successful painter, don't get too attached to what you like. Instead, analyze an edit with a critical eye to move the painting towards the finish line. Another great way to get the best answers is to just plain old pretend it's finished. Hang it up on a clean, well-lit wall. Place it temporarily into a frame or just clean up and paint the sides to make it easy to see if it feels finished. I like to think of painting as an active conversation between me and the painting. A good indication that painting is finished is when the conversation feels as though it's come to an end. While pretending it's finished. See if it feels as if there's still something unsaid. Does the conversation feel like it's still active? In other words, is the painting still asking for something more to be done? Does your I keep moving to an area that feels out of place? If the answer is yes to any of these, this means it may not be finished. If your eyes keep moving in a fluid movement and don't get stuck anywhere, this can indicate there are no issues and is probably finished. So fluidity and movement, and the painting stops asking for more or closes the conversation. These are strong indication that it's finished. By now. You can see that taking the time to edit your painting before declaring it finished, unfinished or dead can save you time, money, and aggravation. It will also give you the confidence to know it is truly finished. Without taking the time to analyze an edit, you risk overworking the painting. One of the sure-fire ways to kill one.
3. Lecture 3 Summary and Key Points: Let's review the key points to edit your painting. Analyze at a good stopping point. Don't analyze too soon. Ask questions for focused viewing to see in ways that you normally don't use. View with fresh eyes to get the best answers. Find issues often created by the left-brain. Use pattern interrupters to reduce uniformity and resolve any issues. In summary, editing your painting involves two parts, analysis for issues and then resolving them. Editing will improve your paintings viewing power. And to repeat what I emphasized in the beginning, this is to your advantage, whether you are interested in exhibiting, selling, or painting purely for yourself, to keep it private or sharing with family and friends. Take the time to edit and your painting will improve and finish quickly. And now let's review the six ways to know your painting is truly finished. One gets attention to hold the attention. Remember these first two are your main goals. Three, we want the painting to invite right-brain viewing for, we want the viewing movement to flow. Five, no quick exits. Six, it feels right. The painting expresses the feeling quality you want and in all viewing perspectives. And so here are our six ways to know a painting is finished. I hope you find the concepts we just covered helpful for your artwork and art process. Which you'd like to learn more concepts like this. More ways to improve your paintings viewing power, and develop your vision into a unique signature style. To take these ideas further, I invite you to my newest master course, the art of painting beyond technique. It includes a series of videos and exercises, projects, and assignments you do on your own to strengthen your eyes to see images, and sharpen your mind to best analyze them. You will learn how to shift your left and right brain sides for painting. You will learn all aspects to review your work and many ways to resolve issues. This course is for any artist that wants to take a deeper look at significant painting concepts.
4. Lecture 4 Q&A Recorded Live: And we've made it to our live Q and a. Wondering as a way to get us quickly into our Q and a. I'll ask my assistant, Bonnie. She's been checking Bonnie, you've been checking the chat for questions. Let me stop my share over here. Is there a question that a lot of people have been asking or frequently asked question? I have I have several questions. The first is from Diane Paris and says, I make all of my paintings while all of the paint is still wet. How do I edit quickly? Wow, that's a really good question and a great way to paint. Or you do, do you paint an oil paint? I'm just curious. Diana, if you're still here, you might want to unmute yourself and knowing trailing o in acrylic. Wow, that's good. Yes, So that's a good question. And even when you're painting while it's wet, do you find yourself stepping back to look at it? Those moments where it's almost like we're in the zone and then I already have let me hear this chat thing is in my face here. Okay. So to answer your question, let me see if I can move this out of the way so I'm not distracted. Okay, That's good. The idea is to, is to strengthen your eyes. It's almost like I call it I yoga, is that our eyes are like these magical muscles they really have. And they have a direct connection to our right brain. If we stare long enough and ask a question, it activates the right brain. And there's a saying that I've heard it from. There's a guy named Nick ladies who wrote a book called the natural way to draw. It was a very well-known book used in art schools in the 80s. And he says that there are no mistakes in the right brain. When you are in the right brain, everything is perfect. So the analyzing for issues is really when that left brain comes in. So two things. One is to answer your question. 1 is to stay in right brain is much as possible to catch yourself when you're in left-brain and move back into right. And one of my favorite ways of getting if you restart, the left brain uses words. So if you're starting to talk and have dialogue, that's a good sign that you're in the left-brain. If your left brain is saying words that help you paint like more red over here or this is fun, then your left and right burner actually working together as a nice team. But if the left brain starts saying sabotaged, negative things like, oh, this isn't good, I'm running out of paint. Why am I doing this? That's the left-brain taking over to pull you out of paintings. So when I find my left brain trying to pull me out, I breathe, blanket swallow because the left brain stops you for breathing. And and it's hold your eyes like this. So if you breathe, blink of swallow, and look at your work when you step back to look at it. So even if you're working wet and wet the whole time and you want to finish it all at once. You're still going to be stepping, I'm assuming you're still going to step back and kind of analyze how the parts are working together as a whole. You want to view it in right-brain also, and then your eyes will naturally, it'll take you a second. You walk back and go, Oh, There's too much darks. Oh, it's too busy. Oh. So I don't know if that helped. Do you want an answer? You can unmute. I think Bonnie allows people to unmute now. Yes, you hear me? Yeah, I can do. Did that answer your question? That did help align? Yes. And I do step back during it. So that does help. I have one more thing to add to that, which is if you're painting in that one session, wet and wet, It's very important to have your setup enable you to create maximum variety. So you have to have a full pallet. So that's a warm and a cool of each of the three primaries. You have to have everything right there. Because if you don't, you're only going to like let's say you only have two colors out. Your your issue is going to be that you don't have enough color. I mean, right. Yeah. So yeah, I'm with a fast drying acrylic or using the fast drying acrylic or the slow, I use the regular acrylic. They're strong. So my trick is I mix premixed my primaries by two reds, two yellows, two blues, warm and cool of each in one or two ounce jars with lids. I mix them up. I add a little retard or or a little glazing liquid, a little water because I don't like it so thick. If I'm starting with the brain and then I swatch the top and it put the lid back on. I do that to all of them. So when I'm ready to paint, all I do is unscrew the lids. Put the lives in an arch. I like working in an arc. I'll break them out. I put the lids out so I see what the colors are because it's different than what, you know, when it's wet. And then I do my mixing and if I'm taking a break, I just popped the I just stick the lids back on real quick so I'm not letting them dry out. Does that help a little. I use a palette knife, but I do an end cap olive my paint at the same time. So it's done before a start because otherwise otherwise it takes too long. Yeah. That's what I that's what I meant is, you know, however you paint, getting all of your stuff together so you can work fast like that. Yes. And that does help. Thank you. Oh, you're welcome. Thanks for the question. Is there any other questions that somebody wants to ask? Just unmute yourself or I'll ask Bonnie to give me another one. Well, everyone's being shy, so I'll step up lists, lists ago. So Gatto asked, how do you combine the gold leaf and acrylic paint? And then she also asked, Will the course teach the acrylic leaf techniques? Yeah, the so there's, you know, the main course, the art of painting beyond tick. Highly asked by the way, the main course, the art of painting beyond technique. That is, it's beyond techniques. So that's why I'm including the acrylic baster course, which is all techniques. So almost like part one and part two, the complete guide to acrylic painting is 30 videos that it has every technique in it, including how to gold leaf and how to work with acrylic on the leaf. Because there are a few tricks. Because acrylic will tarnish the leaf unless you seal it properly. And there's some interesting ways to paint using leaf. So that's definitely in the acrylic course that's going to come with the pat the whole package Listed data, your question? Yes, he did. Yes. Thank you so much. Thank you for sharing your experience and expertise. I have a question. Can I yes. Margaret or mag Margaret. Margaret. Hi Margaret. I use a golden open almost exclusively. But sometimes I'm like mixing on the canvas and then I get to that I'm ends up like screwing up because it's scrapes. I put on like, okay, today is working on like a supposed to be a purple and green bird. I decide I don't like that. I wanted to be all green and yellow, maybe a little bit of blue in there. So it's putting the new paint on top and it was mostly gone. All right. But then all of a sudden I had this hole in the green paint in the purple was there. It's like a push too hard on the brochure. You know, I don't know. It's like I'm always like when I work with artists, the one number one thing that comes up is how they hold the brush. And when you hold it vertically, you know, think about putting icing on a cake, right? Let's say your cake is all crumbly and you still want to get icing on there and hide the fact that you have currently cake. You're not gonna, you're not gonna take your knife directly down and go like this. You're going to be digging into the cake. So it's the same thing when you hold your brush. Most people hold it vertically and far away. Vertically removes paint. Okay. So as you and the open for those of you that don't know, the open is a very slow drying paint, acrylic paint. It's like oil. And so if you hold it closer to the the, you know, a brush. This is a this is a Photoshop to all sorry. I don't have my tools or the right here in front of me. But if you hold it down and you see how if I go on an angle like this? Yeah. Then when I apply paint, if you're working wet in wet and the previous question, she was working wet in wet. You apply paint and then you apply another color on top of it. You have to hold it at an angle like this, almost parallel to the, a softer touch. So a lot of times I actually hold my brush like this. People find it really weird. Like when people come to her delicate, when people, I grab their hand and just try it, you know. But the thing is that if I hold it loosely like this, I can create quite a lot of variety while I apply. Okay, for linework and brushwork. Okay, so try that out. If it doesn't, if it doesn't work, Let's see what's the second thing? You might want to translate it to snap, to stop until the next day. You know what? That acrylic works in layers. Even the slow drying acrylic is still need to work with layers. And I, that's why I work on several paintings at the same time. Because if I, if I still want to work and it's wet and it wants to dry before I apply something, I'll ruin it if i so just work on something else and let it dry. Now, I'm awful at often running things and scrubbing it away and having to okay. I don't know, like wipe that off. Cells are fun. So I think there's a lot of fun. But the only way I can do the colors is I have to put it on there to look at it. I can't imagine my colors the way some people can. You know, though, the color, color doesn't exist. It only exists in reference to what's next to it. So if you imagine, I'll just let it go. That's that so natural. When you mix it on the palate, who knows whether it's going to try to get it as close as you can and then you put it on the painting and you go, Oh, it's too dark, put it back, scraper, backoff. They get lighter. That's part of painting is, is it's responsive to what you're, what you're doing on the canvas. So it's good. All right. Very helpful. I gotta try my brush thing. I gotta hold it like this. But I guess you don't like, very like, okay. Anybody have another question here? I have a couple of questions. Yes. It's good to see you. You too, Rona, have one. So that one is, is it best to just have one focal point in a painting, or does it depend? Actually, that's a quick exit. One focal point is a quick exit. Let me explain. Remember I talked about the Hansel and Gretel going from breadcrumb to breadcrumb. That visual movement. If you let these days remember the footprints six feet apart with the COVID. It's like if there's just one foot, where do you go next? If there's one focal point, it's the left. Remember, the viewer sees a painting with the left brain first. And the painting needs to have some kind of a, something in there to allow it to transfer into the right brain for a deeper viewing experience, the left brain looks for easy outs. It doesn't want to go to the right brain. So anything that's if it's one thing like, oh, there's a red a red circle on, on green. Got it. I'm gone. So if it's too easy, if it's too much of a pattern, if it's too easy for the left brain to label One vase with a blue background. Got it. But if the blue varies and if the flowers vary, the left brain isn't so sure about labeling and that's when it transfers to the right. So rarely do you have one focal point. I mean, if there's a pair of opposites, if you only have one of one of the, you know, that would be one focal point. But don't get confused with form. If you have a portrait of somebody with a blank background, that's not one focal point. That's one form with a form and background. And there's a lot of exciting focal points that I highlight on the lip, but, you know, so a focal point is not a representational form. A focal point is whatever tracks your eye. So a focal point isn't necessarily the same as what's the center of attention. Like if you're doing a landscaping, you pick this is where my eyes going and it's going to this tree or it's going to this cabin or house. That's different than the focal point. Do you remember the wagon wheel in Ross Davis's painting, there was a blue painting with a wagon wheel. The wagon wheel isn't a focal point. That wagon wheel is the main content subject matter. And any subject matter can be either a quick exit or a engaging thing depending on the focal point. So that's why when he put the orange, the orange illuminated, it lit up the the main content. So that's a really good question that if we look at subject representationally, we could say that the content could draw somebody's attention. But remember I said each person has a preference for viewing. So let's say somebody is Preferences texture. And you have no texture in your painting, but you have an incredibly detailed painted portrait. They're not going to look because they're looking for something else. That's why it's so important to use your eyes in all these different viewing lenses. In the eye, in the create perfect paintings book, which is the basis of the whole new course, but it goes, the new course goes deeper. I say there's 10 because who wants to say a 100? So much? But ten basic ways your eye can view. And so if you view your painting to make it work in all 10 ways, you're going to increase your audience. You've got to also increase the viewing power of it. Okay? Yeah, The content is one viewing, one out of ten. Then you have to look at the texture, then you have to look at the contrast and the, yeah, and so when you were talking about variation in a painting, that also means contrast is includes contrasts. Variation could be textured, smooth. It could be space and form. Could also be realism and abstraction. What if you have 80 percent abstract painting and 20 percent realism? The focus is going to be the realistic parts. The focus is, if you look at my 820 idea, the focus is always the smaller of the purse of the ratio. And the percent 1820 thing isn't the only way to create viewing movement and focal points. But if you have a main pair of opposites, it could be color, it could be edge, hard edge, soft edge, realistic, abstract texture, smooth. Any of those black and white color and non-color. You look at your painting, decide with the main pair is your focal points will be the smaller. Just like the beach analogy, you know, people's eyes are naturally going to look for what's rare. The red in that green painting. That's good question. Like these questions and to that answer it. Yeah, I don't run it. Thank you. Sure. 00 00 00, 00 beginning to work on. And I was wondering what would be the medium texture on your oil? You're doing oil over acrylic. And you want to add texture in the with the acrylic for the oil? Yes. Oil will go over acrylic. I mean, if you think about it, most people just saw with an acrylic jet. So these days, so oil paint will go over any acrylic. I would wait for it to dry at least a few days. Texture there's anything that's a gel or a paste is thick enough to create a texture. Have you worked with any of those before? But I promise that you recommended. It is taller with SOC seeing. So yeah. Or more like a pasty? Yeah. The pumice is the most difficult because it's gray and it's big and gritty. I would say if either molding paste or light molding paste, depending on whether you wanted it to be absorbent or non-absorbing. So if you wanted to do washes with your oil paint, the light molding paste is great. It creates like a paper like surface. But the molding paste is made with marble dust. So if you wanted the oil paint a glide more on top, then use the molding paste and they both make really good texture. That's what I wanted to know. Thank you. We have time for one or two more questions. Any other brave souls want to unmute and ask? Bonnie any other questions in the in the chat? I do. Hold on just 1 second. Okay. Paul Bear teen asks associate, your book talks about the play phase and the critique phase. Is there not a tendency to go to the critique phase from the start, for instance, make sure that the 80 20 rule is used from start. Thank you for asking that. That was a big decision of the, of mind to put the play phase in there to make sure that people didn't use analysis too soon. So if now, I would say analysis, if you the play phases is supposed to be where you get into right-brain. And the right brain doesn't always think analytically. So if you want to think strategy while you're in the play phase and it's not bothering you, then that's great. Everybody's going to have a different process. But I found that once I taught these concepts, the first issue that came up was people finding that it was interfering with their painting. And I'm like, well, make sure you don't and analyze too soon. So that's why I also emphasized that natural point where step back to look, that's a good time to think about it. I like to use the strategies like the 1820 in my maybe beginning when I'm planning like, okay, let's say I'm using primarily warm and cool colors. Now I don't I don't think I I might have a plan in the beginning, but I let myself I like to see what comes up naturally in right-brain before I start to analyze. I don't know if that makes sense or not, but I think it's up to each individual person. If you like to analyze and you have that kind of brain and that gets you producing more of what you like with good results, then it works for you. If you want to try the other approach which is going to play face, see what you get and then analyze. Then you can see which one you like better. I don't know if that person's still here or not. It's quarter It's quarter after. I take one more and then we'll call it a night. What about that one more? Bonnie's are another one. Where you guys are too afraid to unmute. Reese Williams, you're asked, how do you recognize the issues in your painting? How do I recognize the issues of my painting? Okay, an issue I define as something that the left brain put in, in, in boring application or repetition or something that is going to keep the viewer's left brain engaged so that they walk away. So in issue is anything that is, is doesn't engage the eye in a fluid movement is kinda like what the whole presentation, how do you recognize issues is? You have to ask different questions. And each question refocus your eye to see. So let's say, I say, Let's say a look at the painting and go, Where are my light values? If I look at one is white and 10 is black, and I have a scale for 10 steps, 1 to 10 whites and light values r, where r i really likes to go. It likes to go to lights and brights. So I could step back and look and say, do I have an issue in the lights? Well, where are the lights if they're just stuck in a corner or if I have nine, that might be an issue, then I have to look at the whole painting to see. Is that going to stop my eye or is that going to help my eye to move through it? Then if I say, well, I think it looks pretty good. My lights are in interesting places, my eye keeps moving, looking for lights. In other words, you can have a viewing movement with each question. And if you get stuck in a certain question, then there's an issue there. So I don't know if that answer the question or not. But a second question. As painters, there's no rules. These are just tools to use to decide. If you feel that the viewing movement in all the different viewing lenses is flowing. If you keep getting stuck, then you ask yourself what viewing movement you're in. Are you in the darks, lights, the hard edges, the brights, you know, the forms, the directional lines, each thing you ask yourself, you see if it flows or not. And if it doesn't, then there's an issue there. That's the whole course is how do you find issues? And then once you find the GCD resolve, if you say, Oh, I have too many dark values, then you just eliminate some. That's the that's the way you resolve it. The hard part is finding the issues. Nancy, I have no more questions at this time and we're now at 617, so it's a good time to close. Thanks, Bonnie, and thank you everybody for sticking it out the whole time. Good. Rest of your day. I'm going to thank you. I'm not going to close out. This is too fun. Wonderful, Nancy. Thank you so much. I'm glad you like to. Thank you for coming. All right, everybody. I'm going to end it. I'm going to end it.
 Nancy Reyner, Fine Art Painter, Author, Instructor