Transcripts
1. Introduction: Character animation
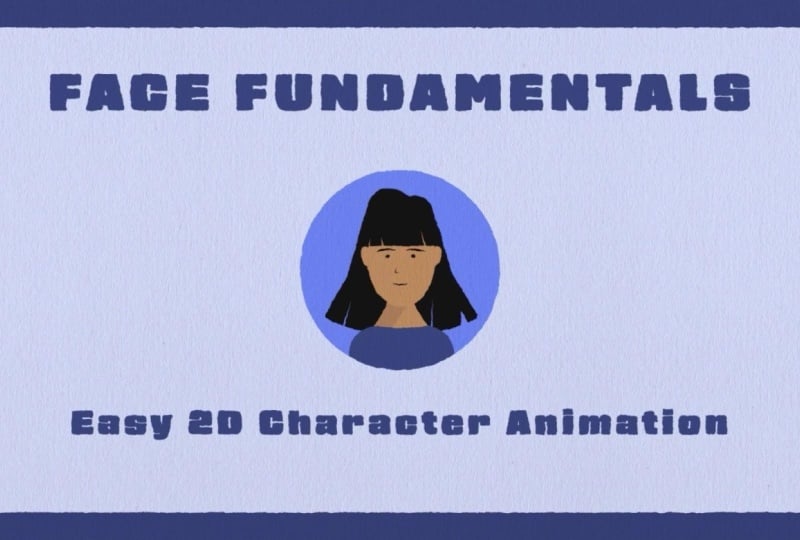
can look overwhelming, but this easy intro to character animation
will show you that it can be easier
than it looks. I'll walk you through how to recreate this intro animation, how to properly rig
and animated face, and other tips and techniques to get you started in
character animation. This is an intermediate
level class. For students that are
new to motion graphics, I suggest taking one of
my beginner classes. Can't wait to see
what you create.
2. Getting Started & Class Project: For this class, you'll
need Adobe After effects, Adobe Media Encoder to export. You can download the
character artwork on the project and
resources page. Your class project is to
follow along and complete the face rig animation
and then take what you've learned and
create your own animation. You can download a
completed project file on the project and
resources page and be sure to post your projects
to the project gallery.
3. Import the Character Artwork: In this lesson, we're going to import our character artwork. Once you're inside
after effects, you can right click Import, file, locate the
character artwork file. Make sure you import
it as a composition. Footage dimensions, you can
leave it as layer size. Click Okay. We can go ahead and click here to enter our character ready to
animate composition.
4. Parenting the Layers: In this lesson, we're going to parent our layers together. First thing we're going
to do is duplicate our character
animation composition, press Control D to duplicate. We're going to rename it.
Press Enter to rename a layer. We can rename it
character artwork. This is so we have an
extra composition with our character artwork just
in case we ever need it. So now let's select eyebrows,
press the shift key, go all the way down to nose, and we're going to connect
all these layers to the head. We can use the pick whip. Or you could use the drop down menu. It does
the same thing. Now, select the ears
and the hair back. We're also going to
connect these to the head. We'll select our head
connected to the neck. And our neck layer will
connect it to the body layer. And now for the second
part of this lesson, we're going to need to
change our anchor points. Go up here and we'll select
our anchor point tool. Make sure snapping is enabled. This will make it
much easier for us. So eyebrows, eyes, mouth, hair front, and nose
all seem to be good. For our head, we're going to have to change our anchor point. I'm going to zoom
in a little bit, select our anchor point. We'll slide her down to
the bottom of the head. And remember, since
snapping is enabled, it should snap right to
the bottom of her head. The body anchor point looks
to be in a good spot. For the neck, we're going to
have to change its location. Again, select our anchor
point tool, drag it down. There we go. Ears are good. Now let's select our hair back. Get our anchor point tool again. We'll drag our anchor point
to the top of her head. Now that all our anchor points
are in the correct spot, our character should
rotate properly. I
5. Body Animation: We want our character to spring
onto the screen and then rotate back and forth before finally resting into the
middle of the screen. This is what we call overshoot. Select a body layer, press P to bring
up the position. Holding the Shift key, press R to also bring
up the rotation. Right click on the position. Go to separate dimensions because we're only going to
be animating the X position. At the beginning
of the timeline, let's change our
rotation value to 90%. Press the stopwatch
to put a keyframe. Then we can move over 15
frames on the timeline. We'll change our rotation
value to a negative number. Negative eight looks good. Now let's move over to
frame 23 on the timeline. We'll change our rotation
value to a positive number. Let's try 3%. Now let's move to frame
28 on the timeline, and we can change our
rotation value back to zero. Select our keyframes,
press F nine to easy Es. Now let's head into
the graph editor. For this animation, I'm going to be using the speed graph. For the first animation, I'm going to drag these handles
all the way to the left. And for the second
two animations, I'm going to drag the
handles into the middle. We want our character to
animate fast onto the screen, and then her animation will smooth out on the
next few keyframes. I There we go. Now our animation
is a lot smoother. Now let's animate the position. Let's drag our position until our character
is off the screen. I'm going to type in
a value of 1,400. Place a keyframe. Now let's move to frame 15
on the timeline. Now, let's drag our
character onto the screen. Let's try a value of
525 for the position. Now let's move to frame
23 on the timeline. Move our character
back to around 555. A Then let's move to frame 28 and we'll have our character move to
our resting position, which should be 540, which is exactly the
middle of the screen. Just like our
rotation animation, we're going to select
our keyframes, press f9d ETE's, head
into the graph editor. And what we want to do is
ease these keyframes very similar to the way that we
eased our rotation animation. It doesn't have to be perfect, but we do want the animations
to be very similar. Now let's preview
what that looks like. They are much better.
6. Head Animation: Now for the head animation, we can close our body layer. Let's select our head layer, press R to bring
up the rotation. Let's move to frame
32 on the timeline. Press the stopwatch
to put a keyframe. Now let's move over to
frame 36 on the timeline. Change our rotation
value to four. Now let's move to frame
42 on the timeline, place a keyframe, because we want no animation to happen between these
two keyframes. Now let's move to frame
46 on the timeline. We'll change the rotation
value to negative four. Now we'll head all the way
to frame 64 on the timeline. Press the place
keyframe button, again, because we don't want
any animation to happen between these
two moments in time, then we can move over to
frame 69 on the timeline, and we'll change our
rotation value back to zero. So this is what we have so far. But it still doesn't
look quite right. We're going to select
our keyframes, press F nine to ess, and we'll head into
the graph editor. For our first head movement, I'm gonna drag these handles
all the way to the left. I'm going to do the same thing
for the second movement. And the same thing for
the third movement. So right now, your graph
editor should look like this. There, now the animation
looks a lot smoother. I
7. Eye Animation: Now we're going to animate
our character's Is position. We can close our other layers. We'll select our eye layer, press P to bring
up the position. Press the stopwatch to put
a keyframe on frame 32. Now we'll move over to frame 36. We'll drag our position
to around 180. So now our character
looks to the right. Now let's move over to frame 42. Press the keyframe button to
put a keyframe because we don't want any animation
between those two keyframes. Now we'll move to frame 46. We'll move our position
to around 140. So now our character
looks over to the left. This is what we have so far. We'll move to frame 52, press the keyframe button. Move to frame 56. This time, we'll move our
Y position down to 235. Now our character
is looking down. Move over to frame 64, press the keyframe
button so that there's no animation between
those two points. And now let's move to frame 69 and copy and paste
our first keyframe. So we go back to the
original position. Here's what we have so far. To make the animation smoother, we're going to select
our keyframes, press F nine, head
into the graph editor. For our first three animations, we're going to drag
our keyframes to the left to have
a fast animation. And for the last animation, we're going to keep it at
the default ease so that the eyes have a
smoother transition back into the final
resting place. There we go. This is
what we have so far. And
8. Eyebrows, Nose, & Mouth Animation Using a Null Object: I Now we're going to animate
our eyebrows nose and mouth. First, let's head to a point on the timeline where there's no animation frame 70. We'll create a new
null object by going to layer new null object. Let's rename it face controls. Remember to press Enter
to rename a layer. Now we're going to
connect our eyebrows, mouth and nose to our
new face controls layer. And we'll connect our face
controls layer to our head. Now let's start animating. On the face controls layer, we'll press P to bring
up the position. Let's bring up our I
keyframes just for reference. Remember to press U on the keyboard to bring
up the keyframes. On frame 32, we'll press the
stopwatch to put a keyframe. We'll move to our
next I position. Now let's change the X
position of our face controls. We'll drag over our position. Let's try 185. We'll move to our
next I position. Press the keyframe
button because we don't want any animation between
those two keyframes. Move to our next I position. Now let's drag our
position back. Around 160 looks good. Move to our next I position. Press the keyframe button. Again, move to our
next I position. This time we're going to
change our Y position. Let's try 300. Move to our next Is position. Press the keyframe button. And finally, we'll move to
our final resting position, and we'll copy and paste our first keyframe to go back
to the original position. Now let's select our keyframes, press F nine to eases, head into the graph editor. Remember, I'm using
the speed graph. For the first three handles, I'm going to drag them
all the way to the left. And then I'm going to leave
the fourth as the default. Let's preview what
that looks like.
9. Ears: We're going to have
our ears move in the opposite direction of the rest of the
character's face. So let's keep our eyes and auditions open just
for reference. And we'll open up
our ears position by pressing P on the keyboard. We'll move to our
first I position. Press the stopwatch on the
ears to put a keyframe. Move to our next eye position. Now we're going to drag our X position in the opposite
direction of our eyes. Somewhere around 158. Now let's move to
our next I position. Press the keyframe button. Again, move to our
next I position, and we'll drag our position
in the opposite direction. Around 172. Move to
our next I position. Press the keyframe button, move to our next
eye position again. This time we're going to
drag our Y position on the ears to around 210. We'll move to our
next I keyframe, press the keyframe button
on our ears, and finally, we'll move to the last
keyframe on our eyes, and we'll copy and paste the first keyframe
on our ear layer. Select the keyframes,
press F nine to eases. And again, we're going
to ease these keyframes in a similar way to our
earlier animations. We'll pull the first three
animations to the left. And leave the last
one as the default. There we go.
10. Blink: So the first thing we're
going to animate is our character blinking as
she comes onto the screen. With our eye layer selected, press the S key to
bring up to scale. We're going to check
the unlink button. Place a keyframe at the
beginning of the timeline. Let's move over to frame
ten on the timeline. And we'll shrink our
Y property to 15%. Now let's move over to frame 15. Change our value back to 100. Select our key frames,
press F nine to Easy Es. Our second Eblink will
start at frame 28. Press the keyframe button, move over to frame 32. Again, put our Y value to 15%, move over to frame 36. Change our value back to 100. And our third eblink
will start at frame 64. Press the keyframe button, move over to frame 68, change our Y value to 15. Move to frame 72, and we'll change our
value back to 100.
11. Hair Part One: In part one of the
hair animation, we're going to animate
our character's hair as she animates onto the screen. Let's select our
hair front layer, press R to bring
up the rotation. Let's move to frame
seven on the timeline. Press the stopwatch
to put a keyframe. Now let's move to frame 16. Let's change our
rotation value to a negative number,
maybe negative seven. I'll turn off the hair back so we can see what
we're doing better. Now let's move to frame 23. Change our rotation value to a positive number,
positive five. We'll move to frame 26. Type in a negative number,
maybe negative two. And finally, we'll go to frame 29 and we'll change
our value back to 0%. Now let's see what
that looks like. Now you can see the hair
swinging back and forth. Let's select our keyframes, press F nine to Ess. I'm going to use the
speed graph editor. For our first handles, we'll drag them all the
way to the left. And for the remainder
of the animations, I'm going to pull
the handles into the middle. There we go. Now we're going to
do the same thing for the hair back layer. We're essentially going to
do the exact same animation. So let's head back to our
first hair front keyframe. Let's click on our
hair back layer, bring up the rotation
by pressing the R. Press the keyframe button. Let's move to our second
hair front keyframe, and we'll change our rotation to a negative number,
maybe negative five. I think that looks good enough. Now let's move to the
next hair front keyframe. Change our hair back value to a positive number,
positive three. Again, let's move to our
next hair front keyframe. Change our rotation
to a negative number. And finally, let's go
to our last hair front keyframe and we'll change our hair back rotation
value to zero. We'll easy ease our
keyframes with F nine, head into the graph editor. And we're going to do
a very similar easing as we did with our
hair front layer. And this is what we have so far.
12. Hair Part Two: In the second part of
our hair animation, we're going to animate
our character's hair as she looks back and forth. Let's start with the hair front. Let's move to frame
32 on the timeline. Press the key frame button. Now let's move over to frame 36. We'll type in negative two. Turn off the hair back
layer so we can see better. We'll move over to frame 42. Press the keyframe button. Move over to frame 46, type in a value of two. Now let's move over to frame 64. Press the keyframe button. Now we'll move to frame 69 and change our rotation
value back to zero. Let's head into our
graph editor. Zoom in. And again, we'll drag
our handles to the left. And we'll do that same
thing for the next one. And again, for the
third animation. So now let's do the same
thing for the hair back. For this one, we want our hair back to be going in the
opposite direction. We'll turn our layer back on. Move to frame 32, press the keyframe button, move to frame 36, change our rotation
value to four. Now let's move to frame 42. Press the keyframe button. Head to frame 46. Enter a value of negative four. Move to frame 64. Press the keyframe button. And now we can move to frame
69 and put a value of zero. Head into the graph editor. Again, we're going to
drag these handles to the left for all three of them. So now that our main hair
animation is finished, there's just one more
thing I would like to do, and it's animate the
position on the hair front. Let's select our
hair front layer, hold shift, and press P
to bring up the position. Let's go to frame 52, press the stopwatch
to put a keyframe. Then we can move to frame 56, and let's type in a value
of 41 into the Y position. Move to frame 64, press the keyframe button. And finally, we'll
move to frame 69, and we'll copy and paste
our first keyframe. So now the hair moves
down as she looks down. Select our keyframes,
press F nine to easy Es. And for this animation, I think I'll just leave it at
the default easing.
13. Final Touches: Now let's add some
final touches. First thing we'll do is
create a new background. We'll go to layer new solid. I'm gonna choose a blue
color for the background. Move it to the bottom of our
layers. We'll rename it. Press Enter to rename a layer. Now let's create a
new composition. I'm going to name it Main.
You can copy my settings, width of 1920, height of 1080, frame rate of 30,
duration 600 frames. In our new composition, we can create a background. I'm going to choos
a light blue color. Again, we'll rename
it background. Now, let's create a circle
to put our character in. We'll use our Ellipse tool. Pulled shift to create
a perfect circle. Let's rename the layer mat. Center our anchor point
using the anchor point tool. Now let's align our circle to the center of
the composition. Now let's drop our character
into the composition. Obviously, our character
is a little too big, so let's bring up the
scale with the S key. Scale it down to 50%. Put it under our mat layer. Let's use the Track
Matt pick whip. I think our character is
still a little bit too big. So we'll bring up
the scale again. Scale it down to 45. There,
that's a little better. Now let's add some texture. I'm going to create a
new adjustment layer. I'm gonna rename it Boyle going to add a turbulent
displace effect. Change the amount down to 16, the size down to six. We can change our
complexity to two. I'm going to add some animation. Hold the Alt key and click on
the Random seed stopwatch. In this field, we can
type in our expression. Random 10,000. I there we go. To make it better,
we're going to duplicate our turbulent
displace effect. We're going to change
some of these settings. We can change the amount to
30 and the size down to two. We can also change our
complexity, change it to four. There we go. This will give our animation a little bit
more of a hand drawn look. Another thing we can do is add a little bit
of paper texture. I'll put a link on the
project and resources page to a website where you can
download free paper textures. I'm going to drop in my
paper into the composition. And I'm going to change
the mode to multiply. Now we have a nice
paper texture overlay. One more thing I'll do
is create a border. I'm going to create a new solid, layer new solid, use
the color picker. We'll make it the same
color as our circle. Now I'm going to
create a mask over our new solid layer by choosing the rounded
rectangle tool. We'll double click on the
rounded rectangle tool, and that'll add a mask
to our solid layer. We'll toggle down the mask
and we'll go to mask path, shape, and here we can
change these values. Change the left
to 55, top to 55, right to subtract 55 and
bottom to subtract 55. We'll change the masks mode
to subtract. There we go. And
14. Final Touches 2: Circle Animation: This lesson is for anybody that wants to
animate the circle. First thing we'll do is
select our MT layer, press Control D to duplicate. With our new MT two
layer selected, we'll go to the fill option, get our eyedropper tool. We'll make it the same
color as our circle. Now let's turn our layer on so it's not
invisible anymore. We'll rename our
layer to circle. Remember to press Enter
to rename a layer. Now we'll select our character
layer and our MT layer, and we'll move them
down the timeline just to get them out
of the way for now. We'll go back to
our circle layer, press S to bring up to scale. At the beginning
of the timeline, we're going to set
our scale to zero, press the stopwatch
to put a keyframe. We'll move over 12
frames on the timeline. Set our scale to 125, so our circle gets big. Move over to frame
20 on the timeline, set our scale to 90, so our circle gets small. Move over to frame 26, set our scale to 105, so our circle gets bigger again. And finally, we'll
move to frame 28, and we'll set our scale to 100, the final resting place. Select our keyframes,
press F nine to Ess, head into the graph editor, make sure we're on
the speed graph. The first two handles we'll drag them all the
way to the left. For the rest of the handles, we'll drag them into the middle. Head back to our timeline. We'll go to our last
circle keyframe with our layer
selected to hold Alt and bracket to trim our
layer on the timeline. And we'll move our mat and character layer
down the timeline just as our circle layer ends. And there we go. A
15. Final Touches 3: Text Animations : Mm hmm. We don't have to use the same text as in the intro. Let's type our names. We'll align our text into the
middle of the composition. I'm gonna turn my grid on, nudge my text up a little bit. Turn the grid off. Now we
can start animating it. Toggle down our layer, go to animate, scale. Gonna rename it scale one. Remember to press
Enter to rename. Change our scale to zero, toggle down range selector one, toggle down advanced, and we're going to
change it to ramp up. We can change our E's
low value to 90%. And we're going to
animate the offset. We'll set our offset to negative 100, press the stopwatch, move over 30 frames, change our offset to 100%. We're going to take
that scale one and we're going to duplicate
it with Control D, with our scale two, we're going
to change the value 125%. And we'll drag our keyframes over ten frames on the timeline. Now our text gets big
and then small again. We can change our Es high to 60. Change our Es low to 60 to
get a smoother animation. Now let's preview
what that looks like. So as you can see, our text gets big and then small again. As a final touch, I'm
going to duplicate the scale again to
get three scales, toggle down our scale three, change this value to 90%. Bring up the keyframes
bipressing U. We'll drag these keyframes
over another ten frames. And under the advanced tab, we'll change our Es high to
40 and our E's low to 40. Now let's see what
that looks like. So our text scales in, gets big, smaller again, and then goes back into its normal position. Now let's animate our
second animation. We'll type out some text. Align it to the center
of the composition. Turn our grid on again. I'm going to nudge my
text using the arrow key. I think that looks good
enough. Turn my grid off. Think I'm going to
start this animation around around frame 67. We'll toggle down our layer. Go to animate. Position. We'll
set the Y position to 100, toggle down our range selector,
toggle down advanced. Gonna change this one
to ramp up as well. Just like our first animation. Change our Es low to 90%. And again, we're going
to animate our offset. Change it to negative 100, press the stopwatch
to put a keyframe. Move over 20 frames. We'll change our
offset value to 100%. We'll rename our animator
one to position one. Duplicate it. Change the second
position in negative 45. We'll move these keyframes over ten frames on the timeline. Toggle down our
range selector one. Toggle down advanced and we'll change these values to 60%. Now our text shoots up and
then comes back down again. Now let's duplicate
position two with Control D. Change this value to 20. Toggle down our advanced layer, and we'll change our Es high
to 30 and our E's low to 30. Bring up our keyframes
by pressing. We'll move these keyframes over five frames
on the timeline. We have some text
that shoots up, goes down, and then goes back
up to its final position. The last thing we're going to
do is on our position one, we're going to add an opacity. Set the opacity value to zero. Now let's preview
our animations.
16. Export: Created text animation, first thing you're
going to want to do is move your text layers
to under the boil layer. Now we're going to have
to trim our work area. I'm going to make my
animation 4 seconds long. You can press N on your keyboard or just drag the work area. Now we'll go to File, Export, add to Adobe Media Encoder. Once Media Encoder is open, we'll click here to
bring up our setting. Beside the preset tab, let's select YouTube ten ADP, OHD click here and we can name our file and
where we're going to export. Since we chose a preset, we don't have to
worry about any of the other settings,
so we can click Okay. Go to the Green Arrow to Export.
17. Outro: Congratulations and thank
you for taking this class. Now you can post your project
to the Project Gallery. I can't wait to see the
animations you created.
18. Bonus Lesson - Extra Mouth Animation: So here I am back with
yet another bonus lesson. I want to make it clear
that these bonus lessons are completely optional and are just to give students
some extra ideas for what they can do
with their animations. So let's say you want
to add a little bit of extra animation to
your mouth animation. Let's say you want to make
your character's mouth frown as she looks down. One way we can go about doing that by right clicking
on our mouth layer, going to create
shapes from layer. What that does is it creates a new layer called
mouth outlines, and now we have a path
that we can edit. Going to zoom in a little bit. As you can see, now there's points on our mouth
layer that we can edit. I'm going to bring up the face controls just for reference. We'll move to the point on the timeline where our
character starts to look down. Frame 52. I'm going to press
the stopwatch on the path, and we'll move over to frame 56. And now we can start
editing our mouth. I'm going to select these
points, drag them down. Gonna drag this handle
up a little bit. Gonna select the other
points on the other side. Again drag this handle
up a little bit. Maybe drag these
points a little bit. Of course, you're going
to have to go through this and fine tune it to get it to look the
way that you want. There, I think that's good
enough for this tutorial. Of course, you can
fine tune it to look however you want. This
is just an example. Then, of course, move
over to frame 64, press the keyframe button, and then move over to frame 69, and we'll copy and paste our first keyframe to go
back to the original. There we go. Starting to look
the way that we want it. And of course, we'll
select those keyframes, press F nine to Ess. And then, of course,
you can go into the graph editor and edit the points however
you would like. But I think that's
good enough for this tutorial just to give students an idea of
what they can do.
19. Bonus Lesson - Optional Nose Animation: And Here's an optional nose animation. We'll select our nose layer. We'll duplicate it two
times with Control D. We'll move to frame
33 on the timeline. With our first nose
layer selected, we'll press Alt plus
right square bracket, and then we'll drag
our nose layer on the timeline to frame 33. Now let's select nose two, and we'll press Alt
left square bracket. Now let's move to frame 43. We'll press Alt plus
right square bracket. Drag the layer to frame 43. Now let's select
nose number three, and we'll press Alt plus
left square bracket. Now we'll select our nose two. Right click, go to transform,
flip horizontally. Now the nose will give
the illusion that it's switching angles as she
moves left to right.
20. Bonus Lesson - Optional Eyebrow Animation: Here's another optional lesson. We'll move to frame
52 on the timeline. We'll select our eyebrow layer. We'll duplicate it
twice with Control D. Now we'll trim our original eyebrow layer by pressing Alt, right square bracket,
drag the layer. Now let's trim our
eyebrow two and eyebrow three layers by pressing
Alt left square bracket. With our second eyebrow
layer selected, get our rectangle tool and we're going to draw a
mask over our layer. We'll do the same thing for
our eyebrow three layer. We'll bring up the rotation
for both layers by pressing R. Press the
stopwatch to put keyframes. Move over to frame 56. We'll enter a value
of negative ten. And then the other layer we'll enter a value of positive ten. Move over to frame 64. Press the keyframe
button for both layers, and then we'll move to frame 69. And we'll copy and paste
our first keyframe. We'll do the same thing
for the second layer. Now let's select our keyframes. Press F nine to add some EZ Es. And if you would like, you
can go into the graph editor. I'm gonna pull these handles to the left for the
first animation, and I'm gonna leave the second
animation as the default. Do the same thing
for the other layer. Now let's preview our animation.
 Tyler Bennett, Motion Graphics Designer & Photographer