Transcripts
1. Introduction: Hello, and welcome
to the easiest motion graphics class
you'll ever take. I'll start off by giving you a bare bones introduction
to Adobe After Effects, and then I'll walk
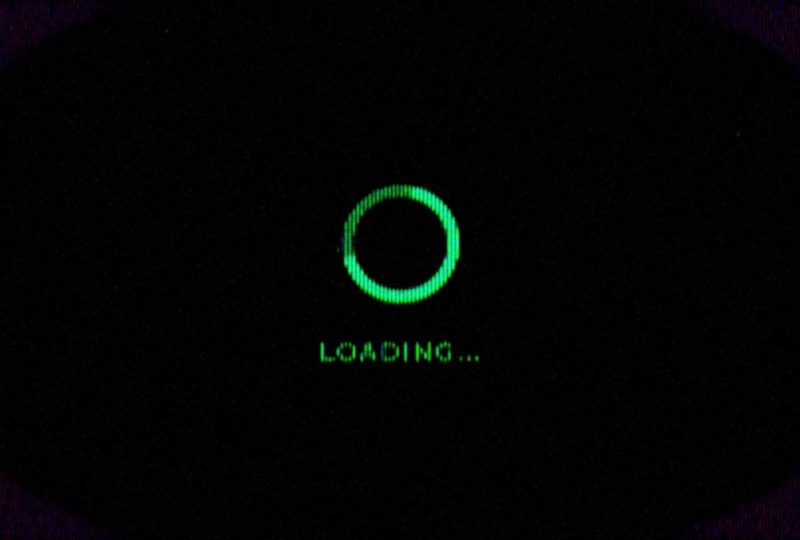
you through how to create this loading
icon animation. Can't wait to see the
animations you create.
2. Getting Started & Class Project: For this class, you're going
to need Adobe After Effects, Adobe Media Encoder Export. The class project
is to follow along and create your own
loading icon animation. You find a completed version of the project file on the
project and resources page, don't forget to post your
project to the project gallery.
3. Introduction to Adobe After Effects: Hello, and welcome
to the introduction to After Effects
portion of this class. I want to make it clear
that creating this part of the lesson is not essential
to the class project. If this is your first time
inside Adobe After Effects, I really suggest watching
this lesson all the way through before you
even start animating. Then once you've watched this
lesson all the way through, then we'll create our
class project together. To get your screen
looking like my screen, you can go to Window,
Workspace and select default. Now we can click on the
new composition button to bring up our
composition settings. In this field, we can choose
a name for our composition. I'm going to type out main. And for the purposes
of this exercise, I'm going to choose a preset. I'm going to choose social
media landscape HD. This will give us a width of
1920 and a height of 1080, frame rate of 30. For the duration, I'm going
to choose 500 frames. It's also worth noting
that your display settings may be displayed as time
code instead of frames. To change this, all you
need to do is go to file project settings,
time display style. I prefer to have
mindset as frames, but changing this isn't
necessary for the class project. In this field, we can
choose a background color. I'll stick with a
white background. We can click Okay, and we'll head into our
new composition. Now that we're in
our new composition, we can head up to the
top of the screen, and on this icon here is where we'll find
our shape tools. When you click on
it, you can see a whole list of shapes
that you can create. For this demonstration, I'm going to select the
rectangle tool. Now, in our composition panel, I'll hold the shift key and drag with my mouse to create
a perfect square. Now we'll head over to our layer panel where we can select our new layer and we can press the Enter key to give it a name. I'm going to name
mine square one. With our layer selected, we'll head up to the
top of the screen, and we'll click on this icon
to get the pan behind tool. What we can do with this tool is change our anchor
point on our layer. And what the anchor
point is is essentially a point on our layer where
our layer animates from. This will make more sense
later when you go to animate. Here's a quick tip for
centering your anchor point. If you have snapping enabled, it'll make it easier
for you to snap your anchor point into the center or the
sides of your object. I'll give an example
by bringing up the rotation
property by pressing R. And as you can see, as we rotate the square, it rotates from the center of the layer because that's
where our anchor point is. I'm going to undo
that with Control Z. Now I'm going to
bring up the position by pressing the P key. We can move the square using the X axis or the Y axis
by dragging these numbers. Alternatively, you can drag
the square with your mouse. I'm going to press
Control Z to undo that. Now I'm going to duplicate our square layer with Control D. Gonna move its Y position.
I'll do that again. Move it down with
the Y position. Duplicate a third time. Again, we'll move it. So
now we have four squares. I'm just going to space them
out a little bit better. It doesn't have to be perfect, but I do want it to look nice. Now that we have four
squares displayed, I'm going to show you how you
would go about animating. But first, I'm
going to rearrange the layers so that they're
in order one to four. There we go. So how would
we go about animating? Well, first, we're going
to want to make sure that our playhead is at the
beginning of our timeline. Over here, you'll
find your playhead. And over here is
where you'll find which frame number you're
on on the timeline. Now we can select
all our layers in the layer panel and we'll
press these stopwatches. This will place keyframes
onto our timeline. Now we can drag our playhead on the timeline to move over. We'll move over to maybe
30 frames on the timeline, which is exactly 1 second. And we can hold down the Shift key while
we drag our boxes. This will help us drag
them in a straight line. We'll drag them over
to the other side of the screen, maybe
to around here. And as you can see, this places new keyframes on the
timeline automatically. I'm going to shrink
my preview area by pressing N on the keyboard. Alternatively, you can just drag the end of
your preview area. We will be learning more about the work area later on
in the export lesson. And now we'll press
the space bar to preview our animation. By selecting our keyframes
and pressing the F nine key, this will add what we
call an easy ease. And what an easy ease is
is it automatically adds a smooth in smooth out
animation to our keyframes. We'll head inside
the graph editor to explore this further, and I'll show you
how you can animate your keyframes differently
by using the speed graph. To get into the graph editor, we'll select the two
keyframes for square one, and we'll press this icon here, which is the graph editor icon. Once we're inside there, we have to make
sure that we're on the speed graph because there's the speed graph and
the value graph. For this demonstration,
I'm going to show you the speed graph because I find it's a much
easier concept to understand for beginners. So this here is what
our graph editor should look like
on the default Es. If it doesn't look like this, that means you're
probably on the value graph and you need to
switch to the speed graph. Currently, all our layers have the default Es applied to them. We're going to leave
our square one at the default Es so we'll head out of the graph editor
by pressing the icon, and we'll go to our
square number two layer, select the keyframes, head
inside the graph editor again. Now we're looking at the
keyframes for the second square. What we're going to
do is we're going to drag the handles into the middle And we'll preview and see how this
affects the animation. As you can see, there's
quite the difference. Slow beginning gets fast in the middle, and
then slow ending. Now we're going to
exit the graph editor. We'll select the keyframes
for our square three, head back into the graph editor, and for this one, we're going to drag our handles to the left. As you can see, it's a
fast start, slow ending. Now we're going to
do the same thing for our square number four, exit the graph editor, select the keyframes, head
back into the graph editor, and this one, we're
going to drag the keyframes to the right. We'll preview. Now
our fourth square has a slow start
and fast ending. Now I'm going to show you how to animate some other properties. I think we'll start with
the rotation property because we've already
touched upon it earlier. We'll select all our layers, press R to bring
up the rotation. We'll select all our layers. Press the stopwatches for
the rotation property. Now we'll move to our
second position keyframes. We'll select all
our layers again. And in this field here we'll
type 360 for 360 degrees. Alternatively, you can
type one into this field, meaning one full 360 degree
rotation. There we go. Now all of our squares
have a rotation on them. Now we're going to go
through each one and press F nine to as
ease the keyframes. And we're going to do
the same thing that we did for our position animations. We're going to
animate each square differently using
the speed graph. We're going to keep square
one at the default. Now we'll select square
two's keyframes. We'll head into
the graph editor, drag these handles
to the middle. Now we'll go to the third
square, select the keyframes. Go to the graph editor. We'll drag these
ones to the left. Now we'll go to our fourth
head in the graph editor. And we'll drag these
handles to the right. Now let's preview our animation. M. The next property I'm
going to animate the scale. Again, we'll select
all our layers. To bring up the scale property, we can press the S key. Once again, at the
beginning of the timeline, with our layer selected, we'll press the
stopwatch for the scale. Then we can change the
scale value to 0%. We'll move over maybe halfway through our animation frame 15, again, select all our layers. We'll type in 100% with
our layer selected. So now halfway through
our animation, our boxes scale in. We'll go through our layers
one by one and press F nine to add some easy Es
to our scale animations. And for the scale animation, I think the default
ease is good enough. The last property we're going to animate is the opacity property. We'll select all
our layers again, press T on the keyboard to
bring up the opacity property. At the beginning
of the timeline, we'll press the stopwatch. Type in 0%. For the
opacity animation, I think I'm just going to go to frame ten on the timeline. We'll type in 100%. And for the opacity animation, I don't think we need
to add any ETEs. We'll just leave it as it is. So, what was the point
of this exercise? Well, 90% of the time when you're animating
Adobe After Effects, you're going to be
animating the position, scale, rotation, or the opacity. Now you have a basic
understanding how to animate. Of course, the software gets way more complex the deeper
you dive into it, but knowing how to animate these four properties will
get you a good head start. Now I'm going to show you
some more things you're going to need to know
for the class project. The first thing I quickly want to show you is the Pen tool, which works essentially the
same way as the shape tools, except you draw your
shape with the pen, and you can animate
it the same way that we animated the shape tool. Now let's head to the
type tool because we're going to need to know how to use this for our class project. We can find our type tool up here right beside
the Pen tool. We'll click on the icon. Now we'll type out some text. First things first,
we'll align it to the center of the composition
with the align panel. Over here in the text panels where we can change
our properties. We can change our
fill color here, increase or decrease
the size of our text. The paragraph menu
essentially changes where the anchor point
is for our text layer. We learned a little
bit about what an anchor point is earlier. Again, I'll align it to the
center of the composition. Over here is where we
can change our font. For the class project, I'm going to be using the monster at font. But you can use any
font you would like. This field here, we can change
the kerning of our text, which is a space in
between the letters. We can add or take away our stroke, change
our stroke color. Here we can increase or
decrease the stroke width. That's essentially all I want to show you for the type tool. Another thing we'll
be animating in this class project is something
called the trim path. It essentially allows you to animate the
stroke of a layer. To find it, we can
toggle down our layer. Go to add trim path. Down here, we'll go to
the trim path menu. And by changing the
end and start values, we can animate our stroke. Now I'm going to
untoggle the layer. Now I'm going to show you
what an expression is. An expression is
essentially a line of code that will make
our job a lot easier. We'll bring up the
position by pressing P, and by holding the Alt key
and pressing on a stopwatch, this is how you can
add an expression. Over here in this field is where we can type
our expressions. And in our class project, we're going to be
using something called the loop out expression. This is how you type it out. And what this
expression is going to allow us to do is loop our animation over
and over again. You'll see how it works later when we create our
class project. And one final thing that we're
going to need to know how to do for our class project
is create a pre-comp. To create a pre-comp,
we can right click, go to pre-comp, make sure all attributes moved to the new composition
is selected. Up here, we can
name our pre-comp. And what a pre-comp
does is it creates a new composition
with the layers that we selected to
create our pre-comp with. We could head into our new
composition by clicking on it. As you can see, our
new composition is now listed up in
our layer panels. To get back to our
main composition, we can go back here or
we can find it up here. And that pretty much concludes the introduction to After
Effects portion of this class. I hope you now have a
very basic understanding of how the software works. Yes, I know it was a very basic and bare
bones introduction, and you probably still have many questions about
how the software works. It's a very complex
program and takes years and years to completely
master, but don't worry. You should have
enough information to complete the class project, which I'll walk you
through step by step, beginning in the next lesson.
4. Create a Comp & Create the Circle: H. Now let's start creating
our loading animation. If your screen doesn't
look like mine, remember you can go to
Workspace, it's like default. That should get your screen
looking something like this. I'm going to click on the
new composition button. We can name our composition. I'm going to name mine Main. I'm going to keep
it on this preset social media landscape HD, 1920 by 1080. 30 frames a second. The duration I'm going to
keep it at 600 frames. We can go into our
background color, and I'm going to select a
white background. Click Okay. I'm going to select my
preview screen to fit. First thing we're going to do is we're going to go
up to our shape tool, select the Ellipse tool. Now holding the Shift key. I'm going to drag out my
shape to create a circle. We can toggle down Ellipse
one, ellipse path one. I'm going to round
mine off to 400. Gonna rename the
layer to circle. Remember to press Enter
to rename a layer. We can go up to our
anchor point tool, center our anchor point. Now I'll toggle down
my align panel, center the circle to the
middle of the composition. Now I'm going to toggle
down the circle, toggle down fill one. We could actually
just delete our fill one by pressing the delete key. Now I'm going to toggle
down stroke one. Change the stroke
color to black. Besides stroke width,
we could try out ten. It doesn't look
quite thick enough. I'm gonna try out 20.
There, that looks better.
5. Animate the Trim Path & Create the Shadow: Toggle down our circle layer. Go to add trim path. Toggle down trim path one. We'll change our end to zero. Press the stopwatch
to put a keyframe. We'll move over 30
frames on the timeline. Change our end to 100%. Now let's move back
to around frame 15. We'll press the
stopwatch for our start. Then we'll move over 30 frames, and we'll change our
start value to 100. This is what we have so far. Now we'll select
all our keyframes. Press F nine to add some EZ Es, just like we learned in
the introduction video. For this animation, I think the default es Es
is good enough. You can head into
the graph editor and edit the speed graph
however you would like. I'm going to keep
mine at the default. I'll toggle down stroke one, change the line
cap to round cap. There, I think that makes it
look a little bit better. Untoggle the layer. Now I'm going to
create the shadow. I'll duplicate the circle
layer with Control D. Press Enter to rename the
layer, rename it shadow. Move it under the circle layer. Press U to bring
up our key frames, and we can press the
stopwatch to remove any keyframes because we
don't want any animation. Change the N to 100 to
bring our circle back. Now we can press T to
bring up the opacity. Turn the opacity down to 50%. There we go. We've created the shadow for our
loading animation.
6. Text Animation & Refine the Loading Circle: Now let's create the
loading text animation. We'll go up to our text tool. We'll type out some text. We can center it
to the center of the composition with
the align panel, we want our loading
text animation to be the same length as
our circle animation. So we'll bring up our keyframes as a guide. Remember to press U. We'll bring up the opacity
of the loading text by pressing T. At the
beginning of the timeline, we'll press the stopwatch
to put a keyframe. Then we'll move to the end
of our circle animation, which is frame 45, and we'll copy and paste
our first keyframe. Now let's move back
about halfway through. Let's say frame 22, and we'll change the opacity
of our loading text to 25. Now let's select the
three keyframes, press F nine to eases,
and there we go. Very simple, very
basic animation. Now I'm going to
refine my animation by just changing the
size of the circle. We can toggle down
circle, ellipse, ellipse path one, and I'm going to change the size
to 200 by 200. We'll have to do
the same thing for our shadow layer contents, Ellipse one, Ellipse path one, change the size to 200. I'm also going to edit
the loading animation. I'm going to turn on my grid, bring up the position
for the loading text, and I'll move the Y position. There, I think
that looks better. I think I'm also going to remove the kerning from
the loading text. We do that by
selecting our text, going over to our text panel. Gonna change it to 100. I think that looks a lot better. I might also change
the size of my text, turn it down to 45 pixels. I'm also going to
add a background. Go up to layer, new solid, and I'm going to choose
a very light blue color. Make sure it's at the bottom of our layer panel. There we go.
7. Loop the Animation & Export: Now that we have our main
animation completed, we're gonna want it to loop out throughout the
duration of the timeline. We'll expand our work area. What we're going to do
is we're going to create a pre-comp of our animation, and then we'll use
the time remap tool to add our loop out expression. So let's select
our three layers. Right click, go to pre-comp. Make sure move all attributes into a new composition
is selected. We'll name it Loading
circle. Press Enter. Now we have our pre-comp. Now we can right click
on our pre-comp, go to T, enable time remapping. Now we're going to want to go to the last frame with
animation on it. Which in our case is frame 45. We'll press the keyframe button to put a new keyframe
on our time remap. Now, this is the most
important step of this lesson. Make sure you delete the last
keyframe for the time remap on the timeline or else the loop out expression
won't work properly. So once we've done that, now
we can add our expression. We'll hold the Alt key
and press our stopwatch. That's how we add expressions, and we'll type in our
expression into this field. Loop out. Now let's see what
happens when we preview. There we go. We have
a looping animation. Now let's export our animation to share in the project gallery. What you're going to want
to keep in mind is that your work area is the area of the video that you're
going to be exporting. You can change your work area by dragging the handles or pressing the B and end keys to change the start
and end of the work area. You can also drag the work
area on the timeline. For my export, I want it
to be a perfect loop. I'm going to have
to find a moment on the timeline where the animation ends and before it begins. In my case, that's at 6 seconds. So I'm going to zoom in here and make sure that the end of my work area ends at
exactly 6 seconds. Now I'll preview the animation to make sure it's
a perfect loop. There we go. It's
looping perfectly. So now I can go to File, Export, add to Adobe
Media Encoder. Now, once Media Encoder is open, we can select a preset from all these presets that
Adobe ads created for us. Let's select YouTube
ten ADP, full HD. We can click here
to name our file and where we're
going to export it. Now up here, we'll
press the green arrow to export our animation.
8. Outro & Congratulation : Congratulations and thank
you for taking my course. Now you can post
your projects to the project gallery so everyone can see the
animations you created. If you would like
to learn more about motion graphics and
Adobe After Effects, I suggest checking out
some of my other classes. I have five other classes
aimed at beginners, where you can learn about how to add texture, color theory, essential text animations, and a whole lot of
other tips and tricks. Can't wait to see the
animations you create.
9. Bonus Lesson - Export Without a Background: Mm. Just wanted to create a quick bonus
lesson for students that may want to export their
animation without a background. You might want to do
this if you want to use your icon in future
compositions. First things first, we'll have
to delete our background. Then we'll head
over to this icon here, toggle Transparency Grid. When you see the checkered
icon, you know it's working. We'll head over to File, Export, and this time, we're going to
add it to our Render Queue. We can leave our render
settings as they are. We're going to want to go
into the output module. By default, the format
is set to QuickTime. We're going to want
to go to Channels. You'll notice that the
setting that we want, which is RGB plus Alpha is not available on
the Quick Time option. So we're going to have
to choose a format that will allow us to use
the Alpha channel. I usually like to
export with AVI. Now we'll go back to
the Channels menu, select RGB plus
Alpha. Click on O. We can click here to name our export and where
we're going to export it. Click Save, and then we'll
go up here to render. Now it should be exported
without a background, and now you can use it
in future compositions.
 Tyler Bennett, Motion Graphics Designer & Photographer