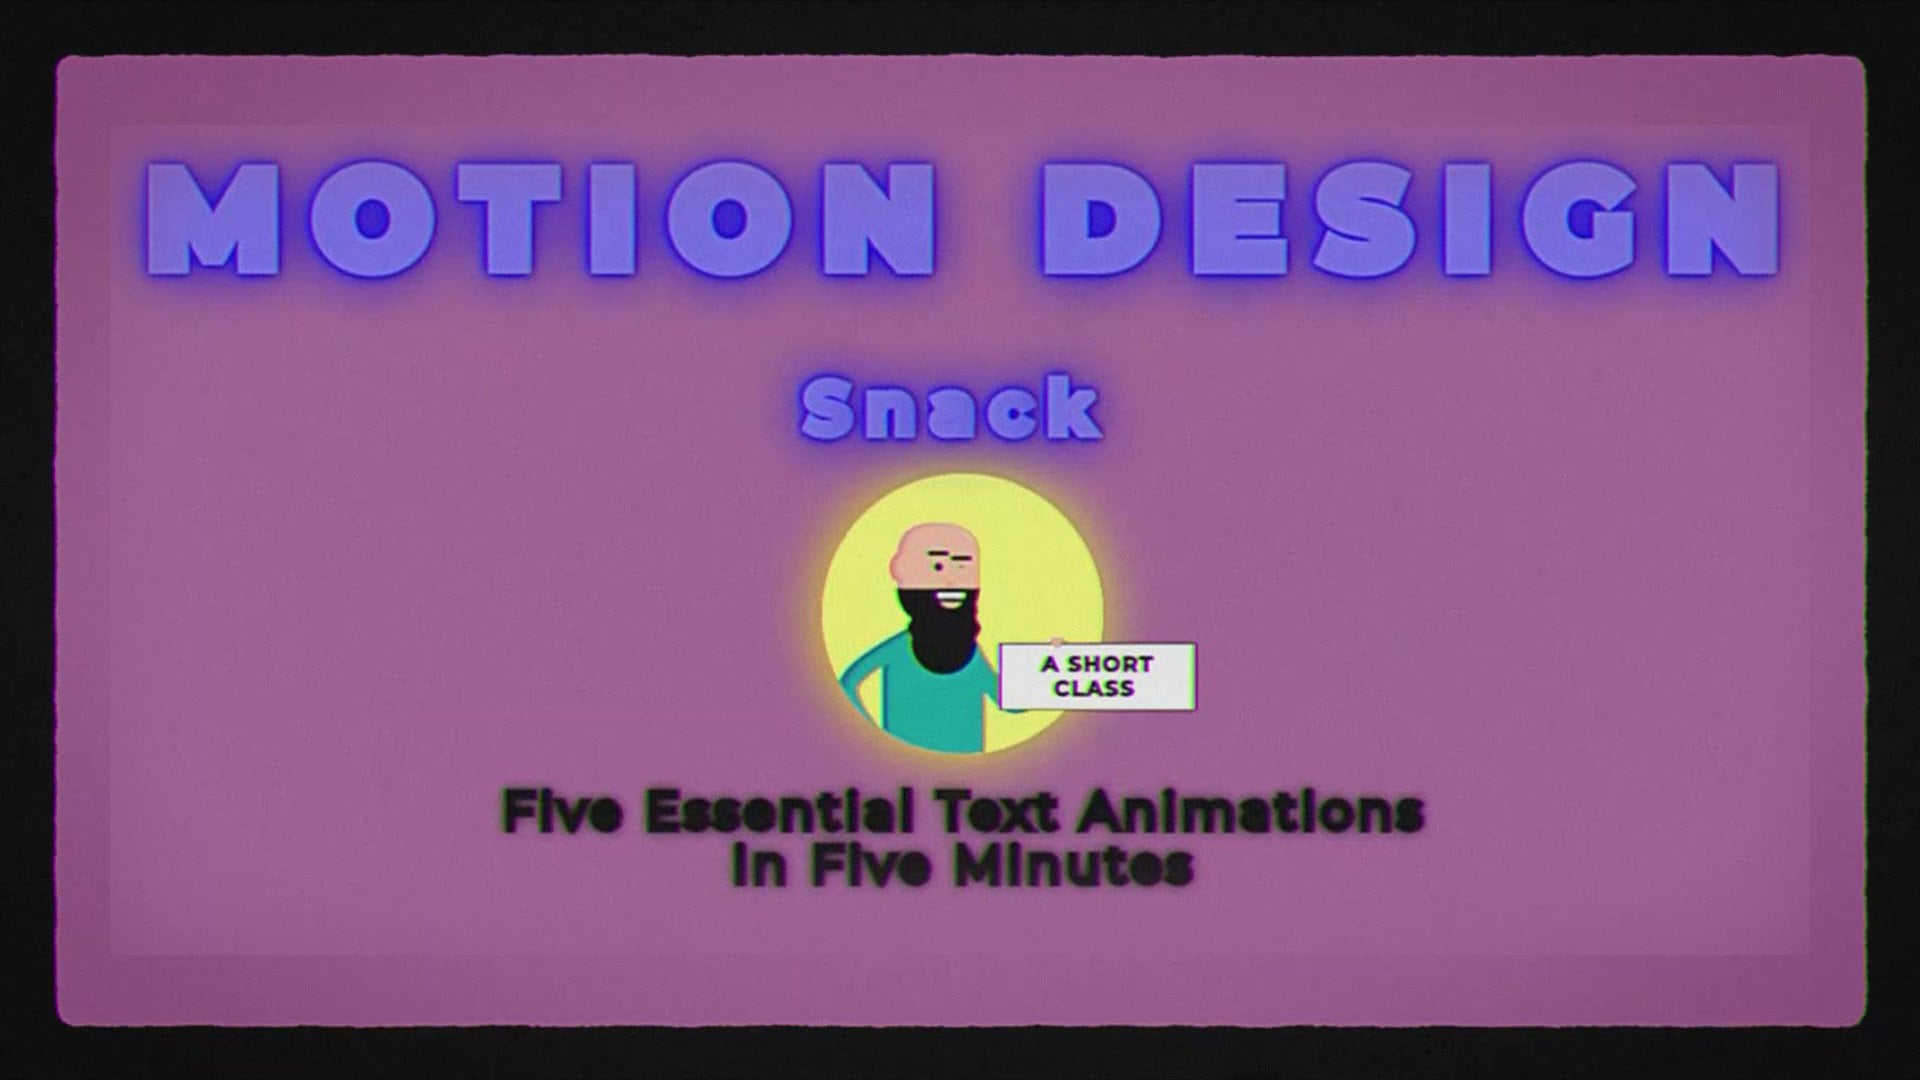
Transcripts
1. Introduction: The purpose of this
episode is to talk about the animation principles
and how they can apply to text animations
in motion graphics. The 12 principles were first contrived by Disney
in the 1930s, but you don't need to be
creating big budget cartoons or frame by frame animation to implement them
into your work. Together, we will
create a text animation while learning about
the principles. Can't wait to see
your animations.
2. Getting Started & Class Project: To get started with this class, you're going to need Adobe
After Effects to follow along. Your class project is to apply the animation principles to your own text animation or
any animation you would like. You can download a
completed version of this project file on the project and
resources page and feel free to post your projects
to the project gallery.
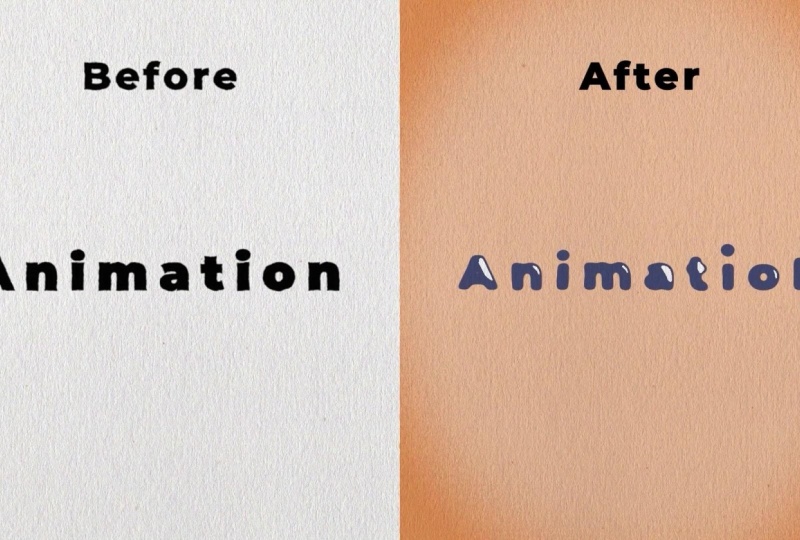
3. The Main Slide In Animation : For this class, I'm taking a little bit more of
a relaxed approach. We'll bring up the
Wikipedia page for the 12 animation principles, and we'll go through
them one by one, and we'll see how
we can incorporate them into our text animation. We'll start this class off by creating a simple slide
in text animation. Composition settings really don't matter for this project. I'm going to get my type
tool and type out some text. I'll type out animation. The font you use really
doesn't matter either, but I'm going to use
Montserrat Black. I'll center the text to the
middle of the composition. And this leads us to our
first animation principle, pose depose versus
straight ahead action. These are two
different approaches to the drawing process. Straight ahead action scenes are animated frame by frame
from beginning to end. While pose depose
involves starting with drawing keyframes and then filling in the intervals later. Straight ahead action
creates a more fluid, dynamic illusion
of movement and is better for producing
realistic action sequences. On the other hand, it
is hard to maintain proportions and to create exact convincing
poses along the way. To pose works better for dramatic and emotional
scenes where composition and relating to the surroundings are
for greater importance. A combination of the two
techniques are often used. In computer animation,
which is what we're doing, computer animation
removes the problems of proportions related to
straight ahead action drawing, but pose to pose
is still used for computer animation because of the advantages it
brings in composition. The use of computers
facilitates this method and can fill in the missing sequences in between poses automatically. It is still important to oversee the process and apply
the other principles. Don't have to
actually do anything for this animation principle, since in motion graphics, most of the time we're doing
pose to pose automatically. Now that we know which type
of animation we're creating, we'll go ahead and create that simple slide in text animation. I'll bring up the
position by pressing P. I'm just going to press
the stopwatch to put a keyframe and drag it
over on the timeline. Doesn't really matter
where at the moment. Now I'm going to
change the Y value. Maybe I'll add I'll add 300
to the Y value. There we go. And that creates another
keyframe for us automatically. Now let's figure out how long we want this animation to be. Maybe we'll make
it 1 second long. So I'll drag that keyframe to
30 frames on the timeline. And there we have it, our
simple slide in animation. Now we can begin improving this animation using our
animation principles.
4. Slow In & Slow Out: Slow in and slow out
or in other words, ease in and ease out. The movement of objects
in the real world, such as the human body, animals, vehicles, et cetera needs time to accelerate
and slow down. For this reason, more
pictures are drawn near the beginning and
the end of an action, creating a slow in and slow out effect in order to achieve
more realistic movement. Concept emphasizes the
objects extreme poses. Inversely, fewer pictures
are drawn within the middle of the animation
to emphasize faster action. This principle
applies to characters moving between two
extreme poses, such as sitting down
or standing up, but also for inanimate moving objects like
a bouncing ball. So like I mentioned,
slow in and slow out can also be named
ease in and ease out. To ease in and ease out our
motion in After Effects, it's as simple as
selecting our keyframes, pressing F nine to
add an easy ease. There we have it. Our first animation principle
is already applied. If you're an intermediate
user of After Effects, you already know that an
ease in and ease out creates a more smooth animation
in between our keyframes. Of course, we can head
into our graph editor and tweak our animation
to our liking. But for right now, I'm
going to leave it as it is, and we'll improve it later on using our other
animation principles.
5. Anticipation(& Overshoot): The next animation
principle we're going to apply to our animation
is anticipation. Anticipation is used to
prepare the audience for an action and to make the
action appear more realistic. A dancer jumping off the floor has to bend the knees first. A golfer making a swing has
to swing the club back first. The technique can also be used
for less physical actions, such as a character looking
off screen to anticipate someone's arrival or
attention focusing on an object that a character
is about to pick up. To apply some anticipation
to our own animation, before our animation
starts to animate upwards, we can move ahead a few frames, and we can pull our animation down so let's head to maybe
four frames on the timeline. We will copy and paste our first keyframe and
we'll drag the Y position, maybe round it off
to 930. There we go. Before our animation
goes upwards, it'll go down just a little bit, and that can be
our anticipation. What we can also do is add
a little bit of overshoot. And overshoot is just another
word for anticipation, but it's overshooting
the final resting place. We can copy our last keyframe, paste it onto frame 26, and we'll change the
Y position upward. I'm going to make mine
525. So there we go. Now our animation
instead of just animating from one
keyframe to the next, it goes downward a little bit, which is our anticipation, and then it overshoots
a little bit before going to the
final resting place. I'm going to head
into the graph editor and take a look at
the speed graph. It's looking a little bit weird. An easy fix to this is unease our keyframes by selecting
them, pressing control, and clicking on our keyframes, and then we'll re easy ease
them by pressing F nine, head back into the graph editor. And I'm going to start
easing our keyframes. I'll start by dragging
these two into the middle, then I'll head to the
last two keyframes. I'll also drag these
two towards the middle. And for the main
animation in the middle, I'm going to drag this
handle to the left. There we go. Let's preview
and see what that looks like. I'm thinking that looks
pretty good. So there we go. We've created some anticipation
and some overshoot. I'm also going to move our
keyframes over a little bit on the timeline so that the animation doesn't
start right away. Maybe we can move it to five
frames on the timeline.
6. Squash & Stretch: Just a little recap of
what we have so far. We have determined
that the type of animation is pose to pose. We have added some
ease in and ease out, and we have also added some
anticipation and overshoot. Now let's take our
animation a step further with our next
principle, squash and stretch. The purpose of squash and stretch is to give
a sense of weight and flexibility to drawn or
computer animated objects. It can be applied to simple
objects like a bouncing ball or more complex constructions like the muscular
of the human face. N to an extreme, a
figure stretched or squashed to an
exaggerated degree can have a comical effect. In realistic animation, however, the most important aspect
of this principle is that the object's volume does not change when
squashed or stretched. If the length of the ball
is stretched vertically, its width in three
dimensions, it's also depth, needs to contract
correspondingly horizontally. In our own animation, since we're just doing a
simple text animation, I don't believe we
need to worry too much about the
realistic animation. However, if we were animating something like a ball bouncing, we would have to counteract
a vertical stretch with a horizontal squash. Apply some squash and stretch
to our text animation, we'll add a simple
scale animation. I think as our text
is animating upwards, we'll stretch the
text a little bit, and then when the text
lands in its resting place, we'll give it a little
bit of a squash, and then a few frames later, we'll have it return
into its regular scale. So to start things off, bring up the position and
scale properties by pressing P, holding
the Shift key, and pressing S. We'll head to the second position
keyframe and we'll press the scale stopwatch
to put a keyframe. Now let's move to the
third position keyframe. We'll unlink the scale so we can just change the Y property. We'll change our Y
scale to one 15%. Now we'll move over to the
last position keyframe. And what we want to do
is we want to press the keyframe button because we want these two keyframes
to stay the same. We don't want any
animation between them. Now we're going to
move over, let's say, maybe five frames on the
timeline to frame 40, and this is where
we'll do some squash. We'll change our Y scale to 85%, and then a few frames
later at frame 43, we'll go back to
our regular scale, change our scale
property of 100. Now let's preview
what it looks like. It's very subtle, but I think it adds so much
to the animation. All these little
subtle things can make your animations
look so much better. And I think we can ease it and just leave it at the
basic ease for now.
7. Follow Through & Overlapping: Follow through and
overlapping action is a general heading for two
closely related techniques which help to render movement
more realistically to help give the impression
that the character follows the laws of physics, including the
principle of inertia. Follow through means that
loosely tied parts of the body should continue moving after the
character has stopped, and the parts should keep
moving beyond the point where the character stopped only to be subsequently pulled back. Towards the center of mass or exhibiting various degrees
of osculation damping. Overlapping action
is the tendency for parts of the bodies to
move at different rates. For example, an arm will move on different timing than
the head and so on. A third related
technique is drag, where a character starts
to move and parts of them take a few
frames to catch up. These parts can be
inanimate objects like clothing or the antenna on
a car or parts of the body, such as arms and human body, the torso is the core
with arms, legs, head, and hair dependencies that normally follow
the torso's movement. Body parts with muscle tissue, such as large stomachs or
breasts or the loose skin on a dog are more prone to independent movement
than bonier body parts. Again, exaggerated use of this technique can
produce a comical effect. More realistic
animation must time the actions exactly to
produce a convincing result. The moving hold animates between two very
similar positions. Even characters sitting still or hardly moving can display
some sort of movement, such as breathing or
slightly changing position. This prevents the drawing from becoming to implement
this principle into our own animation, we could have all the letters of our word animating
at a different time. So in this lesson,
I'm going to show you two separate methods to
offsetting our letters. The first method is a lot
more beginner friendly, but while it might be easier, it's a lot less forgiving when we go to tweak our
animations later. The second method will
connect all of our layers together to one layer
using an expression. That way, when we edit the
animation on one layer, all the layers will follow. You'll see what I mean when
we go to implement this. So what I would recommend doing is watching this lesson
all the way through, and then you can decide which method you would like to use. We start out by right
clicking on our text. Go to Create Shapes from text. What we're going
to have to do is duplicate this layer
for every letter. I'll duplicate my
layer seven times, toggle down the contents, and we're going to delete
every other letter in here, other than the A, then
we'll rename this layer A, and we're going to do
this for every letter. I might fast forward
through this, but essentially, we're
going through every layer, and we're deleting every letter except for the one that we want, and then we're
renaming the layer. And I'm just realizing
now that I need to create another one because
I forgot one letter. Okay, now that we finish that, now we're going to
offset our layers. We can select all our layers, head to one frame
on the timeline, hold Alt and square bracket to cut our layers
on the timeline. Then I'll drag my layers on the timeline so that they're
only one frame long. I can right click the layers. Go to Keyframe Assistant,
sequence layers. We'll just click Okay. And this will offset all our layers by
one frame on the timeline. Now we'll have to
drag out our layers again so that they expand
across the timeline. And we'll have to do the same at the beginning
of the timeline. And essentially all
that's done is it's offset our keyframes
on the timeline. This is just a much
faster way of doing it. You see, as we bring up our
keyframes with the U key, they're all offset by one frame. So that's the first method
of offsetting our layers. Now I'm going to
show you another method using an expression. To start things off,
we're going to right click create shapes from text. Then we'll duplicate that layer enough times for each letter, very similar to
our first method. We're just going to
go through them all, delete all the letters
we don't want, and we're going to
rename our layer, just like in our first method. Okay. Now that we're
finished with that, this is where things
get a little different. We're going to bring up the keyframes for
all our letters, except the first A letter, and we're going to
remove all the animation because we're going to be replacing it with an expression. Remember, to delete animation, you can just press the stopwatch Now we can bring up those
key frames for our A layer. Now with the position for our N, we're going to press Alt
and press the stopwatch. And in this field, we're going to write our first expression. I'm going to write
a variable first. P equals, and I'm going to use the pick whip
to grab the position. Finish that off
with a semicolon. Go to our next line and I'm going to write
out my expression. P dot value at time. Remember this is case sensitive, so write it out exactly
like it's shown. And in here I'm going
to write time -0.10 0.1 of a second because expressions
are always in seconds. And as you can see when we
go through the timeline, our N animates exactly one point of a second later than our A, which is exactly what we want. Now we're going to do the
same thing for scale. I'll start out with a variable. S equals, use the pick
whip to grab the scale. Finish it off with a semicolon. Head to the next line. Type out the variables
dot value at time. T -0.1 of a second. There we go. Now it copies over the scale
animation as well. And we're going to do
this for every letter. The only thing we're
going to change in the expression for the rest
of our letters is the timing. But yeah, so now any
changes you make to the A layer will carry over
to the other letters because, again, we're using an expression that's copying all
of the animation. So I'm going to
go ahead and copy this expression
for the position. Head to the next letter, press
Alt to add an expression, then just paste it
into this field, and we're going to
change it to 0.2. That carries over the
position animation, another 0.1 of a second later. We'll do the same
thing for the scale. And you guessed it. We're doing the same
thing for each letter. So I'll probably just fast
forward through this. But remember, every letter, we're going to change the
number to 0.3 0.4, et cetera. There we go. Let's
preview our animation.
8. Secondary Animation: Now that we've added
some follow through and overlapping by
offsetting our letters, we can head to our next
animation principle, which is secondary action. Adding secondary actions
to the main action gives a scene more life and can
help support the main action. A person walking can simultaneously swing their arms or keep them in their pockets, speak or whistle or express emotions through their
facial expressions. The important thing about
secondary actions is that they emphasize rather than take attention away from
the main action. If the latter is the case, those actions are
better left out. For example, during
a dramatic movement, facial expressions will
often go unnoticed. In these cases, better
to include them at the beginning and the end of the movement rather than during. Hey, there, teacher
from the future here. Remember earlier in this
class when I said it didn't matter which font you
used? Well, I lied. In this lesson,
we're going to be animating the dots on our eyes. If your font doesn't
have dots on the eyes, you won't be able to complete this lesson. But don't worry. It's not essential for
the class project. You can skip to
the second half of this lesson where we add
an opacity animation, or even better,
you can brainstorm different ways you could add secondary motion to
your own animation. I'm thinking one
way we could add some secondary motion is
animating the dots on our eyes. I'll start things off by
selecting all my layers, right clicking,
going to precompose. And we'll name this new
composition animation text. Now we're going to head
up to our project menu, select our animation
text composition. We're going to duplicate
it by pressing Control D. This creates a new composition, and we'll rename this one dots because we're going
to have one with our animation text in it, and the other composition
will hold our dots. We'll head into our
animation text composition. We'll toggle down our I, and we're going to
delete the top I right here to get rid of our dot. Now we'll do the
same thing for our second I toggle down the layer, toggle down contents,
toggle down this I, delete the top one. Now we have a composition with just our animation text
in it without the dots. Now we're going to
have to go into our dots composition
and do the opposite. Delete everything in here
except for the dots. Except one thing to note is we're going to
have to keep this top A layer because that's the layer with
our animation on it. Because remember, everything is connected through an expression. We can turn the
visibility off on it. I'll continue to delete
all the letters, toggle down the I
contents, and on this one, we're going to delete the second e. Do the same thing for
the other eye layer. Delete the second one. So now we have a composition
with just our dots in it. And remember, the
reason we're keeping this A layer is because that's the layer with all
our animation on it. Now we'll head back into
our main composition. Now we'll drop in
our dots composition into our project panel. So now we can start
animating our dot animation. I think what we'll do is we'll animate the dots within
the main composition. So what we'll need
to do is duplicate our dot layer and we'll draw some masks to separate
the two dots. I'm going to take the dot layer, duplicate it with Control
D. On the first dot layer, I'm going to get the
rectangle tool and draw a mask over the
first half of the screen. That'll be for our first dot. By the way, make sure
the mask is set to add. I'm going to rename
this layer dot one. Out for our second dot, we'll do the same thing
but draw the mask on the other side of the screen.
This will be our dot two. I'll rename the layer. So we'll start with
animating dot one. I think for dot
one, we could have the dot jump upwards as
the I is animating up. And then as the letter lands, dot will catch up almost
like a little bounce effect. So around frame 20, we'll
bring up position with P, press the stopwatch
to put a keyframe. I think maybe move
over to frame 32. And this is where we will
drag our Y position upwards. I'm going to subtract
200 from the Y position. Then we'll move over
further on the timeline. Let's try maybe frame 44. We'll copy that first
keyframe and paste it. Select our keyframes, press
F nine to add some easy Es. Let's preview what
this looks like. I'm thinking right off the
bat, that looks pretty good. We could head into
the graph editor. I'm on the speed graph, and I'm going to drag these handles, one to the left,
one to the right. A I'm thinking that
looks pretty good. Pretty good for a first try. Now we can head to our dot two. The dot two, I'm thinking
maybe we can have it just drop in from
the top of the screen. So we'll have to find a
point on the timeline. I think it frame 54 is when we want the dot to be in
its regular position. So we'll bring up the position
and press the stopwatch. Now we'll have to move back on the timeline to a point where we want our dot
to start dropping in. And I'll just drag
the Y position until our dot is off the screen. I'll just round it
off to negative 100. I'm also going to
trim the timeline so we don't see that dot
until that moment in time. Alt square bracket is
the key to do that. It's a nice shortcut to know. We'll select these keyframes, press F nine to ease Es. And for this one, we want
a nice fast movement because it'll look more natural like the ball is actually
falling from the sky. We'll head into the speed graph, and we'll drag both of
these handles to the right. There, that looks a
lot more natural. There we go. We have
our dot animations. And now as a secondary
second motion, why don't we take this
as an opportunity to animate the opacity of
the letters animating in? We'll head into our
animation text composition. Bring out the E frames for
the A layer by pressing. Press shift and hold T
to bring up the opacity. I'll bring the opacity down to 0% and press the stopwatch. Now we have to decide,
at what point do we want the opacity
to go to 100? I think frame 25 might be good. So we'll bring that
opacity back to 100. Select the keyframes
and F nine for EZ Es. I think that might be good. Scrolling through the timeline, I can see that we can
still see a little bit of our anticipation,
which is what we want. So for the rest of the layers, since I did my offsetting
using the expression, I'm going to do
the same thing for the opacity of all
the other letters. G to type in my expression. I'll type in O equals, use the pick whip to grab
the opacity for the A layer. Skip a line, and then I'll
type in my expression o dot value at time,
bracket time -0.1. Now the N, copied the
opacity properties, but just 0.1 of a second later. And this should be easy. We'll
just copy that expression, paste it on the opacity for
the rest of the layers. And, of course, we're changing
the number on each layer. This one will change it to two and so on for the
rest of the letters. And I'll just fast forward
through the rest of them. And remember, if you did your offsetting using
the other method, you will need to copy and paste the opacity property
onto all the letters. Now let's preview the whole animation and see
what it looks like. I'm thinking that
looks pretty good. I'm going to copy the
opacity keyframes, we'll head into our
dot composition. And I just want to
make sure that I paste the animation
on the same frames. So we'll move to
frame five, paste. And of course, we have
to do the same thing for our opacity on the two I layers. I'm just going to go back into the animation text composition, copy the expression
for that layer, paste it onto the opacity here. Do the same thing
for the second I, copy this expression, go
to the dot composition, paste it onto the second So now those dots have
the same animation as their animation text
compositions counterpart. Now let's go to the
main composition and preview our animation. To me, this looks pretty good. Of course, you can
animate yours, however you would like, but I think I'm gonna
keep mine this way.
9. Exaggeration: So now that we've added some secondary motion
into our animation, let's head into our next
animation principle, exaggeration. Exaggeration is in effect, especially useful for animation
as animated motions that strive for perfect imitation of reality can look
static and dull. The level of
exaggeration depends on whether one seeks realism or a particular style like a caricature or the style
of a specific artist. The classical definition
of exaggeration, which was employed by Disney, was to remain true to reality, just presenting it as a
wilder, more extreme form. Other forms of
exaggeration can involve the supernatural or
surreal alterations of the physical features of a character or elements
in the storyline itself. It is important to employ a certain level of restraint
when using exaggeration. If a scene contains
several elements, there should be a balance of how those elements are
exaggerated in relation to each other to avoid confusing or
overawing the viewer. When it comes to
our own animation, we've actually
already incorporated some exaggeration by
animating our first dot. That animation in itself
is already exaggeration. Thinking we could take
things a little further by maybe exaggerating
our scale animation. So I'll head into our text
animation composition. And on our second
scale keyframe, I'm going to maybe
turn it up to one 30%. We'll also have to change our third keyframe to one
30% because remember, those two keyframes
are the same. And then as our text
lands on the ground, we'll add a little
bit more squash, maybe turn our
squash down to 70%. Let's preview this.
And remember, if you did your offset
using the expressions, then this is extremely easy for you because
all the animation that we change on this layer should follow over to
the other letters. If you did it the other
way, the more simple way, you would have to copy and paste the scale animation from our A layer onto all
the other letters. So just keep that in mind when you're creating your
own animations. I'm going to go into
my dot layer and change the scale on
the dots, as well. Go to the second
scale animation. Second scale keyframe,
turn it to 130. Go to the third keyframe, change it to 130 as well. Then we'll go down to
our squash keyframe, change it to 70%.
And there we go. Now let's go back to
our main composition. Preview what it looks
like. There we go. We've added a little bit of exaggeration to our
scale animation, and remember that our
first dot animation is also an exaggerated
animation.
10. Timing: Timing refers to the number of drawings or frames
for a given action, which translates to the
speed of the action on film. On a purely physical level, correct timing makes objects appear to obey the
laws of physics. For instance, an object's weight determines how it reacts
to an impetus like a push. A lightweight objects will
react faster than a heavy one. Timing is critical
for establishing a character's mood,
emotion, and reaction. It can also be a device
to communicate aspects of a character's person
so this is the part of the animation process where
we would contemplate, does our animations timing make logical sense for
what we're animating? If we were animating
something complex, such as a character animation, this process would be a lot
longer and more complex. But for something like
a text animation, such as our case, this is where we would go
through our timeline, maybe space out our
keyframes a little bit, or we can offset our layers, or we could head into
the graph editor. Change the easing
of our animation. These are all things
we can take into account when we're
adjusting our timing. For my animation, I think the
timing looks pretty good. The only thing I want
to adjust now is maybe adjust the scale easing
in the graph editor. So I'm going to go
ahead and do that and I'll fast
forward to the end. There we go. I only did some minor tweaks to
the graph editor and the scale animation
just to make it match up more with our
position animation. If you did your offsetting
using the expressions method, then all that animation should carry over to the other letters. But if not, you
will have to copy the scale keyframes and paste them onto
your other letters. And of course, this
is all up to you. You can ease your animations
however you would like.
11. Staging: This principle is
akin to staging, as it is known in
theater and film. Its purpose is to direct
the audience's attention and make it clear what is the greatest importance
in the scene. Johnson and Thomas defined it as the presentation of
any idea so that it is completely and unmistakably clear whether
that idea is an action, personality, an
expression or a mood. This can be done
in various means, such as the placement of
a character in the frame, the use of light and shadow, or the angle and
position of the camera. The essence of this principle
is keeping focus on what is relevant and
avoiding unnecessary detail. Since the only thing in our
scene is our text animation, this animation principle
doesn't really apply to us, but why don't we take this as an opportunity to stylize
our animation a little bit? First thing I'm going
to do is drag in this color palette that I
made on the Coolers website. I go to scale it down and put it into the
corner of my screen. I'm going to create
a new background by going to layer new solid. I'll name it BG for background. Use the color picker and
choose one of my colors. Drag that new layer to the
bottom of the layer stack. Now I'll add a fill effect
to my text animation. Again, I'll take
the color picker and maybe choose this
dark blue color. Copy the fill, add it to my two dot layers by pasting
it to my dot layers. Blue and orange are contrasting
colors, which means, in other words,
this text animation will stand out from
the background. By the way, I have
an entire class dedicated to choosing colors just in case you're interested. Why not for a final
touch out of vignette? Vignettes are great for drawing the viewers attention into
the center of the screen. I'll create a new shape layer
using the rectangle tool. I'll rename it vignette
with the vignette selected. I'm going to go over
to my Ellipse tool. I'm going to make sure tool
creates mask is selected. Now we can double
click the Ellipse tool to create a mask over
our vignette layer. We'll need to change
the mode to subtract. Bring up the feather
with the F key, and we can drag up this feather until we get a nice
looking vignette. To make the vignette take on a darker shade of
the background color, we can change the mode
of the layer to overlay. There we go. The vignette's looking a little bit too
saturated for my liking. So the first thing I'll do is
bring up the feather again. Turn up the feather
a little bit more. And another thing I might do is bring up the opacity
with the T key, change the opacity to 50%. There, I think that
looks great. A
12. Arc: Most natural action tends to follow an arced
trajetory and animation should adhere to
this principle by following implied arcs
for greater realism. This technique can be applied to a moving limb by
rotating a joint or a thrown object by moving
along a parabola trajectory. The exception is
mechanical movement, which typically moves
in straight lines. As an object's speed
or momentum increases, arcs tend to flatten out in movement ahead and
broaden in turns. Baseball, a fastball
would tend to move in a straighter
line than other pitches, while a figure skater moving at top speed would be
unable to turn as sharply as a slower
skater and would need to cover more ground
to complete the turn. An object in motion that
moves out of its natural arc for no apparent reason will appear erratic
rather than fluid. For example, when animating
a pointing finger, the animator should
be certain that all drawings in between
the two extreme poses, the fingertip follows
a logical arc from one extreme to the next. Traditional animators
tend to draw the arc in lightly on paper for
reference to be erased later. So essentially, in
layman's terms, it looks way more natural
to animate something in an arc or oval shape rather
than a straight line. Now, this can be true for
any type of animation, but especially true for
character animation. Here's an example of a walk
cycle I made a while back, and I've brought up
the motion path. And as you can see, as the
foot leaves the ground, rather than animating in a straight line or
a triangle shape, I have it animating in
more of an oval shape, and this is essentially what
the arc principle is saying. It looks way more
natural to animate something in an arc than
animating straight. So how can we implement this
into our own text animation? Well, for this basic
text animation, there isn't a whole
lot we can do, except for one thing
that I think we can do is perhaps animate our second dot animation to come in off screen
from the side, almost like it's
a ball bouncing. So I'm going to bring up the
position for my dot two, and we're going to have to tweak this animation to have it
animating in from the side. We'll keep our second
keyframe the same. We'll go to our first keyframe, and I'm going to
move the position so that it's animating in
from the right of the screen. Now that we have it animating in from the side of the screen, we're going to have to
do some more tweaking to have it animating in in
more of an oval shape. First, I'm going to unease
the keyframes for now, just to make this easier. You can unease keyframes
by selecting them and pressing Control and
clicking on the keyframes. So I think around halfway or
maybe a little past halfway, we will have to add
another keyframe. We'll lift up our Y
position a little bit. Now we'll have to smoothen out the curve of the motion path. First, I'm going to go
to our first keyframe, and I'm going to move the Y position down a little bit more, maybe round it to negative 60. I'm going to zoom
in a little bit on our second point on
our motion path, and I'm going to
get the Pen tool. More specifically,
I'm going to get the change vortex tool, and I'm going to click
on this middle point, and that'll smoothen
it out a little bit. And there we go.
We're getting there. It's looking a little
bit more natural now. Now, this middle keyframe, I'm going to right click and I'm going to go to
rove across time. If you don't know
what that means, it means that when we go to ease our keyframes in
the graph editor, I'll select them, press F nine. Our Rove Across time keyframe is now just part of
the motion path, and we don't really have
to worry about easing it. We only have to ease our
first and last keyframe. So the second keyframe is just acting more
like a motion path. I'll drag the first
handle over to the right. There, I think that looks okay. I'm just going to
tweak the motion path a little bit more to
have it look more like a curve because we
want it to look more like it's bouncing
from off the screen. So I'm going to go to
my first keyframe, and I'm going to drag the
Y position down more. And I'm going to
drag the handles for the middle keyframe to
get it more oval shaped. Gonna move our first keyframe
down a little bit more. Then I'm going to take
this handle again. And now we're getting
something that looks way more like an arc. G to drag the other
handle. There we go. I think that looks pretty good. Yeah, I think that looks okay.
13. The Other Animation Principles: The last two animation
principles apply specifically to illustration
and character animation, but we'll still go
over them quickly. The principle of solid
drawing means taking into account forms in three
dimensional space or giving them
volume and weight. The animator needs to be a
skilled artist and has to understand the basics of three dimensional
shapes anatomy, weight, balance, light
and shadow, et cetera. For the classical animator, this would be achieved through
the classical training, including extensive art
classes and life drawing. One thing in particular
that Johnson and Thomas warned against
was creating twins, characters whose
left and right sides mirrored each other
and looked lifeless. In computer animation, modern day computer
animators draw less because of the
facilities computers give them yet their work benefits greatly from a
basic understanding of animation principles and their additions to basic
computer animation. This principle highlights
the importance of good illustration
in animation. And while it's not
always going to be relevant for us
motion designers, sometimes we will
be the illustrators of our own motion graphics. So it's still important to
have a basic understanding of this principle and how we can implement it into
our own creations. Appeal in a cartoon character corresponds to what we would
call charisma in an actor. A character who is appealing is not necessarily sympathetic. Villains or monsters
can also be appealing. The important thing
is that the viewer feels the character is
real and interesting. There are several
tricks to making a character connect
better with the audience. For likable characters, a symmetrical or
particularly baby like face tends
to be attractive. Complicated or hard to read
face will lack appeal or captivation in the composition of the pose or character design. So this principle
would be way more relevant if we were doing
character animation. The purpose of this
principle is to make your character as likable as
possible for the audience. But since we're doing
a text animation, we won't be diving too
deep into this principle.
14. Refining our Animations(The Final Stage): So this is the part of
the process where I'm going to go over my
animation and refine it. The first thing
that I'm not quite happy with is the
scale animation. I think I might add
more follow through, so I'm going to head
into my animation text, and I'm going to tweak
the scale animation by adding more follow through to the end of the
scale animation. I'm going to start by dragging my last keyframe over a few
frames on the timeline. I'm going to change the
percent from 100 to maybe 115. I'll move over three
frames on the timeline. Change the percentage to 95. Maybe I'll drag this
keyframe over another frame. Now I'm going to head over
another three frames, and here is where we can change our percentage back to 100. But we have a little bit more follow through
animation on our scale. I think that looks a lot better. I might even increase the scale on a few
of our keyframes. I'm going to go to this
keyframe, change it 130-145. We'll have to change
this keyframe because we want them
to be the same. So I'll change it to 145. Move to this keyframe,
maybe change it to 60%, head to this keyframe. Instead of 115, maybe
we'll go up to 120. The second last keyframe
will change it to 90%. And let's preview
what this looks like. Yeah, I like that a lot more. I also think the
animation is a little bit slow when it's scaling upwards. So I'm going to find a
point on the timeline, maybe around here and
I'm going to select all these keyframes and I'm
going to drag them over. That's frame 26 on the timeline. It's a preview. I
think that looks okay. And, of course, we
can't forget that we have to edit our graph editor. Remember, I'm using
the speed graph. Make sure we grab
the right handle. Just move that handle
out of the way. There we've got
the right handle, drag it over a little bit. Drag this one over a little bit. Just smoothing out the curves. We'll do the same thing for
the last two keyframes. And of course, you can use the value graph if
you would like, if you're familiar
with the value graph. This is what it
would look like in the value graph if you choose
to use the value graph. And remember, again,
you can edit these. You can edit your animation
any way you would like. Remember that mine
is just an example. We're going to have to
copy the scale keyframes, and we're going to have to
put it into our dot layer. I'm just going to
remove the animation by pressing the
stopwatch and then repress the stopwatch and
then paste the keyframes. Remember, we're doing
it on the A layer because that's what our dot
layers are referencing. There now our dots have
the same animation. Let's go back to our main comp and preview the animation now. I also took this
as an opportunity to re edit the dot
two animation, which I fast forwarded through, but I'll give you the
rundown of what I changed. I basically just
changed the path by changing the coordinates
of the position. Here I'll show you
the new coordinates. And I also slow
down the animation by dragging out the
keyframes on the timeline. Here's a little tip
that you can use. You can select keyframes,
hold the Alt key, and as you can see, it drags the keyframes proportionately, keeping the same animation. And I dragged the first
key frame to frame 17, and I kept the last
keyframe in the same spot. So the animation
will still end on the same keyframe
as we had earlier.
15. Outro: Congratulations on completing this animation principles class. Feel free to post your projects
to the project gallery. Can't wait to see the
animations you created.
 Tyler Bennett, Motion Graphics Designer & Photographer