Transcripts
1. Intro: He? Evan, I'm Carson with Studio Mckay and I
have been working as a colorist and filmmaker for the last six years in
the film industry. And in this course,
I'm going to be sharing with you my
tools and secrets that I use in Premiere Pro for color correction
and color grading. I have been teaching
color correction and color grading at
a college level, and I train employees
of major corporations to effectively use Premiere
Pro in their workflow. And so in this course,
I'm going to teach you the exact same
skills and tools that I teach college
students so that you can be effective in
your color correction, in your color grading
in Adobe Premiere Pro. And I'll be throwing in my
personal color grading presets that I use on a daily basis. Throughout this
course, there will be practice footage
that you can use to follow along with the
instructions in the modules. And in the final project,
you will prove your skills by color correcting and color grading a project of your own, either using the
footage provided or footage that you've shot. So if you're ready to take
your color correction in your color grading to the
next level in premiere pro, then this is the course for
you. I'll see you inside.
2. Final Project: Now, before we start learning how to color correct
and color grade, I want you to know
what all this is leading up to the final project. Like I said, there will be
practice footage that you can follow along on
the tutorials with, but there will also
be some footage in there that we
simply won't touch. So that you can use that in your final project so
that you can come up with a color grade that is realistic and consistent with the
instructions provided. You can either use this footage or footage that you've shot. But the main point is to show your color correction and
color grading process. Come up with a color
correction that looks natural and a color
grade that looks cinematic. I want you to come up with
three different color grades for the same piece of footage. Show me a screenshot of each of the three color grades and explain your thought
process behind it. All right, now that you
know the final project, let's go ahead and get started
with the first lesson.
3. Software & Tools: All right, welcome
to this course on color correction and color
grading in Adobe Premiere. Now first we're going to go
ahead and take a look at the workspace and
kind of the layout of the tools and what
they're used for. And then we'll move on
into the techniques and tools used for color
correction and color grading. So first, when you open
up premiere and you import your footage
onto your timeline, this is the general layout
that you're going to see. What we want to do
is we want to jump into our color workspace. Currently we're in the
editing workspace. To do this, you're going
to go to the top of the screen and go to window. Within here you're going to find workspaces and
then select color. Then once you're in
the color workspace, you're going to see
something like this. Now you've got your
viewer right here for anything that your
playhead is directly over. You've got your clips down here. Some of your edit
tools right here. All of your lumitry
color settings right here on the right side, and then over here to the left you have your lumitry scopes. Now sometimes this can take a minute or two to
load up in premiere, it's just a little bit slow when it comes to
loading these up. Sometimes just give it a second, wait for it to load up,
and you should be fine. Let's go ahead and take a look at what
everything here does. The things that are going
to be focusing mostly on are going to be your
scopes and your tools. Let's get started.
First, we're going to go ahead and select a
clip in our timeline. And now we can go ahead and
use our tools before they were grade out because we
didn't have anything selected. But now that we do, we can go ahead and start playing
around with these. You've got all your
basic adjustments that you'd find in most like
photo editing programs. You know, things like exposure, contrast highlights,
temperature tent, all of that are going
to give you a lot of control over the way
that your image looks, how bright it is, how contrasty
it is, things like that. If we go ahead and reset that by double clicking on the
little point right here, we can go ahead and look
at our scopes over here. Now let's go ahead and dissect
exactly what we're seeing. We're seeing our red, green, and blue information from our image laid out on
a graph right here. Down here at the bottom
you see it says zero, and up at the top it says 100. And then on the
right side you go 0-255 This is what's
called an IRE scale. It's basically a measurement of the luminous information
in your image, wherever certain colors fall within a specific
luminous range. This is going to give
you information for that we can see in our shadows, we do have quite a
bit of blue since that's the most predominant
color here on this graph. And then up towards
our midtones, you can see we've got a
lot of warmer colors since we've got our reds and our greens peaking
out through there. Then you can see towards
the center here, we've got a good mix of color. It's compressed right
there and you can see that we've got this pretty good mix of color in our subject here. You can see that this
is actually laying out the color information that
you're seeing on your viewer. Now let's go ahead and play with just some of these
controls real quick. Just the exposure control, just to show you
that as you bring your brightness and
luminous information down, all of a sudden we're bringing down everything in
our waveform as well. This is because we're making
the information darker. Zero is pure black, 100 is pure white. Same thing with zero and 255. It's just measuring from pure black to pure white and
everything in the middle, the brighter something is. The higher up on this
waveform, it's going to be. The darker it is, the
lower it's going to be. Now let's go ahead and drag
our exposure back up here. You can see we're
pulling a lot of information pretty far from zero and now we're not getting anything anywhere
near zero on our way. Form, if you see a
lot of information that's really squished up against the top of
your wave form, you can guess that the
image is pretty bright. If there's a lot of information squished against the
bottom of the wave form, you can guess
that's pretty dark. But if you see a lot
of information spread out across your way form
from dark to bright, then you can tell
that there's a lot of good contrast within that image. Sometimes there
might be too much. If we really create a
lot of contrast here, just like go crazy with this, then you can see we've got information way down
here at the bottom, way up here at the top. And then look at the viewer, everything's just really
crushed and overdone. Looking at your scopes gives you a much better idea of the
information within your image. Let's go ahead and reset all of these controls real
quick Now you can see, if we look at our
highlights in our image, somewhere up here in the sky, there's really nothing
that's actually peaking. There's nothing that's
super, super bright. And you can see that's reflected
up here in our way form, everything seems
to fit just under that 100% or that 255 mark. Now why is this 0-255 Because on the left we can see 0% to
100% pretty easy to tell. But if we're looking
at zero to 255, this is because we're looking
at an eight bit scale. What this means is that
when you're working within an eight bit color space, there are 255 shades
from black to white. This is measuring those
shades from black to white. This gives us a much
better idea of where certain colors are going to
be falling within that range. Now, this is not the only graph that we can see our
color information with. If we go ahead and write Click
somewhere in our waveform, you can see that we have other waveforms that we
can select as well. Let's go ahead and
select Vectorscope YUV. Now if the vector scope, we can see that
we've got our green, cyan, blue, magenta,
red and yellow. Then you've got this color
right here in the middle. And then you've got this line. This line is our
skin tone indicator. Any color that appears
along this line is going to be an accurate
representation of skin tones. All skin tones fall
somewhere along this line. Because most skin tones
share the same basic color. It might be a little biased
towards yellow or red, but they share the same
base color that falls right between the two with a little bit more
bias towards red. And you can see that
we've got colors here that are shifting
towards the cyan range, which is also reflected in
our viewer with his backpack. Let's go ahead and take a look
at a few more graphs here. If we go ahead right click
and select histogram, we can see that we've got
our basic histogram here. You can tell that if
we darken the image, a lot of the
information is going towards the bottom
of the histogram, brighten the image, a lot of the information is going
towards the top and peaking. This is the same kind of a
histogram that you would find in a camera just
flipped on its side. And then we'll go ahead
and select our RGB parade. This is very similar to
our normal waveform, so I'm going to go
ahead and deselect our vector scope and
our histogram just so that we can look
at our RGB parade and our normal
waveform side by side. Basically we're
seeing the same thing with our normal waveform. It's just combining all
three of these red, green, and blue channels
together to show us one composited waveform with all three of those layered
on top of each other, giving us a good idea of the color information
in the image. But with our RGB parade, it's just separated out into
the individual channels. Now, I prefer to use
the RGB parade a lot of the time just
because I can see where the individual
colors are falling, and you see basically
the same waveform repeated three times, once for each channel. So, if we go ahead and de,
select our normal waveform, you can see it's the exact same waveform across these three, but you can tell which of these colors are more prominent. If we go ahead and just shift our color
balance a little bit, make it a little bit warmer, and then maybe add a
little bit magenta. You can see we're starting
to balance out the waveform, and we're starting
to bring the colors a little bit closer together. But for now, we're just going
to go back to our waveform, turn off our RGB parade,
and here we are. Let's go ahead and reset
all of our adjustments. And now that we've got the
wave form out of the way, we will get to Lumitry color
controls in just a second. But before I do, I
want to show you two levels at which you can apply adjustments to your clips. The first level
that you can apply adjustments to is
on the clip itself. We can obviously use our lumitry color settings to brighten or darken this clip, but let's say we wanted to
affect multiple clips at once. Then we can add what's
called an adjustment layer. If I go ahead and drag
this out just a little bit here to uncover this
little sticky note icon, then I'm going to go
ahead and click on that. Click on Adjustment Layer, and then press Okay. You can see we have an
adjustment layer in our media. If we drag that
on top of a clip, something like that, maybe
make it a little bit longer so it covers
the entire clip. Select the adjustment layer, and then let's just go ahead
and take out the saturation. Then you can see
that it takes out the saturation on that
clip that's underneath it. But the adjustment
layer also affects any clips that are underneath
it, not just this one. If we drag this over
multiple clips, then we can also affect the saturation on
the clips around it. If we go ahead and just drag
this over multiple clips, then we can grade multiple
clips as a group. This is really useful
because if you're starting to color correct and color
grade one of the clips, but you want to apply
the exact same settings to nearby clips or to other
clips in the timeline. Then you can go ahead and do that with an adjustment layer, instead of having to recreate the exact same settings
for each of the clips. Let's go ahead and delete
the adjustment layer and focus just on one
individual clip for now. All right, now that
we've got that the way, let's go ahead and take a look
at the controls and tools available within the Lumitry
color panel in Premier Pro. When you first open
the Lumitry panel, the first thing you're
going to be greeted with is the Basic Corrections tab. Within Basic Corrections,
you have your input let, which is where you can
convert any footage from its camera color space to
the display color space. Which we'll work on
in a little bit. I'll explain what that is. And then you've also
got this auto button, which will just kind of
automatically correct anything that the program
sees in the image. But usually I don't stick
with auto just because it might mess some stuff up and the results aren't
very predictable. So I just stay away from auto. And then we've got
white balance. So there's a few ways we can adjust our white
balance in the image. We can go ahead and use the
little color picker icon to find something in the
image that should be neutral. Like let's say this
gray silver kind of bumper on this
truck back here. Click on that and then it'll balance out all the other
colors in the image. As you can see, it made
it a little bit too blue, so we can go ahead and pull
our temperature back then. We can also finesse our temperature and tint
controls right here. To really pull the colors into the range that
we're looking for. We can add more magenta,
add more green. We can add more blue, add more warmth, something
like that, into the image. And then we can also adjust our saturation levels as well. I'll go ahead and
reset each of these. Then coming down to
our lighting controls, we have our basic controls that we'd see in most photo editors, like our exposure contrast highlights shadows
whites and blacks. Playing around with
these controls, you can really affect
the brightness and contrast of your image. And just really create
a nice unique look that'll just get your image a lot closer to what
you're looking for. It's just a really, really simple and easy way to do that. While these controls
are simple and easy to use and are
good in most cases, there are some cases
where these won't work, where we need a
bit more control, which will cover in some
of these other tabs. For now, I'm going
to go ahead and reset all of these adjustments. And then we'll go ahead close our basic Corrections tab and
open up the Creative tab. Now in here you've got
several different options. You've got your look right here, where you can select
any of these looks that are built into Premier
Pro, any of these presets. Or you can just go ahead and press these buttons to scroll through the different looks built in the different
presets and things. If you like this,
Fuji Eterna 250 D. And then you can
go ahead and just click on the image right here. And it'll apply that preset to the image that you
see in the viewer. And then you can change the
intensity of that preset. Maybe make it a little
bit more intense. You can add faded film, which is just going to
bring up your shadows, bring down those highlights
and make it a little bit more faded and make
more milky blacks. You can sharpen it. You've
got your vibrant through saturation shadow tint
and highlight tint. If you wanted, you could
take your shadow tint. Just drag that to whatever
color you wanted. So you wanted some
blue in those shadows, some orange in those highlights. You could totally do
that if you wanted. Just drag that into the color range that you want
to operate with. And then you've got
your tint balance where you can bias this towards one of those
two color wheels and maybe make one of
them more intense. So we'll go ahead and
reset that once more. And if you had any
presets of your own that you wanted
to use in Premiere, then you can click on this
little drop down menu here. And then click on Browse. And then navigate to wherever
your Let files are stored, which we'll work on
in a little bit. So now we're going to
go ahead and close out our creative tab and move
on into the curve tab. This is where things
get a little bit more complicated by promise. It's really not that scary. We'll work on it and
I'll make sure that you understand what is going on
in these different graphs. Down here at the bottom left
with this basic RGB curves, down here at the bottom left, you have your black point. This is the darkest
point in your image. And then up here at
the far right and top, you have your white point. This is the brightest
point in your image. Then everything in between is
your highlights right here, mid tones around here, and your shadows down here. What this allows
us to do is this allows us to click Create a Point anywhere on the
graph and start brightening, say our mid tones,
darkening them. Or say we wanted to
darken just our shadows. We could pull down the
shadow region of the curve and then bring up
the highlight region of the curve to create contrast. Pushing our shadows down, bringing up our highlights, and really creating
some nice contrast. This gives us a lot more control than the contrast lighter, because with the
contrast lighter, all it's doing is it's
just creating contrast. Like what you see here, it doesn't give
us any more range to actually create more points. And then just like really adjust the color information and the luminous information
in different tonal ranges, this gives us that control. Whereas the contrast
lighter just gives us one
dimension of control. Really, this gives us a lot more fine tuning
ability in our image. To reset the curve, all you
have to do is double click anywhere on the curve
and it'll reset it now. In addition to our
luminous tone curve, which pushes around our shadows, mid tones and highlights, we also have our red, green, and blue curves. Starting with red, we can go
ahead and drag our red to introduce more red into the image by dragging
it to the upper left. Or we can reduce the amount of red in our image and create more tealish green by bringing it down toward the bottom right. For instance, if you want to create more teal in the shadows, you could pull down the
red in your shadow region. And then maybe increase the red in your highlights
so that you could introduce more red in those highlights and introduce more of that greenish
blue in those shadows. Let's go ahead and
reset our red curve. And then same thing
with our green curve. We can add more green by
dragging to the upper left, or subtract green from the image by dragging down to
the bottom right, creating a more magenta
look. We'll reset that. And then come to our blue curve where we can add more
blue into the image. You get the drill and
then we drag out down to the right to create more yellow and subtract
blue from the image. We can see in our
waveform over here, what we are left with is mostly just greens and reds which
create this yellow look. And there's a lot less
blue in the image here. You can see we're starting to see what information means in the waveform and how
that corresponds to an actual look on our viewer. Now let's go ahead and
reset our curve here. Now scrolling down, we've got
a few different curves now. Most of these don't impact
the luminous information, mostly just the
color information. Except for one curve, which we'll get to in a minute. Looking first at hue versus sat, this allows us to adjust the saturation of
specific colors. You'll remember
that in our primary basic corrections tab A, pure, our basic corrections. If we go ahead and
increase saturation, we don't have control over
which colors were saturating. We can decrease saturation
as a whole in the image. Or we can increase saturation
on every single color. But there's really no fine tuning ability
within this control. If we collapse our
basic corrections, come back down to
our curves versus Sat allows us to figure out which colors we
want to saturate. Say we want to saturate just
the blue in his backpack. Then we'll go ahead and
we'll create three points. We'll create one here, one
here, and then one on. The color that we
want to adjust. These two points right here
are just making sure that all the other colors stay
put and don't get affected. The central color
right here between the two points just allows us to adjust the color that
we're intending to. We'll go ahead and bring
this out a little bit. We'll bring this one
a little bit closer. And you can see that we can
desaturate our backpack. Or we can make it
really saturate and really pump
color back into it. We'll go ahead and
bring that back down. And then with our greens and
yellows here in the tree, we can add more color into that, or we can desaturate
that as well. As we drag any of these points
down, we're desaturating. As we drag up, we're
saturating with more color. And you can even use this
little color picker icon here to adjust a specific color. Click and drag onto the
color that you want. And it'll select that on
your graph right here. Now, scrolling down
to hue versus hue, this allows us to adjust
specific hues within the image. For instance, if
we wanted to take this backpack and
make it more green, we would go ahead and create
a couple of points here. Then we could just adjust
the color of the backpack, make it really green,
make it purple. Whatever we wanted to do, you can see that we're working with two different axes here. We've got our normal left
to right horizontal axis, which represents the
colors in our image. And then we've got
our vertical axis, which will allow
us to figure out which colors we're trying to
drag our primary color to. You can see as we drag
down to the purples here, you can see us reflect
in the backpack. Can drag it down more
towards those red ranges, or up towards green and yellow. Now moving on to
hue versus Luma. This curve will affect the brightness information
within your image. What this allows us to do is brighten specific hues
or specific colors. What we can do is
let's go ahead and create a couple more
points to select the blue of the backpack and
then just bring that down. You can see we're darkening the backpack or brightening
it based on its color. Now, you don't want
to push this too far because you can easily
get some splotchy, pixelated color artifacts that just don't look
good in your image. You'll be fine if you use
this effect sparingly. Let's go ahead and reset it
and move on to the next one. This is luminance
versus saturation. This will allow us to adjust saturation based on the
tonal ranges in our image. If you want to
adjust the shadows and make those more saturated, you could do that by creating a point down toward the shadows. And then if you want to
desaturate the highlights, you can make a point on the other side of
the curve toward the right and then
bring that down. You can see that we've adjusted the saturation in our
shadows by pumping it up. And then we've decreased
the saturation in any of the brighter
areas within the image. I use this curve a ton, but for now we're going
to go ahead and reset it. Then finally, in our curves, we have saturation
versus saturation. Or sat versus sat. In here, you can adjust the saturation based on the
saturation within the image. What this means is that if
you have areas in the image that are less saturated
than other areas, then you can saturate
those areas more. If you have something
that's very colorful and another aspect of the image that's very dull, you can bring those to canvas. Similar level, what we
can do is we can go ahead and saturate some of the
desaturated areas in the image, and then maybe bring down some of the more highly
saturated areas. Then we'll just bring this
back down just a little bit and you can see if we
turn them off and back on, we've saturated some of those less saturated areas
while maintaining a similar, a tone in the sky which didn't have much
color to begin with. One more time off and back on. Let's go ahead and
reset this curve. Those are your controls
within your curves. They're pretty simple and intuitive once you
start using them. As we go on into color
correction, color grading, we'll be using these a lot
more and you should be more comfortable by the
end of this course. Let's go ahead and
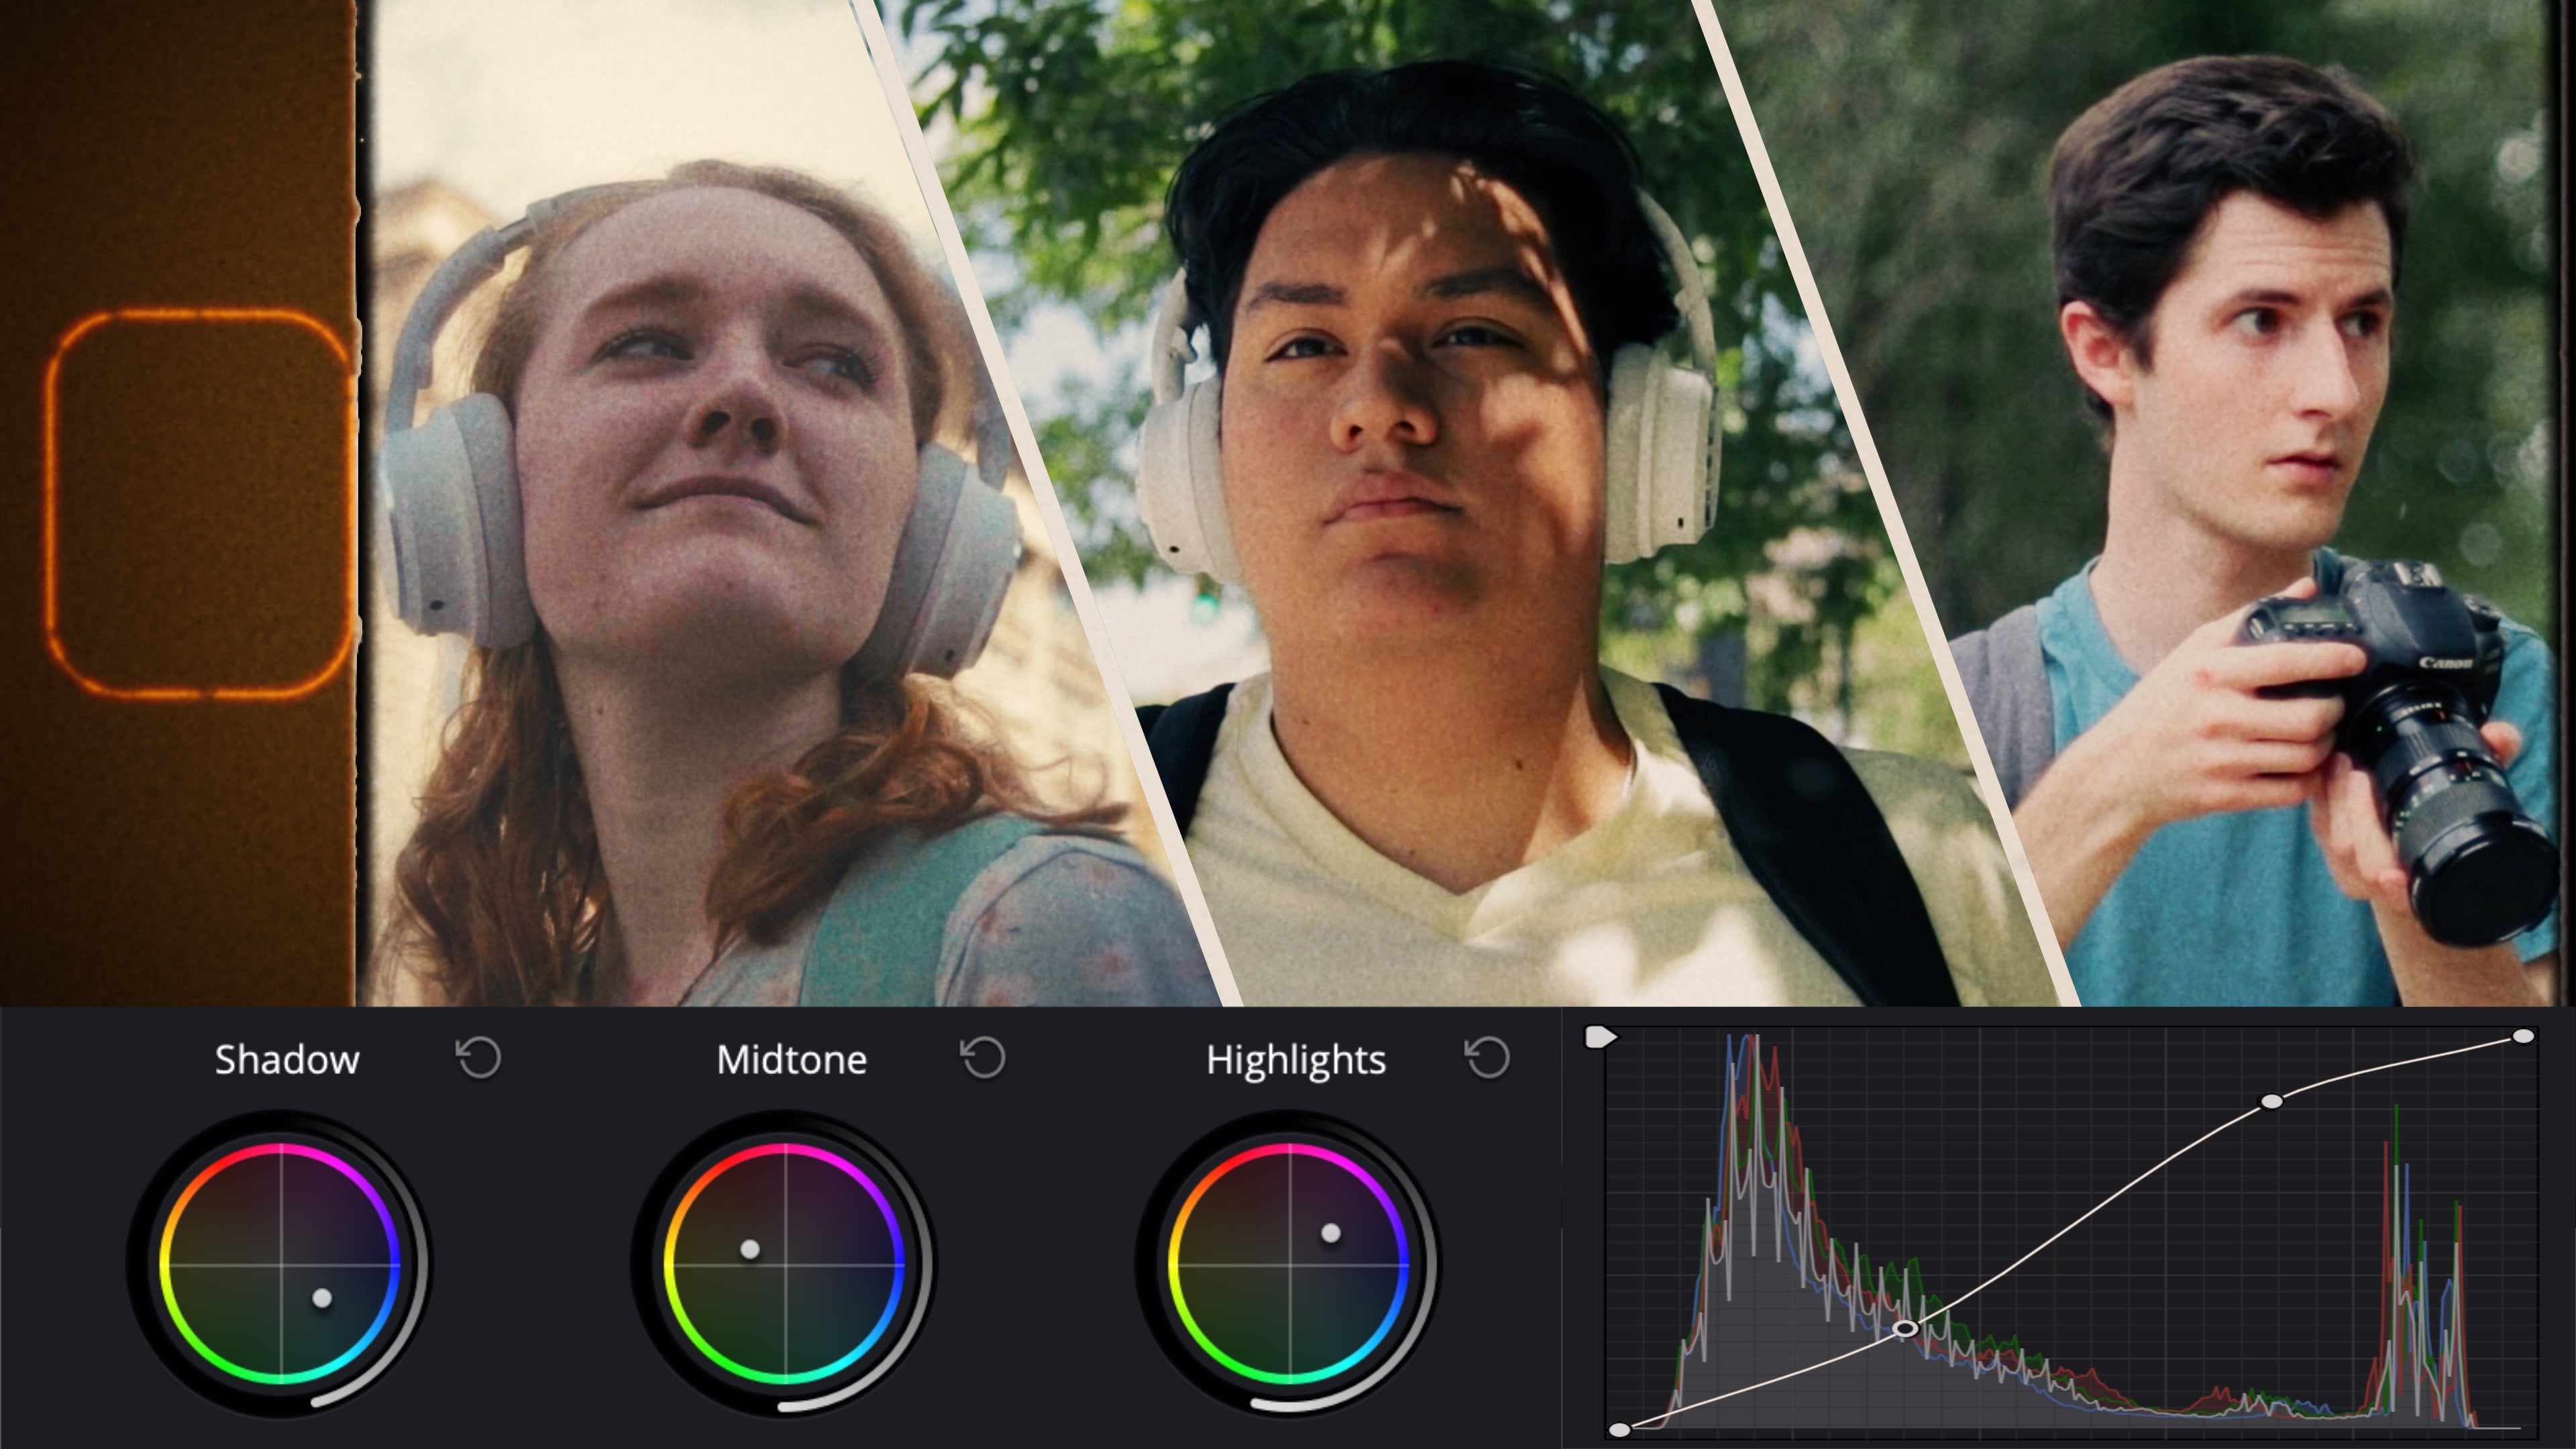
claps our curves panel and come into color
wheels and match. Now for these controls, I'm going to go to a
different clip where we can see the talents
face more easily. Something like this,
one should be good. We've got a few
different controls here. First we're going
to start with the most obvious ones are shadows, mid tones, and highlights. Now the Shadows Color
Wheel allows us to inject specific colors
within the shadows If we want to adjust
more blue in there or add more yellow or magenta, whatever we were
feeling like adding. We can do that in our
color wheels and match. We can also adjust the luminance of that
range within the image. Drag up on the slider or
down to brighten or darken. Go ahead and reset that
by double clicking it. Then same thing
with the midtones. You can brighten
or darken and add whatever color you want into
that range within the image. Something pretty
simple and easy. Then again, same thing
in our highlights, exact same as we were
looking at before. Now we also have
this option that you see called Face Detection. This just allows Premier Pro to automatically analyze your
footage and look for faces so that it can prioritize
the color of skin and faces and make your images look a little bit more natural. Most of the time, since I like to control the color myself, I disable this option. Just so I don't
need to worry about Premier Pro changing the
colors without me knowing. Next, we're looking
at HSL secondary. Under HSL secondary, we can
do what's called keying, where we select a
specific total range or color within the image and make adjustments to that range. For instance, we could click on our Set Color picker and then drag over to the range
that we want to select. And then click on
this little box, this is color gray. And then this will show
us the color range that we're selecting
in the image. Then we can use these
little parameters out here to adjust the range of
color that we're selecting. So we can adjust
our range of hue, our range of saturation, and our range of lumins until we get just the range
that we're looking for. Then to make the selection
a lot more smooth, we can use noise
and blur to just smoothen out those edges so that we select a skin
and not much else. And just blur the gradation from the selection to the
other parts of the image. Now the options that we
have to control the color within this part
of the image are down here under correction. We've got this main
corrector wheel right here, where we can inject whatever color we want into
that range in the image, or we can adjust it with
more fine tune controls. Clicking these three
wheels right here, we get our shadows, mid
tones and highlights. For just this specific
range in the image, everything else that's gray
will remain unaffected. We can also adjust
our temperature and tint as well as our contrast
sharpening and saturation. For now, we'll go
ahead and reset this. We'll collapse our
HSL secondary panel and then come down to vignette, which is pretty straightforward. It's your basic
vignette controls at a bright vignette
or a darker vignette. Control your midpoint roundness, feathering, anything like that. It's pretty simple and
straightforward to use. All right. Those are your color
controls available to you in Premier Pro within the
lumetry color panel. Now we're going to go
ahead and move on into more specific color
correction and color grading techniques to
make your images stand out.
4. Color Correction: All right, so the first step in the coloring process is the
color correction stage. Now in here, we're first looking to make
images look natural. If there's white
balance problems, color balance problems, or
if the image is too bright, too dark, things like that. That's the first thing
that we're tackling is any issues within the image that need to be taken
care of immediately. Once we take care
of these steps, then we can move on into the color grading and
creating a look. But before we do that, we really need to correct the image to get it to look natural and to a place where we can
start color grading it. In this first module, we're
going to be looking at some basic color correction
issues that you're going to encounter
as a colorist or an editor that you're going
to need to know how to fix. First we're going to look
at color space conversion. Now this shot right here was
shot in what's called log. It's a camera profile
setting that decreases contrast so that you can retain information in your
highlights and shadows. It doesn't have much
contrast built into it, and we need to convert this into a standard color profile that has more contrast and is better optimized
for color grading. To do this in premiere, there are two primary ways. Number one, we can come under our basic corrections
tab and adjust our black point to bring some misinformation down just until it barely hits
that black point. And then adjust our
shadows, highlights, and whites to really create the contrast that we're
looking for in the image. Now, this is not
always the best way, since some log profiles are easier to work
with than others. This is a cannon log profile
that we're using right here. This is fairly
easy to work with, but others may give you more issues If you
try this approach. More experienced colorists will typically use the curves
to figure this out. Or we'll bring down
our black point. And we'll start
adjusting contrasts in specific tonal regions
within the image and create a very
specific conversion for this image and create
very specific contrast. But the easiest way to do this
is with a let profile from either the cameras
manufacturer or someone who's specifically a preset designed
for this log profile. We're going to go ahead and
reset our curves real quick, and then we'll come back
to our basic corrections. And we're going to go
ahead and select Input. Let this is going to be
the preset that we use to convert this log profile into something that looks
a lot more natural. I'm going to go ahead and
browse for a custom one. Here we are. This is a
custom cannon log to rec seven oh nine color profile that I've built for this camera. And you can see it is a
little bit contrasty. What we can do now
is we can start playing around with the shadows, maybe pull some information
back out of there, bring some of those
highlights down, or maybe bring them
up a little bit. Anything that we need
to do just to correct the exposure and contrast
within the image. Now, this image has
been color corrected to a point where we can
start color grading. But this was a really easy fix. All we did was convert
the color space from cannon log to rex seven oh nine, and then adjusted our exposure and brought out some
more of those shadows. Let's take a look at
this clip right here. In this clip we
can see we've got good contrast going
on and everything, but the colors are shifting a little bit towards
blue a little too much. And we want to make
sure that we can balance out those skin tones. So we'll go ahead and take
our temperature slider, drag that to the right, and you can see we've already
balanced this out a ton. This was quite blue, and now we've brought it
more to that warmer side. And those greens are
looking natural. Skin tones are looking natural. If we needed, we could add some more magenta to
correct those skin tones, or some more green if the skin tones were a little too red. But this is looking pretty good, somewhere right around there. And then play through the clip. Just drag your play head through and look and see if
there's any other issues. Maybe add a little bit of
contrast to this clip here. Bring up those highlights and
that's looking pretty good. But not all color correction
tasks are this easy. This was a fairly simple
white balance issue, but let's say we face a more significant one
on this clip here. This white balance
is far too blue. The colors are just really overcast with this
giant blue tone. That's just like really messing up everything
else in the image. What we can try to do is we can try to bring our
temperature to the right. That does correct
it a little bit, but you'll see that the
colors are still messed up. And we're getting this
weird wash in the sky here. The sky is overblown
and we still have this purple green cast
everywhere else in the image, and it just doesn't look right. What we can do is we can
go ahead and reset this. And we'll come to our curves. All right, We'll come
into our curves and then we can start playing around with the
different colors. What we want to do is we want to get rid of a lot of this blue. I'm going to start with
my black point and white point and start just pulling things back somewhere
right around there. I'm going to switch my waveform over here to the RGB parade, just so that I get a little bit more information right here. What I'm going to
try to do is I'm going to try to balance out each of these waveforms so that
they look pretty identical. I'll start with my blues,
something like that. Come to my greens, and I'm
looking at my waveforms here, not really, looking
much at the image. Maybe adjust those
greens up a little bit. Bring some of those down in those shadows just a
little bit, not too much. Bring that black point
down a little bit, coming to my red curve and
try to bring those reds up. Bring that black
point of the red down a little bit,
something like that. Bring those reds up in
the highlights just a bit more to balance
out those blues, come back to our blue curve and start pulling those
colors back down. Just a little bit from
those highlights. Pulling out of those
shadows a little bit. Coming back into our greens. Pulling some blue out of those shadows.
Something like that. You can see now that we look at our waveforms right here,
they look a lot more. Even if we turn off our curve, you can see we've
got this nasty blue cast all over everything. Then we balanced out our scopes, which also gave us a much better color balance
in the image. Definitely not perfect, but much closer to a usable image
than we had before. Now I'm going to go ahead and come to my normal tone curve. Then just add a little
bit of contrast here, make it look a little
bit more natural. Now we are to a point where
we can start coming back to our basic corrections and start maybe adding some
warmth into the image. And now we're to a
much more neutral, natural place that we
can start color grading. Now there's more we
could do to this image. We could try to balance out some of the color
in the sky here. But if we wanted to color grade it and give it a warm look, then we might use that
a little bit later. But for now, this is a much better color balance
than we had before. That's confirmed
by the information that we're seeing
in our RGB parade. There we have it
several ways from converting log footage into a normal standard color
space and then how you can take poorly shot footage
or footage that just had bad white balance and make it look a lot more natural.
5. Color Grading with LUTs: All right, now let's
focus on color grading. And in this video we'll
be specifically looking at how to color grade
with lets and presets, Ones that are built
into Premier Pro, and ones that you
can download from the course resources and use
in Premiere Pro as well. Go ahead and select a clip on the timeline that you want to color correct or color grade. Then we're going to go
ahead and come down into our Creative tab under
the Luma Try Color panel. Now we've got several
options built into Premiere. We can go ahead and scroll
through these options using these left and right arrows
on the side of our viewer. Right here, we can
find one that we like, something like the city
space 23, 83 from Adobe. Come back to our basic
corrections and then just start playing around
with our options in here. So that we can really fine
tune our contrast and get things looking right
somewhere right around there. Maybe have a little bit more contrast, something like that. Bring down those shadows or
highlights a little bit up. Those shadows increase
that contrast and we're looking pretty
good right about there. This is a super simple
workflows to use, is to just come to
the creative panel, pick a preset built
into Adobe Premiere. Use some of these controls right here to really fine tune it. Maybe add some tint into those shadows to make it
a little bit more teal. Warm up those highlights
a little bit, something like that,
looks pretty good. And then use the
basic corrections tab to really fine tune your exposure and
things like that to just add a bit more
pop to your image. You can also use our
temperature slider here to really control how much
warmth we want in the image. In this case, I think a lot of warmth looks pretty
good in here. This is super, super
simple and easy to use as long as you just
use these two tabs. Now if you want to use some of the presets that you can
download as part of this course, then you can come
over to the Look right here and drop
down this little menu. Scroll to the top,
and you'll see an option called
Browse under here. You can go ahead and
look through any of the lots that are
provided in this course. Let's just go ahead and
take a look at Kodiak. Now this one is
fairly low contrast, you because we reduced a lot of the contrast in our
basic correction panel. We can go ahead and just
reset all these parameters here just to get back
to a nice neutral spot. Then we can start pumping up
those shadows a little bit, maybe increasing that contrast. Yeah, something like
that looks pretty good. And then maybe even warming up the image just a little bit. Like that looks pretty good. Reduce that saturation
just a little bit. And then you can go ahead
and scroll through some of the other lots and presets
that I've included. Just to give you an idea
of what you can do in Premier Pro without having to do anything really manually. Mostly just focusing on
the controls, built in, and using presets to
quickly grade your images. Now, this does bring
up a question, because now we're
using the Creative tab and the Basic Corrections tab. Let's see, color corrected this image using the
basic corrections. And you don't want to mess up these settings in here
that you've used, but you still want to
color grade it and you want more control than you
get with the creative tab. There's an easy
way to solve this. This is something that we
covered a little bit earlier in the course and that's to
use an adjustment layer. I'm going to go ahead
and either create a new adjustment
layer by pressing on the new item button down
here on the bottom left, Clicking that and selecting
adjustment layer. Or just drag the adjustment
layer that we created earlier over from our media
pool onto our timeline. Then we're going to go ahead and select our clip real quick. Let's go ahead and reset
everything on the clip. Maybe we'll go ahead and give it a quick color correction. Maybe boost up that exposure, increase that contrast, warm up the image a little
bit, something like that. And then we want to
start color grading it, but we want some
of these controls available to us as well. Then we can go ahead
and start color grading on the new
adjustment layer. And then now we have a fresh
palette of controls to use. That way, we can have full control over the color grade in our image whenever I'm color correcting and color
grading in Premier Pro. This is the workflow
that I typically use as I'll color correct
individual clips, and then I'll go ahead
and color grade using an adjustment layer
so that I can just organize my edits
a little bit more. In this case, I've got the
adjustment layer selected. I'll go ahead and find one of
these presets that I like. Something like the
Fuji Eterna 250 D, looks pretty good built
into Adobe Premiere. Might go to my basic
corrections a little bit. Increase that contrast. Bump up those shadows so I can see a little bit of
what's going on there. Maybe bring down
those highlights, and then that looks pretty good. I might even come back
to the creative tab, add a little bit more
teal into those shadows. That generally gives
a pretty filmic look. Warm up those highlights
just a little bit more. Bring my balance a
little bit to the left to really bias it towards
those warmer tones. And then increase faded film just a little bit to raise
those black points and make it look more milky blacks and not so hard, digital blacks. And then from here,
you could easily use this look for the
rest of your project. Looking at this clip that
we color corrected earlier, if we just go ahead and extend
our adjustment layer over the two clips and you can see if we turn this off and back on, we've got a solid
look just using the basic controls in the basic corrections
and creative tabs. And then using some
of the presets built in to premiere
and some of the ones that you can download as a part of this course that
I've developed for you. It's really a super simple
and easy workflow to get a quick filmic look depending on the project
that you're going for.
6. Creating Your Own Film Look: '. All right, so now let's talk
about how to create your own custom film look
without using presets. This is a manual way to
do it that is honestly, really important to
know so that you can create any look that
a client asks for. First what we're going to do
is we're going to make sure we have our adjustment
layer selected and we're going to go
ahead and reset our lumitry color panel.
Something like that. Perfect. Now you'll remember that on this clip below
our adjustment layer, we corrected it in one
of our earlier videos. So if we go ahead and turn
off our lumitry color panel, we can see we started
out with kind of this really cool image. A lot more blue tones in it, and then we were able
to warm it up a lot. Really just bring out some of the color that was in the image. Now this is a neutral spot where we can start
color grading it. What we're going to do
is we're going to go ahead and select our
adjustment layer. Let's just isolate
this adjustment layer to just this clip. So we just brought
it in a little bit, trimmed up the adjustment layer. Now let's go ahead and focus on what we can do to
actually color grade it. Say we want a warm look and we want these
greens to stand out, but we don't really
want the colors to be competing in the image. What we could do is we could come to our basic corrections and just start playing around in here just up that
temperature up, that contrast, things like that. But this isn't going
to get us very far. What we want to do is we want to collapse our basic
corrections and use first our curves and
our color wheels and match. Now you can do this
in either order, but I prefer to start with
my color wheels and match. Just to start pushing around the colors and see what colors I can inject into the image
and see what looks good. Start by dragging your shadows
a little bit toward tal, midtones, more towards orange. And then again with
your highlights a bit towards orange as
well. Something like that. Just to see what colors
might look Okay. In your image. Okay. Now
I've got an idea of that. I'm going to go ahead and
reset my lumetry panel again. I'm going to come to my curves and I'm going to start
playing around in here. First thing I want to do is
I want to add some contrast. Because while this is an
appropriate amount of contrast, this isn't really the
look that I'm going for. If I want something
that's nice and punchy, I'm going to go ahead and bring my shadows down
on my RGB curves, something like
that, not too much. And maybe increase those
highlights just a little bit. We're doing this just enough
to add a little bit of pop, but not so much
that we're actually losing information in the
shadows or highlights. Next, I might come
to my red curve and then just pull
a little bit of my red out of the shadows and then bring it back
in with the midtones. Then with my blue, I might pull that out of the high
lights to really warm it up and then bring it back in toward those
shadows a little bit. Then with my green,
I might pull that a little bit out of my
lower highlights or upper mid tones just to really make sure that the skin
doesn't look too yellow. Then I'll play around
with the green in the shadows just to
see what looks good. Come back to my blue curve, might pull a little bit
more out of those midtones. Something just like
that. Now let's go ahead and turn
off our RGB curves. Turn back on, you can see
we've added some contrast. Add a little bit more green
and teal into those shadows, and made the skin tones
a little bit warmer. Now what I might try
doing is looking at his skin tone and trying to
unify some of these colors. Because when we start pushing
colors around like this, sometimes the skin
tones can look red and yellow at the same time, and it looks a
little bit splotchy. When that happens, what we want to do is we
want to start using our hue versus hue curves to really even out
some of those colors. I might bring those reds
a little bit towards green and bring those
greens a little bit more towards red,
something like that. Then with our blues,
just bring that a little bit more towards blue,
something just like that. Now we're looking a lot more. Even if we turn this
off and back on, you can see there is an evening out of those colors
in the skin tones. And you can see that that's even reflected right here
in our RGB parade, and before and after, those skin tones are
just a bit more unified. We can also use hue versus
saturation if we want to maybe desaturate those greens and add more color just back
into those skin tones. Something like that
works pretty well. Then we can scroll down over to our luma versus sat
curve so that we can add more saturation into
the darker regions of the image and then take out some saturation in
those brighter regions. This adds a unique effect
called a bleach bypass Look where you have more color in the darker regions than
in the brighter regions, giving a really nice soft
quality to the image. And this can also help bring your skin tones into
balance as well. And then with saturation
versus saturation, I might just play around with this curve just a little bit here just to start playing around with it and
see what looks good, what doesn't, things like that. Now that's looking pretty good. I'm liking what
we're seeing here. This is just a very
subtle adjustment. But so far, I'm really liking the color grade
that we've created. Now I might just come back into my color wheels
and match here and just start adding a bit more
teal into those shadows, warming up those mid tones
just a little bit more. Then with those highlights, I'm just going to go ahead
and play around with it a little bit here just to see what colors would look good. To inject into those highlights. I'm thinking maybe somewhere along these warmer tones here, it would look pretty good. Somewhere right around there. Still fairly close to the
center of the circle. Then you can even
play with the levels of those different tonal
ranges in your image. Bringing down those mid
tones looks pretty good. If we wanted to, we could
come into our HSL secondary to select a specific color
that we want to operate on. You can even just select
these colors down here. With these presets, I might
select the blue here. Check on the color gray button. That way we can see the
color that we're selecting. And then just blur out my
selection quite a bit, just so I'm mostly selecting
the backpack from here, unchecked color and gray. And then just start playing
around with these controls. Maybe I want to add a lot more
color into that backpack. Or maybe I just want to decrease that saturation and make it
look a little bit more muted. Something a bit calmer. And then maybe even inject some color into that
backpack as well. Then as a final
touch, I might just play with the vignette
here in Premier Pro. I'm not going to
go crazy with it. I'm just going to
add just enough, just a slight vignette, something really subtle, just to add some focus into the
center of the image. And really draw the eye
toward that center, brighter portion and away
from these corners and edges. Now let's go ahead and turn
off our lumatry color. And turn it back on to see the difference
that we've made. Now I'm going to come
down to the clip. I'm going to turn off
lumetry color again. This is the image
that we started with. Then we went ahead
and we corrected our white balance and
we warmed up the image. Then on our adjustment layer, we made our color grade. And then really
create a unique look, this teal and orange look that really works well
with this clip. Nice and warm summary. A feeling without it being too vintage or too clean and modern. So let's go ahead and see how this color grade
translates to other clips. In this case, we've got another clip right here
with the same guy wearing the same backpack at Sunset in this little town
in the middle of nowhere. So we're going to
go ahead and extend our adjustment clip
over our other clip. And you can see if we turn off our lumitry color and back on. It just creates
that nice warm teal and orange look that
we've been going for. And it just really works
and it's really cohesive. Looking at these greens
and the trees back there, we can see we've created
this nice golden color where the greens and the
yellows really stand out, but they don't call too much
attention to themselves. Skin tones are nice and even, and overall, this is
a very pleasing look. And all we had to do was add a little bit more teal
into those shadows. Pull some of the blue
out of those mid tones, out of those highlights, and just really balance
out the colors. User hue versus sat to really
fine tune the skin tones, added some more saturation
into those shadows, and then used a slight curve on saturation versus saturation. Then we went to our
color wheels and match really fine tune that a little bit more and then our vignette and
H cell secondary. All right, now let's go ahead
and look at another clip. With this clip and my friend walking along the sidewalk here, we can see we've got
some challenging lighting situations going on. We've got a lot of well
exposed areas of him. Nothing's too dark,
nothing's too bright, except for when he starts
to walk in the sun. Then there's these
hot spots right on his bright shirt
right around here, where we lose a ton
of information. There are ways
that we can tackle this so that it's a
lot less noticeable. And I'm going to go ahead
and show you guys how to do that and create a really
solid color grade. Let's go ahead and drag
another adjustment layer onto our time line
right above this clip. And then select our
adjustment layer. And then the first
thing I'm going to do is I'm going to go to my curves. And just using my
luminance curve, I'm going to pull
down my white point. The idea here is to reduce the distance between our
highlights and our white point. If we go ahead and drag up our highlights and pull
down that white point, and you can see we've gotten
a bit closer to just making a smoother gradation between the white point
and the highlight. This can make issues like
clipping a lot less noticeable. And so now what
I'm going to do is I'm going to go
ahead and bring down our shadows just a little
bit more to maintain nice, good, even contrast in his face. Bring up those highlights
just a little bit more. Bring down that white
point a little bit, and now we don't see such a harsh gradation
in those tones before where we could see all of these white spots that
just look very unnatural. And now he looks pretty naturally exposed
right in the shot. This also works
with skin as well, because if we turn it
back off and then come to another spot where he's got a bit more of a hot spot
right here on his arm. This looks fairly unnatural
turn on our effect. And then there's a lot less
of a harsh gradation there. Now for this shot, what I'm envisioning is a nice
warm color grade. I'm going to go to
my blue curve here. Pull out some of this blue
from these mid tones, and we're getting
quite a bit of yellow. What we're going to do is
we're going to come into our greens and I'm going
to pull out a little bit of this green to just maintain a slight pinkish hue
to the skin tones. And then I'm going to
come to my red curve, pull out some red
from those shadows. Maybe add it back in
in those highlights. And then come down to my
hue versus saturation. These greens are standing
out a little bit too much. So I'm going to
go ahead and pull down in that green
yellow region, somewhere right about there. And then bring the
rest of my colors back up to a nice neutral point. I can also use my
hue versus hue to shift those tones a little
bit in those greens. Bring back my skin tones
right to where they should be right about there. Maybe even out those skin tones just a little bit more here. And then maybe decrease the
saturation of those reds. Just a little bit from here. We can use our luminous versus
saturation trick again, to pull some of that
saturation out of the highlights and add it
back in in the shadows. Or we could even do
the exact opposite. Pull some saturation
out of the shadows and inject some color back
into those highlights. You can really do a
lot with this curve. In this case, I think
I'm going to go ahead and leave that one alone. And then I'm going
to come straight to my color wheels and
match from here. I'm going to drag some teal into these shadows just a little
bit, something like that. Warm up those mid
tones a good bit. Bring that color back in, and then take our highlights and warm those up again as well. And maybe just cool off those shadows just
a little bit more. Then I can also
finesse the contrast using these little sliders here to the side of the wheels. Bring down some of those
mid tones a little bit. And then just drag our
playhead through the clip. Make sure that the colors
are where we want them. Turn off our effects
button and back on. And you can see we've created
a nice, natural warm look. You might want to
create a cooler look depending on what
you're going for. But in this case, for this ad, I think this warm look
would be pretty good. And now we're going
to go ahead and color grade one more clip. Right here, we've
got this interview of this basketball player. So we're going to go ahead
and come to our curves tab. We'll add a new adjustment layer and then just extend
it over the clip here. Then we'll just go ahead
and add some contrast. Now before we get to that, the look that we're
going for with this clip is just a clean, neutral, a look
we've already gotten pretty close based on how
this footage was shot. But what I want to do is I
want to go ahead and just see how much information I can
recover from those highlights. An easy way to do that is to use our curves and just drag
our highlights way down. We can see there is a lot of clipping going on in
those highlights, not a ton of information there. I'm going to go ahead
and reset this then. I'm just going to
go ahead and add some gentle contrast
into this clip. Pull down those
shadows just a bit and then increase those
highlights a little bit as well. Something like that is
looking pretty good. You can see we do have
some nasty clipping going on in the sky here. I'm going to go
ahead and bring down my white point somewhere
right about there. Bring our highlights back
up just a little bit. Maybe increase our shadows
just a little bit more. Just barely finesse them just a little bit.
Something like that. Looks pretty good. All we've
done so far is add contrast. If we turn off our
effects and back on, you can see if add some
nice pop into the image. And then in this case I might just leave the curves
alone for a minute. Come back to my color
wheels and match again. See if there's any teal we want to add into those shadows. What I'm really looking at here is the greens in the background. What I want to do is I
want to see if I can add some teal into
those shadows. Just make them look
a little bit more natural, a little
bit more filmic. Warm up those mid tones
just a little bit here. Maybe add a little bit
red because I know his skin is going to be
in those midtones and I want to make sure that I'm
maintaining good colors in his skin, something like that. And now we want to
be careful with our highlights because he's wearing this white hoodie here. I can try to drag those highlights to green or
magenta or something crazy, but you'll see that
it's really going to impact his white hoodie. And we want to make
sure that we keep natural colors in every area of the image for this interview. I might warm up those highlights just a little bit,
something like that. And you can see we've
created a natural look, very minimal color
grading in this case, if we turn it off and back on, there's quite a difference
in what you see, but it's just still a
very nice natural look. And we've really
done a lot to bring this image in and make
it a lot more cinematic. Color grading can
be as complicated as using all of our curves and color wheels to really finest the colors and bring them
into the range that we want. Or it can be as
simple as just adding a little bit of
contrast and then using a couple of basic wheels here to just finest the colors
a little bit more.
7. Fixing Common Issues: All right, now let's talk about fixing common problems
with color grades. When you're color
grading, there's going to be a couple of
issues that you may face now in this color
grade right here. This is a little bit
different than the one that we created in the
previous video. This one has a couple
of issues with it. If you look at it, you might tell that something
feels a little off. Some of the colors just
don't feel realistic. This is a good grade. There's just one problem that's in the darkest
parts of the image. If we look at his hair here, we know that his hair should not have this little
teal tint to it. We know that his hair
is black and we want to maintain that
accurate color here. And then you can see
like this shadow on his neck here
from his hoodie. Again, that's a
little bit too teal. You can see over here in these darker areas of the bushes. Again, it's very, very teal. The issue here, we can
see in our lumitry scopes is that we've got a lot more green and blue in the
shadows than red. Which just means
that these shadows are really, really unbalanced. And it affects his skin
tones and his eyes, and his hair and everything in the image just looks
a little bit off. The main thing here is to really nail the black
point on your image. Because if you can
balance this out, all the other colors
will fall into place. And I'll show you what I mean. If we come to our curves here, what we can do is we can come into our blue and
green and red curves. In this case, I'm
going to come to my red curve and I'm just going to go ahead and
play around with this. If I pull red out, you can see what
I'm talking about. We're injecting a
lot more blue and teal into that black point. But if we drag our red up here, something just like that, you can see we're balancing out those colors in the shadows. But let's pull this back down, and let's focus on our
green and blue curves. What I want to do with this
is I want to go ahead and pull some of this green
out of our shadows, somewhere right about there. Then I'll come to my blue curve. At the black point, I'll pull some blue out by
dragging to the right. Just drag to the right
a little bit more, somewhere right about there. Come to our red curve and then just drag a little bit of
red into those shadows. Pull some red out
of those midtones. You can see we've
already gotten to a much more natural place
than we were before. Turn it off and back on. We've really balanced out
those colors in the shadows. This is one of the things that
is going to really make or break your color grades is the darkest part of your image. Because if there's
some area that should be a neutral color and should not have a ton of blue or green or whatever
injected into it. You want to make sure that
you can balance that out and really make sure that
the skin tones look normal. Make sure that the hair
is an accurate color, because if any of the colors
of the subject feel off, then the audience is going to
know something's not right. You want to make sure that
the skin tones feel accurate, the hair feels accurate. Anything that the
audience is going to pay a lot of attention to. Then you also want
to make sure that the shadows in our bushes and anything in the image is just believable as you're
color grading footage. You may come across clips that have colors that
start to distort and there may be some color artifacting a lot of the clips that we've been working with
in this course. We don't run into
those issues just because we've color
graded it properly. But if you do come across a
lot of noise in your images, one thing you can do
is add film grain. What we're going to do
is we're going to go ahead and create a
new adjustment layer. In this case, I'm just going
to go ahead and put it over everything in
the timeline just because this is really
just going to make a more cohesive look and hide some imperfections in
any of our color grades. Then on this adjustment layer,
make sure it's selected. I'm going to come to
our effects panel. Within effects, if you type
in noise under noise grain, you can drag noise onto
the adjustment layer. Then you can come into your effects controls and then just insert the amount
of noise that you want. You can see that as we
increase the noise, we're getting this really
nasty color noise. I'm going to uncheck the
box is used color Noise. Uncheck that thing and
then pull the grain back. Somewhere around 13%
Usually works pretty well. Then you can see that you've got this nice natural film grain. If we play through
the clip here, you might want to decrease that film grain just a
little bit more, maybe even 5% And you can see that adds a
nice natural film grain that will hide a lot of
the color imperfections in your image if
there's any sort of noise or artifacting going on. So those are my top two
tips for making sure that your color grades look
clean and simple. Each time, make sure that you balance out your image
so that anything in your image that is dark or super bright looks neutral
and balanced, while everything else in your image can have a
more stylized look. And then over on shots
where you have more noise, you can just add film
grain and that will blend in and really hide a
lot of that noise for you.
8. Final Thoughts: All right, congratulations
you guys for making it this far and
completing the course. Make sure that you complete that final project so
that you can practice those skills really fine
tune them and allow me an opportunity to see what you guys have done,
what you have created. I'm really excited to
see what you guys make. And then I'd love to
just take a look at it, give you guys some
feedback so that you can improve your skills
by moving forward. If you guys have any questions, go ahead and let me know. That's really what I'm here for, is to help and support you guys in your video
production journey. So if there's topics you need clarification on or things
you have questions about, or if there are future courses that
you would like to see, go ahead and let me know. I'll see what I
can do and I will see you guys in the next course.
 Carson McKay, Colorist & DP