Transcripts
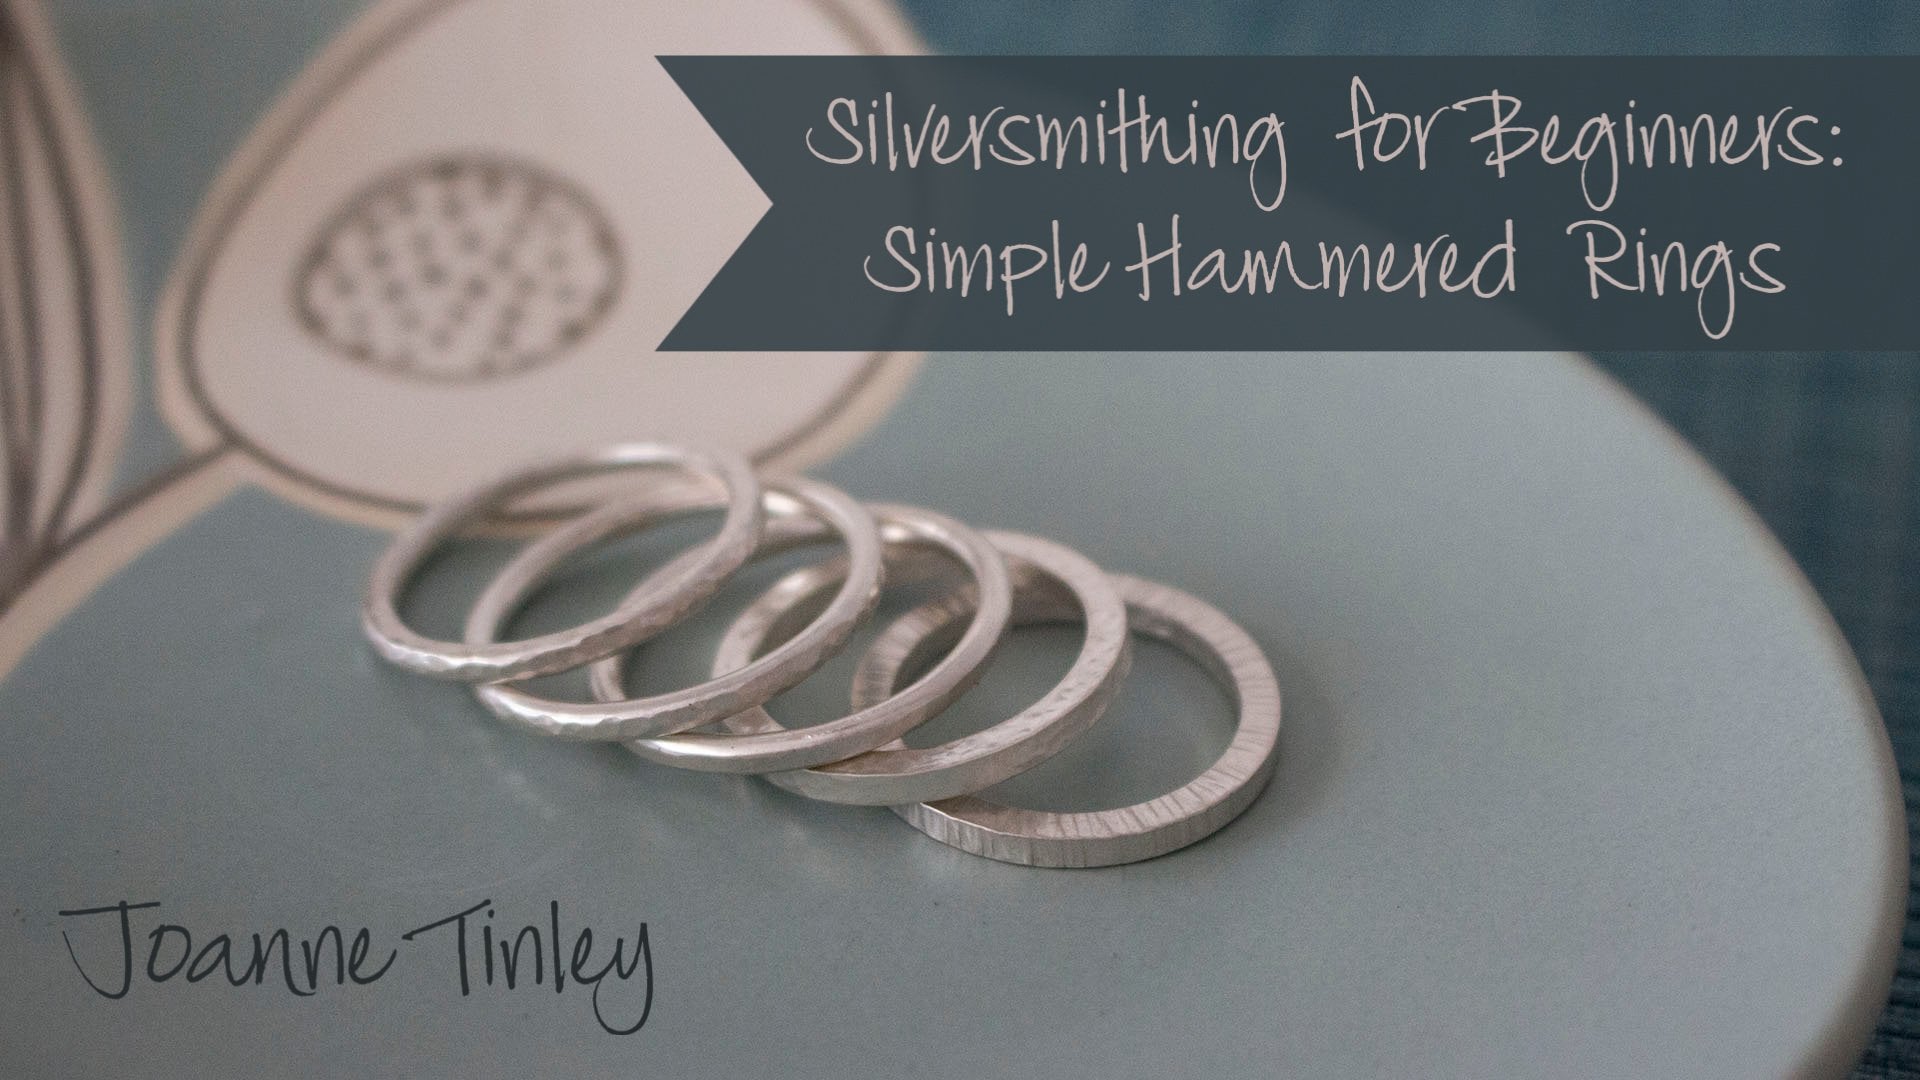
1. Sea Waves Ring: Hello, My name's joint Tinley. I would. You were designer on shooter from South First UK on Welcome to see Where you spring. This class is one of a new intermediate Siri's that's going to build on the skills torch and silver slipping beginning Siri's, for example, this class bills on simple, hammered rings. Carves does assume that you know how to make a simple wire fan ring. So if you haven't already watched that, I do recommend you go back on what shot come back. Enjoying the skill that we're really going to be focusing on in this class as well as obviously making a beautiful ring is soldering because you're going to be solving a site of three reels together. Rings don't fit. Flush together, they shapes and gaps between them so that they create the way appearance. But you're going to have to watch several selfie joints at the same time she's wanted. This is an intermediate world begins class. However, there will be a tip to make, so if you really watch the simple Hamid brings class on your way. Take your soldering skills next level. That's how I stopped by your materials and equipment to make see way
2. Sea Waves Ring - equipment: the's handles that we're going to need to make sea waves ring. I've got two sets offering sizes here, one metal on one plastic on. But those are obviously very useful to help you to check the size of ring that you need on plastic ones. I'm showing you because they are off a cheaper version off them. They don't last this long, but they do get the job done. I've also got to ring triplets. One of thumb is March with the ring sizes as ah, which, if stick way chief being the English measurement for ring sizes on one unmarked. Most of the hammering and the text strings I'm going to do will be on the unmarked one because the marks on the wheat sheaf stick because they're engraved and could leave marks on the inside the metal. As I'm hammering, I've got a nice fine point. Sharpie permanent markers. I'm going to use a couple of times to mark the metal during the class. I've got some masking tape because I'm going to show you a trick using that to help you cut the metal to cut the metal. I'm going to use my jewelers sore with A to order a medium grade sore blade. I'm going to have my work supported on the bench. Paige on April underneath that's collecting silver dust that I will put in my scrap popped recycle at a later date. I've got two hammers, the black nylon hammer I'm going to use to shape the ring to help shape the metal around the ring trip that there to prepare it for soldering. The other hammer. My favorite cross peen hammer I'm going to use to texture the rings. I was an old, beaten up piece of wood. Here's I used to use for drilling into supporting my work Whilst I'm drilling Andi, I'm going to use that to help form the shape of the rings. I've also got a leather cushion. I'm going to use that to support various tools. As I'm working, the six inch, half around file is going to be used to tidy up Soldier joins on each for three individual rings before I sold them together, and then I'm going to clean up the marks left by the file with four grades of Emery paper. I've got 240 great 500 great 1200 on 2000 with Emery paper here. The last thing you can see here are two pairs of nylon. Your pliers, Andi, I'm going to use that to help me shape the rings before I sold them together in a stack. This is also a soldering class. So let's have a look at the soldering equipment that we're going to need to make the ring. Yeah.
3. Sea Waves Ring - soldering equipment: thing is the soldier equipment that I use for all of my small projects, such as earrings and sore pendants, everything sitting on a couple of slate tiles, a heatproof surface to help protect my desk on my work sits on a couple of soldering bricks or soldering blocks, while some heating it up. One of these soldering bricks is made of a softer material than the others. Because it's softer, it's picked up some dips and some cracks in it. It's being used over the years, and these could be very useful for supporting work that isn't completely flat. The charcoal block is there because I melt small piece of scrap on top of that on Do they form? Nice of my balls has, I mean used to decorate my projects when I need to pick up my work or to support it whilst I'm soldering? I used reverse action tweezers that you can see here, and I've also got a pair on a stand through 1/3 hand, and it's there when I need 12 on extra hands to help me out. The blue handled stick is a soldier pick on and that I used to push soldier move it about to make sure it it's exactly where I want it to be. Soldier usually comes in strips or sticks. Andi, I've got three different melting temperatures here that I using combination for different projects. The soldier gets cut into small pieces or Palin's you ting. The red handles snips as I keep those little pieces in the labeled boxes that you can see do. Make sure that you label your boxes because once a soldier is cut up, you won't be hard to tell which is which. Melting temperature. My curl over the ends off the sticks of solder start. I can't tell which melting temperature they are. The more cold over they are, they're higher. The mountain temperature, bright yellow liquid is a flux. Solder won't actually flow out through the joining unless you use of flux with it. Andi The paintbrushes. What? I used to apply the flux to the joints in my work, so he was also available in a paste form, its ground up soldier that's already mixed with a flux, so you don't need a separate flux. In fact, if you were toe adds the yellow Fluxus, I've shown you it would stop this solder paste from working properly. It's most commonly available in syringes with school tips that she can see here. You can also buy it in tubs and pots, just like with the traditional sticks or strips of soldier, so the pace is available in three different melting temperatures. Easy, medium and hard. I've just got easy and medium here. The easy is the one that's 268 degrees sent rate for amounting temperature. The medium is 732 3 centuries. As you can tell, the easy solder paste is a favorite newer in the medium soldier paste. When you have a new syringe, it's best to pull back on the plunger after you finished using it. Otherwise, the soldier pace going to continue to snake out of the tip a little bit, and you don't want to waste it because this is actually the most expensive way of buying soldier. I like to use the solder paste on projects like chains on door, so hollow beads sometimes might use it on sucking rings if I'm in a bit of a hurry because one of the advantages sort of place is that the soldier usually stays exactly where you want it to be. Unlike the sort of Italians that can jump off as you start to heat the metal up, small projects like hearings only need a small blowtorch, and I've got two different makes of those here. Both of them are easy to refill with the gas that comes in aerosol cans since the same type of gas butane gas that you use to refill cigarette lighter at the back of a picture, you can see a slow cooker that Scots a very mild acid solution, go to safety pickle in it. When you heat silver up, the surface becomes not darker and dirtier looking that some of the capo in the study silver reacting with the heat and auction flames before cause cop rock sites on the safety pickle cleans that copper oxides up. Before you put your work in the safety pickle, it needs to be cooled down or quenched in a pot of water. Andi, you need to put your work in and out of the safety pickle with brass or plastic tweezers, not the stainless steel ones that I showed you before and last, but definitely not least our house safety glasses. You've only got one pair of eyes look after
4. Sea Waves Ring - materials: you only need one type of material to make thes rings. You need a length off, Sonny. So, Weir, this is long enough to make three rings that are one size bigger than the stacked ring that you want to end up with. I'm using two millimeter round Why? Which is round about a 12 gauge. If you prefer to work with gauges, I probably wouldn't go any extent up on 1.5 for this design. 1.5 would give you off your much dainty a ring. Andi, I think two millimeter is probably the thickest which way to go a thicker than that you're going to end up with quite a heavy rain, Maybe a bit more uncomfortable, Andi. It's also going to be a lot more difficult to bend each individual ring into the waves shape before you start together.
5. Sea Waves Ring - preparing the wire: this class starts out as three rings from a simple hammer rings class. Andi, if you have a look at that class, it will take you through step by step. How to make the rings. However, I just want to. In this section, the class show you a slightly different way of forming a silver ready for soldering in this massive. Rather than cutting off a length of wire and using batch to form the rain, I'm actually working with a longer piece of wire on that's actually producing is your Sears . We go go through. This section is producing a little bit less scrap because the strap is only produced on one side of the ring, so it helps to make a little bit directly use off the wire. Having a longer length of why also helps, because I can pull the wire a little bit around the triplet rather than just hammering it round to fit the triplet. However, this message doesn't completely replace the massive taught in the simple home brings class because there will be plenty of times when you only have a short length of wire. That's just enough why I needed to make the ring over while they're over from another project on. There also might be occasions where you ordered just enough gold, for example to make the rings. And so you don't have any access to work with. Like because I'm working with here is enough to make all three rings. This project reception class also shows you that you don't absolutely need a marked ring size mystical a week. Chief stick. If you've got a set off, bring sizes. Andan on March triplet. You can, as I've done here, slight, toothy mean side of that you need onto the trip it and then use a Sharpie to mark above the ring tribute on def. You have a look at the troubles. We go through the car to see a line marked on their for stuff hammering above there so that the ring starts a little bit too small and then enlarged, ticked down to that line to catch the right size. The last trigger one showed use with the masking tape. If you're having difficulty getting crossed over wide to sit nicely seeking, soar through it, then having space for peace of Martine tape wrapped around can help you solve that problem now. So show you those tips. Let's continue with my here. The ring
6. Sea Waves Ring - soldering: way prepared metal for three rings, all made out of two millimeter round wire and or three of them currently made to a site Que onda. I'm not going to sort them close, So I've got my paintbrush going to put a nice drop. A flux on each joins joins a front facing towards May, splashing the excess flux off the paintbrush a second, then use that to pick up some Italians. I'm going to be using medium soldier to solder these closed because then that leaves me et soldier to soldier. The three together with Stack, sometimes the most difficult thing. I'm sure you've heard me say this before, in workshops and in videos. Most difficult thing sometimes is actually picking the soldier up from the books sometimes because I use a paintbrush to pick the pieces up. It means that a little bit of flux quite often gets left behind, and the in the books was it dries. It's often sticks the pieces of soldier. These is a Palin supporter of the box. I just sort of scrape with the you go into the paint brush just to loosen up a little bit, so I put a couple of pieces. Very small. Meet him, soldier just on the inside of each soldier joint. So I like to make sure that when the soldier gets flowing, the time making the hottest part of the ring the outside of the joint A soldier always floats the hottest part of your work so far, making the outside the hottest. The soldiers flow from the inside to the outside. If I see nice, I'm a soldier on the outside. But I know that I've got a nice song, so join. So I'm going to heat up at the front, the first rain to dry the flux off quite slowly. Remember that if I'd write off quite slowly, then those pounds of farmers like to jump off, and they're going to hopefully stay far more like a state where I want them once I've done that, but along the way around heater all silver. So it all gets the soldier. In turn picture of a soldier can't flow into the silver until it's or the mountains or all . It's the soldier multi, not silver. Mounting a soldier melting temperature, soldering temperature and then brush across the front together might be a little bit of white powder on the front of that ring there is putting the flame back a bit, so I've got time to show you that that's the drive flux. I could go around around, see the upside period, might see reddish change the muscle as well. Good indicator. It's got the right picture back across the front. So the melting flowing troubling thanks from like the soldier Emotional. Three. Those two guerrilla that one I'm not quite so convinced about. I think the soldier flow to that side of not actually across nicely. I think I heated this side more than that soldier flow. Sasha's parts of slowed on this side. I'm going to pop me, quench parts on a problem in the pickle to clean up, and then we'll have a check. And I think I might need to come back to that one and show you how easy it is to soldier it again.
7. Sea Waves Ring - soldering troubleshooting: the three rings air now nice and clean throughout Pickle on Did Thies to have sorted really nicely. But this one Oh yes, as I thought the solder has flown to this site are not across the middle now, As I said in the last section, solder flows the hottest part of your work. So I obviously didn't even the heat Both sides of the soldier join have c heated one side more than the other on the soldier has been flown onto that side But it gives me a chance to show you how to put it right who is nice having a troubleshooting section to the video class. So make sure that the special that it is properly closed because I just twisted it open to show you that you the soldier joint, hadn't taken properly. So make sure there we go that it's ah, it's nice and tight clothes on and the drop of flops on die I'm going toe Add more soldier and add another couple of pieces. A soldier Because solder had thrown so far to the other side, it wasn't remotely near the joint anymore, so it would have bean very tough to try and pull that soldier backing. In fact, the soldier wouldn't is all our soldier there to be pulled back towards to join. He would just sunk and further into the silver and not actually done the job. So it's now in place. It's actually sitting mawr up on the top 10 on the inside, but I was still George. The the heat make a soldier draw all the way through. So I keep you know that joint and make sure this time I heat it evenly again. Just make sure that flux is dry. You see the white powder appearing that she quite a bit of it this time. Also useful flux. Once you got that, it's over to draw any further. If you start going all the way around, Fox is dying down Now starts died Island Iota, a dark, glossy appearance that's indicated that the right temperature to just go across the joy go . This time I was making sure I hit it, even the and that looks like a nicely soldiers join, so that's going to go in the quench pot again. Back in the pickle parts. There's not very much in the way off oxidation because this has already bean in the pickle . Once some of the copper has come off the surface, there's not not not not as much copper left there to actually to actually form copper excitation. So quench parts pick apart or it's cleaned up our shoes the next step for all three of them .
8. Sea Waves Ring - filing and sanding: I've now got three rains or nicely soldered joins or lifes and strong trade up in the pickle. The next job, though, is to remove the excess solder around the joint because all of them have got a little bit to join us still. Oh, yes. Could be clearly seen on all of them. So the next job is to clean those up and take one time. I'm going to use six inch, half round file. I'm going to use the flat site, clean up most of the outside on guard the rounded sides that fits the curve inside the range of Victor to clean up the inside. So I'm not going to file just at the joy. If I filed just a joy, I'm gonna put a flat area. They're all I don't want that. I want to keep an eye surrounded profile. Why? So let's start off with further back sweet across a little bit final the way around. Just gonna fall at the joint, Andi a little bit. Either side. You see that I'm actually turning the file over slightly, said this. I am making sure that I find a profile of the wire. If you find it easier to turn the ring round as well. Now that looks and feels upsy fine for the top Onda. Uh, the top bit of the sites. Nannies do the inside bit as well. So this time again, I'm not going to file just that section there. I'm going to you try and use most of the length of the file, but twist a little bit. A swell so sweeping across a little bit you can see a little bit of a twist. I can't good file a little bit on the side as well. So interesting, Wire. So twisting, hovering over. So again, I'm following the shtee profile for the shape of that round for that runs ring around wire . That's you inside. There's a little bit more on each side Now. I'm actually going to use the rounded past the file for that as well. And the reason is that if I use the flat side as I file the edges of the file, I'm going to come in contact with the one that actually put marks in. Whereas if I use the rounded section you see that the edges the file are held away from the wire so not gonna cause any damage. So you can't was going to sweet of course, from that side as well, if I need to. And again, Yeah. Sorry, just Well, we need to go back on. Do one section for a bit more than make sure you do that as well. That looks and feels good. Now sets one needs to another two. So we're speak the film up a little bit for that. So you don't have to watch it to Ken unless you really want to. If you want doing well, you can go back and rewind the film. But I'm just going to clean up with the file, those two as well. - Now that the rings and I see filed, I'm going to use the emery paper to remove marks left by the files. So just finished typing off about four grades of Emery paper. I've got 240 grit, 500 1200 on day 2000 great sea level being used before starting to get concede the shine on last little bit, starting to get silver embedded inland. So when these are finally finished with maybe the Emory's such flake off, they got rich, crumpled to use where they've lost their grit. Then because I've been come, it was picked up some silver so has become imbedded in them. I'm not chucking away these what she end up in a scrap pot. I went eventually ascend on the bullion that I can't recycle myself. I send that brought back to Britain supply for recycling. Um, things like this will get included as well. They'll get burnt off the furnace and silver get left behind. Nothing goes to waste. So you start with the course of script, the lowest number first. I don't need to send all the way around just whether far marks Studi inside fold or CO the Emery paper over so it fits inside curve nicely. It doesn't matter which direction he used. The Emery paper, remember, the file only works in one direction, every takeaways, every direction. That should hopefully got to see the difference between the ring that's being sounded in the ring that hasn't had any sightings. I'd be filed yet The shine on here was it a little bit coarser. The markets courses. It's as if it's becoming a bit maybe a bit more satin compared to the swamp, so it's a $500 so that would be for 240. Done. Second, move on to 500. As you send, you probably finds that you sent vehicle bit further around the range each time to make sure that you're covering the agents off where you send it before 240 removes the marks left by the file 500 the marks of by 2 40 so on until the time you get down to the 2000. He really just something to polish. If, as you start to sand, you notice in areas that actually could have done with a little bit more fighting do go back to the file and finish that that sectional factum. Maybe that Nick and why? Or silica bit of active soldier there? Because the emery paper won't get it off a fishing place. You can't go back a step to get in my system. Shen your ring. That's one done. We're nice and cleaned up. I do the same to next, to my sense is strange, but you actually do want to flatten them before then putting a bit of a wobble in through them. on. The reason for that is that I'm going to put a texture all the way around the rings going to hammer a lovely texture ring tooth, um, on the texture looks very uneven and rather untidy with the hammer this I'm going to use. If it's not hammered on rings, it are fat. If it's hammered with rings of wavy, it just starts a little bit of a mess. So I will take the time to kneel these and flatter than before, put a texture.
9. Sea Waves Ring - annealing: before I heat the rings up to Neil Thumb. I'm just going to put a mark with a six Sharpie pen, although putting it slightly away from the joints adjoin each. There, there, there, Um, because the sharpies there was indicated to. So I can see more clearly when the meeting temperature has been reached by some fluke, the Sharp Manufacturers Theme Inc burns off at just the right temperature for a kneeling. So if you are uncertain about whether you're reaching any temperature, if you find that you're he's you worked too long and re melting the soldier join or you're not hitting work from the enough. It's not a kneeled properly. Then using a Sharpie might be the way to go for you. So once this mark is about burnt off, then he reached like temperature. Other clues. It reached right temperature. Is that just nice bloom of oxen ization of hearing again? But the more you heat your work up so that stock civilization appears, so that becomes a less reliable clue. If it's say, a piece of jewelry, he's a work that needs heating up several times during that. During its process, we're going to find that it's going to be more more organization at the soldier joints because I filed and sanded at those points on days gone back from a finest silver surface to sterling underneath, it will be more sensitization there. Another clue even use is that your work has taken on a. It's going to be a deeper red, huge who it. But that's not always easy to see if you have to soldier an area that's that's quite bright . So combination of those three the Technicolor of the silver, the amount of oxidation and also the Sharpie pen ink burning off. A good to help. Make sure the watch to the right temperature for anything. There's no flux, no soldier involved in this. I'm just going to heat up around around, take one ring of time and then pop them in the quench pot because the quenching actually completes a process that's also even quench. My heard the sounds and grains, the water and cooling del. I put him inside a plastic sieve because that civic and then go straight into the the pickle porches don't got no metal parts that will affect pickle, by the way, the so join on each has become a bit more visible because number of soldier is not stunning . Silver doesn't react to the heat in the same way. So these feelings pickle, and once they cleaned up, I'll show you how I flatten them.
10. Sea Waves Ring - flattening the rings: kneeling has made the three rings a little bit softer so that they're easier to work with Everything that had happened. Tooth um, up until then, including the filing and sanding, had worked hard in them, which would mean trying to flush them, trying to move the silver to do that, which is being a little bit more difficult. So a kneeling has obviously made life. It will be easier. So I've got one of the rings sitting on a wooden block. This is the wooden block that, as you can tell from the holes that I drilling to what, a nylon hammock, actually, and I don't have a at the moment, So any marks on their it all so far, Um, and this are the easiest vision also. Good. If you're wanting to relieve a little stress, hammer the ring flat on the wood with a nylon. However, the recent one do it on the wood. Was it if I was a hammer on a steel bench block instead? As this is such a hard surface, it would flatten a section of this round wire. I don't want to do that because I want to keep the round profile by on. And secondly, I'm not directly onto my wooden desk because it would put in dance in the wind dusk, some dating here instead. So here we go. So you know better than to do the same to the other two. He would see that one should be about it on the desk with my great what if, who's too three Fletch rings so amazing. Raised it was actually any of them again because I want to put a texture into thumb on and the hammering that I just done his work hardened them again. So to get the best impression from the textural hammer, I'm going to a Neil them cleaned up in a pickle again and then get on with texture ring. I'm not going to show you how to Aneel them again. You re seeing that. So the next section you'll see is the nearly kneeled rings being textured
11. Sea Waves Ring - texturing: I'm going to use my favorite cross peen hammer the my straight edge. It gives beautiful lines on the silver. Andi, I'm going to use that to put a band of lines around the middle of the outside of each ring . If you've watched the simple Hammered Rings Class, you'll know that it's not possible to get a ham a text around on the side of these rings with this hammer Capitana shape. Why remind you why it's because the hammer itself gets in the way so it comes in contact with the triplets rather then with the silver. So I don't usually use this hammer on round wire rings because I further the textures, being a bit further on and just on the men. But for this project, well, I've got the three rings would be stacked on top of each other. Each of the little wave ease. They don't sit flat against each other. I thought it might be quite a nice touch, actually, just to have the texture going down the middle, so that's not gonna do now. Could be phase two of the way I put the ring on ring triplets is nice. Firm surface behind Andi since Josh. I'm just going to get another the cushion, and I'm going to put that so knocking the camera. I've just put that supporting the, um, the whole length triplet because I was actually finding it was wanting to tip over a little bit with the way to the handles. So that's give me a little bit. Makes things a bit more comfortable if you haven't got to other cushions, and having a vote uptown underneath the handle will help to get everything rested on their nicely if you want to do that, so I'm going to be keeping the hammer more or less still and turn the triplet handle the ring with Hamas. Get to stay like that wealth in the hammer, coming round different angles. I get a much more even finish if I'm going round like some. - I just was checking this. Go around via the whole of the ring to double checks at my my checks is for the even and touching it off. You need to now. I wasn't big wax this. It was tap tap, tap tap tapped up two reasons. I didn't need to do big things with a hammer. Waxler went of mortality would turn to put the texture in. And also, as you were happy saying all the classes, I expect, um, metal rings at right angles. The head of the hammer, my tangles said this farmer is that way. So across being hammer can stretch the metal a little bit. So something else to be aware of. If I hit it lots and really hard, I could have stretched the hammer out a little bit. I'm actually that's going to for the intra the wheat sheaf ring. Triple it up. Good. Now I'd actually being aiming for biggest size. This How should be aiming for a, um Come on, that was Peter Cute. But somebody guys think I'm gonna make these show you that you can actually resize these to a Q. So what, we're going to do face text during the others? It's actually an 0.5 at the moment, so I'm gonna use the opportunity to show you how you can resize into acute. I'm sure that will see when I was aiming for, there are so few millimeters in between differing sizes that it's actually quite easy to make it a bit too slaw. I'd always prefer to make a little bit too small in a bit too big, because it is that you'll see shortly easy to resize them. - Let's check again that the textures even all the way around that one. I should kiss number three. - So again, these air coming out between and oh, you can see that one's a P and 1/2 so it might have bean that this was being hammered a little bit more to stretch it out, says a P and 1/2 on these are accused. Soldiers show you just how easy it is in the next stage of the video class. How to get these two on. Oh, so they're all the same size ready for the next bit of the class, which will be shaping them into a wave before I saw them together.
12. Sea Waves Ring - resizing the rings: the way we've seen, all of these rings are a bit smaller than a Q. This one's a peon half in these two, measured at just a little bit smaller than a pea orbit over on 0.5. So you show you two different ways that you can increased them to a Q, because we do want all three of them to be the same size, same size. The first worry is only possible. If you've used across being hammered, texture them on the first way it's attached to the more. So if I show you a bit more text during on each of them on, we do it on each of them. So the texture still matches. - I should be hard to say if I get that back into focus that with this ring is now sitting on that cue lines. The Q is right underneath the ring and move it up lettuce. So just by doing a little bit more hammering, it took me 40 seconds. Something like that, A little bit more hammering has increased the ring by half a size. That's a perfect example of how across peanuts Crystal Hammer really does stretch the metal out. So it's supposed to say, Look how you sort is would also be aware whilst you're hammering, so you don't you know, drinks too much. Now the other way. What's she going to in do a little bit more hammering on each of these as well? So that they still match? Because this ring this I've been large has got slightly more pronounced texture than the other two now. So I'm going to increase both of these down to a P and then show you a different way of enlarging the rest away. That's going down to a pay and textures looking looking better. I'm happy with that. So they do the same with this one. Okay, so or three? The same texture. I can feel my fingers that this one is a size bigger. It feels wider. So you said the other two down to a que onda. This time I'm going to use nylon hammer I'm going to do it's hammer it down. Teach under triplets service. I hammer away. One went hammer it down This Taper trip that's done towards acute. I can see already being pushed own sometimes a good idea. Boy it off again Because the Ring Mandrell is tape. It is a good idea to take the ring off part way through doing this so the other way up. Continue Gary wide otherwise, that you're using to make your ring. The more important, that is because the wider ring will be covering Morris the Taper in the triple it. And you don't want that type of work for a takeoff show you that is now on the Q. So that's now the right size still got one to a large, but some unsuited, exact same asses done here, certainly, to make you watch that what I am going to do, though, is then because I had to enlarge these a little bit. It's work hard in them a little bit more than if I just put the text Sean. So I'm going to kneel them again before I start to shape thumb and then sold them together
13. Sea Waves Ring - shaping the rings: we need there on this ring. Now I've got to now put, it's shaping into three separate rings. Were just being making because at the moment try and sold them together. They're going to sit by flat against each other. But we want them to sit with spaces in between them. Such do that. I'm gonna actually deliberately put a bend in each ring. I want to do that. I'm going to use two pairs of night on your pliers, and I expect my fund, uh, when to do is hold applies on either side. I don't have to be completely level next to each other. Parallel. They convey a different angles. It's fine, quite fun sometimes to have him a different angle. So you do, um, have a slate different asymmetrical bend on each ring. One don't do is move one damage on one. No, what's with this one up on this one down. But there we go. So what I had to do, you can see now there is that back into focus. There is twist. If I hold that next to one of the flat ones, you'll see that there is now the same shape when you do the same to the other shapes trying Hold each ring a different way. So I get slightly different twist If you don't think one is twisted enough, you can always put applies back on and twists again. Be start to see So they're going to sit next to eat shelter they would want to do. There we go. Three rings Now you put it together. I've got a very distinct twist Tooth. Um So the next thing to do is just to have a play about with them on, see, Watch positions you like them to be in which way around You'd like them to go. What gives the best of fact Call. She don't. He can turn, um upside down to see if that gives a nicer effect. Once you have decided which way around, they should go. I think I like to use with Sharpie to mark assuming at Ishaqi Pento work There we go tomorrow where you want them to be Now this is where how to be a little bit more careful, because now I've decided which position I want to be in. I don't want them to move out of that position until I have marked it. So I'm doing Does he sit with my finger inside, gripping finger in some to turn them around carefully Until I get the next point which should meet, We go. So I see what the different points at which they should meet. It was a little bit out, which is also that was quite without. That didn't move. These are just indicators and battle when I was everything lined up on the the soldering block if those lines don't completely match up perfectly, but they've now give me an indicator of where I want the which way around. I want the ring to bay to help your sitting atop soldering, which is the next job.
14. Sea Waves Ring - soldering the ring stack: theme. Three rings back over on soldiering break because it's obviously time to sort them together on you might notice that I've used a thicker Sharpie to go over the lines. Um, just so it's a lot clearer to see where I wanted everything to join together. Andi, I set up to the rings already. I've balanced one on top of the other. As you can see, Andi, I've already put my point very carefully so that nudge it re put some solder pace and easy soldier paste at the points where they're going to meet. I'm using Easy Soldier because I used medium soldier, obviously, to put the rings together. Individual rings together in the first place, so I won't remote that meeting soldier. I'm using solder paste because I find it a lot easier on projects like this to get the soldiers to state where I want to. If it's solder paste, Um, there's always so the hope that the pace might some temporarily help everything. Teoh stay together when they're balancing like this as well. You could if you wanted to solder two rings together and then soldier the third on top if you want you to do that. It would be best to sold the wings closed with hard solder on. Then do the original to the 1st 2 together with medium on the second with easy. But because I'm a glutton for punishment hand because I wanted you to see it, it can be done. Uhm I'm going to do or three together at the same time. So I'm going to add some soldier on to one two points on this one and then place them ever so carefully on top of from the 1st 2 rings. So I'm not really talk crossed to think so I can concentrate on getting you to a balanced. - Uh , Okay, that's better. That's the thing. It So I'm going to use small blowtorch. Although I've made sure that it's got plenty of fuel in there. Andi, I'm just going to start heating up around first of all. Remember that soldier Pace doesn't like it if you put the heat too closely on it initially . Really likes to you heat the silver, taking time to eat a silver up. First. I'm going to do that, go around and heat the silver. I'm going to have a tool of mother hand as well. Just think a second. Help her toe, hold things. But if it does start to slip into beyond saying much going to take George, wait on the torch off on, then reposition things carefully. Although I have to do so with tools because obviously it will be hot. So let's get started. - So just taking my time to teach up so slowly you might see a bit of the finder in the soldier place burning off some doing this. Start going across now trying to eat up all the silver evenly. So throw one. This is the danger parts soldier she flows. This is what I would like to slip rain full. Okay, point more likely to see the soldier flow on that one on. That one has said the right angle for the camera. But Cruyff is in moving it all about together. That array. All right, Just twitch this. So then Hundley, handle it a little bit more safely. Okay? So stretch out to the the Quench ports itself. See? Still. So what's my house? You still feel the heat coming off that, Rick, If I were to put silver down this book again, it would the water, which would dry off pretty quickly that silver wickets horsey going quite quickly? Because so there's a great conductor of heat that's are trying to do is purposely squash the ring. See if I can chip the rings over a tortoise testing a soldier joints and everything feels really nice and solid. Andi Yeah, I can focus. That's not looking bad already, so it's give you an idea, but it's looking like already that's so bad. So this needs to go in, pick pot to clean up on. Then we'll have a look inside to see how everything is looking on, whether we need to clean up and he excess soda.
15. Sea Waves Ring - after soldering: given the ring. A good check over on the sore joints are nice and strong. You might just get to see a like soldier between two rings there because, of course, the rings a curved. So there is a, um, a recess there that I could get my nail in on dumb. She's just being rubbing the back of force. It's got little bit shyness outside, polish it up so you can see a little bit solder there on do the same on each as the four joints. That's a nice, strong join of the state balance together, which is really good, by the way. If I was doing a wider ring, if I was doing four or more stuck together, then I wouldn't try and do more same time. I'm not that much of a lot of punishment. If I'm doing four, then I would do them as two pairs and then put them together so they would be soldiers in the round with heart solder soldier in pairs with medium soldier on. Then the tube has sort together with easy soldier. No, there's no excess solder to clean up, which is lovely. It is very rare that there is access soldier to clean up on these because the soldier fits so nicely into those recesses. Both inside are the out which if there was anything to clean up. Then again, you're back. Induce possible a ah half round file. Just need think Tapani inside and then finishing it off on some every paper. But it's very rare that very much is needed to be done. A tool now checking on sizing. Remember, I made these two aside que they turned out little bit. It's more than a Q time large doctor to accuse. He could see that that could be done, how it could be done and or so that he was important. Have them all the same size. But you remember I was aiming for a size pay. So if I hope this own that, his let's see more own 1/2 that way. The p she the peak, the peas come in the middle. They always take the measurement from the middle of the ring. Of course, because this is a wavy ring is not even at the chop chop better. Um, it is sometimes like secede. Exact size Pretty Tom the Mandel. The other way up. It's actually a P perfectly. So a couple things to note from that is that you do generally have to make the rings. The individual rings a size bigger than you want the final ring to end up heart onboard. The reason for that is your taking up some of the size you're reducing sides the means by putting a bend in those rings. There was like don't expect the ring to be the same top and bottom because it is such a regular ring, right? I mean, but you've seen not don't necessarily have the same size when you put it either way over the triplet. But that does put me perfectly for me happy with. So I'm going to push it on, show it off to you after that.
16. Sea Waves Ring - bonus: silicon wheels: tha sexual class. I wanted to show you on alternative method off cleaning up the soldier. Join on one of the extra rings that I've made, um, on. And this is a message even use if you've got a pendant drill or flexi shafts more generally known. If you're in the States or something like a Dremel hobby tour something, there's something that you can put Emmanuel in. Um, it is a silicon wheel or silicon disk. Andi. It's got, uh, grit. Got abrasive material inside the silicon. They come in different grades and even greater color coded. This is a black one on bond in the amount for the manufactures that produce the ones I use . This is a medium grade on. It's lovely because it is abrasive enough to remove the excess soldier, but it leaves a soft enough finish that you then don't need to use any emery paper afterwards. So if I've got lots of rings to do and I frequently do, then I use one of these circum wheels instead of theme half round file on the different grades of Emery paper. But this is how they start out on and need a A separate Mandrell. The special screws you screw through the hole in the middle and then scruple cup again. It's best to use a small screwdriver. A slot for a screwdriver in took. Okay, we have get into focus, so it's best to just check that type. Screwed up. Yeah, are they wear down over time as you use them? So that one's being used quite a bit. Now that is one that's the remains of one second. See the difference after it's being used a lot. Sort yourselves that stage well. It is not true, really very easy to use. Its got far too close to the Mandrell Amanda Kitts, then touch your work very easily and actually caused damage. And also, when it gets very small, it becomes a lot less efficient to use as well. So I tend to keep several going at the same time, so that when a big one ways don't about so this side a bit bigger than this, I'll get another Mandel set up with another new one and then save the smaller ones for jobs where a smaller one is needed to fit inside something such assets. Writing up this ring So a couple of couple things out of the way that the reflective shaft okay, Shaft was catching on Onda Shehade to. I'm going to use this to clean it up, so I'm going to ask the motor's running and it's spinning round. Going to go over like that. I move it in that direction. Not that because I find if I used in that direction, it's actually going to call a dick in there. So let's get going. I am still following the shape so far in the shape of the rain, and you could see what has become Shinya that started to remove that Access soldier already but not left any marks behind as a firewood subsequent continuing. We're doing that and also do it on the inside as well as this one. As I said, will fit inside, not sit. I get that back into focus is I'm moving the pendant Jill around Notley, the port video cameras trying to focus on lots of things and moving around. So that's all nice and smooth. All of the excess soldiers being removed. I can't feel the soldier joint anymore, and most importantly, it is a nice Sir Moos finish. There's no Emery paper needed no sounding leader to remove any extra marks. So if you do have access to a pendant, really, or to general something like that, then do you have a look out for the silicon? Disks has said they are a very right useful addition to your toolbox.
17. Sea Waves Ring - final thoughts: ring that I've just made happens to fit me perfectly. So I think it's going to become my new favorite every day. Ring toe where it's really lovely, simple, easy to wear. But it's got a nice, distinctive look about it. Although I just used three rings that together to make my ring, you could, of course, go for 45 on by changing the gauge of the wire. Maybe by going to assist in a gauge, but maybe more rings. You could get a very different look to the ring, maybe a bit more delicate, because the caps will be smaller. So I think I might find time to make that version as well and show it to you to the state. I hope this class has helped you to practice and improve your soldering techniques. But as always, if you have any questions, please let me know. I don't get back to since I can. It would be lovely when you finish your rings. If you could take a quick photo and share them with us, as I always love to see students work. But for now, thank you for watching
 Joanne Tinley, Jewellery Designer, Tutor and Writer