Transcripts
1. Welcome to the Class!: Are you an artist passionate
about wildlife painting? Maybe you're
searching for ways of painting your favorite
natural subjects, maybe insects or butterflies. But feel frustrated by the overwhelm that
it brings you when you think about picturing all of these complicated textures
and color transitions. If that's your case,
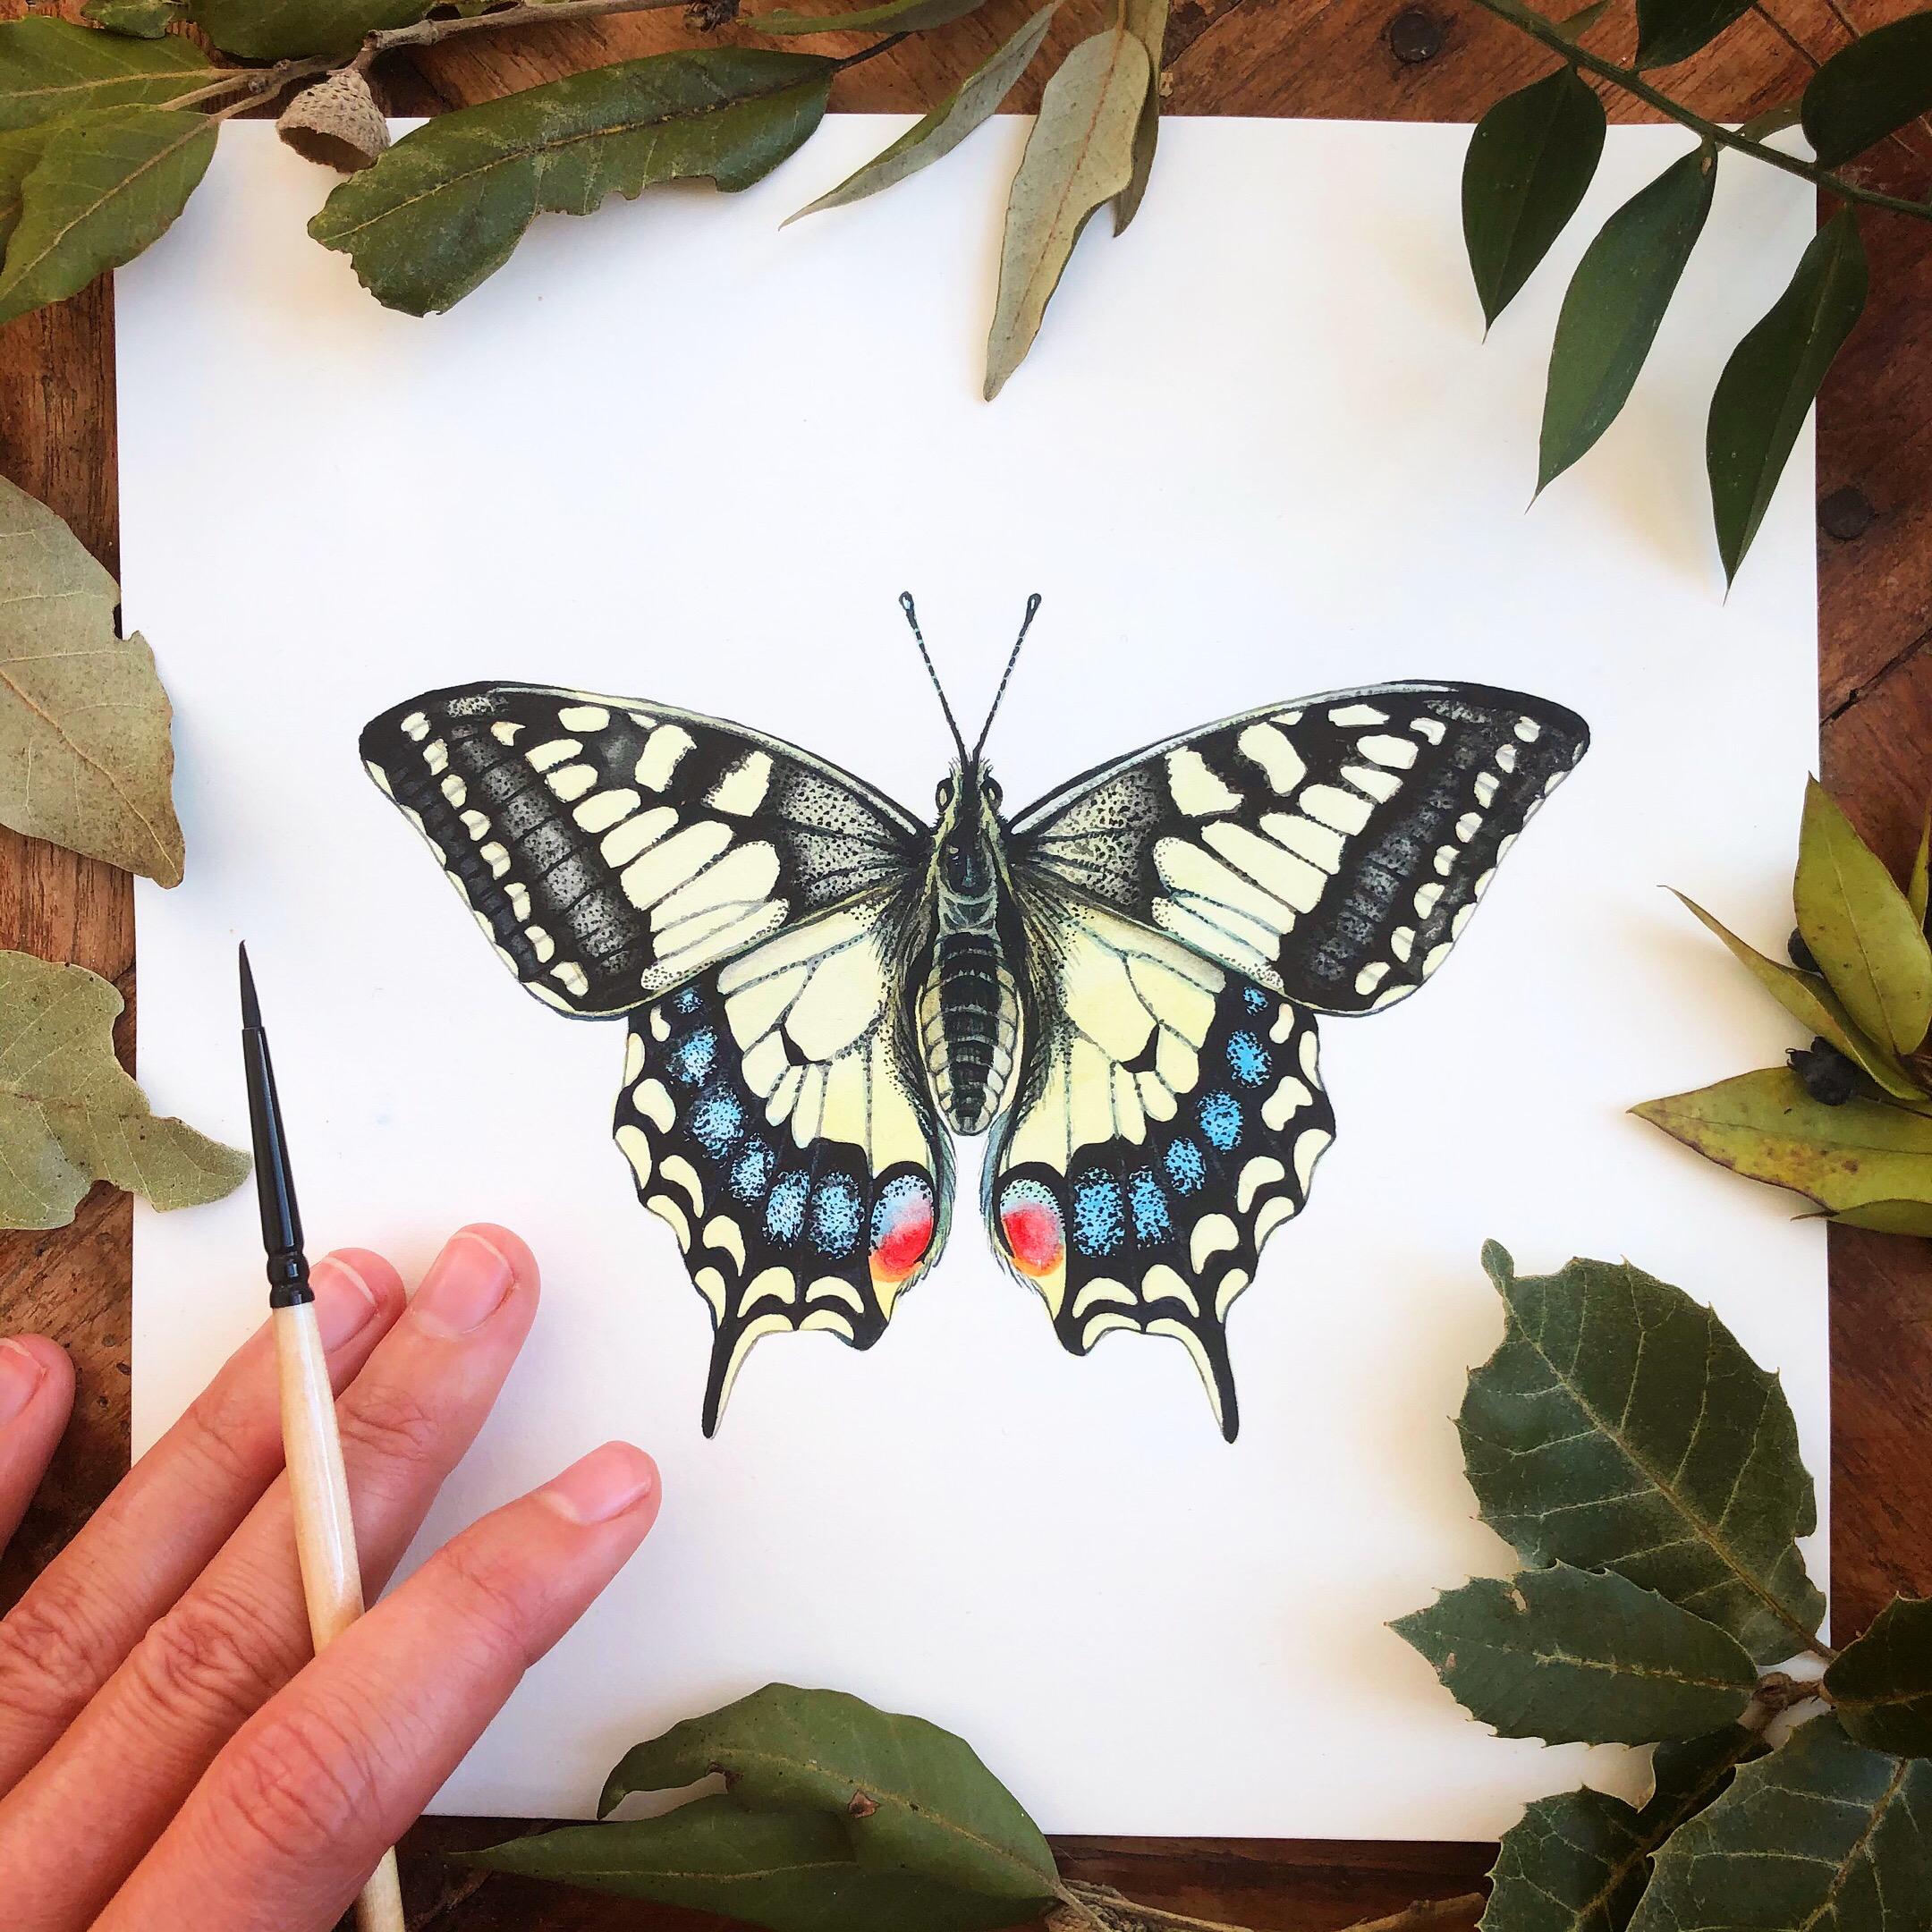
this class is for you. In this step by step process, I will show you how to paint this beautiful butterfly with watercolors in
very simple steps. In this class, you will
learn one main secret of watercolor that you will use in your whole
creative career. You will learn how to approach insect painting
and what to start from so that you
avoid overwhelm and never question yourself if
you're doing something wrong. And lastly, I will teach
you how to add realism to your illustrations and add textures that will really
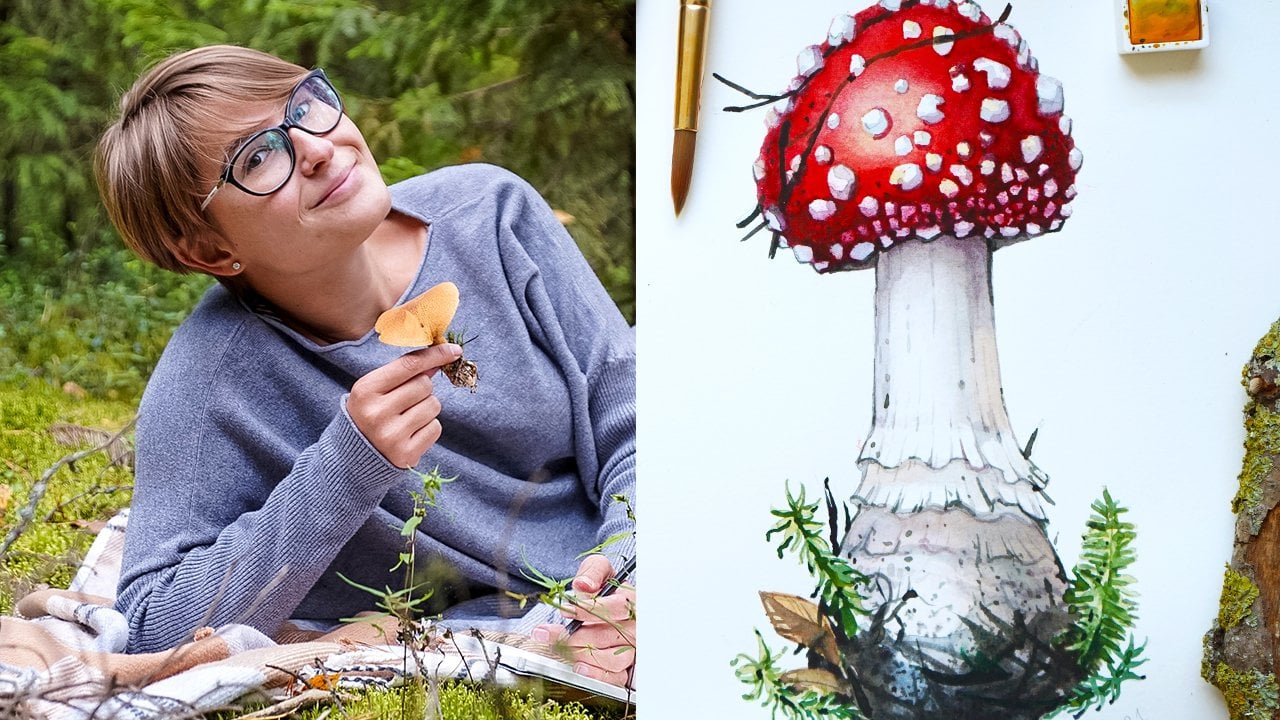
make your paintings pop. I'm a nastasia, an artist, book illustrator and pattern
designer inspired by nature. And in this step by step class, I will walk you through
my whole process of creating a realistic
and vibrant illustration. Swallowtail butterfly. So next time when you're
outside and you took lots of pictures of your favorite
insects or butterflies, you'll be able to
paint them on your own using the techniques I will be showing you in
this master class. This class is open to all
skill levels and I will provide you with a reference
picture, but that's not it. You will also get a ready to transfer drawing that you can easily transfer to
your watercolor paper and start painting right away. This will be especially
helpful if you're a beginner. Are you ready to start expressing
your love for nature on a whole new level and create incredibly vibrant and
realistic insect paintings? Then I will see
you in the class.
2. Art Supplies: As for the art supplies,
I'm using cotton, watercolor paper, so my
favorite paper is arches. I receive a lot of
questions about my favorite paper,
so this is the one. It's cotton paper,
so as you can see, pure cotton and it's 300
gram satin finish paper, so it's hot pressed. So this is a very
personal choice. I think all of the artists have probably different
favorite brands of paper. Some prefer cold press, some prefer hot pressed. This is just my
personal preference. If you wonder what paper I will be using,
this is the one. This is just the sheet from this block that I
separated from the block. As for the brushes, I use synthetic brushes with a sharp tip round synthetic
brushes, not flat ones. These are the brushes
I will be using today. Probably I will end up
using only two of them, Maybe these two or these two. But basically, you need one
small brush, for example. This one is number
zero, I believe. And this one is number
two, so something small. And then one medium brush. So it can be a number eight, number six, depending on
what you have on hand. The important thing is
that the tip should be quite sharp to be able
to do all the details. Then, as for a watercolor paint, I will be using some
of these in tubes. These are by Nevsky Palidra. I also have these in pants, but I think today it's
just going to be easier to squeeze some here so that you can see what
colors I'm using. That's why I will be using
watercolor in tubes. The quality of water color
is exactly the same in tubes or pants. Don't
worry about it. Then of course I
have my water here. There you go. I also
have paper towels. Paper towels is something I
usually use when I paint. If I need to take off the
excess of water from my brush, I do it with my paper towel. That's what I'm going
to use as well. I guess that
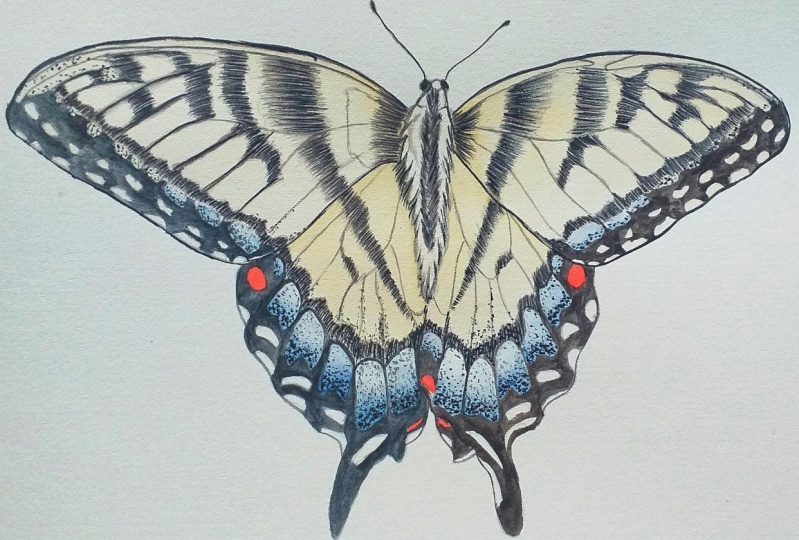
3. Important Watercolor Rule: I have my reference
spectre here. This is the drawing.
So see, it's the same, just moved differently then. This is the image I created
with my procreate program. Basically what I
did, I just deleted the background so that we
can see only the butterfly. We will not be painting all of this beautiful
background here. We will be painting
just the butterfly. That's why I like using these images on
white background so that I can get really
concentrated on the image and not
on all of the rest. First, before starting to paint, I wanted to show
you this scheme. Before we start the
painting process, I wanted to explain you this important concept
in watercolor painting. In classical
watercolor painting, we always go from light to dark. It means that before
starting to paint, we need to analyze our
reference picture and see what is the lightest tone on our reference and what
is the darkest tone. I found three main
tones on our butterfly. This yellow color
here on the wings, we have these blue spots, and then we have this
black pattern here. What I did, I actually
transformed this colored image, this color image, into a gray scale image
just on my ipad. But you have other programs that you can do it with or
even on your phone. Now we can clearly see which
one is the lightest color. You see that this yellow is the lightest color
on our reference. Then the blue one
is the second one. And then of course, the black
one is the darkest color. Which means that we will
be starting from yellow, then blue, then black. The black color will
be added at the end. In the beginning, we're not thinking about all of
these textures here, all of the black details. We will be adding them
after we've created this yellow color
in the blue color. A couple of more things. I wanted to say that I chose this reference for this reason because I can explain you here, this process of working
from light to dark. First of all, then
I thought it's going to be fun to create
these textures here. I always receive questions
about how do I create textures on my images. Here's a perfect
example of this, a dot pattern that
we will be creating without using gas or
acrylics or something else. We will not be using
white color today. And I will show you how you can obtain this result without using any white. That's
going to be fun. I will put my reference aside. I will start
squeezing my colors. What colors should
we have ready? We're going to use
just a few colors. Basically, we will need yellow. I will be using cadmium yellow, or you can use lemon yellow. I prefer cadmium. You can also use
Akra if you wish. We will be using
a blue color that we see here on our butterfly. Any kind of blue will work. It depends on you what
you have on hand. I have this blue here. I don't see the name
because it's quite dirty. But it says bright blue. So it's just a regular blue. But you can use cobalt oil
or ultramarine if you like. Just a blue that seems close
to this one you see here. We will need just a
touch of orange or red for these spots here. Then I will actually
show you how you can create this very dark
color without using the black. I will explain you this concept later on during this session, but my principle is that I
don't like using pure black. Just a simple flat black, right of the tube
in my paintings, because I think it's
not the best solution. And we can create dark colors
without the use of black. To be able to create this black, we can use some
green, red, purple. These kind of things
prepare these ones. I would suggest
you to use green. This is like a sub green, A purple which can be different in any sets depending
on your set. Then a dark blue would
be nice as well. Maybe something like
indigo will be nice. I have my indigo here, which is a dark blue. It's great for creating
dark colors like this one. That's all about colors.
4. First Wash: Okay, so let's get started. The first thing I
will do here is I will cover the whole surface of the butterfly with
my yellow color. I need to mix a color that is close to this light
yellow color here. I will take cadmium yellow. So this is just a warm yellow. I think it's quite close to
what I see in my reference. I'm just squeezing a little bit. Now. I will take my water, I'll put it here. And
just one more thing. I wanted to tell you. I will probably start to paint
the whole butterfly, but I don't think we
will have time to finish all the details on the whole
butterfly just in case. I will probably get concentrate on one side
of the butterflies for the details and then I will see if we have time to
finish it all or not. But in any case, you will have the idea because one side of the butterfly
will be finished. You see I'm adding
a lot of water. I'm adding a lot
of water to obtain a very light yellow
color in water color. It's all about quantity
of color and water. If you want a very light color, you need to add a
lot of water to it. That's exactly what
I'm doing here. First step, I will
just cover everything uniformly with this
light yellow color. The only important thing here is not to cross this line here. I need to remain within
the area of my butterfly. Now, I don't care about the
details and everything. I'm just going to
cover everything. But these blue spots, I will this side of the wing, this one with yellow, this one. But I will not touch this area
here where I see the blue, because blue and yellow are
complementary colors and I don't want them to mix together and
create a muddy effect. That's why I will just avoid
touching this area here. But you can cover everything
else with your yellow. For now, really, it
doesn't matter a lot how beautiful your wash is. The only important thing
is not to cross the line, but this is the first
layer we're making. Again, don't forget to leave this area here white for now, because we will
apply blue there. You see I have some spots of blue also on this
side, somewhere here. I will probably leave this
one without yellow as well. I will be using the principle of layering if you're not
familiar with layering. Layering in water,
color means I will not try to paint the whole butterfly as I see it on the reference. I will not start to add
all the colors at once, but I will create these washes or layers that
will allow me to obtain the volume and the
saturation gradually and avoid overwhelming stress
of messing something up. Because in water color, we cannot just use the white color and
correct the mistakes. If you've covered the white, that's the white is gone. My goal is to preserve the areas I know are light
as much as possible. That's why I not covered
this area here as well. Now we need to leave this
yellow dry here and I will use my light
blue for the wings.
5. Applying Midtones: Let me open the color. Yeah, the only problem with
the water color in tubes that sometimes it gets stuck
and I cannot open the color, I will use another one. So you can actually use
colors interchangeably. So I will use cobalt. It's going to be pretty
much the same thing. I've put some cobalt
on my palette here. There you go. I will
do the same thing. I will dilute it with water to obtain a very
light blue color. When you use water
color in tubes, you can see that the color is very concentrate,
very strong. You always need to
add water there. You don't just take the
color and paint with it, You always need water. And the intensity
of your color will depend on the amount of
water you put there. I'm quite happy with
this light blue. What I will do, I
will start to apply it here to these spots here. I don't care if it's pretty
or not at this stage, I just need to put this
color right there. One important thing
is that I don't want it to touch the
yellow color now, because my yellow
color is still wet. If I accidentally go and
touch the yellow with blue, they will start to mix together because water color
goes where water is. That's why to avoid it. To prevent it, I will leave
this small white line, the line of dry paper, between the yellow and the blue, that these two colors
don't mix together. I hope it makes sense. Also, I have these white spots here that I will try to avoid, so I will not touch
them with the blue. Actually, I did
touch one of these, but I think it's not a big deal. It's not going to be visible. I'm just continued to do it on the other
side of my butterfly. And you see I'm
not even trying to remain within the
area of the spots. Because anyway, we will be using black after like the
very dark color. And we can fix all of it so we can make the nice
outline and everything. Now just about putting the color where we see it
and filling this area here. I will continue on
this side as well. Again, I am very careful of not touching
the yellow right now. If your yellow is
dry, it's fine. You can actually go quite close to it because when
the color is dry, they will not mix together. But if it's still wet,
please be careful. You see this part
was already dry. I just can go on top and paint. This is the first step. First layer is to add
yellow and this blue color. Next thing, I will already paint these little touches
of orange or red here. Just not to forget about them. I will mix a color. I will take some red. This is ruby, or you
can use cadmium red. Actually, I think I
will use cadmium red. It's just a normal basic warm
red that is very common. I'm squeezing just a tiny bit on my palette because I know I will not be using a lot of it. I will just mix it with some
of this cadmium yellow. I'm taking some from there, adding it here, and
adding some water. I think my brush
was a bit dirty. I will wash it and do it again. I obtained this orange color. Now what I will do,
I will apply it to these spots that I
actually covered already accidentally
with my blue. But because it was only
one layer of color, I don't think it will
be visible. It's fine. Now, adding this orange already, I also see it here and I
also see it on this side. I think that's pretty much it.
6. Creating Smooth Color Transitions: Next step, I need to dry
this yellow layer here. The first layer, I can wait until it dries naturally
or I can use my hair dryer. I think I will wait for now. And I will use this time
to mix more colors. I want to add to these wings volume
some color graduation. I want to a different
yellow, a darker yellow. To be able to do so, I
will just add some yellow. My cadmium yellow, I will obtain this slightly
darker yellow color. One thing I wanted to tell you about this is something I
actually never thought of. Because maybe when you
paint for such a long time, you forget these things. But during the course that I was holding
during the last months, working with my students was
interesting because they brought up some questions
that I think are very important and that I
didn't even think of. They were asking me, Some
people were asking me, how do you darken your colors? I realize that a lot
of people use black to darken their colors because
it seems very obvious. You just add a little bit
of black and that's it, you got a darker color. I don't suggest you doing
that for different reasons. First of all, it will make
your illustrations or your paintings more
dirty. Just simple. Black will always
leave colors dirty, dirty, and more dull. If you want your paintings
look nice and saturated, don't do that, because black
will kill this saturation. The other reason is
that you will obtain a more flat and
poor looking color. That's why when you want
to darken the color, do use different
colors to do that. For example, I wanted to
obtain a different yellow. So a darker yellow what I did, I added some okra to it and you see I obtain a darker yellow. Same thing with blue,
same thing with red. So you don't have to use black color to
darken your colors. You can try to use the
other colors to do that. Of course, I will
show you this process here in this session. Even for the black, as I said, I will not be using
the pure black. I will show you that you can use this method even
with very dark colors, thanks to my students. Now I'm aware of
this challenge of this problem because it is a pretty
straightforward solution, I think, to use black, but it's not the best one. Well, at least for me, like I was trained this way, I have a classical
art education, and my teachers were always saying me not to use black
or white in watercolor. And this is what I always did, and this is what I
teach to my students. And this is the classical
watercolor approach, I would say, let me just tell
you what I'm doing here. I'm mixed this darker yellow. And I'm now trying to separate these wings
from one another, the upper wings from
the lower wings. And to be able to do so, I
apply this color on the, on the lower wing where I see these two wings
touch together. And then near the body as well. Then to be able to make this color look smooth and
create a smooth transition, I smooth the edge by
washing my brush, cleaning it with my paper towel, drying it with the paper towel, and smoothing the edge. This is the method
I use all the time. I think it's very handy
because you see that I was able to introduce this
new color seamlessly. I will demonstrate this
on this side as well. All you need to do is
to put this color here. First of all, make sure that
this layer is already dry. This is very important,
mine is already dry. But if your layer is still wet, you need to dry it first
using your hair dryer. Maybe because otherwise
it's just going to mix with the previous layer and we will not have
the desired effect. This is very important. We're using different
techniques here today. First technique
was making a wash, basically wet on wet technique. Now we're using the
wet on dry technique. It means we're painting with
wet color on dry surface. Oops, you see only by adding just a touch of
this darker yellow, I was able to create some depth. I will actually do the
same thing on this wing. I want the viewer
to get the idea that these wings are not flat, but that there is like
this little fold here. And I want the body to be lighter than
this part of the wing. That's what will give
me this illusion of something three dimensional. I put this color and
again I'm smoothing the edge with the method
I just showed you. So you can actually use
it this way as well, but I think this way you can clearly see the brush strokes, you know, you can see that this is one color, this
is the other color. So to be able to give
this like more of an organic look and create
a more seamless transition, you can use this method
I just showed you. See there's really, you don't need to do a lot
to be able to do it. Just don't forget to dry your brush with your paper
towel. This is very important. This is the beginning
of our painting. Now, next stage, I will start to mix the
darker colors already.
7. Better Alternative to Black Color: First of all, I want to
point your attention to the fact that there are different kinds of
dark tones here. We have some really
black colors, then we have these more grayish
tones like on the body. And maybe here,
that's why I will mix probably two or three
different dark colors. Then here as well, we see that this blue
is not a uniform. We have very light blue
color here, almost white. And then we have
this darker color on the lower side of
these sections. So that's why I will
also mix one more blue, just a darker blue.
And it's very easy. As I said, you don't have
to add any other blue. Sorry, you don't have to
add black color to it. All you can do to darken your blue, you see
me doing here. You can just add more
of the same color. So use the more concentrated
version of the same color. Or what you can do is
add some purple to it, just a touch of purple
to make it a touch of red or a different, darker blue. For example, this indigo. Indigo is one of the
darkest blues available. And it's amazing for
creating dark colors. As you can see, it's
dark from the tube. It comes like almost
like a black color. But when you dilute
it with water, you see it's blue. But it's a dark blue
darker than this one. When you mix them together, you see I obtained
a different blue, dark blue, than this one. This is how you can darken
your blue without using black. You will obtain a much more
rich and saturated color if you would mix it with black. My advice, don't use the black. This is just my
personal opinion. Now let me mix
these colors here. I see that on my reference, this is something grayish. So it looks like a
dark gray to me. So that is what I'm
going to mix here. There are a lot of ways
you can mix a gray. I will show you one of the ways you can use some Okra or any
kind of brown color. See, I've just used
some of this old color. I had on my palette some red. And I'm mixing it
with Okra to obtain this brown color,
I would call it. Then I'm adding some
indigo to this color, and I think I added
too much indigo. Now it looks like just blue. I will take some of this color
away with my paper towel. That's why it's
very handy as well. I will add more Okra to it. I will make sure that there is equal amount
of Okra and blue. You see, now I
obtained a new color. It looks quite green to me now, because okra is yellowish
and blue is blue, yellow plus blue will
create green for us. That's why my color
looks a bit greenish. If I want to make it look
more gray than green, I can add a color that is on the opposite side on the
color wheel, which is red. That's why I will add
some of this cadmium red to this mix and I will
see what happens. These concepts I'm telling you here are from the color theory. If you are not familiar
with color theory, this is something you can
totally dig deeper into. Because in my opinion, it's very important for any kind of artist who paints
with any kind of colors, watercolor, gas oil, anything. Color theory is super
helpful for mixing colors. This method here, this
knowledge of color theory, allowed me to create
this neutral gray. My gray doesn't look
like green anymore. It doesn't look
like blue or red. It looks more or less uniformly, this is 1 gray. And then I will another one, this almost black color here. To mix it, I will add some
of what is this color? Acd violet. It's basically a purple, pinkish purple,
something like this. You can use magenta, you can other kinds of purple. For this one, I
will mix it with my Indigo. I will add more indigo. I think this is not
enough what I had here. The trick here, I will be
using very saturated colors, A lot of pigment, and
not a lot of water. What I will do also, I
will add just a touch of green probably to my
mix to see how it goes. For now, I will just put the green on this
side of the palette. You see this green is
very dark as well. This is just green
from Nevsky Paltra, but you can find
it in other brands under the name of Sap Green
or something like this. This is just a very
neutral green that I use all the time for everything,
especially botanicals. I suggest you having it in your toolbox and I'm
just taking a touch of this green and adding it
to my mix of Acton violet, ultramarine indigo,
and then green. You see, I obtained this color. I don't even know if you can distinguish the color
from the screen, but it is, but it's not black. When I will apply it
to the butterfly, you will be able to see that this color looks much richer, more saturated and vibrant
then just a flat black color. So this is just my approach. And then if I want, I can create a third
color by just using the same color here and
adding some water to it. I see now it's very, very blue. So I can add more inacdone
to make it look more violet. Then let's see if I
add some opera to it, I will get this gray again. You see it's a very
complex color. It's not just black,
diluted with water. It's not this flat, simple gray. It's still a gray, but it's
more complex and more rich. And it will result into a
better painting for sure. Once I have these three
colors on my palette, I can start to work on
these darker details. Before I pass to it, I will tell you what
I'm going to do first. I think at this stage
I will start to work on this part of the
wing because I'm not sure I will
be able to finish this one first thing I will see what is the lightest
dark color here. I think the lightest ones
are here. And they're here. And then this side of the
wing is almost black. I will be painting
this at the very end. For now, I will just get
concentrated on this part. One important thing, these
areas here are quite fuzzy. You see we have these dots
and this pattern here, I will create it now.
8. Introducing Texture Using Lines: The first step I
will do is I will use my light gray color. Make sure this
layer is dry area. If it's dry, you can go and
do what I'm doing here. I'm just looking at my
reference and adding this gray where I see it on my reference,
the tip of my brush. I'm not going with
the body of my brush, I'm using the tip of my brush. You can see I use these very thin strokes to
already create this fuzziness, this texture I see
on the reference. I will just fill these areas of my butterfly using this method. Instead of just
going and applying the color with the whole
body of the brush, I'm applying it with the tip and I'm using these short lines. You see it already created this texture here
for me very easily. Then I will just continue on
this upper side of the wing, I will leave this tiny line here untouched because that's
what I see in my reference. There's a gap between
these two wings. This is exactly what
I'm going to do and I'm just going and
adding these lines here. Again, I'm using this method. I will not be using Gag or white acrylic
paint to add details. I'm thinking before on how I want this
texture to look like. Making these strokes
here will allow you not to use the white after you already create
these white details by just making
these gaps between the making this texture. I will do the same thing
here on my reference, I see that there is this
gray color going on here. I will probably
dilute this color even more to make
it even lighter. You see I've just added a touch of water and my color
instantly became lighter. I will go and continue this paporation on this
lower side of my butterfly. I'm just creating
these very short hair strokes, thin lines. At this stage I can cover
this white I had here. We needed this white
just to separate the blue from the
yellow while painting, and now it's time to cover it. You see me doing with
these very short strokes. I'm already creating
this texture here. There you go. Same thing here. I'm starting from
this light gray. And then I will gradually add more depth and more dark colors. Don't worry if now
it looks a bit flat and that you don't
have this instant, very saturated, very
beautiful result. This is one more thing
I wanted to talk about. To be able to create a realistic artwork using this method, you need to pass this
intermediate stage, which is not a
stage where you see like all the details and
everything looks amazing. This is the stage
when things can look a bit messy and maybe
a bit unfinished. Sometimes you may think, oh, am I doing it right? Am I going to make it
look good? This is fine. This is just the stage that
you need to push through. You just need to
keep, add details, colors and layers very
gradually and naturally, you will obtain a
realistic result. Realistic result is not
only what colors you use, it's mainly about how much time you put into
creating your works. I could create this butterfly
much less amount of time, 15 minutes, 30 minutes. But the result would
be less realistic. So it will be more
of a sketchy look and less detailed look, which doesn't mean it
will be a bad work, it's just a different
kind of work. But if you want to
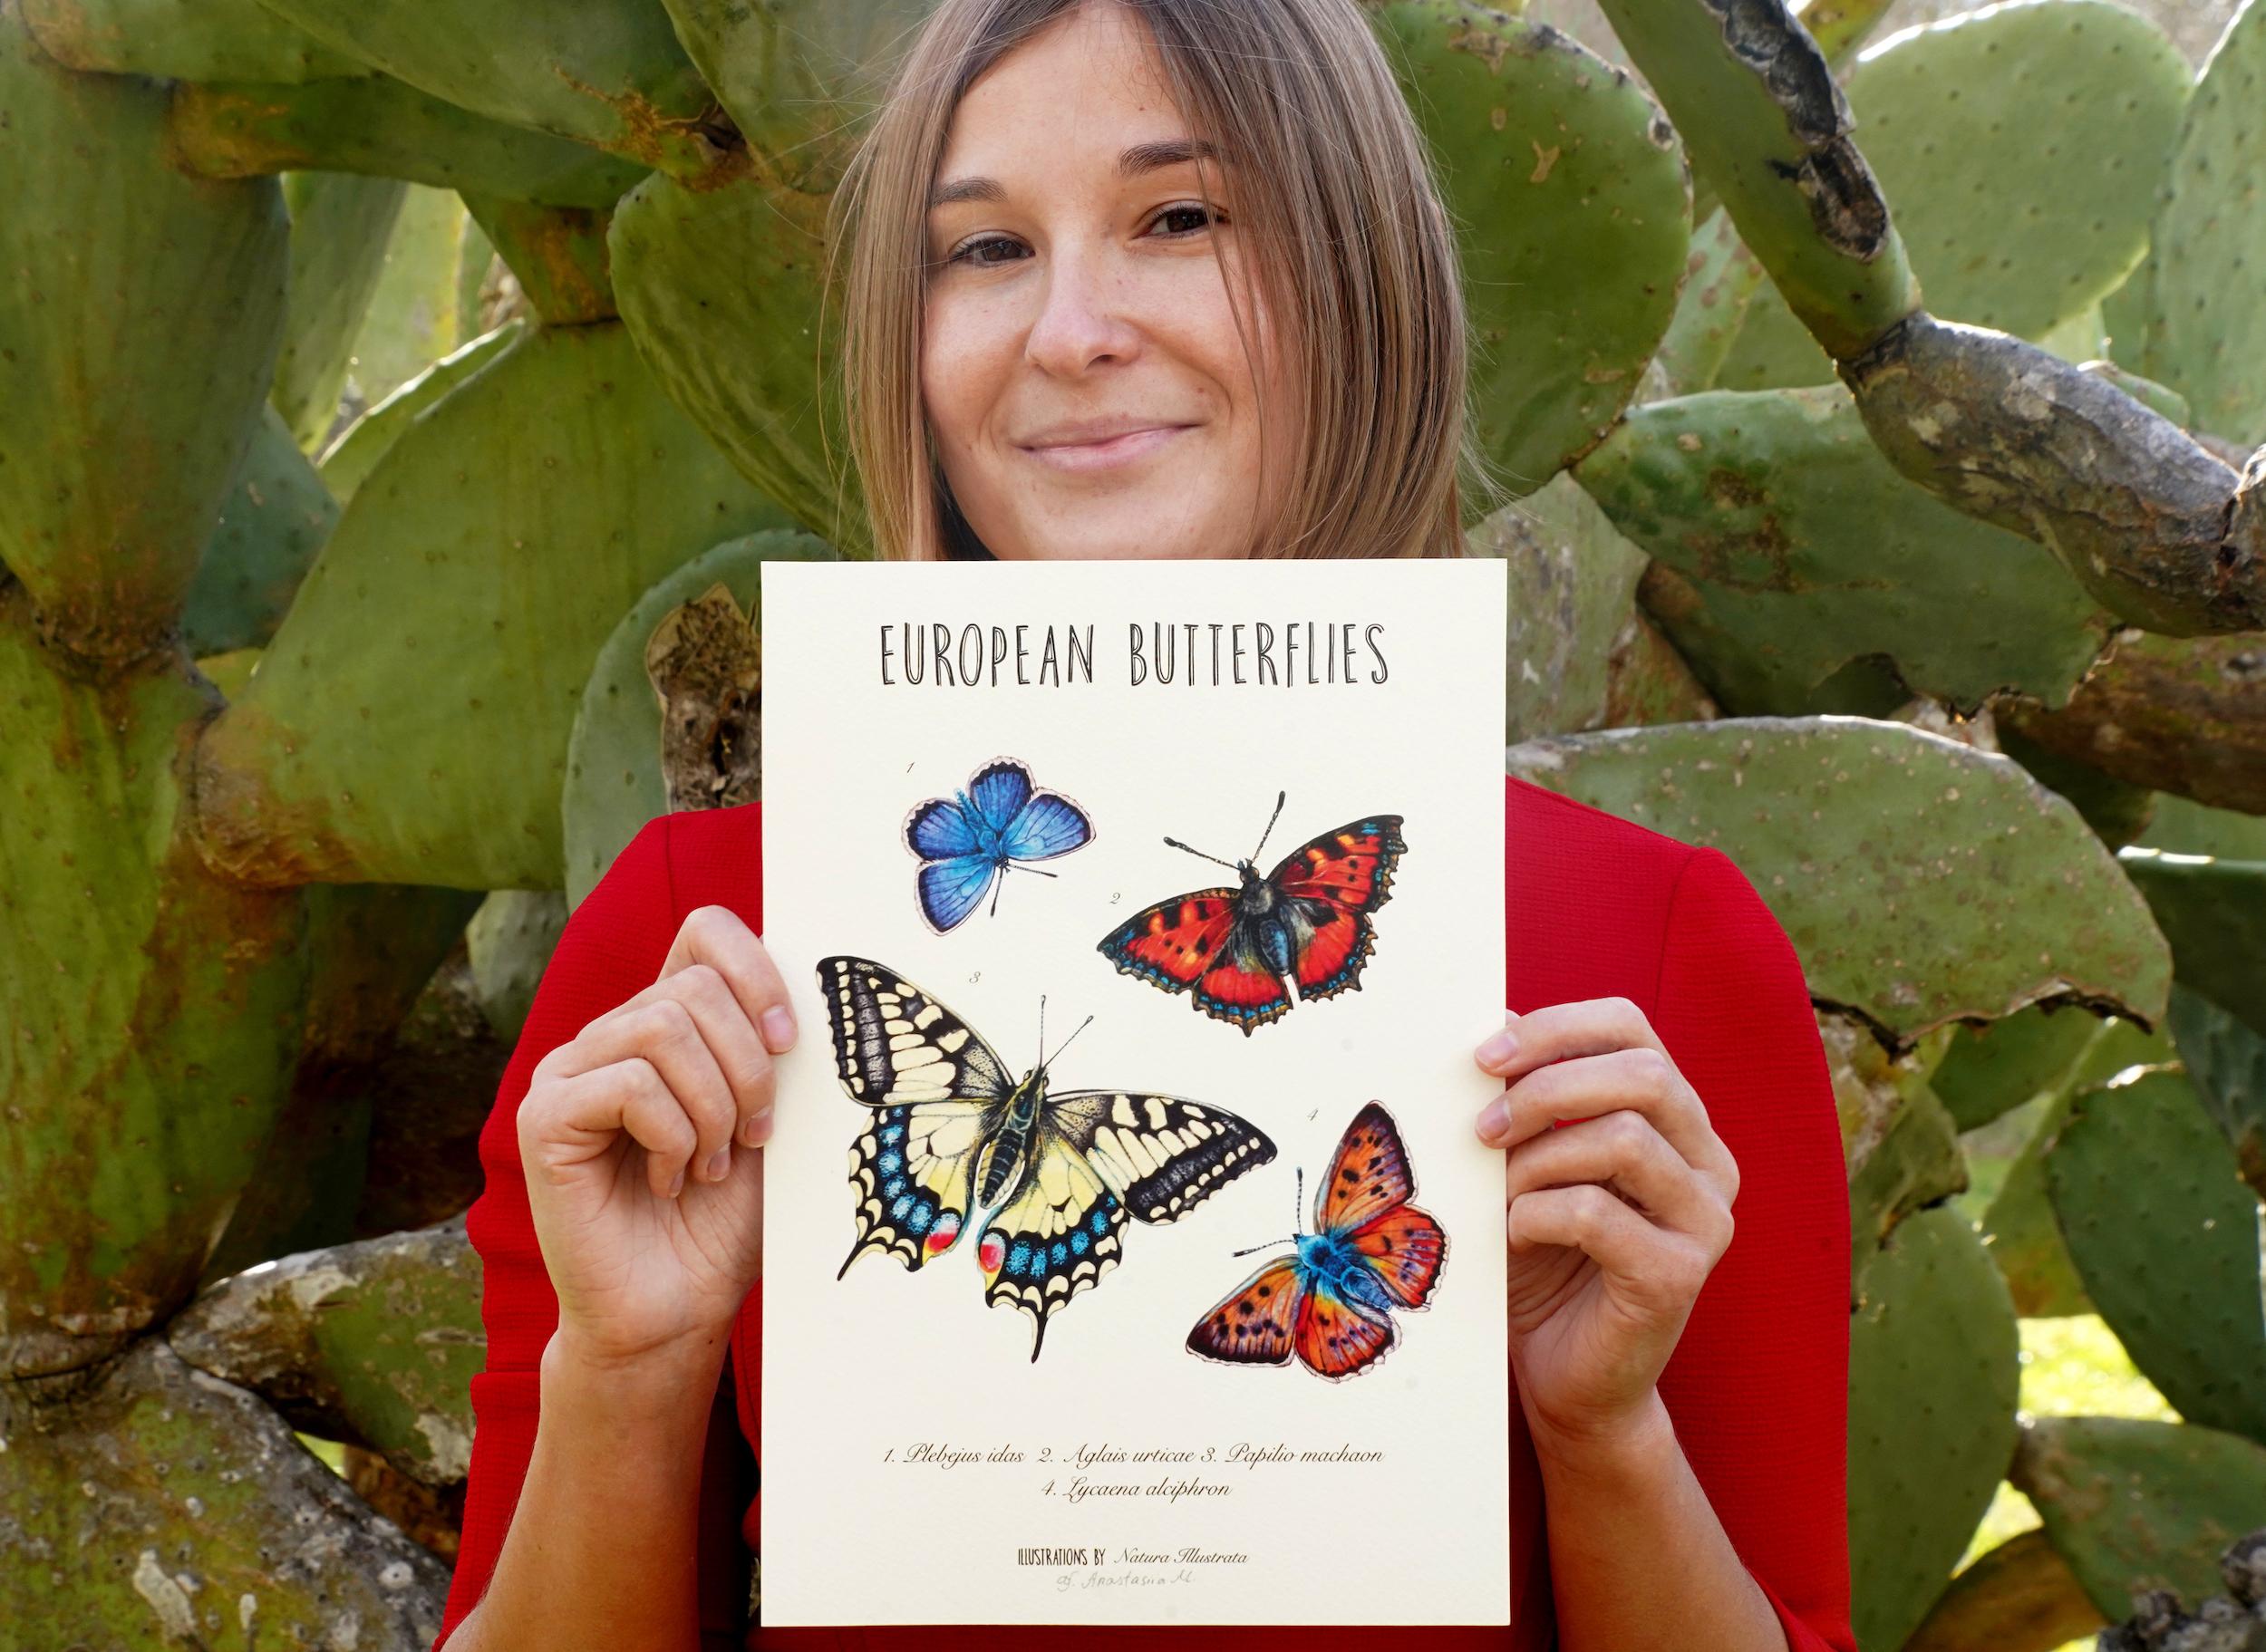
create something that looks like a botanical
painting or, you know these illustrations
from the old books. Entomology. This is
personally what I love. I'm really inspired by the old, old illustrations
and I just love the way they look at the
same time realistic, but also with personal
touches and details. They don't look
like photographies. You can totally see
that the illustrations. These are paintings, but there is still this amount of realism. And they're all made
with watercolors, mainly a botanical illustration, entomological illustration,
animal illustrations for like natural
history books are all made with watercolors. This is the technique that these artists of that
time were using. They were all using this
layering technique, which means you patiently add layers on top of
one of the other, then you obtain this vibrant,
realistic looking effect. A lot of people also ask me, it's impossible that your
paintings look so vibrant. Maybe like you use acrylics
or you add gage to it. You actually can obtain very realistic and
very saturated, very vibrant results
only with water color. Using this technique, by adding layers one on
top of the other, already started to add some of these veins on this butterfly. In the spots where
I add this gray, you see I have already
a darker color when you add layer on
top of the other layer. Because water color
is translucent, you will still be able to
see the layer underneath it. And this is the trick
on how you create all these beautiful
transitions and different color graduations
just by using layering. This is a very simple concept, but it needs time. You can see we
will be working on this potter fly
for about 2 hours. I will see what I
will be able to achieve in this amount of time. Usually, when I just paint for myself without
speaking, I am quicker. But because I'm
explaining to you, I'm a slower because I need to think what to say
at the same time and make you understand
what I'm saying. That's why I'm a
bit slower today. But I think you got the idea. You see, I'm not
touching this area here for now just because
I know I want to make it dark and there is no need for me to go with gray there. I will go directly with
black after with black, with this very dark
color which is mixed. Instead, I'm just
going and working on all the other areas
that I think are lighter than this area here. I'm already outlining these
veins on the butterfly. Insects are an amazing subject, not only for beginners. It's great for beginners
because insects are symmetric, symmetrical, and
they're easy to draw. You don't need to spend a
lot of time on the drawing because it's not the same
thing as the animal. In mammals, for example, it's more difficult because
you have the expression, the eyes, the head. It's more difficult
to capture insect. Even if your wing will be a couple of centimeters
smaller or bigger, there will be no
much difference, nobody will ever notice it. That's why insects are more
forgiving from this point of view then I think insects
are also very fun to paint. You can really play around
with textures and learn all of these techniques I'm showing
you here in a fun way. And also experiment with textures like we did here
on this wing for example. This texture, like the
other important thing, this texture on the butterflies, are often similar to the
textures you can create on fur, for example, on fur or feathers. This is the first step
in illustrating animals, I think is making insects. It also depends on
your level of skills. If you are already
a skilled artist, I think you can absolutely paint animals and other
subjects with no problem. But if you are not that skilled, if you're just starting out, I think insects are a great
way of trying something new. After botanicals, after painting leaves like mushrooms
and flowers. If you want to start
to paint animals, I highly recommend
sugar from insects, then gradually making your tasks more difficult, for example. I don't recommend you to start from super complicated,
right? In the beginning. This is the thing I always
say to my students, because starting from something
very difficult and not appropriate for your
level is not good. Because you will just get
frustrated and you will think, oh, I'm not good enough. Like I don't like the
results I'm getting. But it's totally fine. It's totally understandable. You need to start from
something more simple. This is as simple as it is. Animals are a more
advanced topic then flowers and other
botanicals like fruits. I think gradual approach is the best thing you can do if
you're just starting out. Because if you want
to paint portraits, let's say landscapes, you
start right away from that. Very likely you will not be satisfied with the result,
but it's not because of you. It's not because
you're not good, it's just because the subject
matter is too advanced. Start with something
simple, You see, I've created this
outline already, just to guide myself
a little bit. I think at this
stage I'm done with this light gray color. I will just add a
couple of touches here. You see I've created the body. I made the body a bit more detailed
already at this stage. You see I'm leaving all these yellow details
that I want to be lighter. I'm not covering them, but I'm using this same hairy
texture, I will call it. Then I will already paint the
eyes with a darker color. You see I did
actually everything with my big brush.
You've noticed that. That's why I love these round
brushes with a sharp tip. That because you can use the whole body of the
brush and that you can work just with the tip
and create very thin lines. Oftentimes, I just use
only one brush for everything because I want
to work on the eyes. I want to have a
bit more control. That's why I took a
slightly smaller brush. And then I will make these, really paint these
antennas as well. Be careful with antennas, make sure your lines are very thin because in watercolor we cannot just go and
erase what we just did. Well, there are some methods
to correct mistakes, but it's better not to
make these mistakes. That's why when you
paint these details, try to be very focused
and make thin lines. Oops. There you go.
9. Applying the Darkest Tones: I will darken this
blue color here. I'm just taking this blue
I just mixed with you. I will apply this blue to the lower side of each
one of these spots here. For now, I'm just applying it. And then I will smooth
out this edge as well. With my usual method, I think I will go and do
the same on this side. There you go. Now I just wash my brush, clean it with my paper towel. And again, I'm smoothing
this edge a little bit. I'm just blending these colors
nicely into one another. You see it works better
with some colors. For example, with yellow, you can obtain like almost
seamless transitions. With darker colors such
as this blue color, it's a bit more complicated. But we don't search for perfection here
because we will be adding all of this texture after
it will be covered. Anyway, that's why
I don't really care about making things perfect. Now. It looks fine for me. For now, what I'm doing here, I already started to add this very dark
color. It got dry. I added some water to
it to activate it. Again, I will start to
paint these areas here. What I will do, I will
start from this lower side. At this stage, I just need
to be very, very careful. I'm working with wet
on dry technique, almost dry brush,
I have a lot of pigment on my brush
and almost no water. This is why I am obtaining
this super, super dark color. It looks like black,
but it's not black. It's more blue or purple. Because I have a lot of color
and not a lot of pigment. I have a lot of control
over what I'm doing. You see that my color
is not going anywhere. It goes exactly where I put it. I create this very
textured mark. So all I need to
do right now is to be careful and very patient of, of not accidentally touching the things I don't
want to cover again, because we're not
using any white. I need to think in advance what is going to be white here. That's why you see, I'm
avoiding, for example, these spots here that I see
on my reference are white. I will make just the outline
with a very, very thin line. I like making the
outline personally, this is what you don't have to do it
if you don't want to, if you do want to
make an outline, make sure it's very thin because a dark outline can actually ruin all the
work you just did there. I'm already creating these
veins in the middle of these blue spans
because that's what I see on my butterfly reference. And you see how our
butterfly instantly started to look more alive, more saturated, more vibrant, just because I'm
adding this black now, it's all about contrast. But the trick is
here, as I said, is to wait until you
can start doing it. The approach here
is to go gradually. You see we first applied
all of the yellow, then the blue, we've created some texture with this
light gray color. And only after that, we are starting to add
these very dark details. When we add these dark details, it means I will not
touch this area anymore. I will not go and make
more washes here. Because if I go on top
of it with washes, I will just smudge everything because
this color is so dark. And that if I will apply
water on top of it, it will immediately get activated again and it will
just create a huge mess. Once I started to
add this dark color, it means that I'm happy
with all the rest. I'm happy with the blue.
I'm happy with the yellow. At this stage, I just want
to pass on these details. Again. You see I'm working
with the very tip of my brush. I'm covering the lower part of these sections and
also this upper part. I'm not doing of these spots yet because I just
want to add this dark black, black color first. I want to add the texture
at the end very patiently. I'm just going to
cover all of it again. Here you see I'm
not covering the, these white spots,
I'm leaving them. One more thing you can
also do to be able to preserve these small areas of white is using masking fluid. This is a very handy
tool for artists. I think masking fluid, this
is something I use a lot, especially when you need
to paint a subject. Let's say a mushroom flying. If you imagine a flying Gc, you have this red cap
that is very saturated, vibrant, and very uniform. So you need to create this volume on the
cap of this mushroom. And then you have all of these tiny white spots on the cap. If you want to paint the cap
without the masking fluid, you need to avoid all of these white spots and
paint all around them. Or you can use Gag or white acrylic and just paint these spots on top of the red. But again, this is, I think this is personally
not my approach because I am for classical watercolor, just watercolor
without anything else. Because in my opinion,
this way watercolor just looks much more pure
and more professional. And I think it's something you will not be able
to see on pictures, but it's definitely
something you will notice on when you see the work
from like in the real life. I don't say that you should
not use any of that. You can totally do it. But in my opinion, it just looks
better if you avoid these white spots or if you protect them
with masking fluid. In this case, applying
masking fluid is very handy because you just put
it there, you let it dry, and then you go on top of
it without hesitation, without thinking of it
because it's protected. And then once you're done, you just remove the
masking fluid and you end up with these
areas completely white. It's a super cool tool. You see, I finished this part
of the wing and now I will do the same thing
on this upper wing. Again, I'm avoiding
the details here. There you go. It's a
very tedious process. I think at this stage
it's really about being patient because
it will really pay off. At this stage we
want these details to look nice and perfect. Then I have this blue, I will already
outline it as well. Then once I'm done
with this phase, I will pass to
adding this texture, which will be very fun.
10. Adding Texture Using Dots: Insects. Sometimes it's like
painting something abstract, These textures and
all these things. Especially when it's like the intermediate
stage of painting, sometimes it's look like like a mess or like
something abstract. And then once you start to add these dark details and it brings everything
together, I think, I think it's a little
bit magical when you paint insects see already started to add this
very dark color in some areas of my painting. For example, on the body I see here in the middle, it's dark. I will add this dark
color there in the eyes. I want to give them
this color as well. Then I will darken a little bit. These antennas I see, I'm working with the very
tip of my brush going very, very carefully,
because I still want this lighter gray to be
visible in some areas. I'm not covering it completely. I'm just adding some of this
gray on top, almost black. I don't know if you can
see it on the video. This color I'm using here, it looks almost black,
but it's still not. If you zoom way and you can
see it's more like a purple, purple, dark purple
or dark blue. I think it just looks
nicer than simple black. There you go. I created
this outline a bit better. Now, I will darken this
of the texture as well. I still want some of
this gray to be visible. But I'm adding one more
layer of this darker gray on top using the same
movement, the same lines. What it will give
me, it will allow the viewer to see this
lighter gray underneath. Then I'm a more darker color on top to make it look more
rich, more contrasted. You see I'm doing
the same thing here. I think it just adds an extra
depth to the butterfly and makes the texture look even more interesting and less flat. Also, if you look
at the butterfly, sometimes you can notice
this a hair texture in it, especially you can
notice it on moths. Moths are very hairy. You can totally see
that the body is very hairy and sometimes
even the wings. But same thing on the butterfly. If you look at a
butterfly with a ****, with a magnifying ****,
something like this, you can see this effect too. That's why I think this texture
I'm making here helps me to underline this effect and make it more
obvious for the viewer. I'm just continuing this way
and do the same thing here. Once I'm done with this process, I will start to add
these dots here. We're almost there again. See, because it takes
time and I just wanted to show you
all the textures. I decided to leave
this part unfinished, but because butterflies
are symmetrical, you will be able to finish it on your own just by repeating the exact same things
we were doing here. Okay, I think at this stage
I will start to add my dots. I will start with this
lighter gray color, again, always working
from light to dark. This is very
important. I will be working with this medium gray. I just took some of this very, very dark gray, added
some water to it, and it became lighter. I will use it to create
these tiny dots. I hope you can see it,
but all I'm doing, I have more color than
water on my brush. Again, one more time. That's why it gives me this possibility to
create these tiny dots. I think it's visible
on the screen. But it's just very simple. I'm just lightly touching this area here because I
see this dot pattern here. I'm just slightly touching
with my brush and creating these small dots. Make sure you don't have a
lot of water on your brush, because if you have
a lot of water, you will get the big splashes of color that we don't want. That's why your color
should be a dry, very small amount of water
on your brush there. Watercolor is always
about the amount of color and the amount of water
you have on your brush. Depending on this,
you will obtain drastically different effects
if you are a beginner, if you are not very familiar
with watercolor yet, this is my advice. Really try to control the
quantity of water and of color. Play around with it.
See how it works. If you add more pigment, so more color happens. See when you have more
water, what happens? By experience, you
will start to notice these things and
you will start to understand how watercolor works. Of course, one more thing is to understand basic
watercolor techniques. Watercolor, it has like
a reputation of being a very complicated technique because you cannot just correct
the mistakes with white, go like, and paint on top. This is something you cannot
do with watercolor for sure. But if you know how it works, if you know the basic techniques and if you know how to use them, you will not be that
intimidated by it. Like a lot of artists tell me that they've watched
countless tutorials and then they're having a hard time
of painting something that they want to paint from their
head or invent something. Or even paint something that they want to paint
without following a tutorial or someone to be
able to do these things. You need to learn the
fundamentals, as I said, You need to understand
basic principles of drawing, painting
composition, basic watercolor
techniques, which is very important to be able
to master watercolor, you need to understand
what's available there, what things you can
do with watercolor. Once you have these, you can start to use
them creatively. Instead of following
someone letter by letter. You can decide for
yourself like, oh, on this subject I can
use and this technique, I will paint it this way. Once you have this knowledge, everything just becomes easier. You can start to express and create what you
want to create without necessarily following someone's tutorial
or someone. Video
11. Last Touches: This is today. We covered, we don't really covered
the wet on wet technique. We covered layering,
how to create washes. We covered wet on dry technique, we covered how to
smooth the edges. Then now what I'm
showing you here, I call it usually like
the dry brush technique because you have more color
than water on your brush. Your brush is basically a dry, that's why it's dry
brush that allows you to create these textures
like you see me doing here. Once you know that these
techniques are available, you can start to apply them to different subjects and you
can paint anything you want. If you know how to
use these techniques, I will make this outline just
a bit darker. There you go. You see this is not perfect yet. And of course, I'm going a bit quickly here
because of the time, But you got the idea by
creating these tiny dots. And then I will create
some in the middle. You see I'm varying the intensity of these
dots in their size. The dots I'm placing in
the middle are distanced, like there's more
distance between them and they're smaller then the dots that you see on the sides are
more densely concentrated. This is what will give
us this three D effect. This is the most I think, long but also relaxing
part of the process. I know some people
maybe are impatient, they just want to finish the
work as soon as possible. But most of people
actually, I think, enjoy this process
of adding details. I personally enjoyed a lot. I think it's a meditation. You can just focus
on the process, focus on adding
these small details. I personally find it very, very relaxing and even
addicting Sometimes it gets hard to stop adding details
because it's just satisfying. I will add these
dots here as well. The most important thing is these dots should
be very small, a lot of color, in just
a tiny touch of water. This is very important. And then of course, you should have a nice brush. What I mean by nice brush, I think nice brush should not necessarily
be very expensive. For example, I have
a lot of brushes, almost all of them
are synthetic. It's normal that they wear out, so I need to replace
them from time to time, buy new ones, but
they're very cheap. Synthetic brushes
are very cheap, and depending on the
brand, of course, you can find more expensive
brands than the other ones. But honestly, I think you
can paint a good artwork with $101 brush. I think so. You're not be able to do the
same thing with $1 paper. The paper should be very good. That's why I use arches, which is quite an
expensive brand. Cotton watercolor paper
is usually expensive, but it's worth it 100%
Never save on paper, You can save on brushes, you can save on watercolors. So maybe if, for
example, this brand, this Russian brand, Nevsky
Patra, it's quite affordable. It's much less expensive than Daniel Smith or other
premium brands, but I think it does
the job really well. And I have been using
these colors for years, and honestly, I think
they do the job. If you really want to try
some expensive and very, very good quality
colors, you can do it. But I think what will really make the difference
for you is paper. Good paper is everything. Sometimes you can even
make this experiment. Try to paint the same thing on the regular cellulose
paper and on cotton paper, I think you will be able to
see the difference yourself. Some things,
especially if you're working with layers,
with layering, and if you want to create realistic very
detailed artworks, it's just going to be a
nightmare to try to do it all on cellulose paper. Then one more thing about
cellulose paper is that even though if in water color we say you cannot
correct mistakes, you still can correct
some mistakes by removing some of the
color from your paper. But this method only
works with good paper. For example, arches
paper allows you to do these manipulations and
then paint on top of it, and everything
will look amazing. But a cheap paper will, it will not produce
the same effect because the structure of
the paper will be ruined. You will have this
like messy surface. And the result of
this manipulation, it will be likely that you need to start it all over
on the new sheet of paper. Water color is a lot of work, especially if you want to create detailed botanical artworks
or insect artworks. Why not starting
already on good paper? This is just my advice. You don't have to buy blocks. For example, this arches
paper is available in blocks that are glued
from all four sides, which is the most
expensive option. Then you have blocks that are
glued just from one side. Then you have spear sheets
that you can buy like big sheets of paper and then cut it yourself in smaller pieces. And usually these
are even cheaper. What I usually do, I just
buy a couple of blocks. When I'm traveling, I just put one in my suitcase and
I bring it with me. Then I buy spear
sheets and then I cut them as I want to create
bigger artworks or, um, for sketches,
things like this. It's less expensive
to buy spear sheets. That's why you will not
have this anxiety and like this nightmare of ruining a very expensive sheet of paper, which is useless pressure. We need to, if you really want to
experiment and be crazy, you can totally practice
on cellulose paper. I think it's even
better this way. You can do all the crazy
things you like without being guilty of ruining a
nice sheet of paper. But when you're serious
about something, like maybe you're working
on a client's work or you are preparing an
artwork for an exhibition, or just a work that
you're serious about. I think it's much wiser to start it
already on a good paper. Oops, there you go. I think we're almost done here. I will just add a
little bit more volume on this body here. I will make it
just a bit darker. What I did, I just added
some water to my opera. I will make this body of my
butterfly just a bit darker. Of course, I could go and add even more details
to this painting. Again, as I said, it's all about the time you
have at your disposal and more time you
spend on your artwork. More detailed, it will be
more realistic, they will be. Sometimes it's really
about the time you want to spend on your works. I think I will add
just a couple of more dark brush strokes
worth the very tip of my brush quite of how this butterfly turned out to maybe a couple of details here. I could go and add details
until after tomorrow here, because this is my
favorite moment. But I think for our
today's session, we obtained quite of
a realistic result. I showed you some
of these textures, how we can create textures on insects, especially
on butterflies. Adding a couple more here, and there you go.
12. Final Words: I hope you enjoyed this class. In that now you feel
more comfortable sketching insects and
butterflies in particular. So now you have the exact
algorithm that you can follow next time when you will paint
subjects on your own, for example butterflies
or beetles. Please share your
creations with me. You can upload your paintings to the project
section of the class. No matter if you painted
the same butterfly I did, or if you chose a different
subject, different insect, please put it there and I will be happy to
see it and review it. Also, if you enjoy the class, don't forget to put me a review. And it will help
me tremendously. Thank you again
for watching and I will see you next time. Bye.
 Natura Illustrata, Anastasiia - Watercolor artist