Transcripts
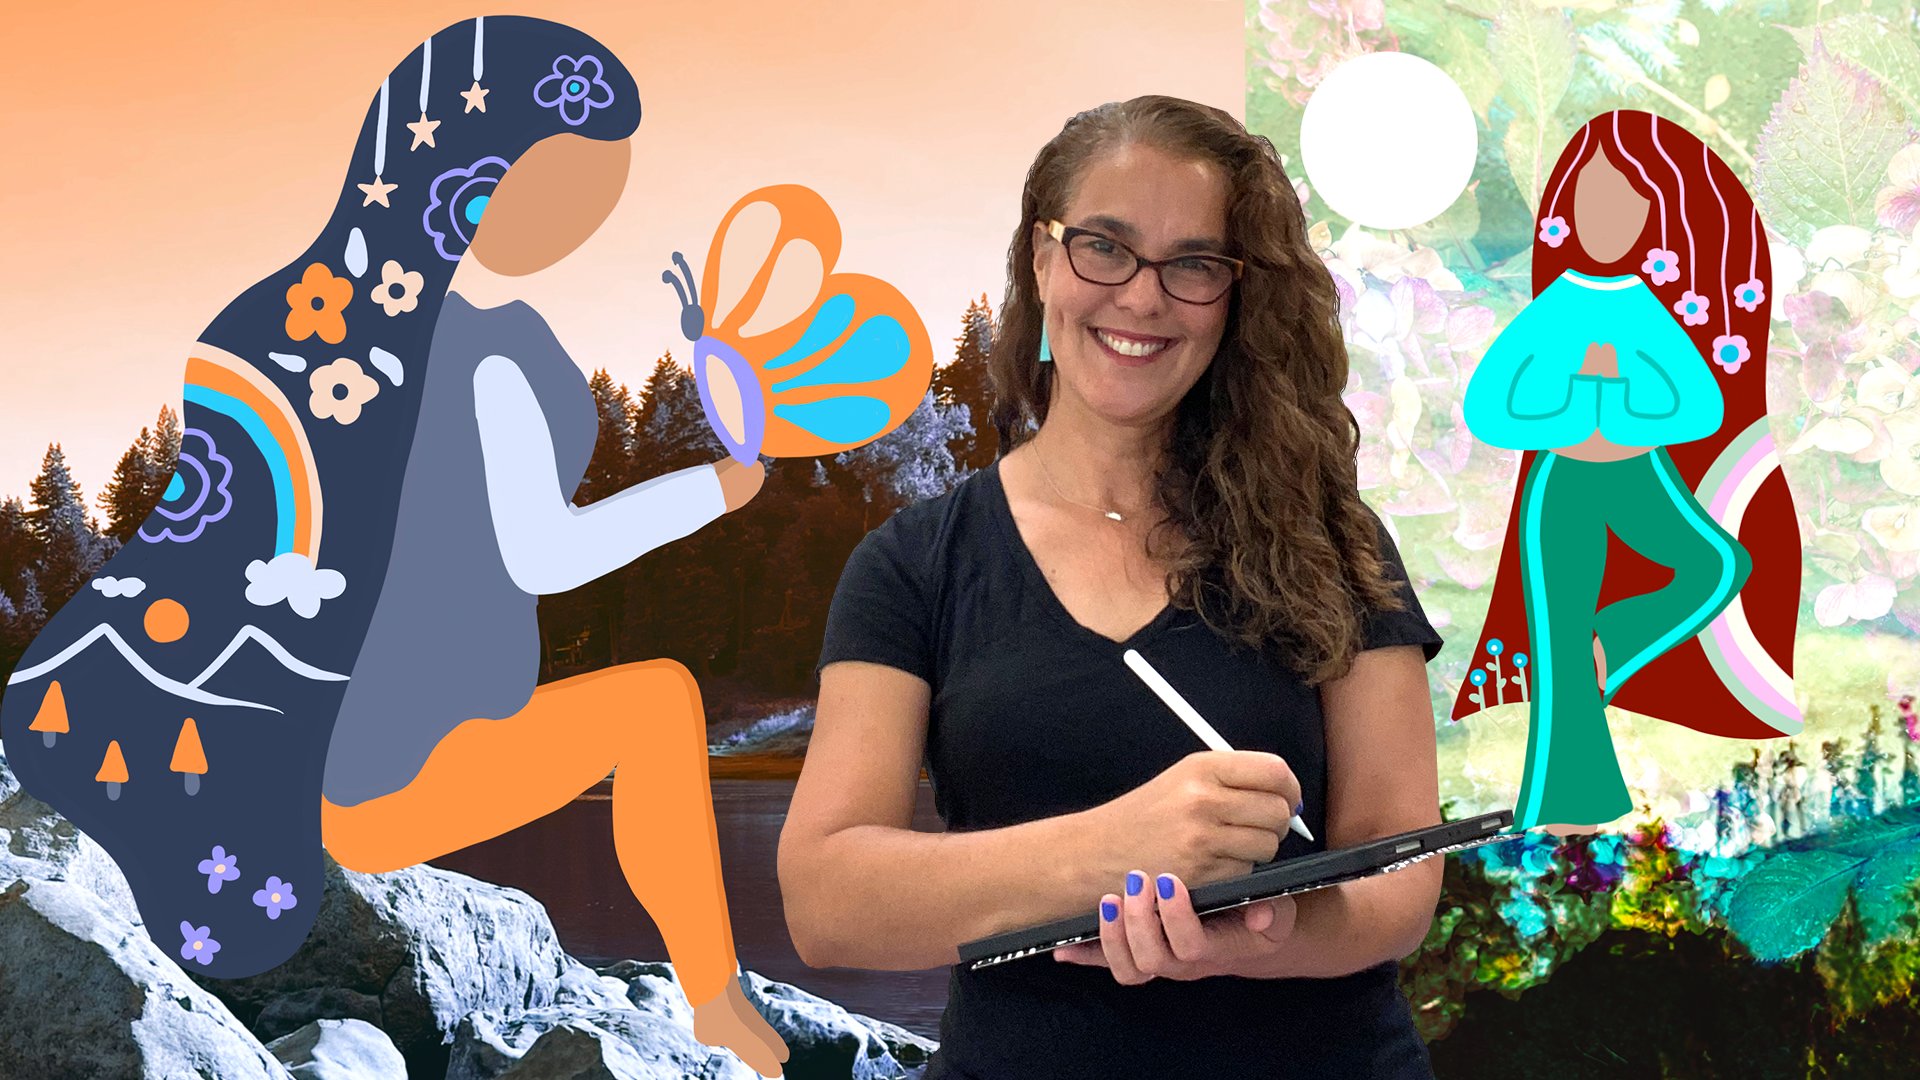
1. Illustrating In Procreate With Photos & Light: Introduction: Hi everyone. Welcome to illustrating and procreate with photos and light. I am all madame Lee in a Cox. In this class, you'll learn how to create the faces of three expressive characters. We'll be using reference photos to draw them for their bodies. Their inner world comes to life with a beautiful photo and we'll place them in a stunning environment in nature. They'll be ready to fly with their light-filled wings. You'll build brightness with the luminance brushes in Procreate. You'll be able to use the exact photos I used so you can follow along and learn the process easily. I'll move slowly, giving you step-by-step guide, and I'll discuss what to look for in photos to make your future characters really special because I know you want to create more. This class is perfect for beginners as well as seasoned digital artists. I love mixed media art, as you can tell from my other classes, and it's a real joy and privilege for me to share my expertise with you so that we can push the boundaries of what's possible digitally using mixed media. I'm really excited to share this class with you. I so look forward to seeing your character shine. Happy creating everyone.
2. Hello Pexels: Wonderful Photo Resources: Hi everyone. So here I am in Pexels and I've created a search of a mountain lake. And one of the photos is right here that I actually selected. And the thing that you want to look out for when you are thinking about the environment to place your character is you want enough space for them to stand on some ground. And this is a really good photo. And it would be perfect actually to have a character standing here. And all that it would take is, you know, you just need to cover the person and it would not be a problem at all. There's plenty of room to create a character in this environment. So the main element here is the ground. I think especially in this first project as you're learning the technique, it's a good idea to have our characters grounded. Now, this is a very nice photo for the interior landscape of a person or excuse me, of a character. And really almost anything goes for the interior of your character. It's the environment that you place them in that just requires a little more consideration, like right here, this is another really good one. Your character could be standing on this doc covering this person and there would still be this beautiful mountain backdrop. Now I'm going to go ahead and do another search for colored landscape. And sometimes you get some nice surprises with the colors. Now this is a beautiful photo and it will work really nicely for a character. You can easily ground them right here in this space. Character could be off to the side. And let's just go through a couple more. This one would work well because you have plenty of ground for the character. It's a really nice open environment. Even something like this could work where you have this city in the background because you could, you can see here that there's this ledge of grounding where you could place a character. Here's another really good one. There's a very nice big path. Let's talk about what could go inside. And really anything goes inside the character. It's whatever you want. It could be, you know, some cute animals. It could be another beautiful landscape like this one. It could be something like a building in the background. You'll see in the inspiration video at the end that I actually do use a house inside one of the characters. So if you want to just jump ahead to get some ideas, go for it. You could do butterflies for the interior of your character. These just make really beautiful inner landscapes. Some of these are just really stunning and you can see that you can take your cues from the gorgeous colors too. So anyway, this is all I want to say about this. I also want to just very quickly do a search in Unsplash, which is another website. And there's also another website called pixabay. And they also have some really nice photos and all of these have a free photos. And you can see, well, let me just look up colored landscape and see what comes up. Ooh, this is amazing. So this is obviously a really good photo. There's some ground, although it could be a little bit odd because the flowers, the character, when technically be grounded, they'd be standing on flowers, but this one would really work beautifully. I mean, you have this gorgeous purple snow. This is just a wonderful color. And actually, okay, this one you see, you have to just check to make sure that there is a free download. And when you do download, let's talk about that really quick. You always want the largest size, the largest download. So back to Pexels. If we pit to this one, there is a free download here. You'd want to pick the original. So I always do the largest because that way you don't risk pixelation. You have the most information in the photograph. I'm always looking for, you know, just a simple shape to the face, but maybe some interesting hairline. And what I like about this particular photo is that she's looking down. So it would appear that she's looking down into her inner world. Now this is one that I used for one of the inspiration art works that I did. Again, that's the last video in this class. And what I loved about it. This particular figure is her fun hair. So I took some creative license and you can go check that out. But I also love that she's looking down and you'll see that I used an image of a child and it was fairly artsy. So take a look at that. Okay, Let's jump into project.
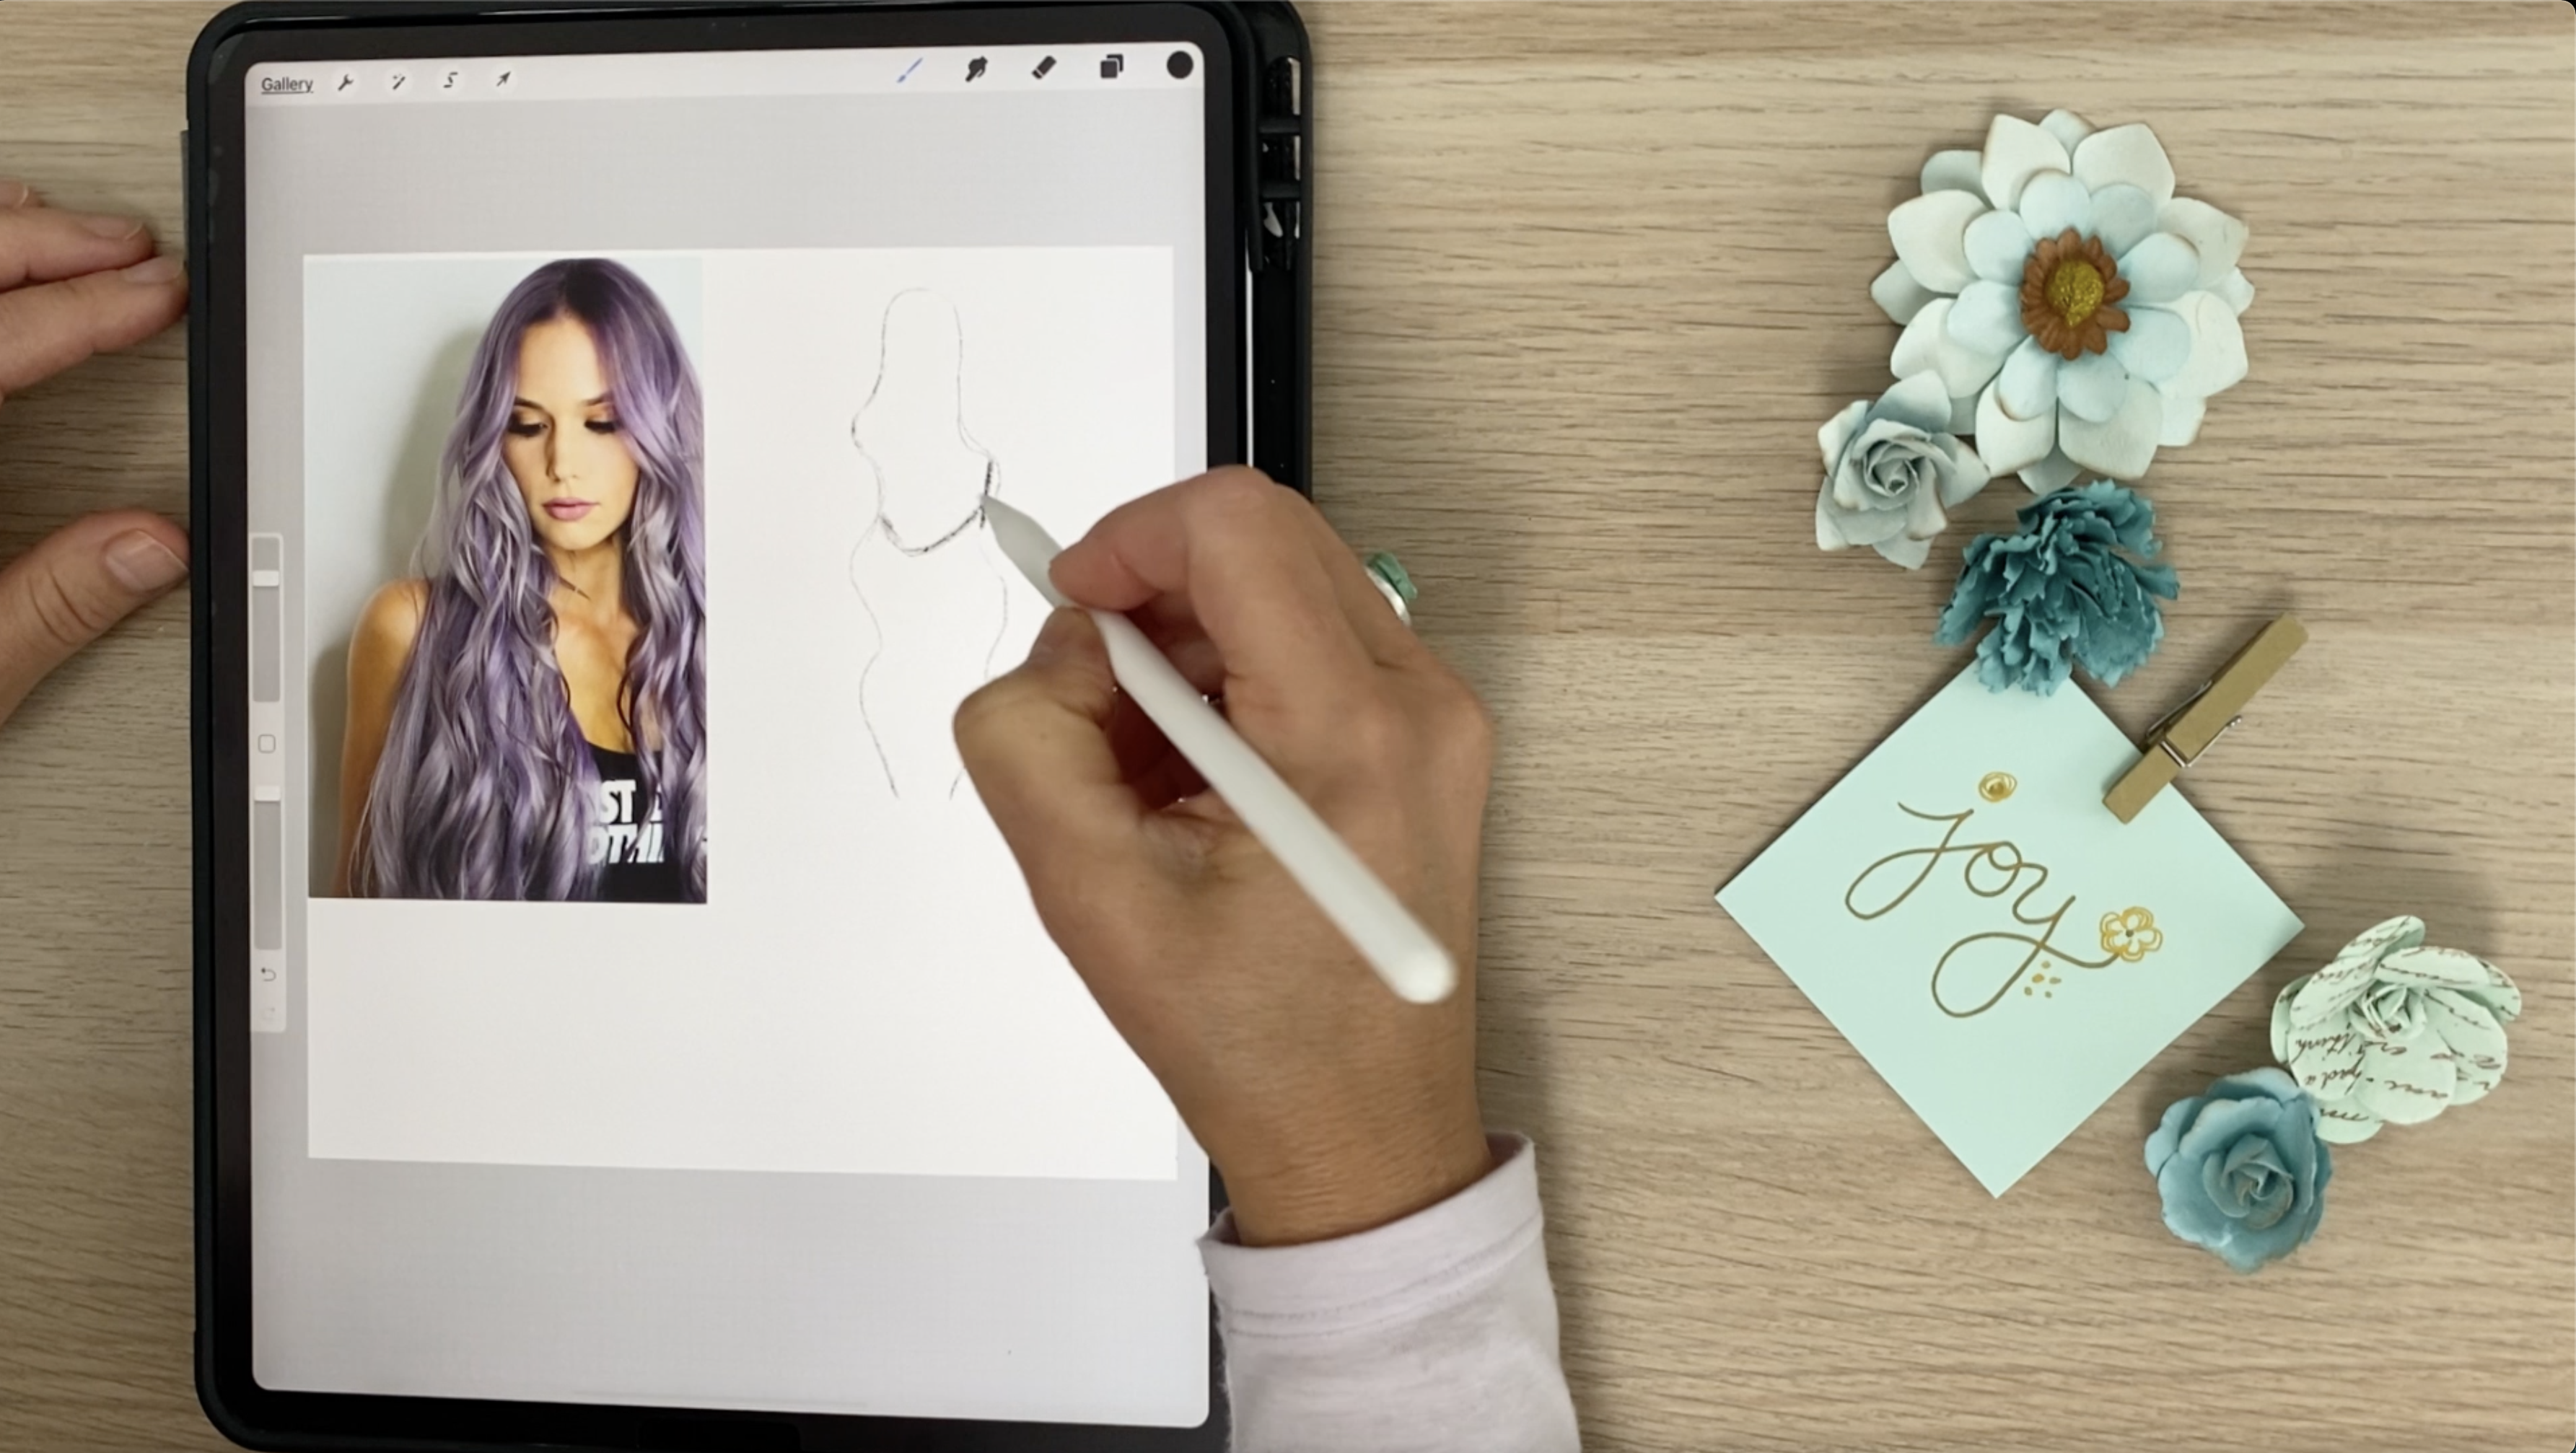
3. Happy Creating: A Contoured Face: Okay, so the first thing that we're going to do is we're going to open Procreate and in the upper right-hand corner hit the plus sign. Let's select a 10 by 10 inch canvas. I feel like this is a really good size to give us a very good print with the photo sizes that we're going to be using. So you can see here that it's a square. And the next thing we're gonna do is we're going to hit the wrench and you're going to insert a photo. And I have my photos saved, as I mentioned before in my albums. So I'm going to go to my album that I've labeled faces. And I'm going to pick the first face that I've decided to work with. And then what I'll do is, well, the dots are still around the photo. I'm going to move it to the size so I have about half the Canvas more or less to do my sketch. So I'm going to add a layer. And then from my brush palette, I'm going to go to sketching and I'm going to select the 6 B pencil and I'm going to make sure that I have a dark color so that you guys can see clearly. So I'm selecting black and sometimes if we focus on the face, we can get a little intimidated. So instead, I'd like you to notice with this first drawing, just the contour of her hair. Try not to focus too much on the face. I know that it's a challenge, but sometimes the hair makes it just takes a little bit of the pressure off. So I'm just going to move very slowly. And you can see here that my sketch is very rough. There's basically an upside down U that I see. And then right here you see that straight line. You can kinda see that there isn't really a curve in that one little area on the right-hand side of her face. Now I'll add the chin and you can see that the curve is a little to the left. So I'm just going to focus on her chin being a little askew. It almost looks like a rounded checkmark. The next thing I'm gonna do is I'm going to select my move tool and the free form down below. And I'm just going to widen her face a little bit because I'm noticing that my sketch is a little more narrow, so I just want to widen it as I see it in the photo. Now I'm adding a layer. Actually, I'm adding a couple layers. And now we're going to select our inking studio pen. And I know that it seems premature, but this is the way I like to do it because I don't have to. I just want to go for it. I feel like a lot of fear gets built up when there's sketching involved and it's just better just to kind of move forward and we'll make adjustments as we go along. So as you saw, I selected the with my color picker by just selecting her skin tone. I picked the color from her skin and I'm going to start it over here so you guys can see it better and a little bit thicker line so that you guys can really see it in. I'm just going over the lines that I just sketched. And then I will drag that color onto her face so it fills. And then the next step is our hair. Now, because it is an illustration, we want to really simplify the whole thing. And I'm going to take some creative license here with her hair. I don't need as many tendrils as she has, although they are lovely. I'm just going to pick a handful and I'm going to just make them on my own. But I have the basic outline around her face and I want to keep that. So the rest of it, I'm just going to, you know, like I said, figure it out and use my imagination and use her hair as a guide. But I'm not going to strictly follow exactly what is there. I'll put one side of her hair on one layer and the other half on a second layer. And I'm just choosing purple. Now, all the colors are going to be changing any way when we bring in the photos because I want the colors of her skin and her hair to be complimentary to the photos I use. So this is just these are just the working colors. And here you can see that I'm just sort of feeling okay, What, what's the overall feel that I want? And I think I just wanted to feel wild, but also have it be a little orderly. So you can see here that I'm kind of working it out and you just have to trust yourself here. And like I said, I'm not going to erase and start over. I think it's just easier on my mind and hopefully this helps you guys to, to work with what you create. So in a moment you'll see that I'll use the warp tool to just make adjustments. And I do this a lot because I don't like to be in a position where I keep telling myself, Oh, that's not it. That's not it. That's not right. I feel like that's not really very nice to do that to myself. K and I'm going to clean up all the jaggedness and all of that soon. But let's take the first half of her hair. I will select that layer and the move tool. And I will go to the warp and hit Advanced Mesh at the bottom. And here you can see that we can move things a little bit and just get a sense of okay, what is feeling good. And you'll notice that the left-hand side of her hair is longer than the right. And I really love asymmetry with hair in illustrations. I just feel like it makes it a lot easier. So the thing that is bothering me on the left is that there's that lump, right. So I'm going to see what happens if I just fill it out, if that fullness feels good. And it does. So I'm just going to smooth it out just a little bit more. And in the next video we will start adding the features on her face.
4. Impactful, Simple Facial Features: For her facial features, I'm going to align as best as I can. Based on the photo on the left. Her eyes eyes are usually right in the middle of the face. So beginning at the very top of the crown all the way down to the chin. So that is my guide for where her eyes are and what drew me to this photo are the thing is the thick eyeliner that she has and these long lashes. So that is really what I want to emphasize here. And only those details, that thickness of the eyes, I can tell that her eyes are closed and then I'm adding, you know, a dense amount of lashes. Now, the next thing that I'm going to do and all of this let me just say is going to get refined later once the photo is in. But we're just placing in the elements. I'm getting a sense of what she looks like. And here I've chosen a color for her nostrils that is a little bit darker than our skin color. The nostril on the left is much smaller than the one on the right. And then there is this more defined curve on the left-hand side of your nostril. And I'm just going to place that in just very lightly as a suggestion, I feel like I want to keep her eyes as the focal point as well as her face. And I'm noticing to the shape of her lips. And obviously the lower one is much more full than the top one. A darker lip color on the top and then a lighter one on the bottom. And I'm going to put the lip, lower lip skis me under the top lip. So here you can see that I'm using a lighter pink and then that darker, more fuchsia for the top. Okay. So I'm, I'm liking where she's going and the next thing is to add in her eyebrows. And again, you know, you could be as detailed as you want. But I feel because ultimately these characters are going to be about their environment and what's inside of their bodies. You, I do believe in keeping the face really simple. I also like to make sure that eyebrows are different from each other. I think that that always makes it more interesting. Now, I'm going to make just some, do some cleanup work. So I am erasing my original photo of the figure. And I'm going to select all the layers. Use my move tool to center her. And you can see that I have a lot of jaggedness in her hair, so I'm just going to clean that up by using a steady hand. I'm on that layer and just smoothing out those jagged edges. The last step to take before we move on is to turn off the color of your background layer so that it is transparent. And then we will move on in the next video to adding her body and photo.
5. The Inner World: Adding A Photo to the Figure: The next step is to select the wrench tool, hit Canvas and hit Drawing Guide. We're going to edit the Drawing Guide and change the size of the grid to 200. The grid is so that I can adjust her head size proportionately to her body size. So I like the head to be about a one to seven ratio, but you can eyeball it and see if it feels right proportionately to use. So the next step is, I'm going to select all of my layers and I'm going to group them. And I'm going to duplicate that group and rename my first group original. And I'm not going to touch that. And I'm going to turn it off. And now with my move tool and the uniform selected below, I'm going to move her head to the center. And it is about 1 seventh of the size of her whole figure. As I was moving along, I realized I didn't bring in her neck. So I'm doing that now. And I've selected a color that's a little bit darker than her face and I'm moving the neck layer behind her face layer. And now I'm going to add a dark layer behind her neck so it indicates her darker hair. And I'm just making a circle and then dragging in some dark color and dragging that underneath the neck layer. And I'm going to refine the neck edge where it meets her body in just a moment. On a new layer, I am starting her body shape. And for now I'm just going to have the layer at the very top so you can see what I'm doing. And I'm just sort of working in where her shoulders might be. And I'd really like to keep these shapes really simple. Really the simpler the better. Because you remember you're bringing in a photo and that's really going to draw all the attention. And here you can see that it just needs a little more refining. So I'm going to drop the opacity and I'm going to use a dark color on a new layer so that you guys can see that. I'm just going to refine it just a little bit more, but it's going to be this general shape. And I'm trying to keep my lines just a little bit smoother as I connect them. And then I'll drag that layer underneath her hair and face. And now for some magic, we're going to hit the wrench tool and you're going to add a photo. And I'm going to go to the albums where I have the landscapes and I'm selecting her inner landscape, hit clipping mask on that photos. So you select the layer hit Clipping Mask and now it just embeds itself in the shape. Now I'm going to hit the Move tool and flip it horizontally because I want the figure inside of her to be a little more on the left. I'm taking a moment to adjust her neck so that it is behind her body figure. So I've turned off the circle, and now I'm using the selection tool, the S2 on the upper left-hand corner, and I'm using the free hand down below to cut away that extra piece of next I'm swiping three fingers and hitting cut and that just removes that part of the neck. And now I'll go ahead and add the darkness behind her neck again, the circles really not, not going to work. And so I'm adding a new layer, which I'll place behind her neck. And I'll just make a shape that will cover that whole space and bring in the darker color. Now I'm going to be adjusting the colors based on the image. So I'm going to select the woman inside the color of her hair. And I'm just playing around and seeing if the colors here are going to work overall. And I'm also going to fix any little issues. So there was some color that I added in my original that needs to be adjusted. So I'm adding that I'm covering up the purple and also her eyebrows. I also adjusted the colors of her lips. And I just want to show you, I'm going to jump ahead a little bit so that you guys can see what I did for her eyes. I just wanted to clean those up and you don't have to redo things. You can just use your selection tool, your stool to cut away parts that you don't need. It's better not to redo and redo over and over again so you don't lose the freshness of an original and it's quirky line work. Okay, the next thing is, let's adjust the layer of the photo and just pump up the saturation a little bit and the brightness so that we maximize the color on a new layer. I'm adding a little shadow to her neck just to give it a little more definition. Let's hit the wrench and share, and we will save this image as a PNG and place it on a new canvas in the next video.
6. Creating Environment With Light: In this video, we'll add the outer landscapes. So let's add a canvas that's 10 by 10 inches and import the photo that you just saved, your figure. And then we're going to also import the outer landscape that you have selected. Now you can see that this photo is not the same shape as the square, so we are going to play a little bit with it without distorting it too much. So the first thing I'm gonna do is with my move tool and on uniform, I'm going to enlarge it. And I like how those two trees are sort of framing it on either side. And now I'm just nudging it up and nudging it down with the free-form tool. Just sort of keeping in mind that I don't distort it too much. So if you take a moment, you'll see that the photo still looks really good. And now I'm just resizing her using the Move tool on uniform. And I don't want to cover up the sun that is glowing behind her and I want to also leave space for her feet. So I will be drawing in some shoes. So I'm going to have her just be a little bit off center so that we maximize that beautiful brightness. The sun behind her on a new layer. I'm going to keep her shoes really simple. I'm just going to fashion some booties for her to wear and I'm not going to show any of her leg. This part. We're barely going to see her feet. So I'm not going to spend a lot of time on it. I'm going to move a little bit quickly. You'll see that I create the boots on a few layers and I actually create only one boot and then duplicate it and then use my move tool to flip it horizontally. So that way we have two boots, a right and a left. And then I'll move the boots to be under the figure's body. On a new layer, I'm going to use a bright color so you can see a very simple shaped wing. And when I say simple, I mean, really, let's keep it really simple because really what gives this wing interests is the photo that we are going to clip to it. So here I've duplicated my simple wing and I'm flipping it horizontally. So I have 21 on each layer and one on each side of her body. And you can see now just by moving the layers they are behind her. Now I'm going to go Insert a photo and I have the wing that I have selected and that is the swan. And making sure that it's on top of the wing layer, I just select the clipping mask. And now we're able to move that swans wing where we wanted to go. I will use the move tool to flip it horizontally until I find a look that is pleasing to me. Next, I will adjust the saturation and the light so that we give it a glow. And then I will, once I'm satisfied, I will duplicate that layer, move it on top of the other wing and give that it's clipping mask and then move that wing into position as well so they're matching. Now let's give her wings more glow. So on a new layer, I'm going to select a brand new brush. And that one is the damp brush under painting. And here what I want to do is I'm going to select three different colors, but the first one is going to be this darker pink, increasing its size a little bit and sort of testing it out. And what I'm gonna do is I'm going to softly go around the edge. I'm not going to be pressing hard because I don't want like that was too hard of a press if you saw that little that strong pink, I'm just going to build up some color and glow layers on this wing and you'll see the result at the end. But here's a medium value on a new layer. So I had that darker pink. Now I'm picking a lighter pink and I'm going to decrease the damp brush just a little bit, so it's a little bit smaller than the other brush. And then I'm just going to lightly brush around the edges of the wing. Now I'm adding a third layer, and this time I've selected white and the brush is a little bit smaller. And I'm going around the wings with this white brush. And this just takes that hard edge of the photo away. Now I'm adding another layer and I'm bringing it beneath all of the layers that we just did. And this time I'm going to luminance and I'm selecting the light brush. I'll make sure that layer is underneath the wings and I will just lightly brush in a little extra glow that's coming from behind. And now I'm adding another layer on top of all the ones we just did. And this time I chose the light pen in luminance. So here you can barely see, but they're just little sketched lines. It's all subtle. But if I turn off these layers, you can see how collectively they really add glow to the wings. Now let's grab our inking pen, our studio pen under inking, and select a color that is little bit darker than the snow. So I just selected right from the snow itself and just picked a darker blue. And I'm just extending some shadows and making sure that I am on a layer that's beneath the boots and then dragging in the color. Now, of course I'm going to drop the opacity of this, but I'm also going to soften those edges using that damp brush like I did with the wings under painting. And this time I'm going to just brush in some of that damped brush all around under Hurd, under her dress and around the snow and under the boots, and that way it just softens. Now we're going to be covering some of this up with some glimmer. So we're going to even remove even more of the harsh lines on a new layer, grab the flare under luminance. And using the white, we're going to grab a flare that you just, you just have to tap the screen and a flare will appear and then you can move it. And here you can see that I'm adding to the sun that's behind her. And I've just duplicated the layer and I'm moving it around. And the any rays that are actually falling on her hair. I can use my selection tool to remove those or I can just move them out of the way. So here you can see I'm building up by duplicating the first flare a few times that we really get some sun coming through the trees. Let's add a new layer this time and luminance select both k lights. And here I'm choosing that orangey pink of the photo that's inside the figure. And this takes a little while and I like to just touch the screen with the different colors that the book highlights are giving me and I liked the random effect. Some of them are too strong. So I just keep playing around, I delete, I go back, I, you know, I keep moving the tapping around until I get the glow that I'm looking for. And here you can see it's just sort of a soft pink that's created. Now I'm going to add a layer above her, so that bouquet light layer was below her. But on top of the background landscape. And now I've selected glimmer in luminance. So with glimmer, you can see here that depending on how big you want the size of this brush, I like it to be really subtle on her hair. But you can see that I'm adding it now to her wings, below her wings on the snow a little bit. And again, this is really fun and you could do this forever. So I just want to show you what I'm doing. I'm adding glimmer around just to give it that extra magical touch. Now let's choose a layer that is above our figure. And let's select under luminance the light pen, and this time again using white. And my opacity is down so that it's not two. I want to be able to read it. I write the word joy. And then as a last step, I'm just going to finish off the edges of her body with a new layer underneath her. Actually, I'm gonna do a couple of things. First, I'm going to use the Studio Pen and using a very pale pink from her wing. I'm just going to add, I'm going to define her scallops a little bit. And just simple rainbow shapes at the bottom, then under luminance and on a new layer, I'm going to grab the light brush. And behind the figure, I'm just going to add some subtle glow so that her body glows as well. In the next videos, I'll show you how I created the other two characters. Thanks for watching everyone.
7. Making An Inner Light Statement: So in the same way that we created our first project, we're going to create another 10 by 10 inch canvas. And for this project, I'm going to just go over the highlights with you and I'm going to move a little bit faster once I import the photo that I want you guys to see that I'm going to be using. And here you can see that she has this really great shape of face and she doesn't have as much hair to rely on for the shape of that face. So for this one, I'm actually going to be doing a contour drawing of her face. And I feel like it's pretty straightforward. I feel like she already has some really cool asymmetry happening with her hair. So we're going to I'm just going to be very simple in my drying. So here you can see I've created kinda like an upside down or not, not an upside-down part of me. Just a rainbow shape. And it looks like one ear. The one on the left is a little more pronounced. We can see it a little bit more than that. You're on the right. And I won't be including her hands because all of these characters, as you know, have wings. Her hair is very descriptive. I'm going to do my best to really capture all of those moments around her face. The colors I'm selecting for inking or right from the photograph. And as you know, these are just the working colors. And once the photograph is in, we will be adjusting those colors. And here you can see that I took some creative liberty with her hair. I put just a few more strands in there. And I just really love the asymmetry of her hair. What I was really drawn to are her eyes and I love just that pop of pink on her eye shadow. So I'll be auditioning different pinks here, but you can see that her eyes and the other features as well. I'm keeping them very, very simple. And I like, you know, just using nostrils sometimes to depict a nose. I don't know. I don't think it's always necessary to draw in the whole thing. So here I'm just focusing on his full lips and then she has this great eye shadow. And notice that I'm putting her lips again on two different layers. Now the eyebrows, they're each different. And notice here that I am using the warp tool. So you just select the Move Tool above and then the warp down below. And I'm adjusting the shape of her eyebrows and member, I mentioned this with the first project that you don't have to redo things. You can really use these tools to save time and also to keep from, as I call it, protecting myself from my own perfectionism. So the last character, we didn't have ears. And so this character I am filling in just a little bit inside of her ears so that we create just a little bit of dimension. But notice how simple it is. It doesn't have to be exact and the ears do not match each other. Here, I'm just doing a little clean up on trying to get her face to be a little bit smoother. Number, I use the drawing guide just to make sure that my head is proportional to the body shape that I'm going to do. And so I liked the head to be about have a one to seven ratio with the body. Do watch the first project if you want to review in detail on how I'm moving the photo and doing the drawing guide and all that. The reason I'm slowing down here is because this is a photo where I have the moon and the birds that are pretty subtle in the photo, but I really want them to be a part of the character. And so here I'm adding the clipping mask and I want to show you slowly how I'm adjusting. So first time using the Move tool and I've selected uniform down below so that I'm not distorting the photo yet. And I'm just scooting it in. I want to get that moon, you know, well into her figure. So once I have positioned the moon where I want it, then I will go ahead and nudge the photo. So you have all these tools at your disposal. You have the Warp Tool, select Advanced Mesh. And then you can just move the clouds and the landscape below and molded to your figure's body. Okay, so now I'm going to bring in the background photo. And I picked this one on purpose because it actually doesn't fit the square at all. And so I'm going to have to adjust that. But also there's a figure right in the middle, so don't be deterred when you see a photo that you love. Try to make it work. I mean, sometimes it's not, it's not going to work, but in this case, figure is going to completely cover the person, so I don't have to worry about that. And once again, you can see here that I'm using this time the free-form tool to stretch that photo. Now, when you have a lot of information in a photo, this one doesn't have a lot of information because we're dealing with a sky and stars and the landscape lends itself to being stretched out. So here I want to show you that I am interested in changing the color of her hair. So right now I'm creating an ellipse with the stool. And I'm auditioning this blue, this really intense blue. And I'm just going to put it behind her head to see if it's a color that I do like now remember she the figure and her head and her photo. They're all on one layer, so I have to go change the original and re-import her into this environment. Again, if I do want her hair to be changed, like I don't want to have to I'm not going to color her hair right now. I'm going to go back to the original, make a duplicate, change the color of her hair and then re-import her in order to make that change. Okay, So this is really a fun thing that I loved to do with this particular character. I'm using the light pen under luminance in the brushes. And I selected the blue that you see, which is a little bit darker blue is the color of her hair, but that luminance pen really makes it look almost neon. And it highlights those curves of her very cool hair. Okay, so here you can see that I'm adding the flamingo wings to her, to her wings, and I'm auditioning different colors. And so you can change the colors of the wings completely if you'd like. And I think because I loved that luminance pen with the blue, I'm taking my cues from that color to bring the color of the wings into this piece. I did all the lighting exactly like I did with the first character. So I'm not going to go through it again. I did many layers exactly as I did before. So if you'd like to review, I would go check that out. And then the last thing that I want to highlight here is the moon. So here I'm adding a, just a subtle light pen just to highlight the edge, but now I'm adding a flare. So the same way I added a flare with the first character, I'm adding the flair to this moon. But in this case I'm using the Advanced Mesh Warp tool to bend that light. So I'm going to slow it down here so you can see it a little bit better. Then as a final detail, I added with the light pen, this symbol for the feminine that I really love. I also want to point out that I use quite a bit of Glimmer with this character. So I use that blue again to, for the light above her head. And then also a final note is for the shadow under her shoes. I start by using the studio pen, the inking pen. And then what I do is I add another layer and I'm using the damp brush, which is under painting in the brush library. And here you can see that I'm just giving it a light brush over. And that's so that it gives the illusion that there's a shadow there, but there's also light on that shadow. Something that happened by accident was this light leak pen. So this is under luminance and here I'm just auditioning just the different light colors and I'm just sort of picking different colors to touch the screen width. And this is how I came across the cool, I loved this blue. So I decided to incorporate the light leak above her head before I added the glimmer. And then the other thing I want to mention about the glimmer, and you'll see me adding more here above her head. Is that I also varied the size and I also put in just some little wavy lines also. So it seems like it's radiating from her head. And then here you can see that I'm going nuts with it under the wings. All right, you guys, this has been very fun. I will give you some highlights of my third character in the next video.
8. Stretching With Creative Color In Photos: Hi everyone, Welcome back. So what's striking about this particular project is the photo, right? The photo that Pexels provided. This is what I love about Pexels is that they have so many gorgeous photos in this one, it just was so stunning to me. And I just had to increase the saturation, which is all I did for this project. And then the color, the electric blue was inspired by project too. I just really loved the effect of that color. So let's go through some of the highlights. So in the layers panel, I'm on her inner landscape and we've all learned how to do that from Project One. And you're going to just simply make an adjustment to the hue and also to the saturation and brightness. Now, this takes a little bit of just playing and figuring out what the right spot is. I noticed that I was also giving it a little bit of pink in the background. I didn't want it to get to pink so that I dropped the hue back down just a little bit so that I can get that blue that I really wanted to capture. The electric blue that I loved so much before. So that's all I did to, and you can see like the impact it really makes on that inner landscape. Just like in Project 1, I actually used her hair to guide the shape of her face because it is kind of an odd angle. I didn't want to follow the contour of her face because it just didn't seem like I had enough information to go on. So I did use the contour of her hairline. And here you can see that my sketch is pretty squashed like her face seems really squished. And so what I did is I used the warp tool. And remember I recommended that in project 1 as well. You don't have to recreate everything. You can just use the warp tool to finesse the shape even of the faith. And you can see that I kept her features very simple, but I did to some creative license with her hair in the same way that I did with the first project. And the last thing that I'd like to draw your attention to are her feet. So keep in mind with this photo. You don't have a lot of space for the feet because of the rocks and I didn't want this to turn into a unit. Let's move the rock class. So it kinda worked out that she is sort of turned sideways and so her feet is sort of just fit in that little space. So one of the things that, you know, I'm keeping in mind when I use these imagined characters and I've done this in my other Procreate classes, is you want them, even though there are imagined you want them to, it, you want the whole thing to feel like they fit in this real environment or semi-rural in this case, because it's really blue. All right, you guys. So thank you so much for your attention. I look forward to seeing your projects and please stay tuned for the last video where I give you some final thoughts. Thanks again.
9. A Little Extra Inspiration: Hi everyone. So I wanted to share a little bit of the inspiration behind the characters that we created in this class. So if this speaks to you, thank you for watching. I've also created just a few more pieces with the techniques from the class to inspire you even more. For many years, I've been practicing being in alignment with my spirit. And it was through the making of art, however, that I sensed a dialogue between me and that inner spirit, which is my creativity. It has felt like inspiration is very personal and I'm sure many of you can relate to this feeling, which is why we get hooked by our creativity, right? It feels awesome. I wanted to deepen the dialogue, so I began meditating 20 years ago. And it was then that those awesome feelings seem to elevate to what I call exalted fields. Where it feels like anything as possible where I'm not only creating art, but I'm also creating my whole life. And I believe I'm creating it 100%, as well as my thoughts which contribute to my life's enjoyment. And I hope that you feel as great as you can as much as possible too, because life is pretty sweet. I gave these characters wanes as a symbol for my spirit soaring with joy, and that's my hope for your spirit as well. So these characters represent inner high vibes and I encourage you to print yours to inspire you all the time. Thank you so much for your attention. If you guys are interested in more art inspired content, join me on my YouTube channel where I share techniques and my musings. And also there are a few freebies in there as well. Thank you. You guys. Happy creating.
 Alma Cox, Painter ✶ Author ✶ Teacher