Transcripts
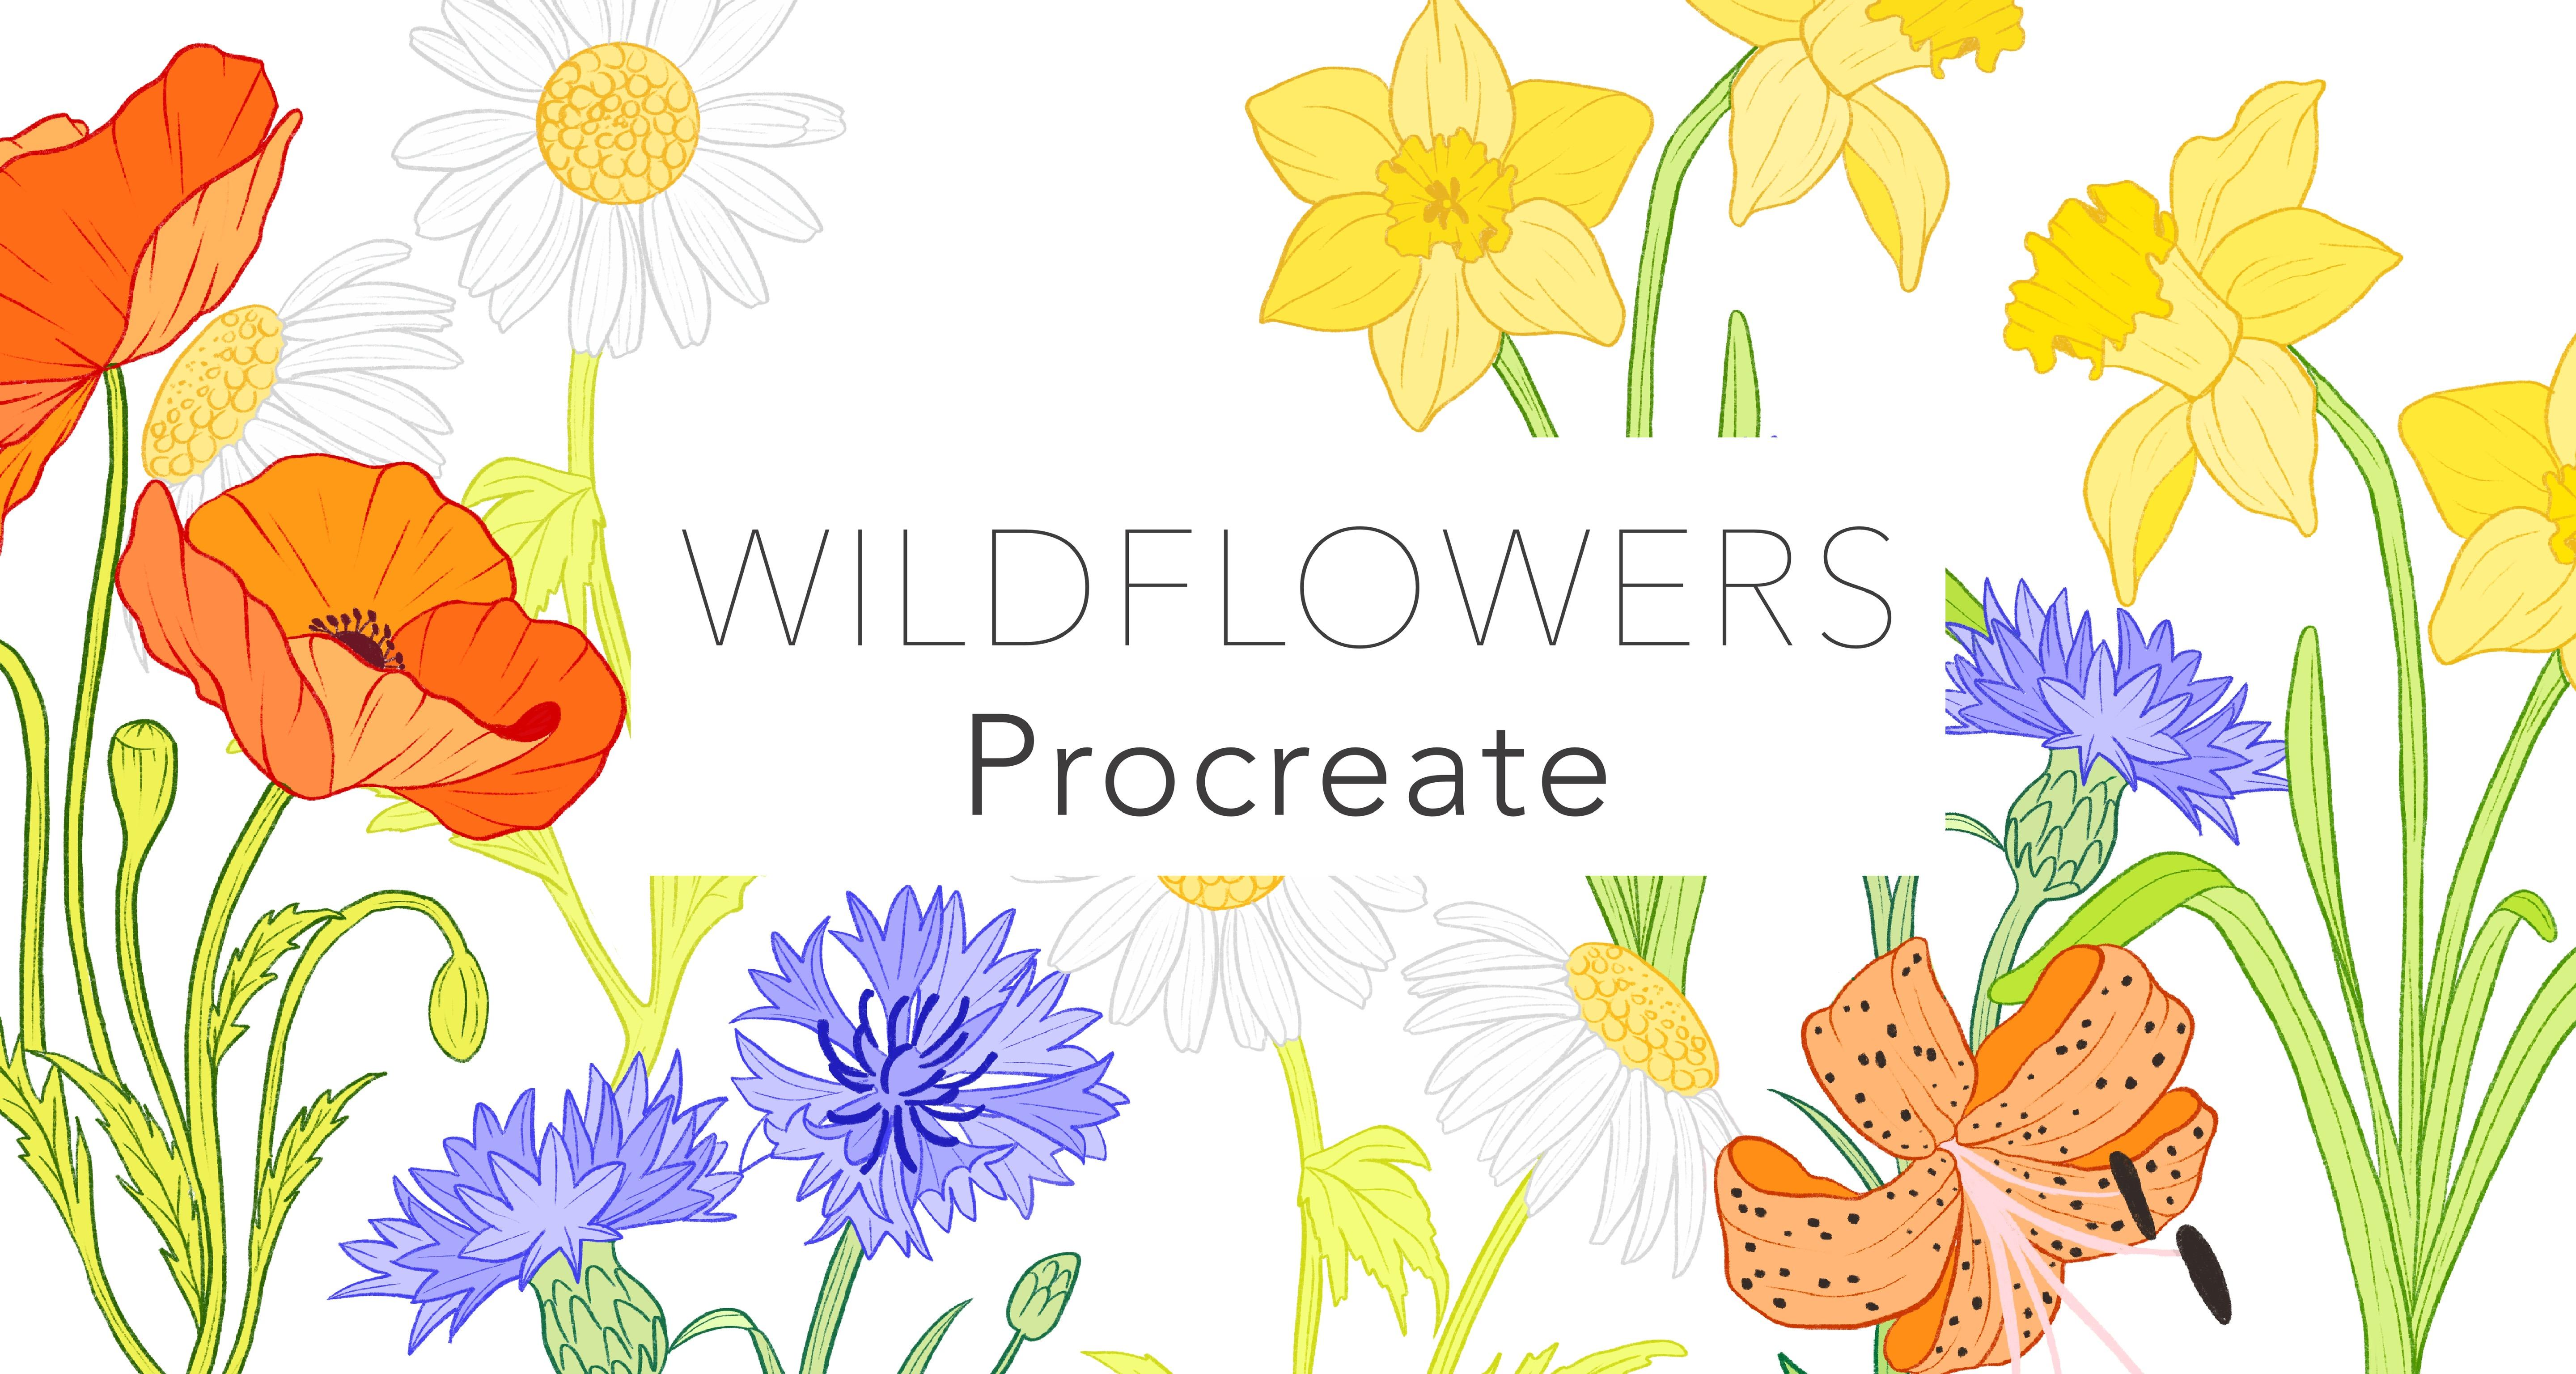
1. Introduction & What You’ll Learn: Hi everyone, welcome to
my Skillshare class. My name is Vinita.
I'm an illustrator and pattern designer based in Singapore. I am originally a pencil color artist. Most of my work was done on
paper with pencil colors I've been using
Procreate for a while now and it has definitely
improved my work flow I loved the non-destructive
way of working. And also it is intuitive. In this class, I'm going
to show you my process of illustrating
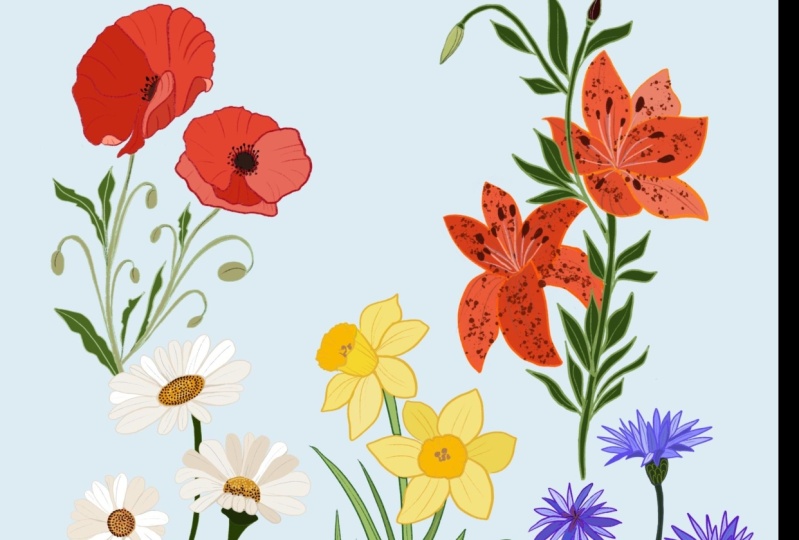
wildflowers in Procreate. We will be illustrating
five wildflowers That's Poppy, Daffodil, Cornflower Daisy and Tiger Lily I broke down the
process in four stamps. We’ll start by planning the
composition for each flower I will take you step-by-step
for each process. Next, we'll finalize
our sketch, add color. And finally, we'll add
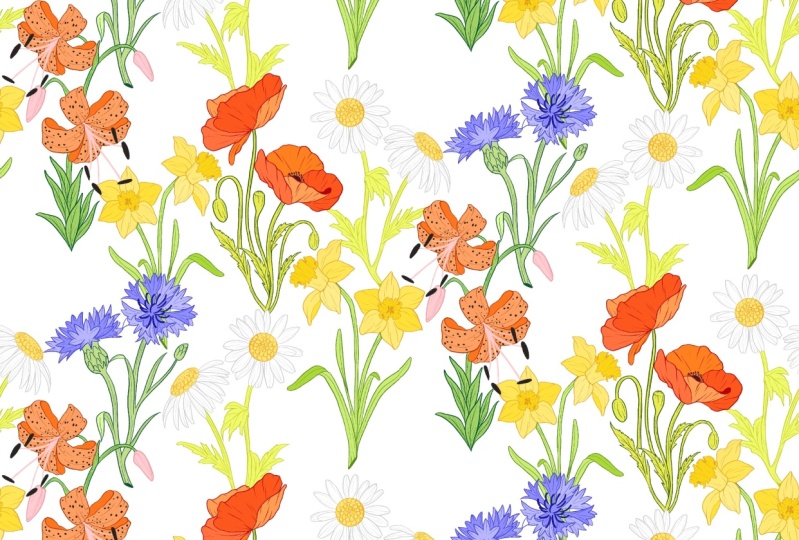
some line art to each flower. In the end, we’ll turn
these flowers into A seamless pattern, will be turning them into
a half drop repeat. I will be showing
you step-by-step process of turning this
into a seamless pattern. Few examples on how they look
on print-on-demand sites products, few mock-ups If you're planning to
license these artwork. Thank you for taking
this class with me.
2. Resources & Project : To download the resource
for this class, you should be on your
webpage and not on your app. Here when you scroll down under Project and
Resources section, you can see this section
called resources. On your right side. Under this you will
find two attachments, wildflower guidelines and
Wildflower reference images. You can tap on these
attachments and tap Download, and this will be saved in
your Download folders. The attachment with the
wildflower guidelines has these stick figures that we will be using
throughout our class. It's a Procreate file. This will directly open
in your procreate app. You can download them
and follow along. The second attachment has
these reference images. These are royalty-free images. We will be referring to them while we're sketching
our flowers. So you can download them and
import in our Canvas too. For the class project, you can illustrate any wildflower
of your choice. Or you can even use the stick figure from
the resource section. Following our list of more wildflowers that can help you decide
on your project, please share your flowers
in the project section. I can't wait to see your
beautiful wildflowers.
3. Canvas & Brushes: Let's start with a
canvas and brush setup. I have a folder ready here. This has five canvas with reference images
for each flower. The size for these Canvas, or 4 thousand by 3 thousand
pixel, with 300 DPI. I've made a collage of reference
images for each flower. And also these reference images are in the resource
section of this class. You can download and
also follow along. The size of your canvas
depends on your project. But it's always better to
work on a bigger Canvas. I always work on a
size of 3 thousand by 3 thousand pixel with 300 DPI. Let's move on to
the brushes we're going to use in this class. There is just one brush that I'm going to use for
the whole class. That is under sketching pencil. I will be using this
brush for sketching, for our rough sketch and also
for our final illustration. But depending on your style, you can even choose a
different kind of brush. They're more similar brushes
under sketching section. Also under Inking section. This brush has a
nice tapering effect that will be very helpful when we are working on online art. Let's move on to our first
flower, that's poppy.
4. Poppy: Sketch: Let's start with our first
flower, that's poppy. I'll tap on my first canvas. I've made these coolidge
of reference images. We will be referring to these images while
sketching our flowers. When you're collecting
your reference images, make sure you can see
your flower clearly. For example, the flowers
should be indifferent angles. Like you can see the
front-facing of the flower here. Here you can see the side
angle of the flower and also the other parts of the flower if you need them in
your illustration. For example, the buds here. You can see the shape and
the fall of the bud here. More buds on this side
with a different angle. We can add them to
our illustration. This flower has a very
thin and baby stem, and the type of leaf for each
flower will be different. For example, here
you can see this has a very spiky and very
tiny leaf to it. Now let's move on to planning and sketching our illustration. We'll start by going
to the layers. First. I'll move my
reference image to the left. We'll start planning our
sketching on this side. Next, I'll go to layers. We'll add a new layer. And I'll rename this
layer as stick figure. Stick figure is
more like planning our illustration
before sketching. With the help of shapes
like circles and lines. We can plan the
placement of our flower, the stem, and the buds. Under Brush Library. In the sketching section, I have my six B pencil selected. I'll select a gray color. I'll start with
the flower first. I'll draw an oval shape. Tap on Edit Shape, will get these four nodes. You can hold these nodes
and adjust your shape. Next I'll draw
another oval shape. For the second flower. Hold your pencil on the screen until you're
satisfied with the shape. Again, I'll tap on
Edit Shape and you can adjust the shape
and also the position. Now moving on to the stem, I'll just draw
lines for the stem. Next, the buds the buds that we saw in
the reference image. I’ll draw one bud on the left
side, another bud here. Now the leaves. Another bud on this side too. I have to stick figure in the resource section
of this class. It's a Procreate file. You can even download
them and follow along. I wanted this stick figure
to be in red color. So while you're sketching, we can sketch in
the green color. Figure can be in red. I will alpha lock this layer and turn this into a red color. I'll hide my reference image and shift this stick
figure in the center. Next I'll add another new layer and rename this layer as Sketch. Reduce the opacity
of my stick figure. Select a gray color. And we'll start
sketching our flower. You can keep your reference
image or the collage around for your reference
while sketching. Another flower in
the second cell. This flower has a
very thin stem. I'll try to keep it thin. They're done with
the sketch here. Let's move on to the line art and adding some color
to this flower.
5. Poppy: Outline, Color & Line Art: Now moving on to the next step, which is adding our client to this illustration for
that and go to layers. Hide my stick figure layer, reduce the opacity of our
sketch around 50 per cent. Now for the outline, I'm going to add a new layer, rename this layer as outlined, and hide my reference
image so we can pick up some color
from the reference image. Select a dark red color with the same six B pencil brush
with the size of around 15%. I'll hide my
reference image layer so we can see the
flower clearly. And we'll start adding the
outline to the floor first. Now moving on to the stem. For that, I'll first select a dark green color from
our reference image. And another new layer, will this layer below our
floor outline layer rename this layer as
outlined stem so we don't get confused with
our first outline there. I'll start adding
outline to our stem. I'll be using the same color and the same brush for the
leaves and the buds too. I move again back to our
first outline layer, the flower outline one. To add the details in the
center for our second flower. I'll pick up a dark color from our reference image and
start drawing the center. Now moving on to adding
some color to this flower. I go to layers. Hide my reference image on
our first outline layer. And you get this option
called reference. Tap on reference. I
didn't new layer. This layer below
our outline layer. Reference will help
us fill the color inside the lines of
a particular layer. Now while selecting the color, I'm going to color each petal with a
different shade of red. I'll start with an
orange-ish, red first. I am randomly selecting colors and dropping
them into each petal. Just making sure that
every color is little slightly different than
each other. This will help Illustration look more
interesting than looking to flat. I'll repeat the same for
the second flower too. I'll fill these
gaps in the center. I will follow the same
steps for the stem. I will add reference
to the outline layer, add a new layer, and start dropping the
colors in the stem. Let's move on to adding some line art to
this illustration. I'll hide my sketch layer, add a new layer, and rename
this layer as line art. I'll select the same dark
color from the outline. With the brush size around 10%. I'll start adding these
lines to the flowers First. Tried to start the lines around the curve area of the petals. Then fill in the center. I'll repeat the same
for the stem to. I'll select the same dark
color from the outline. Starting with the leaves first. Here we are done with
our first flower. Let's move on to the second one.
6. Daffodil: Sketch: Let's start with our second
flower, that's daffodil. I'll tap on my second canvas. These are the collage of images that I'm going to use
for my reference. When you choose a
reference image, make sure you see all the
parts of the flower clearly. For example, here, you
can see the flower, the stem, the shape of the stem. Like in the second image, you can see the center
of the flower clearly. So while sketching, it is
easier to follow the shapes. In the third image, we can see the same floor
with different angles. Let's start with the
sketching on a new layer. I'm going to add
a new layer layer and rename this layer
as stick figure. Stick figure. Would it be more
like planning your flower, how you want your flower to be? This is before sketching. I'll select a red color. And with our six B pencil, we'll start with
the flower first. I will be sketching a
flower with similar to this image are stick figure for this flower will look
something like this. Make sure you're on your
stick figure layer. And we'll start planning flower. I'll start with an oval first. Hold your pencil tip until you're satisfied with the shape. Another smaller oval shape. Hold it. If you want to
edit the circle further. You can see this option
with Edit Shape. You can move this circle around. You can even change the angle, pulling the blue nodes. Moving on to the second flower. I want this flower
to be front-facing. Seem like the one in
the second image. To make it a perfect circle, hold with your finger
on the screen. Now for the stem and the leaves, are we just using lines? I have the stick figure in the resource section
of this class. It's a Procreate file. You can even download
and follow along. I hide my reference image and move my stick
figure in the center. Now for the sketching, I'll add a new layer and rename this layer
and sketch layer. Select a green color. And with my six B pencil, I'll start sketching our flower. And we are done with our
sketching here. Let's Move. Want to add some line art
and color to this flower.
7. Daffodil: Outline, Color & Line Art : Let's add some color and
line up to the daffodil. My first step is
to go to layers. Hide my stick figure, reduced opacity of
the sketch layer. Next, I'll add a new layer and rename this
layer as outlined. Next, I'll unhide
my reference image so we can pick up a darker
color for our outline. Now on my outline layer
with my six B pencil, I'll start with my outline
for the flowers first. I'm just going to
follow my sketch and add an outline
to both the flask. We have to make sure while doing this outline there are no gaps between the outline as we will be filling
them with colors. Now for my stems
and leaves, again, I'm going to select
a green color from our reference image. You can even add a new layer for the stem and the leaves outline. Next go to layers. Hide my sketch layer. Tap on the outline layer that
reference. Add a new layer. This layer below
our outline layer. Reference will help us fill the color between
these outlines, but on a different layer. Now to fill the colors, I'm going to select
different shades of yellow and keep dropping them
in both the flask. Now selecting a green color to fill in the stem
and the leaves. We'll add few basic line
art to this flower, which we will be
doing on a new layer. Add a new layer, this layer
above our outline layer, and rename this as
line art layer. We'll start with
the flower first. I select the same
color as the outline. With the same six feet. Betsy, I'll keep my brush
size to around 10%. And we are done with
our daffodil here. Let's move on to
our third floor.
8. Cornflower: Sketch: Let's start with our third
flower, that's gone flower. I'll tap on my third Canvas. These are the coolidge
of reference images I will be referring
to for my sketches. In these images
you can see I have these flower with
different angles. Also, you can see the leaves
and the buds clearly. So while sketching, we can
refer to these shapes. Let's move on to our first step. That's the stick figure. I'll just make this
collage smaller and slide it in one corner.
We can sketch here. I'll be selecting a red
color for the stick figure. I'll add a new layer and rename this layer
as stick figure. Stick figure is
more like planning. Before you start sketching your flower, I'll draw an oval. Hold it until you're
satisfied with the shape. You can even edit shape all these nodes and
make more changes, or even change the
position of your shape. For the second floor,
I'll draw a circle. Hold your finger on the
screen for a perfect circle. Shape if you want to
make more changes. Next for the stem
and the leaves, I'll be just using lines. Like planning the shape and
position of your flower. I have this stick figure in the resource section
of this class. You can even download
them and follow along. Now for sketching,
I'll go to layers. Hide my reference image, and displaced my stick figure in the center. A little bigger. And go to layers, add a new layer, reduce the
opacity of our stick figure. Select a light gray color. I'll rename my layer
as sketch layer. The shape of this flower from the side is more like
these tiny stars. And from the front you can see this tiny trumpet shaped petals. And the center line. And start
sketching my first plot. Now the second flower. But seemed like the
reference image. Now sketching the
stem and the leaves. We're done with our
sketching here. I'll hide my stick figure. Let's move on to adding some line art and
color to this flower.
9. Cornflower: Outline, Color & Line Art : Let's add some colors and
line out to our cornflower My first step is
to go to Layers. Reduced opacity of
our sketch layer, add a new layer, and I'll
rename this layer as outlined. Next, I'll pick up a color
from the reference image. I'll try to select a darker shade for the
outline of our flower. And with our six B pencil brush with the size of
around 20 per cent, I'll start adding
outline to the flowers Make sure when you're adding
outline to these flowers. All the outlines are close. Let them and select a darker color for the
center of this flower. You can even increase
the brush size. I'll just use the pressure of your pencil to make
it look thicker. Now moving on to add outline
to the stem of this flower. For that, I'll add new layer, rename this layer
as outlined stem. I'll select a green color
from our reference image. You can even select
any other shade of green of your choice. Now let's move on to adding
some colors to this flower. I'll hide my sketch layer, tap on our outline layer and tap reference, add a new layer. This layer below
our outline layer, I will be adding two
shades of purple here, like the one for the inside of the petal and the darker
one for the outside. Next, let's add color to
the stem and the leaves. Tap on the outline stem
layer and tap reference. Add a new layer and put this layer below
our outline layer. I'll select a lighter green and start dropping into
our stem and the leaves. We'll be adding a very basic
line onto this flower. For that, I will add a new
layer above our outline layer, and I'll rename this
layer as line art. I'll select the same
color as the outline. The darker shade of purple. With my six feet and see
the size to around 10%. I'll add some basic liner
to the flowers first. We're done with our
third flower here. Let's move on to the fourth one.
10. Daisy: Sketch: Let's start sketching our
fourth flower that's Daisy I'll tap on my food Canvas. These are the collage of images of collected for our reference. Always choose a reference
image that can show you different angles
off the flowers Like in this image, I can clearly see the petals and the shape of this flower. In the second image, you can see the center clearly, which will help us
while we're sketching. Before sketching our flower, we will be doing a stick figure. Like for example, for this flower stick figure will
look something like this. Also you can see the tiny buds. Let's move on to
sketching our flower. I'll select the
reference image layer and drag it to one corner. Will be sketching on this
empty space on the right side. Now my first step is to add a new layer and rename this
layer as stick figure. Stick figure is a step
before we start sketching. We'll use line and so
good to plan our flower. I will be using six B pencil for all our steps and
all the layers. I'll start by drawing a circle. Hold your pencil tip
on the screen and hold with one finger to
make it a perfect circle. Another circle in the center. This will be a
front-facing flowers, like the second image
in the reference image. Hold your fingertip to
make it a perfect circle. And you can even adjust until you're satisfied
with the shape. For the second floor,
I'll be drawing an oval. And this time I'm not
using my fingertip because that's going
to make it a circle. Once you leave your pencil tip, you can see this option
with edit shape here. Four nodes will
appear on your shape. You can even adjust
with these nodes. Next I'll draw another
oval in the center. Tap on Edit Shape. If you need to do any changes. You can even hold these
nodes and change the shape. For the stem and the leaves. I'll be only using lines. I have this stick figure in the resource section
of this class. You can even download
them and follow along. Once you're done with
your stick figure, Let's move on to the sketching. First, I'll go to layers, hide my reference image layer, select my stick figure layer, and move it in the center. And reduce the opacity of this layer to
around 50 per cent. Next, add a new layer and rename this layer, sketch layer. Select a gray color. I'll start with
the first flower. Moving on to the second floor, sketching some stem
and the leaves. We are done with
our sketching heel. Let's move on to adding some colors and line
art to this flower.
11. Daisy: Outline, Color & Line Art: Let's start adding some
bright color to our daisy. Now my first step
is to go to layers, add a new layer, and rename
this layer as outline. I'll select a bright
yellowish orange color with my six B pencil brush. And I'll start
adding this outline for the center of our floss. Now for the petals
of the flower, I'm going to select
a light gray color. As the buttons are
white in color, we can unselect white. I'm going to select
a light gray color and start adding
outline to our petals. Outline for the second flower. Now for the stem and the leaves, I'm going to select a
bright green color. You can even add a new layer for the outline of the
stem and the leaves. Make sure while
adding the outline, there are no gaps in between. So we can fill colors in them. We're done with
the outline here. Next I'll go to Layers
and hide my sketch layer. Tap on outline layer
tab reference, and do new layer. This layer below
our outline layer, I'll change the background
to a little darker color. So when we're filling the
flowers with the white color, we can see that clearly. Now for the center of the flower selecting a light yellow color. And I'll drop that
in the center. Selecting a white
color for the better. I'll drop the white color
in one of the better. You can see this option
called continue filling. This is when you want
to continue filling same color in more
than one shape. For example, I need all my
pedals to be in white color, so I don't need to keep dropping the same color again and again. I can just take my pencil tip to the place where I want
the color to be filled. I'll do the same for
the second floor too. I'm done with the floss here. Let's move on to the
stem and the leaves. I need a color slightly lighter than the
outline of the stem. I'll select the outline color. Select a lighter color
from the Color panel. Drop in one of the stem area, tap on, continue filling
with three color. Take your pencil tip to the
areas you want it to fill. Again. You can
adjust the threshold here by increasing or decreasing the
percent of the flood. We are done with
filling colors here. I'll go to Layers. Now for the lineup, add a new layer and rename
this layer as line art. For the petals,
I'll be selecting the same color as
the outline color. And we'll start adding these
basic line up to the petals. I'll continue this
for both the flowers. Now again for the
stem and the leaves, I'll be selecting the same color as the outline of the stem. Now for the center
of the flower, I'll unhide my reference image. Select the same color
as the outline, like in the reference image. I'll start drawing these
goods from the outline, which goes towards the inside, a little smaller
towards the inside. Same for the second flower to be and done with our daisy here. Let's move on to our fifth
floor that's tightly.
12. Tiger Lily: Sketch: Let's start sketching
our fifth flower That's Tiger Lily. I'll tap on my fifth canvas. These are the collage of
reference images that I'll be referring to for sketching and also for picking up colors. When you're collecting
your reference images, make sure you can see
the flower clearly. Like for example, here you can see the flower from one angle. In the second image, you can see these buds and also the
stem and the leaves. While sketching, we have to make sure we follow these shapes. Every plant and
Flower has their own different, unique structure. Now let's move on
to our sketching. I'll select my
reference image layer and slide it on the left. And we'll sketch on
this right side. We'll start by
adding a new layer. I already have a layer here, tap on the layer and rename
this layer as a stick figure. Stick figure is a step
before we start sketching. It is more like
planning with shapes, like circles and lines. I'll select bright red
for the stick figure. With my six B pencil brush. Brush size can be
anything around them. I'll start with the stem first. I'm just using lines and I'll adjust the size and the position section
of the stem. Next for the flower,
I'll be drawing an oval shape in the
center of the stem. Draw an oval shape. Tap on Edit Shape. If you need to do any changes, will see these four
nodes on your shape. You can hold these nodes
and adjust your shape. Next to tiny stem for the buds And oval shape at the
end of these lines. And at the bottom these
tiny lines for the leaves. Now let's move on
to our next step of sketching this flower. I'll go to layers, hide
my reference image. Shift this stick
figure in the center. It is the extras here. So begin. Draw the center of this flower. Again. For the center
of this flower, I'm just using lines
for the placement. Now to start sketching alphas, reduce the opacity of
my stick figure layer, add a new layer and rename
this layer as sketch layer. I have to stick figure in the resource section
of this class. You can even download
that and follow along my six B pencil. I'll select a light gray
color for my sketching. I'll keep my reference image on the side and unhide my
reference image layer. And just keep it on the canvas. Going back to my sketch layer. And start sketching
my flower first. Itching the buds here. Let's start with the leaves. So we are done with
our sketching here. Let's move on to adding some colors and line
up to this flower.
13. Tiger Lily: Outline, Color & Line Art : Let's add some colors
and line art to Tiger Lily My first step is to add a new layer and rename
this layer as outline. I'll reduce the opacity
of my sketch layer. I'll unhide my
reference image to pick up a color for our outline. Pick up a dark orange
for our flower. You can even select your own
color from the color panel to start adding outline
to the flowers first, make sure you don't leave
any gaps in between us. We will be filling these colors. Next, pick up a dark green color for our stem and the leaves. Again, I'm going to pick up a color from the
reference image. You can even pick up a color of your own from
the color panel. I'll continue adding the outline for the stem on the same layer. But you can even add
a new layer for this. Now to add outline to the buds, I'll select a bright
pink color. For this. I'll add a new layer and outline to the buds and
the center of the flower. We're done with
the outline here. Let's move on to
adding some colors. For that, I'll go to Layers. Good to outline layer, tap on the layer
and tap reference. Now add a new layer and put this layer below
our outline layer. Reference will help us
fill color in this flower. But on a new layer, I pick up a light orange color for the outside of the flower, and a dark orange
for the inside. A light green color
for the stem. Instead of dropping
the colors so many times you can even
use the option. Continue filling with
three color on top. Now to fill color to the buds, I'll go back to my layer. Select a light pink color, and I'll fill all
the three buds Now the color is going
on with the Canvas because the reference is
on a different layer. I'll go back to
my outline layer. I'll turn off the
reference here. On Layer five, drop
the color again. I feel the pink on the center
of the flower looks today. I'll add for locally or five and painted with the
bright pink again. Our next step is to add
line on to this flat. For that, I'll go to layers, add a new layer, and rename
this layer as line art. My 6B pencil brush. With the brush
size to around 15. We'll start with
the flower first. I'll select the same color as
the outline of the flower. For the line art, one of the most important tip is to follow the shape of the flower. For the buds, I'll select
a dark pink color. I want the shape to be to turn darker than the base color. For the stem, selecting the same dark green as the outline color. Next we'll be adding
dark spots on the fly. For that, I'll add a new layer and rename this layer as spots. I'll select a dark color
from the reference image. My brush size is
around 50 per cent. I'll start adding
these uneven spots using the reference
image as my reference. And we are done with
our fifth floor here, that's Tiger Lily. Let's move on to turning these flowers into
a seamless pattern.
14. Seamless Pattern: Half Drop Repeat: Let's turn these flowers
into a seamless pattern. We will be turning
them into a half drop. Repeat. My first step is
to duplicate our folder. This is to keep our original
artwork safe. For duplicate. I will swipe left and
tap on duplicate. Next, I will rename or
folder as wildflower working so that we know which
folder we are working on. Tap on my working folder. Next step is to merge each
flower into one layer. I'll start with the first one. Two layers. Delete
my reference image, stick, figure, and sketch
from these layers. And I'll pinch and merge
all the other layers. That will give us just one
diode with the flower. I'll repeat these steps
with all the other flowers. For diagonally, I want
to add the flour here. You copy paste the
fly we already have. For that, I will
duplicate my layer first, hide my previous layer, tap on selection tool. And with my freehand option, I will start tracing the floor. You can even use eraser to get rid of the extra on the sides. Once you're done
selecting the floor, tap on copy paste here to get the selected
flower on a new layer. I'll try to position
this flower on the stem. And we're done with
that Tiger Lily here. Next for the pattern, I will create a new Canvas. Tap on the plus sign. Again, on the plus sign. And I'll keep my canvas
as 4 thousand by 4 thousand pixel, 300 DPI. Now, I will drop or copy all
my flask into this Canvas. Now, she'll be done with getting all the flowers into one Canvas. Next step is to select
all the flowers, group them, and
duplicate the group. Hide one of the group. We have this group
so we can have an extra set of laws
in this canvas. So in future, if you
need any flower, we can go back and
duplicate, open the group. And I'll hide all the flowers
except for Poppy and Lily. Because these two are
the brightest color, these two are red color. I want them to be more like
a hero element of my print. I will not be repeating these two flower
within our block. I place these two flowers first. All the other flowers will be more like a filler to the print. We will also be repeating
them a couple of times. Here. I'm placing all my
floss inside the block. Later, we'll split them
into a half drop repeat. Once you're done placing
all your elements inside this square will merge all these elements into
one layer and then split. Before merging them, I'll
duplicate the group. So in future, if we
need to do any changes, we still have them
on different layers. Now we have this one layer
with all the elements. Now to split this layer, I'll select any light color. Add a new layer below this layer below our
element layer. Fill the whole layer
with this color. Reduced opacity of
your colored layer. Group the layers and duplicate
the group two times. Hide any of the two groups here. Select one of the group. Now under snapping. Make sure your magnetics
and snapping is on and the distances around 21. Now slide this group left. Slide it until it
snaps in the center. And you can even see a
golden line in the center. Now unhide one of
the other group. This will slide right? Again, this needs to snap. You can see a golden line. That means it's on the
perfect seamless line. Unhide the third group. And this will go down, right down and needs
to snap again. If it is showing any gap or overlapping on any of
the splitting areas, that means you need to redo
the whole splitting process. It should be seamless like this. Next I'll delete all
the color fill layers and merge all the rest
of the layers into one. Now let's fill the empty space
in-between these flowers. I'll open our previous group and duplicate the flowers I need to fill in-between these gaps. I will split this
daffodil vertically into half with the same splitting
process we did before. I'll merge all our
flower layers. Duplicate this layer,
hide the layer. And I'll just repeat. Select the layer and
drag it to one corner. And drag it to the left
corner. Duplicate. Drag it down. Duplicate
again, slide it right. And a step up. You can see the block snapping. Again, duplicate the layer. Slide it up. Duplicate our block again, and fill the bottom
corner again. Here we are done with our
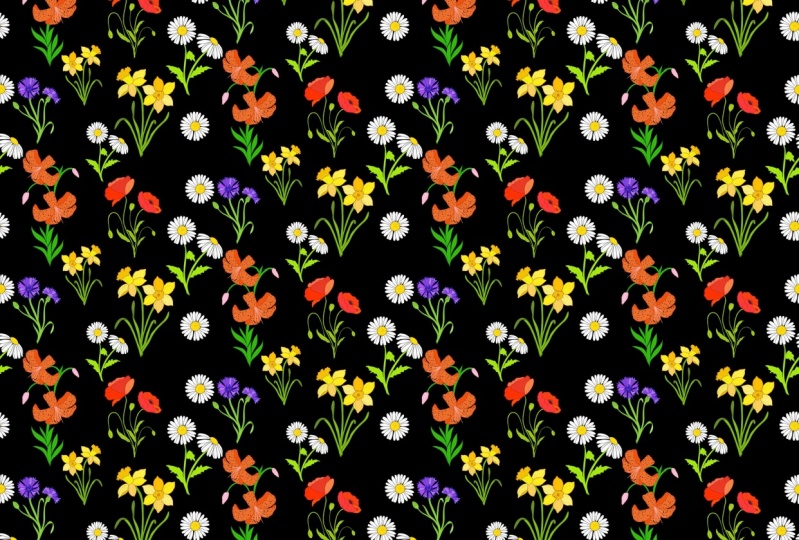
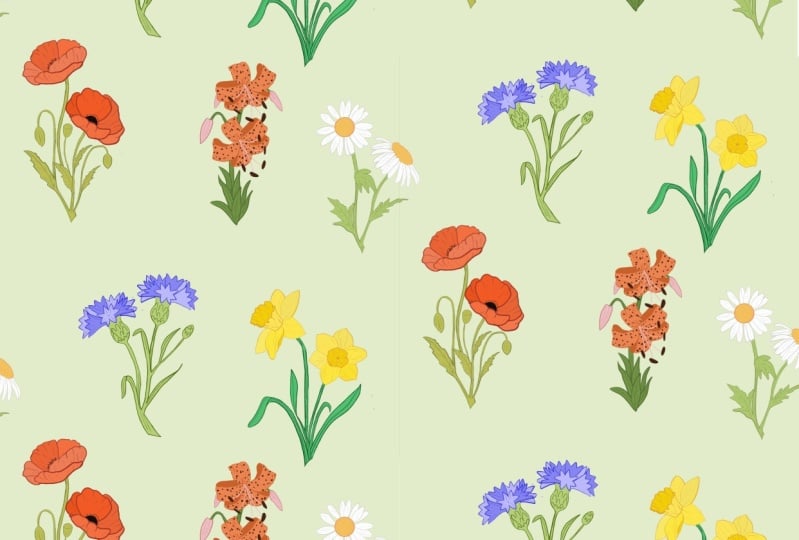
half drop repeat pattern. Let's try it with different
background colors. This is how it looks on print-on-demand sites
that society6 and some mockups if you're planning to license
this artwork. Thank you so much for
taking this class with me.
 Vinita Upadhya, Illustrator & Pattern Designer