Transcripts
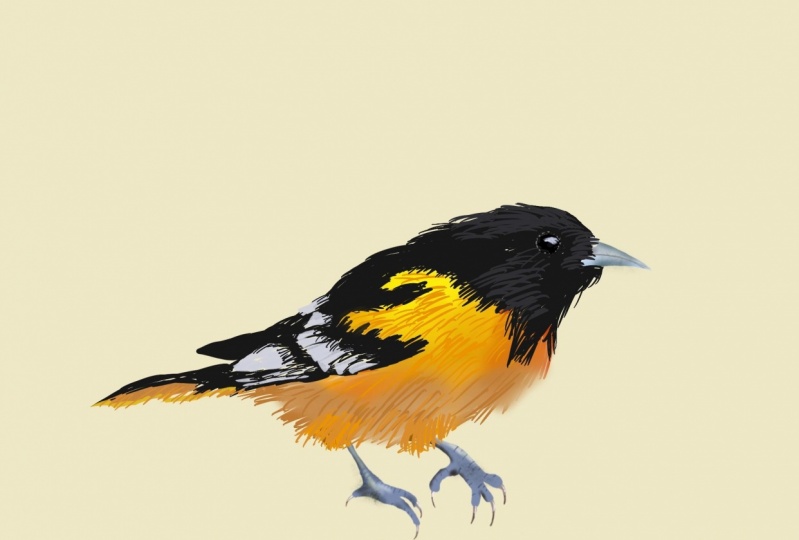
1. Introduction: This class is about illustrating semi realistic birds on procreate. Hi everyone, my name is Vinita. I'm an illustrator and a pattern designer based in Singapore. My designs are inspired by nature, botanical and Birds, this classes for someone who knows the basics of procreate. Thank you for joining the class.
2. Class & Project Overview: I will start by explaining you the brushes im going to use in this class, which section they are located in, and which part of the bird we're going to use it for. We will illustrate our initial sketch with the reference image and use it for all the four birds. Which will save a lot of our time. Each bird has their own unique pattern and colors. So we will alter our illustration depending on the feather and pattern of the bird. We will use the reference image for picking up the colors and patterns of the bird to achieve more natural and semi-realistic look. We'll be illustrating small birds in this class. The first is the tufted titmouse, Songbird, Dark eyed junco and Rose Finch. For the class project. You can illustrate any bird of your choice using this process. You can also find the initial sketch we made in this class in the resource section and use it as your reference sketch. I really hope to see your birds illustration in the class projects section.
3. Brushes: Let's talk about brushes, under the brush library I have created a section called Birds, which you can do by clicking on the plus sign These are the five brushes that we are going to use for this class. The first is the studio Pen, that you will find here in the inking section. The second is, again an ink You'll find in the inking section, Third is the short hair brush that you will find in the touch-up section Fourth is the soft brush under the airbrushing. Fifth is one of the charcoal brush in the charcoal section here. Now let's start by trying out these brushes. The first is the studio pen. This brush is very smooth with the edges and it is pressure based. You can create thick and thin in one stroke just by pressing the pen a little harder, which is really good for the beak and the feet effect. The second one is the ink again, this is for the feather. We will be using this a lot in this class. The shape and the effect this brush creates is really good for the feather. It is a little transparent too The third one is the short hair It is for the tiny feathers near the belly and the chest part of the bird. Fourth is the soft brush This brush is mainly for the shading of the beak and the feet. Now the fifth one is the charcoal brush. This is again to give a grudge and rough effect to the beak and the feet.
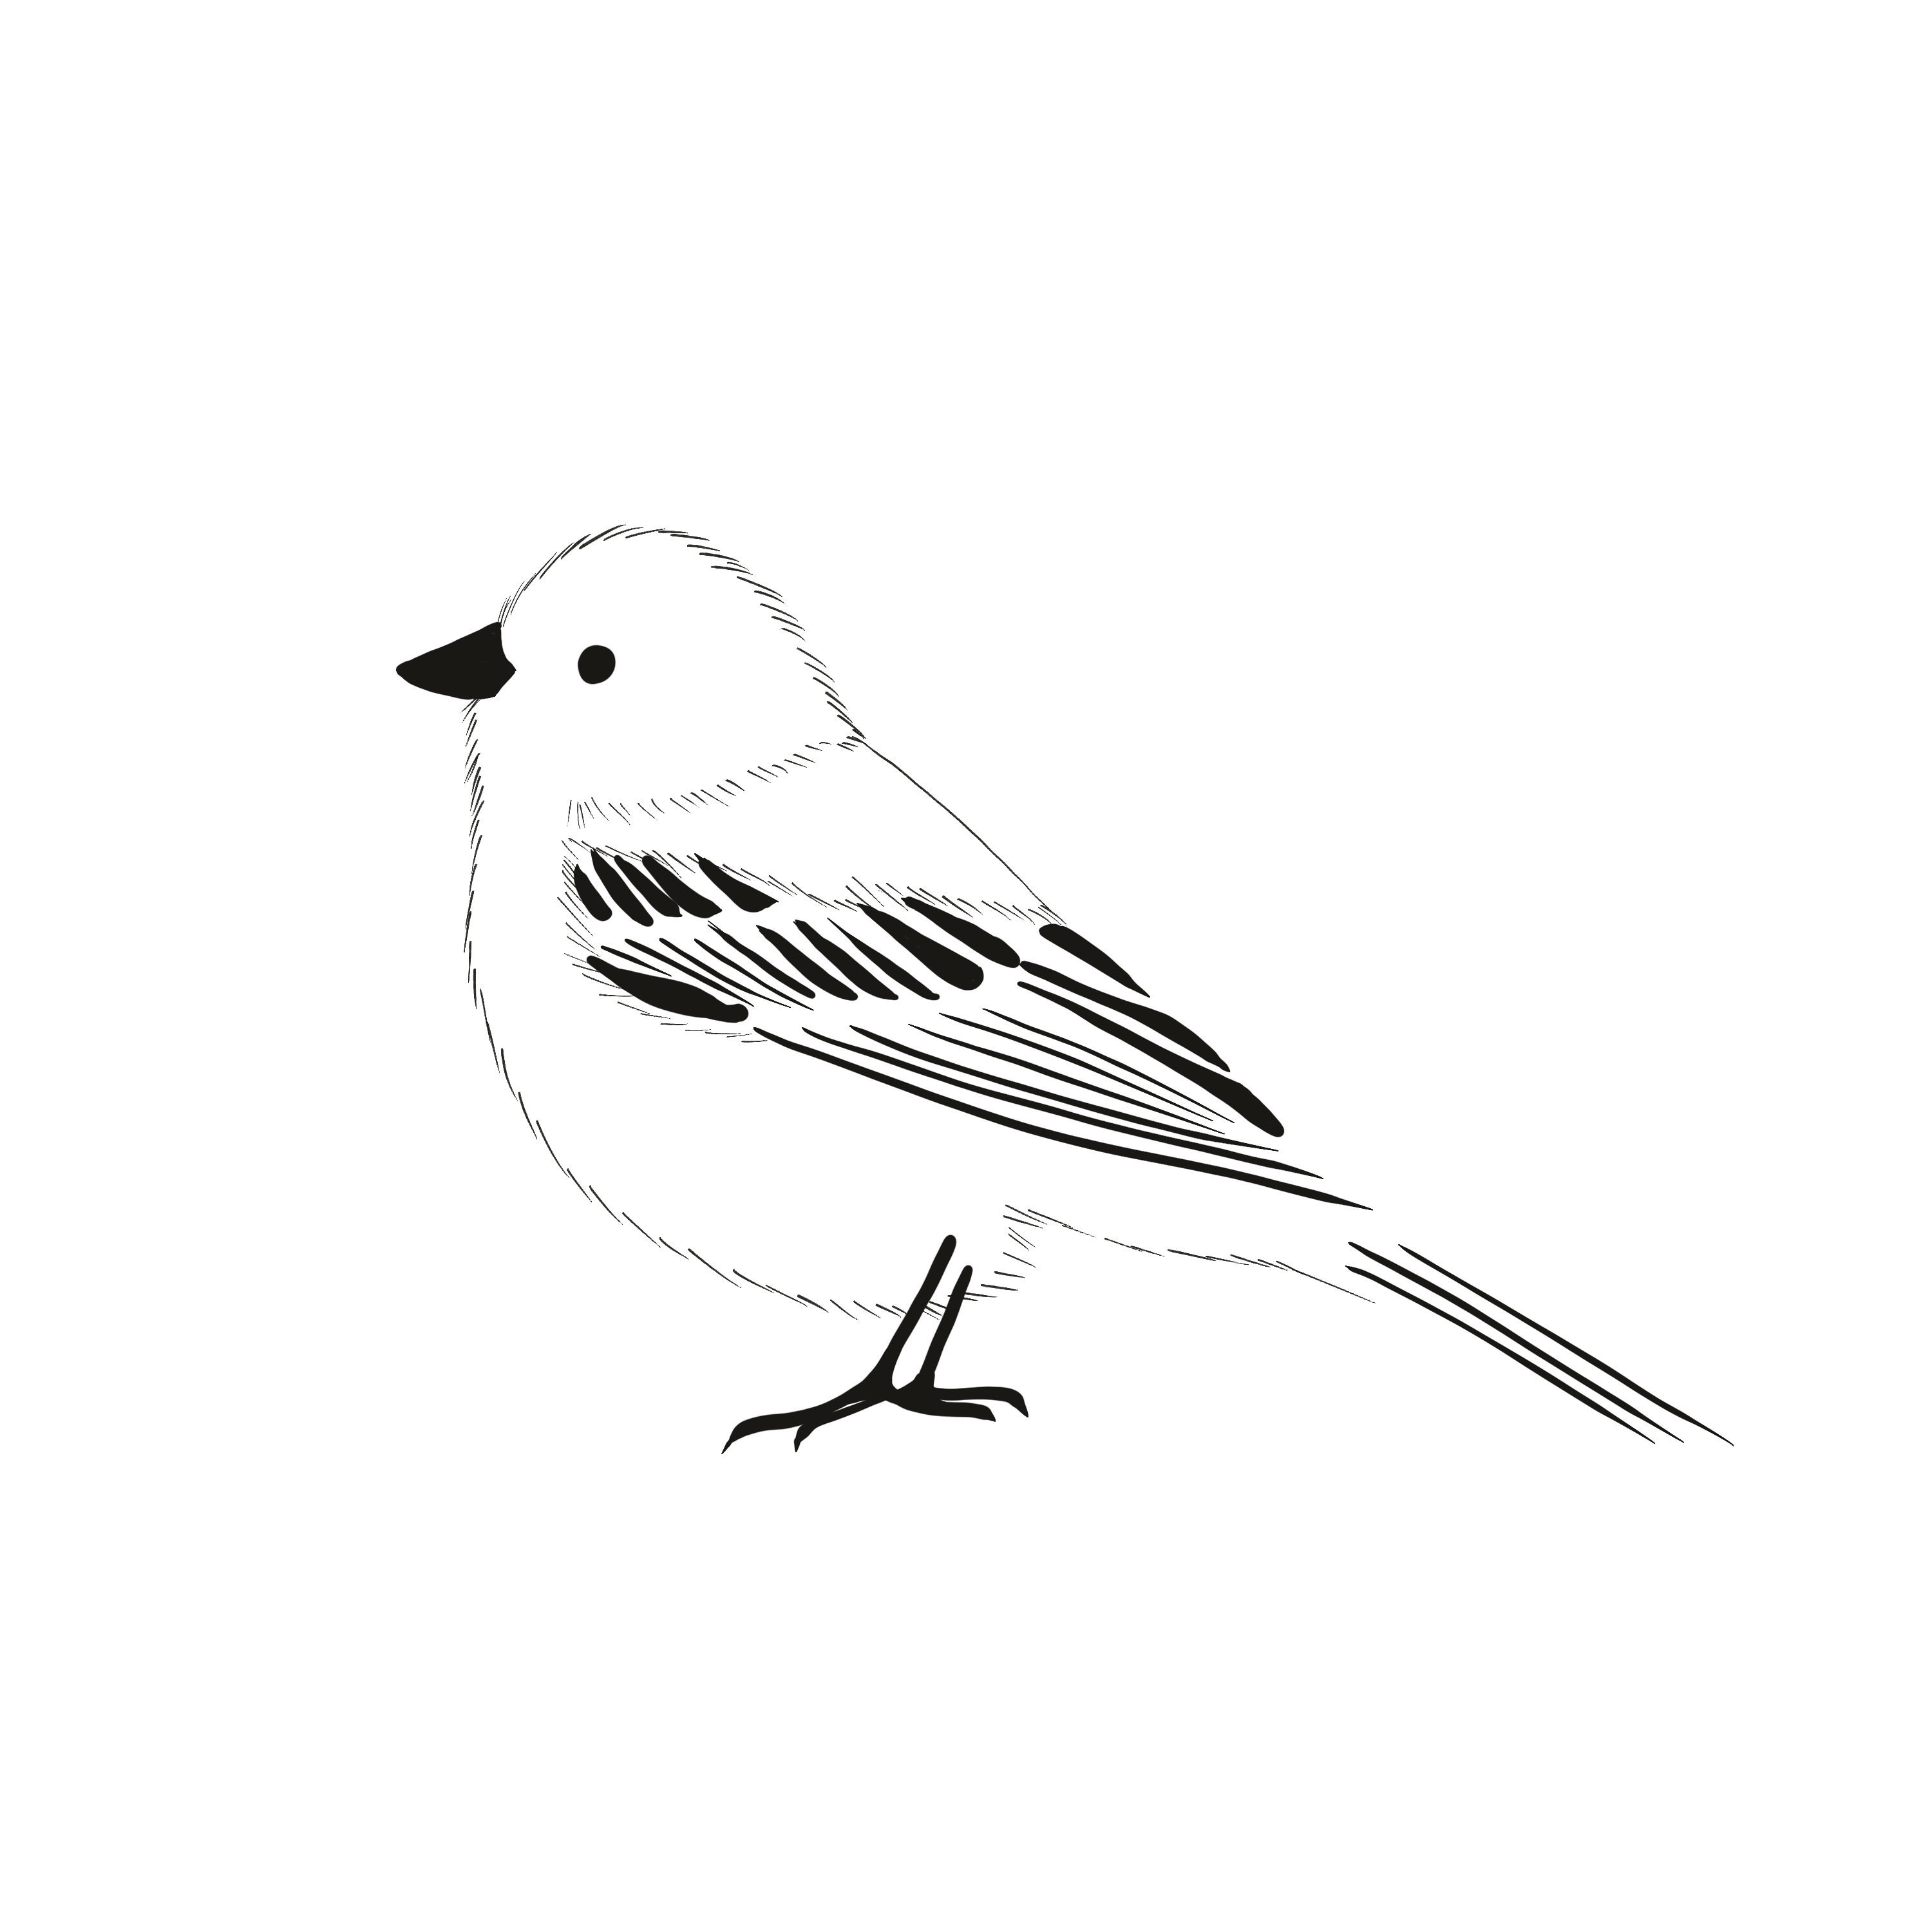
4. Parts of the Birds & Sketch: I will start with the Quick Parts of the birds. This is an image of a sparrow and we will be using it only for the shape reference. And I chose this image because i like the angle and the shape of the body, the feather and details on the wings are very clear. This will make it easier for us to sketch. Let's move on to the parts of the bird, beak The crown which is the top of the head, back feather, wing lining. Secondaries, primaries, feet, belly, and the chest. Let's set up our canvas, mine is 3000 x 3000 pixel & 300 dpi, which is standard for printing. A fourth step is to insert our reference image. We go to action, swipe left to insert a picture. Insert a private photo from the gallery will add a layer about this reference image. decreased the opacity of our picture Select our Studio pen And we'll start by drawing a circle for the head. When you click on Edit Shape, you get these four nodes, which will help you edit your circle in any shape you need. Now another bigger circle for the body. Edit Shape. Now you can change the shape depending on your own style. Now I'll add another layer on top of this. We will start fleshing out the stick figure. Ok Now, I'm picking up my feather brush with the smallest size. And then start drawing the outline for the tiny feathers from a reference. And now I'm going to hide the image and the stick figure. And we are done with our basic sketch for all the four birds
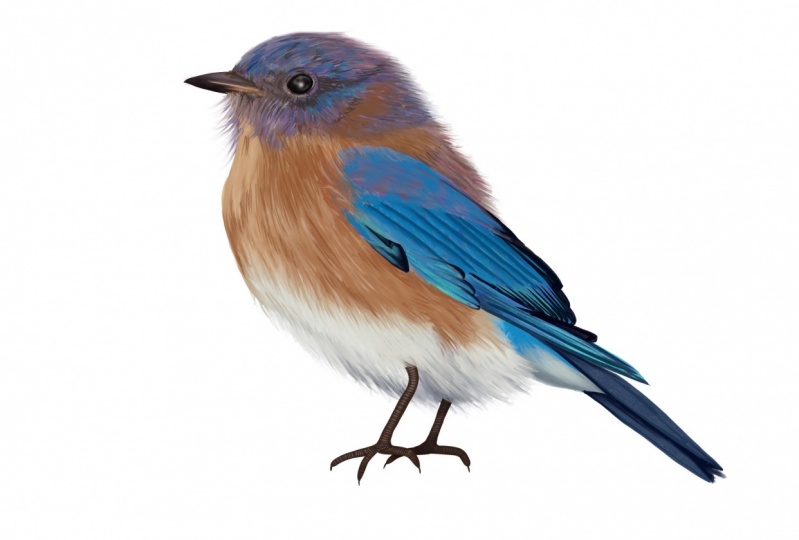
5. Dark Eyed Junco: Dark Eyed Junco It is a common bird from North America. They generally have a dark gray head, back and wings with the white belly, usually with the pale pinkish Beak Let's start by setting up our canvas. Mine is 3000 by 3000 pixel & 300 dpi, which is a standard size for printing. I liked my background to be a little off-white So I'll change it to little off white Our first step will be to import our initial sketch into our Canvas. I'll pick this up, go to gallery and drop it here. Then I'll go to layers, rename this layer as sketch, and add four more layers and rename them. The first one is eyes, feet and beak. And above that will be our feather layer On top of that will be our pattern layer And the last one is our touch-up layer. I'll decrease the opacity of our sketch Then let's go to our first layer And we'll import our reference image, go to Actions, Canvas, reference Now click on image and import image from the gallery This reference image is going to help us with the colored picking and the shape of the bird Now we'll go to our first layer and pick up our Studio pen. Start with the beak first I'll pick up one of the mid-tone from the beak And stop drawing on this reference image Now, mid-tone for the lower beak Now I'll pick up my smudge tool, the medium brush, and start smudging on the centre line. Now alpha lock this layer To add the highlights I'll select one of the darker shade Select our soft brush and start adding highlights Wherever you can see the shadow or the edges darker I'm going to take one of the light To add it in the center Darker shade at the edge of the beak The more details you will add, the more realistic it will start looking And select smudge to medium brush and start smoothening the lines Now you open the alpha lock for this layer so we can start drawing the eyes, take my studio pen, select one of the color from the eyes and start drawing You can also draw your eyes on a different layer for a non-destructive way of working Now I'll select my soft brush to add reflection in the eyes I’ll take white I'll add reflection with a little pressure Now we'll move on to the feet and select one of the mid-tone Pick up my studio pen, and start drawing the feet. Now we will alpha lock this layer to add more details I'm selecting the soft brush, picking one of the lighter color, and start highlighting in the center of the feet Now I will pick up one of the dark color to add shadow on the sides for making the tip of the names darker Adding more shadows Now we're done with the feet We move to our pattern layer. We'll select our ink brush for feather Pick up one of the darkest color from the tail Will start drawing the tail first then move to secondaries and primaries You don't really have to follow the image exactly You can also follow your base sketch and start drawing over it I'm selecting one of the lighter color for the wing liner I've increased the size of the brush So when you start, you start with the higher pressure and leave towards the end Now we're going to decrease the size of the brush and start drawing on the crown Will cover the whole head area with the same brush and the same color Ok And I'm selecting a darker, more like a black, and start adding shadow wherever I can see in the image We have taken the dark grey as our base color and we'll be giving details with darker and lighter shade And the darker color as black And picking up a lighter gray for more details and highlights Ok Ok Now we are done with the head, will go to our feather layer To add our brown feather below this layer. I'll pick up one of, the mid-tone of browns and start covering the whole back area I'll select a darker shade and start adding the feathers on top of the lighter layer Again, picking up a darker shade And more feather details on the top This will give it a more detailed and realistic feel Now for the belly, again, I'm adding one of the lighter gray as my base color And later I will add details but lighter and darker shade And picking up a more lighter gray to add the shadow effect And then on top of that I'm adding feather with the white color Now I'm picking up one of the color for the tail I'll be picking up two three colors of the greys To add more details Now for the primaries and secondaries again, I'm picking up lighters and darker shade of brown, and I'll be picking up the colors from the image Now we moved to the touch-up layer And we'll be adding feathers That needs to overlap the pattern layer Will also add our eye ring On the touch-up layer I'll be selecting one of the color from the image and select our Studio Pen, and start drawing around the eyes Now we'll move on to our last step We will alpha lock our eye feet and select our charcoal brush, select one of the lighter color And with a very light pressure, will start adding texture to the beak Now, let's move on to the feet. Again. I'll take one of the lighter, the color first And very lightly add extra I'll be picking one of the dark color again and smoothly And we are done with our Dark Eyed Junco
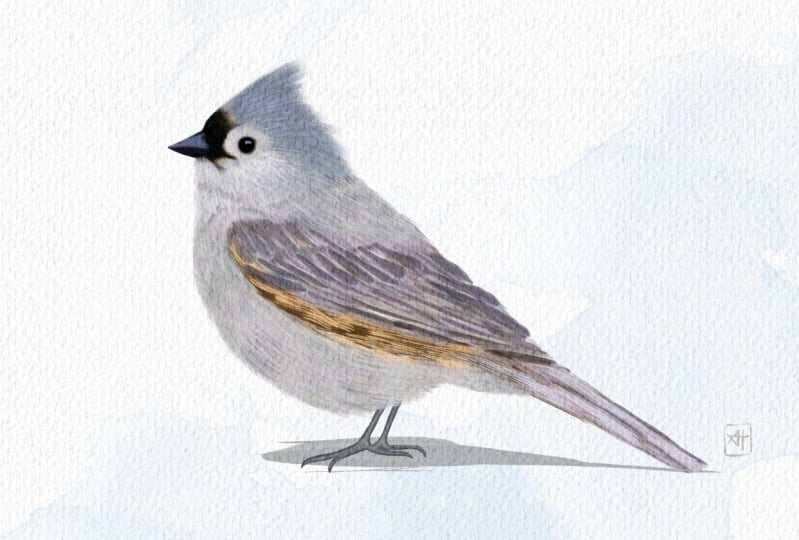
6. Tufted Titmouse : Tufted Titmouse It is a small song bird from North America It has a black forehand and tufted gray crest on their head Gray upper body with white front outlined with rust colored flank Now let's start by setting up our canvas Mine is 3000 by 3000 pixel with 300 dpi, which is standard for printing Our first step will be to import our initial sketch to our new Canvas I’ll pick this up, go to on new canvas and drop Then we'll add four layers on top of the sketch layer and rename them The first is our eye, beak and feet Above that is our feather layer On that is our pattern layer And the last one is our touch-up layer I will decrease the opacity of our sketch layer and add our reference image We’ll go to Actions, canvas and reference We’ll click on image, input image from the gallery Then we'll go to our eye beak and feet layer Select our Studio pen I pick up one of the mid-tone from the reference image and start with the beak first. I'm going to draw the beak a little smaller as the reference image has a smaller beak than our base sketch I follow the reference image Our next step is to alpha lock this layer Select our smudge tool Select medium brush And will smudge the centerline Now we’ll select our soft brush Pick up one of the lighter color from the beak And we'll start adding the highlights Now I am selecting the smudge tool to smoothen the lines I’ll open the alpha lock for this layer So we can draw our eyes, select our Studio pen, select one of the darkest color, and start drawing on the reference sketch Now I'll select our soft brush Select white-collar to add reflection to the eyes Next we'll move on to the feet Select our Studio pen, select one of the mid-tone from the reference image and start drawing on the initial sketch I will alpha lock this layer, to add details Pick up one of the lighter color, select our soft brush and start from the center on the sides Next, we'll move to our pattern layer and start with the tail first I'll select one of the darker color Select the Feather brush We'll start by drawing on the tail I've increased the size of the brush for the winged liner with more pressure in the start and leaving towards the end And now we'll move on to the Black patch on the forehead I've reduced the brush size and start adding tiny strokes And now we'll move down to the feather layer Select one of the dark color. And we'll start drawing the crest on the head As we go towards the eyes I'm going to select lighter shade of grays for the gradient effect Ok Ok I am creating a base for the back now, we’ll add details with lighter and darker gray Ok Now moving to the tail, I am increasing the size of the brush. Ok Now adding details with the lighter and darker shade of the same Now picking up my short-hair brush, selecting one of the mid-tone And creating a base for the chest and the belly Now selecting a lighter shade to add highlights Now for the rust coloured flank I'm selecting one of the mid-tone from the image and creating a base with that color Now adding the details with the darker and lighter shades Now moving to the touch-up layer to add the tiny feather, overlapping the wings Next I'll be adding the detail under the beak I'll pick up one of the lighter color first and create the shape pick up a darker color, To add details on the top Next, I'm going to reduce the size of the beak I go to select, freehand, select the beak, select wrap And I'm going to fix the shape a little bit Go to free-form and reduce the size Next I am going to the touch-up layer to add more details on the crest Now with a lighter gray, I'm adding a ring around The Eye For the last step, we are going to alpha lock our eye beak and feet layer With our charcoal brush We'll start adding details with lighter and darker color of grays, We'd repeat the same on the feet And that's how we are done with our Tufted Titmouse
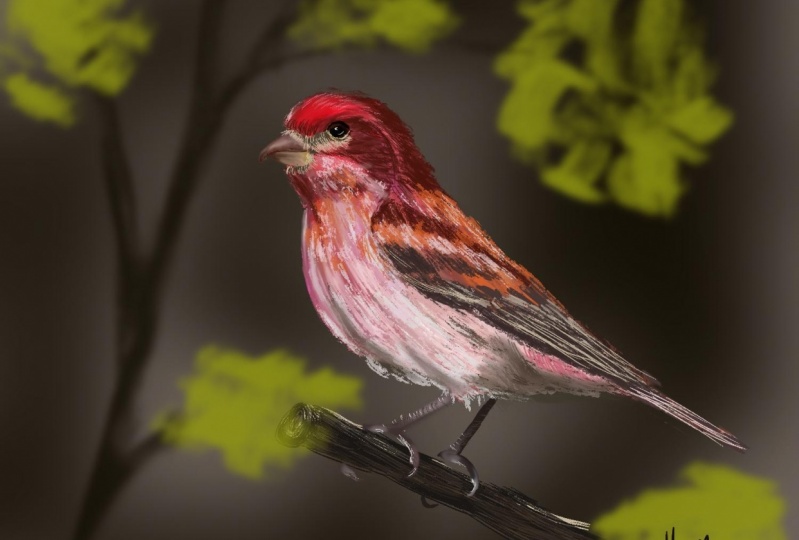
7. Rose Finch: Rose Finch, It is the most common bird of Asia and Europe, It has a rosy ketamine head, breast and rump, brown wings with white belly and a heavy Bill Let's start by setting up our canvas Mine is 3000 x 3000 and 300 dpi, which is standard for printing Our first step is to import the initial sketch to this canvas, Next is to add layers I'm adding four extra layers and renamed them The first one is eyes, feet, and beak Above that is our feather layer Next is pattern And the last one is touch-up layer Our next step is to import Our reference image Will go to action, canvas and reference Click on the image, inport image from the gallery, Next, we'll go back to our first layer, decrease the opacity of our sketch Pick up our Studio Pen Next pick up one of the mid-tone from the beak And we'll start drawing on our reference sketch I'm going to alpha lock this layer to add details Next, I'm going to select my smudge tool, medium brush, and starts smudging from the center of the beak Pick up one of the midtone From our reference image Select our soft brush and start adding strokes on the beak I'll pick up as much color as possible and add different shadow and light details Now for the eyes, I'm going to open the alpha lock for this layer Select my Studio Pen, and start drawing our eyes Now with the soft brush Selecting the white color to add reflection in the eyes We move on to our feet now I'll select one of the mid-tone I pick up my Studio Pen, and start drawing our feet Next I will alpha lock this layer to add details I'm going to pick one of the lighter color to add highlights and select my soft brush from the center Okay next we'll move on to the pattern layer Select our feather brush Select one of the darker tone from the tail and start drawing our tail I'll keep picking up the darker shades from the image and drawing the pattern on the bird I've increased the size of the brush for the thick portion of the feather Starting with a little pressure and leaving towards the end And next we'll move on to our feather layer Select one of the lighter color and start drawing tiny feathers from the promised the bullet. I'm going to select different shades of pink and tried to create a gradient effect on the head area Now I'm going to select one of the lighter color and start adding details on the top Of the base layer now picking up a darker shade and adding details around the beak, I am following the image for the color and the shadow reference The more color you add the more detailed and realistic it will start looking Okay Now picking colors for the tail and adding details with the darker and lighter shades Ok Now selecting one of the lightest color And I've decreased the size of my feather brush and start adding strokes. I'm following the image and picking up as much as possible and adding tiny feathers Now I'm going to select my short hair brush on the feather layer and start picking up colors for the belly and the chest area First I'm going to create a base with the mid-tone color and then highlights with the darker and lighter colors Ok Now on the touch-up layer, I'm going to start adding tiny feathers overlapping the wing areas. Now with the Studio Pen, I'm selecting a lighter color and adding the ring around the eye. Now for our last step, I'm going to select one of the darker color And with the charcoal brush, I'm going to add texture to the beak and the feet And we are done with our Rose Finch.
8. Song Sparrow: Song Sparrow It's a medium-sized sparrow from North America It has dark brown spots in the middle of the breast The face is gray with brown streak going through each eyes Now let's start by setting up our canvas Mine is 3000 x 3000 pixel and 300 dpi, which is standard for printing I like my background to be a little bit off white so I'll go ahead and make my background as a little off white Okay Our first step will be to import our initial sketch to this canvas and drop It here Now we will start by adding more layers on the top of this sketch I'm adding four layers and let's rename them The first layer is eyes Feet and beak, on top will be the second one will be feathers And top of the feather will be the pattern And on pattern The last one is the touch up layer Now will go back to our first layer and add our reference image to the canvas Actions, Canvas, reference We will import our reference image Go to image, Import, The reference image is going to help us with picking up the colors, features, and pattern of this bird will decrease the opacity of our initial sketch And start by drawing our beak first Always start by picking up on mid-tone We'll take our studio pin and start drawing on the beak As you can see, the reference image has more of a pointy beak Then what we have done on the initial sketch So we'll do the changes and the alteration while we are illustrating Now I will pick up a color for the lower beak and try to achieve the same shape as the image Okay Alpha lock this layer To add more details, We’ll go to our smudge tool Take the medium brush and start by smudging the centre line Because it's true sharp, we want it to be little smoother, We pick up one of the lighter color from the lower beak, and select our soft brush and start adding details The more details you add, the more depth and realistic, It will start looking a little shine I can see on the top of the beak And the shadow, a light brown shadow on the bottom, and darker on the tip of the beak Now we can start smudging the hard lines to make it look more merged And we are almost done We'll open the alpha lock, will take us to the open again For the eyes, I pick up a color from the eyes, a darker color, and start drawing on our sketch And now we will pick up our soft brush and white color to add the shine I think that much looks good We can go to our feet Pick up one of the mid-tone and studio pen, and start drawing on the feet. Again for the shape of the feet, you can always do your own shape, whatever you're comfortable with I'm pressing my pen a little harder when i start and leaving it towards the end to give it that pointy nail effect Now we will alpha lock this layer, to add details on the feet, we pick up one of the lighter color our soft brush and start shading and pick up a darker color and shading in the centre Now I'll smudge with the medium brush to smoothen the hard lines Now we'll go to our pattern layer Select our brush, the Feather brush Pick up one of the darker color and start with the tail first You can pick up, couple of dark shades of the browns and stroke on the tail Now for the feather again, we will start with the darkest color Now I'm going to select one of the mid-tone and start filling in between the gaps I'm picking up a darker tone for the wing liner Now with the same shade, will start drawing our pattern Starting from the breast until the end of the belly And following the pattern from the image Now will start from under the beak Now one of the stroke going through the face and the other one through the eyes If you follow the image, even the whole crown is covered with the same color Same pattern on the back too Now we'll go to our feather layer with the same brush We'll start with the tail first, now we have to pick up a shade which we had not used in on our bottom layer It should be a little lighter a little roundish at the end. I'll pick up one of the gray color for the secondaries and the primaries A lighter brown for the primaries. Picking up a darker color from the tail This will give more details and depth to the feather Now a darker color, for the shadow under the feather, I'll start stroking, Same as we did the pattern so it can blend in, a darker brown towards the end Again a lighter color towards the end You have to pick up as much color possible from the image So that will give you more realistic look I'm gonna continue the same tone towards the belly too And this will be my mid-tone And a lighter cream Or you can say, an off white towards the breast, which goes right under the beak Again, I picked up a shade lighter than the off-white we used for the breast I'll be picking more colors to give as much detail as possible Again, a lighter beige I will pick up one of the midtone for the back Feather and use that as the base Cover the whole back feather And we'll start giving the details with lighter and darker tones from the mid-tone This gives more depth and interesting finish to the birds Now we move to the face will select one of the mid-tone of the gray, and give details with the darker and lighter shade of gray I'm creating a whole base You can also take The Eye on a different layer above this layer, which will make it easier for you to draw around the eyes If you see there is an off white patch near the cheek, I pick up one of the color and start stroking and start giving details on the face with a darker gray, Again, a darker shade that creates shadow and depth Picking up a lighter shade for the off-white cheek, Now white for under the beak, Now we'll go to our touch-up layer and start adding more details With a darker brown Wherever you feel there needs to be shadow or more feather effect I'll go back to my feather layer, pick up one of the gray to add more details on the back and the feather areas, With lighter and darker shades, I go to my touch-up layer, add a ring around The Eye I'm taking my studio pen, picking up one of the colors around the eye and just draw a ring around the eye, adding another darker grey Now for the light feather on the breast, I'll be picking up my short hair brush on the touch-up layer and start stroking towards the start off the wing And I'm using different shades to give more details and depth Now the last step, we'll go to our beak and feet layer alpha lock it, and select our charcoal brush and pick up one of the dark color from the beak And I'd start rubbing on the beak with very little pressure Let's go to the feet Again, I'll take one of the dark color And very lightly I'll rub on the whole feet, And I'll pick up one of the light color again, And that's how we're done with our Song Sparrow.
 Vinita Upadhya, Illustrator & Pattern Designer