Transcripts
1. Introduction & What You’ll Learn : Hey guys, I'm Juanita. I'm an illustrator and pattern designer
based in Singapore. In this class, I'm
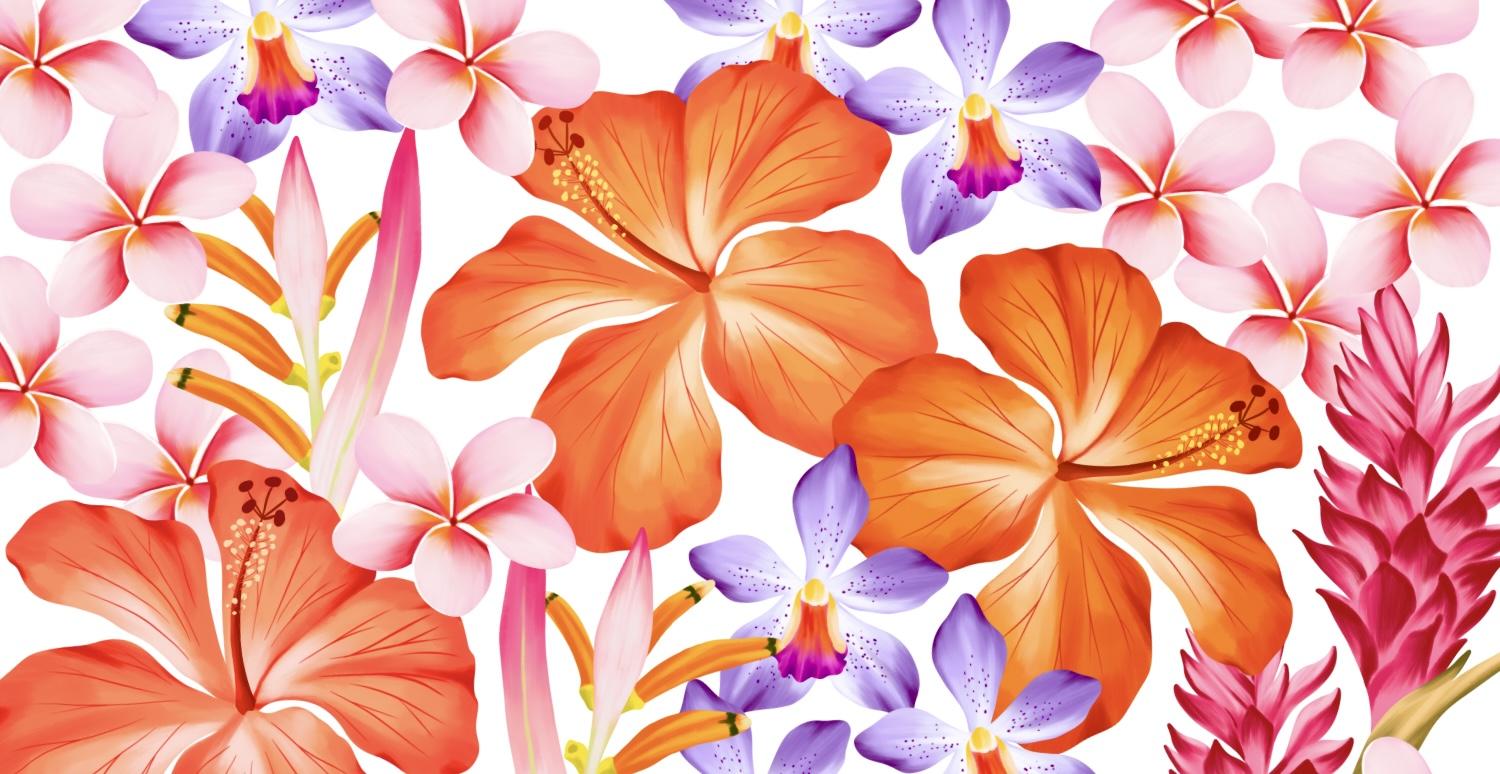
going to show you how I illustrate my tropical
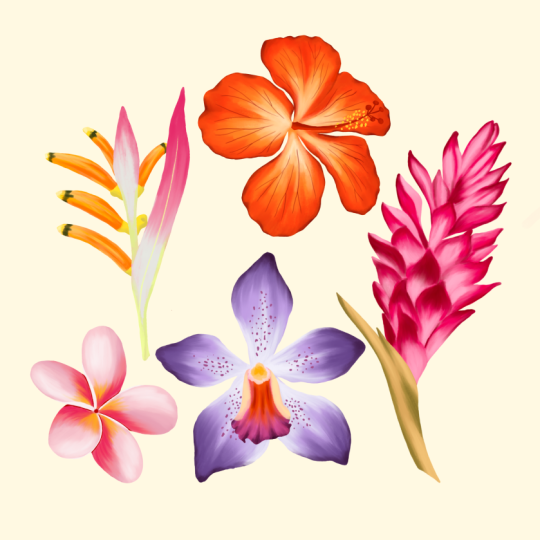
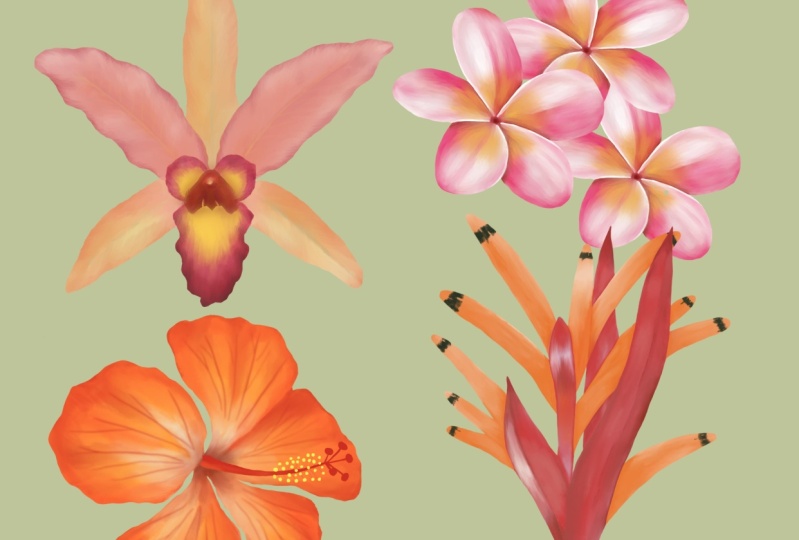
flowers in Procreate. We will be doing five tropical
flowers in this class. That's hibiscus, plumeria, orchid, red ginger,
and heliconia. I will be showing you my step-by-step process of
illustrating these flowers. We will be using
the default brushes from the Procreate
library itself. I have these sketches of all the five flowers in
the resource section, so you can also download
and follow along. These flowers can be converted
into a seamless pattern. I have converted this
into a half-drop repeat. You can upload these
pattern on print on demand sites are licensed to companies for
other products too. Thank you for taking
this class with me.
2. Project & Resources: [MUSIC] If you go under the Project and Resource
section of this class, there are few attachment on the right side under Resources. The first five attachment, where the file name says
Procreate in the end. These are procreate files. When you download them, they open directly in
your Procreate app. They are all the
flowers sketches that we're going to
do in this class. The sixth file is
a zip file with all the images, the
reference images. These are all
royalty-free images, so you can use them for your illustrations or
any other project. For the class project, you can illustrate any flower of your choice using the
technique shown in this class. I have this list of flowers
in the Project section. These are tropical flowers. Just to give you an
idea for the project. [MUSIC]
3. Canvas & Brush Setup : [MUSIC] Let's start with our
canvas and brush setup. I have this folder ready
named as tropical flowers. I have five canvas here
with all the sketches. These sketches are also in the resource section
of this class, so you can download
and follow along, or you can have your
own sketches too. All these canvas
size are 4,000 by 4,000 pixel with 300 DPI. This is quite a big
size for a flower, but it's better to illustrate on a bigger canvas
then on a small one. Let's move on to
the brush library. For sketching, you can use any brushes here under
sketching section. I've used 6B pencil
for my sketches. You can pick any brush you're comfortable with,
because anyway, we will not be using the sketch layer for
our final illustration. I'll make a folder
for our brushes. For that, I'll tap
on the plus sign. Once you tap on the plus sign, you'll get a new folder. I'll rename this folder
as tropical flowers. Now my first brush
is under Inking, that is Technical Pen. Duplicate this brush and
drop in our new folder. [MUSIC] Second is
under Artistic, the second last brush here. I'll duplicate this brush and again drop in
our new folder. These are the only
two brushes we're going to use for
all our flowers, Technical Pen for
all the base layers, and the second brush to add
highlights and details. [MUSIC]
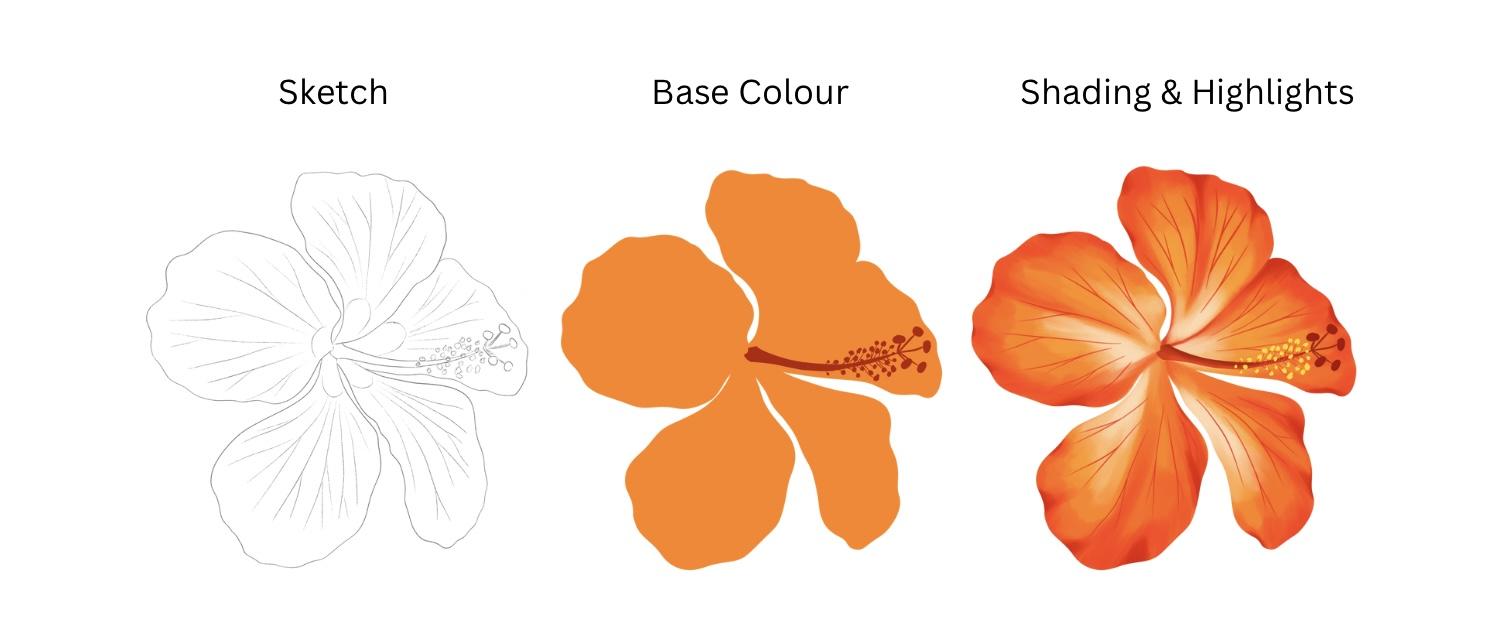
4. Hibiscus: Petals : Let's start with our first
flower that's hibiscus. I have these sketches in the resource section
of this class. You can have your
own sketches or install these from
the resource section. If you have my file, this file just have one
layer with the sketch on it. Now, my first step is to
import our reference image. For that, I'll go to Action. So I've left on insert photo, insert a private photo. You can choose any reference
image of your choice. I have few royalty-free images in the resource
section of this class. Next, I'll go to brushes. Select my technical pen brush
to create our base layer. Go to layers, add a new layer. Put this layer below
our sketch layer. All our illustration layers will be below our sketch layer. I'll rename this layer as base layer so we don't get confused
with the other layers. Select a color from
the reference image. Now, this color should not
be too dark or too light, more towards a midtone, and create a base
layer for this flower. I'll just follow the
sketch and create an outline and fill it
with the same color. [MUSIC] Now we'll start adding
details to this base layer. For that, I'll add a new layer and add clipping
mask to this layer. Next, I'll select
my second brush. Select a darker color
from the reference image. This color should be two tone
darker than our base color. My brush size is
around 35 percent, and I'll start adding these shading details
around each petal. Try to make the brushstrokes follow the shape of the petal. [MUSIC] This was our fourth
layer of shading. Next, I'll select a
darker color from the reference image and again
follow our previous layer. Try not to cover the whole
color of the previous layer. This should be more of a shorter brushstroke
than the previous one. [MUSIC] Next, selecting a lighter color from the reference image. This color should be lighter
than our base layer. I'm going to select this lighter yellow and will start adding
these details in the center. Again, I'm not going to
cover the whole base layer, just to highlight in the center. [MUSIC] Next, selecting a
very light color, more like an off-white. This is again to add some
highlight in the center. [MUSIC] Next, I'm going to
select my smudge tool, select the same brush, and I'll reduce the opacity
to around 70 percent and will start to smoothen
the areas where we feel it looks too
rough or unfinished. [MUSIC] Now, moving on to the
veins on this petal. For that, I'll add a new layer, select my technical pen brush, select a darker color
from the reference image, and I'll start drawing
these veins on the petals. [MUSIC] These veins are
looking too sharp, so I'm going to
blur out a little. For that, I'll go to
Adjustments, blur. Now, here with your finger, if you just slide right, it's going to
increase the percent and also the amount of blur. I'm going to keep this
as around two percent. That looks very light and also merges with the
background very well. Let's move on to the center of this flower in the next section.
5. Hibiscus: Center : [MUSIC] Now for the center
of this flower, I'm going to add a new layer, and I'm going to rename
this layer as Center. Select my technical pen, select a dark color from
the reference image. Following the sketch, I'll
start drawing my center. Fill it with the same color. Now let's add this tiny
yellow part of this flower. Select a color from the reference image and I'll start adding on
our illustration. Next, you're selecting a
bright red from the wing. This is to add this tiny stem on the yellow part
of this flower. Now I've logged
the center layer. I'll just add a few
highlights in the center. Select my second brush. Select a lighter color and I'll add this tiny
highlight in the center. We are almost done
with this flower. I'm going to add few highlights
with a darker color. For that, I'll add a
new layer on top of our petal layers and
clipping mask to this layer. Select a dark color
and I'm going to add this dark color on
the edges to give it more definition and more
depth to this flower. We're done with
our first flower. I'm going to hide
my reference image. Let's move on to our second one.
6. Plumeria : [MUSIC] Let's start with the second flower,
that's plumeria. I'll tap on my second canvas. If you have the same file, this file just have one layer, that's the sketch layer. My first step is to insert
our reference image. For that I'll go to Action, swipe left on insert a photo, and tap on Insert
a Private Photo. You can choose any reference
image of your choice. I have few royalty-free images
in the resource section. You can even download them. This reference image is too big, so I'm going to crop this image and just keep one
flower for my reference. Now, let's move
on to the layers. I'll add a new layer, pull this layer below
our sketch layer, and I'll rename this
layer as a base layer. I'm going to change
my background color so when we're illustrating
with the white color, we can see that clearly. Selecting my
technical pen brush, selecting a mid-tone from
the reference image. This color should not be
too dark or too light. I'll start with an outline and fill it with the same color. This will be our base
layer for this flower. Now to start adding
details to this flower, I'm going to add a new layer and add clipping
mask to this layer. Select my second brush, select a color from
the reference image. I'm selecting already light, almost like a white color. Following the reference image, I'm adding this color on
one side of the petal. While you're adding
these highlights, try to follow the
shape of the petal. [MUSIC] Selecting a dark pink color
from the reference image. Now if you see in the image, this dark color is on the opposite side
of the white color. I'll start adding around the
other edge of each petal. [MUSIC] Now moving on to adding
yellow color in the center. [MUSIC] Another layer of dark pink. [MUSIC] Now for the center, again selecting a darker pink. This will give more depth and
definition to this flower. [MUSIC] I think we need more
white color to the petal. I'll select a white color
from the color panel, just add few strokes on the
white side of these petals. [MUSIC] Now with the same
white color but the brush size is
little smaller, I'll add these much
sharper brush strokes towards the center
of each petal. If you're following
the same sketch, you can just follow
these full lines. [MUSIC] I'll hide my sketch layer so we can see the flower clearly. Next, we can select
the smudge tool with the same brush and smoothen these hard lines we can
see on these petals. The opacity of my smudge
tool is around 75 percent. While you're smudging, make sure you follow the
shape of the petal. [MUSIC] I'll fix this edge that is overlapping on the other petal. [MUSIC] Extending these white
lines for few petals. [MUSIC] We're done with our
second flower here. I'll hide my reference image. Let's move on to the third one.
7. Heliconia : Let's start with our third
flower, that's Heliconia. I'll tap on my third canvas. You can download
this sketch from the Resource section
of this class. This file just have one layer, that's the sketch layer. My first step will be to
import our reference image. For that I'll go to Action, swipe left on insert a photo, and tap on Insert
a private photo. You can select any reference
picture of your choice. I have few royalty-free images
in the Resource Section 2. Next, I'll go to Layers, add new layer, and pull this layer below
our sketch layer. All our illustration layer will be below our sketch layer. I'll rename this
layer as base layer. Next, from the brushes, I'll select my
technical pen brush to create our base layer. Select a light pink color
from the reference image. We will be doing this
flower in two parts, one is the pink part and
one is the orange one. I'll start creating
this base layer for the pink part first. [MUSIC] Fill it with the same color. Next, I'll create a base layer for the second part
of this flower. For that, I'll create a new layer and pull this layer below our
first base layer. I'll rename this base
layer as Base Layer 2. [MUSIC] I'll select a color from
the reference image, the yellowish-orange
color and will create an outline for the second part and fill
it with the same color. [MUSIC] Moving on to our first part. I'll add clipping
mask to this layer. Add a new layer and
tap on Clipping Mask. Next, select our second brush
from the brush library. You can pick up a color from the reference
image or from the color panel. Following the image, I'll
start adding this white color from the stem towards the
upper part of this flower. [MUSIC] Selecting this
light green color. Following the reference image, I'll just add this towards
the stem of this flower. Next, selecting a
darker shade of pink. It's too tone darker
than our base color, same like we see in the image. I'll add these few
strokes from the tip. [MUSIC] Again, selecting
a darker tone of pink. This is like you're
adding shades of darker pinks to create
this gradient effect. [MUSIC] Again, selecting the
same green color so we can extend it from the
center of this petal. [MUSIC] Let's move on to the
other part of this leaf. Same like the previous one, I'll start with the green at the bottom and pink
towards the tip. [MUSIC] Moving on to this orange
part of this flower. To add details and highlights, I will add a new layer and add clipping
mask to this layer. Select a darker color
from the reference image. I'll start adding
this darker shade towards the shadow areas. [MUSIC] Now selecting a lighter color. This will be more
on the areas where the light is falling
and looks brighter. [MUSIC] On the same layer, I'm selecting this
light green color. We'll add at the bottom
of this orange part. [MUSIC] Just select a darker
shade of the same green so we can add few details. [MUSIC] This part you can even skip. If you want it to
look realistic, you can even add this detail, selecting this green color from the reference image to add to the tips of this orange part. If you have my sketch, you can easily follow the sketch lines to
add this detail. [MUSIC] We're almost done
with this flower. This is the last detail I'm
going to add to the tips, selecting this pale yellow
and adding to the tips. [MUSIC] Here we are done with
our third flower. I'm going to change
the background to see how it looks
on different colors. Let's move on to
the fourth flower.
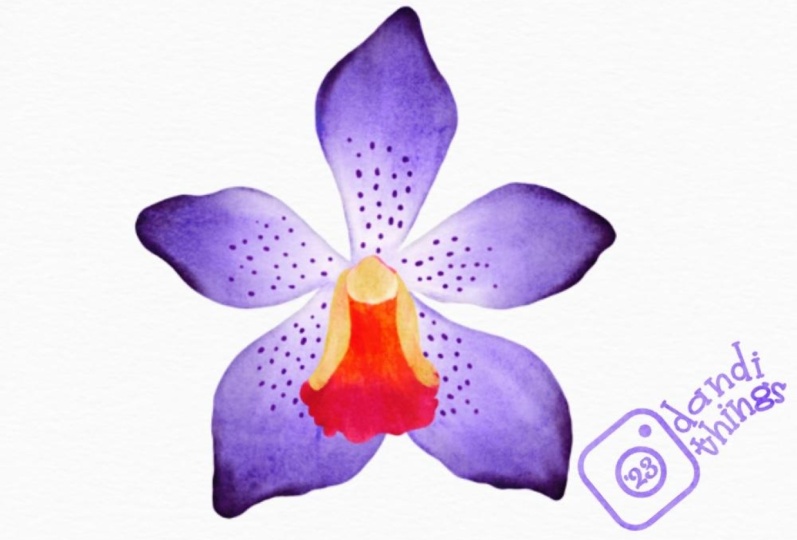
8. Orchid: Petals : Let's start with the fourth
flower, that's orchid. I'll tap on my fourth canvas. If you have my file, it just have one layer
with the sketch layer. My first step is to insert
our reference image. For that I'll go to Action, insert a photo, swipe left, insert
a private photo. You can select any reference
image of your choice. I have few royalty-free images
in the resource section, you can even download them. Reference image depends on which color and pattern
you need of that flower. I think this reference
image is too big, I'll just crop one flower out. [MUSIC] Let's move on to our first step, that's adding a new layer
for our base layer. Pull this layer below
our sketch layer and rename this
layer as base layer. Next selecting my
technical pen brush, and I'll start drawing an outline and fill it
with the same color. [MUSIC] Now to add details, I'll add another new layer and add clipping
mask to this layer. Select my second brush and I'll start adding this light color
detail from the center. I'll select a color from
the reference image, which is more like
a white color. [MUSIC] Next selecting my second color. It's more like a darker purple. Following the reference image, I'll start adding this
detail to each petal. [MUSIC] Now we're done with this
one layer of purple. Next, I'll select my smudge
tool with the same brush, so we can smoothen the brushstrokes which
doesn't look finished. [MUSIC] Now moving on to the
last layer of purple, I'll select a darker purple
from the reference image. This will be with a
tiny brush stroke on the edges of these petals. [MUSIC] Now these spot
details on the petal. For that, I will
add a new layer. I will rename this
layer as spots. I will select the color
from the reference image, and with my technical pen brush, I'll start adding these
uneven spots on the petals. Try to follow the
reference image for the placement
of these spots. [MUSIC] Next I'll go to Adjustments, Gaussian Blur, and I'll blur out these
spots a little bit. Just slide right with your fingertips and
you can see the blur. I'll keep the blur at
around two percent, and we're done with
the petals here. Let's move on to
the center part of this flower in the next section.
9. Orchid: Center : [MUSIC] Let's move on to the
center part of this flower. For that, I will
add a new layer, rename this layer as "Center". [MUSIC] Select a
nice bright pink from the reference image. [MUSIC] With my
technical pen brush, I'll select a base layer first. [MUSIC] Now to add details, I will add a new layer and add a clipping
mask to this layer. Now selecting my second brush, select a color from
the reference image, I'll select this bright orange and will add detail
in the center. [MUSIC] Selecting another color, now here you can even select different color from
what I am choosing, depending on your
style or depending on how you want the
flower to look like. [MUSIC] We are done with our
fourth flower here. Let's move on to the fifth one. [MUSIC]
10. Red Ginger: Part 1: [MUSIC] Let's start with our fifth
flower, that's red ginger. I'll tap on my fifth canvas. If you have my file, there's just one layer on it, that's the Sketch Layer. Now my first step is to
insert our reference image. For that I'll go to Action, Insert a photo and
Insert a private photo. You can choose any reference
image of your choice. I have a dash few
royalty-free images in the Resource section. You can even download them. Now my first step is
to add a new layer. I'll tap on a New Layer, pull this layer below
our sketch layer. All our illustration layer will be below our Sketch Layer. I'll rename this
layer as Base Layer. Select a lighter color
from the reference image, which is not too
dark or too light, more like a mid-tone. Next, I'll select my
Technical Pen brush, and we'll create a base
layer for this flower. I'll quickly follow
the sketch line and fill it with the same color. Next, adding the new layer, and add Clipping
Mask to this layer. Select my second brush. You can pick up a color
from the reference image, or directly from
the color panel. I will be working in bunches, I will be doing four
to five petal at once. I'll start adding this light
color to 4-5 petals first. Next we'll select a
dark color and again, we'll add this detail to
only those 4-5 petals first. Now select a dark color
from the reference image, and following the
reference image, I'll start adding this color. If you're working on my sketch, it is easier to follow the sketch lines and
use it as a guideline. Now again selecting the white
color for my second bunch, I will be adding this
white color detail to 3-4 petals again, and again going back to
selecting a darker shade, and adding the same detail as we did in the previous ones. I will be repeating these steps until we reach the
bottom of this flower. Now in the next section, we'll be adding more
details so we can give more depth and realistic
look to this flower.
11. Red Ginger: Part 2: [MUSIC] Now for my last detail
to this flower, I'll select the
darkest pink from the reference image
and will start adding this detail towards the corners and where you feel there
will be a shadow area. [MUSIC] Now moving on to the
stem of this flower. For that, I will add a new layer and rename this layer
as Base Layer 2. You can even rename
this as stem. Now with my technical pen brush, select a color from
the reference image. I will follow the
sketch and create an outline and fill it
with the same color. [MUSIC] Now to add details to the stem, I will add a new layer and add clipping
mask to that layer. [MUSIC] Select my second brush, select a darker shade
from the reference image. I will start adding
details on this stem. [MUSIC] I will hide my sketch layer so we can see the stem clearly, select a darker color and I'll add this color around
the shadow areas of the stem. [MUSIC] We are done with
our fifth flower here, that's red ginger. Let's recolor these flowers
in my next section. [MUSIC]
12. Recoloring : [MUSIC] I will be
showing you few ways on how you can re-color
these flowers. For that, I go back
to my library, duplicate our whole folder so we have our
original file safe. I'll rename one of the
folder as "Tropical Flowers Recoloring" so we know which
folder we're working on. [MUSIC] Now let's start with our first flower,
that's hibiscus. I'll tap on the file and
merge all the layers. First, merge all the
clipping mask layers and then the base layers. Now we just have one layer
here with the flower. I'll duplicate this layer, and I'll place
them one below the other so we can see the
difference clearly. Now our first option
is under Adjustments; Hue, Saturation, and Brightness. I'll start adjusting
the hues first. When you move this tiny
dot in the center, you can see the color
changing of the flower. With the Saturation option, you can increase or decrease the saturation of your flower. This is very helpful when
your flower looks too dull. Brightness will increase or decrease the brightness
of your flower. We can check one more re-coloring
option for this flower. For that, I'll shift both of these flower
and add one more. Under Adjustments,
go to Gradient Map, here Here can experiment
with a lot of colors. Tap on any one option. You can even change the color. You can move these tiny
boxes and you can see the difference in the gradient
effect of this flower. I'll use the same
gradient effect for the other two flowers too. For the red ginger flower. I just want to brighten up
this flower a little bit. For that, I'll go
to Adjustments, Curves, and you can just
adjust this tiny dot here. That will make your flower
brighter or darker. You can change this and
adjust and see the changes. We are done with our
re-coloring here. In my next section, I'll turn this into a seamless pattern.
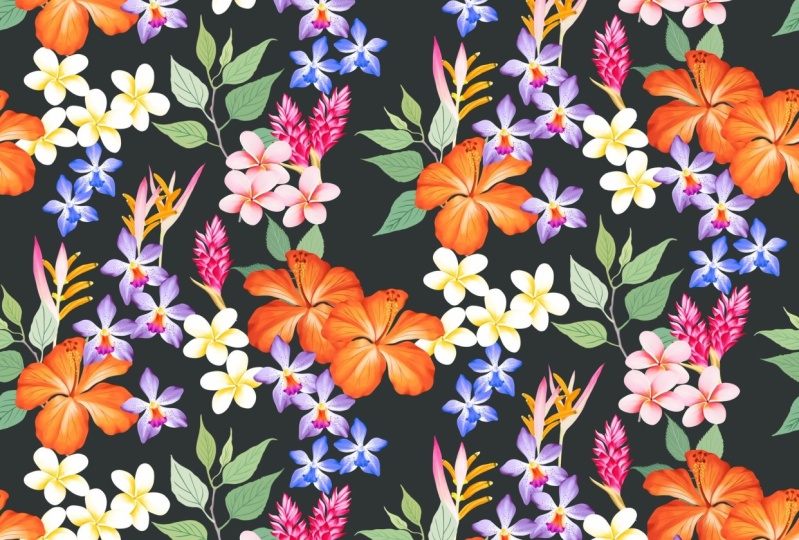
13. Seamless Pattern: I have recolored these flowers and turn into a
seamless pattern. It's in half-drop
repeat pattern. I even added few leaves here. I'll tile them together. [MUSIC] This is how it looks on
print-on-demand sites products. I made these mockups where you can license to companies
for other products too.
 Vinita Upadhya, Illustrator & Pattern Designer