Transcripts
1. Introduction & welcome : Hello everyone,
hugs yachts here. Back with another tutorial. For this tutorial, I'm gonna
be showing the full process from start to finish on how I
create my sort of stylized, cartoony portraits and pictures. I say portraits because that's
mainly what I use it for. But this method can
be used in drawing absolutely anything from pets or objects, even backgrounds. It gives us a cartoony, a nice cartoony stylized feel. To the finished portraits. They got sort of fun
anatomy, you know, big eyes, a little chins. The usual cutesy sort of
stylized anatomy works. But it's a simple
process, is repeatable. I'd been working hard
on this process, tried to make it simple, as simple as possible, as possible so that
it's repeatable. And that even myself, I can sort of go away for
two weeks not drawing, come back and easily remember, every step to this process where it's easy to get
bogged down sometimes when you've got 25 layers
open with I don't know, you've got multiple shading
layers, lighting layers. I'm gonna be using shading
and lighting layers, but I'm going to keep it
simple to just one each. I keep my layers as
minimal as possible. Not only helps, if
you're on an older iPad, you can get bigger canvas sizes. Still have more layers. So I'm going to be going
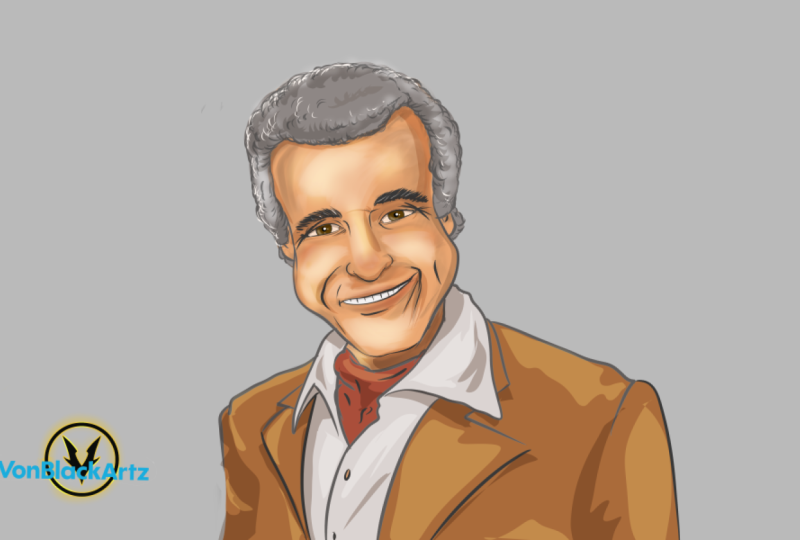
through from start to finish. If we look here is some
I've just finished. You've got this fella did a bit of background on this one. I'm not going to be going
into the background today. I'm just going to be quickly showing you how we
create this guy from from this image. So that, I mean, that's
the reference photo used. If we just knock that off, you see we turned it into a fun cartoon,
stylized portraits. People are going mad for it. They can't keep up with the
commissions at the moment. They're flooding in when someone
sees when they want one. So it's a really great
thing and most importantly, super perfect for beginners. Okay, So we are gonna be using the tracing technique because I think that's important
for beginners. Just to get yourself used to the the Apple Pencil strokes, the curves and the shapes
on the face and the hair. I think it's important to
really put your timing on that. Are learning the
shapes of anatomy and stuff before you actually
start trying to draw. Otherwise, the drawing part
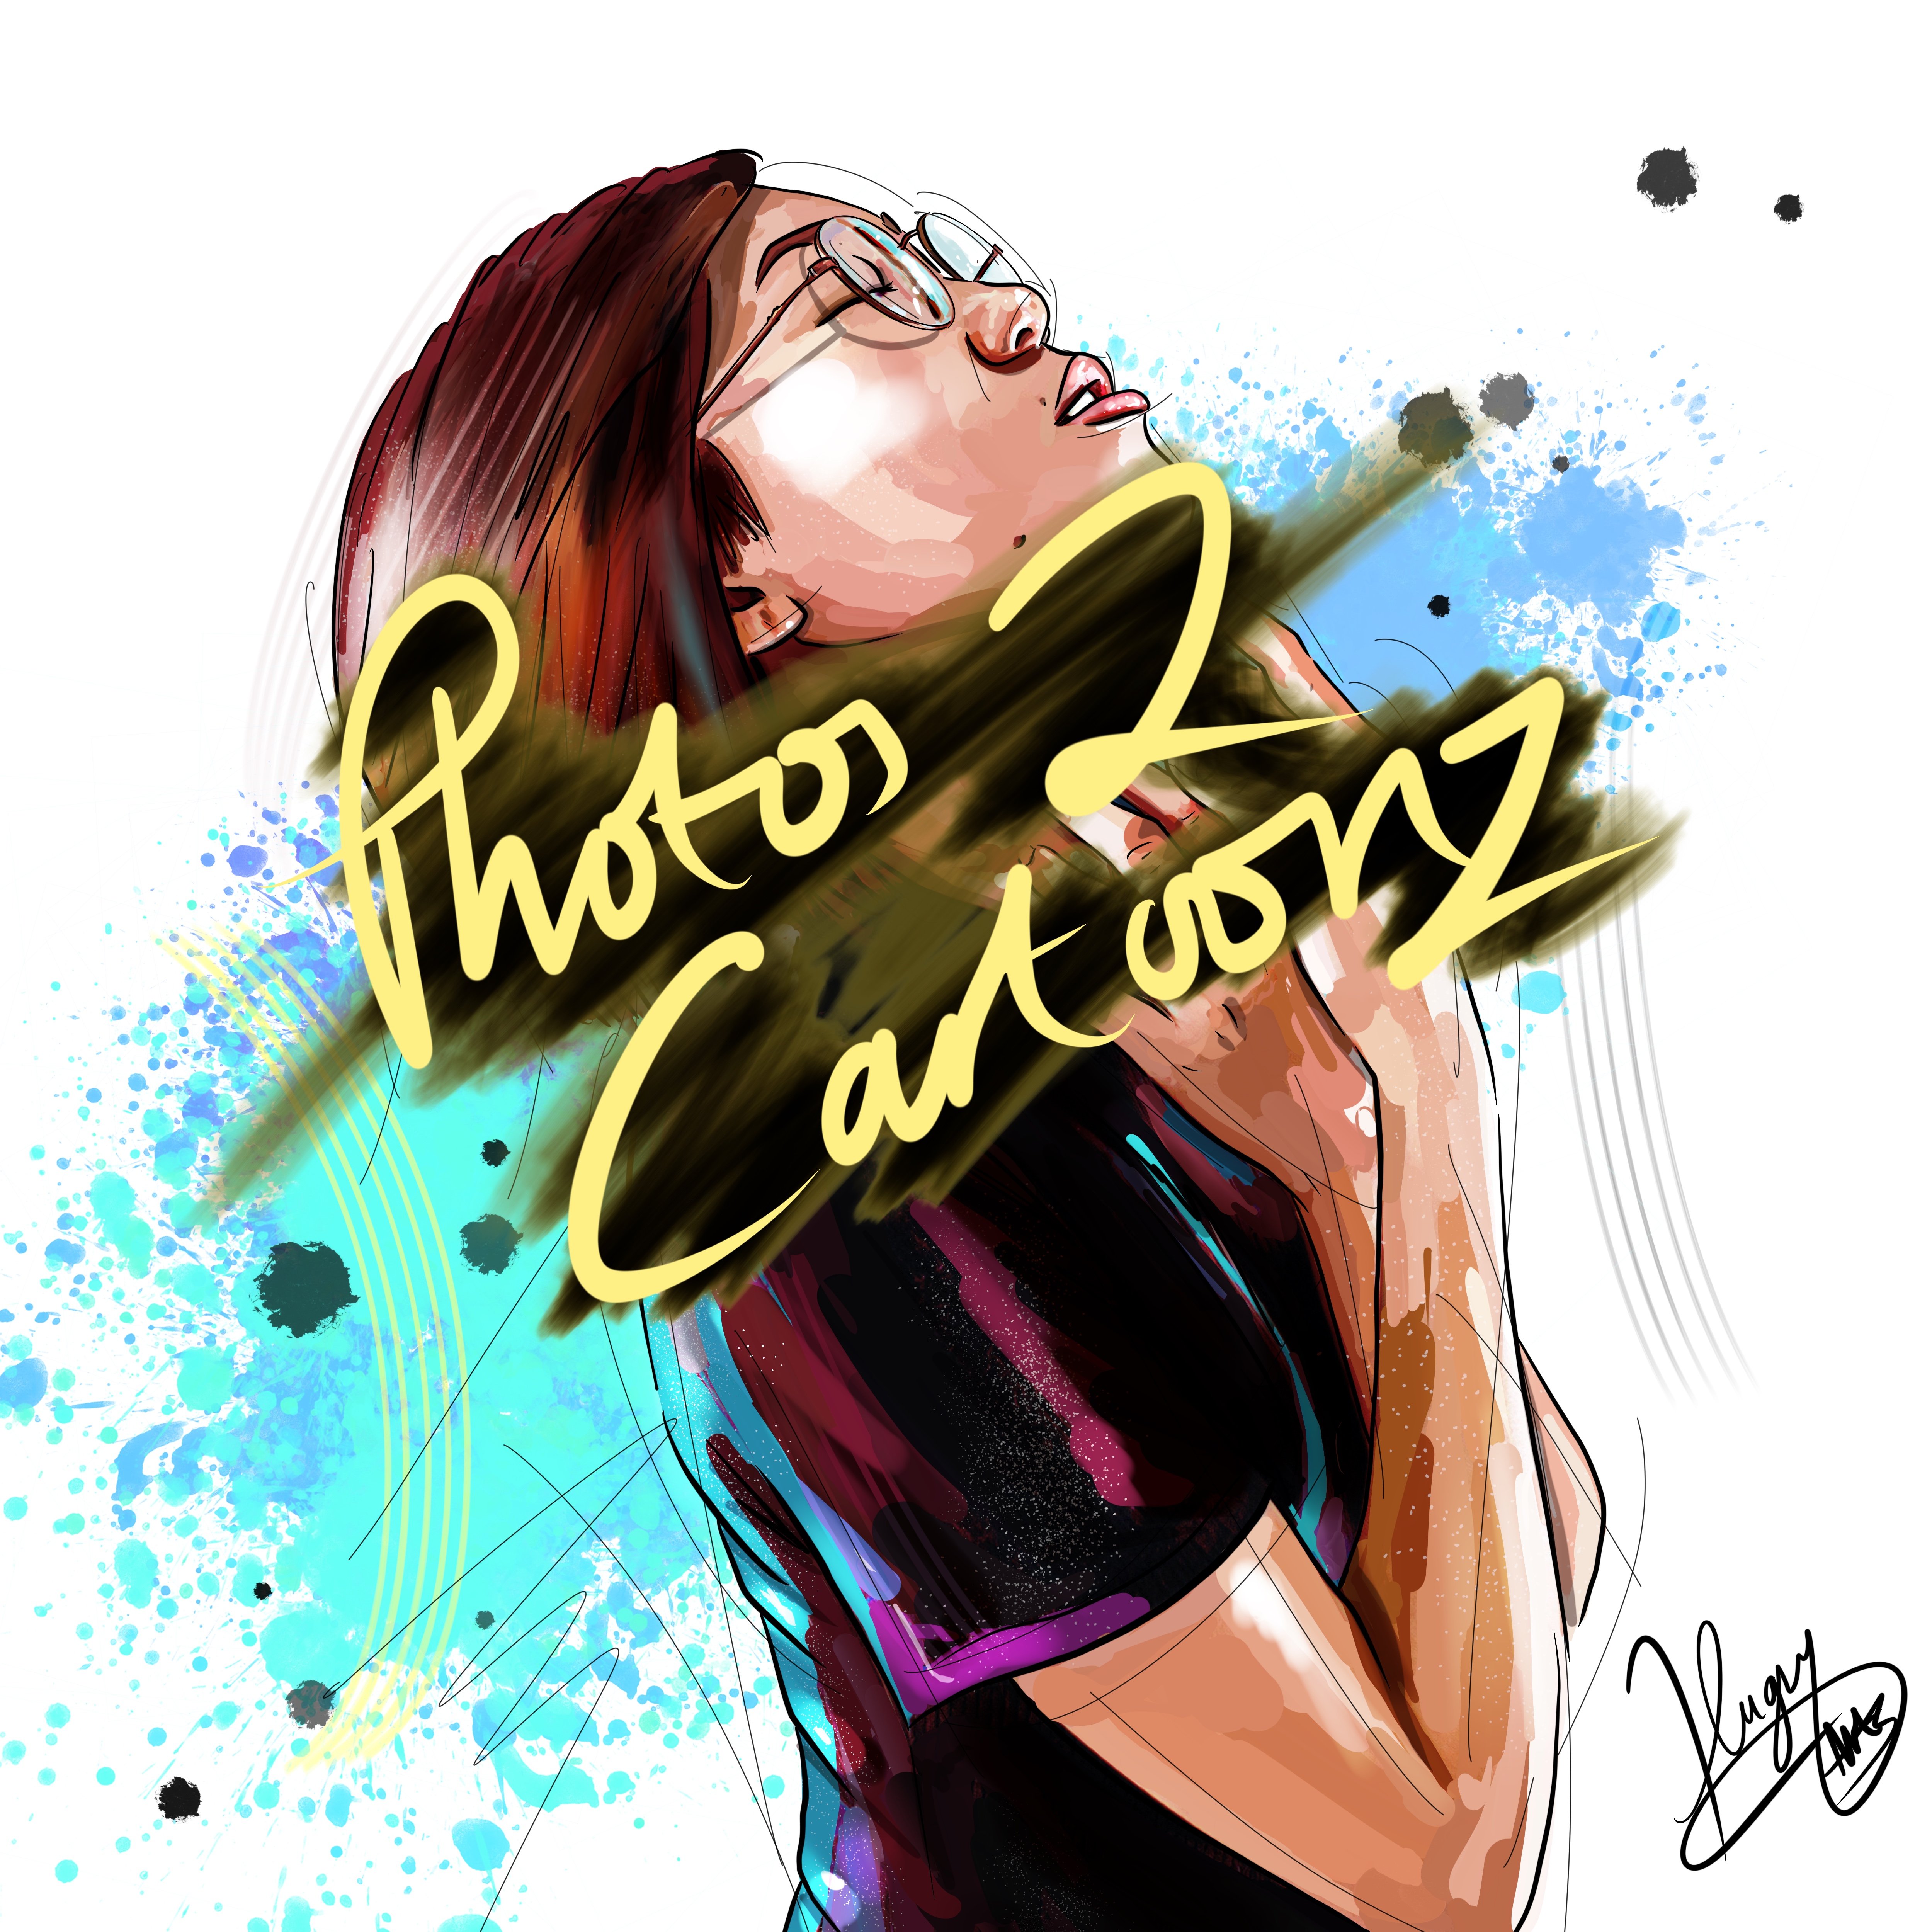
can be a bit daunting. So there's another one I did using this
exact same process, keeping it super simple. There's the reference photo. We stylized or in
200-year cutesy cartoon. Join me in part one. We will
be getting straight in. I'm going to break it down
into bite-sized chunks. So for the first two parts, we're going to go
over how I prepare, my reference, ready
for sketching. So the first two
parts are gonna be sort of photo preparation. Now the next part then
is going to be how I, how I actually lay out
my sketch. What I do. I find if you've
got a good sketch, the rest sort of
follows on suit. The rest is sort of a
double because it's such an easy repeatable process. The sketchpad is probably
the most important bit. Once you get that look in
half decent, you've won. Okay, so I'll see you
in Part one goes, well, we'll just
jump straight in.
2. Photo reference preparation and manipulation : Okay guys. So I hope you
got yourself a nice cup of coffee and some biscuits and you're ready to get stuck in a learn this method with me. It's, it's one of
their methods that once you crack it is so simple. You can't wait to get
up in the morning or, or get back on your iPad
and do it and draw someone. It's that, it's one of them. It's not one which is
dawned in and puts you off, is one which gets you on
the iPad and wants you to stick with it and improve. So let's jump straight
and then so I'm gonna be using a canvas size of
three to 40 by 4050 pixels. I'm using 300 DPI. And thus the canvas I'm gonna be using for my sketch layer. So open up your Canvas and
we need a reference image. So insert photo. I'm D. This also works on pets. In fact is brilliant for pets. You can use it for anything. But I want to keep this video for the purpose of the video. I'm not trying to create
a work of art here. I'm just trying to get
the method over to you so that it sinks in and it's
really easy to understand. So I'm going to pick a nice simple reference image when which I've
done a few times. In fact, I practice
practices that practiced on this image whilst
developing this method. Now, you might think, well, it's not really a method
when you sort of learn it. But it is, trust me, it took a long time to simplify everything and do it my way
to get it to look right. You'll see what I
mean as we go on. So this is gonna be our
reference image used. Most clear photo obviously
helps blurry photos. It don't really matter. Let me just quickly
show you one. I did with a photo
wasn't too great. It doesn't really matter
because we're going for a cartoony, stylized feel. You can get away with a lot. I mean, this is when I'm working on now
with the footwall. This I've only done the
sketch at the moment. This is my sketch layer
ready to be inked. So you see the photo
I got this fellow. The lighting is quite
bad to work out. Features and bits and bobs. So kinda gotta run, run with whatever you're given. But when you learn this method, you won't be scared because you're still
going to create a fun, stylized, really clean looking
piece at the end anyway, so you can really
get away with a lot. Let's go back. Okay,
So this is step one. Upload your reference
image stamp tool. We're just going to pop picture of our reference
image over there. So we've always got it on hand to have a little
gander at when needed. Step two, step three, sorry, we're going to duplicate this photo layer and
not the bottom one off. It's just there for
backup or for right at the end when you
want to take it to the top and do comparisons. So it's just there for backup. This is the one
we're going to be altering and playing with. So many of you are going to actually
be surprised by this. And I'm quite glad
about that actually. Because I assume a lot of people they'd
been they find it, don't do anything or I could
never do that from scratch. Well, this is going to shock you because start actually
from scratch. I'm actually playing
with the photograph to how I want it. Remember, this is
a powerful app. Procreate. All the digital art apps. They're really powerful, so use, use it all to your advantage. And this is going to start
with and use of money, I promise you assure you. I'm not sort of like
in my last tutorial, I found I maybe frightened off the few beginners because it's kind of a little
bit more advanced. China just draw straight on
the Canvas from a reference. You've got to learn the
anatomy and stuff first, this is why this this
is your step to that. And I mean, you don't
even need to go down that road if you get this nailed, like
I'm going to show you. So first off, we don't want this to look
exactly like the photograph. The customer don't want that. You don't want that people
see it, it dome on that. There's 4 billion traced images on the Internet and it gets quite mundane,
it's quite boring. Nobody's impressed by it. So we need to switch things up and stay ahead of our game. So on our photo layer, this is where we start
the manipulation. Things I always look for. If you're doing kids, you want
bigger heads, bigger eyes, smaller chins, is if
you're stretching the head out to give them that
cutesy, cutesy look. So this is what I'm gonna be
doing. Straightaway here. Can I just also say, sorry if you hear
banging and crushing, there's some work
going on out there. They've stopped for the moment. I'm hoping they've
stopped for the day. But yeah, if you hear
that, sorry about that. So we get our selection tool, little S shape,
we're on freehand. Now. I'm going to draw
around the eye. Like so. I've selected the eye. Now I haven't selected
inside the eye neatly. I haven't gotten to
need, I've just got around the contours of the eye. So if you're gonna be altering anatomy on people,
you need to do it right? Otherwise they're just
going to look like aliens. So when you are gonna do this, we're going to take the whole AI is in what's in
that I use sockets. Okay? Then you click the arrow. Now we've got full control
of what we just selected. And we're just going
to go a bit bigger. I've gone a little bit
bigger than normal to be fair for the sake
of this tutorial. So another trick, when
you're making bigger, I use in general,
when you draw in. A little trick is don't have
them too close together. If you're making big eyes, they need to go further apart
to accommodate the anatomy. Otherwise, they will
look like ET phone home. So bear that in mind.
There's one eye. So it was I said what is now k? So we haven't just exploded
it, sort of guarding. We've enlarged it and we've kept it to where it actually was. Seam again, loosely go around the shape of the eye,
the little arrow. And let's make it big. We want it at about
the same as that one. Use your judgment for this. It's all good. It's a cartoon. And Detroit, the line
to line this up. Best you can. Okay, there you go. Now she got big ideas. Symbol that bit. Then. This is where I now
grab my liquefied tool. You'll find it in
the settings or adjustments down to liquefy. Quite a big size. I'm on 65 per cent there. I got pressure max, distortion 0, momentum
0, and I'm on Porsche. So what we could do
now is we need to stretch stretch this head, just go round and stretch it. Meet that cranium. Little bit bigger. It
just makes it more fun. Cartoony look. Really makes your work unique. And it takes away
that traced feel or little things
like this, like so. Okay. The nose, I mean, we've made the eyes bigger. We don't really need to mess
with the nose too much. I do tend to shrink
them in a touch, just especially for
kids where we're going super cutesy lips. You need to be
careful with lips. You can throw everything off. Just like to make that top lip a bit bigger just to
make it more unique. So as I was like, so in fact, I might even make
that a little bit smaller. Went back quite big
again, we're on 54%. And this is where you're
going to squash that chin in, swash the Chilean on the sides
and squash it in like so. That goes cheeks in a touch. So it looks a bit more human. We are going, we are pushing
the boundaries with this. We want it to look
stylized and fun. Okay? With that, It's already
looking quite fun. And all we've done is
manipulated the photo. Right? Another biggie I like
to get my character is bigger heads as
you've probably seen. So what I want to do is I'm just going to
select both of them. And I'm going to shrink
the whole thing. Don't touch to where I
want the body to be. So so about there. Yeah. Back to selection tool. Make sure we're on
just that layer. Back to selection
tool freehand again. And let's get that chin here. I'm going to get the
rest of her heading up here and chin. So pick the arrow. Let's make this
head a bit bigger. Another little, little
quirk that I like to add, which you may not
like you may do. I just like to put
a little tilt on the heads to give it an even more original
look when it's completed. So bigger, had little tilt, whatever feels right for you
that I sort of go there. And you get the
you get the idea, you've got the volume.
Back to liquefy. Unless let's
manipulate this body a little bit as squash it in. Squash it in a little bit. They get up a bit neater. Just in general, making the whole thing look
a little bit smaller. Again, it's just ensuring your, your uniqueness to this piece. Streak. And I didn't look
so it looks fun. Pull some data to touch the fact that I'm not going to do that because I could
just draw that in. No drama. Maybe this bit cooker. Okay guys, so that's
the end of part one. I have no prepared my reference photo with
minimal skills used. And I wouldn't say retrace this. It's not going to look
traced because it looks different to the fault. Door. Head angles changed, the bodies shrunk, the heads
bigger, the IOUs are bigger. So that's our reference photo. If we trace that
it's very boring. Unless you're a master. Now we're tracing this. We've given ourselves
a foundation to build upon upon which we can fail. We can't fail now, it all
starts from the bottom seam. So this is an important
step in my method. Okay guys, so that's
the end of part one, which is, I'm going to label
photo reference preparation. The next part. In part two, we're going to
be sketching this out. Now. There is one quick thing today, I haven't been able
to provide the pens, the brushes for you simply because in my hugs
you complete pack. I've had people buying
it and purchasing it. It's not fair on them that
they go and purchase it. And then I go and give
away all the best ones for free to everybody
on Skillshare. So I am, however, haven't decided which ones yet, but I'm gonna give you a
couple just to do the basics. Okay? So these are the ones we're gonna be using
for the process. Mainly. Obviously
there's loads on here which I do use for
textures and stuff. Especially Mr. Scharf soft, which is probably my
favorite brush ever. But for this today, I'm just going to be
using these brushes here. Not that one. I mean, you'll see are probably provide you I'll probably provide you with my professional
sketching smooth brush. No. I don't think yeah. Okay. I've said it
now. I'll have to one of my favorite
brushes is everything, especially for this method. Join us in part two. We'll be putting some ink
on the paper. She has guys.
3. Sketching and foundations : Hello, Welcome back
to part two of our stylized cartoony
portrait towards tutorial. Unfortunately, what I
mentioned in the last part was there's work going on outside and it looks like
they've just continued. So big. Apologies. If the mic picks any of that up,
hopefully it won't. Hopefully you can
still hear me clear. Right? So as you remember in part one, we've, we've manipulated
our reference image. I'm were to look like
a cute seal it off. I mean, it looks good already. We haven't put ink on yet. Now we're going to be tracing. But not tracing as
you may have done it in the past or you see on YouTube videos,
It's not like that. This is why we're gonna be
laying a sketch before we ink. You'll see lots of
tutorials on YouTube. Very boring, rounded
brushes they're using. I'm going to use this
one just to try and give you an example
of how do they do it. And they're following
every detail there, sort of my honor. Alright. Okay. What color? They are following every detail, aren't they with the
same brush size? This is obviously a bit extreme, but they follow in every detail. We've all seen them noses. And they follow it all the way round as perfectly as they can. Every little detail, the eyes. And then they knock it
off and it looks now, No, for this style to
really explode and pop, we need to vary our brush size. So it's clear that
nonsense or clear. Rough back. Professional sketching,
smooth brush is what we'll be using it down into three. Just to get the sketching. And I'm going to
start about there, not in the corner there. And I'm gonna be using sweeping motions
when you're drawing. Try not to use all wrist. Rest your wrist on the
iPad for stability. This is why I always work with
my iPad in landscape mode. Never in portrait mode, because your hand
is sort of off. It's off and it's
unbalanced on here. I can get on and I got good
control over what I'm doing. So we're gonna be using
sweeping motions. Loosely sketching. I will speed up just being
a bit pedantic on this. I sweep emotions, sketching. I know the power of this brush means that
we can shade effortlessly. So we'll be doing that as well for the next
step so we know where our shadows are gonna go with a ovens and keep
looking at the reference. There's one. Cool,
is a friend on, we don't need to draw it again. All we need to do is copy, paste. Okay, so that we've
got two eyes. Move out the weight. Now we got two eyes. Okay. Let's carry on nose. I'm asleep, being a little
bit messy with it to show you that it all it's doing is adding character to your
finished piece. This is your style. You do it how you like. We've made the
fundamental changes. Just through the
details of the lips. The lips, I only usually draw the bottom bit and I just do the top and the
rest with the color. When I do, when I color my chin, start with a line there
and we're just going to swoop, scoop up. Like so. Maybe she could have. The sort that out
in a minute swoop. It's important, It's
tricky as well. I might make it look simple
here we are with this swoop. But it's a tricky one to learn. When you get it. You can just do it like that
in one thing and it does, shows up in the final piece. It looks nice, right? It's just going to give
us some neck there. Okay. Okay. We can go over there
around like so jumper. So let's just do like a
year before we forgot. Scoops around, goes around like so packed
in there in the middle. Right? So that's our
first sketch done of just the main outlines
of the areas. I mean, we can also
do this cat loosely. Just loosely. When it comes to the time we haven't
even gone to add it to your picture if
you don't want to. But it's not that complicated. Okay, cat goes there, whatever. Let's pop our reference offer
sex, so we see what we got. Now you can see we got a really nice little, little drawing, which looks drawn still gives the resemblance
of this young girl. But looks different, more
fun, cartoony, and stylized. For this, let's just make up the rest of
her jumper there. Okay, so for the next bit, I'm going to open up a
layer underneath them too. Let's merge these together, which we did in the
very beginning. Work on the layer underneath. And I'm going to add some, some shading, some depth. I'm using the professional
sketch in pen. Probably the best Penn I've, I've ever used to be fair, it's certainly new to me. It just works perfectly. So. Take that down to about 70. Use our reference two. So let's pick up the
darkest areas we could see all around her
face is very dark. So we'll put a bit more pressure
on that area. Like Soe. Shin, she's going to
be casting a shadow. Everybody. This is for
nearly every face. If you can't work it
out and you're stuck just a little bit on the eyes. A little sweep under the eyes, a little sweep under the
nose and around the nose. Little bit above the top lip. This is where I
like to just draw the shape of our
top lip in there. Obviously, I'm putting
them up against the time. So when you're doing it, you could take a lot more
care and get it looking good. Now a bit of a shadow coming
sides of a face. Like so. Shadow and who dies? Just going to pick up the
shadow areas over here, which is sort of their pickup some shadow areas. I'm just picking up
the darker areas for the value reasons. So have a look at clothes. Let's go creases.
So Crisco in there. When they're there, you can see how much care and put it in
and it'll still look good. I show you when you
do actually take your time and put a bit of effort in it, you
can make greedy. Really wonderful pieces. It's going to be a shadow
underneath her hair. They're all a bit darker. The arms like so. Okay. This is now where
I sort of knockoff my reference image and I'll change my background color to a gray because I want to show
where the highlights are too. So I'm gonna go
on a layer above. I'm just going to click a
really light color and white. We're going to try and pick
up now the highlights. Bearing in mind, folks, this is, this is the most important bit. That's why I'm
taking a bit longer on this particular bit. Coloring is a double. So we're gonna be having a
bit of light on the back of her head there. Got some light. Eyes, nose, a little
bit at the top lip. Bottom lip. Pretty generic on
everybody will have some. Just the ring, the light coming on top. So we're just looking for
the lighter tones really. So they usually makes it pop when it's finished. Then next to the tax, we could just add
some lighter swishes. On the eyes, will have shines. Shines. A little line scooting off. Okay, so I'm happy with that
now that our sketches done. So we've done this tracing, which will surprise
a lot of people. As our reference.
There's our drawing. You can see we've added
stylized character to it. Yeah, we got to look in,
looking pretty good. With that. To the top there you can see we really created the nice stylized
image of this girl. The next part, we're
going to be inking, which has ink in the lungs. I'll explain it
when we get there. You haven't got to
include this part. I do, because it gives you
that extra cartoony style, which is what I like. You may prefer to just
paint at this point. But I'll show you what
I mean in part three.
4. Creating attractive line work : Hello everyone, Welcome
back to the next part. Inking. We've we've
manipulated our photo. I will reference.
We've sketched it out and we're ready to
lay some ink, God, no. And this is how I do it. So we're going to
lower the opacity withdrawn drawn layer's tangent about 70 for each 1707070. Okay? Again, not really looking at the reference images
at the moment. We're following our sketch now. I like to use this
color for loans, which is, it looks black,
but it's not quite. It's just a very, very
deep saturated red. I'm gonna be using my
buttery lines hard, which gives me a nice thick
and thin pen pressure. How I like. To make
it more interesting. I'm going to start, I swoop.
And this is how I do it. Double-tap in quite a lot. You might notice it's a
good habit to get into their heights up there and we'll go thicker
in the corner here. This pen is perfect
because you could just knock the eyelashes street and you don't even have to
worry about them later on. Okay. I am just going to knock
a circle, lock it in. And that's gonna be
that pupil done. Now because of my
personal style, I like to add a bit of cross
hatch to shaded areas, just a few lines. It gives it an extra
cartoony dimension. Okay, so same as we did before. I've got mine set up, so I'll just tap this button
here and click copy. A lot of you can sort of
three-finger swipe down, select it from your menu. But mine is not set up that way. Paste. Now we've
got two eyes inked. Ready to go? Ready to go. Level. Best we can. What I'm looking for is an invisible line between the inner parts of
the eyes there. That'll do. Let's just merge them together. And let's just carry on. I go
thicker where it's darker. Kind of a rule I stick to. So when you're looking
for variation, but don't really do it
that random or less onto enclosing darker areas, which I've kind of signified
in some of my sketches. That's where I put
the pressure down. Darker in the corner. Thicker by their okie dokie. Right? It comes out Swoosh. Just give it a bit of a chin and it'll take you
a bit of practice. That one. It looks
simple, but it's honest, it's quite hard to get
such an unusual angle. We're going for. You just do it until you're happy
with what you've got. I'm happy with that actually, that will do bring
some head over. Not delighted about that, but to be fair, a bit bigger. It's going to be darker
all in there, isn't it? So we'll put a big
thick line down there. And maybe boy there too. So you can see where we vary and our pen pressure,
which keeps it fun. Keeps it alive. No ball and like these
ones you see on YouTube? Okay. I see, yeah. Some hair strands
just, just for effect. It's darker here. We'll add some
hair strands here. Promised myself I was going
to really loosely do this, but I do like to make
things look half decent. Jumper, darker in there. But across apps.
Like cartoony vibe. Very at this clothing. Keeping that lively
and interesting. If it was all one size lines, it just doesn't sit right. It might sit right
where the real big winners in the very beginning. That you will soon realize
that they all look, actually look the same variant that vary it up for
your own benefit. Okay. That's inked already. I told you that part is part is the preparation
and the sketch. There's our reference. This is what we got so far. You see super fun, super nice to look at. Right? Now. Next step is coloring. So we're going to nip
this part in the bud. Have coloring as its own part. As I know, there's
a lot of people, in particular my patrons
in my Facebook group who really keen for
this coloring pack. So this could potentially be three parts just
for the coloring. It is really simplified though. It's not daunting, it's easy, but I just want to
make sure I do it good and clear so that
you totally get it. So see you in the next
part for coloring.
5. Block fill colouring methods : Welcome back guys. This is another important step that this part is going to
go over the coloring. It could potentially be three mini parts so that I
can break it down clearly. But let's dive straight in. So color selection is
going to be a biggie. It's gonna be a biggie because with this
style in particular, we use in thick
black dark lines. So we need to counteract that with some nicely
saturated colors. So there's no good going for
your traditional portrait. Really subtle, really
subtle pale colors. It's not going to sit right
with these black lines. It might sit better if
you've just used the sketch. But for this is about my style, how I do portraits. So this is how I select colors. So I will, we'll color, pick a sort of tone from the girl which
I feel represents her. Maybe not cheeks because
they'll be like an extra pink. I'll just usually go on
the bridge of the nose. Quite hard to see that actually, that will give me a ballpark. So this is the hue
that I'm looking for. I'm gonna be going lighter and possibly a little
bit more saturated. I rarely, unless
I'm doing clothing, will delve over to this side of the
saturation on the cube. Usually try to keep
it in the middle. Ish. Okay, So that's gonna
be our color selection. Now. Right? Okay. That is more to color selection, which I'll go through
and we're doing shading. For now. We need the block fill in a silhouette
of our character. That's the first step.
There's two ways to do it and there's two ways
I actually change it. If you're going
for real neatness, you're going to want
my clean color block or something of the like, something that's very
neat and precise and lays out no
variation in opacity. So let's go under
all of our sketches. With this, unless least
some color in this way. Let's turn off the sketch is actually for now and just keep our ink because these
are the lines we're going to be drawing too. So if you're using my pen,
this is how you do it. You just stay in the lines. Like so. This is for neatness. This is the neater way to do it. You can make it
more fun and messy. In the other way, which I'm
going to show you in a sec. For neatness. Use a brush. You've got control
over everything. I'm going over my line
work and going into it. I'm not leaving a
gap or going up to it and going into it. Okay. I can see see that
circle on the screen. I can see where
my brushes go in. I purposely go in
right right into it. So if I'm gonna be doing a
commission for some people, I've just done one for the Leicester City
Football, actually. Real neatness and I
want to take my time. Then this is how I color
block fill my silhouette. Because I want it to be
professional looking. I don't really want it. Some people might not see the messy style as
professional looking. So you're going to
think about that. Okay, so all I've
done is outlined it. You know, the rest
we dropped Phil. Take that up to 99.6. That's one way of
doing it. Another way is if I just show
you quickly on here, is using the aes tool, which I do use a lot. And we can just
literally draw around, draw around our
line art like so. I'm not going to go
all the way round, but all the way
round, close it off. We can do it that way too. Alright. So I do use
the selection tool a lot for various things, but if you want pure neatness, your best option is
using the brush. Okay, so let's close that layer off so we know where we are. So this is where we are. Right? We got a silhouette, we got our shape now, which we can alpha lock
and sort of navigate side, which is really crucial. As coloring a jumper. Grab a hue you're happy with. I might go a little bit lighter and a little bit more saturated. Why not go a layer above? But select your
silhouette so you can't draw outside of
it is pretty crucial. Go on the layer above. I'm going to use the same brush. Probably would have
been easier if I left the sketchy layers off
really, but now MUD. Okay. Okay. That's that done. Just make sure I grab
grab it all there. I stopped. Done. Let's
do her hair color pick from the light arranged
in a way you could actually see some color like so. Layer above, re-select this. So we can go outside and
less color blocker here. Like so we only really
need to be careful around the parts of the face. We don't want to fill
sort of around here. The fringe. Just fill out in like that. So let's just give out a bit
of a border so easily fills. And then you go,
don't worry too much about it looking a bit
square. At the moment. I will particularly with
hair, blend in a bit. So it's not too stiff,
particularly on the fringe. In fact, sometimes
if you do purchase my brush that I've got some
unreal brushes for that. Especially this one, which can really chopping and
give you realistic here. Okay, so the hair's done top there, underneath
her jumper. So I'm gonna go underneath her jumper and I'm going
to select a white. When I'm doing white clothing, I go for a blue
color and alcohol. So of off just off-white
there with the blue. Okay. So we can still pick up
some highlights of it, not right up to a
bit of blue color in her top there which
is underneath. Like so. Back to the skin. Let's do her eyes. For eyes, I pick the
color of the skin. I go slightly
touched to the red. And I again, like we did with our whites there, just go over. We don't want to go too dark.
This is not a portrait. We want to go quite liked, but leave enough depth so that our highlights still pop less. That's just block fill
our eyes in there. Like that. There it goes. The work workers again
grab a color of the lips. So she got very pink lips. This lady or girl. She very readied saturated lips. Might not call that saturated. I'll just read it back a touch. I always do my top lip
darker than the bottom lip. So tuplet. I can look okay. Yeah. Okay. Bottom lip. Like purposely left it
like that. Lips or soft. You don't want them
to be all hard or outlined in any
way, it doesn't work. So let's grab our big
softly blend brush. And we're just going to feather in over there to give it a really nice
natural soft lip feeling. A soft feeling. Whatever that is. Maybe does work this way. You could even just
brush over the hard at harsher lines if you want
to, but I'm happy with that. Let's get the basic
colors of it. I use it and they're very
dark saturated brown. I could see board along green. I'm going to go a
little bit darker. Let's get on with dark is
part of the I in first. In fact, I'm just
going to end this part here because I don't
want to overload. You were going to come back in the next part and we're just going to carry straight on. It's gonna be possibly
three parts to color. All right, so yeah, I'll
see you in a minute.
6. How to select colours and shadows: Back. Again, this is
another color part. So let's go straight him, he was about to cut it out. I use on the last bit. Let's do that now. Still using my color block, pen or brush. Just going into the
lines, into my line art. Well stumped here, I'm
just going to grab a little more saturated than that. And I'm just going to dab a bit, a bit of pink that's in there. Just whilst I'm here. Maybe maybe give it a
little blender blend. Okay. We've got the darkest
part of the eyes in. We need to select that color. We need to just go
towards yellow. Just get a bit of a
lighter hue in there. Okay. Again, if you want interest, give that a little and that'll soften it. Okay. So we block colored
the whole lady. I apologize. We actually haven't there's
one bit we are forgotten. We haven't done a little decals on the clothing when
I'm doing clothing. And they have logos
and bits and bobs, even tattoos on skin. This is how I do it. So we need to go
above clothing layer. You could even do it
on the same layer as the hair if you wanted. But so I'm gonna go sort
of keep it on its own. Pick this blue, go really light so that it looks like it's naturally
part of the T-shirt. And we're going to draw
in with our hotline is brush silhouette
we did earlier. The cat. I just showed you in a bit, rubbish, but I'm showing
you how I do it. Let's fill that in. Now we'll do some pink this for the ears. They're pink this for the ears. Pink this for the nose. The eyes done. Whiskers. Go. We've got a little cut
on our on our in now. So we've blocked colored it and now that's what I would
classes block colored. Now, there's another
way you can do this. You haven't got to
have every bit, every part on separate layers. You could know, just condense all of that into
your silhouette. If you wanted. I'm
gonna do that now. It might be easier when you're starting out if you
keep it separate. Because for the next step, we're gonna be adding just
a slight color variation to the skin and the clothing, and then add in our
shading and highlights. So I'm going to keep things
simple and I'm going to condense it all
down, all into one. It's all block filled. And that is now all
just one layer. Still all underneath our
sketch and line work. Right? Shading. Actually, no. Let's do one more
thing. Before I forget. With everybody
there's put a bit of pink in their cheeks just
to bring them to life. So select the skin
towards the red. Get a nice really soft brush. Just try and destroy your
favorite and a bit of pink. Just tiny, tiny amount. Signify that it's there. Maybe a bit on the nose. Yeah. I mean, that's all on
a bit on the ears. Just brings skin to life
with a bit of pink miss. Right? Okay. So above
all of our layers, we're going to open
up a multiply layer. And this is where we start
our shading process. Really simple. You want it to get cartoony, so we're not going to be
feathering hundreds of different opacities to make it look really 3D
and really real. That's not what this style is. I'm just going to get my
sketching smooth brush. And I'm gonna be
doing it this way. Select your silhouette. So we can't draw outside. Bacteria multiply layer. Select your colors for shading. So this is the important bit. This is Hawaii. Select my
colors for a correct shade. Now, it can be a bit of a minefield. When
you're a beginner. And you're trying to pick the correct colors for
shading and liked. It can look a bit muddy
if you get it wrong. It can look just
spoil everything. So this is how I find
works best for me. I don't know how I
stumbled across this. I just did, I put
thousands of hours practicing to find this
particular method. So let's say we're
doing the shadows on the T-shirt or the jumper. Select your local color,
which is that blue. We're gonna be going darker. So as a general rule of thumb, always head towards purple. On this color. The hue slider here. I always had towards purple. Then you don't need
to go down with on a multiply layer is
going to come out darker anyway, then less saturation. Shadows want to be
cool in most cases. So we're just going
to head over there. That is the color that will look nice for our shadows
on this jumper. Alright? So what I'm gonna do first of
all is called full opacity. A little bit bigger. And I'm just going to get I'm just gonna get
the darker areas. First. You can see
we've already got some depth because of
our shading layer. There was sketchy shading layer. So it all adds to
ETC, shadow there. And there were two my shading layers off. What give us more of a
clue of what's going on. Yeah. Yeah. So that's our darkest areas. Now turn to opacity down. Just give it some, just add some variation really like
so you can be completely random if you wanted some shade variation to the colors really
more than anything. Okay, so now we've got
some shading going on. We can go back in. We can just
go down right diagonally. To add in some extra dark parts. It may be even more.
For the darkest darks. You haven't got to do this part. It just gives that extra pop. But you've got to
be careful because we're not going to
serious with this. This is, we want it to
look simple and fun. You don't want it to
look or become tedious. So just going to do that
for the darkest parts, okay, that done, let's go
straight to the skin now. We still selected skin,
same thing, pickup. So because we're here, we're not going to go this way. You've got to pick the
shortest route to purple. Okay, so we're not going
to go slightly that way because that's going
towards the yellows. We want to go straight
to the cooler colors. So pick the skin tone
and we're going to head this way, less saturated. And this is gonna be
our skin shading color. So we're going to have
a bit of shadow up their chin is going
to be in shadow. Under the chin, there
is gonna be in shadow. All this will be
a shadow anyway. It's a bit of shadow down
underneath this here. And then we can lower
the opacity slightly, start to sweep in some
shadow around there. I mean, that he
has that dark part is always going to
be really dark. But you can see there's not a
lot of skill going on here. It's just the case of
trust in yourself. Go a bit lower on the opacity. Just put a bit of lightness
to that bit there. And we will go little bit
darker, darkest parts. The nose. It just gives
it a little extra pop. Maybe the corners of the mouth. Always above the
eyelids, always. Maybe a bit there. May be a bit there too. Maybe just a bit there. This brush is super nice. You can just sort of sweep. You can really sweep color
into what you're doing. So you can sort of sweep
in with a overdo with it. You can even create some
definition for the nose. Looks so anyway, that's
the skin done here. Select the color. We're going to head
towards purple. It's quicker to go that way and backup than it is
to go to there. So we'll go that way. Go up to there. Remember, let's play with Shader
later on so we can remember where we've had to go. Okay. So we're good to go. They go, they fall inside. I mean, as you can see, minimal, minimal effort going on
to create fun texture. It just looks better for one
reason and one reason only. We're using the right colors. So that's that we can now
add some darker areas. Can't wait for that. Here. We'll bring in. Okay, so I mean, yeah, we'll call that done. So now our character
is shaded, shaded in. If we just turn some of
these sketchy layers off, you could see this
is where we're at in terms of our neater drawing. Obviously we haven't
done the lips yet. Select towards purple,
less saturated. Let's just give those lips and depth. Like so. Okay. Eyes. I like to select the
color of where I'm working. So select that white. Let's just go dark
gray for the eyes. Because just because it works. Your eyes done. I'm rushing because
I want everyone at a time. Right? I used on part three of this
coloring part will be next. We're gonna be looking
at the highlights on how do I select the
colors for highlights.
7. Selecting lighting colours and adding final touches: But guys highlights. Open up a new layer.
I'm going to use a overlay layer
for our lighting. Okay, so let's just try
sketching layers on a minute. Okay? Select our silhouette
of our block fill. We can't go outside the
lines. Back to overlay. Now where does we just
went to the cooler? We will go into the
quickest route to purple slightly when we were
picking out with shades for our lights, we're gonna be going
away from there and we're going to go into the warmer colors for our lights. Okay, So same sort of thing. Select the local
color of that blue. But instead of rushing towards
the purple flowers, darks, we're going to be rushing away from it towards the course. Okay? And again, quite on
the least saturated side. And then where you
signaled earlier, just pull that down a touch. Just going to pop in some
highlights. Like so. Okay. That was a bit around
there on that. And then just lower opacity, just sweeping a bit of
just a bit of interest. Okay, done here. Pick a way. It was quicker to go
that way to purple. That is to go that way. Okay. So we're just
going to go to the left. I get up there to a light color. And let's just swoop in some
highlights to make it pop. So we can see this
area with lighter one that, that later. Then we can have some
even brighter. Part two. If we just be careful to vary a bit. Okay. That'll do for this
process. Skin. Yeah, we go a bit to their bit less saturated,
lower the opacity. We can mark the earlier with
our sketch layer, I'm me. So we can see, we can sort of see
where we need to just pop in some lighter parts. Bit there. There,
there's a bit on the top lip bit on this thing, but using a different
color for that actually. So I always like to add a bit to the eyelids
to make them jump. You get out of the pit
to the few squiggles to the eye to make
it look more puppy. Okay. Looking pretty good, isn't it? Right. Highlights done. Not highlighted,
Sorry, just lighting. I usually like to take
them down to about 90%. When I've done it. Maybe have them multiply one slightly more. If we knock off
our sketch layers, this is where we're at. We've got a nice clean
picture of this young girl. Change the background
color at this point to something that meets
peach and blue. Yeah, you're looking
at an off-screen, I suppose a look quite nice. Yeah. I mean, at this point you
could literally call it done. So simple the processes,
it looks pretty good. But I like to just add another layer and we can
pop in some highlights. So if you remember
earlier where we sketch layer, we mark them up. So let's just, let's
just pop them back in to highlight, see it in there. So even a few highlights in the hair. Actually do overlay layer
for this little bit here. So let's do it now. Let's just use white. Okay, we are nearing
completion of my method. I do like to add a
few swaps of hair. When I've done, I use my had
hair strong brush for this. I'll pick whatever color I want. And we're just going to swoop in something just
to grab the attention. Really. I might even go a bit
darker than that. It's a brilliant brush,
it adds texture. Another view here,
strands if you want. We can just swoop in with
this hair texture brush really setting it off
with a lighter color. Like so. And I sit, folks know this is the part where it's completely up to you. If you keep the sketch
layers on or off. I'm tone. Sometimes I
prefer to knock them off. Alright, so sometimes I'll
knock the sketch layers off. Like that. I'll just add a bit
of a cleaner illustration. Sometimes I like to
add them and leave them in because they just add a bit more depth as long as the opacity is not way up and
it's not too controlling. Especially with the sketchy, with the shading one. You want it to look
too dark and muggy. But I do my personal thing. I like to leave my loose, sketchy lines all over. This is gonna be your
personal preference. Okay? One last thing that I like to do is when our line layer
pick out a line color. And I just want to really, just to give you the
extra cartoon pop, I just want to cross
action last way too thick. Crosshatch in some
blatant loans, I want it to be
blatant and obvious. I just want to add a bit of fun. Sweat. I want it to look
like an illustration as opposed to something that's
trying to be something else. I'll do it like so. I will do it like so. I hope you've really
enjoyed my class today. I've had a few people
asking me about it and in particular about my
color and methods. So I hope I was cleared
it up a bit for you. I hope to see you all attempts
in the resources section. So do please tag me. Tag me with your
attempts and efforts. This is doing is
just adding texture. Okay guys, so lastly, the
end of my class today, I hope you enjoyed it. Let me just quickly pop on. I'll close this down. This reference,
we don't need it. So we were given this reference
image off the customer. That's one thing I forgot. Look at that. See, this is why you
always do this at the end. I forgot a little freckles. So knock it off. Less pop in those
little freckles. So it opened up a
new layer for this. We're going to go color of the skin, Amoco, quite orangey. And I can't believe I
nearly forgot them. Just a few, little few little
freckles here and there. Now it looks like a girl. We could lower the
opacity on that, maybe tune it to a multiply,
lower the opacity. And now we're done, folks that were done. One thing left to do is always sign your work because there's a lot of
snakes out there and they will steal anything, anything. It's just don't,
don't encourage them. So thanks for watching. I hope you've enjoyed it. I'll see you soon
for my next class. Really appreciate
your guys support, especially what patrons
or anyone who's ever done a tutorial
or used my brushes. Big thanks. I'll see you all again
soon. Thank you very much.
 HugsyArts, Aspire to inspire