Transcripts
1. Intro: Hi guys and welcome back to my second Skillshare class. It will be all about how to paint different landscape elements. We will talk about the colors you will need for each element and the brushes I like to use for landscape paintings. The sky is the key element as it sets the whole tone and atmosphere for the picture. I decided to show you a four different skies and moods: a cloudless summer sky, a cloudy sky, cloudy and rainy sky, which is more dramatic and a stormy rough and cold dramatic sky. In the second step, we will talk about how to paint evergreens in different distances, like masses in the background, masses in the middleground. Individual specimen in the foreground. And we'll take a look on how to paint deciduous trees with summer and autumn foliage and I will show you how to paint them in winter and how to choose the colors for the different seasons. I will show you how to paint tree masses and how I paint hedgerow and grasses. At the end, there will be an example for how to combine these elements in a landscape painting in the class project section. You can follow the steps in this real-time videos for practice or use the learned things in your own project. So I hope you enjoy the class.
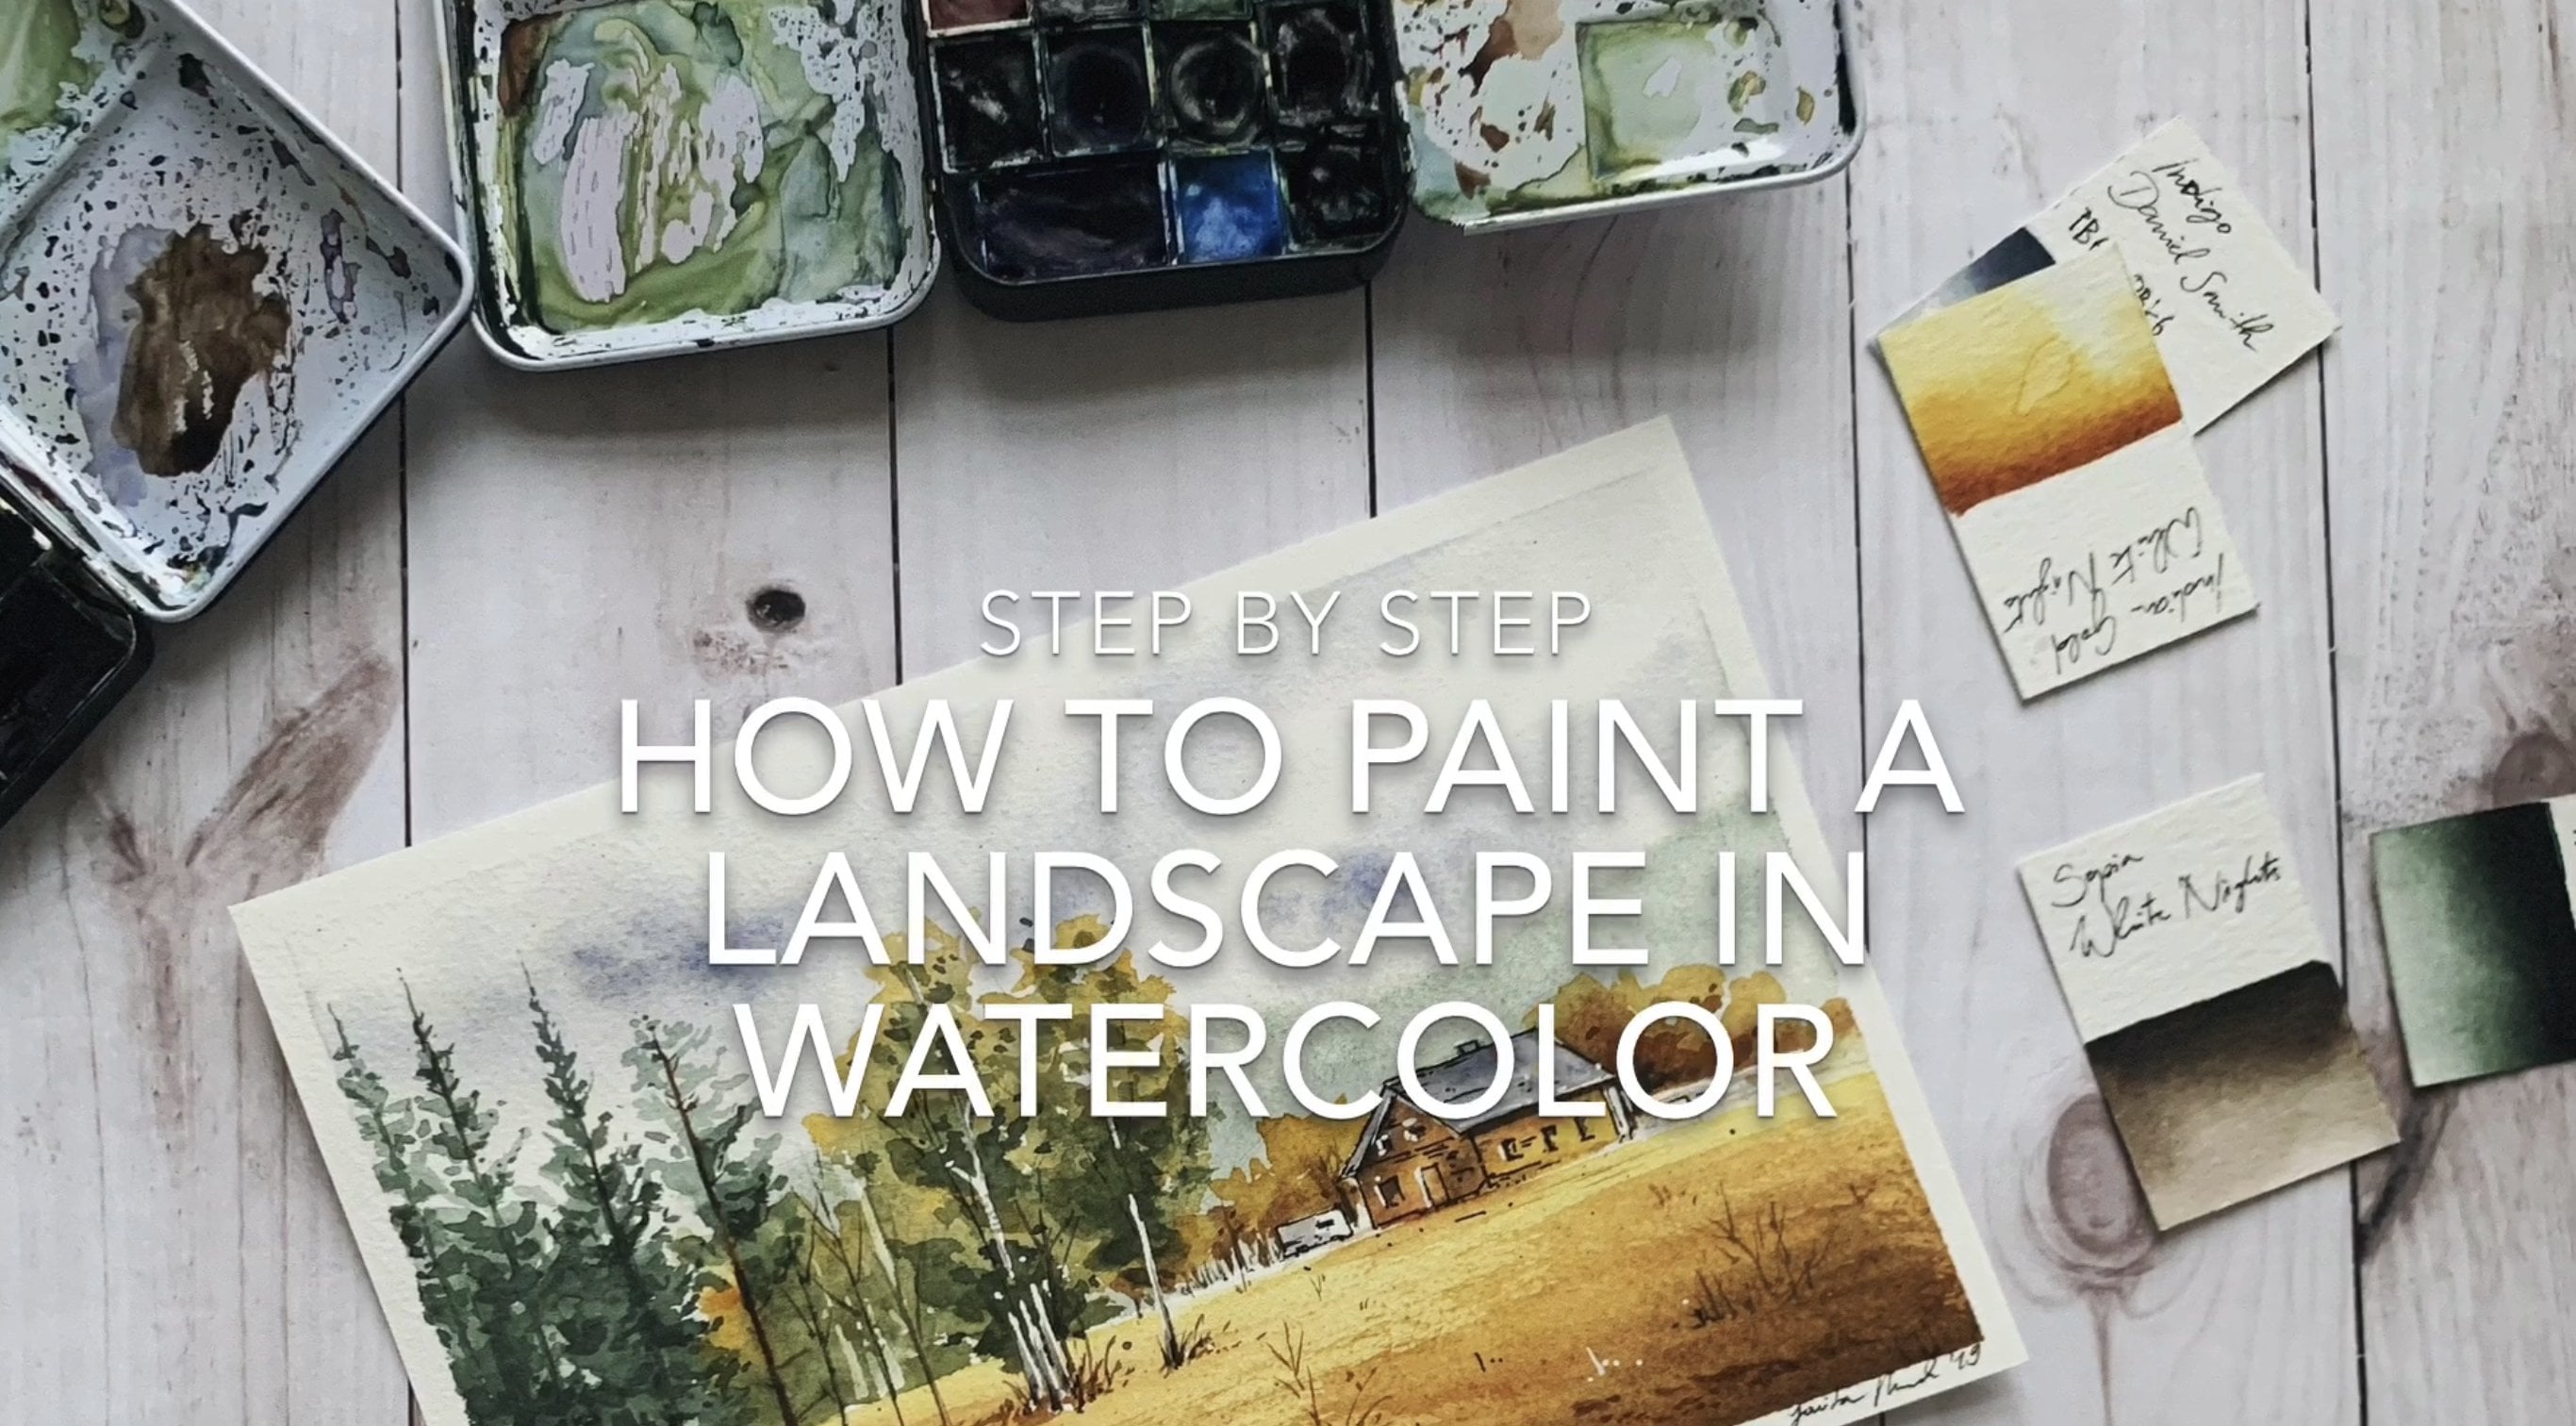
2. Materials: The most important material for your watercolor painting is the paper. It's very, very important to use good quality paper. Only with real cotton paper, you are able to work wet in wet without getting frustrated. For the class, I use my sketchbook with Fabriano Artistico paper. And for the class project, I use Arches cold pressed paper. For my paintings. I like to use round brushes with natural and synthetic hair. They are able to hold a lot of water and you can paint big shapes and detail work with them. I love the travel brushes because I can take them everywhere without destroying them. Brushes I use for this class are around brush number 12 for bigger washes. And number eight and number four round brush for painting smaller shapes. A flat brush number 40, for wetting the paper. And a really, really small detail brush number 0 that , but you can use also a rigger brush instead. Here are the colors I used to paint the examples and the class project. At the end of this video, I will additionally blend in a list of the colors divided by class sections. Other materials you will need: Tissues, washitape, a pen, or a fineliner, a white marker, white gouache and a palette. So here's the summary of the materials. And then let's get ready and begin with the class. Happy painting!
3. Skies and clouds: As it comes to skies, there's one rule I follow. Namely in 99% of my paintings, I start by painting this sky. I bild up the painting from the background over the middleground to the foreground. This makes it much easier than the other way round. For paintings with sharp edges, I use Washi tape. It doesn't have to be the original one, I always use the no-name products. The big benefit of washitaoe is, that it will not damage your watercolour paper. Using other tapes, you have to be careful when removing it. Generally, I like to work wet in wet when it comes to paint skies. This method conveys a diffused softness. That's why I love using it. We will learn the paint four different sky moods. When you're practicing, paint them quite small at first, maybe something around a postcard size. until you become more confident. Because I wet the paper using a lot of water, I always use good-quality watercolor paper. Otherwise you won't be able to achieve the seamless gradient because the paper will curl and the water will concentrate on the low areas. Be careful, the paper has to be damp and shiny, but not wet. So let's begin with a cloudless summer sky. Wet the paper on the whole sky area with a number 12 round brush and mix a wash of french ultramarine blue and prussian blue. Begin at the top of the paper, bringing the wash down with the same brush and a lot of water. The sky is darker overhead and paler at the horizon. Therefore, I stop near the horizon line, wash the brush and clean water, dab it on a piece of tissue to dry it a little and smudge the rest of the paint into the clean area. For the next step, it's important that the mix is more pigmented than the first one. This is the key for painting with the wet into wet technique as less pigmented paint with a lot of water always flows into more pigmented paint with less water. This might produce bleedings you don't want in the sky. Again, begin at the top to darken the top of the sky. Wash the brush out, dry it with a tissue and smudge the paint into the light horizon area. Every time you feel like there's too much paint or water on the paper, use a dry brush and lift some paint. So the first sky is finished. Let's continue with the cloudy sky. Again, begin by wetting the paper with clean water. For skies with clouds, I like to use a kind of negative painting technique. This means I paint the blue sky and leave white spaces to become the clouds. I start with the same mix for the sky blue as I used for the previous sky. It's Prussian blue and French ultramarine. Begin to place the larger clouds at the top. By varying the pressure on the brush, I'm trying to achieve a fluffy looking cloud. Clouds in the distance appear smaller and narrower, place them near the horizon line. I load the brush again with a stronger mix of French ultramarine blue and Prussian blue. And place the mix around the top of the sky to strengthen the feeling of distance, as skies are always paler at the horizon line, as I mentioned before, in the first sky demonstration. If the paper is to wet, the paper might flow too much. In this case, simply use a kitchen towel to dab out the cloud shapes. But you need to work quickly as once the paint has started to dry, it will not lift out. For a dimensional effect, I like to bring in some shadow areas to the bottom of each cloud while the paper is still damp. So work fast. Mix French ultramarine with burnt on bow for a warm gray and begin to darken the clouds carefully with a hint of paint. Don't use too much water because this might produce unpleasant bleedings. With a stronger mix, bring in some darker shadows. The finished sky will look quite different from when it was wet. The colors should have gently fused into one another, going slightly paler and creating a soft diffused look. So let's continue with a sky on a rainy day. In your reference photos, the cloud structures might be too complicated to include everything. Focus on the parts that excite you the most and convey the atmosphere of the sky by assimilating the colors and forms of the clouds. Again, I begin by wetting the paper. Use Paynes gray or any other Gray and start to paint at the top, leaving gaps. Now, add a little bit of Potters pink, to the Paynes gray to suggests the shadow of a huge cloud on rainy day. As long as the paper is damp, you can work out this sky more and more as long you make sure, not to have too much water on your brush. The paint will merge and soften during the drying time. Try to vary the ratio of Paynes gray and Potters pink to add more interest for the viewer, bring some paint on the paper, smudge some areas to soften the look of the cloud. For fluffy looking clouds at the top of the sky, dab with the tip of your brush on the paper. If the paper is drying too fast, let the paper dry completely and then begin to wet the whole area again. Near the horizon use more horizontal movements as the cloud is far away. Darken the sky with more paynes gray And strengthen the shadows of the clouds with a stronger mix of Potters pink. If you want to produce an effect of falling rain, avoid to overstate the impression of vertical strokes. Instead, move the almost dry brush with a small amount of paint rapidly over the bottom of the sky. The output would be delicate strokes. This is often quite enough to suggest rain. For this version, use a darker and more muted blue-gray, the strong color will create a high contrast between the clouds and the sky, which can depict approaching bad weather and look very atmospheric. Wet the paper again. Start with a number 12 round brush and rub in the first wash of a very pale Indian gold. Place the darkest and biggest clouds at the top. And the smaller distant clouds near the horizon line. Try to work fast as the paper dries fast. Every time you take more paint on the brush, it should be more pigmented than the previous mix. If the paper's drying, although you're not finished yet, let it dry completely before adding more paint. After drying, you can wet the surface again and complete your sky until you're satisfied. The last thick mix of Paynes gray, we'll add the final contrast and drama to the scene. Suggest some pale and narrow clouds in a distance near the horizon. So we finished the skies, let's continue with trees and foliage.
4. Evergreens - Individual trees : Watercolor works light to dark because it's a transparent medium. Always start with lighter values and build up darks. We start with a technique you can paint the individual trees in the fore- and middle ground of your painting, because it's more detailed. I notionally divide my paintings in three sections. The background, Middleground and foreground. This helps me to divide how detailed each element has to be. Background is more bluish, less detailed, with less contrast. The Middleground introduce gradually warmer tones and details. The foreground is the most detailed part of the painting with warmer colors like greens, browns, and yellows. Before we begin to paint, I will show you a very simplified drawing how to render the two different types with different directions of your brush strokes. The branches of spruce trees usually pointing upwards. We begin in the middle of the tree with a longer brushstroke and arrange the shorter brush strokes outwards and upwards. The branches of fir trees are usually more horizontal. Your brushstrokes should be generally more vertical and shorter. Work from inside to outside and shorten the brushstrokes gradually. Now we begin to paint the spruce. Use undersea green ( a warm green) and by using a round brush size ten, paint the first wash of our evergreen. Start at the top of the tree and paint the branches by varying the pressure on the brush, more pressure in the middle and less on the outside of the tree. Always paint the foliage first and put in the trunk and branches later, allowing the branches appear in the foliage, this looks more natural. This will be our next step when we finished the tree top. Follow the advice is from the drawing at the beginning. And remember to bring in some variety. In nature trees are never symmetrical. With a mix of gray, I paint the tree trunk. You can make a gray by combining the opposite on the colour wheel, such as red and green, or blue and orange. I like the combination of French ultramarine and burnt umber. Add more blue to make it a cool gray can more burnt umber to have a lean towards a warm brown. For pines and evergreens it can be both. But in this case, I use a more bluish gray-brown. Suggest some thin small branches at the tree trunk. So that was our first layer. So let it dry for the next step. Now start with the second layer of the tree. Use a smaller round brush something around number four. Use a thicker consistency of undersea green and perylene green, which is a quiet dark, cold green. Place the shadows under each branch to make it look dimensional. Again, start at the top and work downwards leaving gaps. You want the first layer to shine through. Add a shadow on one side of the tree trunk with a stronger version of your Gray mix. Let it dry. Now it's time for a creamy and thick mix of perylene green and indigo. This dark layer will add the detail and more contrast to the tree. In this last layer of the tree top, you paint the darkest greens. So this last layer should be limited to something like 5 to 10% of the painting, and at the contrast. Still pay attention to let the most of your first and second layer shine through. Let the tree trunk appear through the branches for a natural look. The second tree will be quite the same as the first. Instead of using undersea green, use perylene green for the first layer. This will create a cooler version, which you can use for trees on cloudy days. The first version with undersea green as first layer, creates a warmer mood on a sunny day. Think about the brushstroke technique for a fir tree I shown you in the beginning. Again begin at the top. Paint large areas of the foliage as a mass with a large brush and only flip a few suggested leaves at the edges of the mass. When you're using a reference photograph, remember, not to try to make an accurate copy of it. The key is to simplify the form of the object. So use your references rather as an inspiration. Just remember to work with the tip of your brush when it comes to the top of the tree. Work step-by-step from the top to the bottom that gradually paint the tree wider. Again, use a mix of ultramarine blue and burnt umber to paint tree trunk and some twigs. With a few fast brushstrokes suggest the grasses on the forest floor. Allow to dry before continuing with the second layer.
5. Evergreens - Individual trees and distant masses: Paint the shadow of the crown of the tree with a thicker mix of perylene green. With a thinker mix of ultramarine blue and burnt umber ,add a shadow on one side of the bark. Do the final touches by adding darker blades of grass, add more contrasts to the crownes by using a very thick perylene green mix. Add some smaller dots on the edges of the tree, suggesting small needles and springs. Now we start to build up the masses in a distance and middleground. Trees in the distance are less detailed and smaller as the trees in the foreground. So let's paint the evergreen masses in the middle distance. Therefore, we wet the paper and begin to add the treetops over the top edge of the wetted area. Use a round brush number four and a mix of perylene green and a hint of lunar blue. The three tops should stay sharp edged and flow into the damp area on the bottom. Less is definitely more when it comes to masses of trees. So don't overdo the distant trees in your paintings. You just want to suggest them. Smudge the stronger paint on the paper into the damp area with a damp brush, so the gradation will be softer. The wet in wet technique on the button help to suggest the distance of the trees. It can be strengthened when you add a more detailed tree on the front of this tree masses. So at a bigger conifer in front of the tree mass, working wet in wet with a strong mix and let it dry. Generally speaking, it's always a good idea to overlap objects as in this way you can accomplish depth in the scene. With a stronger mix suggests some individual branches, grasses, and shadows. To summarize it, three-dimensionality gets stronger when you paint distant trees, smaller, more bluish toned, and paler. So if you want the tree masses to appear very distant, use a very pale mix of blue-green, or blue. For the distant masses, I'm using quite the same technique, but with smaller treetops because of the perspective in a landscape. Wet the paper put the small treetops over the wetted area. Dab in a hint of undersea green to add variation to the cool-green conifers. So we are finished with the evergreens. Let's continue with deciduous trees.
6. Deciduous trees: Trees are essential elements in the landscape painting. An interesting tree can revalue the effect of a painting. In this section, I will show you techniques how to paint trees in different seasons and distances. We'll begin with a golden green summer tree. Long days of sunlight allow the tree to make lots of deep green leaves. Begin with Indian gold and a round brush number 12. Add green while the paint is still wet. I prefer to mix the first layers on the paper, rather than the palette. The combinations from allowing two colors
to merge on the paper are endless. So it's worth to give it a try.
Add more green to the bottom, as this is the shadowed area of the crown, leave the top of the tree yellow for the highlights. With a round brush number four, drop in some pigmented undersea green mix. Then using sepia paint to the tree trunk. Now it's time to add the middle tones to the tree. Use undersea green and paint the shadow areas of the tree. Add more Indigo for the shadows. Tree trunks are not always brown.
When painting them do a bit of observation. Look at the variety of colors in the bark
they're mostly green, silver or gray, but rarely only brown.
Putting a thicker mix of the same color on one side,
will help to achieve this cylindrical shape. At the end add very thin branches, showing through the leaves on the tree top. As the weather gets warmer on spring, leaves begin to sprout from buds and branches. The leaves are fresh yellow, green now. Use cadmium yellow to suggest the highlighted area on the tree. The highlighted area is where the foliage is in the sun. On the palette mix a little of blue in your yellow and drop it in the yellow on the paper while it's wet. I like to paint the first layer of threes with wet and wet techniques and two colors because it gives it a more interesting undertone. Now add the first middle tones in the wet-damp first layer by using a more saturated mix than first one. Make sure you add more paint to the mix, but do not add water. You want the paint to be more pigmented than the first one. So add a hint more blue to your mix and drop it in. Again, make sure you're not covering all of the first layer. Let the first layer dry and begin with the second layer. For the next layer, use a deeper mix of cadmium yellow and prussian blue. Paint the shadowed areas of the tree. This is always the side which is faced away from the sun. Make deeper mix by adding indigo to the mixture and add more shadows. By building the darks, you add the dimensionality to the foliage. The darkest tones are always at the bottom of the tree top, because it's the side of the tree, which is the farthest away from the sunlight. Build up the final contrast by adding more and more indigo to your mix. With a dark brown mix add the tree trunk. You don't have to wait until the crown is dried. It will nicely flow into another. Now you can use the white spaces you left out
and suggest some branches in the crown, it's not necessary, but I like to give
each tree ground, when I practice them. So you can suggest some grasses on the floor.
Add some more touches of indigo on the very bottom of the ground. While waiting for drying, we go on with the winter tree and
return to the spring tree for the last touches. In the cold winter months, the branches are bare and the trees lies dormant, preserving its energy and water until the following spring. Use a number four round brush and a fine brush with sepia. Begin at the bole, which is the widest part of the tree. Carry on with the final limbs. Branches, and twigs are the most delicate part of the tree. Pay attention to paint them very thin with a fine brush. So yeah. With a mix of indigo and a hint of cadmium yellow and Prussian blue add the last layer
to the spring tree to add the last touches and shadows. At the end, I love to use my Lamy pen with waterproof ink to add details and texture to the trees. As the days get colder and shorter, the leaves begins to break down
and they change from green to red and gold. So to paint a tree in the autumn, we use earthy colors with the same method
as we uses for spring and summer trees. We begin with a light area in Indian gold.
Continue with transparent red oxide for the middle tone
areas of the crown while working wet in wet. Paint the tree trunk using sepia,
add some branches in the crown. While the first layer is still wet add transparent brown oxide with less water
and drop it into the damp paint to suggest the shadow areas. Let it dry, and at the last layer of shadows using
the same colors, but with a mare saturated mix. For distant trees it's essential to see them as a mass and not to pay attention
on all the details you might see. Work with extensive brushstrokes, concentrating on the form of the mass and not of individual trees. By varying the pressure, you can control the flow of the paint. The more pressure you give on the brush, the more paint will flow. Begin with more water and less pigment for the first wash,
and build up the contrast by using more and more saturated
paint in each step of your painting. Use a mix of yellow and indigo, to suggests shapes in the foliage
on its bottom. For hedgerows, the approach is quite the same. First layer, wet into wet. I'm using Indian gold with undersea green, adding more pigment at the bottom. Let it dry because we want to apply
the next layer wet on dry. Begin to build up the shades with
undersea green on the bottom near the floor, and vary the pigmentation of your mix. These small saturated spots will suggest
small shadow areas in the hedgerow. For the second hedgerow, it will be again the same technique, I only change the shadow colors. You see, painting foliage, it is all about painting the light, middle tones and shadows. For the first layer, I use always wet in wet, using at least two colors, in the most cases. In the second layer I build up the middle tones,
and in the last layer bring in the shadows. For painting grasses, it's important to move the brush from upwards. Use relative thick mix of paint and paint the narrow leaves.
Vary their shape, directions of strokes, colors, and values. Begin with less saturated paint and make it thicker with each step. Try to use different lengths. At the end, you can add some details
like little branches to the hedgerows. And now, let's move on to the class project.
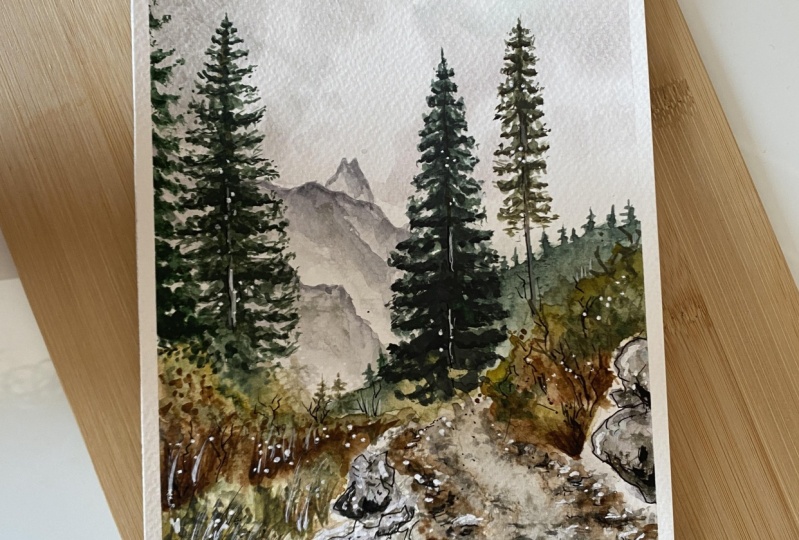
7. Class Project: Sky and mountains: I've already done the rough sketch showing the main elements of a landscape. Make sure everything is in place and that you understand the details you are going to paint. Keep it light, clean with unshaded lines and no hatching. Then we begin to lay down the first wash. Begin to wet the surface of your watercolour paper very well. This is very important because when you don't, you won't have enough time to paint the sky without hard edges. Load the brush with paynes gray and begin on the left top of the paper by bringing the wash down,
by gently putting the paint on the paper. If you want to put more paint on the surface, press more, If you want to bring less paint down, use only the tip. Add some potters pink to the mix,
and a lot of water to get a transparent mix. Now, leaving a wide gap between the paynes grey sky, begin to paint the big clouds. Add more potters pink and go on with the cloud at the horizon. By varying the amount of the two colors in the mix, you create a lot of interest to the sky. A reduced palette is the key for color harmony. Start adding a more pigmented
consistency color mix of paynes gray and potters pink to the clouds and
smudge the color with a damp brush a little. The paper has to be still damp. Hold the brush vertical for bringing a small amount of paint to the paper. Use this technique for the smaller clouds to make the biggest clouds look more
fluffy and loosen them up. If you want to fill more space with the paint, used the side of your brush Begin with paynes gray and the round brush number eight and bring the wash down beginning
at the top of the mountain. Then we will utilize the cold pressed
surface of the paper. With dry brush work create a broken effect, which suggests snow and shadows on the mountain peak. Repeat the steps for each mountain. With a rest of the paint on the brush,
create texture at the bottom of the mountain. Warm up the bottom of the mountain
with a small amount of potters pink. After the second pass has dried, proceed to the second pass of color: the background trees, in the next video.
8. Class Project: Background trees: Now we begin to paint the background trees. Wet the paper with
perylene green and a lot of water. Then mix a very creamy
mix of perylene green. Start to paint the tree tops of the
evergreens with this creamy mixture and a small brush number four.
The paint will flow into the wetted area
and do most of the work for you. By smudging the paint with the brush into the wetted area, the result becomes more blurred. It will create a nice gradation and effect of depth. You can leave the trees like this
right now. In my case, I will add a hint of Indian gold that a bottom to suggest some deciduous trees in front of the evergreens. It will be a nice contrast and add
more interest to the background trees. Make sure you use less water and more paint for the Indian gold mix. Otherwise you might produce bleedings. Now we go with the background trees on the right side. Therefore, we wet the paper again and let the paint flow into the damp area as we did before. At the end, add some hints of very pigmented paint mixture to the damp trees. Suggests some trunks and treetops in this technique. In the next video, we will continue with the middleground trees. See you there.
9. Class Project: Middle ground trees: To strengthen the aerial perspective, use a very pigmented mix of perylene green for the middleground trees. The key for a believable perspective is that you have to use dark and mixes with less water
the nearer the object is. For the background, I use more water, and
more transparent mixtures. Trees in the fore- and middleground are usually the darkest things in the scene. They can act as a frame to the mountains in the background, creating a feeling of space and distance. Go on to paint the evergreens
as we learned at section four of this class, and don't forget to bring variation
to the specimens. We will divide the middleground trees into two layers. The first layer will be our base layer, the second layer will add contrast, depth, and dimension to our evergreens. Begin to bring down the first layer and
form the shape of our conifers. Vary the shape of the branches and the
height of the trees. You don't want them looking all the same
because this can look unnatural and boring. Don't forget to vary the pressure on your brush. More pressure near the trunk and less at the edges, suggesting some small branches and needles. Also try to bring in some variation
to the individual trees. For example, paint the branches more
horizontal, or pointing upwards. Let the crown end at the floor, a few meters above the floor. Try to put individual brushstrokes together
and connect them to one another. Make sure to leave some spaces free
and let this sky shine through a little. The synthetic bristles of the brush
I'm using right now are more elastic than the bristles of my kolinsky brushes. So I can control the brushstrokes better and bring
them more accurately on the paper. When you are working wet into wet, it's important that you load more pigment
on the brush with each new application. As you can see, I reinforce my mixture
over and over again painting the tree. The darkest spots are near the tree trunk, in the middle of the tree, and below the individual indicated branches. Work out the ages of the individually trees step-by-step with very fine brushstrokes
to render separated branches. Your brush tip should only gently
touch the surface of the paper. The tree on the left handside is
a little bit closer to the viewer. Therefore you should paint the branches a little bit larger. The closer to the viewer, the bigger things appear. Paint more trees. Bring in some variation
by making some trees a little thinner or thicker, smaller or larger.
There are no limits. Release your creativity. Search for reference pictures on the internet. Or go for a walk and take reference pictures
by yourself to get inspiration. So that was the first layer of the middleground trees. Now we will let it dry and move on to the first washes of the foreground and get back to the second player later.
10. Class Project: First washes of the foreground : We begin with the first
wash of the path wet the surface of the paper
and bring on a mix of ultramarine blue and burnt umber
on the edges of the path. Because the papers is wet, the paint will flow into middle, creating a gradation. Add a little stronger mix of
the same colors to the foreground to strengthen
the aerial perspective. Paths are also a good way to
lead the glance into the painting and to enhance
the three-dimensionality in the scene. Painted paler and less detailed
near the horizon line, and stronger in the foreground. If you feel like there's too much
water or paint on the paper, you can absorb it with a damp brush. Therefore dry the brush on the piece of tissue,
and absorb the paint or water. When necessary, dry the brush again
and repeat the steps. Now we
begin to bring the first wash of foreground foliage down.
With a mix of Indian gold start to paint the hedgerows in the foreground for
the lightest parts of the foliage. Drop in a little of undersea green. I like to mix a limited amount of colors on the first layers
because it gives a nice variation. When do you use only one color it might look a little bit flat. Each clump of plants has their
overall color. One is more reddish, one more
yellowish. Always try to alternate the
color temperatures with adjoining plants in order
to separate them. At the bottom of the hedgerow
drop in a touch of transparent red oxide to suggest
another variation of a hedgerow. Add burnt umber for the shadow area on the bottom. Now begin to drop in more and more of undersea green to the yellow hedgerow
to paint the shadow of this one. With perylene green add a little
bit more offcontrast. Repeat the steps for each specimen
you want to outline in this scene. Begin with the highlights using Indian gold, the middle values with transparent red oxide, and add darks with burnt umber. Let the first layer dry. When you feel like your foliage has
too much gaps between each other, you can bring a very light wash
of a light color like indian gold over it, but be aware, the layer underneath
has to be dry. Now we go on to add dimension the foliage.
Wet the surface again with a very light wash of Indian gold. Make sure you're not covering
all of the first layer, you want the lightest color to be visible on top
and drop in transparent red oxide, for the middle values on the bottom. Vary the use of your brush by
tapping on the paper and suggesting branches by flipping the brush fast
from the bottom to the top. Now we let the foreground dry and
get back to the middleground trees.
11. Class Project: Middle ground second layer: To add dimension to the middleground trees, we begin to add the next layer. The paint has to be a thick mix of less water and a lot of pigment, so we can add the darks to the tree branches. Use a number four round brush to make sure not to cover too much of the first layer and begin to add the shadows on the bottom of each branch. The shadow areas get bigger the farther away from the sunlight. At the top of the light hedgerow in front of the evergreens add a few dark green points
to make it look like there are gaps in the hedgerow to reveal
some of the evergreens behind it. It's a kind of negative painting and loosen up the foliage, making it look more natural. Paint the tree trunks appearing in the crowns. We add the tree trunks with white gouache later, but you can suggest some twigs growing directly out of the tree trunk, as long as you have the green paint on your brush.
12. Class Project: Second layer of the foreground: For the second layer of the foreground
foliage, mix a thicker mix of transparent red oxide
and brown oxide. This will be our darkest shadows on the foliage. Try to work loose covering
more on the bottom, less in the middle, and single leaves on the top. Add burnt umber for the shadow areas. Do the same with a mix of
undersea green and indigo. Add more indigo to the mix
to achieve a darker shade. Try to make irregular brushstrokes. Some are smaller made
with the tip of your brush, some are bigger,
made with the side of your brush. Suggest some tussocks of grass
on the bottom of the painting. Remember that the closer the object
work out more and more details. I like to darken the bottom edges
suggesting shadows. This will enhance the aerial perspective. Begin to paint the rocks in front of the scene with a light makes a french ultramarine
and burnt umber. The ratio should be something like 70%
blue and 30% burnt umber. Leave hints of white on the top. This will be the lightest parts. The wash should be a watery
mix of more water than pigment. We will add more and more
pigment gradually. Add texture with a thicker version
of the same mix, working wet in wet and suggesting
fissures and shadows. Make sure the mix is more pigmented, than the first wet layer. It's very important because otherwise
the fresh paint will produce bleedings. Now use the same mix on the path to suggest
the shades of pebbles lying around. We will add the pebbles with
a white marker later. To make sure to apply the rules of perspective, the pebbles should be larger at the front
and become smaller in the background. I want to darken the rocks on the bottom a little bit more, using a thicker mix with a very
small amount of water and more pigment. The contrast of darker
and lighter areas will attract the attention of the viewer
and lead the glance into the painting. I want the intensify that perspective effect
by adding some more shadows, pebbles in the foreground and background. As I mentioned before, we will add the pebbles later
with a white marker or gouache. I'm adding some more details, and shadows to the rights side of the path. The hedges are a little bit far
away from the viewer. They don't need to be as detailed
as the hedges on front of the viewer. Now let's move on with some textures in the next video.
13. Class Project: Textures on stones and path : Now we add a warmer shade to the path
as it turned out a little too cool. Therefore, I'm using a little of
burnt tigers eye genuine. It granulate very nice and helps to create the texture
of a sandy path. Load the brush with paint
and bring down the paint at the edges of the path. Clean the brush, and dry it
on a tissue a little, and blur pain to the middle of the path. This technique will imitate the shadows of the objects next to the path
and create three-dimensionality. Do the same with the other side. For the darkest shadows on the stones
use a very thick mix of indigo. Add on the bottom of the stones. Try to work out the roughness of the rocks
with small cracks, fissures and spallings. Then with an almost dry brush, swipe over the paper to create texture.
14. Class Project: Textures: So far the landscape has consistent of larger and smaller areas that we created with paint. Now, it's time to add more details, such as tree trunks, shoots, tweaks, individual or leaves. Be inspired by nature. With white gouache and a hint of blue,
paint. the three trunks in the middleground.
With the same mix, you can add highlights and textures
on the stones and the path. In general, the closer the object is to the viewer the more details
and textures should be painted. This automatically gives the picture
more depth and three-dimensionality. Take the smallest brush you have and paint individual branches, holding the brush
vertical to the paper. Make sure that the branches are wider
near the floor and thinner on the top. Add more details like leaves, twigs, limbs in the background. work out some more fissures on the boulders. Fine details are most effective when
drawn with quick strokes of a fine brush. Vary shapes, directions, colors, and values. You can also add some barren trees in the background. Don't do too much, you just want to give a few hints to the viewer. If you work out details in the background, make sure that your paint is transparent enough, because you don't want to emphasize
the background trees. For the details in the foreground, you can use the a creamier mix to give the foreground a higher contrast and dynamic. Suggest a few more clumps and leaves. And with a very creamy mix on your brush, paint some more texture to the boulders in the foreground. Now let's move on to the last lesson.
15. Class Project: Last details with ink and white marker: As last steps, I often use a fountain pen with waterproof ink
and a white marker. I'm using waterproof ink in case I want to work with water again afterwards, for example, to reinforce a shadow with watercolor. The white marker I like to use for highlights. I tried to use both sparingly and only work out a few passages. While adding the textures, I would like to summarize this class for you. Paint more details in the foreground and less in the background. Use warmer colors in the foreground and cooler in the background. Work from background to the foreground and from light to dark. Work in layers and increase gradually the shadow and contrast. Search for reference pictures and try to catch the characteristic of the object without copying it one to one. So that's all, not it's your turn! I hope you enjoyed the class and I would be happy to your work in the project section. See you!
 JowishkaArt, Architect and Artist