Transcripts
1. Introduction: Hi guys, my name is Kate, and as I've been painting
with watercolors for six or even seven years. If you would like
to learn more about my creativity and
about my lifestyle, you can subscribe to
my Instagram channel. Here I show my
daily life and also I write this a full boss
about watercolor painting. I will be really good
if you subscribe. And today, I would like to teach your painting
with a color tool. This lesson wouldn't be
super interesting for people who has already had some experience in
watercolor painting. But if you're just a
beginner, don't worry, this lesson we'll be
interesting for you to just don't judge yourself too
strict during this lesson, because it can be really
hard for you some time. In this lesson, you
will learn how to paint really difficult and
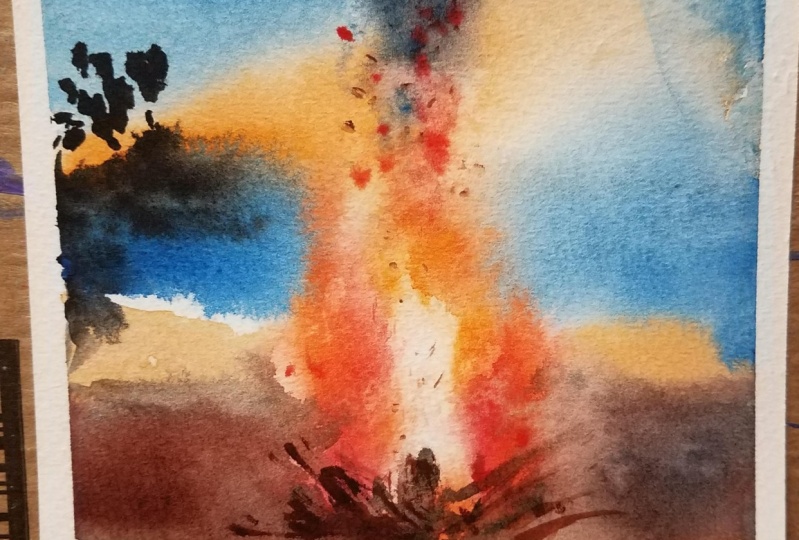
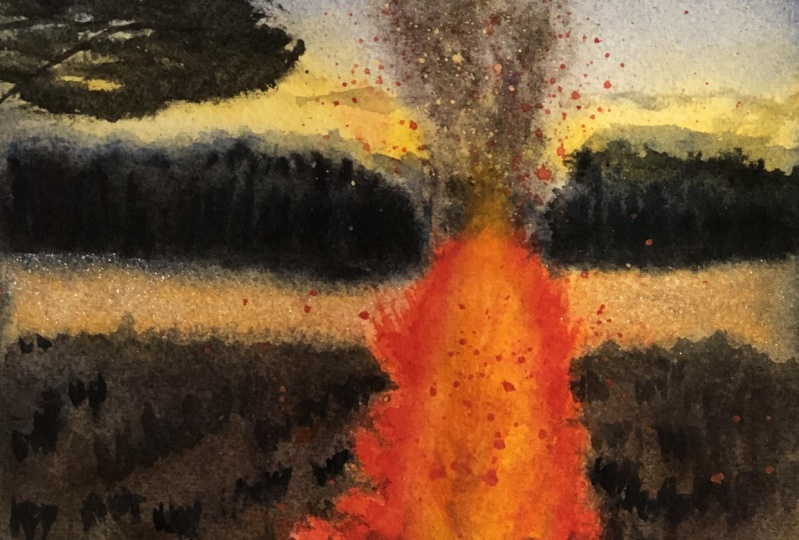
unpredictable state of nature. We will learn how to paint fire. In this lesson, you
will learn how to prepare pencil drawing
or watercolor painting. How to paint using
wet on wet technique, how to paint smoke and fire. And of course, you will
learn how to paint lightning using color contrast. So let's get started.
2. Step 1: pencil drawing: So let's start with
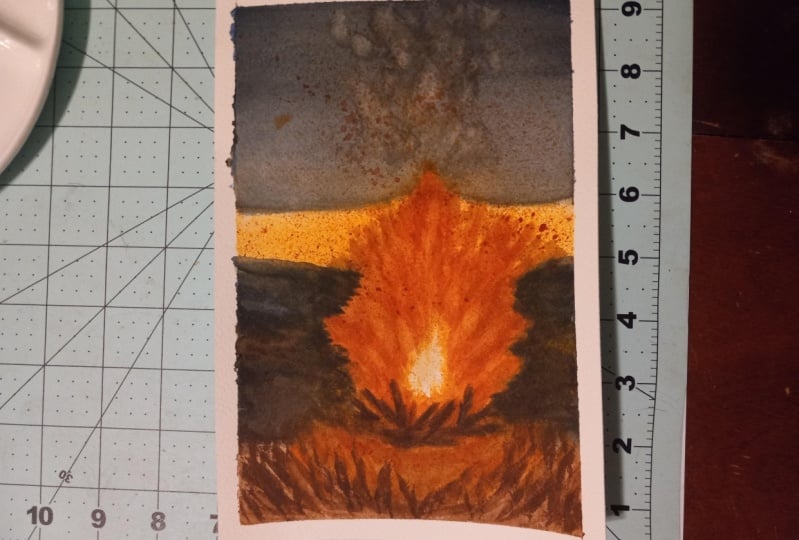
the pencil drawing. I will paint the horizontal
lines that will divide color. Sports, for example, first line, this is line between orange foreground
and dark background. One more line. This is the border between
dark ground and light lake. Then one more line. This is the border
between lake and forest. And the last line, this is the line of forest. And also you can depict
this line between dark sky and light
part of the sky. We have to depict the fire. I don't want to
depict it in detail. So you can paint just triangles. And then they use eraser to make my pencil
drawing less saturated.
3. Step 2: wet on wet: Now we will move on to the stage of painting
with watercolor. And the first layer
I would like to paint in wet on wet technique. I really like this
technique because it led me make very smooth
color transition. At first of course, we need to wet the whole
paper with clean water. It's really important
to start painting with light colors such
as yellow, orange. Because further we will use dark blue colors
and clean water in the glass will be destroyed
to be this dark blue color. And at first, I will paint
the orange line on the sky. If you look at the reference, you would see slightly
orange shade in the sky. And then I start
painting the fire. And I take really
saturated orange. Also, I use synthetic brush because it keeps a lot of color. I will tilt my paper just
in order to let color flow. Then I will change
color to the red. And the more shades of for fire, if you could see
on the reference, the more natural painting
you will get in the end, I tilt my paper once
again just to let the paint flow thanks to the
wet surface of the paper, my colors can easily spread all over the paper and it helped me depict such hard and
unpredictable state of nature as fire, because fire doesn't
have clear boundaries. So it's super important to make its border smooth and flexible. And now we can move on to the dark blue paints
as we finished. For now with this yellow
and orange colors, I take ultramarine
and a little bit in digger to get this
deep blue color. And I start painting
the sky from the top. And I try to leave the most saturated blue color on the top of my paper and then I tilt my clipboard once
again does to lead paint mix super smoothly
between each other. And now we can move on to the darkest part
in our painting. This is the forest. If you look at the reference, you will notice that
it's almost black. I don't like to use black color because it's not
really picture sac. And it's better to
use dark blue here. Because dark blue
can contrast with orange or yellow fire. But I just paint the line and you can see that I didn't
paint over the fire. Now it's nice time to
pay and the smoke, and I use the mixture of
blue and bur to paint it. And then I use round strokes
to depict this small. And thanks to the wet
surface of the paper, this smoke spreads
all over the sheet, pretty smooth and nice. And of course, I often help
from myself using fingers. Sometimes it can
better direct paint, then brush, and now, once again, use orange
color because on the lake I see this
slide line of orange. And then I again mix brown in D, eager to get these
super dark color, but right now I need
warm dark color. So this was the reason
why I took exactly brown. So I'm mixing brown
and indigo and I paint over the whole
area behind the fire. My paper is already dry, so I wet it once again using my super wide brush
and then I use Marissa Brown to depict the
ground too near the fire. And the foreground, I paint with the burnt sienna and
a little bit brown. And of course, you can tilt
your clipboard several times just to help paint
spread all over the paper. Probably your sheet is almost
dry right now as mine. So it's better to stop here and dry everything
with a hairdryer. And our first layer is ready and it looks
really, really great. I hope you are satisfied
with your result to
4. Step 3: fire: So we will move on to the stage of painting fire
in more details. And at first, you need to change how the water
in your glass, because it's very important
to use exactly clean water. On the next step, we will wet with water or the
place with fire once again. And this is the reason why you should use paper with cotton. Because if you use
cellulose paper, you will not be able
to wet the area of wire once again without
damaging the previous layers. And then I start to add
haze, orange color. I'm on the border of this fire. And of course, I tried to
use several teams of orange because it makes our
painting more picture sack. You once again, you can
tilt your clipboard to let the paint spread and
mix with each other. I will use this dark
color, almost black, just to paint over
small white pieces of paper that was lifted
between the ground and fire. Painting these borders
more accurate, also lead us to focus viewers
attention exactly on fire. And on this step you can fix
a little bit this borders of fire so you can paint over the
areas that you don't like. And these borders started
looking too sharp. I wet this area once again
and I let color spread, tilting my clipboard in
different directions. And in this way I can make the border of wire
smoother once again. Then I direct this
water and colors using my fingers in the
direction that I want. Also, I would like to paint
small sparkles, fire. And for this, I splash orange
color using Bristol brush. And to keep the center
of our fire wide, I will use napkin. And if the watercolor
is still wet, you can easily remove some
Carla from the paper surveys, the sublime than the African
to the unnecessary space. I would like to add a
little more sparks. I really use a red and
yellow color right now. I am adding a really
small sparks that you can see only if you'll look at
this painting super close. Using these bristle brush, I can add some more
saturated orange color in the areas I would like. And also don't forget
that you can remove some paint using
wet clean brush. When the brush is clean, it easily collects
all the wet paint from the papers or phrase.
5. Step 4: foreground: So it's a nice time to
paint small details. And I will start with painting the tree that is
located on the right. And I again mix darker brown color and indigo
to get almost black color. And using synthetic small
brush and brush strokes, I paint the tree. It's important to look at the
reference right now and to try depicting the
movement of a tree, it's important to keep all this whitespace
between branches. I just rest my hand I,
during this process, as you can notice, I hold
my brush far from the base. It helps me to create
this kinetic strokes to while I paint this tree, the area with fire is
almost dry right now, I will use a dark
brown and a little bit Marissa Brown to pay and firewood in the bottom
part of the fire. Right now, I would like to pay and small grass on
the foreground. And for these, it's
super convenient to use one brush because it can make
a lot of strokes at once. And I tried to keep the
space around fire empty because I would like to focus the viewer's attention
exactly on this fire. And if we make darker bottom
corners of our picture than the contrast between saturated
yellow and dark brown will be more noticeable. And to depict that fire illuminates these grass
on the foreground, I will use totally
orange color and this fun brush to add some saturated orange
grasses to the foreground. That's all. Thank you
for watching my lesson. I really appreciate that
to trust me as a teacher, don't forget to upload your work in student project section, It's really important
for me to see your progress and
open to any feedback. It's also very
interesting for me to know how this
lesson was for you. Was it challenging or
it was super simple? M, you understood everything. Just sharing your comment,
share your feedback. I will be happy to read it. Don't forget to subscribe
to my Skillshare channel to be pathologist who knows about
your watercolor lessons. So I hope you enjoyed
this time with me. And thank you for your trust. Thank you for your time. And I hope to see you soon. Bye.
 Ekaterina Azeeva, watercolor artist