Transcripts
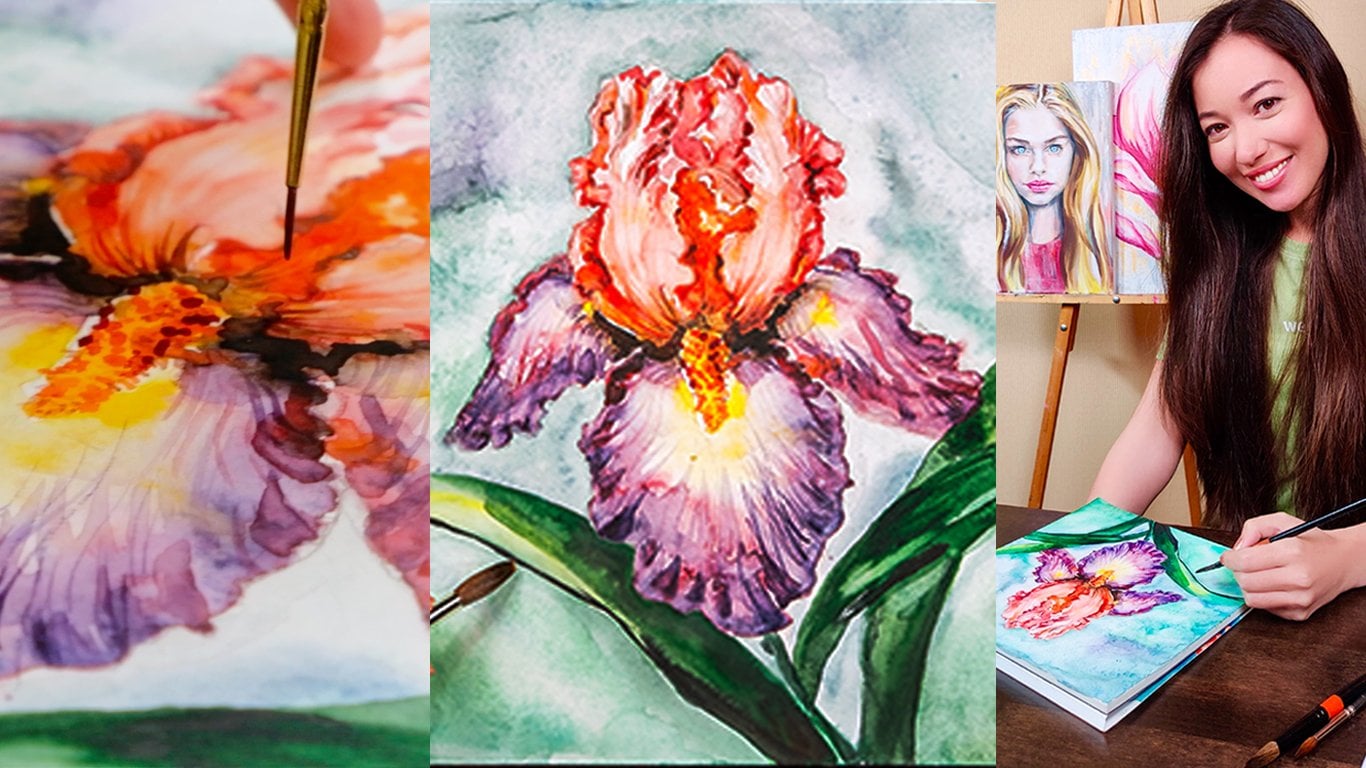
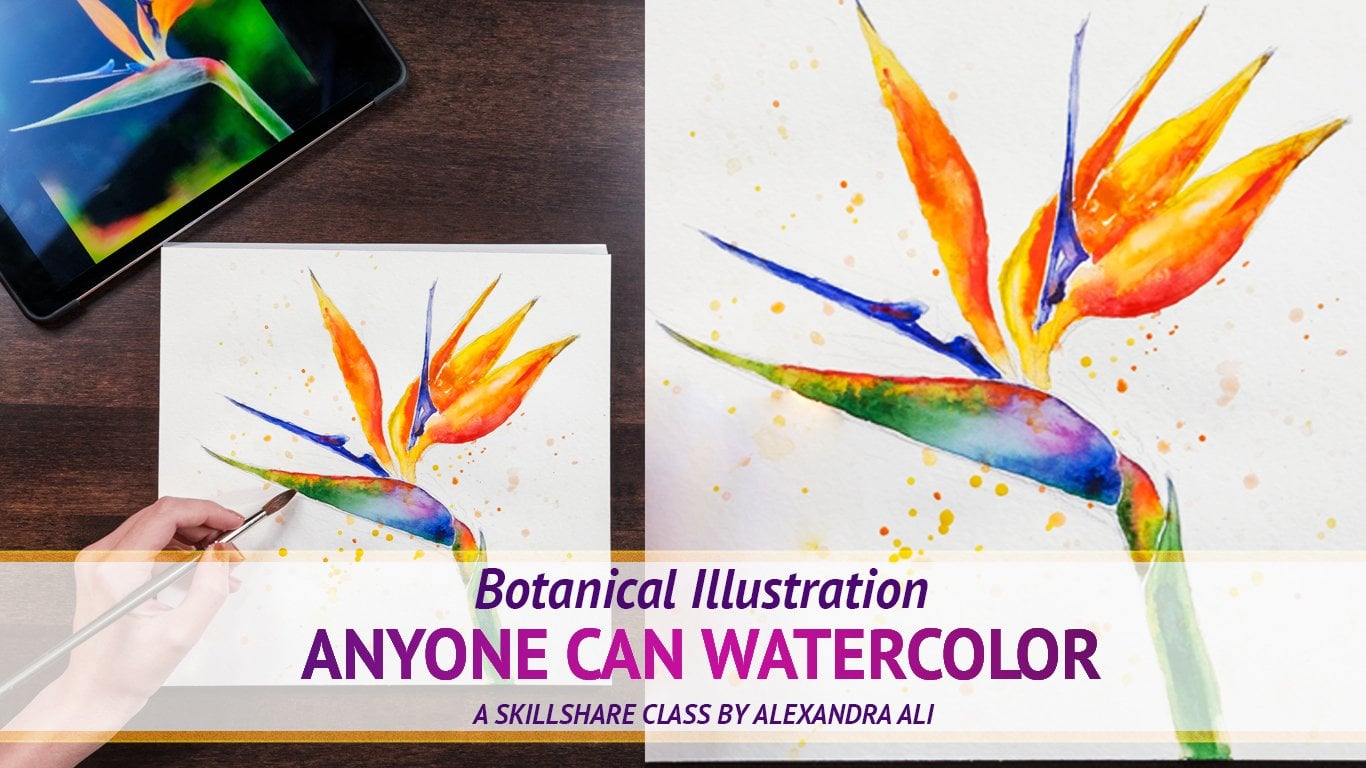
1. Hello & Welcome: Hi, When it was Alexandra Lee and I'm a full-time artist and I'm very happy to see in my class today you will learn how to paint an amazing tropical sunset with watercolors. We will start with all the supplies you will need for this project. And I will show you how it says masking tape to make a nice painting frame. You will learn wet on wet and left limit technique and how to paint watercolor silhouettes. So without pencil drawing, follow along in this step-by-step tutorial. And our demonstrates how to paint colorful tropical sunset sky with silhouettes and how easy and fun it is. Class is suitable for all levels, especially for beginners, because you don't need any additional art skills. Please don't forget to share your artworks and to follow me here and on Instagram for new classes and my painting process. Also prepared for your selection of tropical reference photos on Pinterest that you can use for your project if you want to challenge yourself. So take your water colors and let's begin.
2. Materials You'll need: I will start our class with quick supply around down. I'm using cold press paper, its own block, which means all pages are glued together. And it's really nice for painting on. You will also need a few brushes and different sizes. I'm using professional paints, but depends where you are located. If you're in Europe or US, you can get nice Winsor and Newton set and also on students quality watercolors will be good enough. You will need a pencil and eraser color palette for watercolors. And please don't forget to glasses of clean water and some paper towels for blotting.
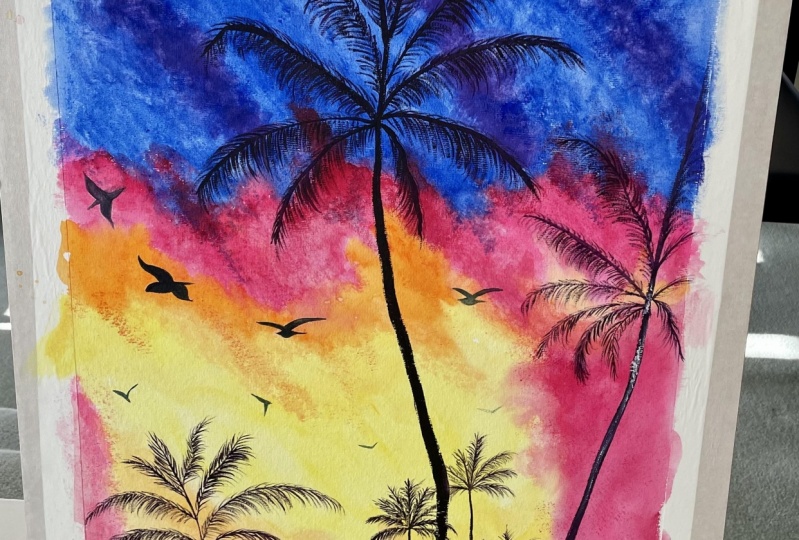
3. Painting Background - Wet on Wet: For this class project, you can either paint along with me from my reference photo or use selection of sunsets reference photos that I prepared for you on Pinterest. Or you can challenge yourself and make few artworks. Let's begin with preparing our watercolors. First of all, let's a wet. All the paints will quite sufficient amount of water. So afterwards it will be super easy and comfortable to use your watercolors. Once it's done, you can start to wet your paper. This way. We're going to try wet-on-wet technique, which is also called Alla prima technique. So take the biggest brush you have and wet your paper with quite a lot of water. So it wouldn't drive very fast. For this case, we are using this very thick paper. And it's very important that you use special watercolor paper. Because otherwise, I mean, like normal paper would be completely ruined with water and you wouldn't be able to paint afterwards. So even if you take student quality paper, make sure it's for watercolor and it's quite thick. Okay, Once you covered everything with water, we can take some blue color. And we will start from the top part. We're covering it completely with a blue color. All the area on top. Take quite a lot of pigment because afterwards it will get dry and intensity will disappear. Well, also depends which paints you use, but usually that happens with watercolors. Okay, Once it's done, you can take a bit of more blue color and add some more paint and pigment on top. So it will be quite intense. And then dip your brush into the purple color. And let's use the violet right on top. Let's make it more darker. And I'm also making some brush strokes in the diagonal direction. So we'll have this illusion of clouds. And look how nicely colors mix together. And now I'm taking some car meal or pink color. And also adding some brush strokes in different directions, but mainly in a diagonal direction. Just few brush strokes. And then take some orange color and make one more stroke. Then I'm adding up some red and pink color and adding up some more pigment. And I'm dragging extra paint down. So it will look nice on the surface. And you can also remove some extra water for the tissue. And you see we've got a bit of this muddy color, but try to avoid it. In order to get like smooth cults transition while maintaining the vibrancy of the sunset. Make sure that you will never mix complimentary colors like blue and orange, for example. So that's why I'm using some pink color in between. And then you can add a bit of yellow color and ambits of orange as well. So we're making this transition from blue to yellow. As an app, a bit of orange color. I'm making it all very bright and intense. And you see we've got this mighty gray color in the middle that we should really avoid. So let's remove it with tissue. We can easily fix it. Don't worry if something like that happened. Then I'm adding a bit of pink color on the right side of the painting and on the bottom part. And a bit of blue color has well. So we have this very nice colorful transition and beautiful warm blue pen. I'm gonna remove an edge paint that we have in the middle. And I'm going to fill it up with some pink color. And I'm just making some nice brush strokes. Don't worry, because it's going to mix up afterwards itself because my paper is still quite wet. So result will be very nice. And I'm also removing some extra water in the middle and dragging extra paints to the sides. Also making this smooth and nice transition between purple and blue. And now we're making this illusion of clouds by eight and add a bit of water and dry campaigns from one site to another. Try to repeat direction of the clouds on your reference photo. Now I'm just adding some more Payne's everywhere. Because you see now is getting a bit more and try and intensities disappearing. And I'm adding some more clouds, blue ones, very small ones, and adding up a bit of water so it wouldn't be too intense. So you just blended up with water. And it looks very nice now and very gentle. We're finished with our background and since it's dry, we can start with our next part.
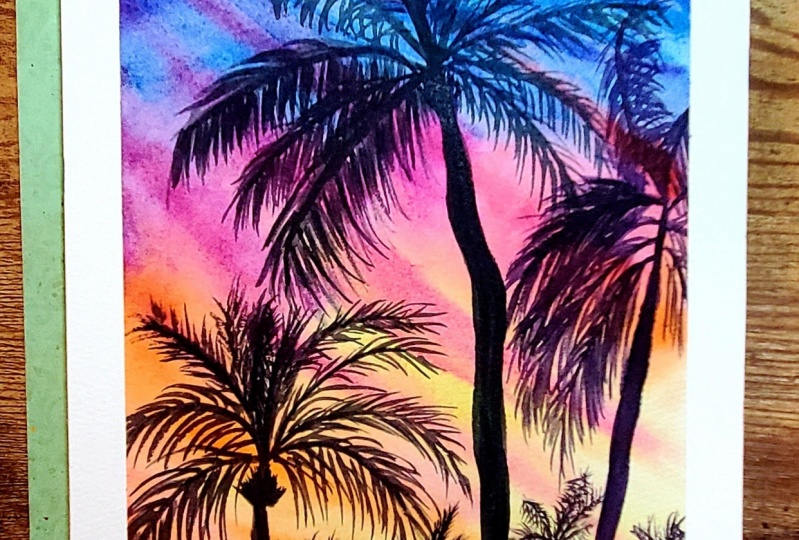
4. Painting - First Palm Sillhuette: Once your paper is completely dry and as you see, the intensity is a bit different. Now, we can start with our silhouettes. Just get some violet color, mix it with black or sepia color. Take a small brush so it will be more comfortable for you. And we are starting to paint our palms. Just make us stroke all the way from the bottom to the top. Very thin line. You can adopt some more lines afterwards and you can make it occur afterwards. Now we just need to find the right location of your palm. And I never painted right in the middle. So this way you will have more interesting composition. Try to move your palm a bit to the left or a bit to the right, like it is on my painting. And it's a bit band to the side. This way, It's also looks more natural because nothing in nature is actually plus trade or symmetrical. Then we're making those very thin and nice branches. First of all, you veins branch. It goes all the way in that circular shape. And you can take smaller brush to make those small fin leaves that falls down from the branch. Make sure they are quite fit because afterwards he can some more leaves. And you're going to do to with all the branches. And don't worry, if it doesn't look like a palm yet, we will get there. As you see, it's much easier with a smaller brush. Of course you can try with the bigger one, but your lines will be more fine, undefined. Nice and small brush. And I'm making many, many brushstrokes. Told the way down. Also on the top branches. We're doing exactly the same. All the time. You can keep your reference photo open. So it will be easier for you. And you will see in what directions those leaves are on the palm. So too much easier for you to repeat. And some branches are very small. And they were quite close to each other. And actually never take just black color or sepia. I tried to mix it with purple or with green or blue. Of course, it's very dark and intense, but it's just never simple black color. This way, your illustration will look much more interesting. And in general, I think in watercolor, It's very important to use different colors, different hues. So this way your image will look more playful. And we'll catch somebody's eye even more. So I'm adding up some more leaves. And it's actually quite easy once you get used to it. Because yeah, maybe would the first bomb, it won't be a bit difficult, but then it will be super easy. The more you practice the nicer leaves you will get. And then I'm adding up more branches. Then I'm putting on more leaves on it. It's a very easy technique with silhouettes. You don't need even to add volume or worry about different colors and how they will mix together. And so it's actually quite fast and fun technique to paint. Then you're adding up some more leaves. Just make sure they're quite fine and that they don't touch each other. And you have very nice and all of those leaves. So it will look more realistic. And then I'm ending up some more branches. And again, you can use your reference photo or you can add some branches where you feel like. Because we have some branches on the back side. And as you remember, your palm is quiet rounds. So make sure you don't paint it like flat. And those branches that are on the backside, they must be shorter than the ones on the front. And you can take your time. And it's quite meditative process. Just make sure you go through all the branches and you adopt a lot of leaves. And then I'm gonna add more and more pigment. Just to make your silhouette a bit darker. Just get some purple color, quite a lot of it and drag it all the way down. And I'm painting some more leaves and I'm making them a bit more darker. And also adding a bit of a darker color tree. Just make sure color is quite intense. And because it's a silhouette. So make sure you cover all this surface that supposed to be dark. And some parts you can make even thicker. It's entirely up to you.
5. Painting - Second Palm Silhouette: And now we'll start with the next bomb. We begin with a tree trunk. You just make a straight line from the bottom and drag it upwards with the small branch until you can say quite a lot of water. And these two will be quite short. And then we're going to paint some branches. The ones that go up and the ones that go on the sides. This time, I should be more easy for you. Since you already practiced on the bigger palm. And some branches they go down. Then you can paint leaves. Again. Same technique in the same way. It's quite a repetitive process. So you can relax and think about something nice. And just relax your mind and use this creating process as an art therapy. And also in then you will get quite an impressive watercolor painting. Because with the simple manipulations like background. For wet on wet technique and pound silhouette technique. You will get quite an impressive artwork and it's going to look quite professional. So I'm adding up some more leaves all the way on, on the branches. In the beginning, you don't need to take too much pigment, but then you can end up more and more. So it will be quite intense and quite define. And you can always stop. If your actually your pace and you speed is a bit slower than mine. Or you can speed up the process and just use those tutorials as you need for your own speed and pace. Because every artist has his own speed and it's quite normal to have different speeds. And now I'm adding some more branches, then some more leaves. But of course, I won't leave it this way. I will add more and more leaves afterwards. But if you don't want to make mistakes, then that's the way you just make few errors. And you adapt more and more paint color and leaves. This way you can control your painting process. Because it's going to be quite difficult to remove black color from your painting at this stage. So it's better to adopt black color gradually. But again, I don't use just black color. I always mix it with purple or with green or blue color. So it will have this nice hue. Then I'm working on the tree trunk, getting up some more color to it. Then fixing the branches of the palm. Make sure that when you paint your leaves in your brushes almost flying. So this way you will have very nice and machine tips of the leaves and try not to make all the branches symmetrical. And I quote this so it's gonna look more realistic. And use your reference photo to help you to get an idea of how your palm tree grow. Because actual or the palm trees are quite different.
6. Painting - Third Palm Silhouette: And now I'm taking quite a lot of purple color. It's quite dark and intense. And I'm going to decide where the third palm is going to be located. It's quite being so now we're going to have three big palms. And I'm taking and making the brush stroke and I'm dragging it all the way up. You also can take a bigger brush. So it will be a bit easier for you to make a tree trunk. And afterwards you can switch brushes. So I'm dragging it all the way up. And then I can take smaller brush and paint the branches. Some of them go down, some on the side and some towards the top. We don't see a full fall, but we can see part of it. And now I'm going to add some more leaves and keep your brush stroke to make them more defined. As you get closer to the foreground. And make sure all the branches has enough leaves. And remember to leave gaps in between the palm fronds. Branching them up in some areas while leaving some areas quite spare to create a more natural feel of your painting. And gradually can add up more and more leaves and those palm fronds. And you see now it starts to stand out a bit more. But it's still not the same as the previous. So just take a bit of patience and work. And you will get there in the beginning by adding some lighter leaves. And then I'm adding up the darker leaves. When I'm sure with the right direction and the right location. Also, I'm adding quite a lot of France in the middle. And it's quite messy as you can see, because you cannot see really every leaf in the middle. But definitely there like there are many of them altogether. So just paint bunch of leaps together in the, right, in the middle of the palm. Make sure you use very saturated dark purple color. And then I'm going to fix the pollen on the left. And I'm going to adopt a bit of more France. And I'm gonna add a bit of more saturation on the palm trunk. And I'm also going to do the same with the bound on the right. Because now it's not dark enough. And it's very easy to fix with, with the small brush up all the gaps and make it quite dark and intense. So this way you will see that it's actually a silhouette. And I'm gonna fix branches on the bigger. We can always work on details up towards and if you feel like you can fix some parts. And I'm keep working on the third. As you see at the moment, looks quite poor. So we need to add up more leaves in France. Also with this painting, we could have done pencil drawing. But I think it's really cool just to try and to experiment and only with pains. So you wouldn't be scared next time to paint anything without pencil sketch. I think it's very nice to challenge yourself as an aspiring artist. So you will believe more and more in yourself and next time your experiment, and maybe you will actually find your own style this way. So don't be scared of water color because it's really cool and fun to work with. So I'm adding up more leaves on the trees. Then you can work on details until you're completely happy with your palms. There's really no right or wrong. So it's only it's only for you to decide when to stop and when you're actually had been with your painting. I want to make this a bit bigger. And clearly, I need to adopt more contrast. And a bit of a darker purple color. When I'm filling up the middle of that bomb tree. Because in the middle It's a bit more darker. And as I said, all the branches are mixed together so you can't really see them properly. And I'm fixing the trunk of the tree.
7. Painting Small Palms - Dry on Dry: Okay, and now we're going to start with the cutest parts. We're going to paint small Palms. We have three main poems and now we're going to add up some small ones on the background. The ones that are far away, but we still can see them. And I'm just taking some purple paint and making breaststroke, dragging it all the way up, and then making painting the branches. And basically I'm doing exactly the same. But all the brushstrokes are a bit thinner this time because it is quite far. And you can also paint palm trunk with the dark purple color and continue with the lips. And you gradually filling them up. Can you get more realistic shape? Again, take your time to paint all the leaves. But they will be much smaller, shorter, and thinner than our big poems that are on the front. But are also making them quite intense and defined. Actually on this Szilard watercolor painting, all the seaweeds are almost the same intensity. So just make sure it really doesn't matter if it's like far from you or closer to you. It looks more like a postcard in a way. And it's quite stylized. And now I'm making up second palm. Very small one, and this time it's much shorter. Also make sure your trees have different heights. So this way, your composition will look more interesting. Some of them should be bigger, some of them should be smaller. So yeah, this way, your composition will look much more interesting. And the euro will have this feeling that you want to explore it, to look at it longer. Then to discover some small details may be off towards. So now we're actually editing those small details and those very small, cute palms on the back. And amazing very tiny leaves. In the beginning, my paint is not very incense, but then I might bring up some more color to it. And now it's quite dark purple color that I'm using. And this time is going to be much more easier because you already practiced on free palms. So for your hand, that should be super easy to make those leaves. Because direction is pretty much the same. And system is, the process is almost the same. Just a bit more smaller size. Also, I mentioned that middle part of the tree quite big. It's simply two wider than the rest of the tree trunk. Maybe there are coconuts actually know. And then I'm making the third small palm on the left side. And the branches. I'm taking some more intense purple to make more defined lines. And just so you can turn on some nice music to enjoy the process even more. I hope you're always doing it while you're painting. This way, I think you will enjoy them painting process even more. And I'm adding even more pains and intensity on my small Palms. So make sure that intensity is exactly the same as on the beaker bombs. As I said, it doesn't matter that those bombs are not that close to us. But in silhouette, watercolor painting, you're making everything quite equal. But of course, in a way it can be nice to you that they, so it'll be a bit lighter. But in general, I think it's quite nice when all the palms are quite similar. In terms of contrast and density. Phantom ending up a bit of thickness to the palm trunk on the left and on the right side to in order to hold all of those branches. Wide. Trunks. Don't forget about proportions. And you can always use your reference photo to compare. And to see the thickness. Actually you can even measure it just to make sure you're making right. And then I'm ending up some more branches to make the lookup those small Palms even more playful. And now we're going to add even more. On the left side. I'm taking some intense purple color up one more palm tree on the left side. Very quickly just filling up. Hold beliefs. That corner is a bit empty. So we're going to end up in there. And you see now our big poms don't look that lonely anymore. I'm just going to finish up when the palm trunks going to add up a bit more leaves all the small columns. And I'm fixing the biggest palm as well.
8. Painting - Background Details: And now we can work on the small details on the background. And we can add up a bit of more trees. And you can do it with a small brush, or you can take a bigger brush. Check which one is more comfortable for you. And with a very dark purple color. Again, we're making that silhouette of the trees that are also visible. And this way we're gonna unite our composition in a way. Then you just mean those small dots and small brush strokes. And you go all the way on the sides, you're feeling that surface. And we'll have this impression of bushes on the sides and on the right side as well. And you can leave some untouched gaps. So we'll get, we'll get that feeling of volume. Some parts will be darker, some parts will be lighter. So you see this way, it looks like smaller leaves on the tree or on the bush. And we're adding up some more contrast in some parts. And you brush strokes are very different one to another. And they should not be exactly equal. Hidden goes in all different directions. And sometimes you can try to make sorts of circular shape, circle brush strokes, ops more contrast and making some darker sides. And this way you are again, getting the right volume Tanya trees. And as you see, I'm not using black color, I'm using very dark purple. And I'm making some more dots everywhere. Take your time to work with the background. Because it's very detailed work and it might also take some time. And now you can finish up with two tails where you feel like. You can also add a bit of contrast on your trees. Fix the branches. That more leaves. Especially on the third phone. I think those leaves are quite small so you can make them a bit longer. And also I'm gonna fix branches on the biggest found. And also you can add up a bit of paint on there where you see some gaps. You can just fill them up. Time's up some more leaves and make every line more defined. And then you can add up a bit of more purple, more sepia color. Work on the background trees and adopt a bit more contrast. And just make some small details with little dots. This way we will show like those small leaves that goes in different directions. That they are not sorts of stuck together. But it will have more natural look. And don't forget to leave some lighter parts than to make some darker bars. Those bars that are in the shadow, that there will be quite dark. And you can finish once you're happy with your artwork. And as you see now, we have this very pretty composition of palms and who have very intense and bride's sunset. So I'm very proud of you. Well done, especially if you didn't have any knowledge, any watercolors skills. So I hope you will continue to upgrade your skills with me in my new classes and lessons. So don't forget to follow me here and to follow me on Instagram as well for my new classes and paintings. And yeah, now we can remove masking tape. And you will see that will have very nice frame and very complete composition and lovely painting. Please share your work with me. I'll be happy to give you feedback either here or on Instagram. And I wish you good luck in your watercolor journey. Let's continue together.
 Alexandra Ali, ARTIST, ILLUSTRATOR, ART DIRECTOR