Transcripts
1. Course Introduction: To introduce myself, I'm Montm
Patel, a contempt creator. Trust me when I say this, I have experimented
with punch of AI tools and video
creation tools. What if all you need to
create a video is an idea. Pack a giant bubble
wrap suit and roll into the black hole and explore
your own private planet. A giant bubble wrap suit and
roll it in the plag hole. We'll protect you from
the gravities clean. Just pop some bubbles,
and you will be right. No need to worry.
It's a funny side. Your one step solution to craft fabulous videos that
not only tells stories, but also attract, inspire and
engage with your audience. Whether you are a
content creator, YouTuber, a famous influencer, or even an educator, our course will unlock the full potential of
video creation for you, regardless of any prior
video creation skills. With in video AI, you just simply
don't create videos. You transform your ideas into
reality and give them live. This course will help you to create viral social media clips, education utorials
and faceless videos. Well, the possibilities
are limitless, and I will see you in
the first lecture. PS to give you a
little secret bunch of famous influencer use this tool for their content creation.
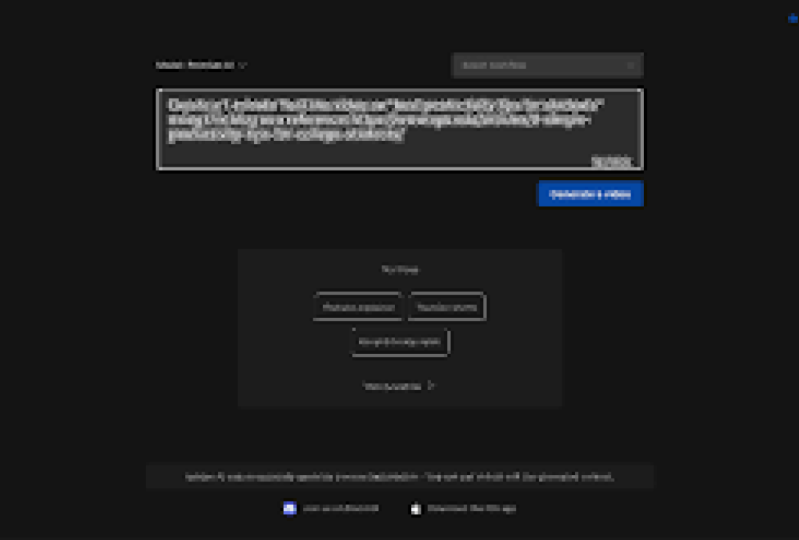
2. Your First AI Video: A Step-by-Step Walkthrough: The future of video is a prompt. Sorry for taking this long, but now let us get started with InVideo AI video creation. Currently, I'm in my
dashboard or home screen of InVideo AI. And in the center of the screen, you will be able to
see a prompt bar, which just give me a topic
and detailed instruction and a generate a video button. So after writing your prompt and by clicking on this
generate a video button, you will see the
magic of InVideo AI. So why wait. Let us start. Let's say we want
to create a video which is similar to
the Turo per channel. Imagine if you want to create a video around field
Tower and Paris. All we have to do is
simply type the prompt in this prompt bar and then
click on generate a video. Let's say, make a video off
Eiffel Tower and Paris. And then click on generate a video and wait for
the magic to happen. One additional benefit
of using in video EA is it automatically gives
the title of our video. For instance, the Eiffel
Tower experience. Now, it will ask
for our audience, and feel or the platform
we want to post our video. As you can say at the
top, we have our title. Then what target audience
you are targeting. Let's say we want the
travel enthusiastic, Paris lover or history Blof. We will select Paris Lovers and what kind of vibe and feel
you want in your video. We have example, let's say inspiring, clean
or professional. We will select the
inspiring and the platform, which platform you want
to post your video. We will select you two, and
then click on continue. You can see this
logo of Info AI, and it is pretty cute. It is projecting
our video creation, or it is generating a video. Congratulation, you have created your first Ivideo AI video. Now, as you can see, it has generated 2 minutes
and 54 second video. Now, firstly, let us
preview our video. Have you ever wondered
why the Eiffel Tower? It has automatically
included the title. Paris is such a symbol
of romance and elegance. Today, we delve into the
history and our lore of this iconic structure and
the city it calls home. Paris, often known as the City of Life is
more than just a city. It's a canvas painted with
the strokes of history. Well, it is pretty
impressive, right? With just a matter of few words. It has automatically created an entire video regarding
Paris and Eiffel Tower. In the generated video, in video AI seamlessly
crafted compelling scripts, sourced the best media and
footage for field Tower in Paris and integrated
all the elements, including professional
voiceover and harmonious music to deliver
stellar videos every time. Just share your vision
and whatever you have in your mind into the
Prom bar and watch invdos AI magic to create a polish engaging and attractive
videos to your audience. We have our magic box right
below our genitd video. Then we have button
of added and Export. But wait, we will explore each of this button in
our upcoming course. Again, by using just
five to six words, we have created an entire video regarding Paris
and Eiffel Tower. But the prompt we use was make a video about Eiffel
Tower and Paris. So it is a pretty
generic prompt, and the result it generated
is pretty generic as well. But the goal of this lesson
was to give you the idea on how you can create videos
by using simple prompts. In the next lecture, we will learn how to prompt engineer to make a perfect and
accurate video on what you had in your mind. All right, I will see
you in the next one.
3. Crafting Better Prompts for Optimized AI Video Results: In the last session,
we have created our first video in InVideo AI. But the prompt we use
was pretty generic, and this is what we
call Nau prompting. Nau prompting means presenting a general question to AI without providing
specific instruction. In our case, if we don't
provide any direction, any knowledge, or any external
resource to our prompt, it will be pretty
generic prompt. An Indo AI won't be able to produce video that you
have in your mind. To create accurate
and amazing videos, we have to learn how
to write better proms. But you are lucky that you
are in the right place. In this course module, I'm excited to unveil
a secret resource or a special result that will dramatically change the
video generation process. I have crafted a comprehensive
notion page pack with the best proms tailored specifically
for in video AI, ensuring that you have a powerhouse of resources
at your fingertips. This is your go to guide from effortlessly generating
compelling videos. Whether you are aiming
for a different theme, seal or topic, all you need to do is tweak the prompts
based on a specific need. This resource is
designed for you to save your time and
enhance your creativity. I will attach the notion file
in the resource section, so make sure to check that out. Now, let us see
practical example of how to write better
proms in InVideo AI. This is the notion page that I'm going to share in the
resource section. So make sure you have a
copy of this notion page. Now, let us focus on how to write better proms
in InVideo AI. Let us refer back
to our first prom, which was make a video
about Eifel Tower in Paris. So if you click on
this plus button, you will be able to
see this added prompt. As we can see, the prompt was make a video of Eifel
Tower and Paris. Again, this is what is
called n prompting. We have to write better
prompts in order to get better result
and desire output. In the notion file, the first
prompt is very good for you to get started with Ivideo
prompt engineering. The first thing we have to
describe is make a time video. We have to specify
the time duration or timeline for our video. As you can see, we
have just simply type, make a video of Eifel
Tower and Paris. We didn't select the time frame or how long the video should be. So it has generated around 2
minutes and 54 second video. Next thing we need is a topic. Obviously, we select a topic
as field Tower and Paris. Then we have to include the
introduction of our video, by simply saying, make the introduction and
then describe our video. Further on, we have
to add details of the subject and the
structure of our video. Simply by saying, make the video about this
subject and structure. Also, we have to
define the language, that's a casual formal and the
overall mood of our video. Let's say you want
a sad video or a happening video
or a funny video. Then we have to also specify
the pacing of the video. You want your video to be fast voiceover or slow voiceover, and the ultimate aim
of the video to be entertainment to educate
or to inspire people. In addition to that, we
can pick information from any of the URLs or the
links and website. And last but not least, we have to include the
rate of our voiceover. Now, we will rewrite our entire previous prompt by decaying consideration
of this prompt. So are you guys ready? Well, let's jump
straight into it. Let us clear our
previous prompt. And then we will first
define our time length. Let's say we want to
make six minute video. After defining our time length, we need to select our topic
as well as our intro. So we will merge
both of these with a fast pace intro of our topic. We will say, make
a six minute video with a fast pace intro or montage of famous part site like Eiffel Tower,
etc, et cetera. We will say with a
fast pace intro. And let's say you want to
do a montage of part site. We'll say montage of
iconic part sites. Like field Tower. Let's say we want the
background music of the introduction to
be French music. We will say set to
bit French music. Now, after defining the time length video topic
and the introduction, we have to write details about our subject and the
structure of our video. The main video content, should cover the
major neighborhoods, attraction, food, culture
and history of Paris. And then we will combine
it with the language. Let's say you want the
language of the video to be casual and conversation
way while the overall mod, let's say, inspiring and funny. Next we have is the pace of the video and the
aim of the video. We will say the pace of the video should be
normal or moderate, and the aim of the video
is to inspire people about what to expect from Paris and
how wonderful place it is. We will say the pacing
should be aiming to inspire Lastly, we can also add any
external resource, let's say, from any URL or website, and then we have to
select our voice over. We will select information
from paris.fr, which is their
official site and make the voice over knowledgeable
and enthusiastic. We will type peak
information from Paris. Deliver with enthusiastic and
knowledgeable voice over. So that's how you
write prom to generate best and accurate videos
that you had in your mind. Again, I know this seems
a lot, but trust me, after writing three four times, you will automatically
understand why we need to write better proms to
get desired outputs. And then it will be easy
for you to write Prom. Now, all we need to
do after writing this beautiful prom is to click on generate
a video button. Congratulation on generating your second video in invidor AI. Now, let us preview our video. Did you know that
the Eiffel Tower, the symbol of Paris,
was initially planned to be dismantled
after 20 years? Quite a startling
fact, isn't it? This iron lattice tower, the marvel that adorns
the Parisian skyline, was conceived as a
temporary structure. Constructed for the 18
89 exposition Universel a world fair to celebrate the 100th anniversary of
the French Revolution. The Eiffel Tower was
meant to demonstrate France's industrial
prowess to the world. The unique architecture,
the intricate iron work, the sheer audacity
of its height, all were intended
to be fleeting. Yet, the Eiffel Tower
defied its initial destiny. It survived, not just as a
radio transmission tower, but as a symbol, an emblem that resonates with
the heart of Paris. Today, the Eifel Tower stands tall as an iconic
symbol of Paris, a testament to the city's
resilience and beauty. Its initial impermanence only magnifies its
significance today, a true embodiment of the
phrase here to stay. Paris is often compared
to New York, London, and Tokyo, but does the City of Lights truly hold its own? Let's start with culture. Paris, like New York, is a melting pot, a convergence of cultures from
around the globe. Yet Paris maintains a distinct
identity, a certain genes. Much better, right? I can simply just download and upload
in my YouTube channel. I won't need to do
any modification or changes because the prompt we use was up to point and in video AA exactly does that we have written
in that prompt. So now, let us compare
our prompt and our video. The first thing we mentioned
was make a six minute video. And you can see it has generated exactly six minute video. But we have to exclude this seven second of
in video AI branding, and it will automatically
export at six minute only. Then we wanted a
fast pace intro of montage of iconic Parisian
site like field Tower, Lai Museum with a French music. And as we can feel
in the background, the music was absolutely French, and it was fast paced
introduction containing montage of Parisiant.
So it has done that. The next consideration it has taken is the
neighborhoods attraction, food culture and
history of Paris in an informative but
entertaining and casual way. So it has taken consideration into the neighborhood's
attraction, which is field Tower
and etc et cetera. The pace of the video
was normal to moderate, and it was aiming to inspire
viewers to visit Paris. So the main question
for you now, have you ever been to
Paris, In addition to that, it has also fetch all
the information from paris.fr because I have
seen the entire video, and it includes all
of the detail that was listed in this paris.fr URL, and it has delivered
the video in enthusiastic and
knowledgeable voiceover. That's how you create an
engaging and amazing video with in video AI by
writing Batter prompts. My main goal of this lecture
was to understand you the difference between n prompting and writing
better prompt. As you can see, by writing
better prompt like this, we have generated an
entire six minute video, ready to publish and
upload to the YouTube. We won't have to do any
changes or modification. But hold on, we will leverage additional features of
invido I like Magic box, which is this box and then
edit media or edit script, as well as export function
in our upcoming course. So don't go anywhere, and I will see you
in the next one.
4. Invideo AI + ChatGPT + Bard = Magic: Welcome back, everyone.
In this lecture. We are going to try second
example on how to write better props to get whatever
you had in your mind, into reality and into
video generation. So this is the home
screen of InVideo AI. Here, we are currently
on the home, then we have our media library. We will cover this
in further lecture. Then we have plugins, which are voices and our
history. Don't worry. We will cover all of them in detail in our upcoming lectures. They are available on Discord, Facebook, Instagram and YouTube. You will be able to
see histories and the export that you
have already done. Now, let us continue
with our second example. Click here to create A video. Again, we are in
our prompt screen. We will leverage the Invidia
AA prompt notion page for you to get started and
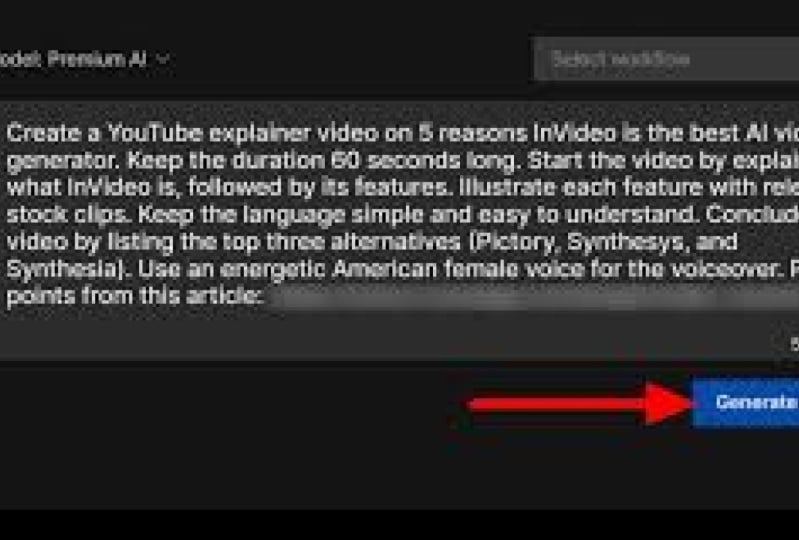
get right off the bed. Here, we are going to use our last prompt in
the notion page, which is create a ten
minute YouTube video about historical facts
that no one ever believe. Make this video VT and
historical accurate, as well as background
music should be inspiring. Use a female clear
American voice. So we are defining
the time length, as well as the topic that we would like with a introduction. Then we are defining
the language and overall mode of our video. As well as we are clearly
defining the voice over, which is female clear
American voice. And last but not
least is this time, we have added the subtitle or
the caption for our video. As you can see, in Video
automatically generate captions and subtitle for your video in any color or any
format you like. Believe me, by adding
subtitle manually or caption manually in your video
is completely a headache. But by leveraging the power
of in video I video creation, my headache is gone now. So let us copy and then paste
it in our prompt section. There we have it,
which is create a ten minute video about historical facts that
no one ever believe. Now, click on generate video. Audience, we are going
to see a curious minds. Look and feel which is inspiring
and platform, YouTube. Now, click on continue and wait for your
video to be generated. Wonderful. We have created our video within a
matter of a few minutes. Now, let us preview our video. Have you ever
wondered if there are events in history so outrageous? They seem more like fiction than fact? Well, you're not alone. You can see it is using a
female clear American voice. It can be more bizarre and
intricate than the plot of it. And you can listen to the
inspiring background music, and it has automatically
added a word by word subtitle where the current
spoken word is in yellow. Here you can see the word current spoken is converted
into yellow captions. We have generated a YouTube
video of 10 minutes comprising historical facts
that no one ever believed. But one problem here is that these ten unbelievable
historical facts are generated in a random order
or in a random manner. Let's say you want to use your own custom data for your
own outline of the video, as well as the
script of the video. Well, you can do
that in in video AI. Now, let us generate our script
by using famous AI tools. Let us use some of the famous
AI tools such as Shed GPT, Cloud or Ji to create an outline or a
script for our video. Let us use this response or
answer in our video script. So let us copy our GPD script. We will copy all of
these five points. You click on this plus, add prompt, and we will
add a single line. Let's say, follow the outline. And then paste the
script that we have generated from Chat GP. And then click on generate video and wait for the video
to be generated. The goal of this lecture
was to let you know that we can use external
resources such as Chat GPT, Claude, or Google Bar to give external direction
to our videos. You can remember for
our first example, we have inputed an external
eral to validate our video. This time, we are validating the script by using Chat GPT. By doing so, our videos will
be authentic and accurate. Now, let us preview our video. War on words. This event known as Great War. Okay. Now, let's check
in our C GPT response. As you can see, our first
example was the great EMU war, and it explains how
Australian soldiers were deployed to combat large flightless word
with machine gun. And it has accurately generated
that particular video. And that's the magic
of generating videos with InVideo AI. Don't worry, we are going
to cover the magic box, the arid function, as well as the export in our
upcoming lecture. Until then, I will see
you in the next one.
5. AI Video Workflows for YouTube Videos, Instagram Reels, Shorts, TikToks: Welcome back, everyone.
In this lecture, I will show you how to work
with workflows in InVideo AI. In the bottom of the screen, you will be able to see
these options of workflows, which are YouTube
explainers, YouTube shots, Instagram els, TikTok videos, recent event videos,
and script two videos. Well, in another word, workflows are prompt helpers. So for instance,
you don't need to manually type all of
this prompt by yourself. You can leverage some of
the pre built workflows. Let's say you want
a YouTube shot. This is YouTube shot, create a prompt option, and it populates with
all of these options. The first thing we
have to define, or the first thing we
have to give details is the topic or what
it should cover. Let's say we want
a YouTube video or a YouTube shot about, weirdest human body effects
that not many people know. And then in the setting, we have to select the voice, a female voice or a male
voice or even my voice, and then any accent, let's say we want to
select a voice with a New York accent,
and then subtitles. Let's say we don't want any
subtitles in our video, and we can select don't
add any subtitles. And this is Use yes
stocks normally, which are the stock footage
that are used in our videos. We have options
as only use tock. Don't use yes stock and
many other options. But Laws as it is. Again, workflows are
better for those who don't want to manually type all of
the things into their prom. For instance, in
the last example, we have added everything in our prom by manually typing it. For the captions, we have
added word by word subtitles, where the current spoken
word is in yellow. All we need to do is
select this option, and workflow will automatically
write this in our prompt. As well as for the
voice, we have typed. Use a female clear
American voice. And in the workflow,
all we need to do is select a female voice
and its accent. It's time to have a look
at another workflow. This time we will select a
YouTube explainer video. You can see it has populated
with all of this option. The first option we have is a time length of
our YouTube video. So for instance,
we have manually type the time length
of our video duration. So for this, we have to
select any videos we want. Let's say we want a five
minute YouTube video. And we have to provide
the topic as well as what should we talk
about and not talk about. So for this instance, we will take this example, which is various
human body effects that not many people know. We will copy this and
then paste it here. Second box is optional, which is creative directions. In another word, creative
direction means giving direction to your videos by
inputting external resources. So for this instance,
we will go to Cloud, and then we will type
weirdest human body fact that not many people know and make
a list of around ten facts. We will just copy
this and then give it external direction or creative
direction to our video. So it will generate
or it will create a video regarding
these ten facts only. Next thing we have is
add background music. As you can see, we
don't have to manually type the music the
mode of our video. All we need to do is
select the theme, and we will automatically
write prompt for us. So let's say we want cam music. And now for the setting inputs, we can use any voice. This time we will select male voice and voice
with a southern accent. And for subtitles, we will select subtitles
with an outline, and we will use Talks as it is. And then all we need to
do is click on continue, and it will automatically
write prompt for us. So as you can see, this
is the magic of workflow, which is create a
five minute tu video about ads human body effects
that not many people know, and here are the list
of ten Vadis fact. Make the background music calm, as well as the sting, which is use a male voice with a southern accent and add
subtitles with an outline. Again, you can see, we
don't have to manually type or manually enter
all of this information. We can leverage the power of workflows to generate
beautiful and better prompts. I hope you understand
workflows now. In another words, workflows
are a prompt helper. I assume that you have
understood how workflows works. Until now, we have
covered how to create videos by
manually typing proms, as well as by
leveraging the power of workflows. Don't worry. In the couple of next lectures, we are going to
cover the magic box, the edit, and the
export options. I promise that you will love magic box features
because it is so wonderful and so amazing and thus name accordingly,
magic box. There we have a video generated
by the help of workflows. Now let us preview our video. The first example is the noise. The first example is the nose. The first example about the weirdsft about
body is the nose. Now let's check with our clot. As you can see, the
first example was the human nose can detect around 1 trillion
different cents. So it has generated the video
accordingly to our script. You can also modify or customize your prom
with any way you like. For instance, if you
want to reveal the facts in a descending
order, for example, for tenth fact, ninth fact, and eight fact, you can do it just by simply
editing the prompt. Let's say dit the prom. Reveal the facts in
a descending order, and it will generate a video accordingly to your
customization. One, another beautiful
feature of in video I is, if you don't like the
current generate video, all you need to do is click
on this free generate button and it will generate new and unique video for
the same prompt. And down here, we have history. If you click on this button, it will show you
all of the video that we have generated
in the past. All right, I will see
you in the next one.
6. From Script to Video: Automated Content Creation with AI: I'm glad that you are back. Well, in this lecture,
we are going to cover another amazing
feature of InVideo AI, which is script to video. Let's get straight into
our InVideo AA screen. Go over to workflows and then
click on Script to Video. For script to video, all you need to do
is simply enter a script retelling the kind
of video that you want. Then we have to
specify the platform. For instance, a YouTube shot or Instagram el or a YouTube video. To ensure the video
format is perfect. The main benefit of using
script to video is you can include any special elements
like a call to action. For example, you can
say subscribe to my YouTube channel or like the video or enroll
in the course. You can do that by
using Scripto video. Additionally, you can also select the background
music you need, as well as the
voiceover preferences, such as a British voice, American voice or
even your own voice. After that, InVideo AI does
the rest of the scripting, finding the ideal
and best visuals, adding transformative
voiceovers, background musics,
and captive captions. Once we have click
generate a video, all we need to do is wait for the magic of InVideo AI as it delivers a polish
and compelling video ready to engage
with your audience. This is our video generated
from script to video. All we need to do is simply copy the script and paste it
in the script to video, and it has generated this
beautiful and engaging video. Now that we have covered
script to video, we will explore another feature, which is recent event
videos in in video AI.
7. Editing Videos/Media in Your AI-Generated Videos: If you're still
watching this course, first of all, thank you, and I hope you like this course. Continue watching the
course to the end where I reveal top ten faceless
YouTube channel ideas, and their videos can be easily generated by using InVideo AI, and it will enable you to create an extra passive
income source from YouTube just by creating
content with InVideo AI. A little recap, we have cover everything that
you need to know about prompts and how to create InVideo AI by typing
proms manually, as well as by
leveraging workflows. Now we will look into the editing part of
our generated video, which is very crucial and
trust me when I say this. By generating video with AI, sometimes it lacks
some information and sometimes they
are inaccurate. So editing one's video is
a must and very essential to create and to grow your YouTube channel or
to create your content, reliable, accurate
and informative. Let us just copy this really quick and then paste
it in our video. This time we will use
gem tips from beginners. Keep it fun and fast pace. Keep the language simple,
and tone persuasive. Avoid any fillers
and flop sentence. Now, generate a video, and this is the prompt
that we have used. The title is GM one one, fun and fast paced
tips for beginners, and this title is very
accurate regarding our prompt. And the audience is beginners. Look and Phil will be bright and platform will be YouTube. And then click on continue. Phil fill to play
around with InVideo AI. For instance, try
different prompts, different platforms
like Instagram rails, TikToks, YouTube shirts,
and YouTube Epliner videos. I really love this animation, which is InVideo I logo, presenting our generated video, and it is pretty cute. And there we have our video. Let us preview our
generated video. Ever wondered why
some folks seem to have all the luck when
it comes to fitness, why their gym routines
seem to yield results while yours
seem to go nowhere. Well, the secret
isn't in their genes. It's in their gym routines. And today, we're going
to spill the pains on how you two can make
every gym session count. First off, it's all about
consistency, not intensity. Yes, you heard it right.
It's better to work out regularly at a moderate pace than to go all out once a week. Start with three days a week, then As you can see, this video is repeated twice. So it is essential for
us to edit our videos, to make it unique and make
it best for our audience. Right below our generated video, you will be able to
see this added button. Now let us reveal the mystery
of this added section. Don't get overwhelmed
with all of this option. We will break it
down one by one. The first thing
we have is all of the medias that it has
used in the videos. So as you can remember, the first and the second video was of this beautiful Ladies, and then you can
see these videos is generated or repeated
twice in our video. Now, we want to get rid
of this second item. And right below the media. We have our entire
script laying out. And if you click on this media. It will automatically
highlight the part or the word that it has
said. Let's try this one. So for this media, it is saying you can make
every game session count. First of all, it's all about consistency and not intensity. For editing our
videos and medias, we have a bunch of options. The first option is upload manual media or your Pown media, and the second is search
from premium stocks. So let's say we don't
like this video, is this is repeated, and you can see the script
highlighted over this media. So it is once a week, start with three days a week. So it is resembling
with a calendar. So we'll search that's calendar. And then click
Enter. And there we have unlimited number
of stock videos and stock footages simply by searching just one word
in this search bar. All we need to do to replace
this media is to just go over any stock footage that you like and
click on replace. It will automatically
replace that media. And make sure to click
on apply changes. As you can see, the
media is changed, and now let us
preview our video. No wonder why some folks seem to have all
that when it comes. Also, don't worry
about the watermarks. While exporting, it will
automatically hide. And there we have it,
our calendar video, which we replace by
the earlier one. Now, let us come back
to Edit and this time, we'll upload our own media. So just simply click
on Upload Media, and you will be able to find your media in this
media library. Let's say this time we want to replace this video
by this image. Simply just click on replace, and it will automatically
replace the previous one. Now, click on panges Again, the media is changed, and now
let us preview our video. And that's how you
edit your videos, simply by just matter a few
clicks by your own media, as well as by using
stock footages. Still to this day, IDA, I just amaze me, you
only need few prompts, and there you have
your own video. If you don't like
certain medias, you can replace it simply by just clicking this
dit media option. And that's how you
dit your media or footage or any video
with using dit media. Now, I want to show you
another important thing, which is the three dots. So let us click on
this three dot, and it will say scene
one media number five. Now, let's say you don't need
a six second long footage. You only need two
second footage. So all you need to
do here is click on the three dots and change the
idle uration to 2 seconds. Now, for the
remaining 4 seconds, obviously, 6 seconds
minus two second. It will automatically add a
new footage or a new media. Now, click on Apply Changes, and let's preview our video. As you can see, one and two, and this is our new media. You will be able
to see a new video is automatically added
to the sequence. And that's how you shorten
the clip length by simply clicking on these three dots and changing the time duration. Again, let us drive 1 second. And for the remaining
four second, it will automatically
generate new video. And then click on apply changes. Let me show you another great feature, which is CenterPoint. So, usually you don't
want to play around with center points in a
YouTube planer video. But you surely do for
the short form content. For instance, in Instagram eels, TikToks, or even YouTube shorts. So let me show you an example. This is a perfect
example for you to allow me to understand
what center points are. As you can see, the horizon or the expect ratio of this video is changed to a
short form content. Here, we want to make
sure that the thing or the object we want to focus remains in this
vertical screen. So for instance, if you
click on this added button, and if you click on
this three button, and this time, let us
change our center points. Let's say zero.
And you'll be able to see it has completely
changed the vertical part. Now, click on apply changes. And this was our earlier
video, and after changes, it has completely changed the aspect ratio or
the center point. Now, if you click on this video, You will be able to
see it will only highlight the human part
or the human body part, and the artificial intelligence
or AI is absolutely gone. Now, if you click on
this undo button, You can see the main focus
was artificial intelligence. But if you condo, you can see that our
whole perspective is shifted to that human body, and that's how undo and
redo pattern works, as well as that's how
center points works. So let's say if you change
the center points to zero, it will automatically
change the center point for it in the perspective
of x and y axis. So feel free to play around with center points for a
YouTube shots Instagram, as well as dicto corals. Well, in this lecture,
you learn how to edit your videos by using
this edit media, by replacing your own media, as well as by using
stocks image, as well as you learn
about undo to button. And in the next lecture, I will show you how to edit your videos, by using scripts. I will see you in the next one.
8. Fine-Tuning Scripts for Polished AI-Generated Videos: In the last lecture,
we have a look upon how to edit video by
using edit media. This time, let us edit our video by editing
the script of it. Let us go straight into it. So click on this edit button
and go to the second option, which is edit script, and this is where you can
modify or change any script of you want simply by typing or removing
the vantage stuff. So let's have a look at it. You can say this script is automatically divided
into multiple chapters, which is chapter one, the
importance of consistency, Chapter two, Chapter
three, and so on. You can also change the name
of the chapter as well. Let's say we want the importance of compounding instead
of consistency. We simply have to
type compounding. And that's all you need to do to change your chapter name. Now we can do the same
for our script as well. Let's say ever wonder
why some folks seems to have all the luck when
it comes to fitness. And if we don't want this line, we can simply edit it by removing and then manually
pasting the line you like. And it will take care
of the time length, the media, as well as the
background music by itself. You don't have to
worry anything. You have to simply just type the script you
want it or remove, let's say we want to
remove this nowhere. So it will automatically remove the nowhere
from our script. As well as on the right
hand side of the screen, you will be able
to see this title. As you remember, our video
started with a title. So let's say we
don't want a title. We can select on this
ad text element, and text element style, which is title, and
we can do it none, and then click on apply Changes. And our title from our video will be automatically removed. Nonetheless, our
script is changed, and if we preview our video, our title should be gone. Now, let us do our changes. And let us preview again. So here you can see this was our title. Now, click on Edit. Added script, and this time, we will select a
different option, which is lower third
or text overlay. Let us select lower third
and then apply changes. Thus you can see
several benefits of using InVideo AI
as a video editor, all our content creator. We don't have to
waste multiple hours simply just changing the title
style as well as editing. By using Ivideo A, we can simply do that in a
matter of few minutes. Now let us preview our video. As you can see it is
in the lower third. Now, let us again click
on Edit Edit script. So this is how you
dit the text element, simply by just selecting
whatever you want. You can also change
the text in the title, which is the importance
of consistency. Let's say the importance
of Ivideo AI. And it will automatically change this with the text in the title. You can also change the keywords that are used in our script, simply by clicking
on this button and then edit media keywords. Simply, we have to change the
keywords of what we want. By default, it is fitness
gym routine waiting at the Sam scratching routine
circuit training session. Let's say, running
in the garden. And then click on Apply changes. And our script is win change. Now, let us preview our video. We have made two changes. The first was text in our title, and the second was the keywords, which was running in the garden. As you can see the
importance of in video AI, and now it should be able to
view running in the garden. Well, it's not exactly
running in the garden, but you get the sense right. Also, you can edit
this media simply by clicking on Edit and by
replacing this dit media. Let's say running in the garden. Let us repress with this
media, and there we have it. Click on dit dit script, and you can also remove
anything you don't want. Let's say we don't want this. Yes, you heard it right. So just simply back space and then type whatever you need. And by doing so, you will be able to change your
script in no time. Feel free to play around
with this added script. You can also duplicate chapters. Let's say we want to duplicate
Chapter number four. So click on these three dots, and all you need to do is click on this
duplicate chapters. You can also add chapter
before and add chapters after, as well as you can
delete the chapter. Currently, I'm using
the first version of Ivideo AI, which is zero. But at the time you are watching InVideo AI version two might be available
or version three, so feel free to pay
around with this. But all the fundamentals of InVideo AI will remain the same, so don't worry about
the different versions. I hope you have understood
how to edit your videos, simply by just
changing the script of whatever you want and
removing the unwanted part. And in the next lecture, we will cover the
magic box part. All right, I will see you that.
9. Mastering the Magic Box: I'm super ready for our
magic box lecture. Are you? In this lecture, we are going to cover the best part of video AI, which is the magic box. So let's get straight into it. This time, we will use our
previous prompt to save your time. And then
paste it here. Click on generate. Again, please leverage the notion document to get started and
write off the beat with InVideo AI
and their prompts. And if you have any
question regarding InVideo, feel free to ask me in the
discussion or the QNA section, and I will try to get back
to you as soon as I can. We will select our
audience as travel, look and feel which will be inspiring and platform you to. K on continue. Also, don't go anywhere because by
end of this course, I will show you how to create
videos like this by using IvideO ASP in your
smartphone or iPhone. So stay tuned for that. Our video is generated. And now let's have
a quick look at it. Welcome to the City of Lights, the City of Love, the
City of Art Paris. This global metropolis
is steeped in charm, beauty, and significance
that's simply unparalleled. It's a city that's home to iconic sites such as
the Eiffel Tower, standing tall as a symbol of French elegance and ingenuity. Then there's the Arc de
Trion a testament to the city's rich history
and the Louvre Museum, a treasure trove of
artistic masterpieces. Paris isn't just a city. It's a sensory experience
that captivates and chance. Now, get ready to him Yes, the video was pretty good. But we can make few changes
by leveraging the power of magic box that are
provided by Ivideo AI. So this is the magic box, which is you simply
have to give command to edit the video and then click
on this standard button. Now, if you click on this, it will give this three option for you to get started
with magic box. So let's say delete the second s. It's not
really relevant. And if we apply this,
it will automatically delete the second scene.
Now, let's try this. As you can see,
the second scene, which was the neighborhoods
of Paris is automatically removed simply by typing this prompt and
clicking on generate. We don't even have to go to this arid option and do
it manually by ourselves. Now let us redo it and check
it if it is true or not. Here you can see
the second scene was the neighborhoods of parts. And after typing this prompt, it has automatically removed the second scene and change
the duration as well. It's time to play around
with magic box in invido AI. Let's say you don't like this first media in the scene one. So simply type Replace
the first media with Field Tower media
and then click on generate and wait for
the magic to happen. Tada, there you have it. As you can see, our first
footage or our first media is automatically replaced with an field ter media.
Now let's preview. Welcome to the City of
City of the City of Paris. This is pretty impressive, right? This is steht. Let's say we don't want
the drone footage. So we can simply type replace drone footage with road downs and then
click on generate. Again, Tada that you change
the media by using magic box. It is so simple and easy, right? Simply all you need
to do is type in your command or prompt and then click on
this generate button. And let NVDA AI handle
all of the rest. Again, this is just
a brief overview of what we can achieve
by using magic pop. We can use magic pose from media editing, audio and music, text editing, as well as giving a creative direction
and from general tapes. So let us look at each
of these example. First of all, let us look
at how you can change the pace of the video
by using magic pox. All you need to do is simply
type the prompt or command. Let's say, make the
cut slower or faster according to your need and it will change the
pace of the video. As you can see, let's slow
down the pace a little bit. Again, this is nature
language processing. So feel free to input
your own words, and it will automatically understand what you
are trying to say. And now let's preview our video. Bonjour welcome to
the City of Lights, City of the City of
Paris. Miss globe woman. And as you can hear, the pace has been a little slow down. You can also change the
entire theme of the video. Let's say you want
to change the theme from inspiring to educational. All you need to type here is change the theme to educational. And then click on generate. All right. Let's sew this
video and educational vibe. And now let's preview our video. Bonjour. Welcome to
the City of Lights, the City of the
City of art Paris. This global metropolis is
steeped in charm beauty. As you can see, the medias, as well as the script
is automatically modified and altered to
make it more educational. Also, you can change your
usage of estoks images. Let's say you don't
want any ice stock or few estrog image
or videos only. So all you need to
type here is use zero to few ice stocks
and then click on Gener. And it will update from all of the six texs
that are available. One, two, three,
four, five, and six. You can see it has automatically
using fewer stocks media and then replacing by Pizza
Bay Texels or story blocks. Now let us review our video. Bonjour. Welcome to
the City of Lights, the City of Love, the
City of art Paris. This global metropolis is
steeped in charm view. Awesome. By using even
zero to few talks. The e and the feel of the
video is still the same. And again, you can change the medias or the scene
that you don't want. Simply by typing the prompt, change media in scene two. It's time to have a look
at how you can leverage magic box for audio
and music editing. Imagine you want a silent video with only music
and no voiceover. So all you need to
do here is simply by typing Mute Voice Over and
then click on generate. Change voiceover volume to zero. Now, let us have a
look at our video. And there you have it. It has automatically mutate
the voice over, but it has keep in mind that we don't want to mute our music. So the music is still there, but the voice over is gone now. It's a Udon music as well. So all you need to
do is mute music. And then click on generate. Change the background
music volume to zero. And your video is
silent as a library. Let us redo our action. Let's say you don't
like the voiceover that is used in this video. Yes, you can change the voice over from magic box as well. All you need to type
your command is change the voiceover to an Australian
accent in a female voice. And then click on Jen. In video, I still amaze me today
because it is so easy for me to create
videos by my preferences, style, tone, or whatever
I need in my video. All right, mate Let's give
this video a little bit of Oz touch and shaine the voice over to the new one.
Let's have a look at it. J. Welcome to the City of Light. And there we have it. City
of Paris. This globe. Also, if you don't
like the new changes, you can simply use
this under button. In this video, the background
music was quite low, and I wasn't able to hear
the voice over properly. So I can simply
type the command, decrease the background
music volume to 80, 50, 30%, whatever you need. And simply click on
generate button. And it has changed the
background music volume to 80%. In addition to changing
our background music, we can also change ti music from happy to sad
or sad to happy. Simply, you have to
type the command. Change the background
music mood to upbeat or sad or inspiring
or educational. Forever unit, magic
box is your answer. And then click on generate. In Video AI is super fast
so that you don't have to wait four days in order to make a
change in your video. Now let us preview our video. You will be able
to feel and hear a better upbeat music
in the background. Are you impressed by using
magic box in InVideo AI? You may also change the text editing simply
by typing your command. Let's say we want to add subtitles or caption
in our videos. So simply add add subtitles
and then click on generate. And again, wait for
the magic to happen. J. Welcome to City of Life.
And there you have it. Trust me, it used to take my whole day by adding
subtitles in my video. But by using InVideo AI, I can simply do
that in a second. Now, if you don't want subtitles or caption in your video, you can simply type
Timo subtitles and it will automatically
remove the subtitle. As you can see, the
subtitles are removed. Bonjour. Bonjour. Let us do our action. And this time, let's say, you want to change the
theme of your subtitles. So all you need to do is simply type change subtitle style, and then click on General. A jour, welcome to
the City of City of. Again, you can see the
theme or the style of our subtitles are changed
to the standard ones, which are highlighting the
words spoken in the yellow. Feel free to play around
with this magic box. It is really amazing and super powerful tool in your
video creation process. Don't forget that
you can also give additional external direction or creative direction by
using the magic box. Let's say, Start on a serious tone and make
it more hilarious, and then click on generate. Therefore, our starting
tone should be serious, and overall mood of the
video should be hilarious. Let's add some humor to
the introduction scene. Our video is dy. Jour, get ready to embark on a journey through the global metropolis known for its charm, beauty, and don't forget. Occasional line. Welcome.
Welcome to Paris, where the streets are
lined with art and the aroma of fresh
croissants fills the air. This city, with its iconic
sites like the Eiffel Tower, the symbol of French elegance and Simply by typing
what we wanted, it has made the overall video hilarious and started
with a serious tone. Keep in mind that I'm currently previewing this
video in four ATP, but at the time of the export, you can export in four K and HD. And the clarity of the video
will be on another level. You can also remove
watermarks during export. So don't worry about
the watermarks. Whenever we are
exporting our video, watermarks will be
automatically gone. You can also add
customization to particular scenes only and
not the overall video. Let's say we don't want to
make the whole video hilrious. We only want a scene
four to be funny. So all we need to type is
make scene four funnier, and then click on generate. To get the best outputs
from InVideo AI, prompts or command
should reflect as much as your
personality as possible. And it has changed the
scene four to funnier. So I hope you got my point
on why should we use magic Works to create videos that we have
exactly in our minds. You can also change
the expect ratio simply by typing the
command in the magic box. Let's say we want to make it
in a TikTok or Instagram al. All you need to type here is
change the video format to vertical for Instagram al or TikTox and then
click on general. And just like that,
our anti video format is changed to vertical. This is something, right? To conclude this video, Magic box is a
versatile tool that can help you streamline your
video production easily. Also, don't worry about
your commands and proms. In video I understand
localized English commands. You can also add blocks
or wikipedia links to this magic box as well as change the video format to
vertical or horizontal. Here's another Cesure for you. If you're not able
to remember all of these magic box
proms, don't worry. I will attach this
notion file in the resource section
and you can use this magic box
proms to alleviate your video production and elevate your video
editing skills. In the next lecture,
we are going to cover yet another powerful tool
of video AI which is AI voice cloning that
will enable you to clone your own voice so that you
can use them in your videos. So don't go anywhere, and I
will see you in the next one.
10. Voice Cloning: Add Your Own Voice to AI-Generated Videos: Welcome to another
exciting segment of our course AI power content
creation with InVideo AI. In this lecture,
we are exploring an amazing feature
of InVideo AI, which is voice cloning. This tool allows
your video to have a consistent personalized voice without the need of
continuous recording. Voice cloning in InVideo AI is a very
straightforward process. All you need to do is go to the voice section by clicking on the three lines
in your dashboard. Here you can clone
your own voice by adding a new voice profile. Simply record a clear
32nd audio clip where you state the
provided sentence, as well as natural process and with using good quality
recording gaze. Once your voice is cloned and
say with a distinct name, you can use this clone voice in any of your future
video project. To simply apply your voice, include the name of your voice clone in your video prompt. This ensures that
all of your videos maintain a consistent
and personal touch. Enhancing your viewers
familiarity and trust with you. Advantages of using
AI voice cloning in in video I is tremendous. A voice cloning not only save
hours of recording time, but also personalize your
content across various copy. Whether you are creating
educational content, marketing videos or
personalized stories, your voice will remain
the consistent. This consistency is key
not only from branding, but also creating a reliable and engaging
user experience. To leverage the full
potential of invido AI, consider visiting to the
resource section of this course, where you will be able to
find notion documents of magic box prompts and
invido AI prompts. Here you can access
detailed guidelines, examples of effective prompts, and further insights into
making the most of Ivideo AI. Let us get straight
into A voice cloning, where I will show
you how to record, then upload and which script
to use for recording. I have already gone ahead
and added my voice. But now, let us add
our voice again. So click here to add voice, and then there are
instructions to follow in order to
clone your voice. The first instruction is submit a recording of
at least 30 seconds, so your recording should
be minimum of 30 seconds. If it is 1 minute, it is okay. Then you have to
mention I Q InVideo AI the permission to use my
voice in this workspace. And third is have a
natural sounding speech, which is pause in between sentence like
you normally would. And last instruction
is kind of optional, which is use high quality
recording equipments. If you have a mic, that's good. But if you don't,
don't worry about it. You can simply use
your own phone as well as your own laptop mic, and it will be just fine. Make sure to follow all
of this instruction. And now you might be wondering what recording should I submit, or what should I say? You can simply say anything in the stats second recording. You could simply read a book, read an article from your phone, as well as you can
use this script, which I found to be perfect
from voice cloning. This is the script I
was talking about, which is hi I am XSS, or Manton or input your name, and I give InvidI
permission to use my voice. Go ahead and please
feel free to record your voice reading from this
script in this notion file, which I will provide in
the resource section. Additionally, you are more
than welcome to record your voice reading from any book or any
resource you like. Again, don't worry
if you're recording your voice from
smartphone or laptop. It will work just fine. After a voice being uploaded, we have to make sure that all of these criteria are fulfilled, which is, this is my voice
and I have right to it. This voice sample includes
the permission to clone. Voice sample includes
nature pauses and fillers, and then this was recording using a high quality equipment. And click on my
samples look good. As you can see, I had used a random script talking
about rapid APIs, and then permission user is verified and the user
voice is created. So make sure to click on the
after the cloning process, assign a memorable name to
your newly con voice profile. This name is what
you will use in the future video proms
to apply this voice. For instance, if you
name your voice John, simply use John's voice
in your video prom. After naming our clone voice, click on this use button
to directly use our voice. Now, let us play around
with our AI clone voice. We have used the prompt, which is foot tapes
from older age people. Keep it fun and fast page. Keep the language simple,
and tore persuasive. Avoid any fillers
and flub sentences. Again, in the setting, we are
going to use my own voice, and then click on
generate a video pattern. We have covered
everything that you need to know from InVideo AI, which are Magic Pugs Edit
Options pre generate history. In the next lecture, I will
show you how to export your videos in the best quality
available in InVideo AI. And with that simple prop, our video is ready with
our own AI voice cloned. Now, let us preview our video. Have you ever pondered about the secret to aging gracefully? Well, one of the
most powerful tools is right under your nose. Yes. It's the food on your plate. As we age, our
dietary needs change, and so should our food habits. Today, we are going to unveil
some food tips that are not only beneficial for
your health, but s Wow. Now, that's something, right? It is pretty insane. Like in just a
couple of seconds, it has not only created
entire video from the prompt, but it has also used our own
voice by cloning our voice. And that's the power
of in ideo AI. Although the voice
generated in my video was pretty clear and
accurate to my voice, but let us fine tune even more. Great. Now you know how to use your own voice in your videos by using voice
cloning technique. Again, make sure
that you specify the name of the clone
voice in your prompts. For instance, Use my voice, which is John. All right. I hope you got my
point. One tip for you. If you're not satisfied
with your voice right now, please record your sample
and try proding again so that next time it will urate better and more
natural human sound. Here's to give you
a little glimpse of the comparison between my
clone voice and a voice over. Pack a giant bubble
rap suit and roll into the black hole and explore
your own private planet. Pack a giant bubble
rap suit and roll into the black hole and explore
your own private planet. All right, I will see
you in the next lecture.
11. Export Formats and Media Usage Quota: Welcome back, ladies and
gentlemen to our course. Today, we are focusing on how to effectively export your
videos in InVideo AI, as well as we will look over how talk media is counted
in your videos, as well as in your account. Click on Export, and then you will be able
to export your videos. First, you will need to choose whether to include
watermarks or not. The no watermarks
option is currently selected because I have
InVideo AI MC subscription, which allows me to export a clean video without
any watermarks. Next, you can select
the level of in video A brandings or visuals to be included in your
exported video. The option is highlighted, meaning no additional
AI branding elements will be added in my video. For export resolution, you have options ranging
from four ATP up to four k. The ten ATP full HD setting
is pre selected, which is optimized from most online video platforms
and should provide a nice balance of
quality and file size for smooth uploading
and viewing. Then we have our status of
our stock license so far. As you can see, I have used
32 out of three 20 stocks, and for this new video, it will consume 12
more from my quota. One thing to keep in mind is the three 20 Stock
licenses reset in 30 days. But before we export our video, let us look how this
12 Stock license are being counted in our video. So this is the
first Stock media. Then second. Then
third, Then fourth. Then fifth. Then
sixth. Then seven. Then eight, nine, ten, 11 and then 12, and that's how your stock
media is being counted. So if you click on Export again, you will be able
to see this video would use 12 out of your quota, which is tock licenses. After optimizing our
video export settings, let us click on continue. And once the rendering
is completed, it will be automatically downloaded in your
laptop or your PC. Or you can simply click
on this download button, and your video will
be downloaded.
12. Pricing and Subscription Plans: Hello, and welcome to
the detailed overview of InVideos pricing and
subscription plans. Whether you are
just starting out or looking to scale
your video production, InVideo AI offers tailor
plans to suit every needs. The first plan is free plans, which is ideal from those who are new to this
I video creation. The free plan allows
you to explore the basic features at no cost. You can create videos
with in video branding, export up to four
videos per week, and store up to ten GB of data. This plan is perfect from sampling what InVideo
AI has to offer. The second plan is plus
plan which is billed at $20 per month yearly to $40. Export an unlimited
number of videos, use up to 100 chips of storage, and enjoy 50 minute per
month of premium generation. You also get the
arid advantage of 80 stock media per month and
unlimited standard stock. Voice cloing is also
included helping you personalize and
consistently brand your videos. Then InVideo AI has Max plan, which is billed at $48 per
month and yearly five $706, which is best suited for established creators and teams looking to maximize
their output. The Max plan offers the
most extensive features. Enjoy 200 minutes of premium
generation per month. And significantly
more stock medias at 3:20 pieces per month. With 400 GB of storage, five voice clooning and
unlimited number of exports. This plan supports high volume, high quality video production. Here's the look at my usage, and I'm currently using
the Max plan of indo AI. As you can see, my
premium generation, I have already used 70 minutes
out of 200 Then I have consumed 45 top media out of three 20 and
for the storage, I have only used one GB. As you can see, this is
pretty low because most of my premium generation and top medias are gone
in this course. As you can see, once
the video is generated, and once you export it, it will be
automatically licensed, so you don't have to worry about any copyright
infringement. All right. In the next lecture, I will show you how to
create this type of video by using in video
AI in your iPhones.
13. Creating AI Videos On-the-Go with Your iPhone: Welcome to the Mobile
frontier of video creation. In this lecture, I'm going
to show you how to use in Video AI application in your smartphone to craft
stunning videos effortlessly. Whether you are traveling or
you are away from your desk. Making professional content
has never been so easy. All right, I will see
you on the other side. M. This is how we craft stunning and
compelling videos in your mobile phones by
using Indo AI application. Unfortunately, at the time
of recording this lecture, Indo A application is only available from iPhone
users and not roiers.
14. Class Project: Welcome back, ladies
and gentlemen. In this lecture, we are going to cover recent event videos. So in the workforce section, click on explore all. And then click on
recent events video. With InVideo AI, creating a video on recent events
has never been easier. Just input your search for a specific news headlines and
let InVideo AI do the rest. Indo AI will craft a
compelling script, source the best visual from
the vast talk library and add professional voice over or your own voice with
harmonious background music. Also, don't forget
to add subtitles to make your content accessible
to a product audience. To get started, simply specify the event you want
to cover in the video, as well as any particular angles or perspective you wish to
highlight in the video. You can select the
tone you prefer and the voice you like to resonate
with your target audience. Whether it's breaking
news or weekly updates, in video AI ensures that
it's generated engaging, informative and professionally
presented videos. Just type in your prompt. Sit back and watch in
video AI transform your text into CPT
video narratives that ready to
publish in the news. You can add any Wiki P tellings or any news channels URLs. Again, this is optional. But for you, this
is a homework or a class project or
a class assignment. Now I will sit back and relax and try to roll this
pencil in my hand. I promise I have seen
someone on TikTok doing so. Hopes, it isn't working. Well complete your
homework and create a video by using recent
event video workflows.
15. Congrats and Farewell: Conclude our entire course of AI power content creation
with InVideo AI. It's time to reflect
upon what we have learned and what we have
made by using InVideo AI. We begin by identifying who can benefit the most from using InVideo AI and explore the various types of video you can create with InVideo AI. Example, from social media clips to detailed explan videos. Further in this
course, we also took the full potential of
invido AI features, such as workflows, magic box, voice cloning, editing
our video by edit media, as well as by
editing our script, as well as you learn how
to write better froms from creating accurate
and desired videos. To summarize all of the
above, first of all, congratulations on
completing this course and understanding how
you can leverage in video AI to create stunning and amazing videos and to grow your content
creation journey. Thank you for joining us, and I will see you next time.
 Manthan Patel, AI Instructor