Transcripts
1. Intro: Hey, I'm Maja Faber. And in this tutorial, I'm going to teach
you how to draw this fun watercolor ice
popsicles pattern in Procreate. You're going to learn how
to use watercolor brushes, including how to add color and texture to make the watercolor
look even more realistic. We will practice on using
clipping masks and blend modes, and I will show you how to add an overall texture to watercolor patterns to add a realistic
paper look to your drawings. We will talk about how
to arrange the colors in your pattern and how to change the colors of a watercolor
motif and pattern. In this tutorial, I've
included some free resources. You will get four procret
brushes and one color palette. I've also included
a Procrit file with my Ice Pops sketch. So you can follow along
and draw with me as we go for the best possible
learning experience. So are you ready to
create this fun, sweet Ice Pops pattern? Let's get started.
2. Your Project: This class project,
you will create your own What color Ice
Pop pattern in Procreate. I recommend using the free downloads
included in the class, the Procreate brushes,
the color palette, and ICPop sketch file. They will help you
follow along step by step and get the best
possible learning experience. Please share your
project in class. I would love to see your
watercolor ICPopPatterns.
3. Sketching: Okay, so let's start
with the sketch. Tap the plus sign,
tap New Canvas. And here I will make sure
that I have 300 in DPI, and I will go for a
3,000 pixels square, which means 3,000 pixels
in width and in height. That will bring me a maximum
amount of layers of 204. I have a huge iPad storage, so it's possible that your iPad, if you have a lower
storage than mine, you will get a lower
maximum amount of layers. But that's completely fine. We don't need that many
layers for this pattern. The color profile
that we will use is the first one in SRGB. And then we tap create. So here we have our Canvas, and I will skit my pattern
with latch as the color. And I will use for this sketch, I think I will use
the crunchy crayon, which I included in my Skillshare class about how to create a Christmas
pattern collection. But you can sketch with any
type of brush that you want. I will sketch crunch crayon
because I think that it suits when we are creating
this simple type of motif, and also it's a good sketching
pencil for me to use so that you can see the
sketch clearly on screen. So with the crunchy crayon, I will just start with sketching
out one ice popsicles. So this pattern is not made up of super
complicated motifs. The course isn't about creating very complicated
motifs and drawings. It's about using
what color brushes in procreate and how to use them to make them feel like
realistic watercolor motifs. So first things first, let's just sketch up
one ice popsicles. A I will just go
for something like this and maybe like that. I think I want to have it
a little bit more narrow. So let's do it like that, maybe. And then I want to
clean up this sketch, so I will just add a new
layer on top and drag down the opacity and just
draw a new one on top. Sometimes I feel that
that is easier than trying to erase parts
of the original sketch. Okay, so now we have
an Ice Pop scoops. I will swipe the right on the first layer
and just delete that. So we have a pretty clear
sketch on one ISPOp. And this is actually
all that I will use. Now I will just duplicate
this shape into the pattern. So we can create patterns
in a few different ways. We can draw the whole pattern
and draw different motifs. But in this course, I want
to show you how to create a really interesting
and fun pattern with only using one motif. So let's go ahead and do the same with the sketch
as we will do later on when we create actual motifs with the
watercolor brushes. So I will swipe to the right on the motif and tap duplicate. And then I will just
zoom out a bit. And with the new layer selected, I will make sure that I don't
have snapping and magnetics turned on their settings
in the transform tool. So I will just tap those to make sure that
they are not blue, and then I will drag one of
the ice pops to the side, and I will maybe twist
it up a little bit, rotate it with this green led up here so that it
kind of dances. And then I will swipe
to the right on the first layer
again and duplicate it and drag that
one to the left. So here we are creating
a kind of dens and actually a simple kind of repeat as we are just
repeating the same motif, and we're just kind of
twisting them around and rotating the motifs to make them look a little
bit more interesting. I will tap on the
first layer again, and I don't think
that I want one of these pops to be
completely straight. I will just make it a little bit more rotated to
the right as well. And then I probably
want to rotate the other one, this one, so I will tap the select that layer and tap
the Transform tool, and then I will just rotate
that one a little bit more. So now I can see
how this will look, but this is kind
of my first sketch of how the pattern
will be repeated. So something like that. And now we need to fill the edges. So to do that, I will do
the actual pattern tile, and you can create a pattern appropriate
in many different ways. For example, you
can tap and drag the layers to the sites, which I am teaching you in
one of my Skillshare classes. But the technique that
we will use here is my favorite technique where
we will use selections. And why this is my
favorite technique is because it saves
us a bag of layers. So it's much easier
for me to teach you how to create the
pattern with this technique, as I'm hoping that most
of you won't run out of layers when we use
the technique with the selections and the actions
to create the pattern. If you don't understand at all what I'm
talking about here, just follow along with me now, and you will understand
in a short while. So the first thing that
I will do is to tap in the layers panel on the plus
sign to add a new layer, and I will just choose
any color and tap and drag to create a square
on the whole canvas. So I fill my whole
camas with the square. And then I will actually
just tap at a new layer, and I will fill it
with a new color, taped add a new layer, fill with a new color, and a fourth layer and
fill with a new color. You don't need to have
different colors, but I will show you in a bit why I do this with
different colors because it's much easier to visualize which of the
squares you have selected. Next step is to tap
the transform to, and we will tap in the
left corner node up here, and I will type in half of the size of
this and make sure that I have the little
chain symbol up here selected so that it's blue. And then I will tap
in 1,500 pixels, which will make my square half of the size and perfectly align it to the top left
edge of our canvas. And then I will just
tap the transform tool again and I will
tap the next layer, which is the orange one, tap in the top right node, Oops, type in 1,500 pixels
and transform tool. Next, the yellow one, tap
in the left bottom node, type in 1,500, and you can tap the layers
panel, tap the blue. Layer, tap the right
bottom corner node, and type in 1,500 pixels. So now we have four squares perfectly aligned to our Canvas, and now we will snet
the first one so we can either tap with two
fingers to select it, or if that isn't
working for you, you can tap the layer
and tap Select. When we have selected
it, we tap Save and load and tap selections, the little plus sign in
the selections panel. Then we select the next layer, which is the orange one. I tap and hold with two
fingers in layers panel, tap selections and
tap the plus sign. I tap with two fingers on the
yellow layer, selections, plus sign, and two fingers
on the blue linear, saving load, and selections. So now we have four selections, and now we can delete all
of these four layers. So now we created
an action which we can now create the
actual pentile of. First thing first, we will add
a layer with a background. We need a background box to be able to repeat this paddock, so I will tap and
drag that layer that I filled with white color at the very bottom of my sketch, and then I will
swipe to the right on all of these
layers and tap group. Next, I will tap
on the top layer, or it really doesn't
matter which one of those that you choose, but I will tap on
one of those layers, tap duplicate and tap and drag that one on
top of our group. And I do this because
I want to save one of these sketches of the Ice pops to be a whole shape because now when we are creating
the actual pattern tile, this will be divided. So I want to have a whole shape that I
can use later on when we have made the pattern tile and we want to
add more motifs. So I will just turn
off the visibility of our duplicated layer that
is on top of our group, and then I will tap the group, tap the selections tool, save and load
selection number one, tap the transform tool, flip pristoFlip Vert code. Then I will tap the layers panel and make sure that I
have the group selected, and you should have that
as we already selected it. And then you tap
the selections to. Saving Load Selection
number two, tap the Transform tool, slip vertical, and
flip Prisonto. Tap this elections tool
again to deselect, and then I tap selections. Again, saving load,
selection number three, tap flip vertical
and flip Prisoto. And selections two, again,
selection number four, tap transform two, flip
vertical, and flip horizontal. As you can see now, our motifs
are turned upside down. So the easiest way that I feel to turn them around
is just to tap the transform to when you have
the group selected and tap rotate four times until you have them in the right
direction again. Then we tap the transform two. And here we want to
add more motifs. So then I will turn on the
visibility of the layer with our duplicated motif that is on top of our group and I
will tap the transform tool, and I will see how I
can adjust this so that it looks like it fits these white
spaces in a good way. So I will just rotate it a bit and kind of make it fit
in this white space. And then I will just swipe right on that layer to
duplicate it again, and let's see what
we can do here. Maybe we want to to
decide here again. So if that one is
twisted that way, maybe we want one that
is twisted this way. Whoops. And then we will
duplicate it again. And let's see. Which way we want that twisted,
maybe like that. Maybe you want to twist it a bit more to make it more fun
or keep it more straight. So we will try this
out in a bit and see how we like it.
Something like that. I think that I want to have the first one kind
of a little bit more twisted so
that it looks like the popsicles are kind of
dancing with each other.
4. Test the Sketch: So now we have created this pantile and we
want to try it out. You can swipe down with
three fingers, copy all, which means that you're copying the whole canvas and then make sure that you have
the top layer selected, swipe down and paste. And now you have
paste that flattened image of your sketch, and then you can
swipe to the right to duplicate that four times, and we can tap the transform to make sure we have snapping
and magnetics turned on, and we tap and drag
down until we reach 1,500 and you see that the
yellow guidelines are showing, which means that we are
perfectly aligned in the center. And then we tap the Rsm too, and then we can do the
same with other ones. So tap the layer, tap and drag until you
reach 1,500 pixels, and you can see how your
pattern is building up here. So that was the first way that we can try out our pattern
insider Procreate. The second way that actually is a bit faster that I like to use more nowadays is that we will swipe
down three fingers, copy all, swipe down with
three fingers paste. And now we have our
flattened image over here. I'll just make
sure to drag it on top so that it's
the correct one. And then I tap split
screen and Safari. And here I have my
repeat pattern tester, which I have linked to in the
description of this video. Then I tap on my image, Procreate, and I drag it
into the repeat pan tester. I swipe to the left to
make sure that I fill the whole screen with
the pattern tester, and then I can drag down and up and see how my
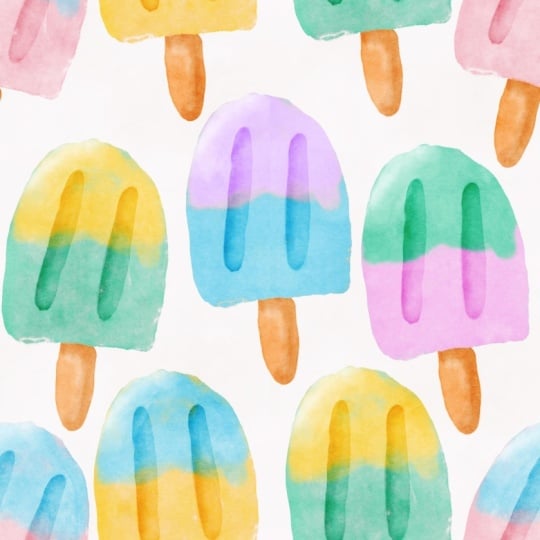
pattern is repeated. So this is a dense pattern
with ice popsicles. I think that this
looks really good. So this is just a sketch, but we want to make sure
here that we don't have any weird white spaces or that we don't have anything
that we want to change. So now we have tried
out our pattern sketch, and we see that it
repeats in a nice way. And that it has a good flow. So we will always
go back and try out our pattern again once we have created the
actual pattern type. But this is the first step to create professional
pattern in Procreate is to check your sketch and see
will this repeat work? Will the flow be good? Will the pattern be balanced
and things like that. So moving on again to Procreate. So now we have our sketch, and we are ready
to start to draw these motifs with the
watercolor brushes.
5. Draw Main Shapes: And now it's time to draw the ice pops with the
watercolor brushes. So what I will do is to tap the plus sign in the layers
panel when I'm in the group, and I will add a new layer. I will tap on the symbol
on the sketch layer. First, we can just rename this so that we know what it is. So tap layer, tap rename, and I will write
sketch on that layer. And then I will tap on the end symbol to drag
down the opacity. I will drag it down quite a lot so that we don't
get disturbed by it, but so that you still see
the sketch on the screen. So maybe something
like that around 13%. And I will tap on my new layer and start to
draw my water columotives. I will use the
watercolor base watery to draw the base shapes. This is a new brush
that I created for our Faber company
watercolor brush set. And I've actually updated that brush set with
a few new brushes, and I really love this brush. It adds such an amazing
watercolor texture. So let me just show
you. I will tap colors, and let's go for a
pink color here. It's this really
night pink color. And then with the
watercolor base watery, I will adjust the size. Let's just try something
out around nine 10% and zoom in and start to
draw this ice popsicles. So that was a bit too
low in the brush size. Let's try 20%. When you add pressure
to this brush, it will both be more watery and you will get
a bigger brush size. But if you just draw
really lightly, you can get sharp edges. So let me show you
how to use that. So let's start with
the shape here. I'll just try to draw
this shape in one line. And then I will add some watercolor texture by adjusting the pressure
on my brush size. So without losing the
hold of my brush, I will just continue to fill. It's not the end of
the world if you lose the pressure on your
brush and need to redo, but then it will get
a little bit darker, so you kind of need to fill in the edges if you
do that like this, so let me just try that
once again because I want to use this brush with a
little larger brush size. So I'm going up to around 35%. And I'm doing kind
of a rough move around the edges of this motif, and then I want to fill
it in with a large brush. So when I'm filling
in the outline here, I'm putting more
pressure on the brush, which will add more water, you would say, kind
of, to the brush. And when I'm in the
edges of the outline, I can make sure to add
a little less pressure, and that way I can
kind of blend in the outline to the wrist. Of the motif. Okay, so now we draw the
base shape of the ice pop, and we will add the stick
or what you call it. And I will add new layers. I will tap layers
panel, tap the plaster, and I will drag
that layer beneath the layer with the
pink shape on it. And in the color palette, I will use the kind of brownish. It's more beige
maybe than brown. And with the same brush, I will zoom in here and just draw a little
stick over here. So something like that, I won't mind that it's overlapping
because I will show you just in a bit what I'm doing with that. So
something like that. And now I don't want to see
my sketch layer anymore, so I will just tap
the checkbox to turn off the visibility
of that layer. And now what I want to do
is to erase that part of the stick that are falling
inside of the pink motif. And I do this by tapping the
layer with the pink motif, and I tap select. And if you think that these
lines are kind of in the way, I will tap Canvas. No, preps and selection
mask visibility and just drag that
down so that I don't see that mask so much. And then I will tap the
layer with the stick, and I can try to erase with the same brush
and see how that works. But if you feel that it
takes too much time, you can always use
another brush, and what I usually use is a Faber company free monoline
brush to raise with. So I will just erase. And as you can
see, I won't erase the stick that are falling off the edge of the pink motif. I will only erase what's
inside of the pink motif. So that's a good technique to erase something beneath
the other motif. So now we have our
first ice popsicles. I think that this is a
little bit too thick, so I will just tap the
transform two and tap free form here and
make sure that I don't have magnetics
and snapping turned on. And then I will just
kind of tap and drag a little bit to make it
a little bit smaller. I like that look better. So here we have our first motif, the ice popsicles,
as you can see, looks kind of flat, but now we will
add some texture.
6. Add Texture: So as I mentioned
previously in this course, we will create this
whole pattern with only one motif that we
will repeat, twist around, rotate a bit to make it
look more interesting, and change the colors of the motif when we
are repeating it. So the first thing
that we will do to add more interest to this
motif is to add texture. So let's add some more color. We will tap the layers panel, and the first thing
that we do is to tap on top of the pink layer and
tap to add a new layer. And this layer, I
want to make sure that I turn on the
clipping mask on. So I tap clipping mask, and then I tap in
the color palette, and I want to use
this blue color. And then I will use the watercolor mix water to see how that looks
when I add that brush. I want to make kind of a
top of the popsicle to be blue so I can just draw. And when I release the brush, I will add more color. So I will just start
to draw at the top. You can choose yourself how far down you want
the blue part to go. I will try to keep
it at the top, like that. So let's
try that out. So next, I just want to try to add a little bit more color, a little bit more booms
to the pink color. So I will tap in the
layers panel and tap to add a new layer on
top of the pink layer, which will automatically make it a clipping mask layer when I already have a clipping
mask layer on top. And then with the blending mode, multiply, selected, and
the same pink color. I will just go over with the watercolor mix water
and you see if I can add some more interest and some more texture to that
watercolor pink color. So that looks a little bit
more interesting to me. And then I can try to do
the same on the top layer. Let's just try that out and
add multiply on that layer, and then the blue color. Now I'll make sure that
I have clipping masks ected and then I can go in and see if I can add
some more color. So that might bring a little bit more umph to your watercolor, kind of like just adding more color when you're
drawing with watercolor. So that's one way of
adding more texture. And then I want to add these
two kind of lines to my Pop. I will add a new layer on top. And on this layer, I will choose color burn. And here I will
use a gray color. So I will tap in the
colors panel and I will just drag down here a
little bit to the left. And see how that looks. And with the watercolor
base watery, I have a new layer on top, and I can add these
little bumps here, but that didn't
look much at all. So what I will do is
to increase the gray, so the darkness in the gray, and then draw these
little bumps here. So we're using blend modes here because you can easily change the color of these
motifs when you use blend modes when you add
certain details or texture. So then we might want to add some texture to
the stick layer. So I will actually just try to do that with
the Alpha lock. So swipe right with
two fingers to make ph lock on that layer or
tap layer tap Alpha lock. And then I will just make the beige brown a little bit darker
and more saturated. So just drag it a little
bit to the right. And then with the water
kind of mix watery, I can just go in and add a little bit more color
and texture there. So that looks pretty cool to me. And then we will actually
add an overall texture. So we don't need to add
too much texture to this single teeth
because now I will show you how to add
the overall texture.
7. Add Overall Texture: Okay, so now we will
add an overall texture. And actually, I probably would do this when I have
created all of the motifs. But as I want to show you how this motif will look when we
create an overall texture, so we know if we want to keep
these extra texture layers, I will do the overall texture when we just have one motif, and then we will add all
of the motifs beneath the overall texture and
see how that looks. Even if it feels a
little bit confusing. So I will swipe to
the right on all of these layers first
and tap group. And I will just rename
that group to Ice pop, let's say, pink and blue. And then I will tap add a
new layer on top of this. And on this layer, I want to make sure
to use a gray color. So maybe somewhere around a little bit over the middle and the grayish to the
very left side in the colors selection tool. And then with the watercolor
magic take light, I will have 100% in size, and I will draw over the whole canvas with an even
stroke and make sure that I don't lose the pressure on my brush and
draw again because then I will get this
uneven texture. So let's just undo that. And now we have an even texture. And here I will tap in the nears panel and
tap color burn. So maybe you don't saw
what happened there, but if I turn off the
visibility of that layer, you can see that
with this layer, the ice pop kind of
pops the color pops, and you can see that it gets more paper texture to the
watercolor where it is drawn. So you won't get a
paper texture to the canvas because I
think that that should be something that you choose
if you want to add that too. But we won't add that
in this pattern, we will add it only
to the motifs. The next thing
that we will do is to add a new layer on top. And here we will use the watercolor magic
texture wet and zoom out. And I will draw with
that. And as you can see with this, Bush, it gets a really uneven watercolor texture,
which looks really, really nice on your motifs
because it makes them look more alive and more
realistic watercoloring. And then we tap the symbol
and drag up to Caliburn. If we zoom in on motif, and I will tap the
visibility on that layer, you can see that
the colors really pop and you get this
really nice uneven look. And if we turn off the
visibility of the first texture, you can also see the difference. So now we can see if we want
to keep these kind of extra. We created two extra
texture layers here. So as you can see, it makes quite a difference
when we are using the top overall textures like this and when we
aren't using them. And if you want to add more pop, you will add more gray
to the overall textures. So to do that, tap the layer, tap alpha ok. And
then we can I will just save this gray layer
here in my color palette, so I know which
gray color it was. And then I will drag
down to make it a little bit more dark, and I will tap the
layer that has the alpha look on
and fill layer. And let's see what
happened there. Maybe I want it even more
dark and fill layer. So the darker gray you have, the darker the texture will be. And it's the same
with this layer, you can swipe the right
with two fingers or tap lp. And if you tap thin layer here, you can see how it really pops. So with the first texture, the watercolor magic
texture light, it gets kind of a more dry nook, the more gray color you add. So I will just go back there because I
didn't want that nook, but I really like that on
the watercolor with texture. So I will save that gray in my color palette as well
if I want to use it again. So I know which gray color
I use with the Caliburn. As you can see, when we've
added the top textures, if we turn on the visibility
of our added textures here, you can see that it
adds quite a bit of texture to your
watch columotives, and you can choose how
much texture you want. So actually, for me,
I don't want this like really saturated
what kind of look. So I will actually just delete these layers
with the extra texture. So we created those so
that you would learn how to add even more
color to motifs, but to make it easier and also
to save layers when we are creating more motifs
duplicates of this Ice Pop, we want to Make sure to use
as few layers as possible, especially if you
have an iPad that hasn't that large storage. So now you might want to add a little bit more color
to these lines as well, and then you can swipe
to the right with two layers to create Alpha
lock on that layer or just tap Alphoq we can try that new gray color
and tap fill layer. Maybe even more gray
and tap fill layer. So there you can see
that the more gray, the darker gray you use, the darker this will be. When we use blend
modes like this, it's very easy to change
the color of the motifs, and that is also why
I didn't want to keep these extra texture
layers because then we had more layers
to change colors. Old. You will
understand what I mean when we are repeating
this motif.
8. Repeat the Motifs: Now it's time to repeat our
motif to make this a pattern. As I mentioned, we are creating this whole pattern
with only one motif, and we're changing the colors. And because of the
overall textures and the textures
in the watercolor, your motif will still
look really interesting, even though that you
repeated the same motif. So let me show you
let's just start. We will duplicate
the ice Pops group. So swipe to the right
and duplicate that one. And then I will turn on
the sketch layer because we already tried out how
our repeat will look. So I want to just place
the Pops on the sketch. So cap the transform
to when you have the new group selected
and then just tap and drag it over
so that you kind of fill one of the
other sketched Pops. And then we can do the
same with a thermotif that aren't cut in any way. So we just want to
place the motifs that are fully showing on
our cavas right now. So don't add these
that are cut in half. So we'll just
duplicate that one, tap and drag and turn it around. You can also, if you want to
try to flip it horizontal, if you think that will
look nice to kind of have them a little bit flipped so that they
don't look the same. But I will just
keep them the same. And just tap and drag
to place it there. So now we have three Ice Pops, and I would just turn off
this sketch because now we want to change the
colors of the motifs. So first, we have our
pink and blue over here. So let's start with this
one, zooming in on that one. And let's make that one green. So tap the pink layer, tap Alpha lock or swipe the right with two fingers to choose Alpha
lock on that layer. And I will in the color palette, let's just drag out
the color palette and tap the palette over here so that we have the colors here. I will tap the green color, and in the layers panel, I will tap fill layer. So for me, this is the best
way of recoloring motifs, objects that are
textured and procreate, because if you
would tap and drag, it will make a kind
of strange result. Sometimes when you zoom in, you won't fill in the
edges of a textured brush. So to make sure that you
do a good color change, I will just tap the
Alpha Dot on a layer, tap the layer and tap the layer. And I want to change
the blue to yellow. So I will just do
aval on that layer, tap the layer tap Aval or swipe it right
with two fingers, and then I will tap
the yellow color, tap that layer and
tap the layer. So that looks pretty cool, and that's how easy it is to change the colors
of these motifs. And if you want to, you can always
kind of change how the top part is flowing down
towards the bottom part. That way, it will be
a little bit harder to see that it's the same
motif that I repeated. If you want to do that,
you can tap the layer with the yellow part and turn off the alpha
lock on that layer. And with the yellow
color selected, I will use the
watercolor mix watery, and I will just go down
a little bit more with this brush to kind of
add more but top part, more yellow towards the green. So then it will be
harder to see that this is the same motif
that is repeated because you will have a different top part
here where it's flowing further down towards
the bottom of your Ice Pop. And then I will go to the third. I will just rename this so
that we keep track of them. So it will be the
What's the name? Green and yellow. So I will tap rename on that
group and green yellow. And then I will tap the third
group, zoom in on that one. And let's make this one purple. Tap Avlc on the pink layer. And we have a pastel
purple color here, tap the layer and tap fi layer. And then we can make
the top part green. So swipe through with two
fingers on that layer, tap the green and tap fi layer. And here we can choose as
well if we want to add some more color to the top
or something like that. I would just turn off Alpha lock and use to watch
color mix watery, and I will just with a light hand draw a little
bit further down here. And as you can see, it
looks really realistic and nice where the colors meet up. So something like that. So now we have the three
repeated ice pops here, and we want to repeat them
to the edges of the canvas.
9. Make the Repeat: We have added more motifs, and we color those, and now we will make
the actual repeat. So we will duplicate
these motifs. To make sure that these
motifs aren't cut off, I will save one of them. I only need one of
them, so I will save the one in the middle,
the original one. I will duplicate that group. Ice pops pink and
blue and tap and drag that on top of the whole group. And then I will
select the group, and I will turn on the
sketch layer just to make sure where I will place
the other ice pops. So with the group selected, I will tap the selections to
tap selection number one, flip vertigo, flip horizontal, selection number
two, flip vertical, flip horizontal,
selection number three, flip vertical, flip horizontal, and selection number four, flip vertical and
flip horizontal. And then I will tap the transform tool and
rotate it four times. As you can see, there's one single iPop in the
middle that aren't affected by these selections and how we're making
the repeated tile, and that is because it's
on top of the group. If you think that's confusing
to have that there, you can always turn
off the visibility of your duplicate of the IPop when you create
the actual repeat. But now I want that duplicate because I want to
place it over here. I will tap that
group, select it, and just turn it
around a little bit, rotate it with the
rotation node. And place it where I
think it will look good. And then I will do the
same with the other twos. I will duplicate that
group and twist it around and duplicate the first
one and twist it around. I want to mention here
that if you would end up to have a maximum
amount of layers, you can always merge
your layers together. The thing is, then that if you merge
your layers together, you won't be able to change the colors of them
in a good way. So it depends on what you
want to use your pattern. But if your iPad says that you don't
have enough of layers, I will just tap one of
the popsicles and I will flatten the layers that
don't have a blending mold. That means these layers, and then I will just merge those layers together by
swiping them together. So then I have two
layers instead of four, and that should save you enough layers to be able
to create this pattern. But as I have a bunch
of layers to use here, I want to keep all of the layers separated in colors
because that way, I can easily change the colors
of this pattern later on. So it depends if your storage
is lower than mine on your iPad and you can't use the same amount
of layers as I can, then you can merge
the layers together. But don't merge the
layers together that has a blending mold because that
will only look strange. Okay, so now we have these three new ice pops and I don't need a
sketch layer anymore. And I will change
the colors of these. So let's change the
one in the middle. Maybe we can change it to. Maybe it could be
blue in the bottom. So swipe to the right with
two fingers on that layer or tab Avloc and I will
select the blue color. And tap the layer,
tap fill layer, and swipe through with two
fingers on the top layer. And maybe I want to
have that pink them. So pink and fill layer. Okay. And then I
will go for Okay, so this is pink and blue. Let's just rename that to
blue and pink instead. So that will be easier for us to find our ice pups later on. The next one is the left one. So maybe we can do that
purple in the bottom. Let's see how that looks. Swipe to the right
with two fingers on the layer with the
pink or tap Avloc, tap the purple and fill layer, and then let's try the orange. So tap Avloc on the top layer, tap orange and fill layer. So that good. And then we can do
instead of green, yellow, we can do
a yellow green. So let's try that
out on the top, let's just rename this
one to purple orange. And the last one, what did I say that
it should be green, yellow in the bottom. So tap Avalok on the pink
layer, yellow, fill layer, and then AvalokO the
top layer and green. And fill layer. So let's
see how that looks. That looks pretty cool. I might want to add
some more to the top here as well so that they
don't look the same. So I will add D would
change the name of that? No, change the name
first to Green. Yellow. No, yellow, green. A lot of colors
to keep track on. So now we want to change
the top on these. I will start with the
one in the middle, and I will tap off Alphaoq
on the pink layer there, make sure that I have
the pink selected, and then I will just tap
and drag down a little bit here to add some more pink so that it's not perfectly the same
as the other blue pink. And then I will go to
the purple orange, and I will do the same
other orange layer, turn off alpha ok. Choose orange and
watercolor mixed watery. And then just maybe a little
bit to the top green one. Turn off Alok and add just a little bit more
green, something like that. So now they don't have
all the same distance from the top to the bottom. So I think that this looks good, and we can tap and drag these beneath the overall
texture layers now, because as you can
see, they are a little bit more pale
than the other ones. So swipe to right on
these three and tap and drag them underneath
the overall texture layers, and there you can see that
the colors really popped.
10. Test the Repeat: So it's time to try
out the repeat, and I will just turn off the
color palette like that. You can do this in
many different ways. First, let's just swipe hoops, swipe down with three fingers, copy on, swipe down with
three fingers to paste. And then we want to
make sure that we drag this flattened image. On top of the group and
on top of everything. So now we have that
image as a flat image, as a flat penentile
and we can try it out. I will duplicate this four times so that we
have five squares. And the first thing that
we will do to try this out is to tap the selections tool, make sure we have snapping
and magnetics turned on, and no just zoom out a
bit and tap and drag until I reach exactly
1,500 pixels, tap the transform
tool to deselect. Tap layers panel and the next pentle drag it
down to 1,500 pixels, and tap the Layers panel
and the third paten tile, drag it down to 1,500 pixels, and the fourth pattern tile and drag it down to 1,500 pixels. So we place one of these
squares in each corners, one through top left, one through top right, one to the bottom left, and one
to the bottom right. Now we can see how this
pattern is repeated. But what I usually do
nowadays when I have my repeated pattern tool
on my website is that I take the layer with the
tile as a flattened image, and I tap split screen, I tap Safari, and I have my
repeat pattern tester here. I tap and drag to place the
image in the pattern tester. And here I can see my pattern
in all different scales. So you can zoom in, zoom
out, and see how it looks. And for me, this pattern
looks really, really good. And that is because we already made the patentile
in the sketch face. So we knew how it
would be repeated, and then we can just place
the motifs on the sketch, which is a great workflow when you create
patterns in Procreate, so you don't need to move
around your obj so much. Because moving around objects in procreate and
rotating them a lot. And what I mean with
a lot is actually a lot like moving them
around, rotating them, placing them in
different positions, that can make your
pattern lower resolution. I don't experience this
when I create patterns, but that is because
I know that I need to plan my patterns
that I create in procret. You can move your motifs around as we did
in this pattern, but you shouldn't move your
motifs around for an hour, then you might lose
resolution of your pattern. So it's best to
have a good thought already in the sketch
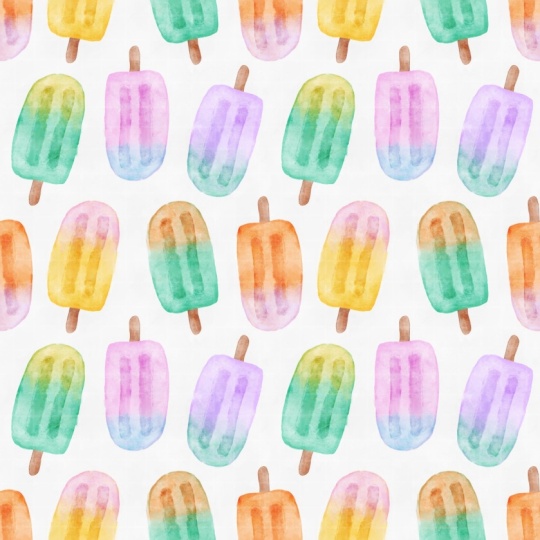
phase, which we had here. So here is our finished pattern, and that looks
really, really good. But what if we wanted to
make changes to the pattern?
11. Make Changes: Sysios turn off
the visibility of that layer with a
flattened image. And if we would like to make
changes to the pattern, if you want to make
changes to the pattern in the center on the motifs in the center that aren't
cut off in the edges. You can just tap those motifs
and make changes to them. So let's say that we want
to change something here. Maybe we want to just add a
little bit more pink to that. So something like that,
that works perfectly fine. But what if you wanted to make changes to the motifs
that are on the edges? Well, then you actually need
to repeat the pattern again. So what I do then is to select the whole
group, once again, tap the selections
to save a loads, selection number one, y
vertical, let horizontal, saving loads selection
number two, if vertical, let horizontal, save a load, selection number
three, flip vertical, flip horizontal, saving
loads, selection number four, flip vertical and
flip horizontal, and then tap the transform tool and rotate my
pattern four times. So now I have the motifs
that were in the edges. I have those in the center, and now I can make changes. And the changes that you can
make really are anything, but you can, for example, move your motifs
around if you want to. Oops, I had a snapping
and magnetics turned on. You can move them
around, twist them around if you feel like
that, and you can, of course, change
the colors as well as we did in this whole course. So let's say that we want to change the colors
of the blue here, so we will tap Aphaoc
on that layer, and let's just change it to
orange to see how that looks. Tap the layer in layer, and there we had changed
colors to orange. And that is how you
make changes to your patent tile when
you have created all the motifs and when you
have repeated the tile.
12. Export the Pattern: So we have created
the whole pattern, and it's time to export
the pattern tile. If you want to export the
tile to be able to use it, we will tap the
excess panel share, and you can export it
as all sorts of files. The most common for me is APEg and then I
will just save it. Or you can also, of course, to share it in class, you can save the repeated image, which is the four pattern
tile squares placed next to each other so that we can see how your pattern
is repeated. And then we tap
access panel again, Ya PEG and share our pattern to our camera
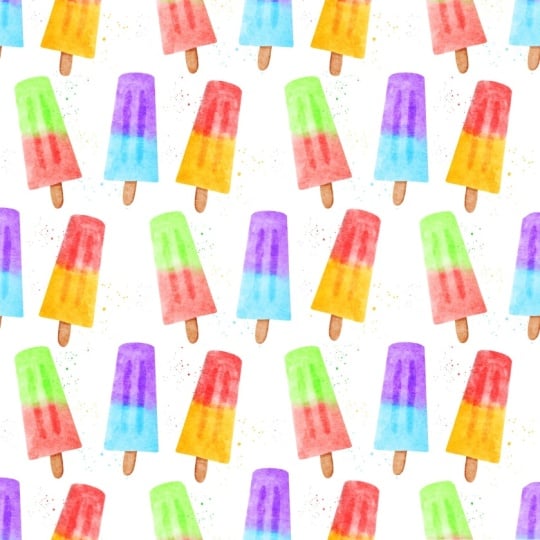
roof. And that's it. We have created this
really fun, fresh, cool watercolor ice popsicles pattern with only
using four brushes, two main brushes, and two
overall texture brushes.
13. Next Step: Grab Your Free Starter Pack: Before we end this class, I want to give you
something extra. If you enjoy this
class and want to keep building your
pattern design skills, I put together a free Pattern Rebels Starter
Pack just for you. Inside, you will find two mini classes,
procreate brushes, a playful color palette, time saving templates, and
even a procreate mockup. All designed to help you create beautiful patterns with more confidence and
less overwhelm. It's a real taste of the classes tools and
resources that you find inside the Pattern
Rebels membership without the commitment. No credit card, no
deadline, no catch. Everything is yours
to keep forever. You can grab it
right now through the link I've shared
here in class. Just click Sign up and you will get instant
access to everything. It's completely free. I can't wait to see what
you create with it. The link is in the
description about this class. And if you're excited
to dive even deeper, check out Pattern Rebels
my membership program. Inside, you will get
monthly classes, resources like brushes,
palettes, mockups, and pattern layout templates, plus design challenges, feedback sessions,
and Q&As with me. You can learn more at
patternrebels.com. Finally, thank you so
much for watching. If you like this class, you
can hit the follow button by my name so you don't
miss my future classes. You can also tap my name to see all of my classes
here on Skillshare. If you have any questions, drop them in the Discussions tab and feel free to leave a view
if you enjoy this class. I would love to
hear your thoughts. Don't forget to upload your
project here in the gallery, and if you share
it on Instagram, tag me with Maya Faber. I would love to see
what you create. Thanks again for joining me, and I hope that you
enjoy this class.
 Maja Faber, Surface Pattern Designer