Transcripts
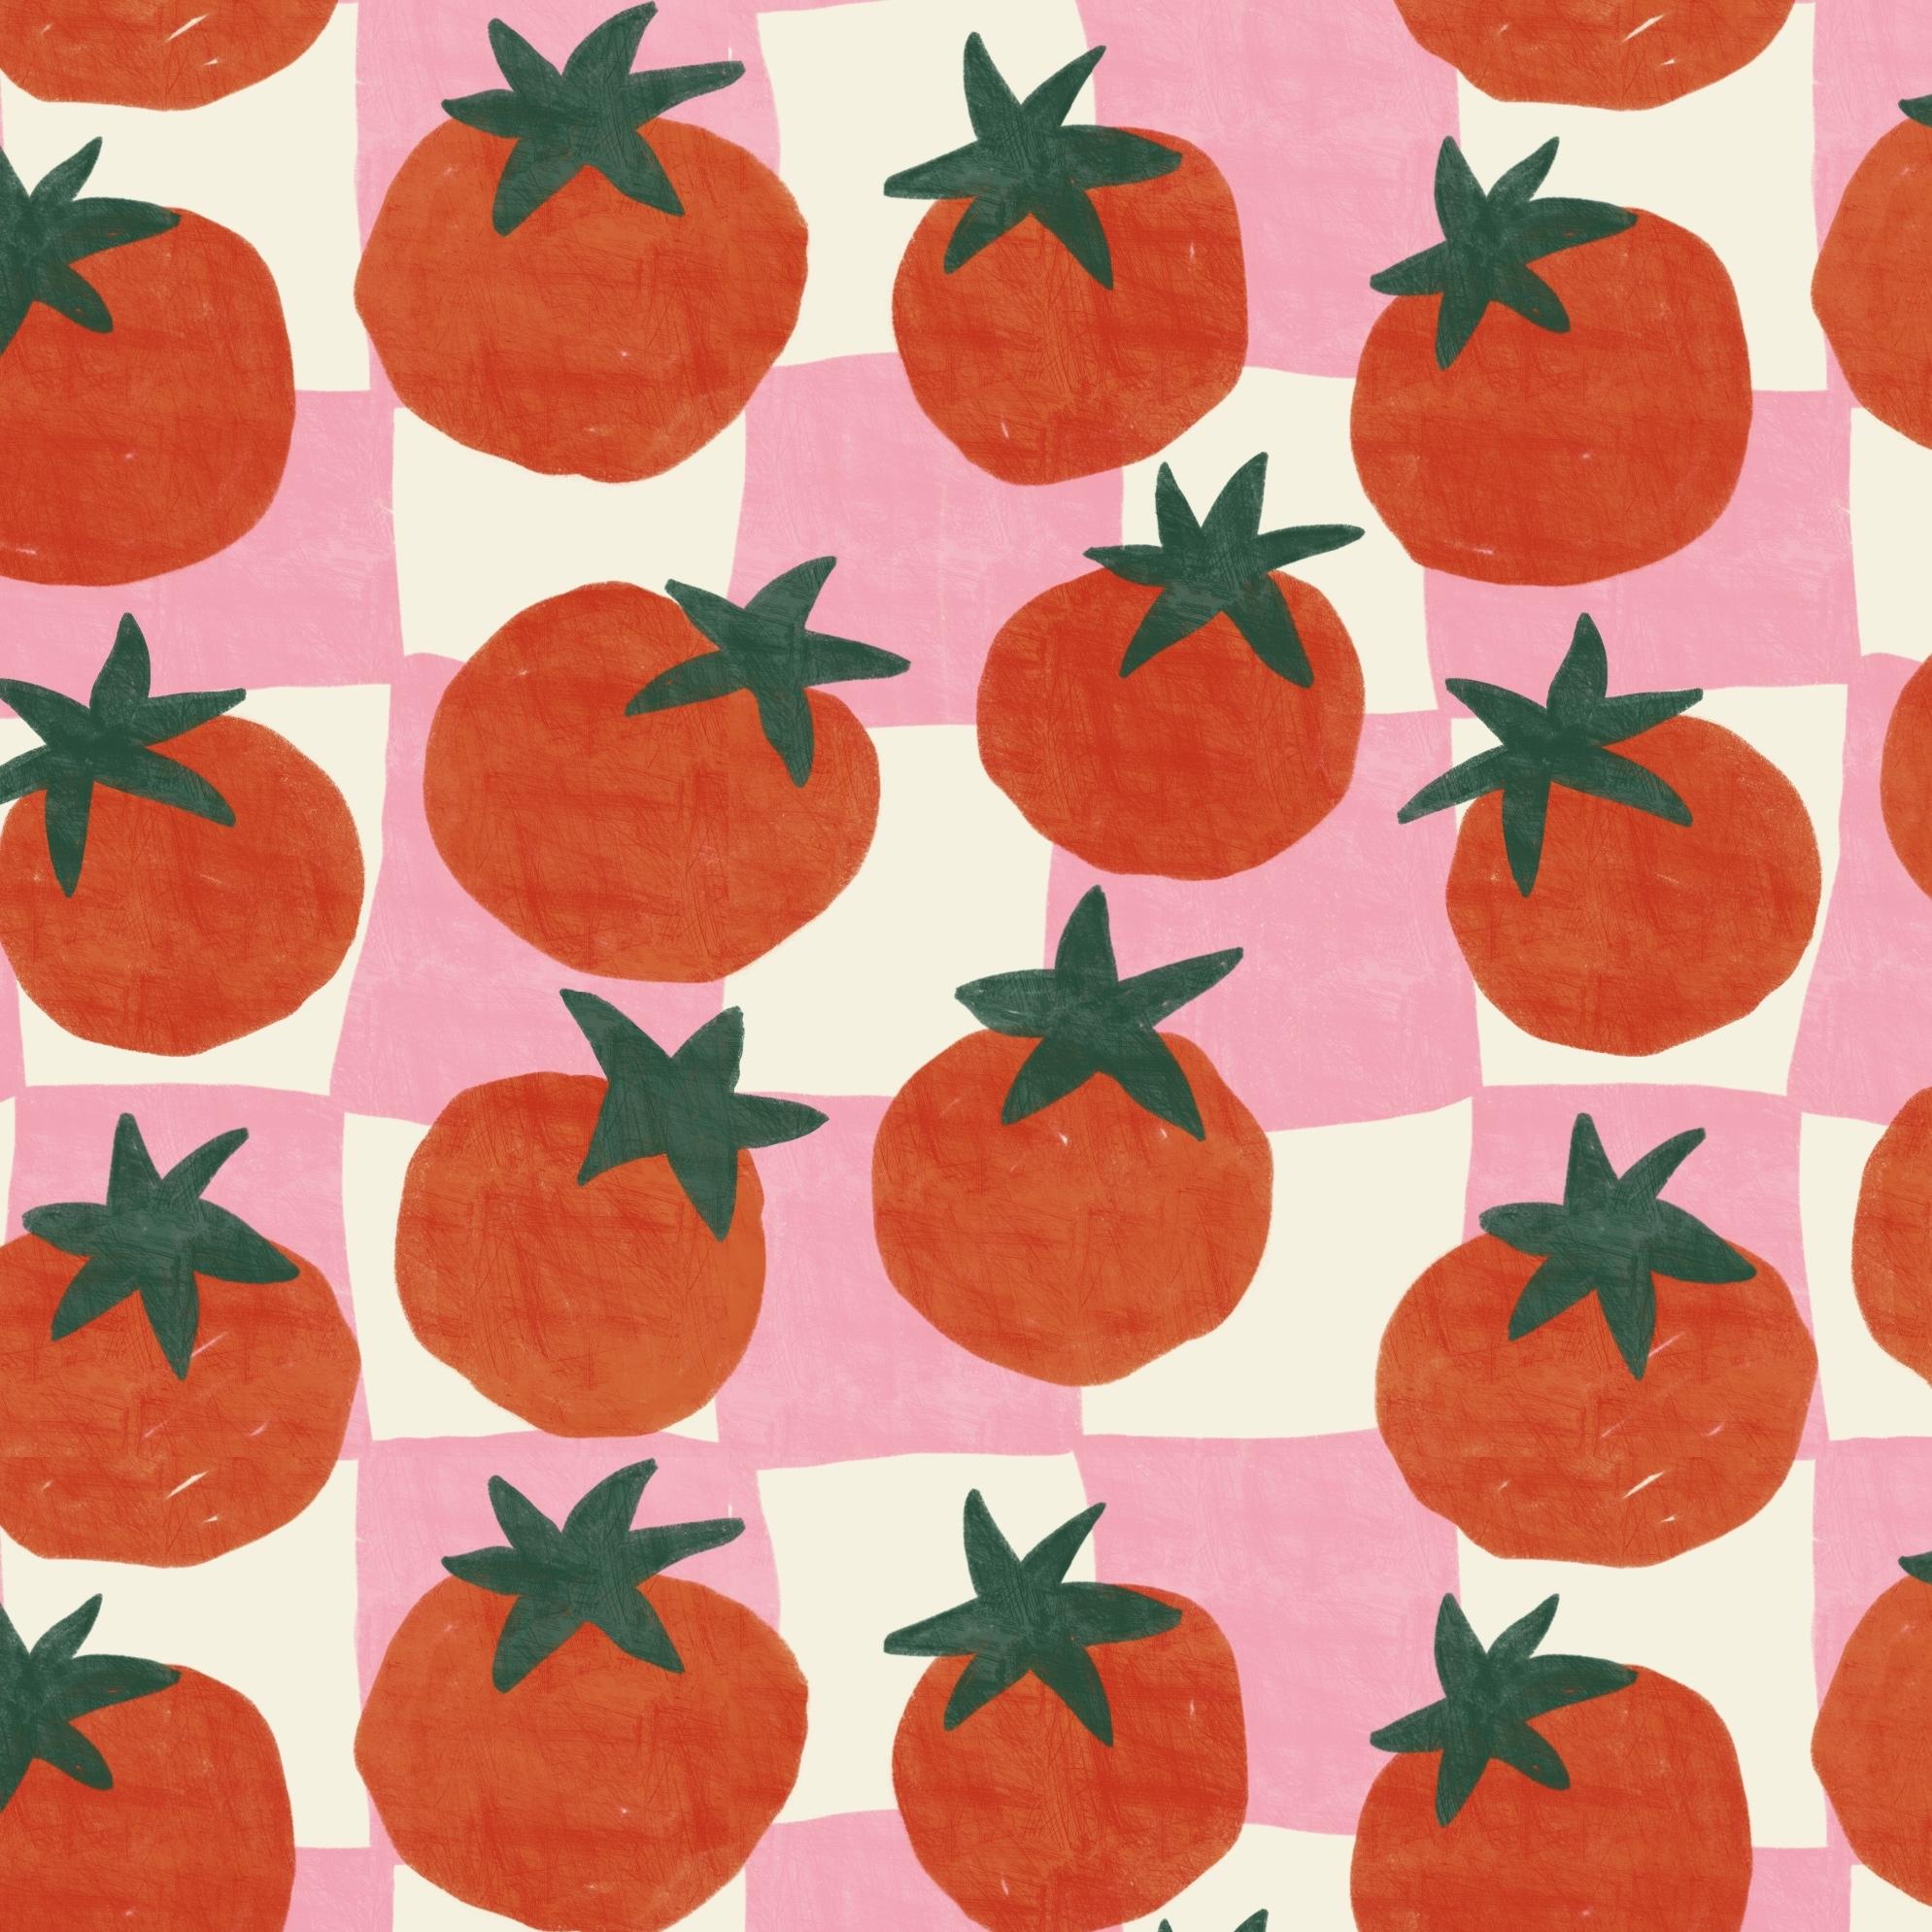
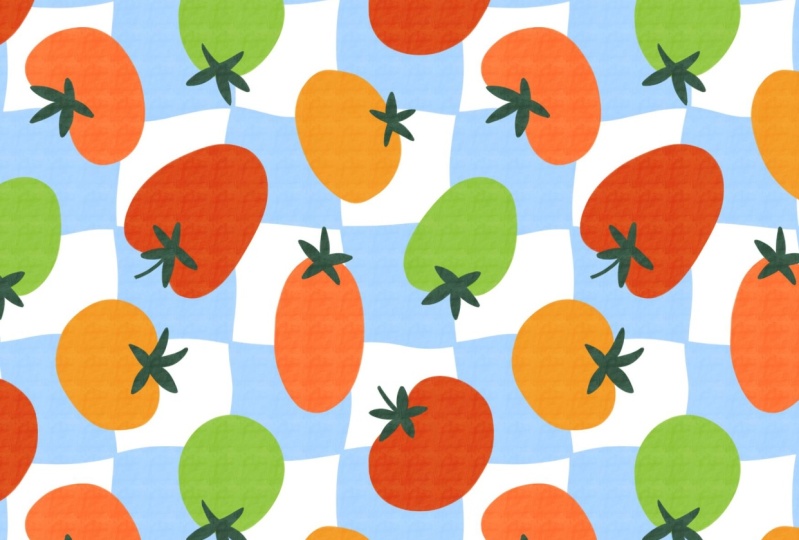
1. Intro: Hey, I'm Maya Faver, and in this class, I will teach you how to create a fun tomato picnic
pattern in procreate. You will learn how
to design a bold, playful pattern
featuring juicy tomatoes using choke brushes for
that soft hand drawn feel. I will also show you how to add extra depth
and interest with a scratchy textured brush that gives your pattern a
beautiful painterly finish. In this class, you will
get free resources, including three
procreate brushes and one procreate color palette. Join me for a fun step by step class where you will create your own vibrant tomato
picnic pattern in Procreate.
2. Your Project: This class project,
you will create your own tomato picnic
pattern in Procreate. You're welcome to experiment
with the composition, colors, or textures to
make the design your own. But you can also feel
free to just follow my lead and stick closely
to what I create. When you're finished, share your patterns in the
project gallery. I can't wait to see
what you create.
3. Sketch the Tomatoes: So the very first thing
that we will do is to start with the pattern
perfect template, which is free to download. So there's a link
in class where you can download this if
you haven't already. The very first thing
that we do is to turn off the visibility
of the guide layer, and I will tap the plus
to add a new layer. I will tap and drag
out my color palette, and I will choose
white as my color, and create the background layer. So I will tap the
layer, tap field layer, and rename that
layer to background. The next step is
that we will create a quick sketch of the
placement of the tomatoes and also a sketch of the kind of wavy picnic blankets squares that we will have
in the background. So tap to add a new layer, and we can turn off the
visibility of the color palette, actually for now, and I
will use a sketch brush. You can use any sketch
brush you want to, but I'm using from the
pattern elements brush set, which is also free to download so there's a link to
that too here in class. Now we use the perfect pencil. You can use any color. I will just use
black. And first, we can draw the actual tomatoes. So we can try to place the
tomatoes in the pattern, and then we will flip it around and create the full
sketch of the pattern. I'm not sure that we
will actually sketch out the kind of wavy squares
in the background. We will probably just
create those later on. But let's start with
the tomato sketch. So I will just rename
this to tomatoes. Tom do. And now we will start to sketch. Okay, so I want this hand
drawn feel to these tomatoes. I'm just doing a rough sketch. I want my tomato to
look kind of like that, and just filling out, you can draw them in
different directions. So that is a tossed pattern. I think that I want to do a
perfectly tossed pattern. I just want them to be a little bit upwards in
different directions. So I'm just starting with a
few different tomatoes and we can place them later on. Maybe one in that direction, and one in this direction. As you can see, I'm doing
this rather quickly because I'm not sure yet
how the ballots will be. So I'm just placing
a few of them, and then I can tap
the Transform tool, make sure I have
free hand selected, and I will just
select the ones that don't feel balanced
and tap and drag and not have snapping
and magnetics turned on and just drag that tomato
a little bit over there. So that is just the first step. For me, this looks good enough, and now we will just
flip the pattern. So in this class, we're doing a really
quick sketch, and the motifs are big
on the pattern tie. We just want them to fit
together so that is not super crazy with a lot
of air somewhere and dense between
different motifs. Okay, so with these two
layers selected, tap group, tap the tap the selection tool, Save and load selection eight, tap the transform
tool, flip vertical, flip horizontal, tap
the selection tool again to deselect and tap it again to select Save and
load selection seven, tap the transform to, flip
vertical, flip horizontal, tap the selection tool
to deselect and tap it again to select Save
and load selection six. Tap to transform to, flip
vertical and flip horizontal. Then tap the selection
tool again to deselect and tap it again to select
saving Load Selection five, tap the transform too, flip
Vg come flip horizontal. Then I will tap the
selection tool or the transform tool
to deselect and tap the transform
tool again to select. Then I will rotate this square 45 degrees four times so that I get it in the same direction
as I do it in. Instantly, you can see here
that it's a little bit dense there and it's not
super balanced. So what we will do then is go
to the sketch tomato layer, tap the selections tool, and I will just flip these
around a little bit. I will select that one, tap the transform tool, drag it out. I don't want this one to
be in that direction, this one to be in that
direction, that won't work. I won't look good. So I will just maybe
drag it down there. That might look better. And this one, should we do
that a little bit bigger, maybe pull it out a
little bit like that. And then this one. So this is just,
like, experimenting, seeing what works and
what doesn't work. I think we can make the
tomatoes a little bit bigger, actually, so that we don't need as many of them to
fill out the pattern. They don't need to be
exactly the same size, but I just want it to be like
filling out the pattern. Okay, so that might work. We might have some air here where we can draw
a tomato and here. So I will just flip the top and bottom first
and then the sides. So tap your group. Tap
the selections tool. If you get an error
message here, you need to tap one layer, tap the selection tool and
check your color fill, and then you will be able
to tap the group again, to select it and tap the
selections to, save a load, and you can scroll down
to selection four, tap the Transform tool, flip vertical, tap the
selection tool to deselect, tap the selection tool again to select Save
Selection three, tap the Transform to
and flip vertical. Then I will tap the
transform to and rotate 45 degrees four times. So that I get all of the tomatoes in the same
direction as I do them in. And then I will go to
the sketch tomatoes. And here I will actually just
draw drag out the tomatoes, select them with
the selection tool, drag them out in
positions that work so that maybe like that so that I can draw a
tomato down here, I think. I think I want to fill it
in with a tomato there. So you can pull these
little yellow boxes to you can tap free form. You can drag the tomatoes in the form that you want to or uniform just to kind
of pull them in. Okay, maybe that could work. Yeah. And then we can draw a tomato in the center here
and see how that would look. So I would tap the
sketched tomato layer. And here I could just
draw something like that. Yeah, and then I want
to keep moving them a bit so that I place
them balanced. They don't need to be
perfectly balanced because I like this, like, imperfect look as well, but they shouldn't be too. I will tap reform,
pull it down a bit. They shouldn't be I should still be thought through
where you place them. This actually might work. Now we have that
sketch and we need to try out the sketch
before we continue. I will swipe down with
three fingers, tap, copy all, tap on
top of the group, and swipe down with
three fingers tap paste, tap split view, two
safari and I will drag in my pattern to the pattern
tester on my website and just see how the
pattern repeats. We have one problem as I
can see it and it's here. That is, let's have a look. We have that that I can
easily see as the center one, I think, and then it's
from the top and there. Center and from
the top and there. Okay, so if we flip the
insides, outsize in again. I will delete that,
tap the group, tap the selection two, save a load, selection eight, and I will flip all of the four squares in the center again, tap the transform to, flip vertical offlHrizontal, tap the selection tool again, save a load selection seven, tap the transform to,
flip vertical horizontal, tap the selection tool again, tap the transform
to, selection six, flip vertical flip horizontal, tap the selection tool again, selection five, tap to transform to flip conflict horizontal. Then I will tap the selections to rotate four to five degrees, and here I can see the problem. So I will tap the
sketch tomatoes again and drag these tomatoes
around a little bit, see if I need to draw a
new tomato or if I can just kind of align
them better somehow. I would want one there. I
think that that would work to place one maybe over there. So I will actually
just delete this one, I think, I will drag
around that, drag it out. And then here I would maybe just place that over there so that I can
draw one over here. Maybe I want to
pull this one up. Let's see. Let's flip
the sides again so we can see if we can
draw one over there. Tap the group, tap the
selection tool, save and load. I will tap selection two, tap the transform
tool, flip horizontal. Tap the selection
tool to the select, save and load selection one, tap the transform
tool, flip horizontal. Now you can see that you
have a little space here. We will move into the sketch. I will just change the
placement of these. I can tap free form. Just make that one a
little bit wider maybe. And then draw a new tomato, maybe just like this. And then I can select
it as you can see, when you don't have the
layout that you have in the pantukit and also the Muti
layouts that I share here, takes a little bit longer
to get the pattern in a good balance and a
good flow with motifs. Sometimes it works to just
create larger motifs, but you need to work with it
a bit to make it look good. So I will just drag it around, move it up and down. I would love to drag that one
a little bit to the left. I will actually tap
the group again, tap the selection tool, so back and forth, save
a load selection two, flip horizonta with
a transform tool, tap the selection tool again, save a load selection one, tap the transform tool,
and flip horizontal. And then I will just tap that and tap flip horizontal
again so that I get it in the right direction as
I saw it in when I wanted to Change the position
of this tomato. Drag around that and we'll just now I think
we're getting somewhere. This is probably really
good. Let's try it out. Swipe that with three
fingers, tap copy, swipe that with three fingers, tap paste, head to the
pattern tester again. Tap and drag, swipe
away procreate. And this is definitely
good enough. I really like this, and it will look really good when
we have the kind of picnic blanket look
in the bottom with the wavy squares that
we will create soon. So let's move on to
the next lesson.
4. Create the Checkerboard Background: So it's time to start with the wavy
checkerboard background. So we will just uncheck the visibility of the flattened
image, the sketch there. And then I will we can just
turn off the tomato sketch. And on top of the
background layer, I will tap the plus
to add a new layer, and I will just rename this
to sketch a checkerboard. And then I will tap the
actions panel Canvas, drawing guide, edit
drawing guide. And let's see how many
lines we want to. Something like that
would work really good. So that is what is it? 3,000. It's probably 750. Yeah. 750 pixels. I think that will be good. Let's try it out and tap done. So now we have our
little squares here. So the first thing
that we will do is just use any type of brush. I will just use the
perfect pencil because this is a sketch from
the pattern elements. But you can use any
brush that you want to. And now I will draw the sketch
of the wavy background. So what we want to
do, instead of just drawing a shaky board
pattern like this, we want to do like
a wavy pattern. So not to wavy. I will flip my pattern around because I
think it's easier. But I will just do maybe like that so that it looks a
little bit hand drawn, but it's not too wavy. And what we want to do is to match the lines with the
guidelines in the edges. But the center can
be a little bit wavy up and down and
wherever you want. Maybe like that. That can work.
Let's try that out. And then the other ones So can be more wavy than
others. Maybe like that. Okay, let's turn off the drawing guide to
see where we created. Yeah, I think that looks nice. So what we will do now
is to flip that around. So I will swipe it right
on both of these layers, and I will tap the actions No, I will tap the elections tool. We can just group
those together first. So with the group selected, we will tap the selections to save and load
selection eight, tap to transform to, flip edge, go flip horizontal, tap
the selections to again, saving load selection seven, tap to transform to, flip edge, C and flip horizontal, tap the selections to again, selection six, tap
the transform to, flip edge, conflipHrizontal,
tap the selections to again. Selection five, tap
the transform two, flip edge, C and
flip horizontal. Okay, so now we
have flipped all of our sketch shaky board. The whole layer. So I will
go in on that layer again, turn on the visibility
of the drawing guide, and I will add one line
here at the center. Let's just flip
the canvas around. Something like that will
probably look good. And then maybe
something like that. Okay, so that's good. As this is a sketch, I will
just move over quickly with the eraser tool and the monoline brush from the
pattern elements brush set, and I will just erase if we
need to erase, maybe there, maybe there and kind of
just match the edges together quickly because we won't spend more time
than needed on this. Then I will move
over to the brush again and just make
sure that these are put together the
lines so that we can draw the actual. I don't like that
line, actually. I only erased that part. It was a little bit too
much wavy, like that. And then like that. Okay, so now we have
the base of that, and it's time to draw
the actual background. So what I will do then is just to tap the symbol
drag down opacity. I will turn off the visibility
of the drawing guides, tap actions panel Canvas, turn off drawing guide, and now I want to draw pink lines. I will tap the plus. And here I will just rename
this to pink squares. And I will choose the pink from the color palette
and tomato picnic, and you can choose
if you want to use the light glaze or
the heavy egg glaze. Let's try it out. This
is the light glaze. This is the heavy glaze. So you can see
yourself which one you want to choose and use. I will go for I'm not sure. Maybe let's try to do the
heavy glaze for this one. So I will tap the
transform tool, pull out what I draw, and just use the heavy glaze. Or should I do the
light? Okay, let's do the light glaze. We can
see how that looks. Okay, light glaze and
choose a brush size, I think around that's
too small. Around 30%. I will say that I have 31%. So what I would do
is just to draw a line here that is aligned
with our sketch layer, something like that, and
then turn it around. Draw a line there. Line there. A line there. Okay. So then I will
start to fill it in. I'm not sure that I
did the right thing when I wanted to do
the light glaze here. Let's try out the
heavy glaze again. Yeah, I'm just going to do the heavy glaze
on these squares. So I will go for
around maybe 26% in brush size and just fill in
every other square pink. I will draw in it so that it gets a little bit of texture. Okay, so that was that one, and then I want to
draw in this one. But I will keep that from when
I flip the pattern around. I'll only do the ones that
are at the center now. And I will draw this. You could, of course, go like, with a smaller brush
so that you don't get this thick line there in the center where
the squares meet, but I won't mind
that because I want this pattern to be
a little bit like chunky So I'm just
feeling that in. There was one and two. And where are the other ones, it's there, there and there. So I will just flip
the pattern around, and we will do the rest. So tap the group with the background and the
sketch and the pink squares, tap the selections two, save and load, tap selection eight, tap the transform to, flip
artic, la horizontal, tap the selections tool again, saving loud selection seven, tap the transform
to, flip Partico, lay horizontal, tap the
selection tool again, selection six, tap
the transform to, flip artico, lay horizontal, tap the transform tool again, saving Load Selection five. And I transform to a flip
vertical flip horizontal. Then I will go to the
pink squares layer, and I will just draw
my little line here. So you will move a little
bit back and forth to get a good where the lines meet to get them
meet in a good way. But that's perfectly fine. So we will just fill
out the squares. So every other square is
supposed to be pink and every other square is
supposed to be white. So just fill that one in So as you see here, if it
doesn't match, that's fine. You can just drag that line a little bit differently
so that it matches. Oops. And then fill that one in. Do we have another one?
Yes, we have this one. And then we have this one,
but I will wait with that. I will only do the
ones where I can see all four sides of the square. And then I will flip the
pattern around and do the rest. So I won't do the ones
that are at the edge where I can see the edges
of the square. Here I have another one. Okay, and then do we
only have one left? Yes, we do. Okay, I will actually cheat a
little bit here, so I will fill that in there. I can see that it will
probably look good, and then I will fill it in here. We will also be able
to change this and add when we've flift
the pattern around, and also the tomatoes is
going to be on top of this. So even if you made
some few mistakes, you might not be able to see them because the
tomatoes will be on top. Okay. So that's good. Now we'll turn off
the visibility of the sketched squares, and I'm happy with that. So now it's time to
draw the tomatoes.
5. Draw the Tomatoes: Let's draw the tomatoes. I will turn on the
tomato sketch. Already, that looks pretty cool. And I will tap it in to drag
down the opacity of that. And I will tap the
plast new layer, and now I will pull
out my color panel, tap the panels over there
and draw with the red. Now you can try again. Do
you want the light glaze, or do you want the heavy glaze? I think that I want a heavy
glaze for this, as well. Yeah, let's go for
the heavy glaze, but you can definitely
do the light glaze if that is the look
that you want to do. Okay, so I will start with
just drawing the tomatoes kind of quickly and
filling them in. Maybe I can do like two sizes because it's easier to
fill them in if they are larger brush size or 60% and 26% are the
brush sizes that I have to be able to more quickly fill in the outline
of the tomato. The wobbly line is something
that I actually want. So if you want it
to be more smooth, you can do that. And I will draw this tomato. So just draw all of
the tomatoes that aren't chopped off by the etch. Okay. The next one. As I already tried
out the pattern with the tomatoes in
these directions, I will try to keep them at least almost in the direction
that the sketch is in. But of course, you can also
change that later on if you want to Okay. So then the next one is
a little bit cut off, so I will wait with that one. So I will just rename
this to tomatoes, tomato, to mate, dose, and then tap the plus
to rename a new layer to green and add the green
parts of the tomatoes, maybe with the 26%
in brush size again, or maybe even smaller, actually. Let's go for 10%, try that out. Maybe that was too small, up towards 15%, maybe.
Yeah, that's better. 15%. Drawing kind
of a star shape, but really rough,
really hand drawn look. And moving on to the next one. So I'm drawing all
of the colors, all of the motifs that
are in the same color on the same layer so that I
will be it will be easy to change the colors of
the different motifs later on when we keep
them on different layers. The next one Okay. And then let's flip the
pattern around again. Tap the group, the whole group, tap the selection tool, save and load selection eight, tap the transform tool, flip vertical, flip horizontal, tap the selections tool again, saving load selection seven, tap the transform tool,
flip articoFlip horizontal, tap the selection tool again, saving load selection six, tap the transform
tool, flip article, flip horizontal, tap the
selections tool again, selection five,
tap the transform to flip vertical
flip horizontal. Then I will tap
the transform tool and rotate the whole group four times 45 degrees so that I get them in the same
position as hydromin. Then I will start
with the tomato. And the ones that
I can see here's a tomato. Filling it in. And there's a tomato. Filling that one in. And then the green part on the green layer with a
smaller brush size, 15%. Oops. Filling that one in This one Okay. And then we have one
tomato left there. So I'll tap the group,
tap the selection tool, and I will just flip the
right and left sides. I will tap selection two, tap the transform tool,
flip horizontal, tap the selection tool again, same load selection one, tap to transform tool,
flip horizontal. Then I will tap
the transform tool to select the whole
group and flip horizontal so that I get them in the right position and
then tap the tomatoes, tap the red color, and draw the last oops, little tomato with
the 26% brush size. I like that and then
add the green parts. Okay, so now we have all of the tomatoes and we
have the background. Let's turn off the
sketch of the tomatoes, and now it's time
to add texture.
6. Add Texture: So it's time to
add some texture. First, we will try to add oral texture
and see what happens. We might want to add texture to just the tomatoes and then add
texture to the background. But let's try to add
an overall texture. So tap to add a new layer, the plus, and I will just
rename this to texture. And I will use a gray
color over there maybe in the gray and thick
and scratchy texture. And then I will just
increase the size and add a little bit like this. So that it's texture everywhere. Then I will tap
the texture layer, tap and drag up to Caliburn
and see what happens. So that, to me,
looks really good. You can keep it like this, or you can try to just add a little
darker texture, maybe. We can go darker in the
gray, tap the layer, tap Apalck, tap the layer
again, and fill layer. And maybe a little bit less, but I think I want it a little bit darker than
the original one. Tap to layer, tap fill layer. Okay, so here we have
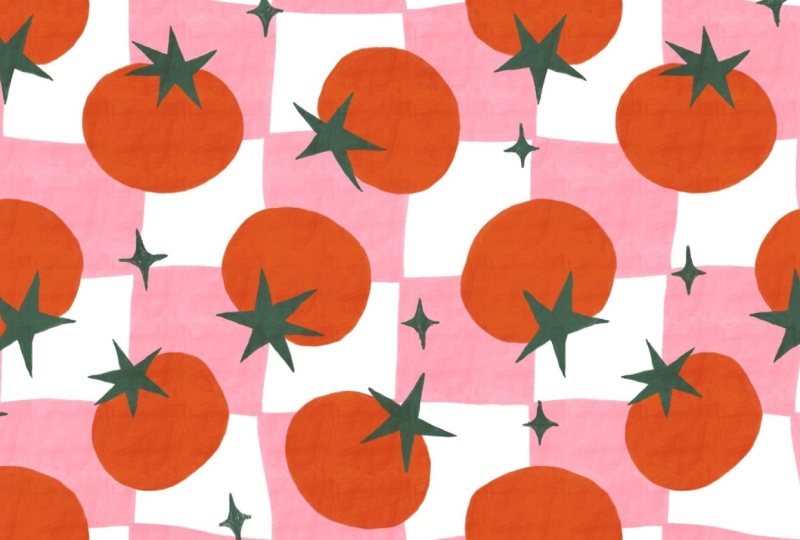
added the texture, and to me, this looks amazing. So now it's time to
test the pattern.
7. Test the Pattern: Okay, so I will just shut down the color
palette like that, and I will tap in the top here, and I will swipe down
with three fingers, tap copy all, swipe down with
three fingers, tap paste. So we have a flatten image. I will tap three little
dots, split view, Safari, and head into the
paten tester again, tap and drag my pattern. And I can drag up and drag down. There I saw actually a line in the texture,
so we'll fix that. I didn't think that that
would happen in this texture, but we'll definitely fix that. But other than
that, I think that this pattern looks
perfect as it is. So I don't want to
change anything else. I will just change
the texture layer. So I will swipe that
to delete that. I can also delete the sketch. And what I would
do then is just to flip everything to the center, and then I will fix the
texture in the center. I will tap the group, tap the slcionsTol save
a load, Section eight, tap to transform to, flip
work go flip horizontal, tap the selection tool
again, save a load, selection seven, tap
to transform to, flip verge go flip horizontal, tap the selection tool
again, selection six, tap to transform to, flip ge, conflict horizontal, and tap
the selection tool again. Selection five, tap to transform to flip ge
conflict horizontal, then tap the transform tool, rotate 45 degrees four times, and then I will zoom in and see where that line was and
I can see a line here, so I will actually fix that. It's minors. I'm not
sure that it would actually that you actually
would see it in the pattern, but I will change it anyway. I will tap the eraser tool, the tomato picnic and thick and scratchy
with the eraser tool. I will just pull down the sides and I will just delete
a little bit there. And if you want to, you can also add with the thick and scratchy, you can add a little bit,
so that you can see. That was the only line
that we had, I think. Now here is a little
line as well. You can just delete that
and add a little bit. Okay, so that is our
finished pattern. Now it's time to
recolor the pattern.
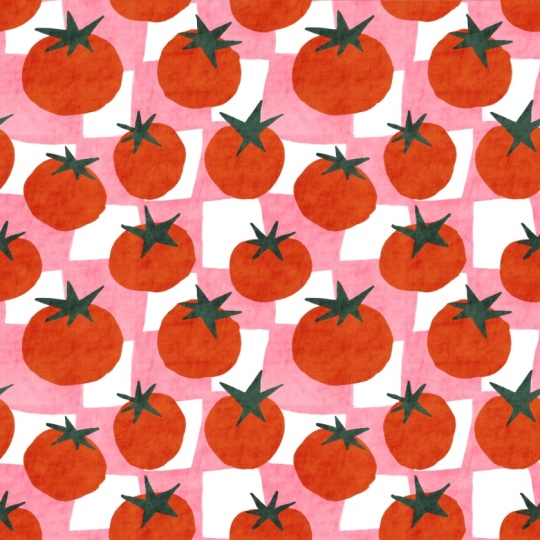
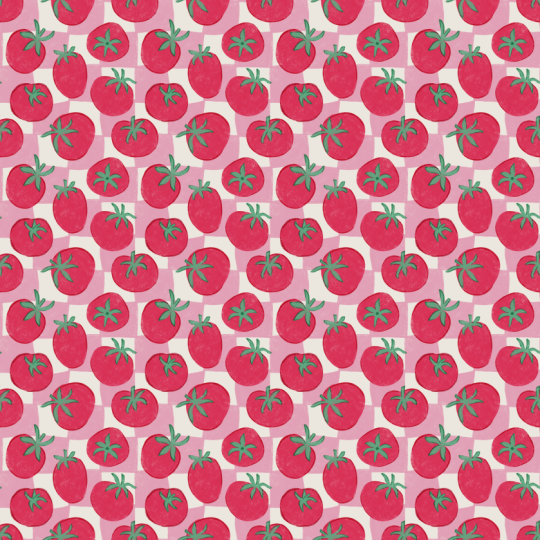
8. Recoloring: Now I want to show
you how to recolor this pattern if you want to
so I will tap galleries, select the pattern,
and duplicate it. Then I will tap into my new pattern and we can recolor the texture you don't need to
do anything with. We can recolor, for
example, the pink squares, tap that tap Avalok and what
should we recolor it too? Maybe green. Let's try green. Tap pink
squares and tap fi layer. And then we can recolor
the tomatoes, Avalok. Maybe we should do, like,
a lighter orange color, tap the tomatoes and tap
Avalok and fi layer. And then also that green, avalc maybe to a
softer green tap, fill layer, or
maybe another green like over there and fill layer. So I didn't like the background. I actually didn't like
anything about this, but let's recolor the
background to purple. Fill layer. Okay, so
that looks better. So that is how you
recolor the pattern. You only need to
recolor the motifs. You can also recolor, of course, the white background,
if you want to do that. You could recolor that
to, let's say, pink. But it doesn't look
that good because it doesn't give that much contrast. But you could if you want to. That is how you recolor this pattern in a
non destructive way. Now it's time to export the pattern so you
can share it here in
9. Export the Pattern: Let's head back to
our original pattern, and I will swipe down
with three fingers, tap copy us, wipe down with
three fingers, tap paste. I think we forgot this in
the test the pattern lesson. So I will do it here instead. This is your pattern tile. We can rename this
to tile and then I will swipe right
to duplicate this. So I have four copies, and I will tap one of them, tap the transform tool, and tap in the top
left cornon node, and type in 1,500 pixels,
tap the next layer, tap in the top right cornonde
and type in 1,500 pixels, tap in the next layer
with the transform tool. And the bottom left cornonde
and type in 1,500 pixels, tap in the last layer and the bottom right cornonde with the transform tool and
type in 1,500 pixels. We can swipe these together, these four and rename that to repeat so that is your
repeated pattern. This is your pantile. So let's export the pantile. I will tap the action spanel, share JPEG, save the image, and then I will tap on the repeated pattern
on the visibility, tap the actions panel, share JPEG, and save the image. So now you have
exported your patterns, so you can share them
here in the class.
10. Next Step + Grab Your Free Starter Pack: Before we end this class, I want to give you
something extra. If you enjoy this
class and want to keep building your
pattern design skills, I put together a free Pattern Rebels starter
pack just for you. Inside, you will find two mini classes,
procreate brushes, a playful color palette, time saving templates, and
even a procreate mockup. All designed to help you create beautiful patterns with more confidence and
less overwhelm. It's a real taste of the classes tools and
resources that you find inside the Pattern
Rebels membership without the commitment. No credit card, no
deadline, no catch. Everything is yours
to keep forever. You can grab it
right now through the link I've shared
here in class. Just click Sign up and you will get instant
access to everything. It's completely free. I can't wait to see what
you create with it. The link is in the
description about this class. And if you're excited
to dive even deeper, check out Pattern Rebos
my membership program. Inside, you will get
monthly classes, resources like brushes,
palettes, mock gaps, and pattern layout templates, plus design challenges, feedback sessions,
and Q&As with me. You can learn more at
pattern rebels.com. Finally, thank you so
much for watching. If you like this class, you
can hit the follow button by my name so you don't
miss my future classes. You can also tap my name to see all of my classes
here on Skillshare. If you have any questions, drop them in the Discussions tab and feel free to leave a view
if you enjoy this class. I would love to
hear your thoughts. Don't forget to upload your
project here in the gallery, and if you share
it on Instagram, tag me with Maya Faber. I would love to see
what you create. Thanks again for joining me, and I hope that you
enjoy this class.
 Maja Faber, Surface Pattern Designer