Transcripts
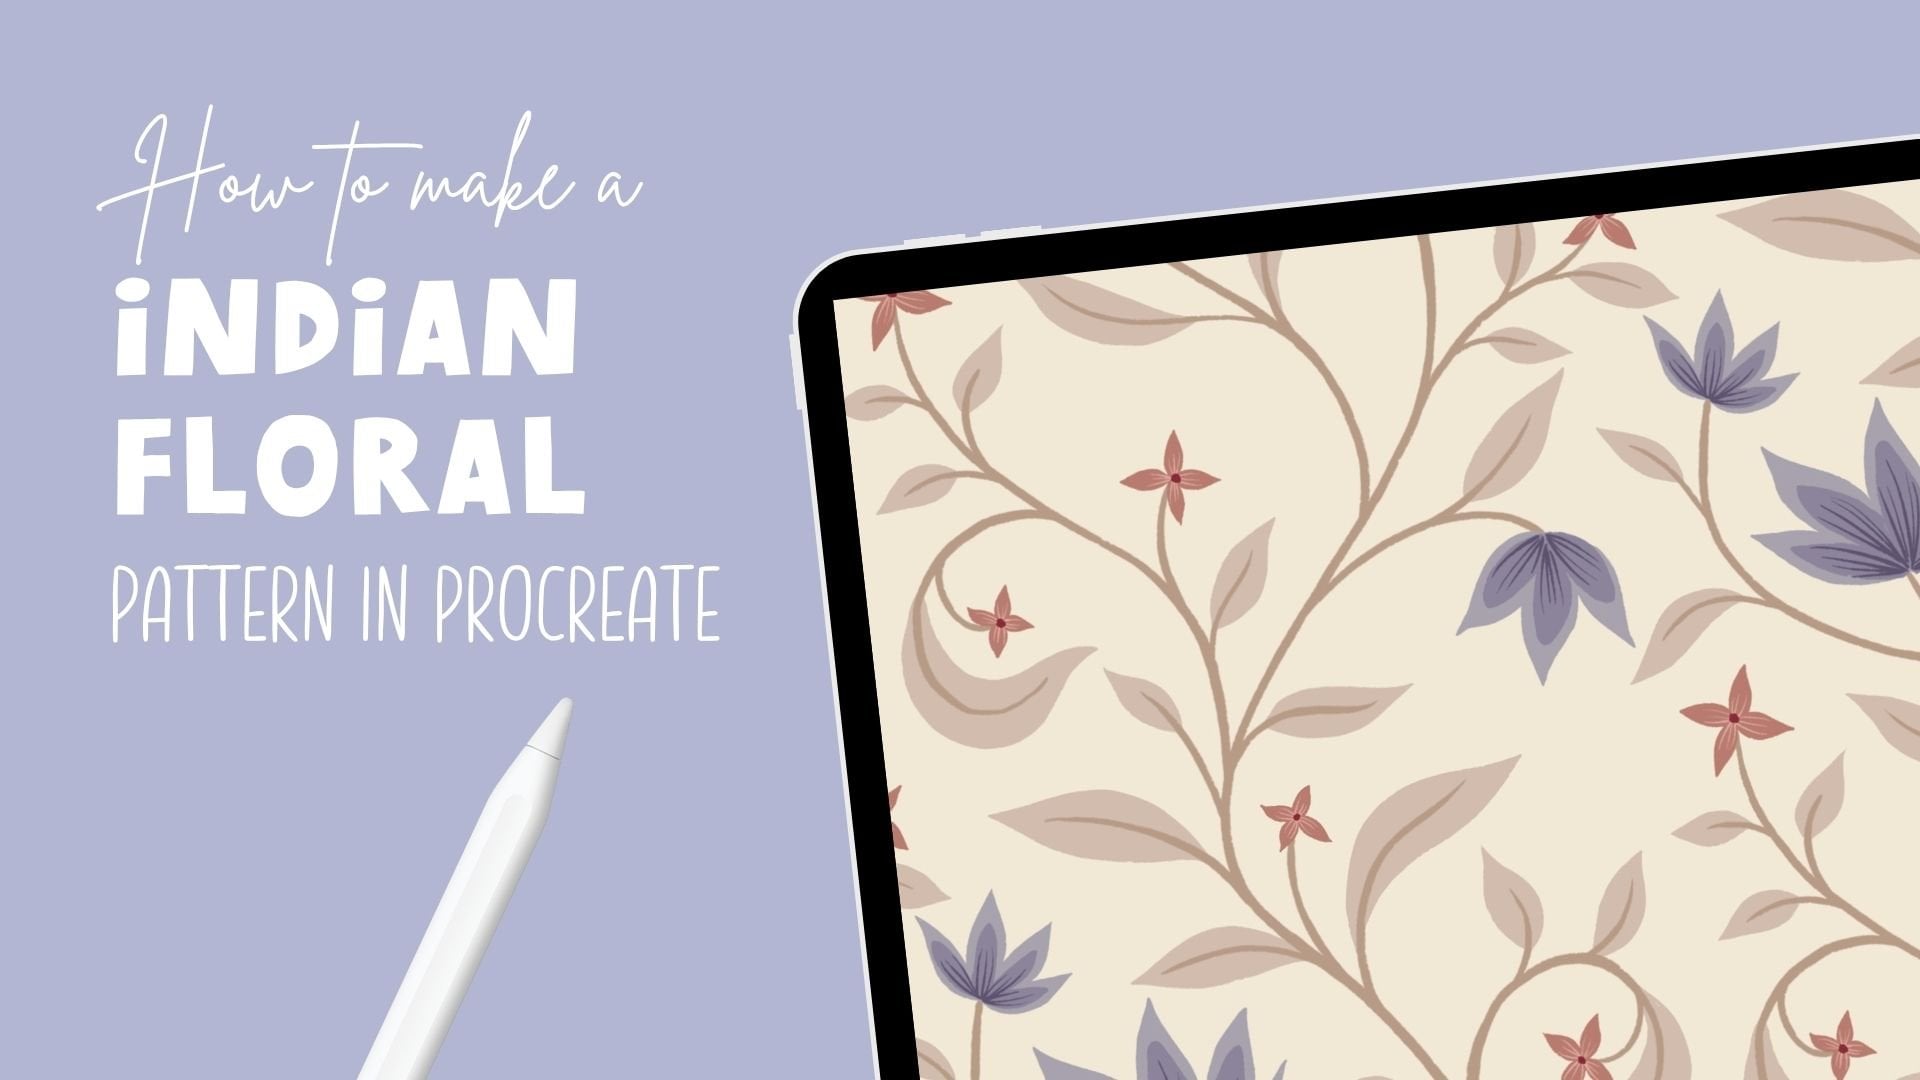
1. Intro: Hey, I'm Maja Faber. I'm a surface
pattern designer and online teacher with over
100,000 students worldwide. In this class, I'm going
to teach you how to create a vacation themed mini pattern
collection in Procreate. We will explore how to
find inspiration from your favorite vacation spot
or your dream destination. We will also work with a seasonal color
palette to make sure your mini collections captures the fun adventures and carefree vibe of a
perfect getaway. I will guide you
step by step on how to create the pattern from
scratch in Procreate, and how to use panel layout
templates to make sure that the entire process is more
fun, easy, and seamless. As a bonus, this class includes my free Power Pack
Procreate brush set, featuring 20 on my
favorite brushes, including two pattern layout templates that I will show you how to use during the class. Using the Power
Pack is optional, but I highly recommend
it to get the best out of this
learning experience. This is a fun creative class, perfect for anyone
looking to practice designing pattern collections
around a specific theme. You will need a basic
understanding of Procreate and should have created at
least a few patterns before. If you never made a
pattern in Procreate, I recommend checking out my class on creating
an editable pattern with color variations before
diving into this class. If you're eager to dive
deeper into Pattern design, be sure to check out Pattern Rebels, my
membership program. In Pattern Rebels, you will get access to monthly classes, design resources
like procretbushes, color palettes, mockups, and
pattern layout templates. Plus, we have monthly
design challenges, feedback sessions, and Q&A opportunities
where you can ask me anything about design or
running a creative business. You can learn more at
patternrebels.com. This class is also part of my Mini Pattern collection
series where we explore how to create small but cohesive
pattern collections around different themes. If you enjoy this class, be sure to check out
the other classes in the series with the other
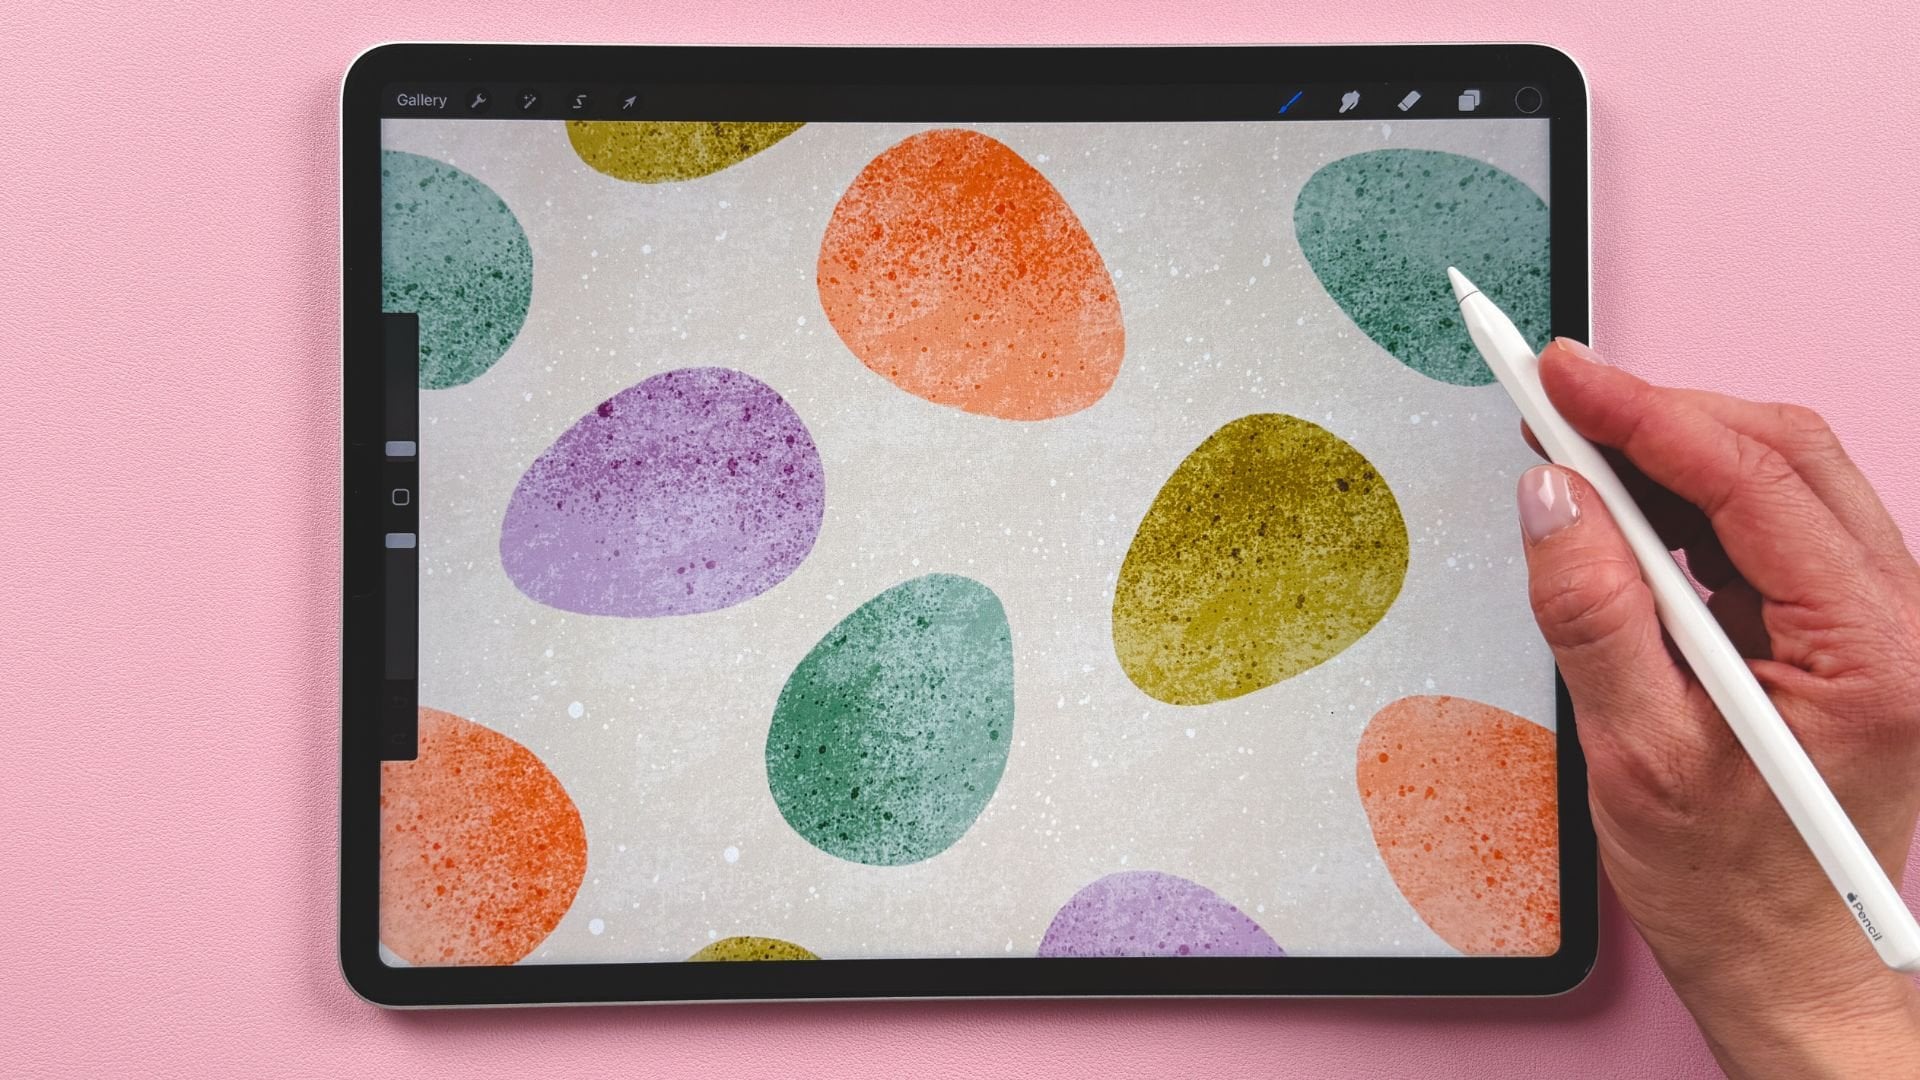
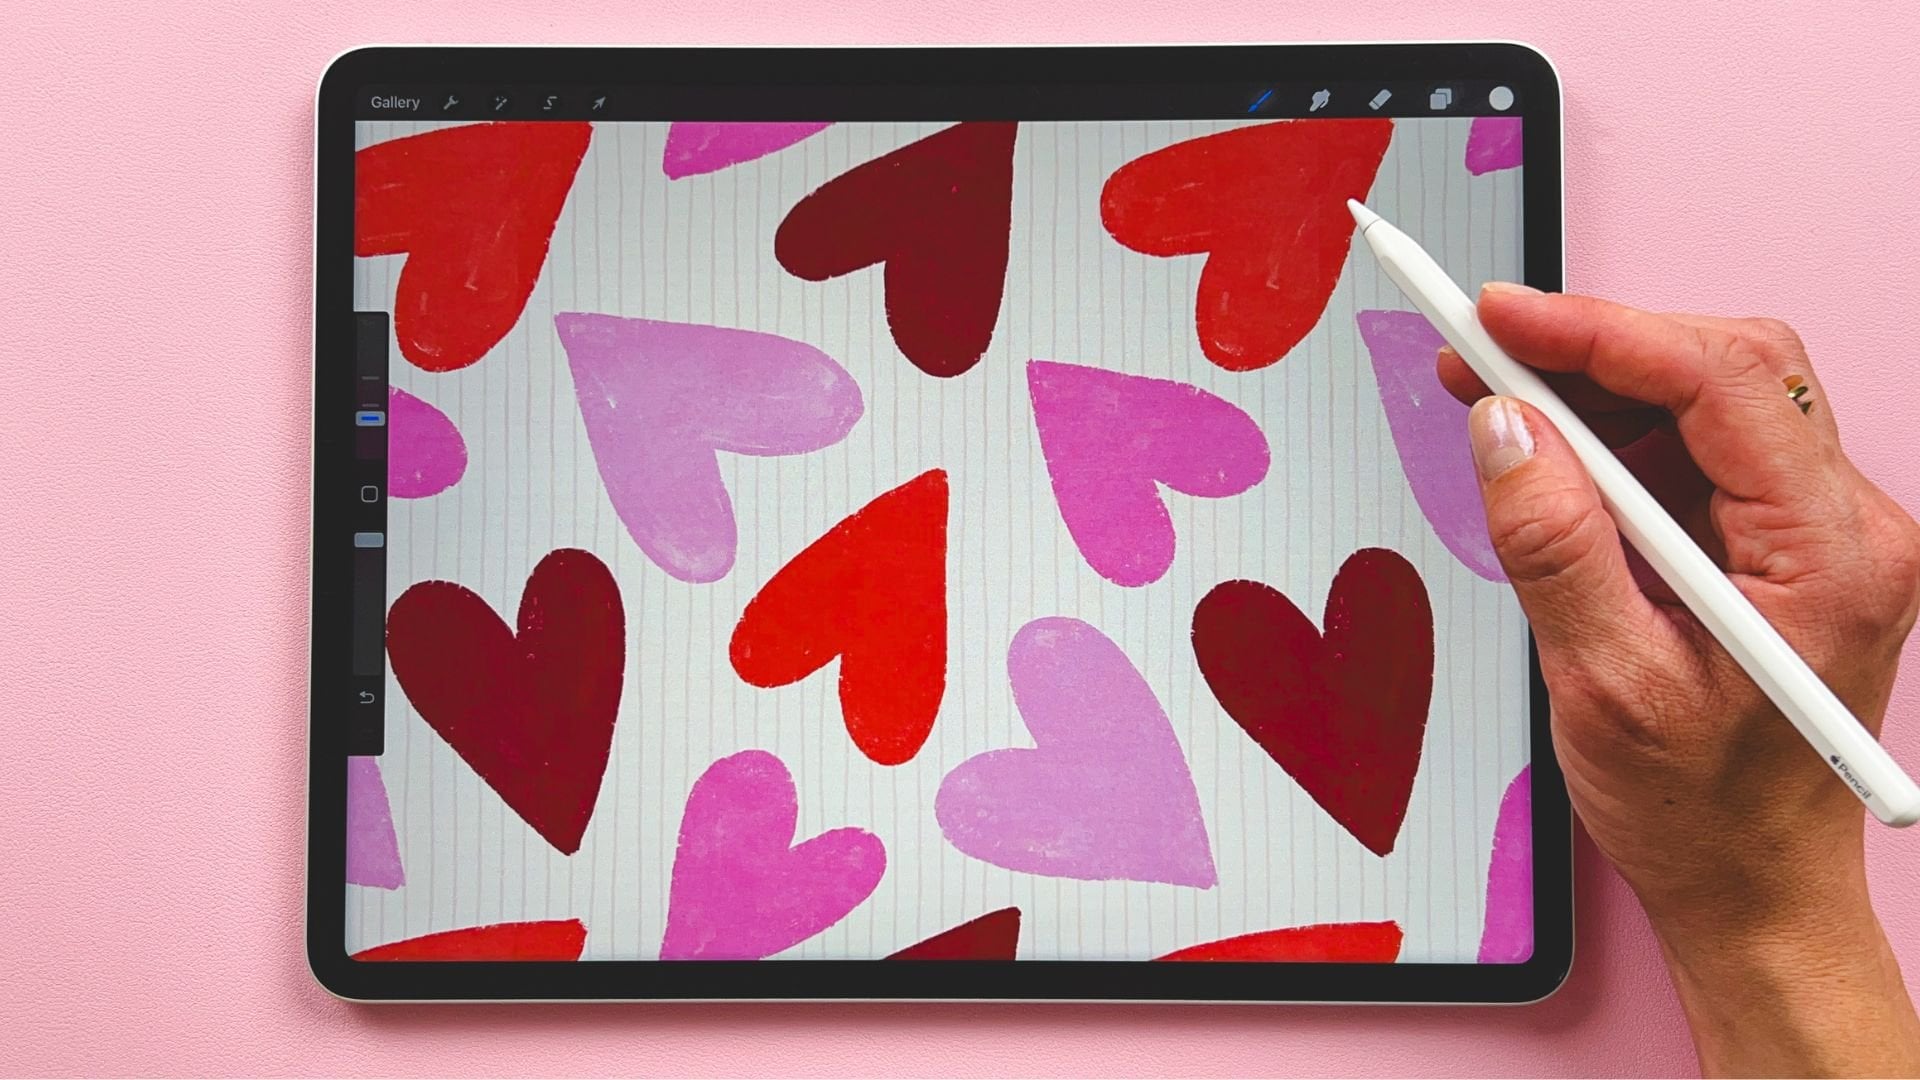
themes such as Easter, summer, Halloween, Christmas,
and Valentine's Day. So with all of this said, let's get started with creating our vacation themed Mini
Pattern collections.
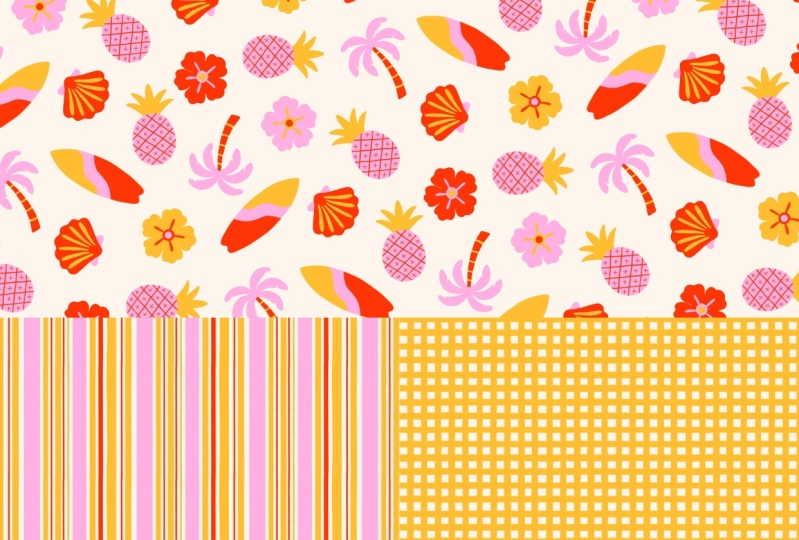
2. Your Project: For this class project, you will create
your own vacation themed Mini pattern
collection in Procreate. Your collection will include
at least three patterns inspired by your
favorite vacation spot or a dream destination. Using a travel inspired
color palette, feel free to use my Power
Pack Procreate brush set to make the process easier or work with
your own brushes. Once you have completed
your mini collection, share your patterns in
the project gallery. I can't wait to see
what you create.
3. Downloads & Resources: This class, you have access to my free Power Pack
Procreate brush set, which includes 20 of my favorite brushes designed to streamline your pattern
making process. This set also includes two
pattern layout templates, which is free to use for both personal and
commercial projects, and we will use these layout
templates or at least one of them here in the class to design your mini
pattern collection. While using the Power
Pack is optional, it's highly recommended for the best possible
learning experience. To download the brush set, download the PDF from the project and
resources section and tap the link in the PDF. Or you can go to
mayfavor.com slash POWEPAC. Write in your name
and email address, and you will get the Power Pack delivered straight
to your inbox. In this class, I'm using my Summer and vacation Pinterest
board for inspiration. I made this board
specifically for you, my students in this class. So feel free to just stick to this and use my
pre made board, or you can gather
your own inspiration on Pinterest or
wherever you wish. I've also included a
free color palette with some colors that I
have been inspired by, and I'm going to use a
Mediterranean vacation theme. So you can use this pre made color palette or
create your own. All of the links
to the downloads, you will find in the PDF in the project and
resources section here in the class.
Let's get started.
4. Make a Pattern Template: Okay, so the very first thing that we will do in this class, which is the same thing that we have done
previously in all of my mini pattern
collection series classes is to create a pattern template. If this is the first
class that you watch in this series
of at the moment, six classes, then go ahead and create the
pattern template with me. But if you have watched the
other classes in the series, then you have probably created a pattern template and you
can just reuse that one. Then you can just
skip this lesson. But if you have never created
a pattern template before, let's go ahead and
follow my lead. So tap the plus to create a new canvas and here
tap the plus again. And I usually use 3,000
pixels in width and height that my standard
size, and DPI 300. That will bring me 204
in maximum layers. That's a bunch of layers.
We don't need that many. So if you get less
layers, doesn't matter. As long as you have around maybe 20 layers will
probably be okay. And then I tap color profile. And I go for SRGB, the first SRGB that is
underneath display P three. Then I tap create. Now we have our canvas and it's time to
create our pattern template. What we will do
then, I will drag out my vacation color palette. You can use any colors
that you want for this, but I will zoom out a
bit like this and I will use different colors to fill four layers with
different colors. Tap the layer, tap f layer, tap the plaster and a new layer. I'm using different colors
because it's easier to see, but you can use the same
color if you want to. It's easier to see what
we are doing later on if we use different colors
on different layers. And then let's see this
mustard, fill layer. So I have four layers that
I have filled with colors. The next step is to tap
the transform tool, tap in the top left corner
node on your first layer, make sure you have the
chain symbol typed in, and tap 1,500, then
tap the next layer, tap the transform tool, tap in the top left corner node, and type in 1,500, tap the next layer, tap
the transform tool, tap in the bottom
left corner node, and type in 1,500, tap the next layer. Tap transform tool and the bottom right corner
no and type in 1,500. So now we have four layers with four equally sized squares, and we don't have any
space in between. Then we tap the first layer. We can shut down this color
palette if you want to. We tap the first layer,
we tap layer tap select. And in the selection tool, you tap Save and load,
tap the plus here. If you have colorfll selected, it will be a little bit wonky, make sure that you don't have
color fill selected here. Then tap the next
layer, tap select, tap save a load,
plus, the next layer, tap select, save a load plus, the next layer, select, save a load and plus. Now we have four selections. Now we can just merge
these together, and if we tap the selection
tool, save and load, you can check which of the different selections
that are selected. So tap selection four,
three, two, one, make sure that all of
these four squares have a separate selection. So now we created our
pattern template, and we will reuse
this over and over again to create the
patterns in this class.
5. Finding Inspiration: So in this lesson, I will show you how I find
inspiration for this theme. I have my summer
vacation Pintresbard, so I used the same Pintresbard for the last class in this mini pattern
collection series, which is with a summer theme. So the thing is that I couldn't really stop when I was creating my summer
Mini collection. So after that, I
created another one, and then I thought, Well, I might as well do a mini
collection class for this one, as well, because I can't
get enough of this theme. So instead of naming it to
Summer number two class, I'm naming it to vacation. So this is more like a vacation
theme where you can think of either vacations that you have been on or your
dream vacation spot. And I really like the
Mediterranean. So I am going to get
inspired by that. And I think I have some
of that inspiration, like here in between, but
I have some on top here. And I think for this
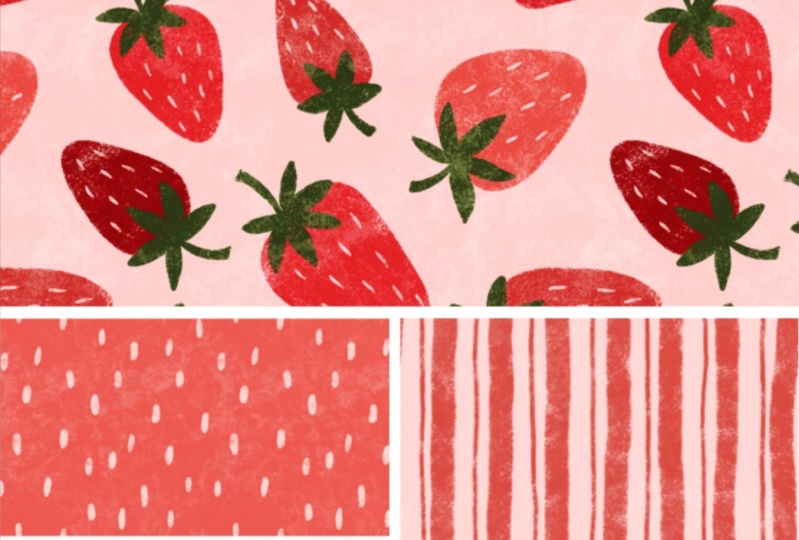
mini collection, I want to create fruit
as my hero pattern. So if you've been watching
my other mini pattern collection classes
in this series, you know, that I create a themed pattern, like a motif
theme for the hero pattern. And then the secondary
and the blender print, I keep kind of plain with stripes or dots or
checkerboard or things like that. So I only think about
what I want to create kind of motifs for the
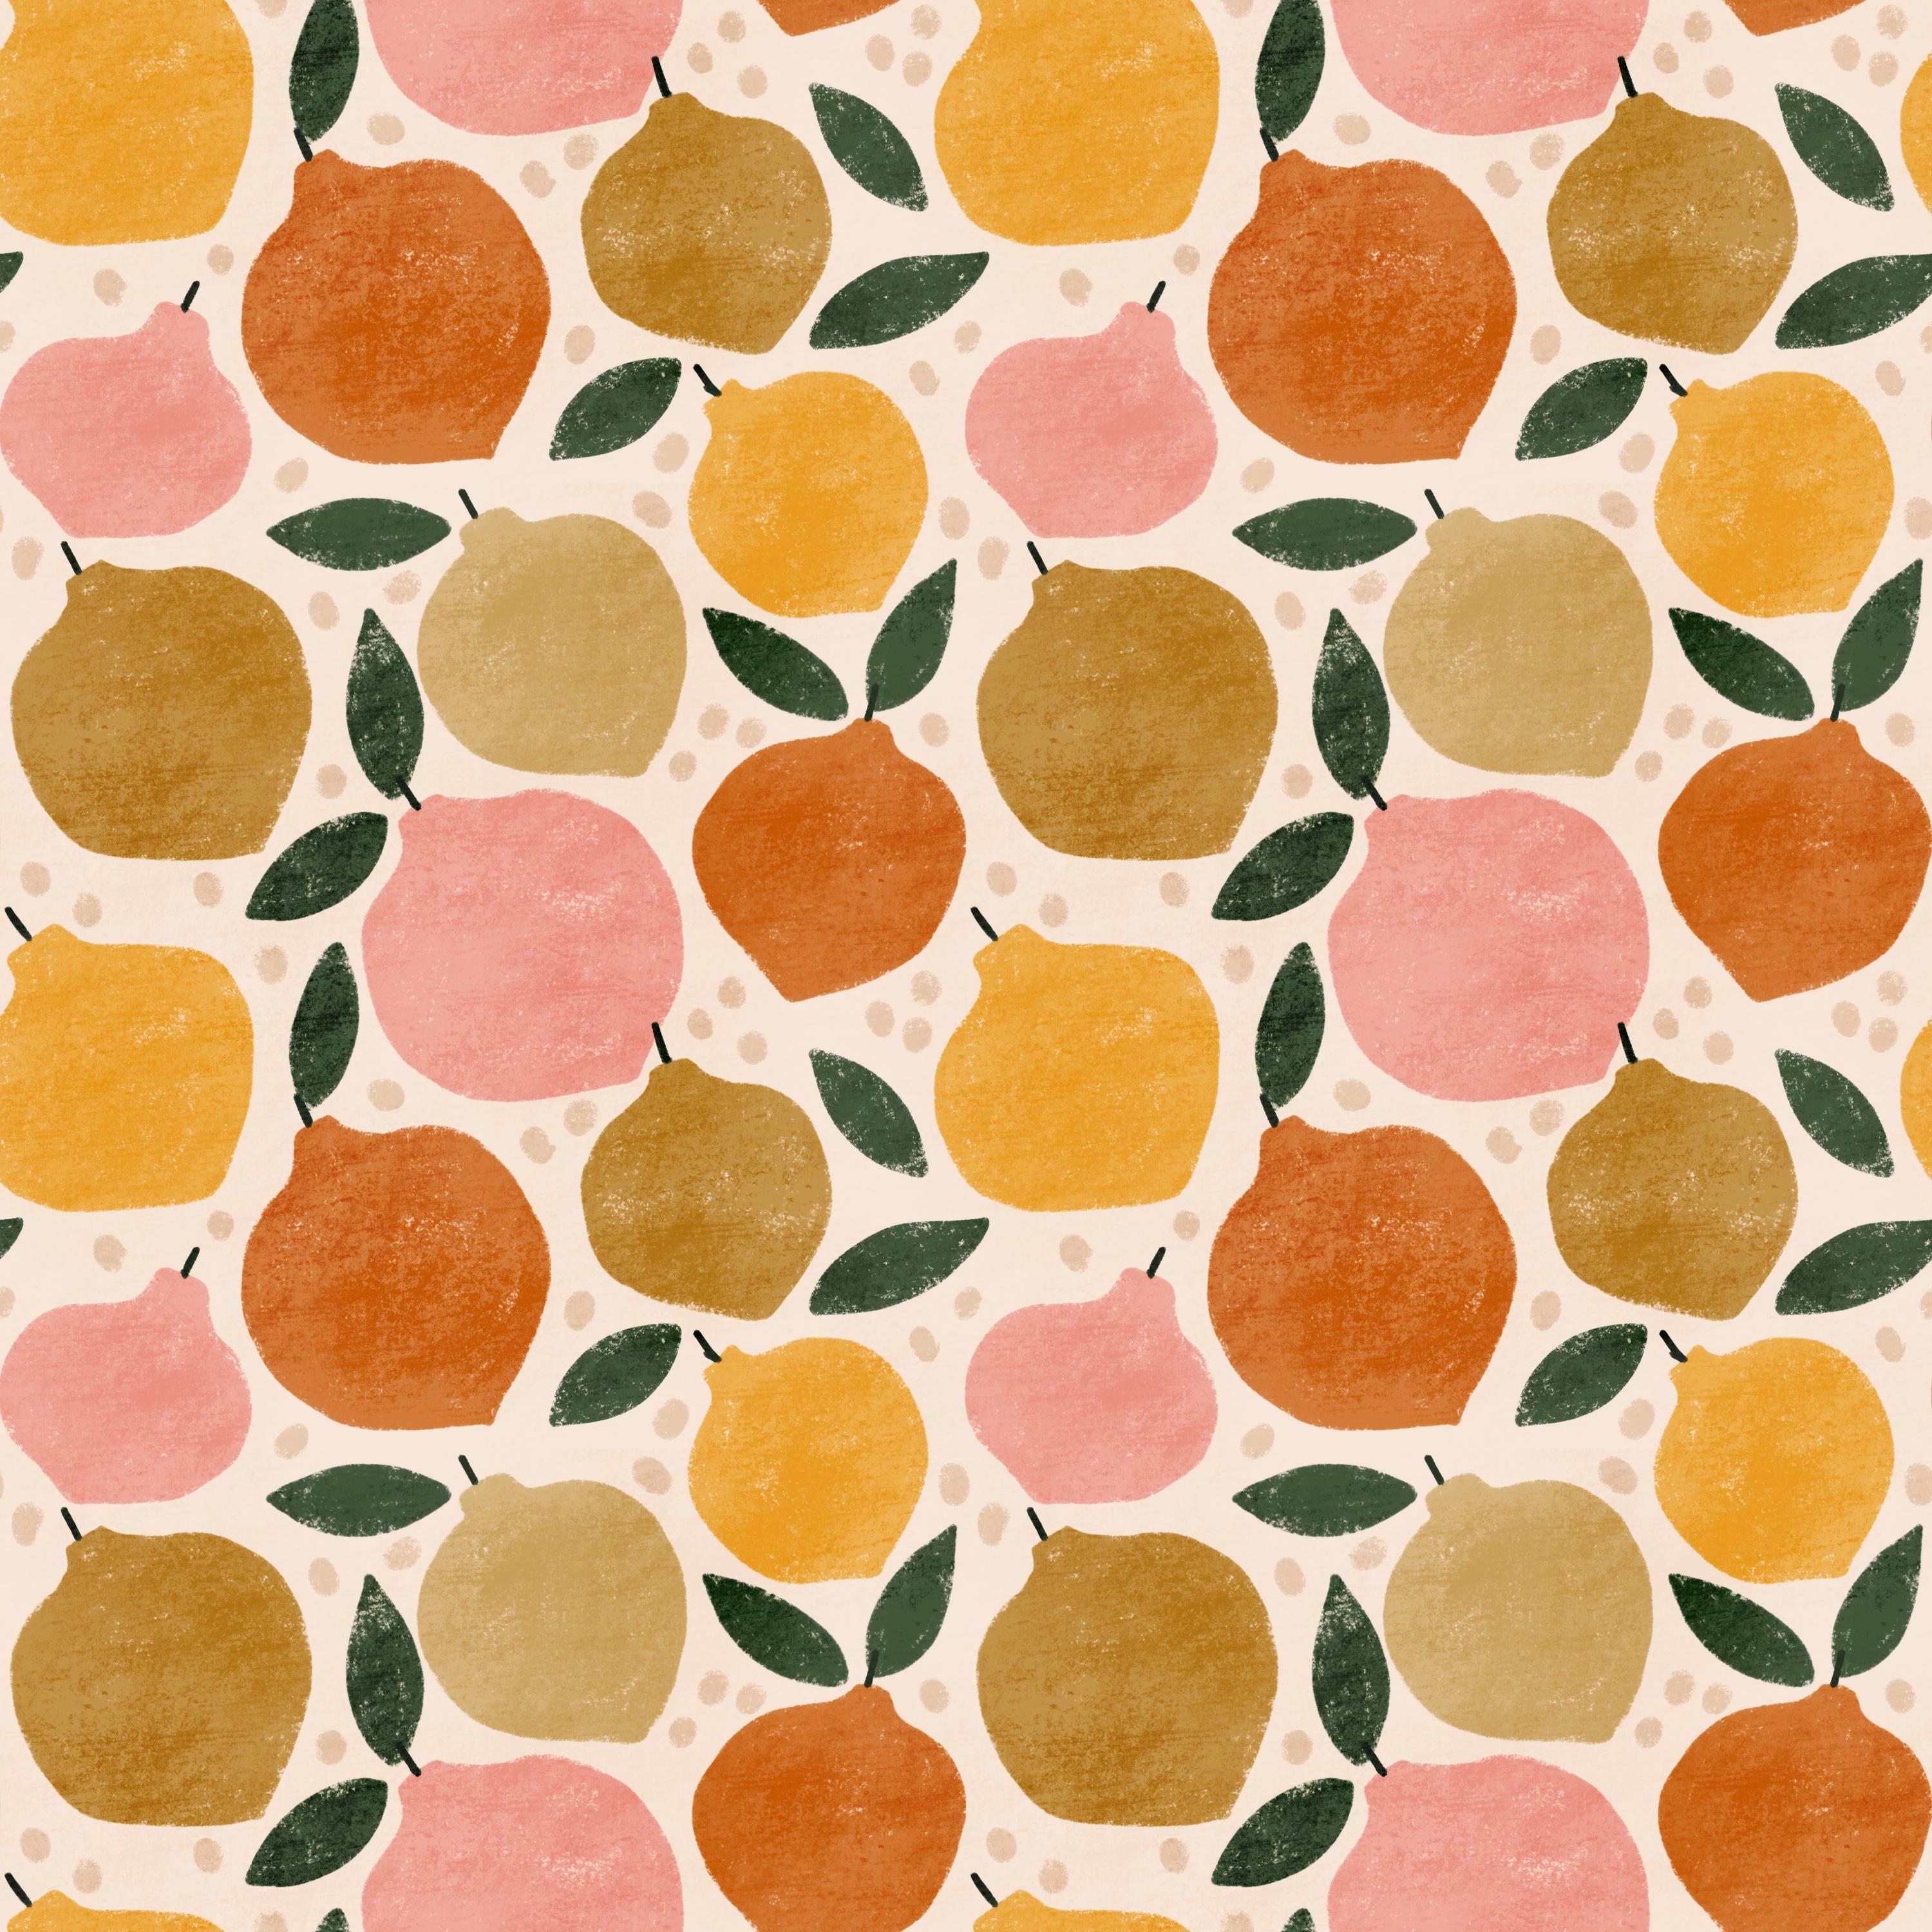
first hero pattern. And I want to create fruit. So I think that I want
to do lemons, actually. So I'm going to get inspired by this image and create
some kind of lemon print. You can get inspired
by anything else, maybe boats or
whatever you want to. But for me, I am going to
choose Mediterranean fruit, and to keep it simple, just one fruit and just lemons. So if you want to find inspiration
in this Pintras board, you are free to do that, or if you want to find your
own inspiration. Okay, so let's move on to next lesson where we'll show you how to sketch
this collection.
6. Sketching the Collection: Okay, so to sketch
this collection, we can use any sort of
format on our sketch. You can sketch in
a square canvas or you can sketch in a screen size canvas. It
really doesn't matter. I am just going to use our pattern template
here to keep it simple. So I'm going to select
that, duplicate it. You don't need the pattern
template for this. I will rename that
to patent template, actually, so we can
use it later on. And make sure to always
keep the original. And here I will just
rename this to sketch, and I will tap into that. Then I will delete the first layer there or
clear the first layer, and I will pull up Pinterest. Where do I have my Pintresbard, summer vacation, drag it to
the side, make it smaller. And the very first
thing that I will do is to fetch colors. So as you know, you have
an included color palette, and this is the same with all of my mini pattern
collection classes in this series that you
have a color palette that we will use in the class or you can use if you want to. But the same as in
all of the classes, I want to show you how I find the inspiration because I want these classes to be
standard alone classes. So if this is the first class that you watch in this series, then I still want to
show you how I do it. So I will tap my
Power Pack brush set and the mon line brush, and I go for this option
in the color panel. And then I go ahead and just
fetch inspiration here. So I really like, you know, I like the yellow in the lemons. I might want some mustard
yellow, some more orange. And then I just try out
different colors here to see, like, which colors do I like? Which colors look good together. So there we have some
different yellow, and I definitely want
green. Some sort of green. I want, like, a more
maybe a more teal green. I'm not sure or maybe more
like foresty green hoops. Festy green and darker. And some neutrals
up here, maybe. Some cream white. And I want maybe
I want some pink. And maybe even more like
reddish in the pink. And also, I like this blue. Let's try out the blue
there and also orange. So this is how I go
about choosing colors. I try different colors out, and it ends up with me having a bunch of
different colors. And when we create this sketch
of the actual collection, I will try out these colors, and that is how I end up with my perfect color
palette for this theme. But as we already
have a color palette, I will leave this there, and I will no, I
don't want to swipe boy Pintres because I will
use that as inspiration. But I will rename
this layer to colors. We can just keep it there, drag it down in size with
the transform tool. And now I want to sketch
my first pattern. So for the first pattern, I am drawing lemons, and I know that I want to use my bold flowers pattern layout. So I'm just going
to start with that. I'm going to use
black and the layout maybe round, not that large. Let's do it around 25%. And we can just do
it over here so that we have room for all
of our patterns. So this is not how you use the pattern layout when you
create the final pattern, but this is just how I
use it in the sketch. I will show you
exactly how to use it in the lesson where we
create the hero pattern. So I will tap the N
on that layer drag down opacity,
rename that layout, and tap the colors layer, tap the plus, and rename a
new layer to background. And here we can choose
a background color. I will go to my pre
made color palette. And for this, let's use
just the monoline brush, and I will use the cream white. That was the beige,
wasn't it? I don't know. I'm going for this. It looks
a little bit like this. Looks a little bit dark. Maybe it's too
dark. We will see. I will keep I actually like
this really cream white hair. I will keep that tap in my
color palette for these two as well to try them out to see if I would like to change that. So for now, I will start
to sketch my lemons. So I will tap the layout layer, tap the plus, rename
that to motifs, and then with perfect pencil, you can start to sketch your lemons or if you
just want to draw them. For this pattern,
let's just draw them. I usually sketch, but
let's just draw them in this sketch of
the collection, and then we can maybe sketch them out for real in the
actual pattern later on. I think that I want to use
the taper texture in this. I really like the
texture of that brush, and I want to use. Let's start with
the yellow lemon. So this pattern layout is from the beginning
made for flowers, like you can draw a flower here and then a leaf
here and there. And you can draw
different flowers, and that will make it
kind of a bold flower. That is why it's
called bold flowers. But you can, of course, use
it for any sort of motifs. And now I will use it for lems and I don't know if
I would use these limes. So that is how it is with
these layout templates. You don't need to use them
exactly as they look, but they are kind of just like a guide for you to get started. As the layout looks like this, I'm going to create
a fat lemon shape. So it's not super long, but more like a fat shape. So that looks like it can work. And then I'm going to draw with other colors as well.
Let me just remove that. I know that I want
to create lemons, and I have an idea
in my head how I want this pattern to look with a vacation
Mediterranean theme. Maybe like this. It looks kind of like a
Christmas decoration, as well. But don't mind that.
Just keep moving. And let's use maybe
the base for this one. Which direction I want it
to be a toast pattern, so I will try to toss
my lemons around. Right now, I'm just
thinking about trying out kind of
the base shape of the lemons and also the
direction of the motifs. I might change where
the colors are and I might change some
details later on. And then moving on to let's see. Let's turn off the motifs. That one was too, so that one's supposed to be the same color. That is how this works. So maybe number five
can be orange, then. Oops, turn on the motifs. Number five can be orange.
I which direction? Should it be down, maybe? I'm not sure. Maybe like this. And number two is supposed to be the same color as
that one, number two. So let's just try
that one as pink. And we have a number four there. Let's try that one. I'm not sure in which
direction this will work. Let's see. So as you can see, I do this super quick. Okay, so now we have this. And we have number
three there as well. Um yeah. I think that's fine for now. We can try if we want
to change some of the different colors later on, but I think this
looks good for now. And then I will add let's add
a layer with color buurn. I want to add some texture. I can just rename it
to texture and choose, like a gray color and just
want to add some dots on them, like smaller dots to add some interest to the
kind of simple motifs here. Oops. Dots. Like that. Like that. And then moving on And then Okay, so that is fine. And then I want to
add some leaves. We can add it on
the motives layer, but I can also add
motifs top here and choose the green
with the same brush, I just want to add some leaves. And the Something like this. This is also a good
way of trying out, I can see now that it should would be nice to have
some leaves over there. So maybe I can twist
this one around. Leaves. And, yeah. Let's select all of these, and I will try to
twist this one around. Let's see if that
will work better. Maybe or maybe not. But I think it might work,
I will actually just select this one as well and twist that one around
a little bit so that I can fit this one in here. So this is why we do these sketches so you can
see the overall look. Okay, so I'm pretty
happy with that. We might want to add something more to the pattern
when we're finished, but I'm pretty happy with that. So let's move on to
the next pattern. I'll tap the background layer. And for this, let's do
a colored background, the pink, and I can go for
a solid, do a pink one. I'm thinking like a
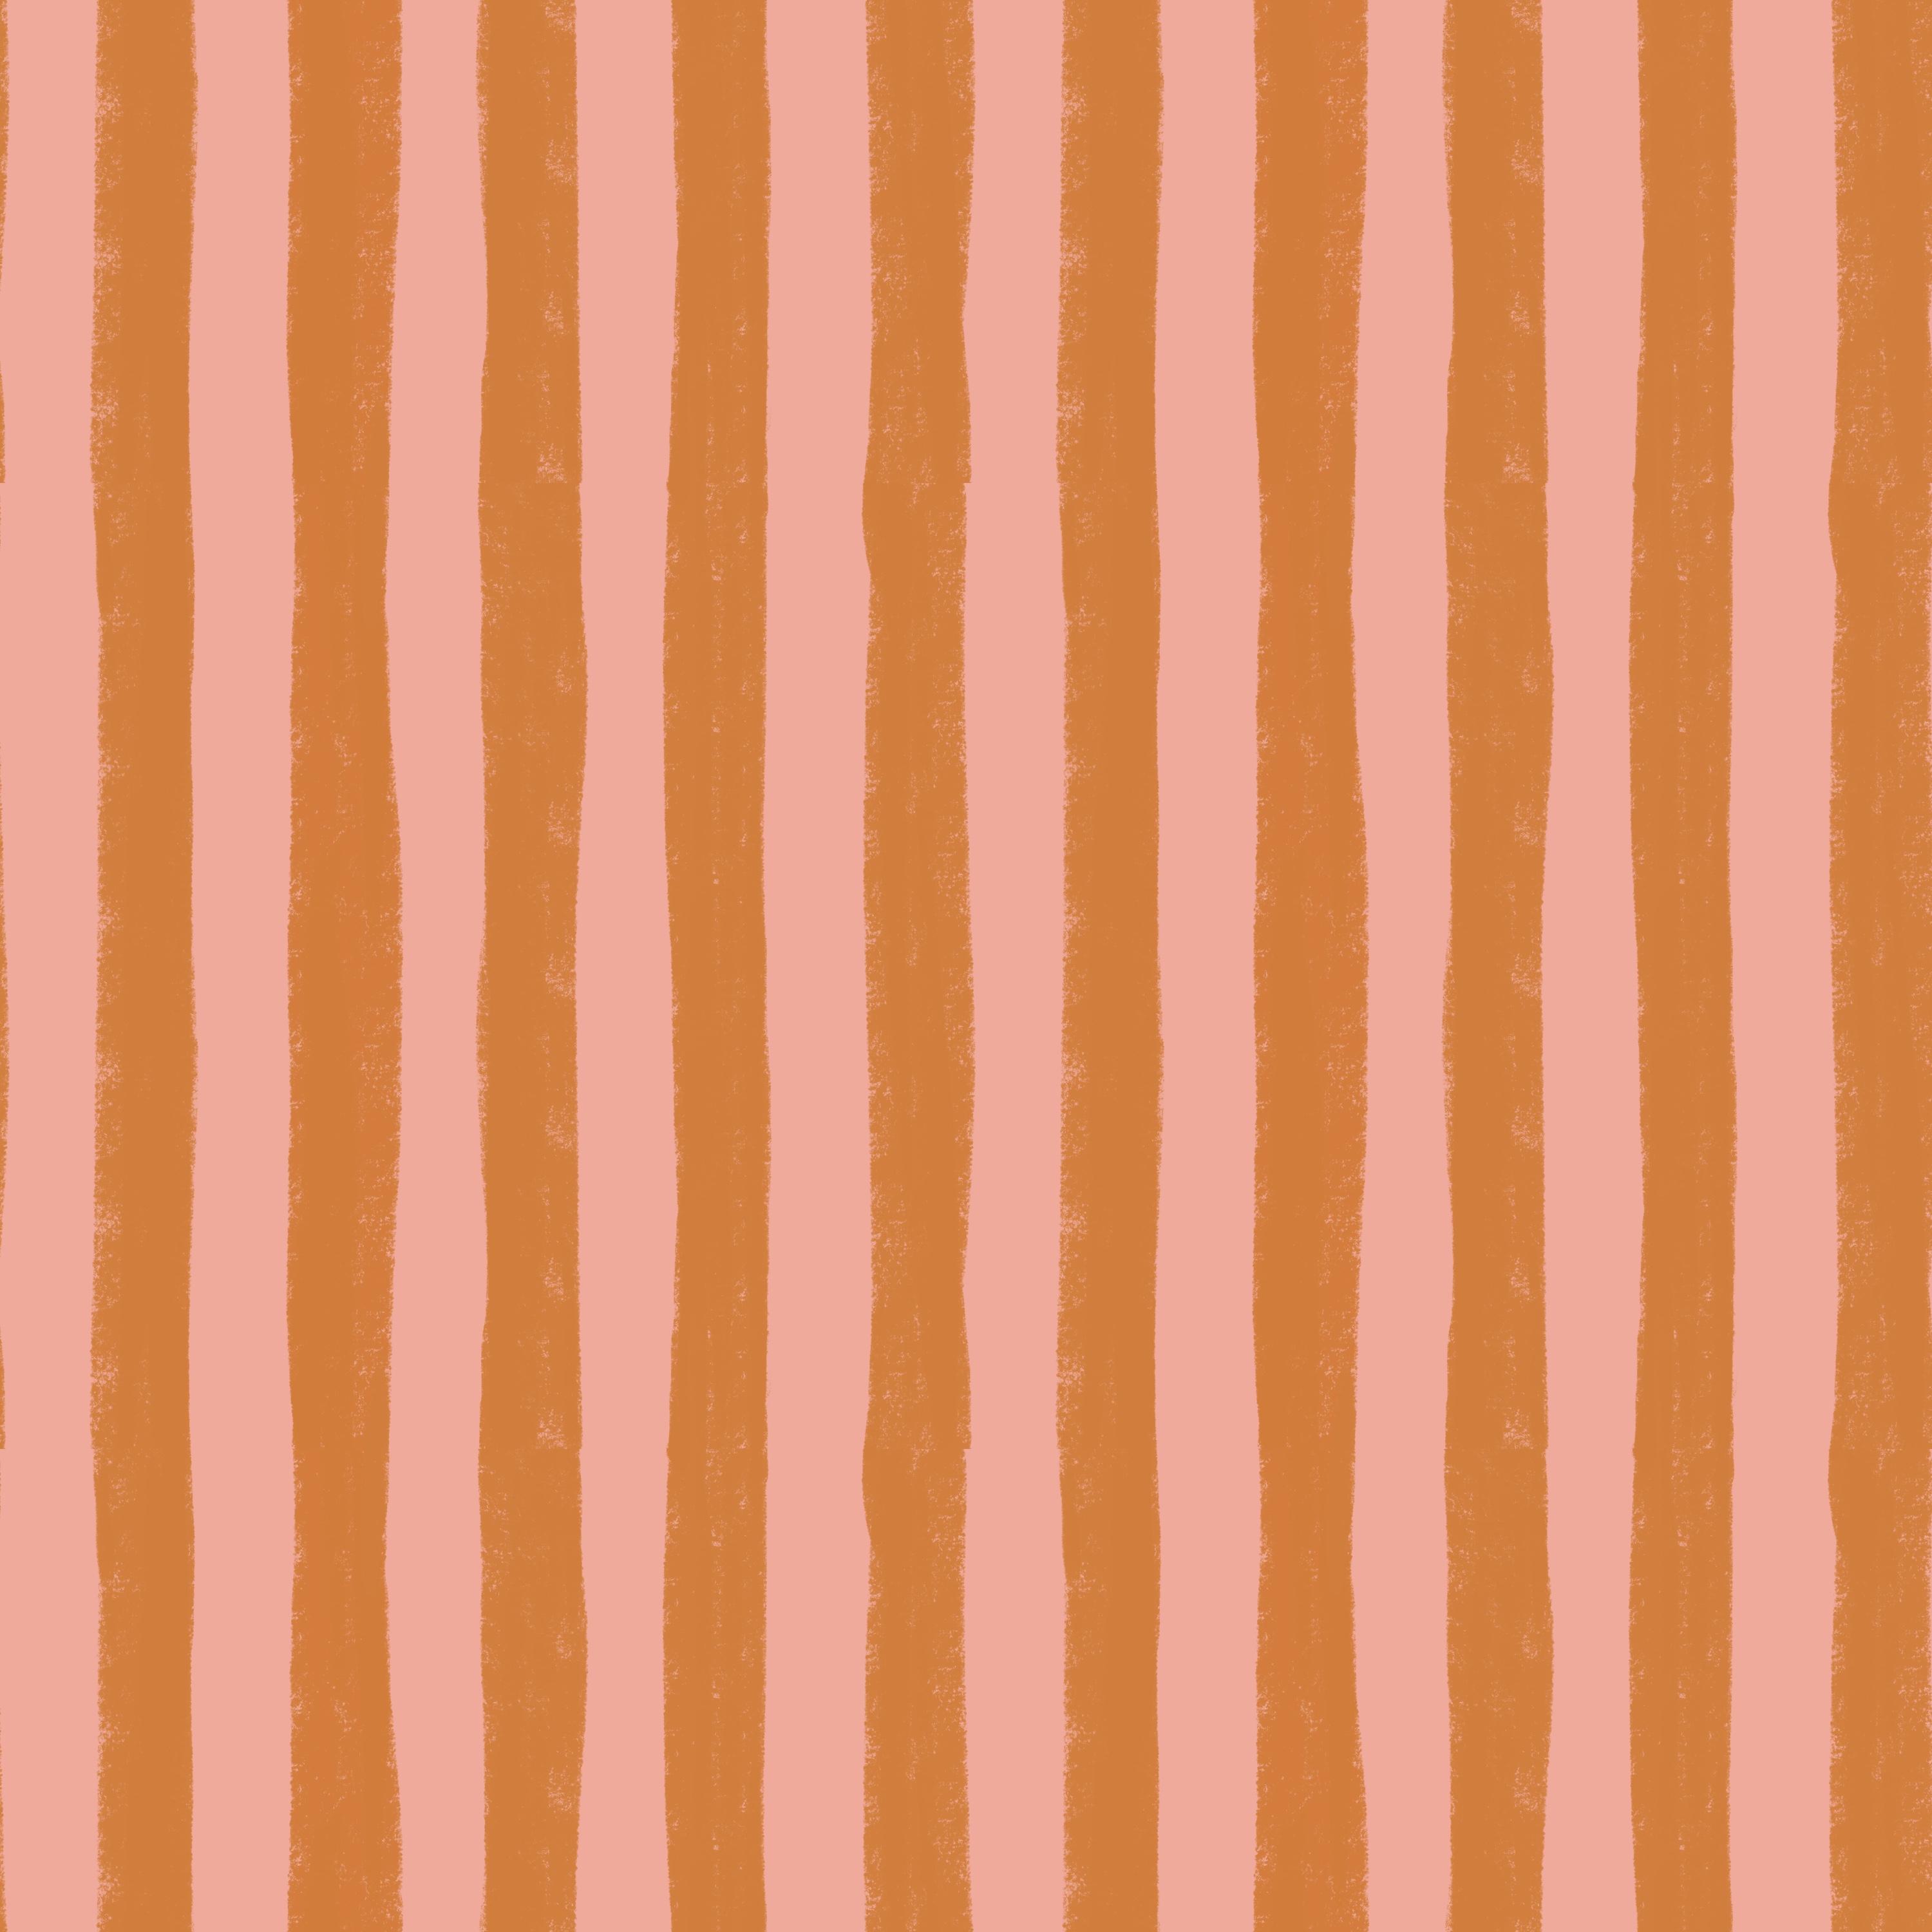
bold stripes pattern, and then tap add a
new layer on top. Here I would just
tap clipping mask. And with the same brush
to tape or texture, I want to create
some bold stripes. I think these two colors
look good together, the orange and the pink. And then the next layer, I'm happy with that, so I'm
happy with how that looks. And then we're going
on to the next one with a solid brush,
the monoline brush. And let's do maybe
the beige color, this one. Yeah, maybe. Let's try it out.
Or this one. No. Let's try out that
beige color over there. Oops. We have some lines. It doesn't matter,
but I'm just going to avoid them. Like that. And then I would want to I
could actually on this layer, I could add some squares. Let's go for the taper texture
again and the white there. And I would just kind of, like, add some squares
here, like a shaker board. Oops. That didn't turn up
really well. Like that. I'm actually not sure
about the the white here, I'm going to try to change this background actually
to the new white, the cream white
that I found there. I like that much better. And then on this one, it's going to tap and drag and I like that one
better as well. So I think I will add
a color actually, this cream white to
my color palette. Okay. So moving on, this is the idea
for the pattern, and then we will start with the hero pattern
in the next lesson.
7. Hero Pattern: Sketch the Pattern: Okay, so moving on from this, we will tap the actions
panel, share JPEG, and just save this to our camole so that we can use it as inspiration when we
create our patterns. Then I will tap gallery, and I will tap select the pattern template
and duplicate that. I will actually do
that right away so that I have three copies, and then I can name one
of these to lemons. Okay, so now we will
start with the lemon. I will just tap into that and I will clear
the first layer, rename this to background. I will tap and drag
my color palette. And now we use this new
cream white background, actually, fill layer. And then I will tap
the plaster add a new layer, rename that layout, and then just choose the
bold flowers, layout brush. And here we go for around 60% in brush size and tap once
to add the layout, stamp, tap the transform
tool, and fit the canvas. Then tap the end on the layout layer and
drag down the opaste. Now I will tap the plast, add a new layer, and we
name that to sketch. And I think for this pattern, it will be important to sketch it out because I'm not sure how we will make it work with the different lemons and
how they are twisted. So let's just sketch
out the lemons. You know you can take out Canvas actions Canvas reference, tap image, import image, and you can import your sketch. So you can zoom in here and have the
idea of your pattern, and maybe make it a
little bit smaller. And then we can just
sketch our lemons. Okay, so starting out, we have one lemon there. Let's do them not that kind of rough looking, but
a little bit more. Like clean. Oops, that was way too small. 16%, no a little bit bigger, 29% in brush size. And then I'm going to draw. So for this sketch,
I'm actually trying to keep it a little
bit more neat, not super rough because I need to see how the
pattern repeats. I think that I want to
add these type of lines, what you call them on the
fruits, on the lemons. And then let's see. Maybe we can go for
this one. We can try. I'm not sure about the
rotation there because I want to maybe make it up here. So sometimes when I'm sketching, I am much making a
much rougher sketch, and sometimes I'm making a more detailed sketch
from the start. And for this pattern,
it feels like I need a detailed sketch to make sure that the pattern
repeats in a good way. So moving on, let's do this one. Maybe we don't want them, like, totally twisted around. We can do them a
little bit upwards, but in different directions. Maybe that will look better because this is a little
bit strange, I think. Okay, so moving on, we can do a little bit more
twist, maybe, like that. I'm actually going to be
really neat here and just erase the lines
that I don't like. I think so far, this looks good. And then maybe this one
should also be like upwards. Yeah, I'm going to try this out, but I actually
think that that is an easier way using
this layout when we have this type of motif that has a specific
direction like this. And then this one, maybe we can twist a little
bit more upwards then, or should we have some
kind of flour in there, maybe, or not
flower leaf, maybe? That good at all. Yeah, maybe. This is
a little bit thick. Maybe like that or something. And then we can go for
something around here. I'm not sure about that. Maybe
maybe it should be bigger. And in which direction? Let's see. Maybe like this. No, that looks strange. Okay. Yeah, I think that's good. And then we can fit
some leaves here. Okay, so let's try out to add some leaves here as
well in the sketch. I think here is definitely
a good place for leaf. And maybe here and there. I'm not sure here. Let's
see what will happen there. Maybe this and there, maybe. And we will see
what happens there, and then a little stick there, and we can see what
happens with other ones as soon as we created the
other ones at the sites. Okay, so I will just
turn that one off, and then I will flip
the pattern around. I will swipe to right on all
of these layers, tap group, tap the group, tap
the selection tool, save and load selection four. Tap the transform tool, flip Word, go flip horizontal, tap the selection
tool to deselect, tap it again to select
selection three, tap the transform tool, flippered, column
flip horizontal. Tap the selection tool again
to select selection two, tap the transform tool, flip Word column
flip horizontal, tap the selection tool to
deselect and tap it again to select selection
one in saving load, tap the transform tool, flip Ward, com flip horizontal. Now if you feel that it's a
little bit twisted around, you can tap rotate 45
degrees four times so that you get it in the right position with the numbers. Then I will tap the
sketch layer and continue with my
sketch here and see. For this one at the edge, I need to flip it around. But here is a good one. Maybe I can do this. And then we can add maybe
we can add a leaf out from this one or up here. And then here we have something that this leaf
might be in the way for. So I will just erase that first and we might and this one. And we will draw
the lemon first. So maybe in this direction, like a really fat lemon or
maybe a little bit lower. That might work, and
then we have the sides. Okay, so turning off
the layout layer. Now we can see in
the sketch layer where we can fit some leaves. So I definitely want some
kind of leaf over there. And over here, it doesn't
matter if they move exactly out from the lemons to
on the layout layer. They can just be
here and there to make kind of fill out the space. So I think that that
will look good. And then we need something here. So I'll tap on the layout layer, tap the group, tap
the selections tool, Save and Load Selection four, tap the transform tool and just flip horizontal this time, tap the selections
tool to deselect, tap the selection tool again, to select Save Load
Selection three, tap the transform tool
and flip horizontal, tap the selections tool again to select Save Load
Selection two, tap the transform
tool, flip horizontal. Tap the selection tool again
and save load selection one, tap the transform
tool, flip horizontal. Then I can tap the
transform tool and just flip horizontal one time so that I get it in
the right position. Then I tap the sketch layer, and here I want
to draw my final. My final lemon. So let's just remove that
leave because it's in the way now and I'm thinking about where I want
my lemon to be. As all of these lemons
are twisting that way, I want it to be a little
bit more this way so that the pattern gets a
little bit more balanced. Maybe like that, but it's
a little bit too big. I really like that. Okay. So now I'm going to turn
off the layout, and I am going to fill in the empty space
here with some leaves. And maybe here. Okay, so this will
probably look good. The next thing that you
can do if you want to save some time is to
turn on the layout, and on the sketch layer, I can just write
the numbers four, two, one, three, three, two. 51. That way, I know which colors
they are supposed to be because they are going to be the same colors for
the same numbers. Okay, so let's turn
off the layout, and now we will just
test this sketch out. I will swipe down
with three fingers, tap Copy, swipe down with
three fingers, tap paste, tap the three little
dots split view, Safari, and then I will tap and drag my flatten image to the
pattern tester on my website, which is linked in the
description of this class. And here I can zoom
up and down and see how the pattern will look
or how the sketch looks. I think for now
that it looks good, we might need to add something, some leaves or some details
to make it look even better. But let's try out to
draw the actual pattern, and then we will
see how it works.
8. Hero Pattern: Make the Pattern: So it's time to make the
actual repeated pattern of this hero pattern
with the lemons. So I will turn off the visibility
or I will actually just delete that flatten image. And now I will tap
the sketch layer, tap the plus, to
add a new layer, and I will add all of the same colors on the same
layer because that way, it will be easier to
recolor later on. So let's just start
with one of them. We can start with number, I don't know, number two, maybe. Let's do that one yellow. I will rename this
to two yellow. And tap and drag out
my color palette. And I will use which one was it? Taper texture. Let's
see which size yellow. And I will turn on tap on the end symbol on
the sketch layer and drag down the o paste to around 10%
so that I can draw on top. So on number two, I
want the yellows. I will just draw like this. Okay, so I like
the look of that. So number two is here too. So I will draw that
one in yellow as well. Keeping some of
the texture there. Moving on to the next layer. Let's do number five. So number five could be I
think I'll go for the mustard. Five mustard and
go for that one. Okay, so let's move on
to number five Mustard. Drawing that one, filling it in. Yeah, like that. And then
the number five is here, so we will do that later on. So I will move on
to number three. And what should we do there? Number three, let's do pink
maybe three pink pink. Okay, pink and three
pink over here. And number four, I
think that's a loner. It will only be one of those. Let's do the Big.
Number four, beige. This one, I think. How does this look then? Cut here. I actually don't think that that
bage looks so good. Let's just choose the mustard, and I will just go a
little bit lighter here and just tap that layer, tap aval and tap the layer so that it can
be just a little bit. Maybe brighter as well. No, too yellow. Yeah, that might work better,
just a little bit here. So I'm messing around with the pre made colour palette now, but it's just because
I thought that that beige was a
little bit too light. So let's go for
that one instead. If you want the codes for that. It's this. If you go for I don't know, maybe you want to go for
the RGB, 22185, 129. So I've changed it to that, and I will save that
in my color palette. I can also show you the code for the light cream white
background color. So that is 255, 24219. So I have messed around a little bit with
premade color palette, but sometimes that can happen. Okay, so moving on, or have I forgotten something? No, I need to do
the orange as well, but I have one left.
I have the one. Yeah. Okay, so unshaked
Alphalo and then tap the plus, and I will tap the layer, rename one orange and
choose the orange color. And then I can't
really do that now, so I will need to
flip it around. Okay, so before we do that, I will tap the plaster, add a new layer with
the what you call them? The little lines, sticks, stick. I will call them line. Okay, so small line, I would go for this darker and just maybe the perfect
pencil and then just create like small thin
lines with around 29% here. And I will also go ahead
and draw the leaves. So I will add a new layer. I can add it above the sketch
layer, renamt to leaves. Leaves. And choose the
lighter green color, the taper texture, and draw some leaves here where I
have planned for the leaves, one over here, one over here. That was a small one. One there. One here. One over here. We might need to change
some of these later on, but I'm just drawing the ones that I can
see on the sketch that are not cut off by the
edge of the canvas right now. So I'm trying to draw
as much as possible of the pattern when I have
it in this direction. Okay. And then I also want to add a little dots
that I had planned for. Should I do that?
Let's try it out, tap on top of the line
layer, tap the plus. We can just tap color
buurn here and let's just choose gray color. So for this pattern, I think
that I will add all of the texture at once, and
then we flip around. And when we create
the final motifs, then we are finished
with the pattern. So this might be a little bit
more efficient. Let's see. Okay, so here is a gray color. We can add some dot. Three dots on each. I'm
not super happy with it. Okay, let's just
leave it like that. And then I will try to add
overall texture as well. So color burn on
that layer as well. And let's see. We can just turn off
the sketch for now. So we can see overall texture, we'll rename that to texture. And then I will
add texture width, maybe square on texture.
Let's try it out. Like a large brush or
square and texture. That can be nice,
but it's too much, I think, maybe the
grunge texture. Yeah, I really like that. Let's also try the
Grangi background. Okay, I really like this,
granchy background. But then I think the dots
are a little bit too much. So yeah, I will actually
remove the dots, move away from my original plan, and I will go Oops. And I will actually do
the overall texture again to make sure that I do
it on the full canvas. And then let's see
with the sketch. Maybe we can add some dots. I delete that layer, and I will tap the
line layer and I will just rename this to dots. Maybe we can add some dots
at the middle instead. And I can choose
this beige colour then and use what's the
name, taper texture. Let's just add some dots here and there
instead like this. I like the idea of getting
some dots in here, but maybe not on the lemons. Okay, so let's turn
off the sketch. And yeah, I really
like the look of this. And let's turn on the sketch
again and tap the group, and we will flip everything around and draw
the final motifs. I will tap the group,
tap the selections tool, save a load selection four, tap the transform tool, flip vertical, and
flip horizontal, tap the selections tool to deselect and tap it
again to select, save a load selection three. Tap the transform tool, flipward, column
flip horizontal, tap the selection tool again to deselect and tap again
to select selection two, tap the transform tool, flibard, column flip horizontal, tap
it again to deselect and tap it again to
select selection one, tap the transform tool and
flipwardFlp horizontal. Then I can tap the transform
tool and just rotate 45 degrees four times so that I get them in
the right position. Okay, so now I have
the five and the one. The one is the orange. The five is the mustard. Let's start with the
mustard, taper texture, mustard, and drawing this lemon. So as you can see, I already
have texture here now. So that looks pretty
cool when I draw. You get this really textured
effect, which is nice. Like that. Mustard.
Moving on to number one orange orange our
first orange lemon. And then moving to the line
layer, the dark green, the perfect pencil, drawing
a line here and a line here. And we have some more leaves? Yes, turning to
the leaves layer, tap the lighter green color, drawing a leaf over here maybe. That might look good. And then over here, Okay. So turning off the sketch
layer and having a look, turning on the
sketch layer again, maybe we can add some dots, tap the dot, tap the base. I just add a dot here and there, maybe one there, maybe one here. And that might work.
And now we need to flip the pattern around the
top and the bottom, tap the group, tap
the selections tool, saving load, selection four, tap the transform
tool, flip vertical, tap the selection tool again, save load selection three,
tap the transform tool, flip vertical, tap the
selections tool again. Selection two, tap the
transform tool, flip vertical, tap the selection tool again, selection one, tap the transform
tool the flip vertical. Then I can rotate
this 45 degrees four times and actually also
flip it if I would want to. Like flip it that way
or flip it this way. I think this way looks better. So that you get it in
the right position. And then I will choose
number one orange, taper texture, and just draw
the last of the lemons. So as we prepared so
much from the first way, from the first when we
draw the first motifs, everything kind of just fits from the start here when
we draw the final motives. So that is a nice feeling, and it also saves a lot of time. And then the line, go
to perfect pencil, the dark green, and
drag a line there. Okay, so I will turn
off the sketch layer. And this looks to me
like a finished pattern. Maybe I want to move that dot. I can see a dot there. So I will tap the dot layer, drag around the selection there, maybe move that dot there. So if you see anything in the pattern that
you don't like now, you can adjust it. But for now, this
looks good to me, so I will just test the pattern. I will swipe down with
three fingers, tap Copy, tap at the top of
my group there, swipe down with three fingers, tap paste, tap the
three little dots, split view, tap Safari. And here I will tap and drag my image to the pattern
tester on my website. Is free and linked
to in this class. And this looks like a
beautiful lemon pattern. I'm super happy with it. I think it looks great right from start. So let's move into Procreate, and I can just turn off the
color palette there and swipe it right on the layer
so that I get five copies, tap the transform tool, tap in the bottom left. Top left corner node, make sure you have the change
symbol typed in, and tap in 1,500 pixels, tap the next layer, tap
the top right corner node, type in 1,500 pixels. The next layer, the
bottom left corner node, type in 1,500 pixels, the next layer, the
bottom right corner node, and type in 1,500 pixels. Then tap the transform tool. Swipe the layers together, and here you have your
repeated pattern, and here you have your pantile. I will leave the
repeated pattern here so that I can share
it in class later on. So now it's time to
create our secondary
9. Secondary Pattern: Make the Pattern: So back in my gallery, I will tap a new
patent template, and we can rename this to
bold stripes, for example. Bold stripes. And I will tap into that
and clear the first layer, rename that to background, and drag out my color palette, which is a little
bit mixed up now. And for this pattern, we
wanted the pink background. I will tap the background layer, tap fill layer, and I will actually turn on the
drawing guide here. So tap the actions panel Canvas drawing guide,
edit drawing guide, and here two degrade grid size 300 is my idea.
And then tap done. Then I will tap
the orange color, tap the plaster add a new layer, and just renamed it to stripes, and then I will start to draw my stripes with a taper texture, see how large I want them to be. This will probably be
good like four to 8%, and then I will start
to draw my strips. This is a really quick pattern, so follow along now. I will draw my strips
within these guidelines. I will try to fill out that
whole guideline there. And the next one
and the next one. And the next one. So now you
can see you have one here. You can choose if you want
to draw that like this. I think that I would do it
like this and just keep it not exactly on the edge because that way I can save some time of flipping the pattern around. So I'm a little bit
lazy right now, but I think that's okay because you can't draw
exactly on the edge because then the pattern will be
a little bit, cut off. Okay, so with this done, I will swipe right on
both of these layers, tap group, tap the
group, tap selections, save and load selection four, tap the transform
tool, flip vertical, tap the selection tool again, same load selection three, tap the transform
to, flip vertical. Save the selection tool again, same load selection two,
tap to transform tool, flip vertical, same load
again on the selection tool, selection one, tap to transform
tool and flip vertical. Then I will tap
the actions panel, and turn off the drawing guide. Here you can see that you need
to fix a little bit here. But as this are kind of like bowl stripes
and really texturized, I think we can do
it rather quickly. I would just fix the edges so
that you can see where they meet up so that your pattern
will in fact be seamless. Okay, so that's actually it. We have created a
full pattern in, I think, under 4 minutes. So now we can try
out the pattern. We will swipe down
with three fingers, tap Copia, swipe down
with three fingers, tap paste, tap the three little
dots, split view safari. And here I can tap and
drag in my pattern and swipe down and up and see your beautiful textured
bold stripes pattern. Okay, so now let's just repeat
it in Procreate, as well. I will shut down
the color panel, swipe to the right to duplicate the flattened image so
that I have five copies, tap the first layer, tap in the top left corner node, make sure you have
the chain symbol tapped in and type in 1,500. Then tap the next layer, tap in the transform tool and the top right corner
node, type in 1,500. Tap the next layer, the
bottom left corner node, type in 1,500, tap the transform tool to
deselect if you need to, and then I will just
zoom out so that I can access the bottom right corner
node with the next layer, tap the transform tool, the
bottom right corner node, and type in 1,500. So here you have a
repeated pattern. You can swipe those
together to merge them, your repeated pattern
and your pattern tile. I will turn on the
repeated pattern so that we can export it in.
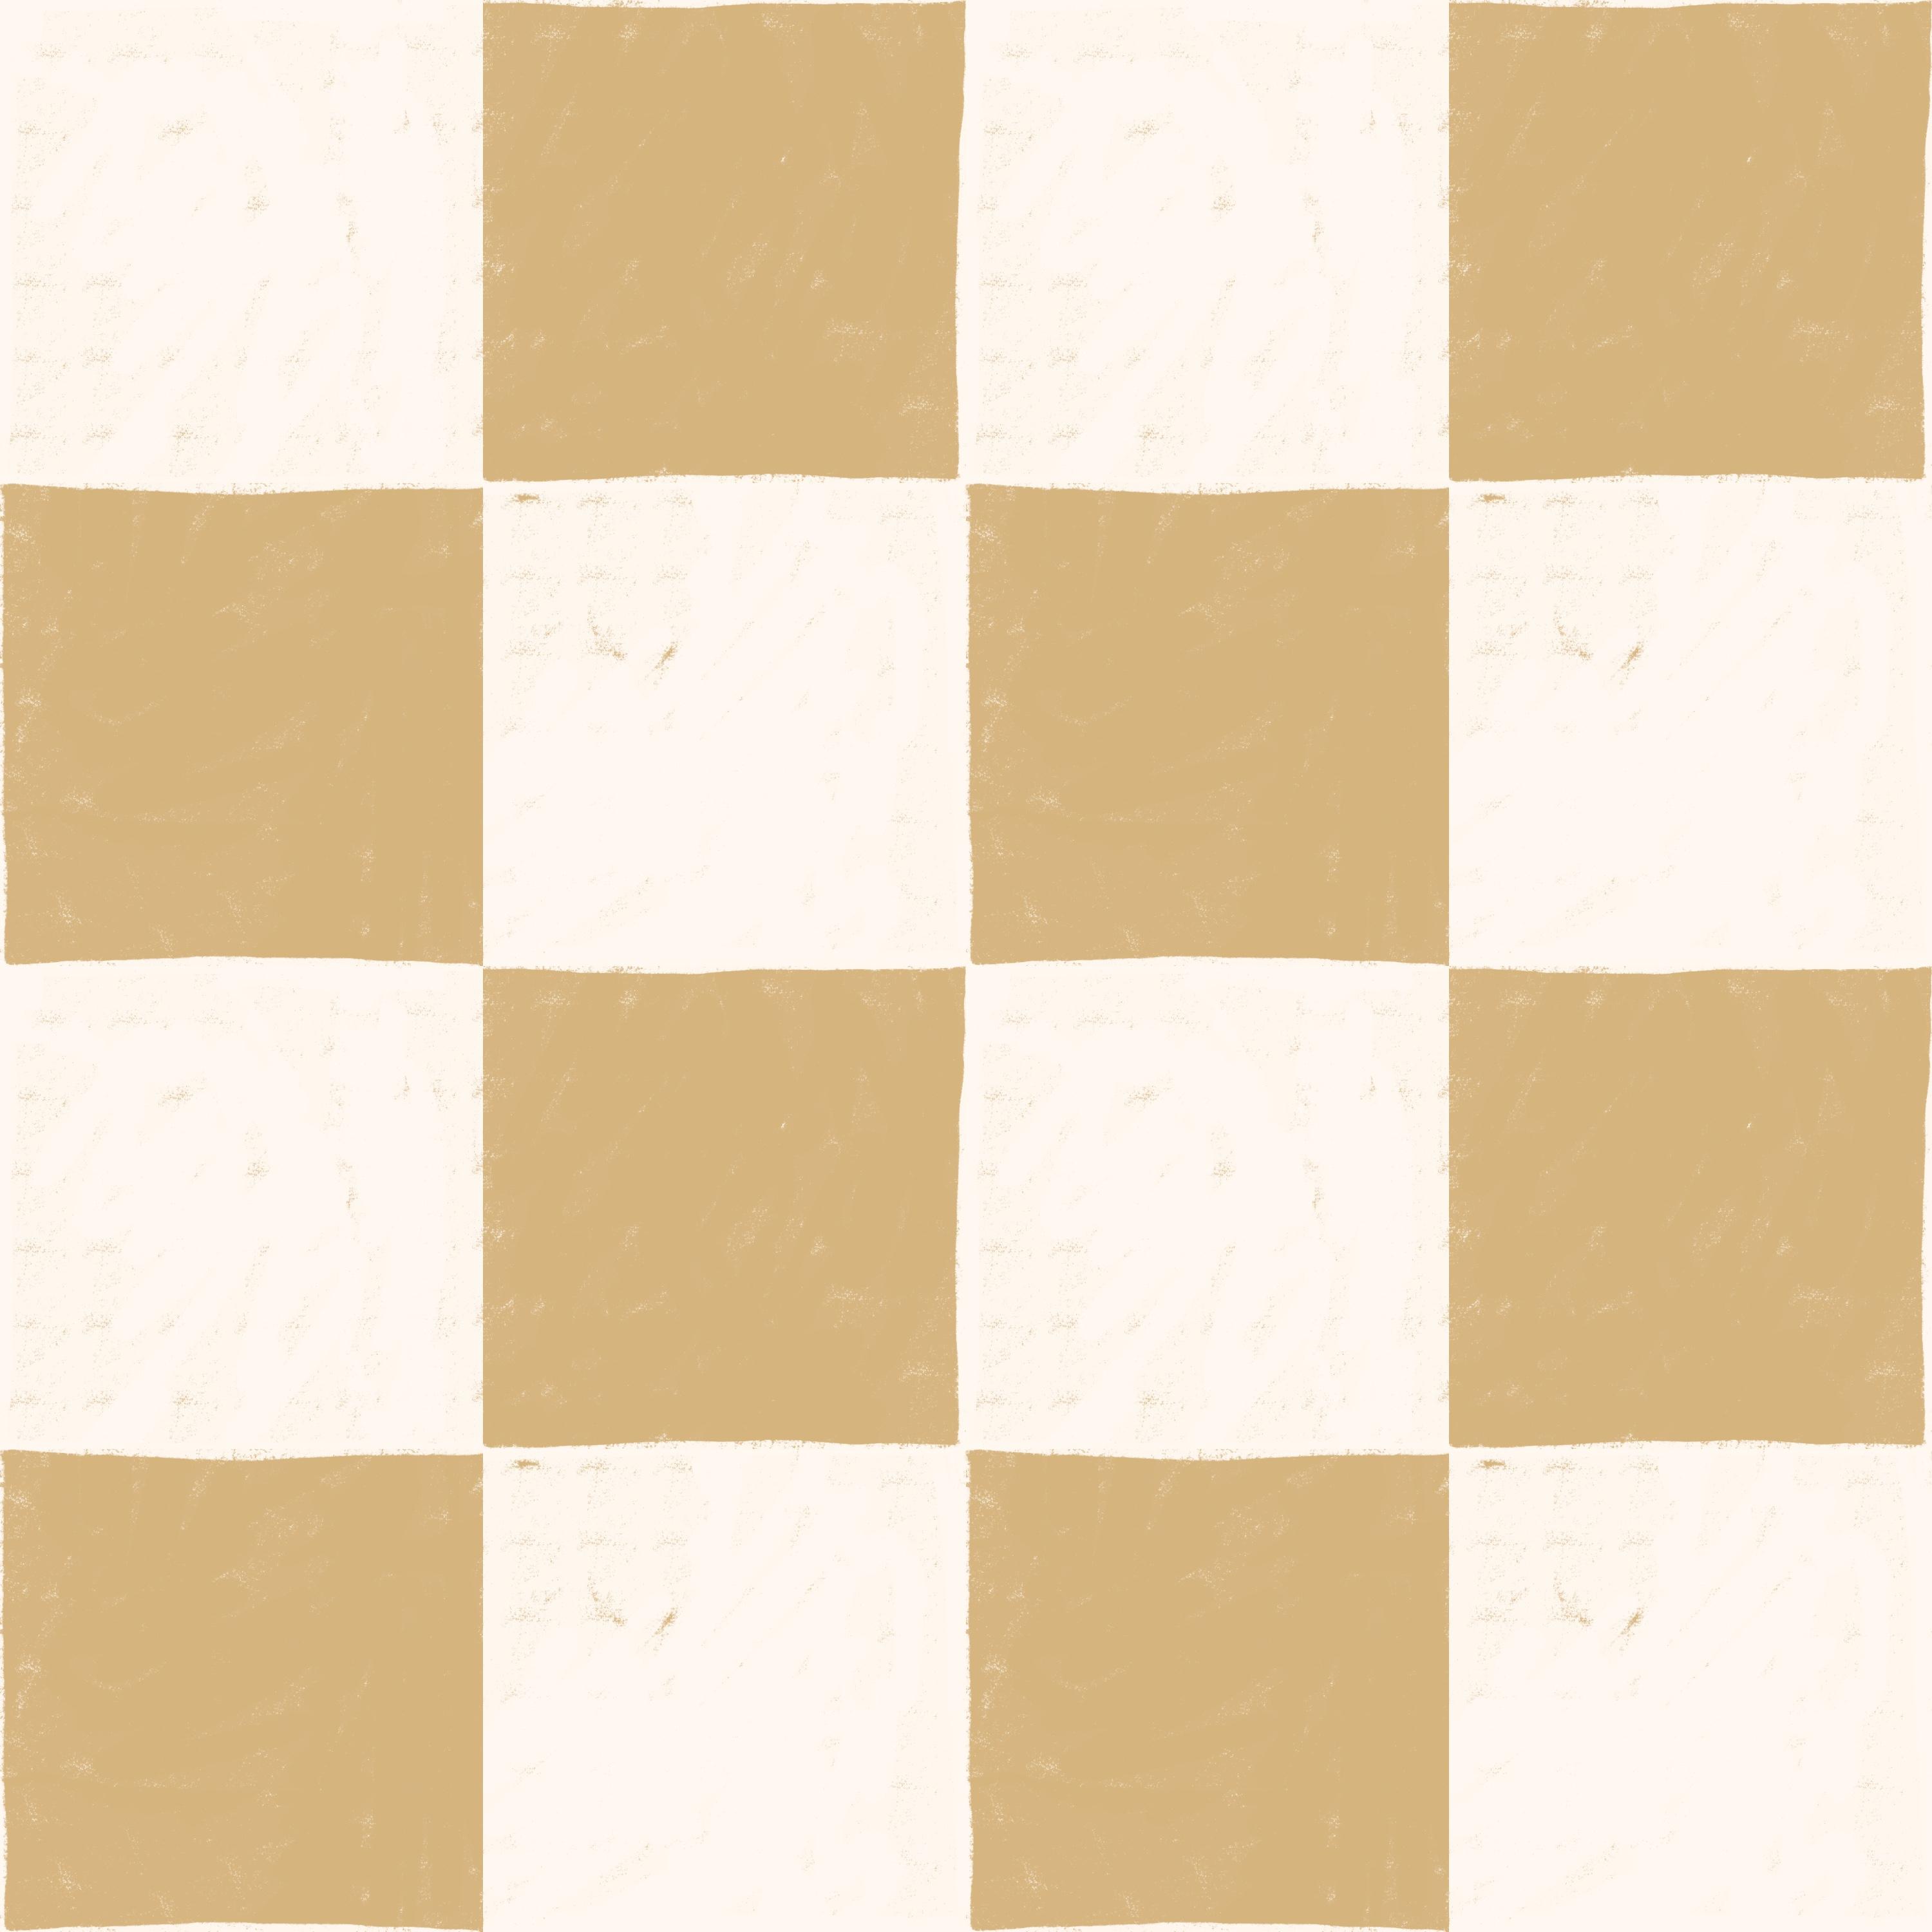
10. Blender Pattern: Make the Pattern: Okay, so it's the final pattern. I'm going to use the final patent template copy
that we created, and I'm going to rename
this to shake board, board, and tap Enter, and then tap into that
pattern template. I will swipe it right on the
first layer to clear it, rename this to background. And I want to go for Let's go for the color
palette, write that one out. I want to do Let's do
this new beige color. Let's try it out. Tap,
the layer tap fill layer. And then we will do a quick shake aboard pattern and then add
some texture to it. So follow my lead
here, tap the plus, add a new layer and tap your
white that you want to use. I'm going to use
that cream white, tap the layer, tap, fill layer. And then I will tap
the transform tool, tap in the top left corner node, make sure you have the
chain symbol typed in, and type in 1,500. Then I will tap to add a new layer and tap
fill layer again, tap the transform tool, tap in the bottom
right corner node, and type in 1,500. Okay, so now you have a
solid checkerboard pattern. So what we want to do now or what I want to do now because I want to texturized is that this is the
look that I'm after, and I will swipe
these two together, and I will start with
instead of the background, I will actually I think I want to make that
texturize as well. So I will tap on top of
the background layer. I'm doing this a little bit. Double work now, but that's fine because it still
goes so quickly. With the taper textured, I can turn off the
background layer and make it really large, and I want to draw on
the full background. So let's turn off
the squares as well. And then I just
want to draw like a textured background like this so that it's not solid. It's a little bit texturized. Okay, so that's good. And then
we turn off these squares. And what I want to do then
is that I tap Select there, and I will turn off the
visibility of that layer, tap the plata at a new layer, and then I want to
use this cream white. I hope you follow my lead now, and I want to draw the texture
on these squares as well. Have the selection
tool to deselect, and there you created a
checkerboard pattern. So for me, this looks great. But if you want a little
bit more textures in the edges, you can do so too. So I will just delete
those that we don't use. And let's just rename this two. Beige and White. And on the white layer, we can use to taper texture
with a smaller brush. Let's see, 11%, and
we can just add a little bit of bunky
look to the edges here. That way, it will look a
little bit more hand drawn. I don't want it to be
a lot, just a little. So like this and then maybe like that so that will make it
look a little bit more wonky. If you would want to add to
those as well, you could. And I could just add
a layer on top here. If I want these to meet up,
let's see how that will go. So I will choose the beige
color and add a new layer, and let's just see if I want to. This is on top of everything. If I would want them to
meet up, I could do. I like this. Okay. So I think that looks good. So now we have kind
of three layers, but that doesn't matter because it's still just three layers. And then tap the group, tap the selections tool, save and load, selection four, tap the transform tool, flip vertically horizontal,
tap the selections to again, save load selection three,
tap the transform tool, flip vertical flip horizontal, tap the selections to
again, selection two, tap the transform tool, lip vertical, flip horizontal, tap the selections to
again, selection one, tap the transform tool, flip
vertical, flip horizontal. Now we have some
straight lines there, so we can just move into
our Bache layer here. And just add some lines there. I think this will
work in a good way. Just a little bit more like human touch to that instead
of being really flat. So now let's just try
this pattern out, tap in the top in
the layers panel, swipe down with three
fingers, tap Copia, swipe down with three
fingers, tap paste, tap three little dots, split view, Safari and tap and drag your image to the
pattern tester on my website. You can swipe up and down, and this is lovely. Shake a word pattern with a
little bit more textured. Squares. Okay, so
I'm super happy with that swipe to the
right on all of these, or on the flattened image to make so you have five copies, tap the top layer, tap in
the top left cornon node. The chain symbol is typed
in and tap in 1,500, tap in the next layer, the top right cornonde, 1,500, the next layer, bottom left cornonde with
the transform to 1,500 and the next layer and the bottom right
cornon node, and 1,500. Then you can swipe
them together. Here you have your
repeated pattern, and here you have your pentile. So now we have created all
of these different patterns, and I will show you how
to recolor the patterns.
11. Recoloring: Okay, so let's recolor the patterns or I will actually show you just how
to recolor one of them, the lemons because that is
the most complicated pattern. So I will tap the lemons
pattern and duplicate it and just drag that one
at the bottom here. I know that that is the
copy and then tap into that and just unshake
the visibility of the flattened images and now
we can recolor the patterns. So if you would want to
recolor the background, let's drag out our
color palette again. You could just recolor
your background. Let's say that you want it
to be a little bit beige, tap layer, tap a layer, and then you could recolor
all of the lemons, for example, then you tap
alpha ok on those layers. Let's just tap alpha
lock on all of the layers with the lemons. And let's just recolor
all of the lemons so that they are dark Green? I don't know. Dark green? No, Mustard. Okay,
tap the layer, tap the layer for all
of the layers that you want to recolor when you
have Alpha lock selected. So now you have recolored all of the lemons to
the mustard color. The overall texture
will just go ahead and be recolored as
it's in color mode. It's in color burn in
the blending mode. The dots that you
need to recolor, you can tap Avloc
on that and let's recolor the dots to
maybe the darker beige. Will that work? Tap the
layer, tap the layer. And there you have the dots. That didn't look good at all. Let's just do them pink
and see how that works. Yeah, that looks pretty nice. Okay, and that is how
you recolor patterns in procrate when you have the color separated
in different layers.
12. Export the Files: Okay, so let's export the
files. It's super simple. What we do is that
we tap select, tap our three repeated images, our repeated patterns,
tap share JPEG, and save the image to your camera roll or wherever
you want to save them. If you want to save
the paten tile, you tap into one
of the patterns, turn off the visibility
of the repeated image, tap the access panel, share and JPEG, and save that image to your
camera roll as well. So I'll turn on the visibility of the repeated image again, and that is how you save your images so you can
share them here in class.
13. BONUS: Have a Look at Using Procreate Mockups: So this is a bonus lesson
about my appropriate mockups. So if you watch this
class on Skillshare, these mockups aren't available
for you to download, but if you watch this
class in my membership Pattern Rebels in
the All Access plan, these mockups are available
to download for free, and you can use them for both personal and
commercial projects. So if you watch this
class on Skillshare and are interested in
getting these mockups, check out the All Access plan in my membership Pattern Rebels. So for this class, I have created
these five mockups with this vacation theme. As I have created with a Mediterranean theme
kind of for my vacation, I went with kind of Mediterranean theme with
the mockups, as well. So it's these five. And let's just tap into one
of these and see how you can change the pattern on the mockups. So which
one should we take? Maybe let's take
this beach towel. You can also say
that this is like a kitchen towel or anything, but I'm thinking that
it's a beach towel. Okay, so how we do this is
that you tap into the file, and all of the layers that are logs on, you don't
need to touch those. Here's an example image
you can turn on and off. So you can tap the mask layer, tap the actions panel, add an inserted photo, and you can insert photo of one of the patterns
that you created, turn off the visibility
of the example image, tap the transform tool
on your inserted photo, and as long as you are
outside of the product, you can place your
pattern however you want. So that is how you
place your pattern, super simple, and I
think it looks so nice. Let's just try as
one of the mockups as well because I really
like this collection. Let's try the suitcase
because that's a fun one. So I will tap that
example image, for example, tap Add, insert a photo, and I will
insert my lemons there. Now I need to drag it in
above the mask layer, turn off the visibility
of the example image. And here you have
your lemon pattern. On a suitcase. Okay, if you want to save this, you tap the actions
panel, share JPEG. You can save them,
share them online, share them on social media. And the actual
mockups are free to use for both personal
and commercial use. So that is really nice. And as I mentioned, if you're interested
in getting these, check out the All Access plan in my membership Pattern Rebels.
14. Final Thoughts: And that's all for this class. If you only get one
thing out of this class, I hope it is that it
doesn't need to be complicated to make a
pattern collection. In this class, we are
creating a mini collection, but if you want to
take it further, you can add more patterns
to make it a larger collection that can be used
for all sorts of purposes. There's no limit to
what you can create, and you have already done the groundwork by
finding inspiration, choosing a theme, and creating
this mini collection. If you enjoy this class, I also want to
recommend checking out my other mini pattern
collection classes with the themes Christmas, Halloween, Easter, summer,
and Valentine's Day. And if you're eager to dive even deeper into pattern design, be sure to check
out Pattern Rebels, my membership program. In Pattern Rebels, you will get access to monthly
pattern design classes, design resources like
Procreate brushes, color palettes, smock gaps, and pattern layout templates. Plus, we have monthly design challenges,
feedback sessions, and Q&A opportunities
where you can ask me anything about design or
running a creative business. You can learn more at
pattern rebels.com. That said, thank you
so much for watching. If you like this class,
hit the follow button, by my name to make sure that you don't miss
out on future classes. You can also tap
my name to go to my profile page
here on Skillshare, where you'll find all of my
classes available to watch. If you have any questions
at all about this class, please ask them on the discusses
page here in the class, and feel free to leave a review to let me know if you
enjoy this class. I would love to
hear your thoughts. Make sure to share your
project here in class, and if you posted on Instagram, feel free to tag
me with my favor. Thanks again for watching.
 Maja Faber, Surface Pattern Designer