Transcripts
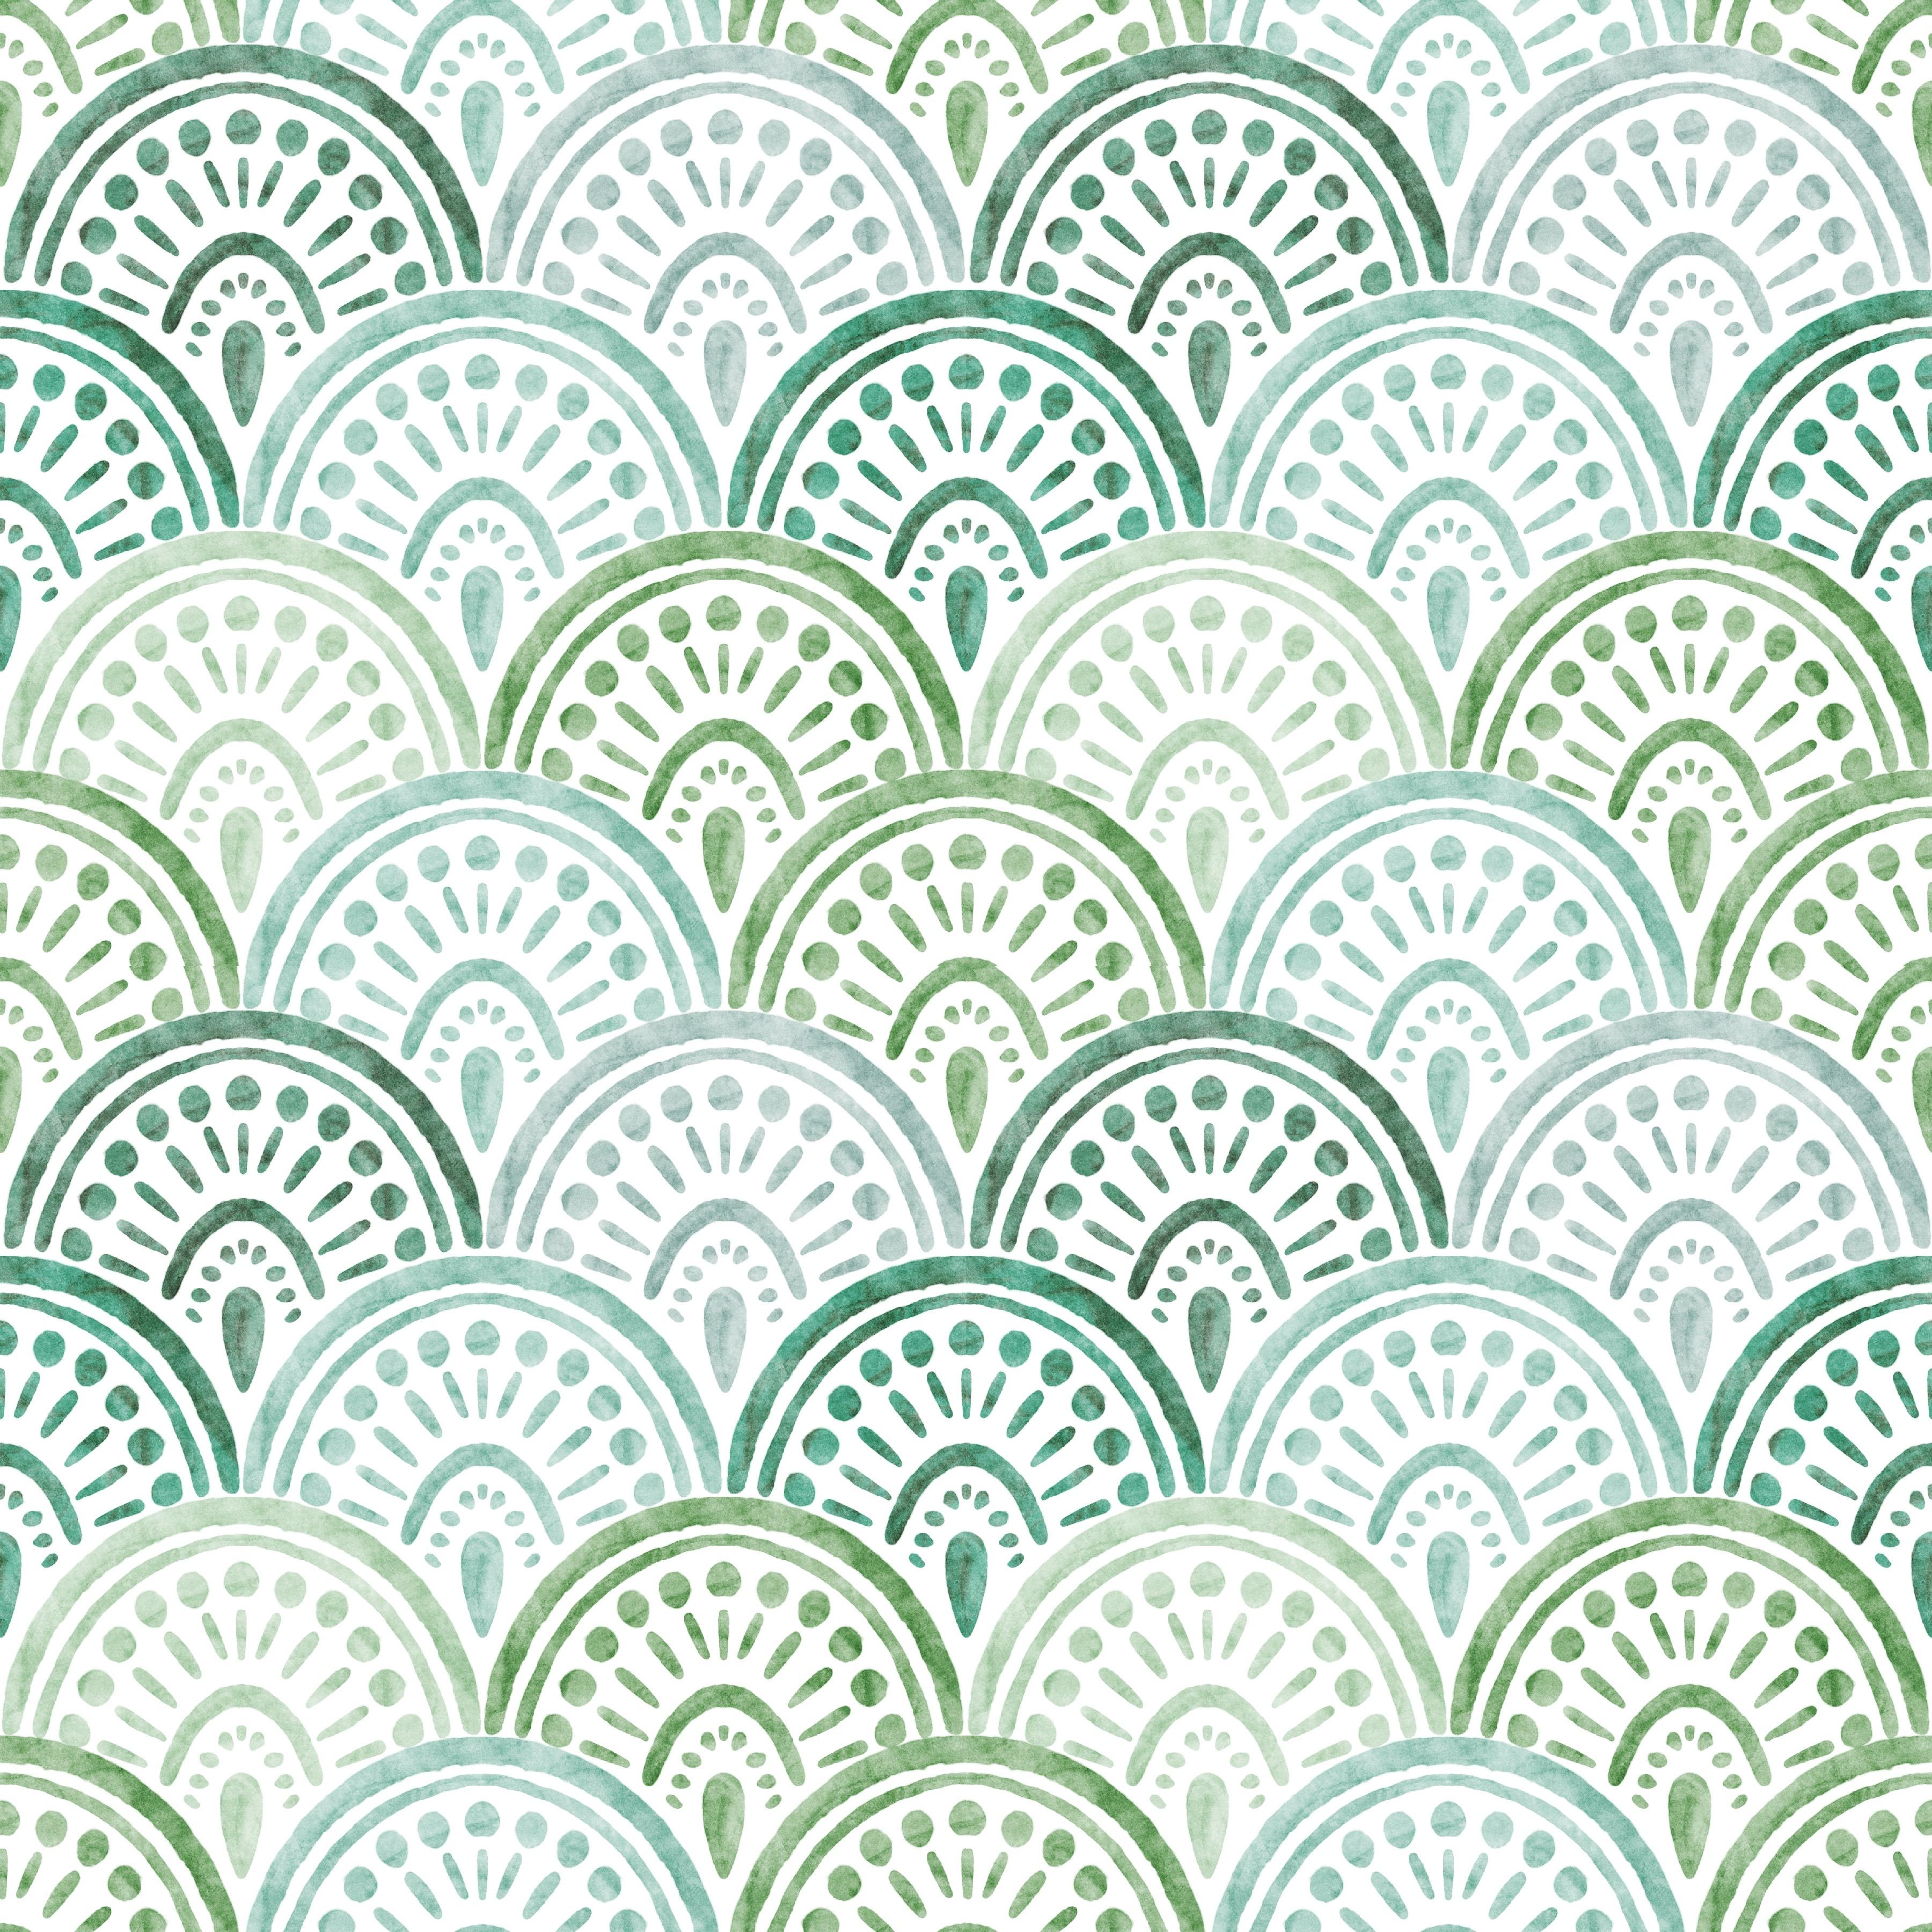
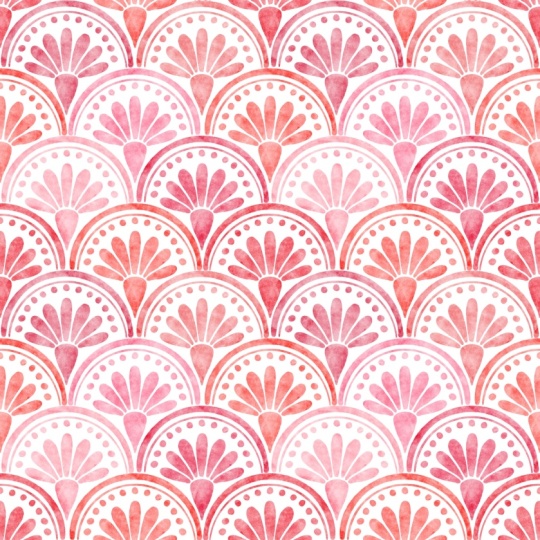
1. Intro: Hey, I'm Maya favor. And in this class, I'm
going to teach you how to draw this sweet Seashell
pattern Ipcrate. You will learn how to create
a geometric scallop pattern, including how to
make a scallop shape to use as a guide when you
draw your motifs Procreate. We will practice on using
watercolor brushes and adding lots of Yumi texture to make your watercolor
look professional. In this class, you will
get free resources, including four procreate brushes and one procreate
colour palette. Join me in this class to
learn the art of creating a stunning watercolor
Seashell pattern Procreate.
2. Your project: This class project,
you will create your own Seashell Scallop
pattern in Procreate. I recommend using
the free downloads, which is the Pattern
Perfect Template, the free Procreate brushes, and pre made color
palette to be able to get the best possible
learning experience when you're watching this class. Please share your
project here in class. I can't wait to see
what you create.
3. Create the Scallop Shape: So the very first thing
that we will do is to duplicate our pattern
Perfect template. So this way, we know that we get perfect selections and
that we can create our pattern seamlessly and smoothly and without
any white lines. So duplicate the pattern
perfect template. I'm using the 3,000 times 3,000 pixel template
for this pattern, and I tap duplicate. And then I will tap into
my copy and turn off the visibility of my guide layer and tap the plus to add
a new layer on top. The very first thing
that we will do now is to create the scallop shape. So start by choosing the moonine brush from the
Pattern elements brush set. This is a brush set that is available for the members in my Pattern Rebels membership. But you can also find this brush in my free
Power Pack Brush Set, which you can find a link to in the description
of this class. You can also choose to use any type of monoline brush that you are
comfortable with using. But if you want to
follow my lead and use the same pixel size and
everything like that, I highly recommend to download my free Power Pack Brush
Set from my website. And I will make sure that
I have black as a color. You can, of course,
use any type of color, but I usually use black when
I create template layers. And then with a monoline brush, and let's see if
7% is a good size, I will draw a circle, make sure that it meets up, and then I will tap with my finger to make
it perfectly round. And then I will let go. So
create a circle that is inside of your canvas that
aren't cut off the edges. And then I tap the
transform tool and I tap fit to Canvas. So now we have a circle that
is filling the whole Canvas. So I will duplicate this layer, and then I will turn
on the drawing guide. So tap your actions panel Canvas drawing guide,
edit drawing guide, and make sure that
you have two degrades selected and bring up the
grid size to maximum, which will bring you four
equally sized squares. With my copy, I will tap
the transform tool on that layer and make sure that I have snapping and magnetics
turned on under snapping, turn on magnetics and
turn on snapping, and then I will tap and drag the new layer to the bottom
right until it snaps, and you have these
yellow guidelines, so you know that it's
placed in the center. And then we tap
the transform tool again to place that layer. Then we will duplicate the first layer again
with the circle, tap the transform
tool and tap and drag that one down
to the bottom left until you get your
yellow guidelines and it snips perfectly to the
bottom left corner. And then we tap the
transform tool again. The next thing that we
will do is to go into our original circle
layer over here, and we will select the part of the circle that
are falling off here. So tap the selections tool, make sure that you have
free hand selecting, and then we will zoom in it's okay if it's not perfect because
this is just a guide layer, but I will select what
was falling off there, and I will just zoom in
over here, drag down, zoom out, and then just drag up and tap the gray dot
to close the selection. Now I've selected this part of the circle that are falling
off the scallop shape. So I will tap the
transform tool, and then I will just drag
that one out to delete it. I will make sure that I have the original circle
layer selected, and then I will go in and do the same thing on
the other side. I will zoom in and select the part there that are falling off
the scallop shape, and just draw over here, make sure that you select
the whole shape, drag up, oops, something like that, and then close the
shape over here. When you have the selection, you tap the transform
tool and tap and drag out of your canvas
to delete the selection. So now we have one
scallop shape, and we can merge these
layers together. So swipe with your fingers these layers together
to merge them, or you can tap merge down
on both of the layers, and this is our
original scallop shape. I will actually rename this
layer to original scallop. And then I will
just duplicate this and I can just rename
this to scallop. So I will save my original scallop because
maybe you want to use that in another pattern later
on and to use it as a bigger scallop
shape because now we will minimize the size
of this scallop shape. And what we will do is to select the scallop layer which is our copy of our
original scallop, and I will tap the
transform tool, and I will just tap
and drag in one of the corner nodes to drag it down until it meets
perfectly in the center, and it says half of the
size of the Canvas here, 1,500 pixels, and then we
tap the transform tool. You can also see that it
is perfectly placed here. So you have made
the scallop half of the size of its original size. Then I will duplicate
this layer and tap the transform
tool to drag it to the right so
that it snaps and is placed perfectly
to the bottom right. So you know where it snaps when you have the
yellow guidelines, and then we tap the
transform tool to place it. Now we can merge these
layers together, tap the layer and tap merge down or swipe the
layers together, and now we have
them in one layer. So duplicate that layer again and tap the
Transform tool and drag up your copy until
it snaps up here, and then tap the Transform tool. If we turn off the
drawing guide now, you can see that we
have one, two, three, four, five scallops
that are hole. The whole shape is in the
center of the canvas, and then we have
some cut off here in the edges where you can
see half of the scallops. So this is our guide layer, the template layer, where
we will draw our motifs. The last thing that we can do is just to merge these together. So tap the layer
and tap merge down. And here you have
your scallop layer.
4. Draw the Motifs: Okay, so now it's time to start to draw the actual motifs. So the first thing
that we will do is to tap the layer's panel, and on the scallop layer, we will drag down the
opacity on that layer. I will go for around 20%. You can go even lower
if you want to, and then we will add a new layer on top of
the scallop layer. So tap plus to add a new layer. And here we will draw our
scallop shaped motifs. So the first thing that
I will do is to drag out my color panel and tap
the palettes over here, and I have my Seashell
Scallop color palettes. I have saved a bunch of different green hues
here for you to use. I will use at least five
of these maybe more. Let's see when we start
to create our pattern. So I will choose the first one, which is called grayish blue
green in my color palette, and I will choose the watercolor base brush in the Seashell
Scallop brush set. Then I will drag up my
size to around 20%. And what I want to do now is to turn my canvas
around because I think that it's harder to
draw a half circle or any kind of geometric shape
on the horizontal direction. I will just twist my
canvas around because it's easier for me at least to draw in this vertical direction. So what we want to do is
to create a half circle. And you can choose to do this really organic look where
you just draw like this, and it's a little bit wonky, and that's completely fine if that is the look
that you want to have. I will go for the more
geometric half circle shape. So what I want to make
sure then is that I have my quick shape turned on. So tap the actions panel
preferences to control, quick shape and make sure that you have draw and
hold tapped in over here so that you will get
a geometric shape when you just hold with your Apple
pencil to make a shape. So as I said, with the
watercolor base brush, we will zoom in a bit, and I want to follow
the line here. So I will start in the center in the center scallop shape, and I will just draw this shape. And if you feel that
it doesn't work out perfectly from the first
try, that's perfectly fine. You can do it a few times before you find the shape that
you actually want to keep. So I didn't really
like this shape, but I will do it once again. So I will tap and drag and
I will make sure that I meet up the other scallop shape over here somewhere so
that I don't go below it. And I will go for I have
around 20% in brush size, and I will tap and drag. And when I have quick
shape selected, it will make me half circle. So if you want a perfect
geometric shape, you tap with one finger, but I want mine to be more aligned to my
template layer here. So I don't want to
hold down my finger. You can if you want to,
but I will just align it with the template
layer over here. So I want to have the edges kind of the same the
ends of the shape. So I will just undo that and try to have the same pressure on
my brush at the ends here. So I want to make sure
that my line don't go beneath this line
and above this line. So I will try once again here. It can be a little bit
detailed to get it right. So something like that maybe. Yeah, I really like
the look of this. So this should work. Good. Yeah. And then I will lower my brush
size to around 10%, and I will draw a
thinner line over here and hold to make the
quick shape and let go. Okay, so that looks good to me. You might need to
try it out a few times until get a shape
that you really like. So the next thing
that we will do is to draw some dots here. So what I will do
is just to fetch the center and draw a
dot over here somewhere. And then I want to draw the same things on this
side as on this side. You don't have to do that,
but I would do it to make it quicker and also to make
it a more symmetric shape. So what I would do then
is to zoom out bit, tap the actions panel,
Canvas drawing guide, edit drawing guide,
tap symmetry options, and make sure that you have
vertical symmetry selected. Then you can just zoom in to see that it's in the
center and it is. And then you tap done. So now it should say
assisted on that layer. If you tap the layer, you should have drawing assist selected. And with the same brush, if we draw a dot here, it should end up
on the other side. So that way, it will be
perfectly symmetrical, and what you draw on this side will also end up on that side. I didn't use the symmetry
tool when I created the lines because that is a bit harder to
make the meet up, but I want to use them
now for the rest of the motifs or at
least for these dots. So with the symmetry tool, I will just draw some dots here. You can zoom in
hoops to make sure that you like the
placement of them. Okay, so it was a little
bit too crowded there. I will actually start here
and try to go up with the dots and meet
them so that they are meeting up over here. Okay, so that looks good to me. So what I want to do next is
just to draw a few lines. So I will start here underneath that dot and
draw kind of a line. It can be a bit messy, but I want it to be kind
of underneath the dots. Maybe I want those to
be a little bit longer. I will just delete them, undo and just make the
lines a little bit longer and a little bit tilted in the same
direction as the dots. For the center one, I don't
want the drawing assist. I will tap the layer, tap off drawing assist, and I will just draw that line without the drawing assist. Okay, so that looks good. And then I think that I want
another line over here. So maybe we should
do a thicker line. Let's try the 20%, and then we'll just
turn my canvas around and make sure that I
don't have drawing assist. And then I want to
draw a line and make sure that it doesn't
go underneath the guide layer here, the line. And I will hold to make the shape. No,
I didn't like that. Oops, I will try to have the
same pressure at the end. So that was a thinner line. Maybe I like that or maybe I don't, I think I
kind of like that. So I'm happy with that. Then I want to draw some dots again. So I will draw a.in
the center here, smaller dots this time. And then I will turn
on the drawing assist and I will start
at the edge here. And draw smaller dots. Okay, so that looks good to me. And then I can see if I want
to have the drawing assist selected or not because here I want to kind of
create a drop shape. Yeah, that looks good. Let's zoom out and see if
we're happy with that. Maybe not completely happy. Maybe try one more time. Not that thick. Swimming out. I think it looks good,
but I think that I maybe want it a little
bit more thick in the edges so that it
meets up the other shape. Let's try once again.
So it might take a few tries with all of these shape until you find
that they are balanced. But what is good is that we will just duplicate
this motif later on, so you won't need
to do this for all of the scallop shaped motifs. So as you can see,
I'm trying this out quite a few times before
I'm happy with the result. I think that this one
will probably look good. Turn off your guide layer
to see how it looks. Yeah, and I think
that that looks good, so I'm quite happy
with how that looks, and now it's time to
add some texture.
5. Add Texture: Next thing that we will do
is to add some texture. So what we will do then is too. We can just unshake the
assisted on that layer. So tap the layer,
tap drawing assist, and I will tap to add
a new layer on top. And on this layer, I will tap
the N and drag to Caliburn, and I will choose the watercolor mix blobby
and go for a gray color. So somewhere around here, and then I will actually tap the layer and tap clipping mask. So if you go higher in the gray, you will get more color. So it depends on the
look that you're after. I will go a bit lower, so light gray or a bit over
the center here in the gray. And then I will just tap to add some
differences in the color. If I zoom in, I think you
can see what happens, and you can also see what
happens on your own screen. And then you can change so you have lighter gray color
and darker gray color. And just go over to add some differences in the texture.
So something like that. So that is how we create the texture on the
actual motifs. And then we will also
create an overall texture. But I will do that
in a later lesson. So for now, this is all
that you needed to do.
6. Add More Motifs: Next, we will create
the actual pattern. But the first thing
that we will do is to create the other
scallop motifs. You can, if you want to draw all of these scallop
shapes separately. I won't because I want to
create this pattern quickly. But if you do want to
create different shapes, you will create one for each of these five
scallop shapes. But for me, I will
duplicate these. I will swipe it right on both of these layers and then
I will tap group. We can just rename the layers. I will rename layer five, to texture, and rename
layer one, two. I don't know. Let's say motif. Then with the group selected, I will swipe to the
right and duplicate it, tap the transform tool, and I don't want snapping and
magnetics turned on here, I will tap the snapping and turn off magnetics and snapping, and then I will tap and drag
to place my motif over here. You don't want it to fall out
of the edge of your canvas, so you want to make
sure that you place it within your canvas and
within the scallop shape. So something like that, maybe. Yeah, that looks good. Then I will duplicate the
original shape again, tap and drag that one down
so that if it's over here, if you just make sure that it's in within the guideline here, then you will be fine when they meet up,
something like that. And then duplicate the
original shape again, tap and drag it to
somewhere around there. And then once again, duplicate the original
shape and tap and drag it to the top
right scallop shape. Somewhere around there and tap the transform
tool to place it. So now we have placed four other scallop shapes over here, and they are in
different groups. So if we just tap the different groups,
visibility of them. You can see that you have
your different scallop shapes here in different groups. And that is great if you want these to be different colors. So I will create mine in
various hues of green. If you want all the same colors, then you can create
them on the same layer. But I want mine in
different colors. I will start with this one, the top left one. And I will tap the Mati layer and tap
paloq on that layer. And then I will
actually just drag out my color panel again
and tap the palette. And let's see. Let's go for a darker green. And this one, I will
tap the darker green, and I have Alpalq on that layer, so I will tap the layer
and tap fill layer. And there you have created a whole different
color of that green. So it might happen that when you change the hue of the color, you might not be perfectly
happy with the texture as darker colors will bring darker textures
as it did here. If you want to add new
texture, you can, of course, do that, add a new layer and add texture as
we did previously. You can also grab the layer and drag down opacity and see if
that works better for you. So I think that that's
fine for this pattern. And then I will move
along on the next one. So it's this bottom left one, and I will tap the Muti
layer in that one, tap Alok. And here, I think that I want to go for
an even lighter green, maybe this one, like
a real mint green. So tap that color
and tap fi layer, and that looks really good. So I'm happy with that
and then I'll move on to the next one, which is the bottom right one. And maybe I want a bit darker there again or
somewhere in between, like a medium green. Let's try this one out
and see how we like that. So I will open up
the motif layer, tap the layer, tap apho
and tap the layer. I kind of like that,
but I don't like that those two are in the same hue. So let's try another one, maybe this darker green. That looks pretty cool. Maybe that can work. Yeah,
let's try that one out. And then I can go into the texture on that
layer and just bring down the opacity a little
bit because I think it's too much when it's 100%. So I'll drag that one down, and then I will tap
the last group, tap the motif layer, Apalok and let's
see if we can do this really bright
green on this layer. Yeah, I think that looks good. If you want to, you can
even try other hues here. Maybe this one will look good. Yeah, I really like the look of that, I will go for that one. It's let's see which
was it, the blue green. Okay, so now we have
changed the colors, and I'm happy with
how this looks. The next thing that we will
do is to flip the pattern around and add the
other scallop shapes, and we will do that
in the next lesson.
7. Add Overall Texture: So we will add
some more texture, and this is absolutely optional, but it can be a nice way to really bring out the
watercolor effect. So I will add a new layer on
top of all of these layers, and I will go for a grey color. So somewhere around two
thirds up, I would try that. And I will go for the
watercolor magic texture wet. And with the largest brush size, I will just swipe over
the whole canvas. As you can see, this is a little bit
irregular texture, and that's completely fine. So just make sure that my
whole canvas is filled, and then I will tap the layer, taped in and drag to Caliburn. If we zoom in, you can
see what happens when we don't have the texture and
when we have the texture. So we get a little bit of irregularity in the
watercolor effect, which will make it look even more realistic and
not digitally drawn. So that is the first one, and then I will tap the
plus to add a new layer, and I will go for
the watercolor magic texture light 100%
in brush size, and then just swipe
over the whole canvas. And tap the layer N and
color burn and drag down. You can see now, if we remove the texture and add the texture that you get
some more watercolor effect. If you feel that it's too much, you can use one of the
textures, for example, you can also drag down the
opacity of the textures, and you can even
change the gray color. If you tap the layer, tap Alpha o and go a little bit lighter
in the gray color, tap the layer again
and fill layer, you will see that you will
get a lighter texture. So it all depends on the
look that you're after. I usually think
that a little bit is good but not too much, so it's too saturated. So I will bring
down my opacity to around 70 or 80% on
both of these layers. Okay, so that was how we
added overall texture.
8. Make the Pattern: So now it's time to
create the actual repeat. The first thing that we will
do is just to tap above the original scallop layer to add a new layer with a plus, and I will go for
white as my color and tap and drag to fill
that layer with a color. And this is our
background layer. We can rename it to background, tap the layer, tap rename,
and right background. And then I will swipe
to the right on all of these layers above and tap. Now I want to select the group with the original
scallop in the center, and I want to duplicate that one and drag it above the group. So we have it over here and then turn off the visibility
of that layer. The next thing that I want
to do is to tap the group, and now we want to choose our selections from the Pattern Perfect template
as we're using that. So I will tap the selections,
tap Save and load, selection five, tap
the transform tool, flip vertical, and
flip horizontal, tap the selection tool again, save a load, selection
six, the transform tool, flip vertical, and
flip horizontal, and in between, you can tap the transform tool or the
selection tool to place it. And the selection tool again, selection seven, transform tool, flip vertical, and
flip horizontal. Selection eight, tap
the transform tool, flip vertical, and
flip horizontal, and then we can just tap
the transform tool and a rotate 45 degrees four times until we get our scallops
in the right position. Now it's time to add the
scallop in the center, and we have our
scallop saved here. So we want the same color of this one as the
ones at the edges. So before I move it, I will duplicate that one again, and then I will tap
and drag to move that one underneath our texture layers
that we haven't named. Let's name them. Overall,
texture one on that layer, and overall texture
two on that layer. So we have our duplicate of our original scholar
shape above the group. So now we place that
one in the center, and now it's time to place
the ones on the sides. And to do that, I will flip
around my motifs again. So I will tap the group. And now I want to tap
the selections tool, tap saving load, and here I
will go for selection four, tap the Transform tool
and flip Vertical, and then I will
tap the selections tool again to deselect, tap saving load and
selection three, tap the Transform tool
and flip vertical. Then I will tap the
transform tool and rotate four times to turn
the motifs around, the whole group
around so that you get them in the right
direction again. And now we want to add one
more color because that will be the color that is in the center here and
on the edges there. So I want to add a
new color on that. So tap to add that motif in the center on the
group that we had outside of our general group. And then I will
change the color. So I will make sure that I have aphlox selected on that layer. And let's choose maybe we can choose this
really green color now. Let's try it out. So I
will go for the very green over there and tap the
motif layer and tap layer. So I think that that
looks really good, so I will keep it like that. Before we drag it in the group, I will swipe the right on the group with that
scallop shape, and I will tap one of
these groups and drag it beneath the overall
texture layers. Then I will check off the
visibility of that layer, tap the general group, and now we want to flip
the sides in again. So I will tap the
selection tool, tap selection five,
tap the transform to, flip vertical, and
flip horizontal. Selection two, saving loads, selection six, flip vertical
and flip horizontal. Saving load, selection seven, flip vertical and
flip horizontal, Save and load, selection eight, flip vertical and
flip horizontal. Then with the transform tool, I will tap and rotate
four times 45 degrees. And now we only have
one motif left to add, and that's the one
in the center. So I will just turn
on the visibility of that layer and drag it
beneath the overall texture. Now we want to turn
off our guide layers. I'll just turn off
the scallop layer so we can see our whole pattern. So this looks really
good, and I can't see any visible lines in our overall texture
or in our textures. But if you do have visible
lines in your textures, you can go ahead and add more texture and
also delete texture. So I know that this texture was the watercolor made
magic texture light. So I will just show
you how to do that. We don't have any
visible lines in this, but if you would
have a visible line, this is how you would do it. So I would choose
the same brush, and I can with the eraser tool, choose the same brush. That one. And on that layer, I can go in Oops, eraser tool, and I can erase a little bit of texture
where I see the lines. And I can also go in and actually add some texture
with the gray color. So I can choose the gray color, and I can add some more texture. So that is how you would fix. If you had some visible lines
in your overall texture, you can go in and erase a little bit and
add a little bit. It's a little bit
hard to show you here as we don't have
any visible lines, but maybe we can
create a visible line. Let's add a new layer. You don't have to do this, but I
just want to show you. So I will add a new layer, and I will go for a darker
gray so you can see the difference and go for
color burn on that layer. So here I have a
very visible line. And it's much darker. But if you would like to
do something about this, you go in and erase
with the same brush, and you can also add on the other side with the same brush to
even out the texture. So that is how you
would do if you would have really sharp lines
in your overall texture. So now we created this pattern, and it's time to
test the patenti.
9. Test the Pattern: Okay, so it's time to
test this pattern out. So what we will do is to swipe
down with three fingers, tap Copy, swipe down with
three fingers and paste. And then we have our
flattened image over here. I will just tap and drag
it above our group, and I will tap the
three little dots. Up here, can find them over
there, split screen, Safari, and then I will tap and drag my image into the
pattern tester, which is linked to in the
description of this class. And here you can zoom in and out and see how your
pattern is repeated. And I think that this is a
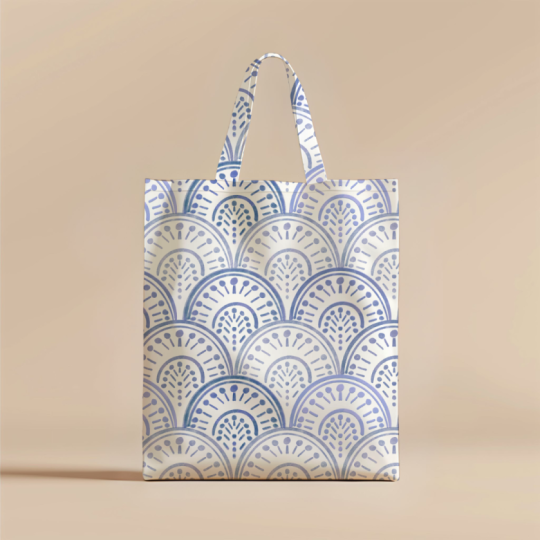
really, really cool pattern. It will look awesome as
wallpaper, for example. I would love this as wallpaper. Okay, so now we
have tested it in the pattern tester
and the loose grade. So now we can test
it in Procreate. And what I will do is swipe to the right on
this layer because I want to keep that
pattern tile image and tap the new layer, tap the transform tool, and I can tap in the top left corner
right in 1,500 pixels, and then I will swipe to
the right on that layer to duplicate it and
make sure I have snapping and magnetics turned on with the transform
tool and tap and drag to place it perfectly
to the top, right. Then I can merge these
layers together. So tap the top layer,
tap, merge down. Swap to the right to
duplicate that layer and tap and drag to place it perfectly
beneath the other ones. So tap the layer
and tap merge down. And here you can see that here you have your repeated pattern, and here you have
your parentile.
10. Make Changes and Recolor: So this pattern
looks great for me. I hope that it does
that for you, too. If you would want
to make changes to this pattern or
recolor some motifs, I will show you how to do that. So I will turn off
the visibility on my flatten image over here. And in my group, I will show you how to
recolor the pattern first. So what I will do then is to
go into some of the motifs. Let's say the motif with
the supergreen over here, and I will tap. Let's go for a blue then. A blue color, maybe
something like that, and tap the layer
and tap the layer. And there I have recolored
the shape, and that way, the texture moves along with it because it is in
coliburn and it's gray. So it's enough if you
recolor the motif layers, and it will work perfectly fine for the
texture to just follow along. That is the best thing about having caliburn
on your texture. So let's just undo that because
I don't want to recolor. So I like it like this. If you would want to make
some changes to your pattern, this is a little bit harder when you created
the whole repeat. So I would actually
suggest that you go back to where you only have the five, it doesn't matter if you
have the ones that we had in the start or these ones. I would start here and
create changes here. So actually, as we copied
all the scallop shapes, I would actually just
keep one of them. So let's just keep this one, and then I would turn on
the scallop template layer, and I will go in on that layer, just turn off Apalq. And if you want to
change something here, I will go in here. Maybe erase something. I don't
know what you want to do, but let's say that
you're not happy with this dot over here, and then I would erase it, and I would make sure to add a dot with the
same brush that I use, so you need to keep
track of the brushes and the colors and then
add that one there, and then I would copy this motif and make the whole
pattern once again. But I would just undo that and turn on the visibility of
all of my scallop shapes. But basically, in this
type of geometric pattern, where we've actually
copied just one motif, I would just go all the way
back to my original motif and make the changes if you end up that something is looking
a little bit strange. So that is how I would make
changes to the pattern.
11. Export the Pattern: So to export this pattern
to export the patent tile, so that you can share
it here in class, you will go to the actions
panel, share JPEG, and then you can just save your image to your
camerao for example, and share it in this class. If you want to export
your repeated pattern, you tap on the layer with
the repeated pattern, and then you tap
the actions panel, share JPEG, and save your image. And then you have
both of these in your camera roll and you're ready to share them
here in class.
12. Next Step: Grab Your Free Starter Pack: Before we end this class, I want to give you
something extra. If you enjoy this
class and want to keep building your
pattern design skills, I put together a free Pattern Rebels Starter
Pack just for you. Inside, you will find two mini classes,
procreate brushes, a playful color palette, time saving templates, and
even a procreate mockup. All designed to help you create beautiful patterns with more confidence and
less overwhelm. It's a real taste of the classes tools and
resources that you find inside the Pattern
Rebels membership without the commitment. No credit card, no
deadline, no catch. Everything is yours
to keep forever. You can grab it
right now through the link I've shared
here in class. Just click Sign up and you will get instant
access to everything. It's completely free. I can't wait to see what
you create with it. The link is in the
description about this class. And if you're excited
to dive even deeper, check out Pattern Rebels
my membership program. Inside, you will get
monthly classes, resources like brushes,
palettes, mockups, and pattern layout templates, plus design challenges, feedback sessions,
and Q&As with me. You can learn more at
pattern rebels.com. Finally, thank you so
much for watching. If you like this class, you
can hit the follow button by my name so you don't
miss my future classes. You can also tap my name to see all of my classes
here on Skillshare. If you have any questions, drop them in the Discussions tab and feel free to leave a view
if you enjoy this class. I would love to
hear your thoughts. Don't forget to upload your
project here in the gallery, and if you share
it on Instagram, tag me with Maya Faber. I would love to see
what you create. Thanks again for joining me, and I hope that you
enjoy this class.
 Maja Faber, Surface Pattern Designer