Transcripts
1. Introduction: Hi. My name is Lenny Bedford. I'm a music video director. I've been featured on some international music magazines and blog's Andi. I've also had some plays on TV with some of the music videos that I've made in this cause. I'm gonna teach you how to make a music video from start to finish. So everything that you need to know to make a music video is in here. There's some intermediate stuff. There's a few little advanced tips here and there, but this is holy for beginners. So if you've never made a music video before, that's okay. I'm gonna talk through everything that you need to know before making a music video. So what I'm gonna teach you today is specifically for a performance video. So a lot of times there are stories or their arm or complicate things that are happening in music videos. I'm not gonna show you how to do any of that kind of stuff, because that's essentially filmmaking that's making short films. But doing it to a music video. What I'm going to show you is specifically performance videos. So you've got artist on there in a room performing. We're gonna make one of those kind of videos
2. What You'll Need: So what you will need first off is a camera. Obviously, the better camera you have, the better the videos. Probably gonna turn out all those smartphones, and our days are very, very good. So if you're using an iPhone or if you're using like a fairly new android, you're probably gonna be all right to make the music video. There's a few things that you need to do differently. Let Iran, but I'll show you That's all good. Yeah, If you want to shoot the music video on your phone, feel free to. There are people in Hollywood that are shoe in films on phones, so it's no out of the realm of reality for you to shoot a music video on the phone. You will also need a computer. The faster is the better. But pretty much any computer that's been built any time recently will probably be all right . Toe a music video. Yeah, the back of the computer, the better. But don't worry. If you've got a like a five year old Mac book, you should be all right. We're going to be using Divinci resolved. So this is a video editing software, but it's free there's a free version of pro version People in Hollywood used the pro version, so it's really, really good. But there is a free version, so get it. If you're using anything else, all of the tips that I'm going to say will work with anything else as well. But I'm going to specifically show you individual resolve, so it's free. Download it. If you don't have it, you're going to need a song, obviously. Ideally, if you do have the song, learn what the BPM is. If you're the band, you should know what the BPM is. If no try and get the information from the band. If you got MP three or a wave file, add a click to the beginning. So just a 1234 and then the song actually starts. This is really gonna help when we're filming, because how does the person that's playing the first bit, you know when to start? Have the 1234 and they'll know exactly when to start. You need a band or an artist, presumably with one that made the song. Yeah, if this is you and your band, fine. If this is someone that you're working for. If this is a friend's band, either way, you need to natural band or an artist. Otherwise, you can't really make a music video. You need a location. This is really, really important because a location is sort of the make or break for a music video. If you're just in a bedroom on Joe, just playing, that's fine. But it's not very interested. If you can find a really interested in location that is like golden, that is literally the best thing that you could do because having an interest in bomb performance only gets you halfway. If you've got an interest in room or an interest in building or an interest in landscape, that's that's what's gonna make the video interesting. You know you're gonna need some lighting if you're shooting outside. Obviously, the son will do most of that job for you, but if you're indoors, you really, really, really need lighting. Andi, honestly, this is, um, this is Mawr important than getting a good location. A well lit, boring room is much more interesting and better toe look a than a poor little it interesting room. You could rent lives like video lights you could buy some cheap on eBay. You could just be creative with tortures. Anything. Just having good lighting is really important if you want to actually jump us a little bit deeper than I'm going to go into a lie in, like just going you. Toobin's type in How toe like a film or anything like that and loads of stuff will come upon how to light things better. You will either need a loud speaker system or a pair of headphones with the drama it aware because there is nothing worse than playing out the phone speaker. And as soon as the drummer starts playing in the music video is too loud. The rest of the band can't hear what's going on. You're gonna have loads of times when people going out of sync they just aren't being it. You can't mind to a song that you can't hear so a really loud speaker system, or let the drummer wear earphones that are loud enough that they can actually just hear it at all times while playing. And that's pretty much all the in need. With that, you can make a music video, but what do you actually film
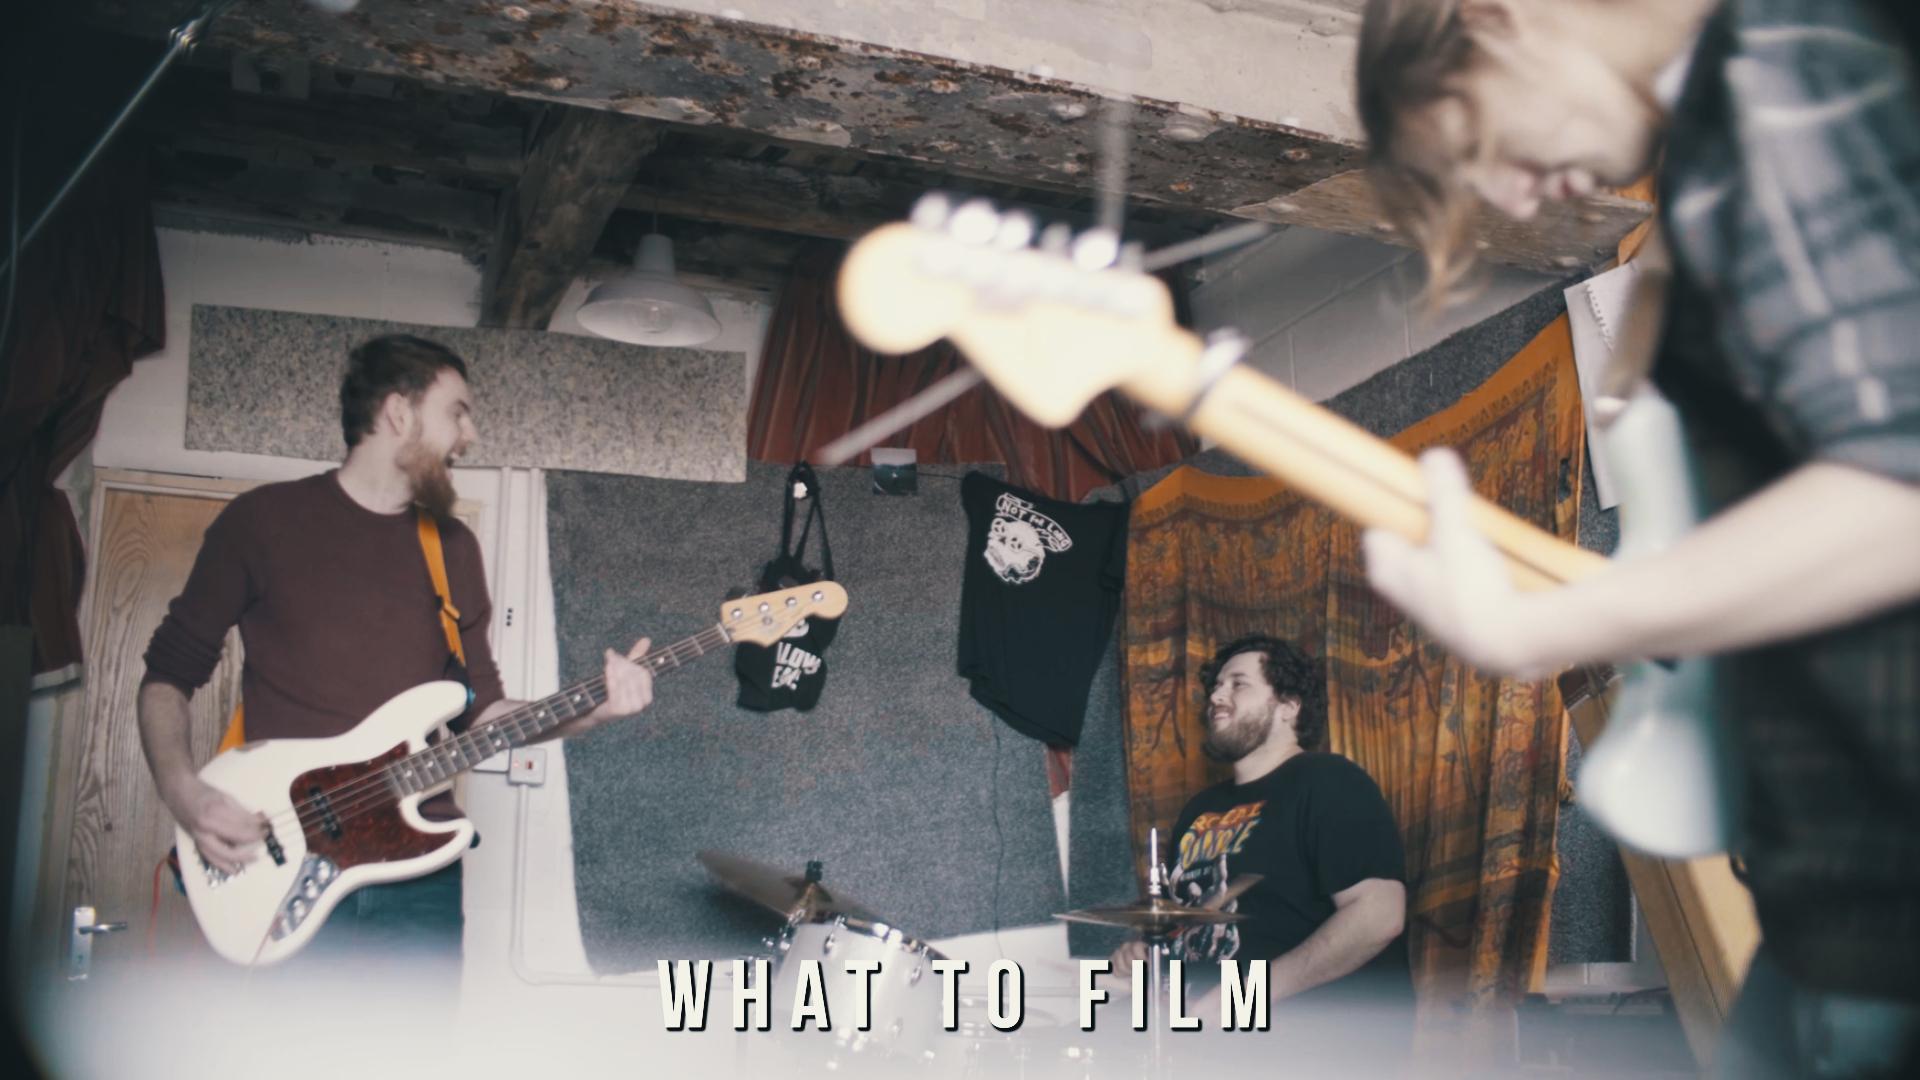
3. What to Film: So it's a few things that we need to talk about before you actually film on. One is kind of a talk with the artist. If you are, the art is, consider this the talk. If not you can. You need to have this conversation with the ice, and that is you desperately need them to perform like their plane to thousands of people. So if they are kind of, ah, shy eyes that doesn't like, go big and loud and whatever, fine. But they still need to perform like that, performing to a lot of people. Same with big lard rock bands. A lot of bands that I've worked with tend to be really, really energetic on stage, but the first few takes the music video. They aren't that they need to act like they're playing to thousands of people because they might be. It's just those thousands of people going to be watching on the screen, but that doesn't mean that you need to not be performing as loud and as biggest usual, because that's what's visual interested in about your band. So you need to do that. The music video to If you are the artist, obviously there's a few things that you're gonna struggle with. One is getting all of you in frame while holding the camera. There's a few ways around this. The first is that at no point are all of you on camera. So if you're the filmmaker, you film every other member. And then when you need to be filmed, one of the other members just films, all of your shots that can work. You may be better just doing a tripod video for the entire thing, so that no one needs to be specifically behind the camera. But there are a few potential issues with having a tripod for the entire thing. Which leads me on to this next point off. Should you go tripod or handheld or both? Eso video that's filmed entirely in a tripod or entirely just locked off shots that aren't moving can be potentially boring. You need it to be visually interesting. You need to be in an interest in location with interesting lighting to get away with having no motion whatsoever. Whereas handheld adds a lot more energy. It's a lot more visual intrigue, and you don't you can kind of cover up a boring background if the cameras kind of constantly moving the example that I'm gonna show you when I actually get to read it. It was in sort of like a dive, Bob, but we did a few specific things. The first thing that we did was we pulled the band off of the stage. We didn't use the stage whatsoever. We actually had the band playing the middle of the room and had the crowd surrounded them. We only had, like, 10 or 12 people turn up. So I needed to make 10 or 12 people look like a full room of people. And we did that to waste. One was we lit it really, really dark so that we only let the band you can see, like the first row of people are kind of let and then you can't see anything behind that. That's because there isn't anyone behind that. It kind of just looks like the people behind on lip. But they actually just on that, I could also cover that up a little bit. But by moving the camera lot, this is a really energetic band that I'm specifically working with so I can get away with moving the camera lots, and it just looks high energy, which is exactly what I wanted. So I was handheld for the entire thing. If you want to go tripod for the entire thing, that's fine. I would avoid mixing. So if you've got some shots with Tripod and some shots with hand held, the tripod shots feel more boring and the handheld shots feel more erratic because of the other ones are also there, so just be aware of that. The one can be jarring to the other and vice versa. So how much should you film? I would recommend get in at least three shots of each member. So three different shots of the drummer, three different shots of the basis to three different shots of the guitarist. Three different shots of the singer, ideally, slightly more shots of the singer. But it all depends on what's important. If you've got a really big guitar solo that lasts five minutes, you're gonna need a lot of shots of the guitarist to make sure that that section remains interested in. You can cut towards different things. So some shots from far away some shots from up close, using different Zoom Rangers. I mean, be creative with this. This is where the creativity of the music video comes in shuts down the neck if you can mount a go pro to the end of the head stock so that when you move the camera kind of moves with it lives in large bands. Do that all of those will work on. It's just about what you want, but just try and get as much coverage as possible. As I say, at least three shots per member on then obviously get some shots of, like, the entire band playing, provided that you aren't in the band, in which case you have to do tripod. If you did want some bands and I mean most bands at first starting out want like a scene at the beginning or end like Why don't we have it so that we were like walking to shop? Pick up arrangements and then the song stars. Just be aware that every band that is starting out once this and it's crap every single time. It's not interesting to watch. Nobody cares if the scene at the beginning is an interesting don't include it. If it's people walking towards their instruments on then put in on their instrument just under it. Police is boring. People will chew now before the sun even stars.
4. Compiling/Organising Footage: Okay, so we should have got all of your footage. Hopefully, the shoot went well. So all of your footage out of the camera out of your fern is going to just have names like thes here. That's just like a code. And each file name will have, like, a numerical value, and it'll just income. And that's really not helpful when we're at it in that. So what we need to do is we need to go through every single file and name it so normally. What you would want to do is name it. What is that? Your recording. So drums and then give a bit of a description. So if the shoot that I've done here, there's only two members in the band. Andi, I'm swapping between who I'm filming constantly, so I can't say, Oh, this is a guitar show. Are this is a drum shop? Because it's no all of the shots on birth, so I have instead just had to do the descriptive. It's close. One close to close. Three close vocals, five wide one whites Lomer lighted if you slow mo shots on down. We shot the bridge separately because we had an audience there on for the bridge. We had the audience or kind of jump into where we were playing. So because of that, we shot the bridge completely separately so that we could do full checks of the entire song . Normally on then do the bridge bits where three audiences jumping around in and around the musicians. We could shoot that on its own and kind of have it in a bit more of a controlled environment. So because of that, you need to go through name everything. So, like guitar close one guitar wide one. This process is literally so that you can look at the name of the file and know exactly what shot is because a little bit later, on the method that we're gonna use, you're just gonna have a list of names and you're going to need to pick files from that. So actually, accurately naming them now is going to save your help a lot of time later on. So with that, I have got some files here. The are no named thes are just files that I'm not going to use. We'll do that Just shots there just aren't gonna work. They are very good, so I'm not gonna use them. Therefore, on what would normally do is create a folder and just call it dump. And then it just popped all of the's, including this. J. Paige don't know what that's there into the and then I just have the footage that I'm going to work with. So I know that when I go into edit in, I can signal this folder here. One little tip. If you are filming on a smartphone, they don't have a consistent for emirate. So if you go into one of these files on going to proper is in details. It tells the frame rate. So that was shot 120 or 119.8 friends per second. That's because it's one of the slow motion shots were going to one of the normal shots. It should be 23.98 23.98 So that's the French. For second. Phones tend to record a variable frames per second, which means that they will differ how many friends per second that shooting that based on what they can keep up with, which is an ideal for editing because a lot of editing Softwares will kind of estimate the average and then keep the entire video at that frame rate. Long story short, that just means that you're gonna have some business out of sync, which you really don't want. So I'd recommend get a program called handbrake. So this is hambre. You can ignore most of the interface. Why would recommend if you filmed anything on the phone? Just click on source folder. So if you never get to your footage folder, if you just select that you can, then so filling a destination, presumably a different folders, you could create a folding here that was just like output or hand brake or anything like that, at which point you could Then, you know, put that in the destination, their style, and it will just go through. Your footage on it will hand brake it literally into one consistent from red 23.9 24 25 30 . If he shot nothing that consistently does, like 60 frames per second, anchoring it to 30 might be a good idea. So with that, we will get into editing. So we're gonna open up DaVinci resolve
5. Preparing for Editing: So here we are in a brand new DaVinci Resolve project. The person that I'm gonna do is never get to the left on side tab. So I just had this talk for a second. Go over to the left inside tablet, which is where we can compile all of our footage if we then never get off which holder, we can't pull all of it into this little area bottom. So it may say the clips, they have a different frame Right now. I shot in two different frame raise, so I shot in 122nd and 24 frames per second, which means that if I click change, it's gonna change the one or the other. And I don't know which. So I'm not gonna click. Don't change If you shot everything at the same for Emory or you were shooting on a phone and hand braked it a quick change and it will just automatically do that for you. I'm gonna done and I'm gonna that it myself. So this is just in your men been. It's not ideal to keep all the footage here, so I'm gonna create a been over here at the side you've been and just called out footage. And then I must highlight everything. Get rid of the Ben on the pop in. There is actually quick way to do that. You can. Actually, you can actually click on the folder itself and drug it into the bin. Three issue is for me that that would have brought over the dump fold to which I don't want . But you could have done that, too. So let's up the project. So if we go into file products settings, so there's few signs on here that we need to make sure that our correct before we do anything. So the resolution I normally had it in 1920 by 9 60 That's the most common resolution for phones nowadays when they're turned sideways. So like landscape. So it's ideal for YouTube. But for traditional anything 1920 by 10 8 it makes sense. That's 10 8 p. So that's just full HD. So you've got then the frame rate. So I'm a 23.9. You may be 30 which is more commonly 29.97 You Mabel so short 25. That's if you'd find out if you don't find that out just right. Click on any file on details and it's just right there. So with that, we should be perfectly So there's a few things in here that you could change if you know what you're doing. If not, just leave everything as is, and you should be gold. So there's a few things that we need to do to make sure that editing is as smooth as possible. Now, there's a method that we're going to use for this. That is multi camera editing, which means that we're gonna use one best file to control all of our footage. So to give you a brief of view of how that's gonna work, I'm just gonna select to don't do this in your project will set it up in a second, but just show you how it works. So I'm going to select a multi cam. Um, I'll just skip over this just for now. So it's gonna create is a multi camp sequence right here. So if I just pull this into the timeline so I can go in here and it just looks like one file, however, Aiken going here on go multi camera clip angle and I can change from angle one toe angle to That's gonna change the other bit of footage that I put into this. So what we're gonna be able to do with this is basically Eddie out forage just from one file, which makes it super, super easy to swap camera angles rather than if we had all of our footage in the timeline like this. So we could edit like this and have it so that we have all of our shots just lead on top of each other, and we're constantly de selecting them and cooking them like this. But it's just so messy to do that. It's much easier to actually do it as a multi cam. So I'm gonna undo everything that I've just done, and then we'll actually set this up properly. So I'm gonna highlight absolutely everything and I'm going to do credible to come eso should we give it a name? So let's just call the multi can, um so we can sink using different parameters. So we consent using the end. So basically, whenever you hit record, did you hit record at the exact same time so that they will all be in sync. Probably know saying without did you press stop it the exact same time in the song? Probably no eso We could do it on time. Good. So if you're using, like a clapper in theory, if it was set to the exact same time could that could work But we're actually gonna go on sound Onda DaVinci Resolve on davinci Resolve. It is going to try and work out where it should sink each clip based on the sound. But obviously, we will play in a song there, so it should do its best to single of these correctly I could do angle name. So sequential is as I just showed you. So it'll save angle one ankle to ankle three. Not very helpful. Whereas if we actually use file name, we can used to file names that we've already given it. That's what was done about earlier with making sure to do that. So this may take a while. Depending on how much food do you have? The more footage that you have, the longer that this will take. But it is going to say it was a lot of time in editing itself, so It's definitely worth doing rather than using the method that I was on about earlier. So you may get an era like this. So essentially saying I tried to sink thes, but I physically couldn't. I couldn't analyzed the audio to sink it, and that's okay. I'm gonna show you how to fix that. I was kind of hoping that get that air a just cause there's a chance you will. So I'm best showing you how to fix it. So if breast OK, they've gone in anyway. So all the original clips now in here on enough footage folder we just have one thing called multi Cam or whatever you happen to call it would pull that into the timeline. You can see that if I just come to random point in the video. So this clippers ended up very, very long, which I assume means that it's trying to sink in a very, very bizarre way. So I'll go here. I can see some audio here, so we know that some things cracking. So if I go to switch multi cam angle, I can talk to any of my angles. There's a chance that some of these haven't seen correctly, so we need to make sure that we sort that out first. I'm also is create Timeline one, which is what we're currently is. I'm just gonna drug that back to master. So it's not in the footage folder, So in multi cam, I'm gonna open it in time line, which is gonna open up the multi come shot as if it was an edit itself. So, as you can see here, I now have all of the footage. The air's tried to sink. Now, for some reason, it is scattered them about quite a lot. I think the ones that scatter the ones that it couldn't think Yes. So it had three that it couldn't sink, which is obviously these three. Why it's decided to scatter them. How it has. I have absolutely no idea. That doesn't seem to be any footage Roman about elsewhere. So before I mess about with those, I need to check that all of the other footage that thinks it has got correct is actually correct. There is one sort. The easy way to test that and that is to just hit play. It's gonna be extremely loud, but as you can see from the audio, which is probably the best way of checking sink. You can see that most of these, like laws and loud bits do seem to be pretty accurate. So we can't actually test up by just in play on a very, very quiet volume. So obviously that footage is coming from within the room off. See, that's not the actual recorded audio. So it's extremely river being loud and sort of unpleasant to listen to. But you can see that pretty much everything is perfectly sync here, which is really, really, really good. So yes, I like peaks like this, a really ideal. So you find yourself something that's like, obviously can only be one thing. You can see how close this is, so we could tidy this up if you wanted to. If I If I turn off snapping, if I change this one frame letter cause look, it's a little bit early. If I change it to one friendly, it's now it's a little it which which is how close of a sink that that is, that I can physically get any closer because of how the frames working stuff They work 24 frames per second, which means I can only choose one of 24 subdivisions per second, which both of these are equally is accurate. So that is fine. We're going to use any of this audio anyway, obviously, because we have a full studio recording. But we do need to get the other clips in here so I can see that this truck has nothing to If I just select the blank space and hit backspace, it will ping it closer. That's close to see if I just go to close to on the audio as well. I just zoom in. You can see here close to is closer now. But I'm going to try and get that perfectly in sync so much assuming on the's here so you can see that this is where it starts. This is where it starts. This is where it starts in terms of this loud section. So I'm gonna drag this into that too. So that's pretty much and think that is now actually battering sync with this. This one is probably pulled that back. It doesn't work because of that 24 frames per second sort of restriction that's on there. So I just need to do that with the other two bits of footage that found as well, I don't believe the bridge ones are that Oh, no. Maybe they're so obviously the bridge shots are only for the bridge of the song, so they only acquire a small amount of space during the bridge. But these two obviously not there for that. But they are called Bridge Bridge. So that's what we need to sink. So if I just press backspace, make sure pressing backspace not believe If you hit delete, it can take stuff away. Such make sure to backspace. So we'll do this one here. Obviously, I've got a bit of footage before the song starts. So this might be talking if I just solo, it will have to be able to find out what's going on here. Yes, he So that's just was talking before before we ended up. Actually, Shirin. So that's fine. We can get rid of that, but it doesn't really matter, because it will never make it into the idea anyway. So we know the bridge one is in sync. Or at least we can assume so. We never actually tested that. So if you look a bridge one and then the trucks that we know we're in sync. That does look pretty bang on. Now we just need to do to them with this. So your first instinct might be to actually sync it up here. But remember that this isn't part of the song. This is before we press play on the CD on this is when we hit play. So if we actually think this, there is no guarantee were hits play at the exact same time. So if we actually go later on in the song will be able to see that this isn't sink to all those two things and know in your sink. So, um, we need to find some form of audio peak that we can really nail this down on. However, that doesn't seem to be that many like we can see a few peaks here in a few peaks here. I don't know if they are the same. So the only real way to get around that is to actually just solar each one and just make sure that we can solve, tell waltz walk. So we have a bit where it's just the target zone and that the drums come in turn up for you . So we know that that is around there. So I convinced so that the one that we're trying to sync up so that hit there is the first drumbeat. So I'm just for now, just gonna get rid of everything before it. So we should not be able to play and not bang on the drum beat, which it is the audio and video minor precinct. Perfectly. So you might ce go over and then hear the drumbeat when it's about here. But the first thing that you hear is the drumbeat. So you know that that is actually going to be paying attention to So that's bang on. So now if I go back to bridge one just so so that peak, right? I think that peak right there is whether it needs to be. So If I pull this now, too as close as I can get it to the I should be able to play both on it should be pretty. I'm sure whether that is perfect. Although these peaks here, you can now see that these peaks here lineup. So you've got this peak here on this peak here, speak here, speak here. So they are pretty bang on, and I can actually get that any closer. So it's worth remembering as well. Obviously we are going to hear this audio at the end, so any mild in consistence is with audio sync, provided it is like within one frame. Isn't that noticeable within the final product? That's not said that you shouldn't try and get as perfect as possible. But if you do end apartment and issues like that, it's not the end of the world that we just need to do the exact same thing with this other bridge Ron are trying to. This is quick as I possibly can. I can now see a few peaks like I can see this peak here in the one that we just think it's a lot harder to see that peak there you can see here. I assume I was a bit closer to the drums on this so you can see the drum hits a little bit , but so you can see that these peaks need to be sink with one another. So that peak there with this big here. So that's I'd say that that is better for that peak than that is. But if you look at the other peaks, that might just be a mistiming because actually pull it that way, that peak, that people look better, that picking that the labor and that one and that one look better, although there's a lot of noise going on here, so we probably best of ignoring that anyway. So if I just go in and so are these two together, hopefully they should sound so in sync that you can tell that there's two things playing. Yes, so that's pretty bang on. So there's nothing I need to really change their, which means that absolutely everything is way too far. Absolutely everything is in sync now. It did this in alphabetical order. So what? The files were originally called. It's just ordered them enough. Macklowe does a bridge bridge bridge close, close, close, so you might now want to take the time to reorder these. You can right click and got moved back up, moved right down. It's no quick, but it might be better if you if you want in a specific order. I want the bridge ones kept separately, so the father there, right at the top. This fine. Like I I just want them elsewhere, But they're either top, so I can just ignore three files at the top every time I'm selected. So that's all done. Which means we can now go back to master on, go back into our timeline. So audio wise, you might get a few weird things. The audio in the video are selected differently. So if I just select as an example wide slumber, the audio is still selected to bridge. Which means that I'm only getting the bridge audio. There s a factually so like this to as an example, close one. I'm I should now when actually loads old theater. I am still getting a really long time line. I could no quick thought a little bit, so I can now see this a hell of a lot better. Now we still have more sinking to do. We need to sink it to the actual song itself. So I'm gonna pull that because I haven't done that yet, So you can actually do it without going back to that first thing. So if I go into here, I could bring the song, so ideally, you'd need a wave file. So adult wife, I've got MP three. Either is fine, to be fair, especially if you're not gonna be pushing it TV or anything. It's just going online. MP three is generally find flight YouTube and everything. If you can get a wild file, please do the bunch and provide you with one. Or you should have one yourself if you are the band. So now we just need to sink this andan this so we can manually do it and I'm gonna show you how to manually do it. It's pretty similar to earlier, but I believe that is also a way to audio sync itself. Um, although it's not as easy as it is in some other audio programs. I can't find it on here. I think you might actually have to do it from within the compartment. You Either way, I'm gonna manually sink this just so I know that it is by on. So there's obviously a lot of talking at the beginning of each file will have a different amount of the beginning of talking, so I can kind of gauge exactly where it will be. X If I select something else, it's gonna be completely different. Obviously, this file doesn't even start until here ish. But obviously, here you can see the massive peak of audio from when we hit Play right the begin of the song so I could try and think that they're But I don't know whether I like this bit of audio here matches with that or matches with the big bit on whether this is on the CD but didn't come through his loud when we were filming. So I'm actually best off picking somewhere else in the song that has an obvious dropping peak. So, like, this area here that I think is in the bridge is gonna be perfect because you can see here there's 12 three peaks here on 123 others, actually four peaks. But it's a little bit quiet on the actual there filming that we did. But you can see here that if I get that pretty close to concede that sink with that, that that that that there's a big bit here and be here and see him as it goes along. So that is pretty perfect. So if I just zoom in now and just try and get the audio perfect. Now you'll notice that because I don't have video, it actually saw audio. I can actually freely move it so you can see that I'm going. Plus 0 +00 I can actually go. Plus, here is one. Before when I'm using video, it's snapping, but with actual audio, it's not. Which means that we can get this way more precise. Obviously, this is only sink into one thing so we can actually click to complete different file, and it's gonna see that was actually a little bit late. So if I actually go between, you can start kind of averaging between all of the audio's, which means that you're gonna get a much more accurate sort of average of wear. Those inconsistencies are with Sink it. There's no real way around that, because if you did sink the audio perfectly, that doesn't mean that the video is thing two perfectly. The video is still 24 frames per second, so we do have to do this work around just to make sure that it's as perfectly sync is possible so I could go to the bridge because I think is this actually a big ridge section? Um, no, it's not the bridges over here, so I could just make sure that it's all right over here. Quite hard to tell. Are so it's like this where it goes from really allowed to really quiet. You can see that it is pretty bang on. Although the sink is an absolute perfect, you can see a few peaks here that looks like there Bang on Sunday. In fact, eyes days pretty All right. Which means that probably all of the footage just find you'll notice that we've not used video for any of this way about to sink use in it video itself. If you're confident in this and you don't want this file just being here, you can either meat or you could Actually, if you want to delete it, this is not necessary. Now we just need the video that is quite Westell, so we will just mu it on. I'm gonna move it down so that the actual truck that I want to be working with is here. So depending on what you're wanting to do for your injury, you could cook. This right is the song starts on, then hit Delete on that. So it pulls everything right. But beginning, at which point the song will literally just start as soon as you hit play. Sometimes you want a bit of an intro. Sometimes I like to just pull it to maybe like, eight seconds or so and just have this in case I want a title screen beforehand. Maybe we shot the scene beforehand. Either way, just having a bit of wiggle room here that you can delete a later date is a lot better than edit and everything. It's a lot about them just added and everything here, and they needed to highlight everything and pull it all out later on. So you know it's there. I just accidentally move that in which case is not in sync anymore. We can solve that just by highlighting all of these files, right click in a link clips. And now if I'm the one, I will move all of them. This is a really good way of just making sure that your sink is going to stay. So with that, we are now ready to edit
6. Editing the Music Video: there's a chance that you shot some specific things for the intro. Or maybe you did certain things that were only for the interim Altra or I don't know it changes for every single video. But I know that I had a shop that looked at the roof and then pan down Teoh, the guitarist playing the open EMR. If normally I would have named that footage something like that. But we did then film for the entire song after it. So I don't know, just called injury because we did film everything. So I do just need to go through here and just find out what that wa So it's not this, although that I mean that could work, but just so looks a little bit shabby. It's also worth noting that we didn't shoot with a click. I put the band in charge of bringing the song on. They didn't put a click on the beginning, which means that for the first few seconds, Guitars isn't in sync with his playing because, of course, season he didn't know when it was gonna hit play, which is why you'd want that counted. So because of that, we did do the work around of. I'm filming the roof for a bit, and then I pan down to him, Play in and you would never know. Close to I don't think is it might be one of the wides out. Here we go. So this looks like I'm filming the roof. Yes. So what I actually did here was I penned up to the roof and then back down. So I want to say that that Jim pick that we found earlier is actually what I need. I believe that this J peg if I bring that into the foot folder is the exact still frame that I want to hold on because I don't want to start here so you can see the song starts if I actually, um you it like if I just hit play there, guys, not ideal. I don't want it to pan up and then back down. I wanted to start up and come down. So actually have this Jeff bag that I could just pull in if I just hit play on this topic now? Yep. So that's pretty perfect. So it's a few tricks I could do to this to make actual video is, it does look like a further that turns into a video. One is that, obviously the darkness he can see. No, he's moving around in the video if you press. But here you don't. So I could add some noise to that. That's a little bit more advanced. So if you did want to know how to do that, you can, I guess. Just look into how digital noise and grain works, but for now I'm just gonna keep that, and then we can get on to doing the actual proper edit. There's a few things don't need to remember here on. One is piercing. We don't want to be caught in everything so quickly. The it's just mental all the time. I've got quite a hand high energy song. I'll just play it for you. So, like when it kicks in, just show you how high energy is. That was influenced massively into what we shot. The movement of the camera is incredibly high energy in moving about the place all the time , because that's the kind of motion that I wanted to show within the shoe. So that's kind of fun that we're working with. So I need to have quite a fast pace in. If you're working with a slow song, you're gonna have a lot slower person pacing just refers to, I guess how quickly these shots are changing from one to the other. But good pacing tends to fluctuate between the two, depending on the kind of energy levels of the song itself. So you need to be matching. So we start with just a guitar playing on its home here, so we don't want it to be constantly cut in between like the guitarist in the drummer. I mean the drummers not even playing. So unless he's doing something cool and interesting, there is really no reason for us to kind of look over there. I have very little shots off the crowd because the crowd was like 12 people. We made it look like more by not light in them whatsoever. You can't tell in the background here that they're on hundreds of people, but that there are hundreds of people that there is very little people in the room, so we didn't do any specific crowd shots, So we do need to just focus on the terrorist. There is no reason that big constantly caught in between different shots of the guitarist. So I'm not going, Teoh, I know that I need to do this shot mainly. Just because it's it's the opening shot that we shall. I want this on the roof. I might put title card up here. So this is the shot that I want to go with. Now that I really like, I really like going from the guitarist to the drummer on it does it within the same shot. So I'm gonna make use of that. I just know cut their Sometimes the best cuts are not going all so right about here. I think I want to make a cup. So for ease of court, and I'm actually going on link the clips just cause if I if I cooked them all while they're linked, it will cut the audio as well. I just I just don't like how that looks, but for security, if you are worried about dragon things around it, making it not sink anymore, keeping them linked will work without for you. So I remember First cook here. So this is now where we get into actual proper editing. I can now, right click on this bit of footage Go to switch multi cam angle and I could swap to any bit off footage that I have. Obviously, if I go to one of the bridge forages, it's gonna be completely black because we only shot that later on. So this is where your life is gonna be a lot easier. You're gonna be ableto just gone to you and just click guitar bass, drums, vocals. I didn't do that, obviously. So I've got a bit have a harder job on What are all these things? I don't know, because I was constantly changing while we were shooting. So if I just got a close one what kind of show is this? So it's shot the drummer. I can't see his face, which is really no idea was bought by this symbol. So I'm not going to use that shop. No, that that could be used. So there's a few things that we can talk about here, and it's so we went from Guitarist over to the drummer. So do we want to go back to the guitarist or do we want to stay on the drama if we went back to the guitarist. We could swap to pretty much any angle of the guitarist, and it will be okay. We're literally changing what the subject is. So the angle can just be whatever you feel like it needs to be. However, if we're gonna be swapping to the drama, ideally we need to change the perspective or change the angle or anything. So this show is quite a wide shots using a wide angle lens on, and it's quite close, like I'm basically just stood on top of this symbol here. If it hits it, I'm a risk of him. Here in the camera is how close I am. Where is this shot that I'm thinking of going to? I'm were for the back. I'm using a long angle lens. This guys over here is really enjoying himself. So this might be a good shot to cut too. So yes, So I think I want us down that until that three hits of the Dead order on this now I think I want to emphasize that a little bit more so if I just play that again and just that dough dough, dough bit it doesn't feel impactful when we just down this one shot. Got that? That that needs emphasis. So we're gonna do that using the edit. So I'm just gonna hit play and I'm gonna hit Stop as soon as it comes to that point right there. So we're going to now cook. I don't I'm gonna cook multiple times over there. There's a shot that's so much movement in it that it's just gonna feel right to just stay on it like old just here. That looks really nice. So know that that doesn't have the emphasis is on. It's not really not really focusing on anything this bit here kind of is, but that's already after anyway. So let's try and pick something. Maybe you can see some do those three, and it's got a nice bit of movement afterwards. Maybe not. That's it doesn't maybe close full circle five. That's a maybe it's not. Not too great a shock that specific, so I can click on one of the slow mo shots on, Even though it's trying slimmer and it's a high frame rate. It's interpreted it as not that for now. I could manually go in here on change clip speed, and I could drastically lower the clip speed on it should go to slow motion and depending on how it works with the multi cam I match after pulling the slow mo shots individually from the original Clips folder to make them slow motion. I'm unsure how exactly that works, but I'm assuming you didn't shoot using a slow motion camera anyway, so let's have a look out. This looks so that was a nice bit of movements. I'm sizing the over the subject that it cuts to is a bit of shoulder andan out of focused audience member. So probably no wide one is back to the same camera angle. So I'm probably and he also doesn't hit the snare right? So you will have this sometimes if you're filming bands, sometimes they just won't play exactly as we're hearing it. So you desperately need it to be that so any take where they're not doing it perfectly. Just don't use the Aztecs, or at least don't use that specific pie that take. So I got another wide angle one here, which is from roughly the same point of view that might look trip. It is what between those two and Let's find out. See, I don't think he hit that. We put a bit of water on the snare drum for that. So you can. Actually, it was like a burst of water that comes off. That was pretty cool. But those three shots, nice creature. That don't look awfully interesting. So I've got to white slo mo to what's going on here. So I'm behind the audience here. We actually Somalians members of front. That might look good. Oh, so that is quite nice. So a zai was on about with the fact that we had very little audience members. We shot some shots with the audience at the back and we shot some shots with the audience at the front. Being able to cut between those random basically means that we can make it look like the room is a lot more full than it actually is. So using that, then my emphasised that, but also it has a nice energy and the sort of it's like we're in the audience ourselves, which naturally feel sort of energetic and lively because you're part of the audience, you know, on DWI. Now swap back to the guitarist, so I might keep that in for the entire duration just because it's like we're doing five cuts here. So we've got the guitarist, but over here, the drum a bit we actually could tow a different shot. The drama cut to another different shot of the drummer and then go back to the guitarists also is quite nice in terms off, kind of get a feel for the space, which we could do with giving the audience a little bit early on is this is the kind of room that we're shooting it. Aunt, Here's how you can kind of adjust to that so soon as we kind of move over. Soon as we move over to the guitarist, I think I want to cook quite quickly. The shot isn't that good, but actually, having that momentum of moving over to the guitarist does feel good. So I'm gonna move over and then immediately co so I'm actually able to cook sort of on the beat, but a little bit off, I think. Let's hope that we have some good shots off the Guitarist year that's of the drummer. So I straight away. Don't one that this is a shot from a similar angle. It's actually the same shot that used here. Is that sharp? Except so it's that shy except I've now moved over to here, so it looks like a completely different shot. That's one thing that we might get away with you. We didn't use that many shots. Like out recommend filming way more than this. But each shock doubles is about three different shots. Depend on where I'm in the camera. And I was trying to swap between those shots constantly, so that has a nice little moment. That was a nice little moment, right? We have a little bit of the German kind of come in there, and then it kind of goes back but doesn't go back far enough. So when it goes back, but not far enough, I might cut away to a different shop. That guitarist again So right, that port. So right there, I think I'm gonna cut once more. Eso pacing wise, I'm actually do a few quicker cuts around here. We've done a lot of kind of slur hold on the shop for a while, so I might now do a few quick Kurtz ready for when the vocals come in, which is about here in the in the audio. So this is Ah, close up shot of the instrument itself. Eso That might be quite nice because we've done a lot of shots focusing on the musicians is people like show, actually. What that doing? So then we have the day, Rondo that happens about here. I'm definitely gonna cook to the drummer for that. Hopefully there's a shot where he's doing it. It was kind of cool. Which point we have got quite a lot of what's going on, which is gonna be nice for the person. So right about that? I think so. Let's have a look about to close one to see what was going on with close one. Maybe. Is this gonna make that cut a little bit earlier year? Just click between the two clips. You can actually swap where the cut happens. See, the shot is in sync because you can see here he's in. Think. However, that little fill that he does that actually want isn't in sync. So I can't really use that shot. No idea what that shows doing. I'm trying to focus on him, but I'm obviously missing a little bit. Oh, this is a really close, but I'm not going to use. I think I was physically moving myself to get better angle. So I'm just gonna avoid that shop, The same shot, the word use and Oh, a little start from behind. That's quite nice. So we're just kind of masking what it is that we're doing. But the energy of what you're seeing kind of encapsulate sound weaken. We can infer that he's playing what we're well, we're hearing, so that might actually work quite nice. And I'm gonna quite quickly cut away from that. I think Tom sighs, we're showing you this because he's doing a cool little thing. But let's show you something else. So I think I want toe may be moved out to the drummer. I'm gonna Sorry moved out to the guitarist. But I'm going to just try the because here we are essentially showing. Here's the drummer, but you currently see what he's doing. And then Oh, here he is. He is a kind of a close upon his face, so that might actually work to kind of give context to that shop. I do think I quite like that I might not go back to the guitarist. Let's go on. Just like we've struck gold. The shot itself moves to the singer when he does that first line that couldn't be more perfect in terms of giving motion, Andi purpose to what the camera is doing. So rather than just showing the drummer and then cook in a way to the guitarist one seamless shot Perfect. We're going to use that. So that shot then gives context to this where we can really see what the drum. Mysterion here is what the drum experience on then the vocal start on is the vocalist. Let's go. So and then it goes back to the drama. But I don't think I'm gonna use that. So I will stop here. I'm gonna actually stopped at the bit with guns across, and I'm gonna hope I'm gonna hope to God that I did another shot where I panicked roughly that exact same time. Maybe, Maybe, maybe no. Now that I could I could fade between the two and actually make that really kind of seamless. Let's have a loop. So forget video transitions, cross dissolve, pulling a little crusts off, Just, you know, that That looks really kind of nice. So that's just look of literally the fact that I was shooting and constantly swapping between the two certain times when I was filming, I knew that I would want to go from the singer to the drummer because the song literally does the same kind of thing so that if we just listened to the song here, you're gonna hear vocals and then you can hear in the instrumental section. So naturally, when I was filming that I wanted to have it so that I was focusing on. The vocals are specifically the face of the guitarist on, then move over to the drummer for the little incremental section. So I did that on a lot of text, which means, like and then swap between the text during the transition, which means I can make it look like one continuous shot. But the camera is moving too far forward, so I'm going to stop at in here. Obviously you you can keep going for the entire thing, and then you will have a music video, so that's about 30 seconds in. So if the songs like three minutes, it will take obviously like six times as long as I've just taken here. But it's really not as long as it would be if we were having a load of footage all in one thing, and we were you in it and whatever. So that's quite nice. There is one thing that I did for this music video to enhance the energy a little bit more . This is really to taste, but I will just show it you anyway. So for those hits on the snare, that I actually zoomed a little bit is a full. I don't have to get this perfect. I can actually move these abstinence, but for that little bit that if I just going to the inspector and Sumit shows a little bit , you can bail in its that. But it really emphasizes what is it? And I'm gonna zoom in a little bit more just to make it really obvious that I didn't do it this much in the actual music video, right? Did it? I did do it, emphasises it where? Too much. But if I if we just do this to, like 1.1 just little bit, especially that little hit on the on the cross symbol that just that's that's really, really nice. So just like that, we have an edit. So we have 30 seconds of Eddie. I'll just play this for you from the very beginning and office. They'll stop it before it just goes on forever with the one shop. And just like that, we have the 1st 30 seconds of a music video. So you see here I would have the titles. Andi, I would have liked my name or the band's name or anything like that, which I did dio in the notes. You can check out the actual full final music video for this, but yeah, do that and you will. You will have an edit.
7. Colour Grading (Beginner): So we're now going to move on to color grading. So that's gonna be adding the final look of what the music video is actually going to look like. If you shot this on a phone, there's very little that you can do to kind of make it look even better without just kind of making it look worse accidentally. So what we're gonna do is we're gonna add a new truck, and we're gonna add video track right at the top here. We're gonna go into effect. We're gonna go adjustment clip. We're gonna pull the adjustment clip onto the very, very beginning of of whether video starts. Why? Just got rid of my clip there. So make sure to do on an empty track, not on a truck below that because it will just get rid of it on. And then I'm gonna pull it out. Zoom, zoom, zoom all the way to the very end. So obviously you should have. I'm just going to clip in on sorry clipping and then it in, snapping on on. Then just snap it to the last bit of forage. So the song ends here. I'm gonna just get rid of that there. Hopefully you finished you already so that you will hardly ever finished ending Wherever that last video clip ends, just pull that there if you don't make this a little bit bigger. If you go between the video and the audio, you can actually pull the audio bit, like all the way down so that you can see more on the video. So that's perfectly the eso. If you have any titles or you have anything that's like words over the top, make sure that they're above the adjustment clips. You can, like, move the adjustment track down so that it's only above footage. Make sure that all of the foot just below it and anything else is above it. So we're not gonna click on the color tab, which is this one here might take a few seconds for it to just load. So we're gonna call a great we're gonna do very, very basic color grading. There's a lot stuff you could do with this, but I just want to show you the absolute basics. So I've come over here so there's a few different options. If you go to this middle one and then go to the third option here. So you've got that one. That one. And this one. So you've got shadows, Midterms, highlights and offset. So shadows, as you can tell, are the dark areas. So if I just make that brighter using the thing all of the shadows become brighter. If I make it darker, old child has become darker and is very hard to see anything. Seven mid tones day. Um, they exist. But in the shot specifically, they exist very little. You can see that the midterms are just this bet on the guitar here because of how physically dark it was when we shot. And then highlights are the absolute highlight. So this over here in a Bev, the Ryan over here. So, um, to kind of help you with this. There's a graph here. If you don't have this, just click that little graph there and I'll bring up the scopes and then you can click parade. So this is kind of an analysis of what's going on in your shop. On the lower is the darker is and then you got the three different color channels Red, green, blue, eso, as you can see here, there's a big spike in brightness. That's this light here. If I go to a completely different shop. So like this war, you can see that it's a bit more so of average because there's a lot of average brightness going on here and darkness over here. Average brightness here, darkness over here. So, in essence, you want to find a shot that is most representative of the sort of brightness Andi color that is across your music video and just sort of mess around with these just to make it look as good as you can. Don't go too extreme. So you don't like pull the highlights of way to motion and the shadows down way to Merchant , then is like a really extreme look. That looks, I guess, okay. A few groups like an extreme nineties music video look, but it's way too extreme. Subtlety is key here. Honestly, color grading is an entire art form, so if you are new to it, just basil or just don't touch it. If the footage looks pretty good, you'd be better off keeping it like that. The maroon in it with really over the top grade. One basic thing that most people will do when color grading is Just grab this curve here, which is the absolute left, one on the absolute left on him. Punch up a little bit like that and then click down here and put it down a little bit on defy. Just turned that often on. By selecting the node that currently edited do control day, you could just see the before and after, and it just it just makes it a little bit nicer. In contrast with that, there are a few things that you can do to kind of have presets and how these are called looks. So I'm going to right click, add a new node at new, correct honored and just drag it into the pipeline. In short, this is just different ways of that it in. So this has that edit on. I go into this and do a completely different idea on this on. It will do both so I can turn this one after just show you that one second in this one after Just show him the insane extreme one that we did. Obviously I don't want that. So I'm gonna delete this one of just making you on to note drug. So there's things called looks. So if I click looks up here, thes are kind of in short, there essentially filters. They don't work like Phyllis, but they kind of give you the end result that it filter would do. So there is some fellas the the awesome looks that come up with a DaVinci resolve on its own. But you can try some of those. There's loads that you can get online. But if you do happen to get a look that you kind of like the look off on like Oh, yeah, I know that looks exactly like Why one? That's kind of I guess the introduction to color grading is walking on how that looks pretty good. Let's room with that and then later on, you can kind of get your own looks for stuff. I specifically one to make this black and white, so I'm not going to use a look. You could if you wanted to, but I'm gonna go back into this original note and I'm going to go to saturation, pull it all the way down, and then this is not black and white of the contrast. A little bit. Just make it a little bit more moody. Onda, Honestly, that might be done. I would think with this a hell of a lot more. In the actual final version off the music video, I pulled up this little thing here to make the blacks gray rather than black. And it gave you this kind of vintage look, that's sort of the look that I wanted for it. You don't have to do that, but just pulling up the blacks. I'm pulling down the whites a lot and not a lot, but just a little list will go a long way to making it look kind of vintage. So with that, there's a few things that you're now going to need to do, and that's go through each shop and just make sure that it all looks good. There may be some shots that look a little bit too dark, so like is an example. This shot here looks probably a little bit too dark, so I could mount click on that rather than the adjustment layer that we met. And I can just this on its own so I can actually grab the curves and maybe make it a little bit brighter so you can see that that's pulling out so much more detailed specifically on this audience member but on the drums and everything. So if I now just play that from a little bit, that fits so much better than if I just turned the note off for that specific clip. Look how much darker that is, like far too dark. So so if we do, that turned out from the adjustment layer and make sure that you already in the actual right thing, pretend this back on way there. So I would go through now and just do that to every single shot. This takes a very, very long time, but it will give a conscious don't look to your entire music video and make it look so much more professional than if you just have some shots that too dark, some just that to contrast it. Teoh. Too many shots that are Teoh Satya Red. Just go through and just make sure everything is consistent. Ideally, you would do this first, but honestly, if you put on that final look, it's a lot easier to see. The inconsistencies is when everything is a bit more kind of contrast in two. Your final taste on with that. That's kind of the basics of color grading.
8. Exporting: So let's move on to exporting the final file. You've done your at it. You added any titles that you might want. You've color grated. We now need to deliver it. So if you go over to the little rocket ship at the bottom, that is the deliver top, so you should see your final thing here. If you're in any other timeline, make sure that you click that and go to the actual timeline that you were working in. So there's a lot of options here. So what we're gonna do is we're gonna collect H 26 form master that's solved the Universal Export File type. We're going to select a folder for it to save, too, and then we're going to give it a name on the file name. So, ideally, you want the band's name Dash. It's song name and that in brackets do version. If the if this isn't finished on that you are still working on it. I would do no 0.1 on If it is finished, I would do 1.0, so every single time that you create a new version don't save over the old one increments. So if it's not a final version. Do not 10.1 and then do not by doing them three of them, for their part and then six on if it is the final version, and then the band gets back in touch is like our Can we change this or like Oh, I don't quite like how this looks. Can we change that when you do the next one from 1.11 point 21.31 point for just do like that. So it's not only a lot better for cataloguing and making sure you know what the newest file is, but you also get to keep all of your old ones just in case there, like how do you know it was actually better before you changed that? You don't have to go in and re edit it all again. You have that previous version. So with that, I'm going to say this is 1.0 is finished, so under video, so format quick time, you could also do, and before that worked to honestly, if there's preference, go with it. If no I gentle, rendering quick time doesn't really encode a you could do never until quick saying that Intel quick singers sometimes given me mild artifact in, so I tend to just run a But again, if you know what you're talking about, you can kind of go with whatever hits 264 Obviously, resolution should be what we selected originally for Emory. It should be what we selected originally. Obviously, we wanted to be the best quality. And then we can go up to render queue that now shows up here and we could go start render on. It will render the video out.
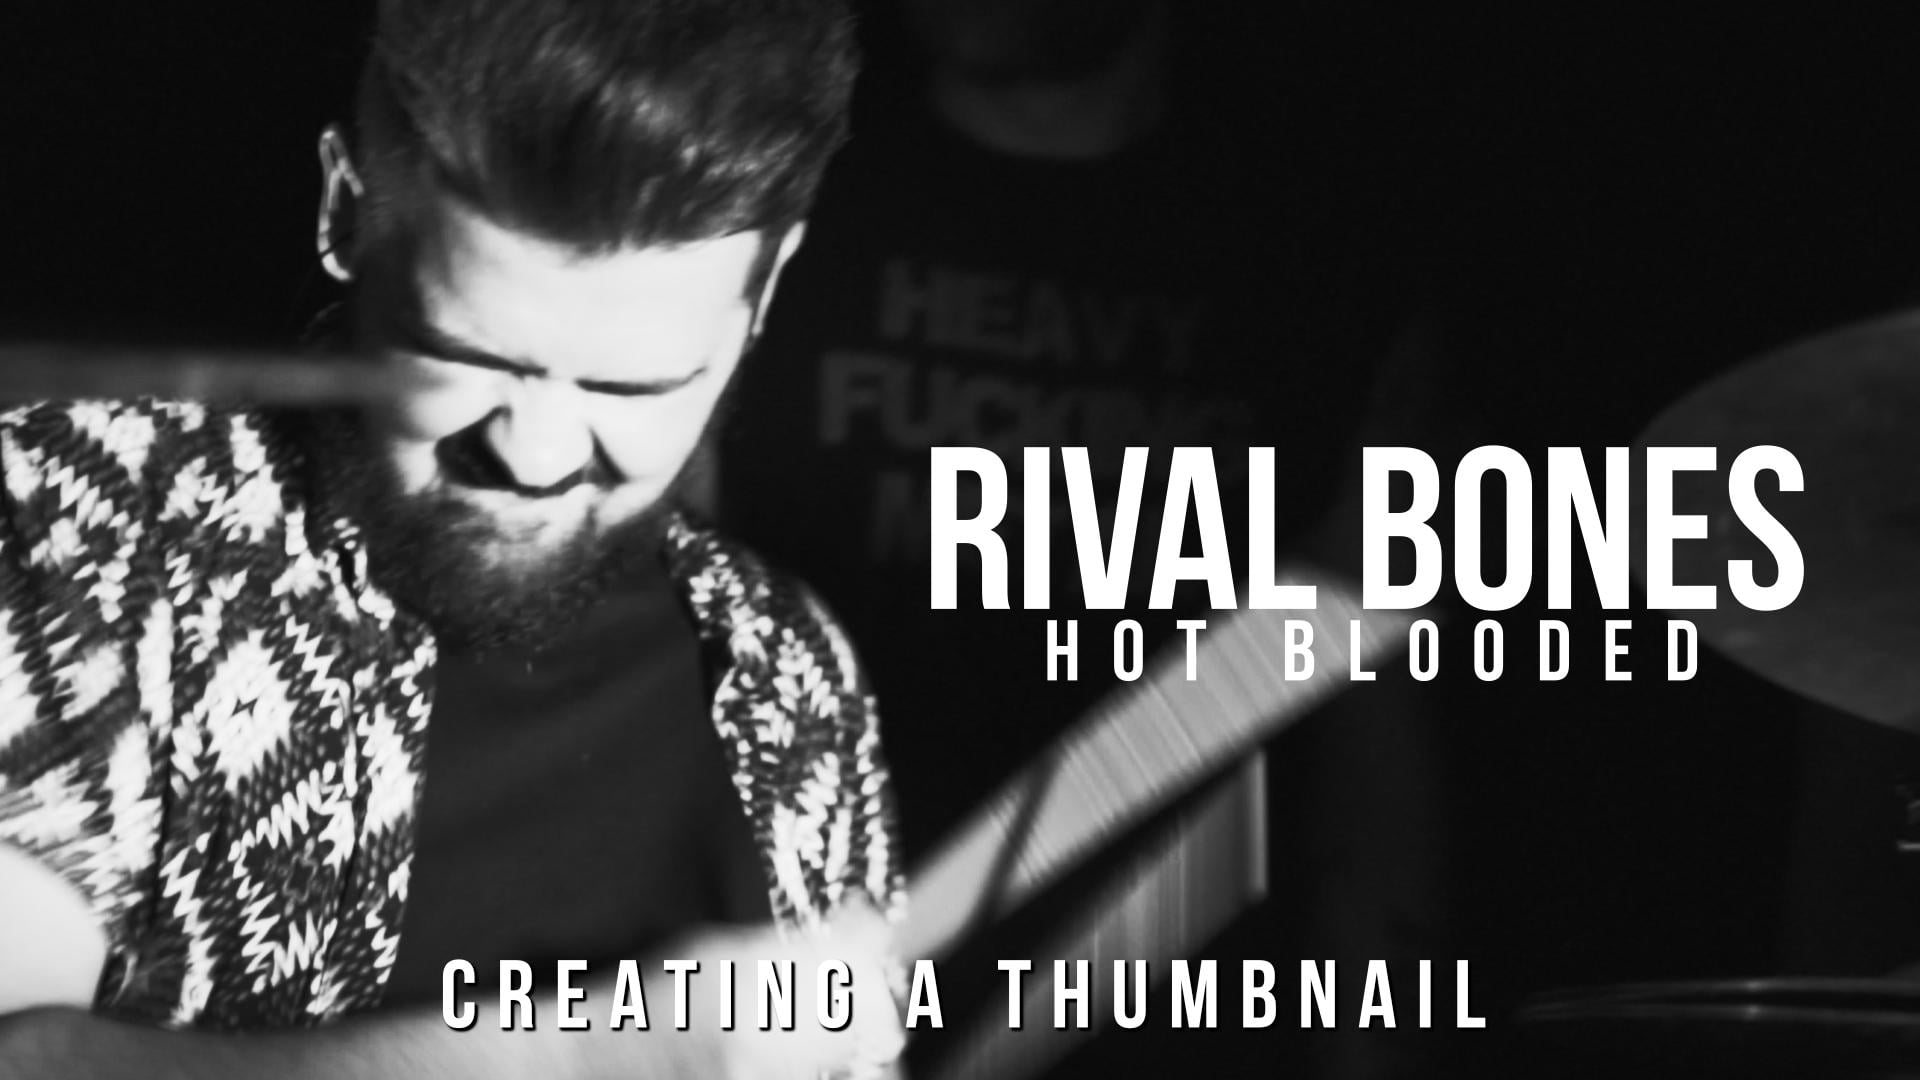
9. Creating a Thumbnail: So if you want making this music video for your own band or you're working for a client but you want to go above and beyond, making a thumbnail is ideal, especially if this is your own band. You're gonna need a thumbnail. So when you were blood it to YouTube or Facebook, it's gonna ask you for a thumbnail on a lot of the times. It will just randomly pick maybe three to choose from. So it'll just, like go. OK, Do you want this? Do you on this or do you want? This is the female, and obviously all of those aren't very good, so you just kind of have to pick one. Whereas if you make your own, you can properly tailor it so you could do this inside a photo shop or gimp is another photo editing software, but you can actually do it inside off. DaVinci Resolve, obviously is. It's free. So if this is all you have, I'm gonna show you how to do it here. If you have a shop feels. But if you have a shot, please feel free to use for a shop. So I'm just gonna make a new truck I'm gonna have an adjustment layer to it. So we're gonna use this to actually kind of tale of the thumbnail, exactly how we want it. And then we could just delete this afterwards, and then everything's back to normal. So I'm gonna pick from my edit office. I'll I only did, like, the first day Second. So I'm gonna pick something here that is gonna be my thumbnail. So obviously, this is if this was thumbnail, It just kind of looked like someone filmed it gig. So I want something that specifically it sort of looks like a music video. Um, well, maybe one of these shots off the singer. Maybe. Maybe, Maybe so. One. That's so you can see here. There's a lot of movement going on, so it's a little bit out of focus. So we do want to make sure that it's Ah, a shot that is so of I was shoppers. We get it now. That's an action shot. Look at Look at the emotion in his fist. Yeah, let's go with that. So let's use this. Maybe I want to kind of crop it, love it. So I'm gonna go into the top adjustment clips or the one that specifically for the music video. So I could name a up here this for the thumbnail. So? So I'm gonna call that therm. So then here, I can see that it's for the thumbnail. So I'm gonna zoom in a little bit because, uh, obviously thumbnails were a little bit smaller than videos itself, So I want to make sure that you're looking exactly where I want you to look. So if we do that, then I contend, Officer, that's what it would look like originally in the music video. And this is why, with some nails kind of look like I could also go in here and go tiles and, you know, pull a bit of text on Teoh a new video when this whole loads in here. I could go rival booms and then pick sort of a nice, fun kind of adjust size. Here, pull over there, put the No, let it. In fact, I'm actually gonna take that, could it? And then in here at another new track, old pull that up So it duplicates it. And then for this one, put the name of the song and that I could just pull that down. Then I met for the band name. Just make that a little bit big for the song name. I'm gonna increase the truck in so that the distance between each layer is a little bit longer. So things like that and then I can actually go into position here and just really find shoe . I thought something like that looks pretty good. I'm actually move from buff to the left, just cha something like that. And then I can actually go back into the cooler top if I want to make sure that I have that thumbnail adjustment last selected, and I can then use this note. Teoh really kind of dialing What? What the look I want for the thumbnail specific Lakers. If it's a vote or you generally you can go a little bit more extreme and make it pop even more than it did for the video. If this was the video that I'd probably be a bit too much, but it's a photo so you can actually get away with it a little bit more, so I could then go in and find June that a hell of a lot more. But In essence, that is. That's sort of alright looking from now. So we're going to gallery here. You'll see that it's admitted no steals create, but I can actually now click on the video, and this has to be inside the cooler top click on the video. Go grab still and it will grab that specific thing on. Just put it in there. Now I can right click on this, and now I can go elsewhere and go back to read it in Hyde. All of these things in the edit and this will stay here so I can right click on this on Go export. So if you find yourself a file, ideally, you would want a render render file, and that's the way it would pull of your renders. And then you could put inside of that another you want and called out sums on. Then do some nail one. Make sure that you're seven, it as a jetpack export that and then if we go into that folder, is going to run the some nails. We can see this that it did do a D rxe file as well. You can completely you know that so the J. Paige. If we just open it, we can see that we have the thumbnail. So I could now upload this to the YouTube or Facebook or anything like that, rather than it just trying to pick a thumbnail from at the video itself.
10. My Finished Music Video:
11. Outro & Extra Tips: And just like that, you should now have a finished music video and a great thumbnail to go along with it. There's a few extra tips that I want to give you. Don't just send you off on the right. Off you go. If you are making music videos for clients, there's a few things that you need to be considering. Most of it is about Peyman. Obviously, I've shown you the process of actually making music video, but in terms of getting paid for it, there's a few steps that you should do to protect yourself. Onda also have better communication. The first is How much would you charge? I can't give you a number if you're first starting out. Charge little like £50.50 dollars then, as you get a little bit. About £100.100 dollars, £250. $250. The Mawr days of shoe in, the more you should be charging. If there's more complex things going on, charge a little bit more kind of do it on case by case and really find out what the band wants before you give them a price because sometimes you can have it. So that is why we're just going to a normal performance video. Just like I've shown you in this video and then a week in tow. Like talking about it That's ago. Yeah, but we could, like, shoot a story here and we could like, let's go on the train and like, do this and then it ends up being really not worth your time. And you end up spending all the money on travel and whatever. So really find out what the band wants before you give them a price and give them right According to all of the effort that it's gonna take with that little asterisk, You don't do anything for free. This is for a few reasons. One is that if you do something for free legally you on the music video, which is them very weird for the band. They can't do much with it because legally you own it. If they pay you for it, it's dies. Yeah, I would just avoid doing any kind of work for free, even if it was £5 like the littlest amount. If you do wanna work for free, I just work for a little bit like a pound. Like just that transaction of money legally gives them the rights to the music video wearers. If you did it for free, you own it. It's just we're thinking about to save yourself and to save a band just going dark and you never getting paid. Try and get paid half up front and half when you have finished. So a soon as you agree on a price and everything, just make sure that they know that you're gonna want half of it right now on. Then, before you send the final file over to them. That's when you want that final payment so you could send links to videos with, like, a watermark over the top if you are slightly worried that you might get duped. So like the final version you send with, like your name written over it So they go yet that's exactly what we want. You said right call. If you send me over that final payment, I will send you the final file and thumbnail. That kind of saves you a little bit. You don't always have to do this, but it is kind of good practice just because there are sometimes and bands that try and get away with, like stealing the video and not paying for it. So just try and nip that in the bud before you know before it happens. Some bands will want revisions if you send them what you think is the final version, and they come back and won a lot of changes. That's fine. That's normal. You be better off kind of discussing beforehand how many revisions you're going to allow. A lot of bands will take advantage and constantly want changes, whereas if you force them to get together and talk to each other about exactly what it is that they want to change, they'll make a big list and then send it over. That's a lot better than, say, having a fist. But messenger group on you put perversion. One of the member says. I want these changes, so you start working on it. You're just about to ascend it back over, and then one of the other members jumps in, and those are. But what about this change of them to start debate? And then they decide that one of the changes that they wanted, they actually don't want anymore. Just getting all of that out and just make them talk on their own. Get a list together of all the changes and then send it over to you. Is one big list. You do it all, send it back over. Hopefully, that's the final version. There may be some more revisions. Do something like that. And just when when you were getting that initial price, maybe say, if you want in, like two revisions at the end, that's call. I'm gonna charge you like an extra £50 for that. If you don't want any revisions at the end called fine. No worries by am I going to do to revisions? So after that first revision, you really need to think hard about the revisions that you want for that Final one because it will be the final one. I'm not doing any more visions and that kind of save yourself because you could end up doing 10 extra hours of edit in based on how many changes are constantly being sent to you . So I just kind of stopping that as soon as possible. His ideal. And with that, if anyone has any mawr questions specifically about making these music videos feel free to send me an email lending Obando y I'm happy to help. Yeah, I think there's a comments section thing here on skill share. So feel free to message or anything like that. Yeah. And please send me a music videos on blood it to the the assignment thing. And I'd really I'd really like to see it. Yeah. I hope you enjoyed the skill share course. Hopefully, you're gonna go make some mint music videos on DA Thank you for tuning in. See you later.
 The Music Lab, DIY Music Educators