Transcripts
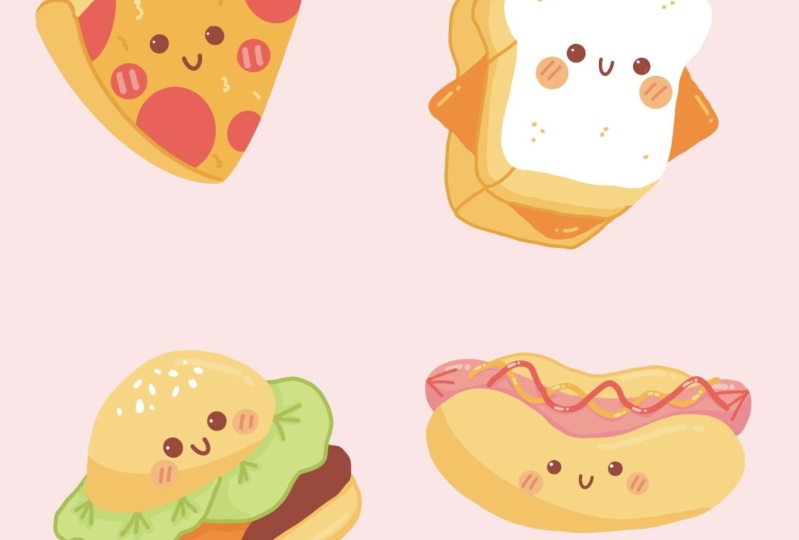
1. Introduction : Hello everyone, I'm unique. And into this class we will draw a few cute fast
food illustrations. These class doesn't require any prior experience
or fancy tools. We'll start from scratch
and we'll be using simple techniques
throughout the process. Everything you'll see will
be happening in Procreate. However, if you
have other software or wants to try
traditional materials, you are welcome to join if
you are ready to start, Let's jump right into it.
2. Pizza: Sketch: Firstly, we need to find out what kind of Canvas we
are going to be using. And you can see it is a very
simple square canvas because both pixel width and pixel
height are 2048 pixels. As for GPI, there are 300
and S for the color profile, it is set as SRGB, where this loan and scary
number, when it's all set, we're hitting done and
we are at our Canvas. So now we need to
decide what kind of colors we are
going to be used. It you can go to the
Project and Resources tab. You can download
the color palette and you can follow along. So when you did it, we will go straight to our color palettes. And you will see that we have two options of how we
can use the colors, the compact view and the carts. We will be using the cards because they have
all the colors, names and they are ready
for you to be used. So our first task for today is to change
the background color. Let's go to the layers. Let's go to the
background color layer. And firstly, we will see that we have our color palette
on the bottom. And we will need to select the first color
in the first row. So let's tap on it. When you did it,
you will see that you have changed the
background color. And that means that
we are ready to start creating our
first illustration, which will be l
little pizza slice. But before starting, we
will need to select a brush and we will need to select a color for our sketching part. Firstly, let's deal
with the brush. Go into our brush library, go into the Sketching folder selected in Procreate pencil. If you would like to
use any other brush, you are welcome to do it. So when you have your brush, Let's get back to
our color palettes. And here we will
select the color with the name Patty and eyes. So let's tap on it to select. And when everything is set, Let's continue by
creating our first shape. And as we are creating
a pizza slice, you probably know what kind
of shape we need to come up with is going to be
a little triangle. So firstly, let's zoom in our
Canvas and nothing scary. Manually, we will go
and create three lines. We will combine them to
a shape of a triangle. When you have a base, we will need to go
over these two sides. And we will need to turn these
very boring straight lines into the curves because we are creating a very
cute illustration. We will need everything to
be as rounded as possible. Let's firstly go over
the left side and we will create a
descending curve. When you've reached this corner, we would want to
make it soft to. So let's create a
curve there as well. And when you have the
curve for the corner, we will go over our right
side and we will try to recreate what we already
have on to our left, again, creating a
descending curve. And when you have
something similar to what you now see on your screen, Let's move on to the soap bars and we will be making a crust. So firstly, we will go over
this horizontal line and we will create a convex
shape like that. So going along the whole
shape of our base of the pizza and go in a little
bit beyond the frames. So when you have
the first curve, we will need to add
a bit of thickness. So we will need to go underneath this line and we will
need to recreate it. So let's go and do that. When you have these two lines, we will need to go firstly
over our right sides. We will need to connect
these two lines together by making a half of the circle or
half of the ellipse because we want
everything to be rounded. So let's go and do that. When you are done
with this task, we will go over the
opposite sides. And here we are going to
be adding more thickness. So for the crust, we will need to come up with
a full circle or ellipse. So let's go and do that. When you've connected
these two shapes, we will need to go
over the whole site, which is on the left. And who will need to connect
these olives that we have for the crust with the corner
that we have on the bottom. So let's go and do that. And now we have the base, so let's make everything
nice and clean. We will go to our eraser to, and we will erase every
line that we don't meet. So now we have the base, and that means that
we are ready to add a few facial
features as details, but before it starts and
we will need to find the center of our
whole elements. Firstly, we will go with our vertical line going through
the center of this shape, going from top to the bottom, and creating this line too, when you have the vertical line, Let's go with a horizontal
one and we will try to go along the shapes so we are not going with
a straight line, we are going with a tiny curve. And when you have the cross that is going
through the center or U-shape, we will go over this
horizontal line and we will start by creating
two dots for the eyes. So let's try to do that with
the first eye on the left. When you have the first i, we will move on
to the right side and we will try to
recreate the same size of the eye and we
will try to keep the distance between the
eye and the central line. So let's go and do that. So when we have the two
doors for our eyes, Let's erase this cross for our center parts
because we already know where we need to
add are the elements. We will go between these two eyes and we will
create a curve like that. So it's going to be
our Smiley mouth. You can vary the size. You can vary the distance between these elements
and the eyes. You can vary the position of it. You can put it up,
you can put it down. Just find what works for you
and try to make it cute. And when we have the base
for our facial features, we will add the cheeks. So we will go under our eyes
and we will add one circle on each side and we are ready
with our facial features. But now we can go and we
can add more elements. For example, we
could add pepperoni. For the pepperoni is, we will go and create half of the circles or half of the ellipsis going
along the whole shape. One more thing that we
need to keep in mind is we don't really want to add
this additional elements. It's pepperoni is to
their facial features. So let's go over the
area that we have on our shape and we will create half of the circles
for the pepperoni. Yes. You again, can vary the size. You can vary the amount. So these elements is up to you. It's time for
creating something, it's time for experiments. And when you are done
with your pepperoni is, we are done with our sketch. And in the next part, we will be creating
the clean lines.
3. Pizza: Linework: Before jumping right
into this part, I just wanted to
mention that you have a few options of how your finished
illustration might look. It might do with sketchy lines, so you can keep what you have
onto your Canvas right now. But you would need to clean
it up and you would need to erase every extra line
that you don't needs. Or on the contrary, it might be with
clean visible lines colored in one color. And that's what we're gonna
be doing inside these parts. And also, while we are
still here onto this stage, we need to readjust
our elements, reposition it risky,
rotates and so on. Because every time we are making some distortions
with our picture, the quality of that
picture is getting worse. So it's always good to do all the distortions
on this sketch stage. For these concrete illustration, we would want to make it bigger, rotated, and find a
perfect position for it. So let's start by going into
our layers and we will make sure that our layer is
selected when you did it. We are going to this
arrow key on the top-left and we will select the uniform method
on the bottom panel. With a uniform method, you will see that you
have a bounding box. You also will see that you have a green nodes over the top part. Let's hold it and let's
rotate our Apple pencil. And you will see that you are
rotating the whole object. Let's find the perfect
placement, perfect rotation. And when you are done with it, Let's make it bigger. And to make it bigger,
we would need to drag one of the
corners to the sides. And depending on the corner, you would need to drag
it to a different site. For that concrete case, let's just go to the bottom and we will drag the
bottom corner down. Now when you are
satisfied with the size, Let's position it a
little bit differently. We will drag it to the left. And when you are
done with this part, you might want to make
more adjustments, more advanced adjustments
to, for example, you would like to
make it slimmer or more vertically access longer. And you might go to the web method over
these boards and panels. So let's tap on it and
you will see that you have not only the
external corners, but more corners inside the
shape that you can drag, that you can tweak, that you can adjust in a
different manner. So here you can
play a little bit and you can find
what works for you. And when you're satisfied
with what you see, we would need to
deselect everything by hitting this arrow
key one more time. If you selected that you will
be following the tutorial fully and you want to
create the clean lines. We will do the following. We will go to our layers
and we would need to make the opacity of this
layer a little bit lower. So by default, all layers
come with a 100% of opacity. And that means that if you
have two layers with content, the content on the
top layer will oral add the contents
on the water. And as we are going
to be creating the lines over these
concrete layer, we would want to see what's
happening on both layers. So let's go to this icon near the chat box and
we will tap on it. Here you can see that we
have the opacity slider and we can just hold and
drag it to the left. We still see what's going
on onto our canvas, but it's not disturbing us. Now when we have these, we would need to
create one more layer. So let's tap on the plus icon. And as we are creating
a clean lines, we would need to select
a different brush. So let's go to the Brush
Library and we will go to the calligraphy folder and we
will select monoline brush. Now, adjust the size of
your brush so it will sue the whole illustration
and we will need to go over our sketch and
create the clean lines. So it doesn't matter if you are creating them in
a 100 per cent of similarity or if you are adding other details, It's all good. So firstly, let's go and
try to create our crust. So let's just go and
create the first curve. If you hold your Apple pencil
at the end of the line, it will snap to a better
shape so you can use it. Or if you would like
to go with the flow, you can go to your brush library and you can go to
your monoline brush, and you can go to
the stabilization and increase the amount
of the streamline. So it will let you to
create more smoother lines. So depending on what
you want to achieve, you can use these two options. And that is how we are going to be agent or a clean lines. Our main goal for this part
is to create the closed lines because we would want to use the color drop method of
re-coloring later on. So now, very quickly let us
go and create our lines. Remember that they
should be closed. If you want to adjust
your lines even more, you can go to Edit shape over
the top here you will have a few nodes that you can tweak and you can achieve
a better shape. For the facial features. You can increase the size
of your brush and just add the dots both for the
eyes and for the cheeks. Now when we have all of
our elements lines up, we will go to our
layers and we will hide the layer with our sketch. So let's just hit this checkbox. Now we would need to
make everything clean. So if you have some places where you would
like to go with it, an eraser tool and erase some parts to make
everything look nice, you can go and do so. So when you are done adjusting your elements and
adjusting your lines, we can go and we can create
more additional elements. So for example, we can prepare ourselves for creating
a highlights. Let's go over the top part of our crust and we will
create a line there. If you want to add more details, you are welcome to do it. As for our cheesy parts, Let's decrease the
size of our brush and we will add more
additional elements. And they will be very simple, just with something that
looks like a digit three. So just go over the
whole place and add a few of these digits. Try not to overdo it. And if you want to
add more details, for example, for pepperoni, you are welcome to do it. So when you are done
with this part, we are ready to move on
for the coloring parts.
4. Pizza: Coloring: For our coloring part, we would need to
create one more layer. So let's go to our
layers and we will go to our layer with the sketch. We will select it
and we will hit the plus icon because we want our layer for the
color and be right between these two layers
that are already half. So basically what we can
do with the coloring part, the first one is to go to
our layer with the lines, select the color and drag it to the area that we would
like to recolor. But that's not what we need. We would like our aligns to be separate from our colored areas. And we can do it in
two different ways. The first one is to
go to this layer that we created for our current, manually go over all the
places and recolor them. But that's time-consuming
and we don't want to do it. So we would like to use this layer and we
would like to use the color drop method
to recolor everything that we have on
our illustration. But if we go to
this layer and if we just drag and
drop the color to the area that we would
like to recolor. Nothing good will happen because everything
that we have onto this layer and we don't have anything here will be recolored. The whole canvas will be yellow. In that case, it's
not what we need. We need to do one trick. We will get back to our
layer with the lines, will tap on it and we
will set it as reference. And now everything that we
are going to be recolored will be somehow connected
with this layer. So let's go back to our layer that we created
for the coloring. And we will try to do this thing with dragging and dropping the color
one more time. Let's firstly select the color. We are going to be using the
color bands for our crust. So let's just go and drag and
drop the color right here. And you can see
that it's working. And if we hide the
layer with our lines, you will see that only
the area that is inside the lines is now recolored and that's
exactly what we need. Now let's get back our
layer with our lines and we will go to this
layer for our coloring. We will be selecting different
colors and we will be putting them wanted their
concrete positions. So now let's go and select
the color pizza crust. And we will drag the color
to this area for the cross, for this circle or an
ellipse that you have on the top and for this
bottom area as well. Now when we have these, Let's select a different color. So it's gonna be
cheese and mustard, selecting it and dragging it to this area with our
cheesy elements. The last color that
we need to use here is pepperoni and ketchup. So let's select it and we will drag the color over
our pepperoni. And that's easy. We just recolored
our whole object. So in the next chapter, we will meet up and we will
be dealing with our lines.
5. Pizza: Recoloring the Lines: Now one more time you
have the opportunity to choose how your final
illustration would look. So for example, we can
go over just a few of these elements as cheeks or maybe this little
highlight over the top. And we could recolor them and all the remaining elements might stay the same as
they are right now. So it's your choice, or we can go with a full
rights and we could recolor every line or almost every line that we
have on to our illustration. Let me just show you the basics of how we are
going to be doing it. So we are going to
the layers and we argue into our layer
with the lines, we don't really need
the reference anymore, so let's tap on it and select
reference from the list. Then one more time, we will tap onto this layer and we will need to
select another option, which will be Alpha Lock. Alpha lock will let
you draw only on the existing content
on this layer. So you won't go beyond the frames and you
won't be creating any more lines while this
alpha lock is selected. So you can see that you have a little checker words
around your whole lines. And that means that
Alpha locus turns on. And what we're gonna be doing, we will be selecting
the same color that we have for the object. And we will be going along the lines and we will
be recoloring them. So firstly, let's select the color that we
used for the bonds. So for this area of where the crust that we have over the top, we will select
these bonds color. We will use the same
brush and we will go over this line and we
will just recolor. It wasn't very accurate. And you have
something similar to what you are right now
see on your screen. So other objects that
have different colors, they are recolor it
with a lines right now. And that means that you don't really need to use
your eraser tool. If you just grab
your eraser tool, you will be erasing the
line that you have. What you need to do is to select this color that belongs
to this concrete parts. And she would need to recolor
this line with that color. And we don't really
need to go back and forth to our color palettes. We can just pick the
colors from what we already have onto our canvas. And to do so, we would need to invoke the eyedropper tool. To do so, we would need
to tap and hold one of our fingers on the screen until we see this little tool. And if you move your finger around the whole sheet
that you have here, you will be selecting
different colors. So now let's select the
color for the pepperoni is. So while you are here, just on hold your Apple pencil, you will see that
you have changed the color over the top
right corner and just going over the other areas
and recoloring them the same way as
we recover the crust. While we are still using this color allege us
recover our cheeks. Now let's go over the right parts and we
will select this color for the cheese and we will go and recolor this line over
there, right parts. Now moving on to the left, and we will select
the same color that we have for the
crust right here, but we will recolor just the line that
we have on the left. So the leftmost line. Now when we have only
this line remaining, we would like to add a
different color for it because we have
similar colors for the cheese and for the crust. Let's go to our color
palettes and we will select the color with
the name dividers. The same way we will go over
this line and we will try it very easily to recreate it
with a different color. Make the nice dividing line over the bottom and with
the same color. Let's recolor these digit three that we have on
our cheese for now, let's just recolor
only the half of them. And we will go to
our color palettes and we will select a
different color with a name, bands, highlights
with this color. We will recolor the rest of them and we will go over
our top part and we will recolor these
highlights now with the same color or by
selecting a different color. So for example, we can
select toast and seeds, it just a plain white color. We can go over our eyes and we can add
the highlights there. So firstly, let's
decrease the size of our brush and we will
start with the one I. So let's start with the left. We'll put the highlight over
the top area of the eye. And then we will move
on to the right one. And we will try to recreate the same position of the
highlights over there. So now we have the highlights. And the last thing
that we will add right here are a little
details for our cheeks. So let's again go to our palettes and we
will select this color, which is called sausage. And we will add just two lines over each element of our cheek. And we are done with
our first illustration.
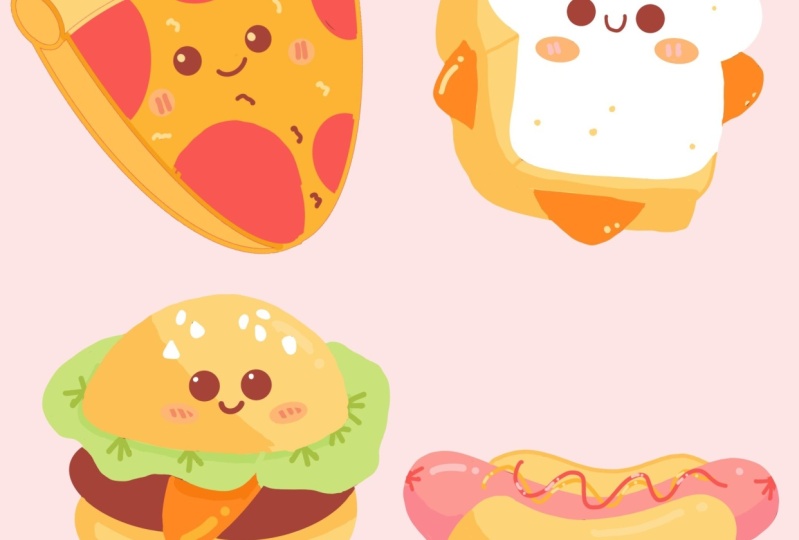
6. Hotdog: Sketch: Now we have our first
illustration and that means that we are ready to move on and create the second one, which will be a hard duck. But before starting, let's clean everything up into our layers. So let's go there. And what we're
going to be doing, we will be selecting each layer that belongs to our pizza, and we will be putting
them into a folder. So you can see that the
first layer is already selected and we can
go underneath it for our layer with the
coloring and we need to swipe it from left to
right when you did it. We will need to do
it one more time with our sketching layer. So go in there and swiping
it from left to right. Now with all three
layers selected, we will go to our
top right corner and we will select group. Here you can see that
everything pizza related now is in the folder. And we can collapse
this group by going to this V icon near the chatbox. So let's tap on that. Now, our layers panel
is looking quite nice. And the last thing
that we will do with this group is renaming it. Let's tap on it and
we will choose Rename for that group labs go
with the name pizza, and now we are ready to
start making our sketch. But before starting, let's
create one more layer. So tap on the plus icon
and then we'll go to our color palettes and select the same color that
we used before. It was Patsy and ice. They're very last preparation
of thing is to go to our brush library and go
to this gauge in folder. Into this kitchen folder we are selecting procreate pencil. And when all the
preparations are done, we are ready to begin with our sketch and we will start
with something very simple. It will be just a
line that will show the direction and it will
be as simple concave line. So let's zoom in our canvas
and let's create this slide. When you have
something like that, we are ready to start
making our band. And we will start
by adding a circle or an ellipse at each
side of the slide. Let's start from the left side. When you have the first ellipse, move on to your next side and try to recreate
the same shape. So when you have
something like that, when you have to add ellipsis
and this guiding line, we can go to the bottom of everything that
we right now have. And we will need to combine
these two shapes together by connecting them with
the same line that we have right here for
the guiding light. So let's go and try to do so. When you've connected your
two ellipses from the bottom, Let's move on to the soap. And here we can recreate the same one that we
have on the bottom. Or we can go with
that a little bit curvy shape and create
a little dance. So it's up to you. Now if you want to
adjust your shape to make it softer or
rounder from some sides, you are welcome to do it. And when you are ready, let's move on to this sausage. And for the sausage,
we will try to remain the same shape
that we have for the ban, but it will be a
little bit more LN gated and it will be
a little bit smaller. So firstly, let's
go over our shape of the bond and we will
create the curve like that. So doing a little bit beyond
the frames of the bond. Now when we have the
curve on the top, we will need to recreate this
same curve on the bottom. And we will need to do
something similar to what we have here on the crust. So let's go and try to do so. Now, go into each
site and connecting these two lines by creating half of the circle or
half of the ellipse. Now when you have your sausage, Let's add the other bond and we can do it a little bit
into the perspective. So we can go and create the
guiding lines like that. And they will show
us where we need to start creating our shape for the bond and for that shape we will need to recreate
the line like that. So let's go and do that. And now we have the base. So that means that we can
grab an eraser tool and erase every extra line
that we don't need. When you are done
with this task, we are ready to add the face. Let's go to these
bonds and we will add the same phase that we
have onto our pizza. So you can again start
by creating a cross like that and finding
the center of this bond. Or if you feel confident, you can go without it and create the facial
features just manually. Start with the I, go to the other side and try
to recreate this shape. When you are ready, just go between the eyes
and create a Smiley mouth. And the last thing
that we will add for our facial features
are they cheeks. So go and underneath the eyes
and creating two circles. Now let's add more additional
elements and we will go to the sausage and we will
go with the line like that. We will try to create
something that will reminds us, mustard and ketchup. So you have the first-line
and try to recreate it one more time for the
additional elements. Also, we can go to the ends of our sausage and we can
add the lines like that. So on one side and on the other, if you want to add more
additional elements, more details, you are
welcome to do it. And when you are satisfied
with your sketch, we are ready to move on
to our aligning parts.
7. Hotdog: Linework: Alrighty, Now we have
our sketch and we will need to do the same things that we did with the pizza. So we can rotate this
element reposition, find the placement for it. And the first thing that we
will need to do is to go to our layers and make sure
that this layer is selected. Then we're arguing to our
heirarchy on the top-left. And firstly, using
uniform method, Let's move it to the bottom. Let's rotate it, Let's
make it smaller. Do whatever you feel you
need to do with this shape. And when you are satisfied with the placement and everything, if you want to make
more adjustments, go to Warp, adjusted
to your liking, then we are ready to move
on to our ally in parts. So the same way as we
did with the pizza, we are going to earlier, when I go into this, an icon and we are making
the opacity level lower. Now when we did it, we are creating one more
earlier and we are going into our brush library
to get the mono line brush. It is in the calligraphy folder. And now we need to go over
our sketch and we will need to create the lines that
will be clean and closed. So let's go and do that for
the future convenience. Let's add the lines
for the Masters and for the catch-up
on a different layers. So go into the
Layers and creating the layer for the mustard first, increase the size of your brush and create the shape
for the mustards. Remember that you don't really need to repeat
everything that you have on this gauge with a
100 per cent of similarity. When you are done with the
master it Let's get back to our layers and we will create one more layer for the ketchup. So now go over
this shape and try to create a line
for our ketchup. When you are done, let's get back to our
layers and we will hide the layer with our sketch. Let's make sure that everything
is closed and clean. And when you did it, We are ready to move on to the next chapter where we are going to be adding the colors.
8. Hotdog: Coloring: For our colors,
let's get back to our layers and we will
need to set this layer, the main one with the
lines as a reference. So let's tap on it and
lead select reference. Now we will need to create one more layer and
we will need to put it right under the layer which we have
for the reference. So let's go to the
layer with our sketch and we will tap
on the plus icon. Onto this layer, we will
be adding the colors for our bands and for
our sausage and so on. So firstly, go into
our palettes and selecting the color
with the name bonds. Now let's drag it to the bonds. So 12. Now getting back to
our color palettes and selecting the
color for the sausage. So selecting the color and
dragging it to the sausage. Now we are almost done with the whole coloring that
we have right here. But let's make it a little
bit more complicated. But don't worry, we will
just add little shadows. So firstly, we will go to
our color palettes and we will select the color
with the name bonds shadow. So firstly, we will go
to the bond that is on the bottom and we will create manually the line like that. So it will go along
the whole shape or alone one of the
sides of our bonds. And again, manually
we can recover it to avoid some
accidents like that. You can go and you can
make this layer that you have for your coloring as
an alpha lock if you want, you can add a little shadow
on the bottom on the bag ban. But if you don't want to, you can leave it as it is. Now, let's go back to our
color palettes and we will select the color with
the name sausage shadow. For this sausage shadow, we will go again to
the boards and part and we will create
a shadow there too. Also, when we have
the shadows on both sides of our sausage, we can add little
shadows underneath our lines for the
masters and the ketchup. So let's just go
over these parts and add little
shadows there too. While we are still here
with our coloring, we can add the colors
for the highlights. You can go and do them the same way as we did for our pizza. So firstly, you can go and
create the lines, for example, for them, or you can just do it onto the
layer with the coloring. So let's do it in that way. We will go back to our
color palettes and we will go firstly for
the bonds highlights. Now let's go over these
bond that we have on the bottom and we will create a highlight there
on the top area. If you want, you can add a little highlight
on the bag ban two. Let's do the same
with our sausage. So getting back to
our color palettes, go into the sausage, highlights and going over the top part and creating a
few highlights over there. And we are done with
the main coloring. So in the next part, we will be recoloring the lines.
9. Hotdog: Recoloring the Lines: Okay, let's move on to the
coloring part for our lines. So firstly, we will need
to go to our layers and we will need to select
this layer with the lines. We don't need reference anymore, so you can tap on this layer
and deselect the reference. But also we would need to set this layer as an alpha lock. So tap on it one more time
and select Alpha Lock. Now we will do the same thing
that we did with our pizza. So we will need to go to our
color palettes and select the same color that we used for the base where we can
use the eyedropper tool. I will remind you how
you can invoke it. You will need to hold
one of your fingers on the screen and you can
select the color like that. So we will select the
color and we will go over the lines to create
a line list illustration. So let's quickly go and do that. Let's highlight the
different color for this sausage elements and they will be just meet with the pepperoni and ketchup color. Now, let's move on to
the facial features. And for the cheeks, we will select the color
with the name cheeks one. And we will go over these
parts and just recolor them. Lads then go back to
our color palettes and we will select the
color cheeks details, and we will go over
our cheeks and we will add two lines in each. Now let's get back again to our color palettes and we will select the color
toast and seats. And with this color we
will add the highlights. So firstly, increase
the size of your brush. Go for one eye and
pull the highlights. When you did it. Move on to the next
one and try to recreate the position
of the highlights. And now we are ready to move on to our masters and ketchup. So one more time,
go into the layers and go into this
layer that we have, either for the mustard
or for the ketchup, we will need to set it as an
alpha lock when you did it, we are going back to our
color palettes and we are selecting the color
for these elements, go over the shape
and recolor it. While we are still here, we can add some highlights
to the shape as well. So let's make our brush smaller and let's go and grab
a different color. So as I created mastered,
we'll grab bands, highlights, and I will add a few highlights on this shape. And now let's do the same
thing for our ketchup. So firstly, go into the layers, tapping on this layer, setting it as an Alpha Lock, go into our color palettes, can choose pepperoni and
recoloring the shape. And the same thing
that we did before, decreasing the
size of our brush, going back to our
color palettes. And here we can select
sausage highlights or just sausage color and add the highlights
onto the ketchup. And when you did it, We are ready with our
second illustration. In the next part, we are going to be
creating a little toasty.
10. Toast: Sketch: Now let's move on to
our next illustration, which will be a little toasty. But before it starts
in one more time, we go into our layers and we
will tie everything up here. We will select each
layer that belongs to our hot dogs and we
will group them. When you did it, we can
collapse the group and we can tap on it to rename
for that group. Let's go with the name hotdog. Now when we have it, Let's continue by
creating one more layer. Then go into our color palettes and selecting the
color for this gauge. It's again, Patsy and eyes. Then the last thing
that we will do is go into our brush library, sketching folder,
procreate pencil. So when you did
it, Let's zoom in our Canvas and we will start
with something very simple. It will be a rectangle. So let's try to do that. When you have a base, we will be doing the same thing that we did with our hot dog. So we will go over
the top era for these two corners and we will add an ellipse on each sides. Let's go and do that. When you have these
two ellipses, we will go over the
top part and we will connect them with
a simple curve. You can leave these two
corners as they are right now. Or you can go over
these corners and connect them with a
simple curve like that. Now when we are ready
with our soap part, Let's move on to the bottom for these two
corners and we will soften them by creating the curves instead of
the street corners. Now we are ready with our base. So let's grab an
eraser tool and we will erase everything
that we don't need. When we are ready with
the cleaning parts, we will need to add some
thickness for our society. So firstly, we will go to this corner and we will
create a line like that. Now when you have this line, we can move on to
our right side and we can recreate it
on the right corner. Tried to make these two lines
parallel to each other. When we have these two lines, we are going right here and one more time creating
the line like here. And now we need to go over these three lines
and we will need to connect them repeating the same shape that
we have right here. So let's go and do that. S for these parts. Let's go and connect the curve that we have on the
top with these dots. So just go in and creating the line over there,
simple curve. And now we have one toast, bad for the sandwich, we will need to create a double. So let's go and do the
same thing one more time. We will need to create
the second toes that will be underneath. So starting from
the line like here, and we are going to elongate it, go into the other sides. And Ellen Gates and
the line here as well, one more line on the left. And we will go and connect them together by repeating the
line that we have right here. Again, for this part, we are repeating the line
that we already have, and now we have the
base for art, so C, and we can go and create the cheese right
between the two bonds. So we can start by creating a little rectangle or rhombus, and you can go and start. The very beginning
of this journey is to go and create
four dots like that. So it will be sticking from
the sides and you need to make it not too big
when you have four dots, just go and connect them
with a straight lines. And now we can grab
our eraser tool and erase all the lines that
overlap and our toasty going for these parts and
erasing it and just going over all the parts where they choose should be underneath the toast. And when you have
something like that, Let's soften the
corners of our cheese. So again, instead of
the street corners, we will make the curves. So now we have the whole body of our TOC and that means that we are ready to add
additional elements, which will be again,
facial features. So you can again go by creating the cross to find a
center of your elements. Or if you are bold enough, you can go menu and start creating the facial features
just by themselves. Start by creating the first eye. When you are ready, move
on to the other side, create the same
shape for the eye. And when you are ready, go right between them and
create a little Smiley mouth. The very last thing is to go underneath our eyes
and add the cheeks. And our sketch for
this OC is done. And in the next part, we will be making the lines.
11. Toast: Linework: Let's move on to
our aligning part. But before starting
one more time, we have the opportunity
to adjust our elements. We can rotate it, find
a better placement, or go for the
Advanced adjustments. So firstly, let's make
sure that this layer is selected into
our layers panel. And when we did it,
we are going to the left and we are
selecting our arrow key. Let's start with
a uniform method. I just rotate, do whatever you need if you want to go for
the Advanced adjustments, go for the Warp
option when you are satisfied with what you're
right now see on your screen, Let's deselect everything by hitting this heirarchy
one more time. And we will go to
our layers and we will set the opacity
level to a lower. Well, yes, we are
hitting this icon and we are dragging our
hands-on to the left. Now let's create one more layer
by hitting the plus icon. And we will need to go to our brush library and into
the calligraphy folder, we will select monoline brush. And very easily we will go
and create the clean lines. And we don't forget that we will need to create
the closed lines. And we firstly go and
creating the lines for art. So sick, because
probably we would want to add the lines for the
cheese on a different layer. So very quickly,
Let's go and do that. So when you are ready for
the lines for your toasty, let's create one
more layer above, and we will create
our cheese elements. Now when you have the cheese, we can go to our layer with the sketch and we can
hide it and we can get back to the layer with
it ptosis and very easily erase the lines
that we don't need. When you are ready
with this task, let's get back to
our layers and we will combine these
two layers together. So go to the layer
with the cheese, tap on it, and
choose merge down. Now let's make sure
that every line that we have is
closed and clean. And when we did it, we
are ready to move on to our next chapter where we are going to be
adding the colors.
12. Toast: Coloring: For our coloring part, we will need to
create a new layer. So let's go to the
Layers panel and we will go to our layer with the sketch. We will tap on the
plus icon and we will add the layer right between
the two existing ones. So when we did it,
we are getting back to our layer
with the lines. We are tapping on it and we
are selecting reference. And when we did it, we
are getting back to our new layer and we will go to our color
palettes and we are starting recoloring our objects. So the first color that we will use will be toast and seats. Let's select it. We will drag and drop it
to the top of our toast. Now, one more time getting
back to the palettes and selecting the color with an
imbalance with that color, we will recolor just
decides of the soap toast, getting back to our
color palettes and selecting the color
with the name bands, shadow with that color, we will recolor the
boards and toast. And again, going back
to our color palettes, selecting the color
for the cheese, and this time it will
be cheddar cheese. So selecting it and dragging
and dropping the color. Now we are almost ready with
recoloring of our objects. But before going forwards, Let's create a little
shadow for our top toasts. So again, go into our
color palettes and selecting the color with
the name bonds shadow. We will go to the bottom part of these toes and we will add
a little shadow over there. Also while we're still here, we can add a few details on our top part so you can go and create a few dots like that. The very last thing that
we will add here are gonna be the highlights
for the cheese. So with the same color, Let's just go over these little parts and we
will add little highlights. And now we are ready to move
on and recolor our lights.
13. Toast: Recoloring the Lines: Let's try this Friday. Bye, go into our layers and go into the layer
with our lines. Let's tap on it and firstly,
deselect reference. Now it's happening it one more time and select an Alpha Lock. Now, what we need to do
is to recolor our lines. And one more time you can go to your color palettes and
select the color from there. Or you can go over
your Canvas and use the eyedropper tool to select
the colors that are nearby. So let's go quickly and recolor the lines that we
have on the left, we have two shadows. So we can divide these
two lines by going to our color palettes and selecting the color dividers
with this color, we will go over that line
for the rest of the lines, just grab this same colors
that you have nearby. Now let's get back to our color palettes and we will select the color for the cheeks. This time we are using the color with the
name cheeks one, go over these places and recolor the cheeks
when you are ready to get back to the car
palettes and select the color with the
name cheeks, details. Decrease the size
of your brush and add two lines in each cheek. Now let's get back to our color palettes
and we will select the same color that
we have for the top of the toast dosed and seats. And we will go over our eyes and we will
add the highlights. So start with the first one
and then go to the next one and try to recreate
the same placements. And we are ready with
our third illustration. In the next chapter, we will be creating
a little burger.
14. Burger: Sketch: The last illustration that
we will be drawing today, East LA, It's a burger. But before starting
one more time, when I go into our
layers and we are selecting each layer
that belongs to, so say, now we will group them, we will collapse the group
and we will rename it. So at SAP and hit
Rename for that group, we will go with the name toast. Now the last time we are creating a new layer
for this gauge. So tap on the plus icon
and then we'll go back to our color palettes
and we will select the same color that
we used before, which will be Patsy and ice. And one more thing
that we need to do is to go to the
Brush Library, go to the sketch in the folder and select in Procreate pencil. Now when all the
preparations are done, Let's zoom in our
Canvas and we will start by creating
the curve like that. Now when you have these curves, we will go over
the top of it and we will create a
dome light curves. Let's soften these two corners
by creating the curves. And we will erase everything
that we don't need. Now when we have it, so bond, we will go to this
line and we will try to create two
leaves for the lattice. So firstly, let's go
over the left side. We will go a little bit behind our bond and we will create
a wobbly shaped like that. So when you have the first leaf, Let's move on to the
right and we will try to recreate this shape. Now the half of the
burger is done. Let's move on to the bottom
and we will create a patty. So to help you find the right
destination for your Patsy, let's create two lines
going like that. And when we have
these two lines, we will try to create
something similar to what we have on the
crust of the pizza, but it will be less curvy
when we have that Patsy, let's create some
cheese and we will go right between these
two letters leaks. And we are creating just a
simple triangle over there. Soften this corner. And if it's soften already, you can just grab the
eraser tool and you can erase what we have for
this line over the petty. And the last thing that we will add is the boards and bomb. And we will recreate the same shape that we
have for the petty. Now we can move on to
adding some details. So let's go to our its
own band and we will add a little face one more
time if you need it, just go with the
cross firstly and create the ice to start
with the first one, go for the next side
and create a second I, when you have the eyes go
right between them and create a little Smiley mouth
when you have the face, Let's move on under the ice and we will
create the cheeks. Now when we have the face, Let's add a few more details. So we will go over this soap and we will create some seats. The seats are gonna be
something like that. So few of them. And when you are ready, we will move on to our lattice and we will add the
lines like that. When you are done with
your first, let's asleep. Move on to the next one. And when you are ready, we are ready to move on
to our aligning parts.
15. Burger: Linework: Before starting
our lining parts, let's adjust our elements. So firstly, we will
go to our layers and we will make sure that
the layer is selected. And when we did it, we
are go into the top-left and we are selecting
our arrow key. Let's start with a
uniform methods. You can rotate your object, make it smaller font,
a better placement. And when you are ready with
the basic adjustments, Let's go for the warp
and adjusted even more. When you are done
adjusting your objects, Let's deselect everything by hitting our arrow
key one more time. And when we are
ready to continue, we go into our
layers and we will set the opacity level
to a lower value. It's happened on
the icon and moving our slider to the
left when you did it, we will need to create
one more layer. Onto this layer, we
will need to get back to our brush
library and we will need to get back to
the calligraphy folder to select monoline brush. And the last time
we will need to create glows and clean lines. So let's go and do that when you are ready
with your lines. Let's get back to
our layers and we will hide the layer
with the sketch. Now let's make sure
that everything here is clean and closed. And when we are ready, we will move on to the
next part where we are going to be recoloring everything that we
have right here.
16. Burger: Coloring: Before starting our
recoloring part, we will need to
create a new layer. So let's go to our
layers panel and we will go straight to our
layer with the sketch. Here we will tap on the
plus icon and we will have a new layer right between
these two existing ones. When we did it, we
are going back to our layer with our lines, tap on it and
selecting a reference. Now, get back to the new layer. And here we are going to
be adding some colors. So go into our color palettes
and start in with a color with the name bonds dragging and dropping
it to the top one, end to the bottom one. Getting back to our
color palettes, selecting the next color
which will be lettuce, and again, dragging
and dropping it. Getting back to our
color palettes, selecting the color for
the cheddar cheese, dragging and dropping it. And the last color
that we will add right here will be our
color for the patsy. So select it and
drag and drop it. Now, let's make everything
a little bit more interesting and we will
go and add some shadows. So firstly, getting back
to our color palettes and selecting the color with
the name bonds shadow. Now we can decrease the
size of our brush and we can go over one of the
sides and create a shadow. Manually recolor this
area when you did it, Let's move on to the bottom bun. And here we can add a little
shadow underneath the cheese and the petty to show that
these band has some volume, now go over one of the sides
and add the next shadow. Let's continue by adding
the shadow for the letters. So one more time, go
into the palette, selecting the color with
the name lattice shadow. And we will go over
the top and we will separate these objects. And the last shadow
that we have for today is going to be the
shadow for the cheddar cheese. So let's get back to
our color palettes and select the color cheddar shadow. Now one more time going over the top part and
creating the shadow. We are basically done
with our recoloring, but the last thing
that we will add here will be lethal highlights. So let's get back to
our color palettes. And firstly, we will add the
highlight for the bonds. So selecting the relative
color, going over that. So part and add in a
little highlights. If you want, you can go over the bottom band and add
the highlight there too. Now, let's go again to
our color palettes and we can select the color with
the name cheese and mustard. And we can add a
little highlight for our cheese elements. And now we are done with
our recoloring parts. So in the next chapter, we will be recoloring
our lights.
17. Burger: Recoloring the Lines: The last time into this class, let's recolor our lines. But before that, we
will need to go to our layers and we will need to go to the layer
with our alliance. And firstly, we will need to tap on it and deselect reference. And then we'll tap
on it one more time and we will need to
select Alpha Lock. Now what we need to do, we will need to go over all the lines and we will
need to recolor them. So you can use your color
palettes or you can use the Eyedropper tool to
select the nearby colors. So let's quickly go and do so. So when we have recolored everything that we
have for the base, Let's move on to the details. Let's go firstly and adjust
our lines for the lattice. We will select the color with
the name lattice details. We will recover it
these elements. And we also can separate
these two leaves by creating a line with this
color over these parts. Now let's get back
to our car palettes and we will select the
color for the cheeks. We are again going for
the cheeks, one color. Let's go over these areas for our cheeks and recolor them. And when we are ready, we are going back to
our color palettes and selecting the color with
the name cheeks, details. With this color, we will
decrease the size of our brush and we will add two
lines in each chick. Now when this is done, we are getting back
to our color palettes and we are selecting
our last color, which will be toast and seeds. And firstly, we will add the
highlights for the eyes. So let's increase the
size of our brush. And firstly, we will go to
the left eye and we will put the dot there for the
highlights when you did it. Let's go to the right
side and we will try to recreate the same position
for the highlight there. And now with the same color, we will go over our seats
and we will recolor them. And when we did it, we are done with our
final illustration. Thank you for
watching this class. Leave a review if you liked it, and consider subscribing for more Kawhi videos in the future.
 Uni Corn, ⭐Kawaii Art Enthusiast⭐