Transcripts
1. Introduction: Hey, it's clayton. Welcome to
my class on drawing mouths. Throughout these lessons,
you'll discover how to draw the human mouth from the front and side views
in different expressions. And then I'll show
you an easy to use technique that
will allow you to draw the mouth from almost any dynamic angle
that you can think of. All right, let's jump
straight into it.
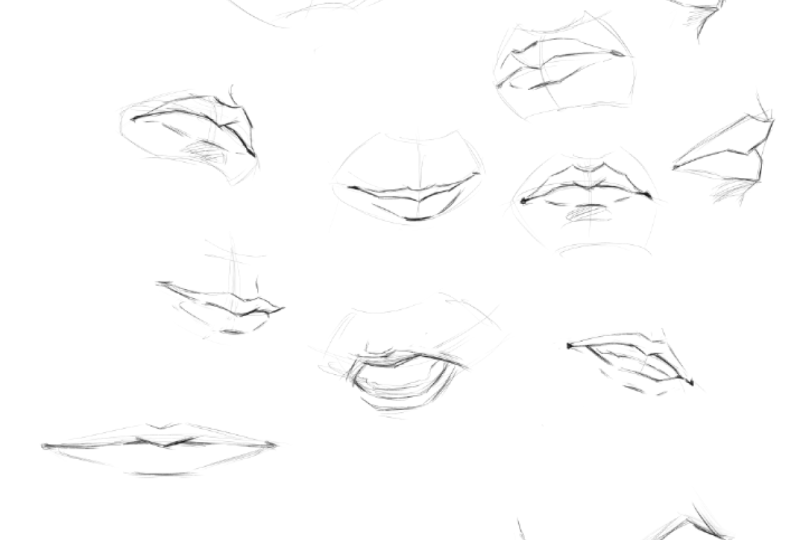
2. Mouth Front View: You should define a
mouth with just a line. So I'm gonna get my blue pen out here. Let's draw them out. We'll draw them
out from the front and we'll draw it
from the side and a three-quarter view that
standard views to begin with. Let's just draw a mouth opening. I always start with
the mouth opening first and we can
define that as a line. And the really cool thing is that you can define a sad mouth like this or a happy mouth. I know that seems
really oversimplified, but I'm telling you
it doesn't need to be more complicated than that. And let me show you why. Because I'm going to
turn these all into finished mouths that we're
looking at from the front. I'll get my black pen out
here and check this out. What I'll do when it comes
to laying in a mouth, when it comes to drawing it out. The final version of it, because I start with the middle, which is basically a little
downward triangle, an arrow. And I'll draw out
a line from there, from the middle point that
runs out to the sides, on either side of the mouth
and into the corners. I usually break that line. So if I was drawing the
mouth opening up here, this is what it would look like. The darkest points are going to be in the middle
and at the sides. Will draw that out. Then once I've got the mouth opening in, it's just a matter of
placing in the lips. Place in the top lip
on a female character, of course, ellipse is
going to be fuller, plumper, juicy are
looking than on a male and also more
defined as well. Again, they've got
more contrast. Usually. You can get lips of
varying thicknesses and shapes as well. It also comes down to style, the way in which he liked
to draw men or women. If you take, for
example, Michael Tanner, he draws very big, plump seek looking lips. And then I'll lay in
a fairly defined, dark looking line
for the bottom lip. I'll even indicate
the underside plane, the bottom of the mouth, muzzle. And then I'll lay
in the sides of the lips. The
bottom of the lips. You'll notice that they're
not a defined line. Okay, So I'm not drawing this. I'm not drawing this single
line all the way around. That would work, but it
wouldn't look as good. Then we could do
the same thing for these other mouth examples. Okay, so this one's going to
be a slightly sad amount. So you can really go ahead and create an expression for the mouth with a single
line if you want to. You can do it quite
easily and quite simply. Adding a little dip
for the top lip. Then indicate, in other words, not fully defined,
but just indicate visually the outline
of the tuplet. For the bottom lip. Well, oftentimes what you'll find is that the chin muscle. Who was the lip up? When the mouth is
looking a little sad. Something that looks like this. If you want to take
it to the next level, you can you can start
shading the lips. I don't really shade the
lips of male characters. But if I want to show that this female
character, for example, is wearing lipstick,
and what I'll do, I'll go ahead and start
laying in some rendering. This is quite sketchy
for comic book art. Oftentimes you don't even
need to lay in any rendering. This is only if you're
doing that like really ultra detailed stuff. What's cool about showing
you how I would shade the lips here is you get a
good idea for the forms. Again, adding a little bit
of a reflection if you want to give the lips a
nice shiny look. And don't worry, we'll go over some more male looking lips
and just a little bit. Let's go ahead and do
a smiling mouth now. Now, you'll notice
that as the mouth stretches and becomes a
wider to create the smile, well, so does the shape
of the mouth opening it, it starts to flatten
out a little bit. You'll notice that dip in the middle isn't as accentuated. And the same goes for the
outline of the lips as well. It's going to be stretched out, flattened out, and
less compressed. And when the mouth is rested. Okay, but the shape
is still there. The shape is just being pulled as just being
narrowed a little bit. Okay, so now we've got another interesting expression
for the mouth. We can take a look at here. Remember we got the
middle a little bit. We got the corners of the mouth, and then we've got the bits that join them together in between. So this is a bit more of a smirk that we're looking at it. Just to give you an idea of the anatomy I guess that
we're dealing with. In other words, the pockets
of fat within the lip. You've got this little
bit here in the front. Looks a bit like a love heart. You've got these bits toward
the ends of the lips. Again, little pockets of fat. And then you've got
the adjoining areas. The bottom lip that these
two giant pockets of fat. Again, I'm just trying to show you the forms here that are going on within the lips. Then of course you've
got the little dip up above your lips that you'll also probably
want to consider. You've got the
underside plane of the mouth and the mouth
muzzle. Of course. Let's go ahead and
just do a few more mouths drawn from the front. I'm going to draw some
different mouth expressions. Okay, so we've got a bit
more of a smile here. As the sides, the corners of the mouth
or pulled outwards. And you might get a
look at the teeth, which you never wanted
to find like this, that's going to look scary. Usually just a fine teeth
look at some very simple, basic lines. Nothing too crazy. Next up. Some men looking lips. So some lips that
aren't going to have the outline for
their lips as defined. You know, it's okay
to shade the top of the male lips because
sometimes they go into full and shadow
and that's fine. But really you don't want it. You don't want to make it
as pure as though they're wearing lipstick unless
they are, of course, which some dude characters are wearing lipstick like the
Joker may be, for example. You're just going to
be going ahead and defining some of the anatomy
a little bit more on dude. He might add in some,
some actual shading around the muzzle of the mouth, at least in the
lower areas there. So let's do another male mouth. Again, starting with the opening during the lip outline
around the opening. Then that's about it. Once again, if this
is a dude's mouth, I'm gonna give him
a nice amount of shading underneath it
to define those forms. Thus, get that
masculine appearance to come across a
bit more clearly. If you want a slightly puckered looking mouth with the ladies. Usually I'll do something that looks a bit more like this. Top lip might be
raised a little bit. We'll give this particular mouth some really nice full lips. And you can see they look
nice and juicy. These days. I kinda drew female lips though that aren't
quite as full. They do look a little
bit more realistic. If they're if they're
not as pumped up, It's completely
fine as they are. That's just a stylistic
decision and it looks good. No doubt about it. We'll draw one more view
mouth, the bottom here. Let's draw really
angry one actually, one that's kinda snarling. Why didn't the
corners of the mouth there? The bottom lips? Now that we've got
the opening defined. And we'll also add in the teeth. And again, we'll get
a good look at how to define those teeth without
making them look to find, because otherwise,
it looks too weird. You don't want the
OTs to look weird. They look scary. They looked like monster teeth. If you define every
single one of them. It's a big mistake. Most
people do define their teeth. They don't know
what they're doing and can lead to an outcome
that's undesirable. So let's say that this
is a man's mouth. So we'll add in some
additional definition. That's looking pretty
good. So that's the front of the mouth. Let's do some side
view examples.
3. Mouth Side View: As far as the side view goes, You're still gonna be working with the opening of the mouth. But you're also going to be defining the outline
of it as well. So the outline of the lips, at least at the front of them from the side ellipse
kinda look like this. Hey, we're drawing some nice
female lips here again. There's another way that you
can approach it as well, rather than defining the
opening of the mouth first, you can to find the outline. And I'll show you that
in just a moment. Actually. It's probably more the way that I would draw
the lips from the side. For example, when you're
drawing the head side on and it gets to the point where you're laying
down the lips. Sometimes what I'll do is just something that
looks like this. Then once I've got the
outline for the lips to find, I'll go ahead and then add
in the opening afterwards. That can work just as well. It ultimately comes down
to going with the method, the approach that is most
comfortable for you. If initially you find
that what I'm showing you just doesn't quite feel right if it's not
working for you. Definitely try to mix it
up and try to tweak it, modify it so that
it is enjoyable. Usually what you'll find is
that especially on women, the top lip will hang over
the top of the bottom lip. It's not always the case and it doesn't always have
to be the case. Usually if you're drawing
the mouth like this, where you've got basically an under bite for your character
that looks more a fish. And so it's, it's more appropriate for like a butcher
looking masculine dude. So you might end up with
something like this. Even though it's
already a little confusing as to what
we're looking at. This. But others, whether it's a man's mouth or a woman's mouth. But to make it less confusing, Let's just take out
some of the outline. And that'll certainly
make it more obvious that what
we're looking at is a, is a male mouth. Let's actually do some
expressions for the mouth. In this view, we could draw out an open mouth
that's screaming. That might be fun to look at. So from this angle, the opening of the mouth would
stretch all the way down. This might be that
the lips here. And you can see how the mouth opening is
now pulled forward. Again, that's because
it's stretching, right? I'm like elastic. As the jaw moves open, you'll be able to see the teeth. We could draw out an open smile. A smile where the teeth
are being revealed. Case starting with
the opening and then dropping the bottom lip down. Again. We've got
the lips. I'm only, I'm only doing a bunch of elliptic lady looking
mouse because once again, it gives us a good look at how the shape of the lips would be defined in these
different views. So there's our side views. They will come pretty solid. I think. Let's do some, some male mouse from the side just to mix
things up a bit. You'll notice here that
I'm going to invert the teeth and increase
that under bite with this example is probably way
to exaggerate it actually. But we are getting into a little bit of
facial expressions here. Once you know how to draw the basic math from the
side and from the front, it becomes fairly easy. There's not a whole
lot that really has to go into over
complicated honestly. So then in order to
make it interesting, we can start
expressing the mouth, expressing emotions through some of these facial features. The last thing I'll go
over is just a bit of a description of the geometry that we're dealing
with in the side view. What the side view offers us is a really good look
at the mouth muzzle. The actual form around the mouth as it sits
on to the head. Then of course
you've got the lips and remember, the lips. They're going to angle inward, back into the face toward
the mouth opening. Always think of it in
that way because when you start to move their head
and you start to rotate it, it gives you an idea for
what planes are going to be hidden them up planes
are going to be more revealed in any
given perspective.
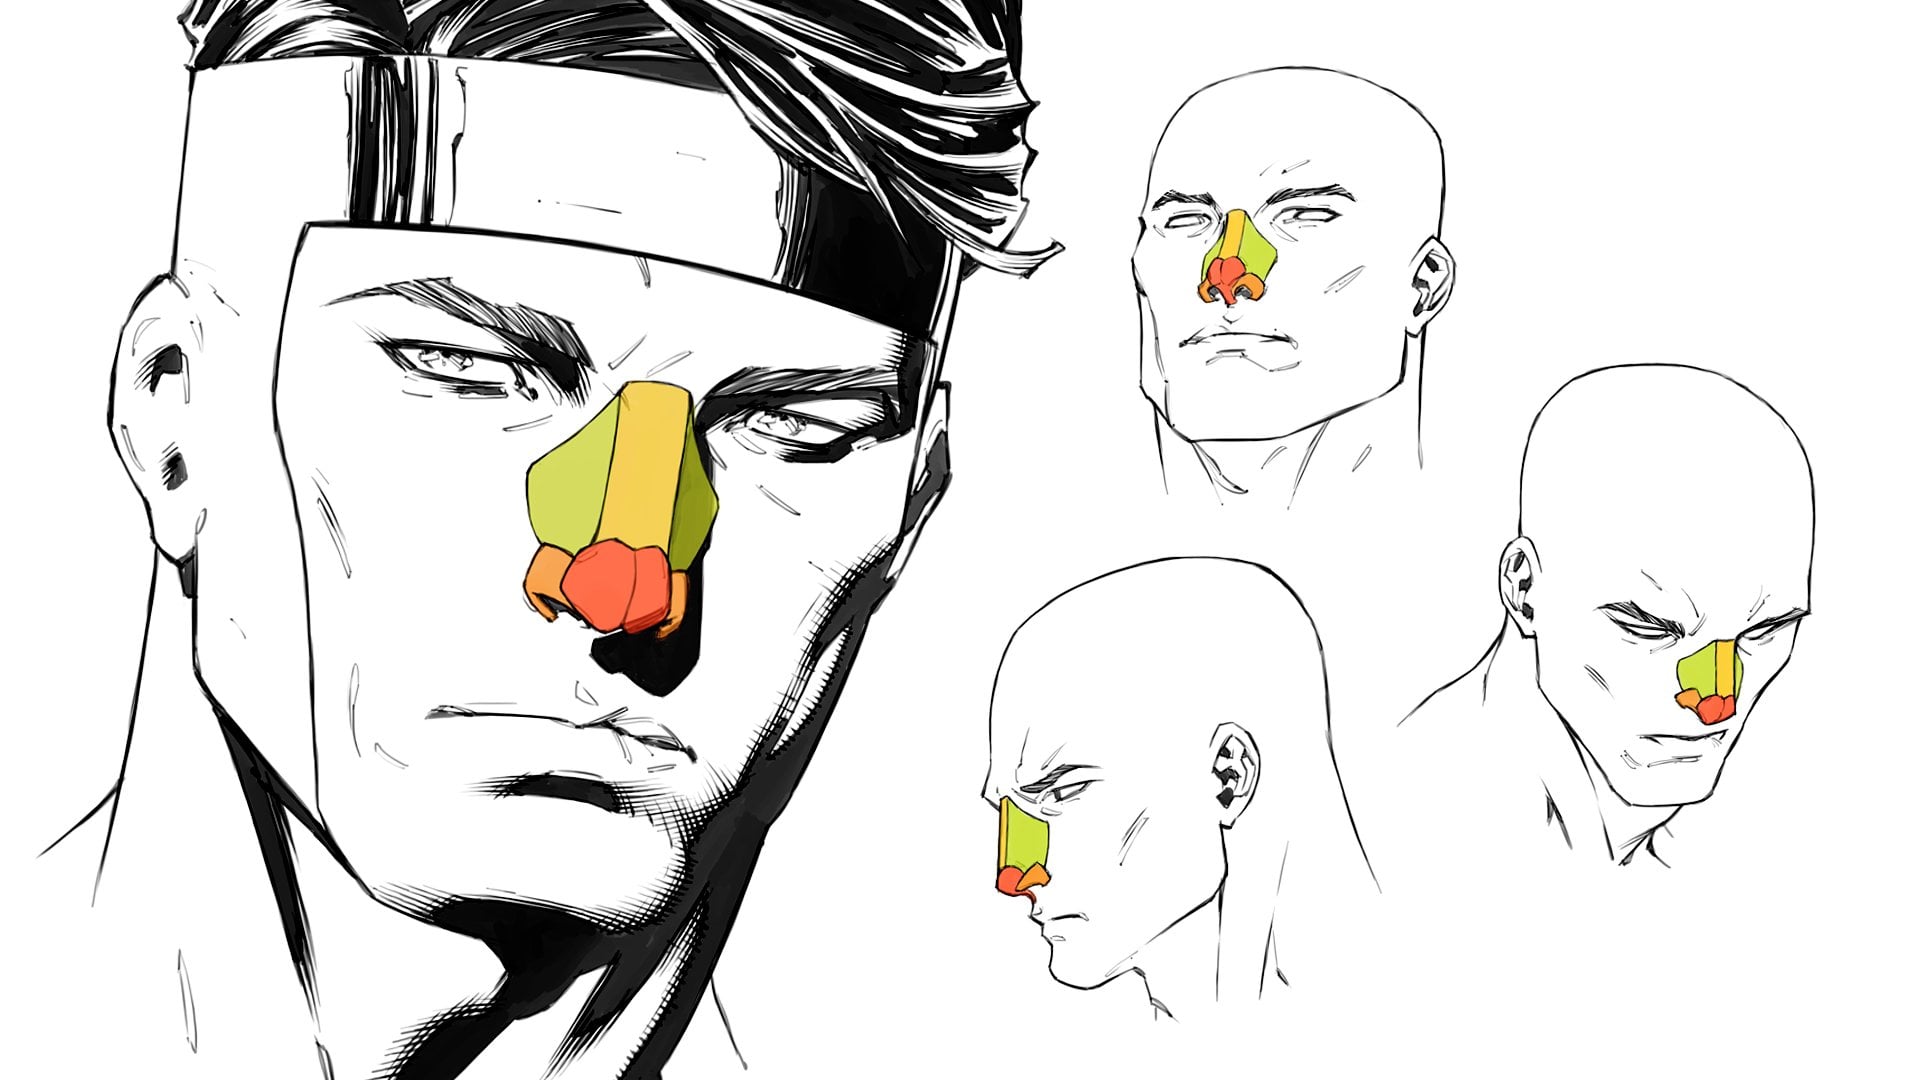
4. Mouth Muzzle: If you think about
the basic head, so let's draw it out
real quickly here. You've got the cheek bones. You've got the top of the skull, the bottom of the skull. Now you don't have to be a
master at drawing the skull. But what it can do is just help you to fit everything
together and having an understanding of the structure of the head
on a very simple level. If we look at the skull, what we can see is that
on a simplified level, the mouth is going to
sit on what seems to be essentially a tuna can. And we're looking down on
the mouth in this example. If we get that
tuna can out here, you can fit your
mouth around it. And the reason this works is because the opening of the mouth actually
follows this form. It follows the curvature
in the same way, the eye-opening
follows the curvature of the spherical
form of the eyeball. Well, the mouth opening
is going to follow the form of the mouth muzzle, I guess you could call
it underneath the skin. What we end up with is something that looks a
little bit more like this. I actually have a very
basic representation as a skull inside my mind when I'm drawing sometimes especially
on very dynamic angles. But let's say that we're
looking up at the face here. This is how I'm thinking about mouth and where
it's going to sit. This interpretation
of the skull. It, it really does
help me out and I think if you can study
it and just memorize it, at least it'll help
you out as well. Like you don't have to
become good at drawing. You can see I'm barely
drawing anything that another way that you can think about the mouth muzzle is a
little bit more like this. I like to think of it as
more of an organic shape. And I'll sometimes draw
cross contour around it. One running around
the horizontal plane, one running along
the vertical axis. And then I'll draw the
mouth on top of it. That's going to work just as
well as the tuna CAN works. The reason that I like to use this more organic
representation of the mouth formation
is because it's a less structured version of the chain and can't
because the tuna can, you can get really stuck on
drawing a perfect cylinder. I wanted to draw a perfect tunic and I just want to draw a mouth. And I feel like this is also
a better representation of the actual muscle that resides
around the mouth as well. So what I'd say you'd want to start doing
just to begin with, is practicing this
basic math form and practice drawing
it, for example. Or from below is if
we're looking up at it, all, it might look
something like this. Some erasing here that's
a little bit rough. You can get used to
just this shape. Maybe we're looking at it from the front a little
bit more here. And we're looking down on it. So we can draw out
this very basic shape. If we can get to know it. It'll make drawing
the mouth from these different points of
view much, much easier. So we can draw up
a few of these. Just to familiarize
ourself with it. Try to challenge yourself
to draw this basic maths, muzzle shape from a multitude
of different angles. It's simple, it's easy to draw. Notice that I'm just focused on the outline and then I lay in the cross contours and that's what makes it look and appear 3D is if there's some kind
of curve applied to it. The more you can draw it, more comfortable
you get with it, the more confident you
are going to feel when it comes to actually
drawing the mouth. Do some studies of the
human skull as well. I mean, that's going to help
you out Who great extent. I know it seems pointless
in the beginning and really over complicated
and kind of useless. But I think it just gives you some idea as to what's
happening underneath the skin. The skull is responsible for forming a lot of the
shape of the head. And because most of our faces bone throughout the
rest of the body, we've got lots of different
pockets of fat and muscle. But we've got very
thin layers of fat and muscle that sit on
top of the skull. So it's really the skull that defines most of
the phases shape.
5. Mouths In Perspective: So let's say that we wanted to draw a mouth that we
were looking up at. Well, at start out with
my mouth muzzle like so. The center line that
runs down the middle and the one that runs around it. Then once those are defined, it's really just a home run it drawer in the mouth opening, adding the corners of the mouth. When you're looking at
the mouth from below, you're going to see
more of the top lip. Then you will the bottom lip. To visit our first
mouth example. What if we were looking up at the mouth but directly
from the front? How would that appear to
us? Let's have a look. I haven't really seen
the mouth being drawn in this particular way before in a book or
anything like that. This is something
that I came up with. So in other words, reason
I'm telling you that is you can really come up with your own way of
drawing this stuff. Figure out what's
going to work for you. What makes the
most sense to you? And she'll just
interpretation really. So again, go ahead. Jordan. The opening of the mouth will show more of the top lip here than we will
the bottom lip. What you notice is that because we're looking
up at the mouth, all of a sudden we see an upward curve for
the mouth opening. Now if we're looking
down on the mouse while we see the opposite
effect happening. So let's draw an example of what happens when we're
looking down on the mouth. It will draw now cross contours. One running around
the horizontal axes of the mouth muzzle, the other running along
the vertical axis. So we're adding the
opening of the mouth. And of course, now, which way is it curving? It's curving downward. And what's the other thing
that's going to happen? Well, the reverse of what
happened in the upward view. Now what we're going
to see is less of the top lip and more
of the bottom lip. What if we push these
angles even more, right? So what if we went ahead and we really made it so that we had turned the mouth all the way upward so that we're looking almost directly underneath it. Okay, let's try and
extreme angle here. Now we're really pushing the roundness of
that mouth muzzle. Everything that we've been doing so far is going to
be exaggerated. So we'll add in the
opening of the mouth here. It's going to follow the
curve of the mouth muzzle. Going to see way more of the
underside of the top lip. And the bottom lip is
also going to be pushed up and curved quite a lot. In this example,
the nose might even be sitting right
above the mouth. So let's do another
extreme example, looking down on the mouth. So we'll go ahead
and add in the mouth opening just as before. Being pushed in the opposite
direction. This time. The top lip is barely visible. Since we're so high up
above the lip this time. I work here. I'm also thinking about the geometry
of the lips as well. So let me get my red pen out. I'm thinking about
the angles that the lip is slanting out on. Always be thinking in a 3D mindset when it
comes to drawing. Because as a result, what will happen is
you will find that your drawings begin to look
three-dimensional by default. Okay, so now let's just
do whatever we like. Let's do a few more random
examples of the mouth muzzle, representing it from a
multitude of different angles. And we'll draw the
mouth and on top of it. These won't be as
extreme though. I just wanted to
show you the extreme examples to give you an idea of just how
far we can push this. The reason we don't have to use references with these
particular views so much is because you can really just get your head around the concept of what's happening when you start to represent the mouth on
these different angles. What I mean by that is you start to understand really what happens to the geometry and how it's manipulated
by perspective. And as long as you know, you know how the forms being modified or being
skewed and distorted, when you start the
foreshortened them, you're gonna be fine. You can literally put
the mouth in any angle, may be in a default state. Sure. Let's see if we can do some
interesting expressions here. Actually. Let's draw a mouth
that's a little bit more surprised because I've got an idea of the geometry
that I'm dealing with. A mouse opening will
be here, for example. And the mouth might be
hanging open a bit. We can add in the loop on top, which by the way will be very, very low down because
now the mouth is stretched as it opens up. And the other thing
that's going to happen also is we're going to see the teeth in the mouth actually
start to go backwards. Yes, it will see the
bottom set of teeth, especially curve back
up into the mouth. And the bottom lip sitting below the
opening of the mouth. And we'll see a fair
bit of the top of it. We'll define the mouth
opening a little bit here. But as you can see, the
mouth opening actually, it determines a lot of how the mouth is going to be drawn. And so it's really the key thing to focus on from the get-go. You can see that I've tweaked the shape of the mouth there multiple times in order
to get it to look right. You might see just a glimpse of the top row of teeth there. Let's add those in. Now, of course,
that bottom part of the mouth is extending
past the mouth muzzle. And the reason for that is because now the jaw has opened. Let's see if we can come up with another expression this time one that we're looking up at. Again, some of these can
be very complicated, especially when you start adding movement to the facial features. It'd be too hard on
yourself if you can't get it to look
right straightaway. We really do have this crazy
expectation that we're gonna be able to draw
everything perfectly the first time we learn it, but that's just not
going to be the case. Maybe we could draw
a smiling mouth. This one will be interesting
because you would think that a smiling mouth
might stretch up this way, but actually it won't. Instead, what will
happen is it will still follow the mouse muscle
except that it will widen. And the other thing that'll
happen is there'll be the bottom mouth that
actually dips down a little bit and it will still follow
the mouth muzzle as well. But you can see that what
defines a smile mostly is the way in which it
stretches out. At either side. Of course, the lips are going
to stretch along with it. Again, it's very
easy to just stop and throw in the towel
at certain points. Mean drawing the same thing
over and over again isn't exactly the most riveting
experience in the world, but it is something that's required if you want
to get comfortable drawing whatever it is you
want to get good at drawing. Okay, This one will draw a
mouth that's slightly open. Mouth that's a wilted. And eventually, one day if you're doing
your own comic book, you'll never stop practicing. You're always going
to be drawing mouths. You're always going to be
drawing eyes and you'll be doing it over and
over and over again. So hopefully you enjoy
it is what I'm saying. It's one thing to do a study
like this, but when it's, when you're drawing a
mouth in the context of a finished comic book
panel on a character. It's a little different. There's a purpose
beyond just learning how to do it and getting
good at it then. Okay, I'm going to draw a
mouth that's screaming. Maybe. You can see that I am now opening the
mouth a little bit more. With this example. This does look kind of messy, but you'd be surprised at how messy certain
comic book artists started drawing that. It's even crazier than this. And then sometimes
I'll go riding over the top and just
start inking it out. I'd always amazes me when people are able to do that summer and it'd be great to get to a place like that or
any artist of course. Anyway now you might
have the tongue layer as well sitting inside the mouth. Okay, great. And then we'll
just draw one more down here. Let's draw two
more. Actually, we could fit two more on the page. And it's all about practice,
practice, practice. And we'll just draw some
standard regular mouse. Just to wrap this up. And we'll do one
more from above. Moreover, the top
lip, the bottom lip, and make sure that the
whole mouth there is curving around the mouth muscle. That is my approach for drawing the human mouth
a multitude of angles.
6. Assignment: Thanks for watching. I hope that you enjoyed
this class and that you've got a ton of
value out of it. But now it's time to put
what you've learned into action with the assignment
that I'm about to give you, open up your sketchbook or your favorite digital
drawing application. Your task for this
assignment is going to be very simple and straightforward. What I'd like you
to do is to draw up your own set of mouth this time. First from the front
and side views and a number of
different expressions. And then from those more
trickier dynamic angles using the very same methods that we discussed throughout
these lessons. Once you've completed
the assignment, be sure to submit it in the project section of
this class for feedback. Good luck, and until
next time, keep drawing.
 Clayton Barton, Harness the Power of Dynamic Drawing