Transcripts
1. Introduction: Hi. Do you want to learn how to draw beautiful dresses and skirts for your characters? Then this is the class for you. In this class. Allah teach you step by step on how you can draw dresses and skirts by learning how to draw pipe folds. We'll start the class by showing you the pipe fold in real life examples. This way you can see how textile stick shape in the real world, but you're not here for the teary, so we'll start trying. Our own pipe folds right away. First, we're going to draw a smaller piece of cloth so you can get the hang of it all the way from simple sketches to finished and colors artwork. Then it's time to draw, skirt and finally address. Not only that, but I'll includes all the files. I'm using the class so you can practice with me side by size and follow along the drawing process. And of course, they'll be an assignment at you end off the class to test your drawing skills and improved them. So I ready to begin. Let's get started
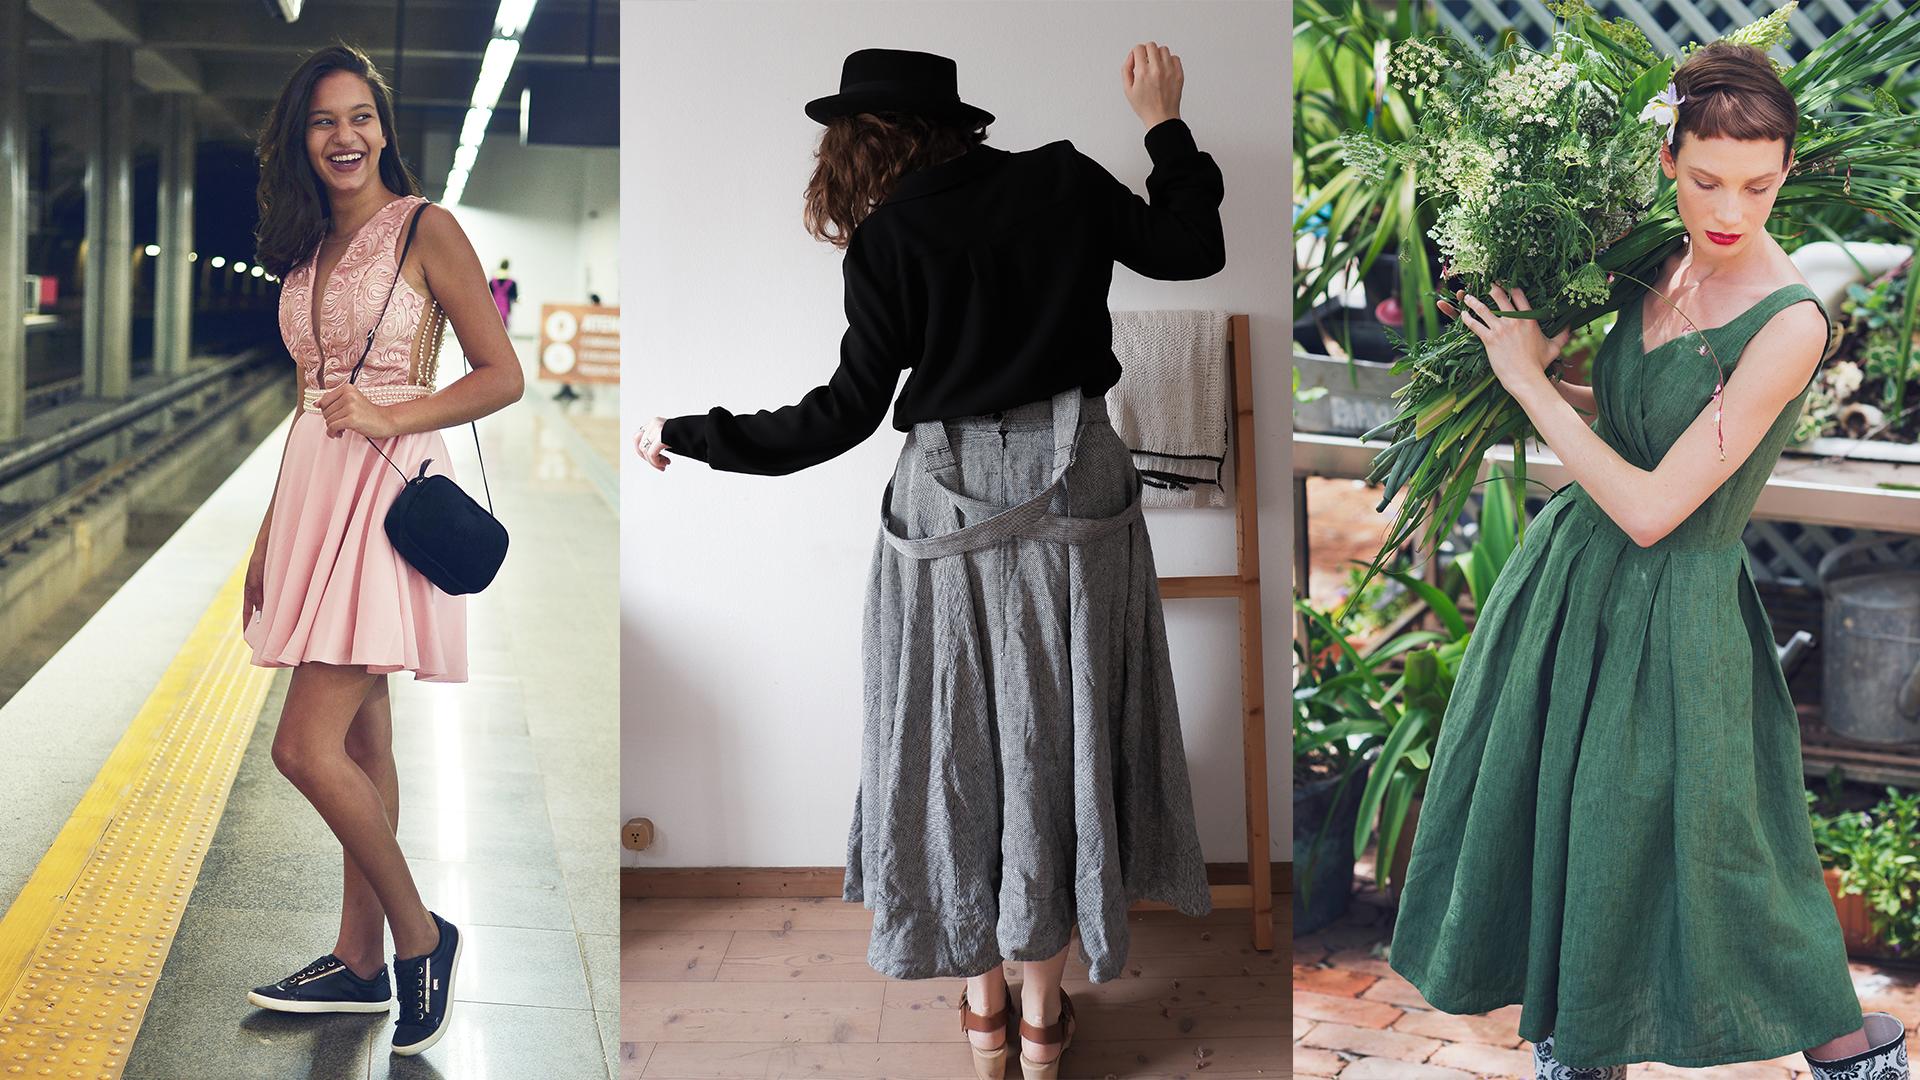
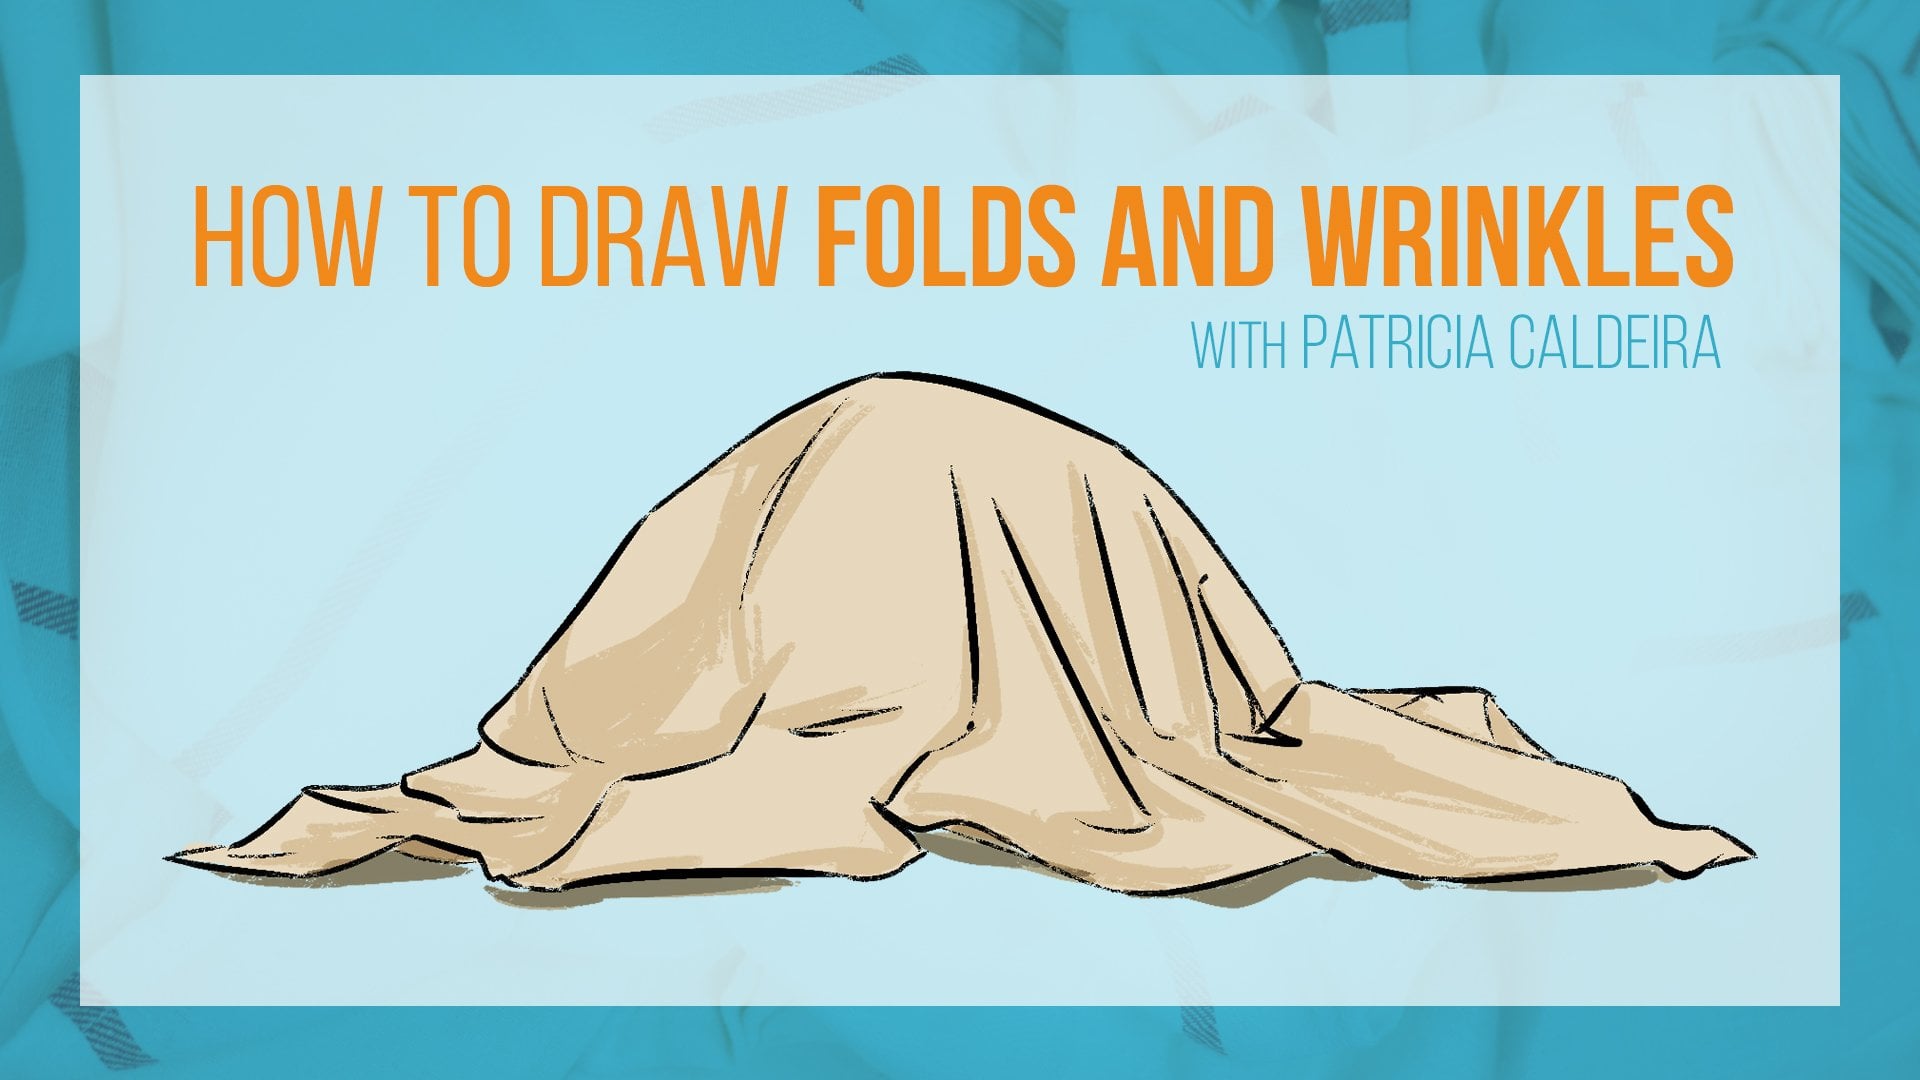
2. Examples And References: and hello and welcome. So before we start drawing, we're going to talk little bits off, teary about. I'm going to show you some examples off skirts and dresses as well as what type of fold we usually use when drawing this type of cultic. So we have here the skirts, and you noticed that we have thes wavy style to eat. There's almost like pipes at the end off the skirt. So we have these folds. Thes type of folds is called the pipe fold because off their looks, this is the type of fold we mostly used from drying scored sin and dresses off course. It depends on the design off the skirt or the dress, but most commonly we will find this kind of faults the pipe full that looks a bit too black . It tends to be very wavy, and another place where you might find this type of fold is something that you probably have at home. For example, some curtains curtains are usual displays in a way that creators pipe effect as well this wave effect. So as you can see here, we can very clearly see those cylinders the main shape that is creating this effect. So to draw a pipe fold, we have to think about cylinders or if for drawing a skirts, it can also be a cone shape. But that always depends on your reference off course. But generally speaking, cylinder is our shape when drawing the pipe fold. So if you want to practice this folds before jumping to closing, you can take some photos of your curtains, for example, lifted to create this effect or find some images. I'm sure you can find something, and you can practice with curtains. So about the pipe fold again, it usually has a tube or pipe like look, as you can see in this image, depending on the origin points off the folds. You can also look almost like a cone. Again, it depends on your images. We're going to see several examples as well. Let's draw them. So why this? This fold happen. It's because the origin point is compressed together. So as you can see, there are a few original points in the skirts, and at least someone's are compressed together and then the other end off the fabric. False loose. So we have a compressed point and the rest will fall and open up. So we see these tube like shape, and I think it's very fun to draw. It's probably one of my favorites folds to draw, so I hope it's the same for you. And as I said, it's It's very common to draw with skirts and dresses, So if you're drawing a skirt or dress for your character, you're probably going to be trying this fold. So let's see some examples. So if you seen my previous videos, I've talked about thin and seek fabrics, and we have here two examples. As you can see, both off them do have the fivefold, however, the example from the left as a very thin fabric. So we have lots of faults happening there. It is very complex. There's lots of faults. There can be very fun to draw can also be very hard if you're just starting. So if you're starting with folds and drawing close, maybe start with something simpler. For example, some thicker fabrics like we see on the example on our right. As you can see, it, has the same kind of fault, but it looks less wavy. Why? Because the fabric is sticker so it will creates less folds again. We have here an example, this time with dresses, so the example nor left is very thin, very loose. So we have more waves happening here. More pipe falls happening, as opposed to the example on the rights, which is a secret fabric. It is also quite loose on the skirt part, but since it's think of fabric, it has less false. So gift is in mind if you're just starting to practice your fault, maybe start with something simple, like example on the right that has less false so it gets used to them and then grow from there. Then try thinner and thinner fabrics to practice your faults. Now, as for references as always, I recommend Pinterest is always a good place for you. To go and see lots off dresses or skirts is just need toe typing in what kind of dress you want, or just very general about it. Scroll and see whatever you like in practice from there. As you can see, there's money types off dresses that you can use for your own practices. Then you can also go for free stock websites like Unspool Rush, where You can also look for specific clothing, and you also have quite some examples for you to practice and another website that I really like. ISP Exel's. It is similar to Owen Splash. It is also a free stock websites. So again you can look for dresses, skirts, whatever you want. Choose one that you like and practice from there, then finally, and not a very good place for you to find. Closing to practice is fashion magazines. They usually have good photos off closing and models wearing them. So it is a good place for you to get some references to practice, and the same goes with clothing catalogs. I know this is something that it's not as used today as it was before, but you probably still have some at home. And if you do, it's a good place for you to also look and have some clothing references to draw. So this is it for now. I'm not going to bother read anymore theory. From now on, we're going to draw, and we're going to start by practising the pipe fold, so I will see you in the next video
3. How To Draw A Pipe Fold: All right. Welcome back. Now, as I said, we're going to start drawing and before drawing a skirt or a dress, we're going to practice the pipe fold. So I have here an example. As you can see, we can very clearly see our tubes or are cylinders our main shapes here. So let's start them. As always. I'm going to start by giving some conspiracy here tore layer to our photo, and I'm going to create a new layer on top of it. I'm going to grab my pencil. I usually use my rough pass alone clip studio, then usually I used to read but cysts, our image is red. I'm going to use a blue so you can see well and we're going to find our basic shapes. That's it for now. We don't need to find any details or draw them just our basic shapes. So we have here also, don't worry about your lines right now. They don't matter. This is just a rough sketch. So I'm going to find here our first shape. So we have here 12 Now, the 2nd 1 we have treatment shapes your tree mine cylinders. So that's what we're going to draw right now. So we have another one here. So this one goes has quite some ways. So we have one here, ended up again and it goes on the other side and ca next again. Here. There you go. And now here we have this shape. All right. So, as you can see, I'm ignoring most of the details right now. I'm just finding the mind shapes. So the secret is always to just break it down to smaller shapes, toe anything you want to draw. This is the way to go about it. You'll see that everything will become much more simple when you break it down to simple shapes. So finally have here are thirds shape. So again, we have here the wave going like this and then on the other side. So there we go. See? Very simple. We already have the foundations off our drawing. I'm just going to participate smaller so you can see well, so as you consumed with very simple shapes already have something that is recognisable. When I look at this, I think off fabric off tubes. And it was very simple to do this Now I always recommend when you're starting to draw something, you for the first time, Teoh, find the shapes on top of your image reference because this way you'll get more used to the shapes. You learned the shapes and then, later on, when you're practicing, you already know by memory. You already know how to draw those shapes. So when starting something, you'll drawn top off your image reference. And then as you learn and as you get more confident with your shapes, you start drawing on the side of your image reference, for example, so try to find always the shapes. This will make your life much simpler, and it to also be less frustrating when trying to draw something new. So now that we have our main shapes again, you can always just practice the shapes as many times as you want it to look at used to them, and then we'll go to our sketch. Now this sketch, you don't need to worry about the lines yet. It's just a sketch show. It doesn't need to be perfect, so I'm going to create here in your layer on top off my shapes layer. Again, I'm going to grab my pursue and the darker tone. And now I'm going to start to draw adding some more details. So we have this mind going down the full here and the underneath part of our faults. We can create here a little bit now. There's also here this line we can droit here. You can also draw the seems if you wish, start adding as many details as you want on their skitch. Now, here again, we're going to go down now. Notice that we have here quite some folds happening here. Some movement happening here. So we're going like this. And then the beat out we have here this curve. So we have a bit of a folds right here and now our other folds that to be true before all right, and always remember to be very relaxed so your lines will show relaxed as well. Now this seems that we go as you can see, my lines that I'm perfect but they do show relaxed. So try to be as relaxed as you can. And the secret for that is toe. Just don't think too much about it. Just follow your your guts and just scribble away. So again we have here two folds. There we go, all right, and that's it. It's mostly it. We have our sketch are missing the same here, so let's do that. And there we go. We have it. Remember, when drunk special in the drying. These long lines do not use on lee your hands used your whole arm and even shoulder. Not only will it help your lines, but it will also be better for your, But using only your hands and wrist will mean that you probably going to end up with some pain on the long road, so use your whole arm when drawing. You'll notice the difference in your lines right away. So think about it. At the beginning, you might have to be always conscious about the movements off your arms, but once you get used to it, you'll see that you'll be using your whole arm well, drawing without thinking about it. So we have heroes sketch. All we're missing now is our final mines, and for the final lines were basically going to just be trying on top off the lines, which is true of our sketch. So we're just grinning everything up, and I'm going to grab my my brush, my Leinart brush or pen brush, and now we can start. So, like I said, use your whole arm to draw the long once. Not only the long lines, of course, the all the lines you're doing, use your alarm for it. And again, don't think too much about your lines or how perfect they are. The secret here is to be as relaxed as you can, and that will show in your minds another thing I want to mention. Since this is all just just watching me going over all the ones we did before, feel free to do this had to sometime as I do or watch the video, and then you can practice or pause whenever you you feel like you need to if you're doing this at the same time as I am. But remember when doing your final lines or even your sketch, remember that practice and repetition is important. So, uh, don't worry too much. If your first drawing isn't looking like you wanted to just do it again. Practice it and you'll see that with each practice, your drawings will become better. So here we go. We have huge are, and also you don't need to co p exactly watches he, in your reference, use your intuition as well. Maybe some things don't really make much sense when drawing. Just go along with it. Just have fun with your faults that the most important thing about trying folds usedto relax and have fun with it. So there we go. We're almost finished with our final lines. We just have this part here missing. Also, you'll see me repeating my lines over and over, so it's running natural toe happen. Don't be afraid to repeat your lines as many times as you need. That's just how it is. It's all about you're raising one's trying again until we have something that we really like. So, De Rigo, I have my final lines. All I'm missing now is the seems that we have get on the sketch and then we're done. As you can see, drawing folds doesn't need to be heart. We just need to find the way to do it's and the way that will help us off course that everyone works differently again. This is my process. This is I think this is a process that really helps special when you're just starting. But who knows? Maybe another process will help you better. Maybe you prefer doing things another way. There's no wrong way to go about it. The important thing is to experiment until you find a way that works videos so. But hopefully this way will help you. As I always say, the secret is to find the shapes, everything as a shape. And once you find them, everything will become much simple to drop. So now that we have our final lines, all we need to do is to add some callers. So there we go. I created a new layer, but needs my lines. And now, with the help of a bank for good, I'm going to and my colors here. This is just to be do do this faster, but you can also add the color with the brush of your choice. And now I'm just adding the places where the Olympic buckets failed to add color, and this is it. So, as you can see, I think it looks really interesting. Right now we can see the movement there. There are different widths of lines off Ah, the thickness over lines this is very important because it will give a different feel and look toward drawing So another to have caller. We can also add some shading. So let's see. Be darker. I'm going to pick a darker tone than what we have. Something really simple. We don't need to do a lot here right now, although the shading can help in giving some depth to your faults. Okay, so these here underneath. So they are really in the dark. So I'm choosing a darker tone, even darkened in and warned that we're using for our shades. All right, picking up this one again. So here it just have some fun with this. Adding shades now here. There you go. I'm giving really simple shading here. You can't b s complex with it as you want. So we have people. Quite some darkness. I'm falling a bit. Are referenced image here at least. Ah, where All light sources. So the light is coming. He's shining here in this direction. So it's coming from the left. Always spate entered into that choose a light source and then throw accordingly. So here we go. I think we are done for now. So this is it? This is our pipe fault. Withdrew. What a lot of them here. And on the next feed, you were going to draw a skirts. So we're going to draw actual co thing and hopefully I will see you in the next video.
4. How To Draw A Skirt: all right, here we are. And welcome back. I hope you're ready to start drawing clothing because we're going to draw a skirt now. So we have Here are reference image that we're going to use, and this time we're going to draw a long skirts. So again, we're going to use the same process shapes, sketch final lines and then coloring. So some conspiracy here and you lay it on top. I'm going to grab my pencil. Remember that even though I'm using digital on doing this on computer, you can also do this sweets, paper and pencils or pens wherever you prefer. You can still do the same process. You can still do your first your shapes first, then the sketch and then your final lines. Just remember that if you didn't, traditionally, you should not apply a lot of fresh. And when doing the shapes and sketch, so you can you raise it later on when you finish the dry. But other than that, feel free to use any medium that you prefer and, as always, experiments with as much as you want. Beats reads how we draw the tools you use. You can try any kind of software. There's always lots of rushes for you to try. Israel, is there lots of materials for you to try. So experiment with it and have fun. This is the most important advice I have when drawing is to have fun and relax. So without further to do, let's start out drawing So again we're going to find our shapes. So I see here right away one shape. This is the first trip that I see. Now here goes down And then now here we have a full So we can also throughout that shape. There you go. We have here are first shapes. Remember that the shapes that I find my not be the same that you find experiment different shapes. There are lots of oy to construct your drawing, so to build your drawing. So again, tryouts, different shapes if they are different than the ones that I found. So here we have another one. Now from here we do have the arm here beat on her on the front But it is still possible to understand our shape here. So there we go here we have another pipe and it goes inwards. And then here we have our final shape. So I think this is all for now. I forgot. Finished here. Close the shape there. So this is it for now. We have here again. I think it is already quite clear what withdrawing that we have here. Piece of clothing and some faults. It is not a finished piece, but it is already recognizable. So that's always goods. That's always a good sign that you're doing something right. So again, Now we're going for the sketch. Fey. So some conspiracy to our shapes. And you layer on top a darker tone and my pencil brush again. So we're going to start again. Don't worry too much about your shapes here. About your lines here. I'm sorry. Here at some point thes part here goes beats to the side. There's a bit of fold here, as you can see here. All right, we can add the buttons. All right. In the we're going to start to draw our faults. So you have one. There you go, then. Here we have another folks fed a big one here, and it goes below the rest off the fabric right here. So this fold is underneath this part here, Derek O, and just realize here little bids. All right. I think it looks better this way. And now the other side. So again we have here and then another fold here, another pipe here. A good way for you to have the movement right is sometimes to draw this cursed here. And then you add the rest off the fold when I'm having some kind of difficulty with my fault. Or I think they don't look as natural as I want them to. I draw the wipes first, so I'll go this way and then adds the rest of the full like this. So if you're having an in difficulty, if you think your false aren't looking very natural, find ways that will help you. This is how I usually dio. So I recommend you doing it that way to the waves and then adds the rest off the fault. Now we have our sketch, and now we're going to draw our final lines. So again, some conspiracy and new layer. Also, you might have noticed that I use different types of lawyers for my sketches and the final lines. If you're using clips stood you, you have vector layers, and I use veterans for my line out because that way I can skill up or down my lines as much as I want without losing and equality. But as always, you can use a number of Russell layer wherever you prefer to use. So now we're going to start drying the final lines of our skirts again. This is mostly drawing on top of the lines. You just wrong. You're you just throwing your sketch. So it's a Metro repeating and drying cleaner lines. So as you can see, I drew the wives first, and now I'm drying the rest, just like a told you about, and like what we have so far now toe the other side. Remember to take your time. There's no one after you. There's no timer. Just have fun with it. If you work slower, then that's fine. Just Walcott your by see if needed. You can just pause the video for drawing at the same time as I am. You can post a video for a while, take our time with a drawing, and then you can continue watching DVDs perfectly fine. Everyone has their own pace, so if you feel that your slower or quicker than other artists don't fret about it. It's perfectly normal. We all have different places and ways of working so that we go. And now I think all I'm missing is the buttons. So let's do that now. All right? I think it's good. Let's see without the other layers. Yes, I'm happy we did. Now we can adds our colors and our shading to it. So again we create a layer underneath our lines. I ran my pestle. I'm sorry. A grand, My bent bucket Here. Now pick up a call or so the skirt has quite a lot off has a pattern. They're not going to use that. I'm just going to feel it with cream tone. And then we can add some shows. Girl, just feeling out the place is that the paint bucket missed. All right, so now a darker tone and we can start adding our shells. So in here we see that the shadows are mostly toe the left side, which means that our light source comes from the right. So we're going to draw that accordingly. So this full big Turker Sorry. So this fold here is underneath the other two, so it real be in shades. All right, spot to hear. Swell. So here this part of the fabric goes underneath this side. So we're going to have here a little bit of shade as well as you can see here in a picture . That's what happens as well. Now here we also have tiny beat can also add some shading to the buttons here and here as well. We have a bit of shading again. I'm keeping everything very simple. Feel free to spend more time on it. Remember that you can also give more fuel off depth and create more folds with your shading . So feel free to explore dead as well. Again, everyone has around process. I prefer to work with Leinart. Some people might prefer to work with their coloring and shading, but I think this is good for now. I'm going to live. It's like this and here we have our skirts. As you can see, this is thicker type of fabrics and we don't have a lot of false, but we still confined. Our pipe folds here. So this is it's I hope you had fun and else you on the next video where we're going to draw a some address
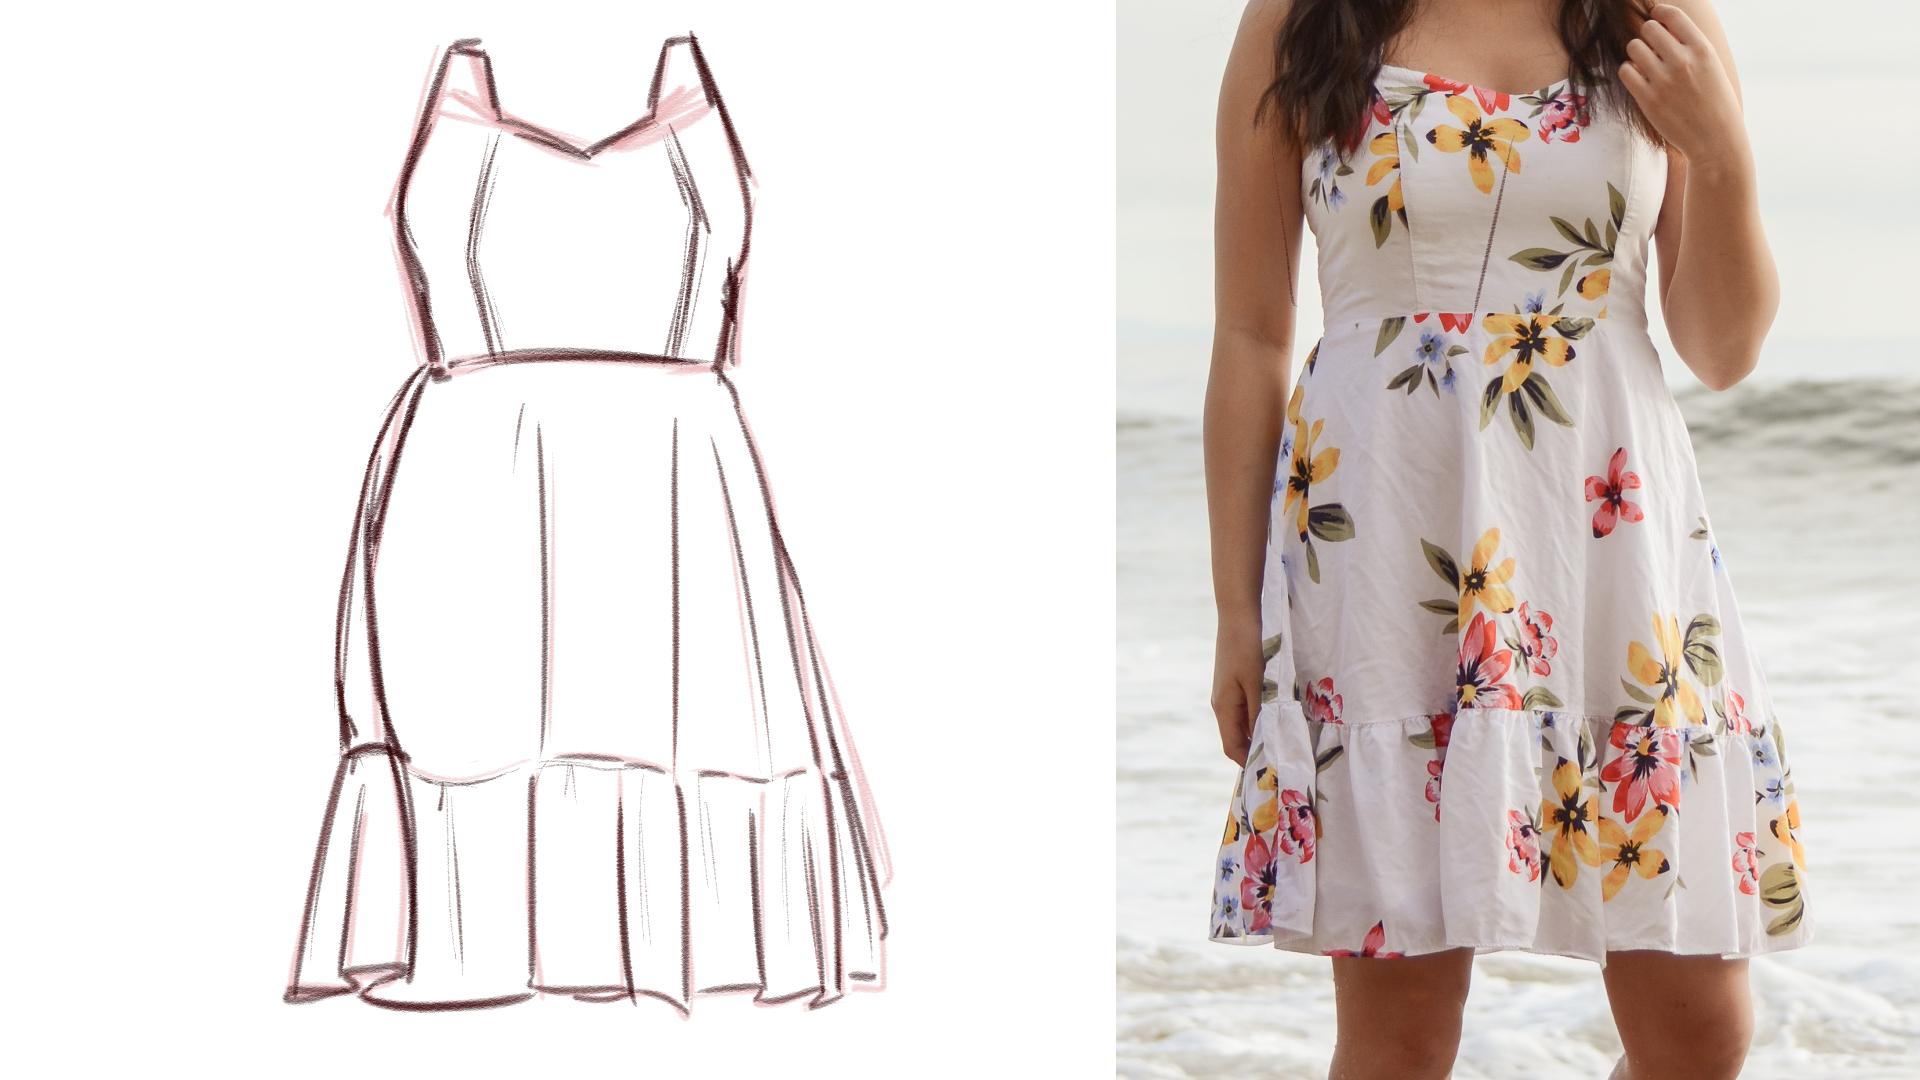
5. How To Draw A Dress: Hello. Hello and welcome back. So this is our last drawing video, and this time we're going to drop address. I have here my reference image. And as you can see, I've up arguing here. So these has quite more folds than what we did so far. But we already practice a skirts and the pipe falls. And I'm more than sure that you'll tackle this with no difficulty at all. Don't be scared, toe. We're going to use the same process we used before and you'll see that it will be as easy as all the false you did before. So let's start this. Okay, So a bit of conspiracy on a reference now a new layer, my pencil. And now we can start our shapes. So we drew a skirt and we only had the bottom part with address. However, we have assessed parts, sometimes even sleeves and then the skirt. So we're going to find our shapes again. Don't worry too much about your minds. As you can see, our model is a bit to the side. However, I'm going to be drawing this, changing it a bit, so it looks like it's turned to the front the dress. So there we go. All right, top Pakistan. Very simple shapes. And now we're going for the bottom part. So pissed off all we have here, this mainline right here and then here. And the little bits picking here. There we go. Now here we have quiets samples when nothing too complex. C fun at easy. Now I just need to draw on lines here in here. Then we have here another main falls and we have again a few folds happen. E line up on up and stuck. Now, finally, we have yet another folds right here, then going up. All right, so this time now we're going here. We have one line going, but then we have a beat off the dress, going on top off the rest. So let's see that shape. Here. There we go here and now folds. It's all about waves. Now, notice that we have here, some seems so These are important. So let's just get them down here. There we go. And now, finally, if you want, you can ads here. Someone's for these folds. So, Derek, go. As you can see it months, it might seem more complex, but using this technique by creating some shapes drying on top of our reference, it will help us understand the shapes and the movement off address. So now I'm going to move this to side, give some conspiracy this like, and you want on top, and we're going to draw a sketch. Remember that as you practice anything, be it address a character, any kind of objects as you get used to it. You might skip some steps, for example, when I already know how to draw something. I skipped the shape part. I just drove my sketch and then my final lines again. This is different. Depending on the artist, you can have as many sketch layers as you wish. If that does help you or less, that's totally up to you. So even though we already have quite a lot of complexity here in our first layer, I will still draw the sketch layer because one it to let me add more details. And second, this is a good way to practice because you already have the shapes you practiced once, and now we're going to practice again on top, off the layers you already have, and then you'll even practice 1/3 time when drawing the final lights and you'll see that from layer to layer, you gets actually some improvements because you're practicing your repeating and you're getting better at it. So let's start. So we have here sleeves feel free toe adds a bit of full here if you wish. As you can see, there are some here, not this side. So now we have our seem here. Now notice that there are also some seems here on the chest. So let's draw them. Terry built. And now the skirt. So again, waves. Remember that again. You don't need to copy exactly what you see on the image. Feel free to add your own touch to it. There we go. Oh, here we have this hold as well. Now here, this big fault going insides. Feel free to ads as much details as you want on this face. And now we have the rest of our dress. So we do have here. But then from the other side comes because the wind is blowing obits and we have the dress the the behind off the dress appearing on the front. There we go, making things a bit more interesting. All right, I think this is it for our skitch. I'm happy with it, and now we can draw or fun ones. Also, this does have some patterns here and feel free to add its. For example, you can add a twitch of online's, or you can add that pattern while coloring, for example, so I'm going to show you debts afterwards. So final lines. First conspiracy here, a new layer on top, my pen brush, and now we're going. Have some fun with our final lines. Remember to keep yourself relaxed, trying to keep things as symmetrical as I can that so I had through this line here. Great. Any God said, My help you guides are always important. As important as using references to learn and to draw something, remember that both guides and references are your friends, and feel free to use them as much as you need. Even professional artists will used it all the time. Okay, so if someone tells you that using image for reference images for reference is cheating, it isn't it is a tool, it is a helper, and it should be used special when you're learning to draw something you can't learn to draw something without seeing it. So it is important to use references and images to help you. All right, so I'm drying here are folds now, trying to keep everything very flowing and relaxed. His party. This part here is probably my favorite. I really like the movements here. All right, so now it's time to add some coloring. This is our final drawing. So let's have some fun. We did so going to procure a great tone. The dress is white, but since we are working with the white backgrounds, this easier to show you the coloring this way and the color too. We forgot. Here, There we go. All right, so we have a call or coloring? No, let's also adds a bit off pattern. So some flowers here and there. Just have fun with it again. I'm going to do something fairly quick, so I don't bore you with all these pointing. Otherwise, this will take me quite some time. But again, feel free to take as long as you want. You can either do the same kind off pattern off the image. You're using our off this image, but you can also just creator on patterns and designs for your dresses. It all depends on what you want to do it the moment you might. Either we creating colds for your characters. Or perhaps you're just want really to practice. And the idea is to be as truthful as you can with it. Your drawings. I always like to add my own style and my own twists to my practices. But like I already said, everyone has their own preferences. So shield free to do as you like, as long as you having fun. All right, there we go. I think I'm happy with its. So now I'm going to add some shadows now. This time we have this pattern so far and just been choosing a darker tone that then what I've used as the best color. But this time since we have the pattern and I want to apply the shade, the shading to the pattern Israel. So what I'm going to do is I'm going to create a new layer on top of my coloring change. It's styled to multiply your beat up conspiracy, and I'm going to pick here my gray and now draw my shadows as you can see it trill. Make it easy to apply my shadows to it. This is how I always do my shading in my drawings going to Yes, so you can see the shadows better. I think this is a very interesting way to apply the shadows and it lets me draw on top off everything I have so far. I think this is it for now. I'm fairly happy with my shaving here again. Feel free to take more or less time with it again if you feel that. And if you're drawing at the same time, time as I am and you feel that this is going to first was the video for a bid. Take your time with your sketching with creating shapes with painting, whatever. And then you can continue the videos. So this is it. I hope you have fun. And next we're going to talk about your assignment. So hopefully I will see you there
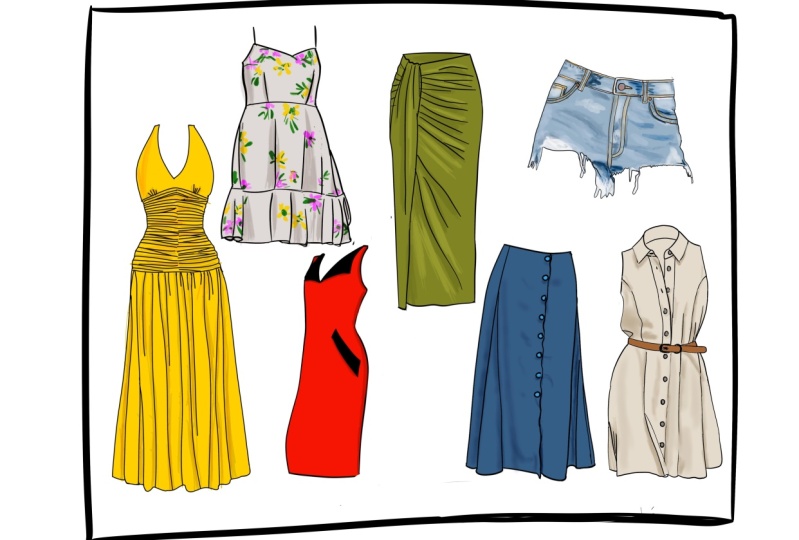
6. Assignment - Time To Practice!: Hello again. I hope you've enjoyed the beauty so far and learned a lot. It's not time to get some more practice, so I have your a quick assignment for you. That's practice drawing dresses and skirts. I have your tree, different images for you to choose from. Simply pick one android. You can even downloaded to your computer and printed out if you'd like. All right, that's pretty much it. Remember to post your work so I can check it out. I can't wait to see your project. Have fun and see a son.
7. Conclusion And Thank You! + Speedpainting: Hey, again. So what did you think about the class? Did that help you improve your drawing skills? I really hope so. And I hope you've had a lot of fun while learning to draw clothes as well. If you can leave a review, that will help me immensely. And it lets me keep working on you and updated classes for you. So thank you in advance. Also, feel free to check my other classes about figure trying, drawing animal scholar cheery and much more. I hope to see you and your artwork there. All right, that's about it. So have a great day and I'll see you next time. Bye bye.
 Patricia Caldeira, Illustrator | Digital Artist | Designer