Transcripts
1. Introduction: Drawing any ME ice is one of the most fun things to draw that many of us find it immensely difficult. You've probably already tried it yourself, but you find it difficult to get grasp of. And most tutorials move too fast from one step to the next one for you to follow. Fortunately, I structure my classes so that even the people who have no drawing experience at all can have a go at it by just following this class. I guarantee that after this class, you'll have all the skills and understanding to draw any kind of anemia eyes in no time. Hi, I have more women art, a cartoonist, illustrator and an all around artist. I have over 10 years of drawing experience and an art school Decree under my belt, I have gathered information and skills to draw and to make it as easy and as fun as possible. In this class, my focus is on teaching you the fundamentals of drawing anime eyes using simple, easy to understand steps so that literally anyone can start drawing beautiful eyes immediately. And I'm not just teaching one way to draw the eye is, but rather giving you the tools for you to draw any kind of Animalia you want. So get your art supplies ready and let's get started.
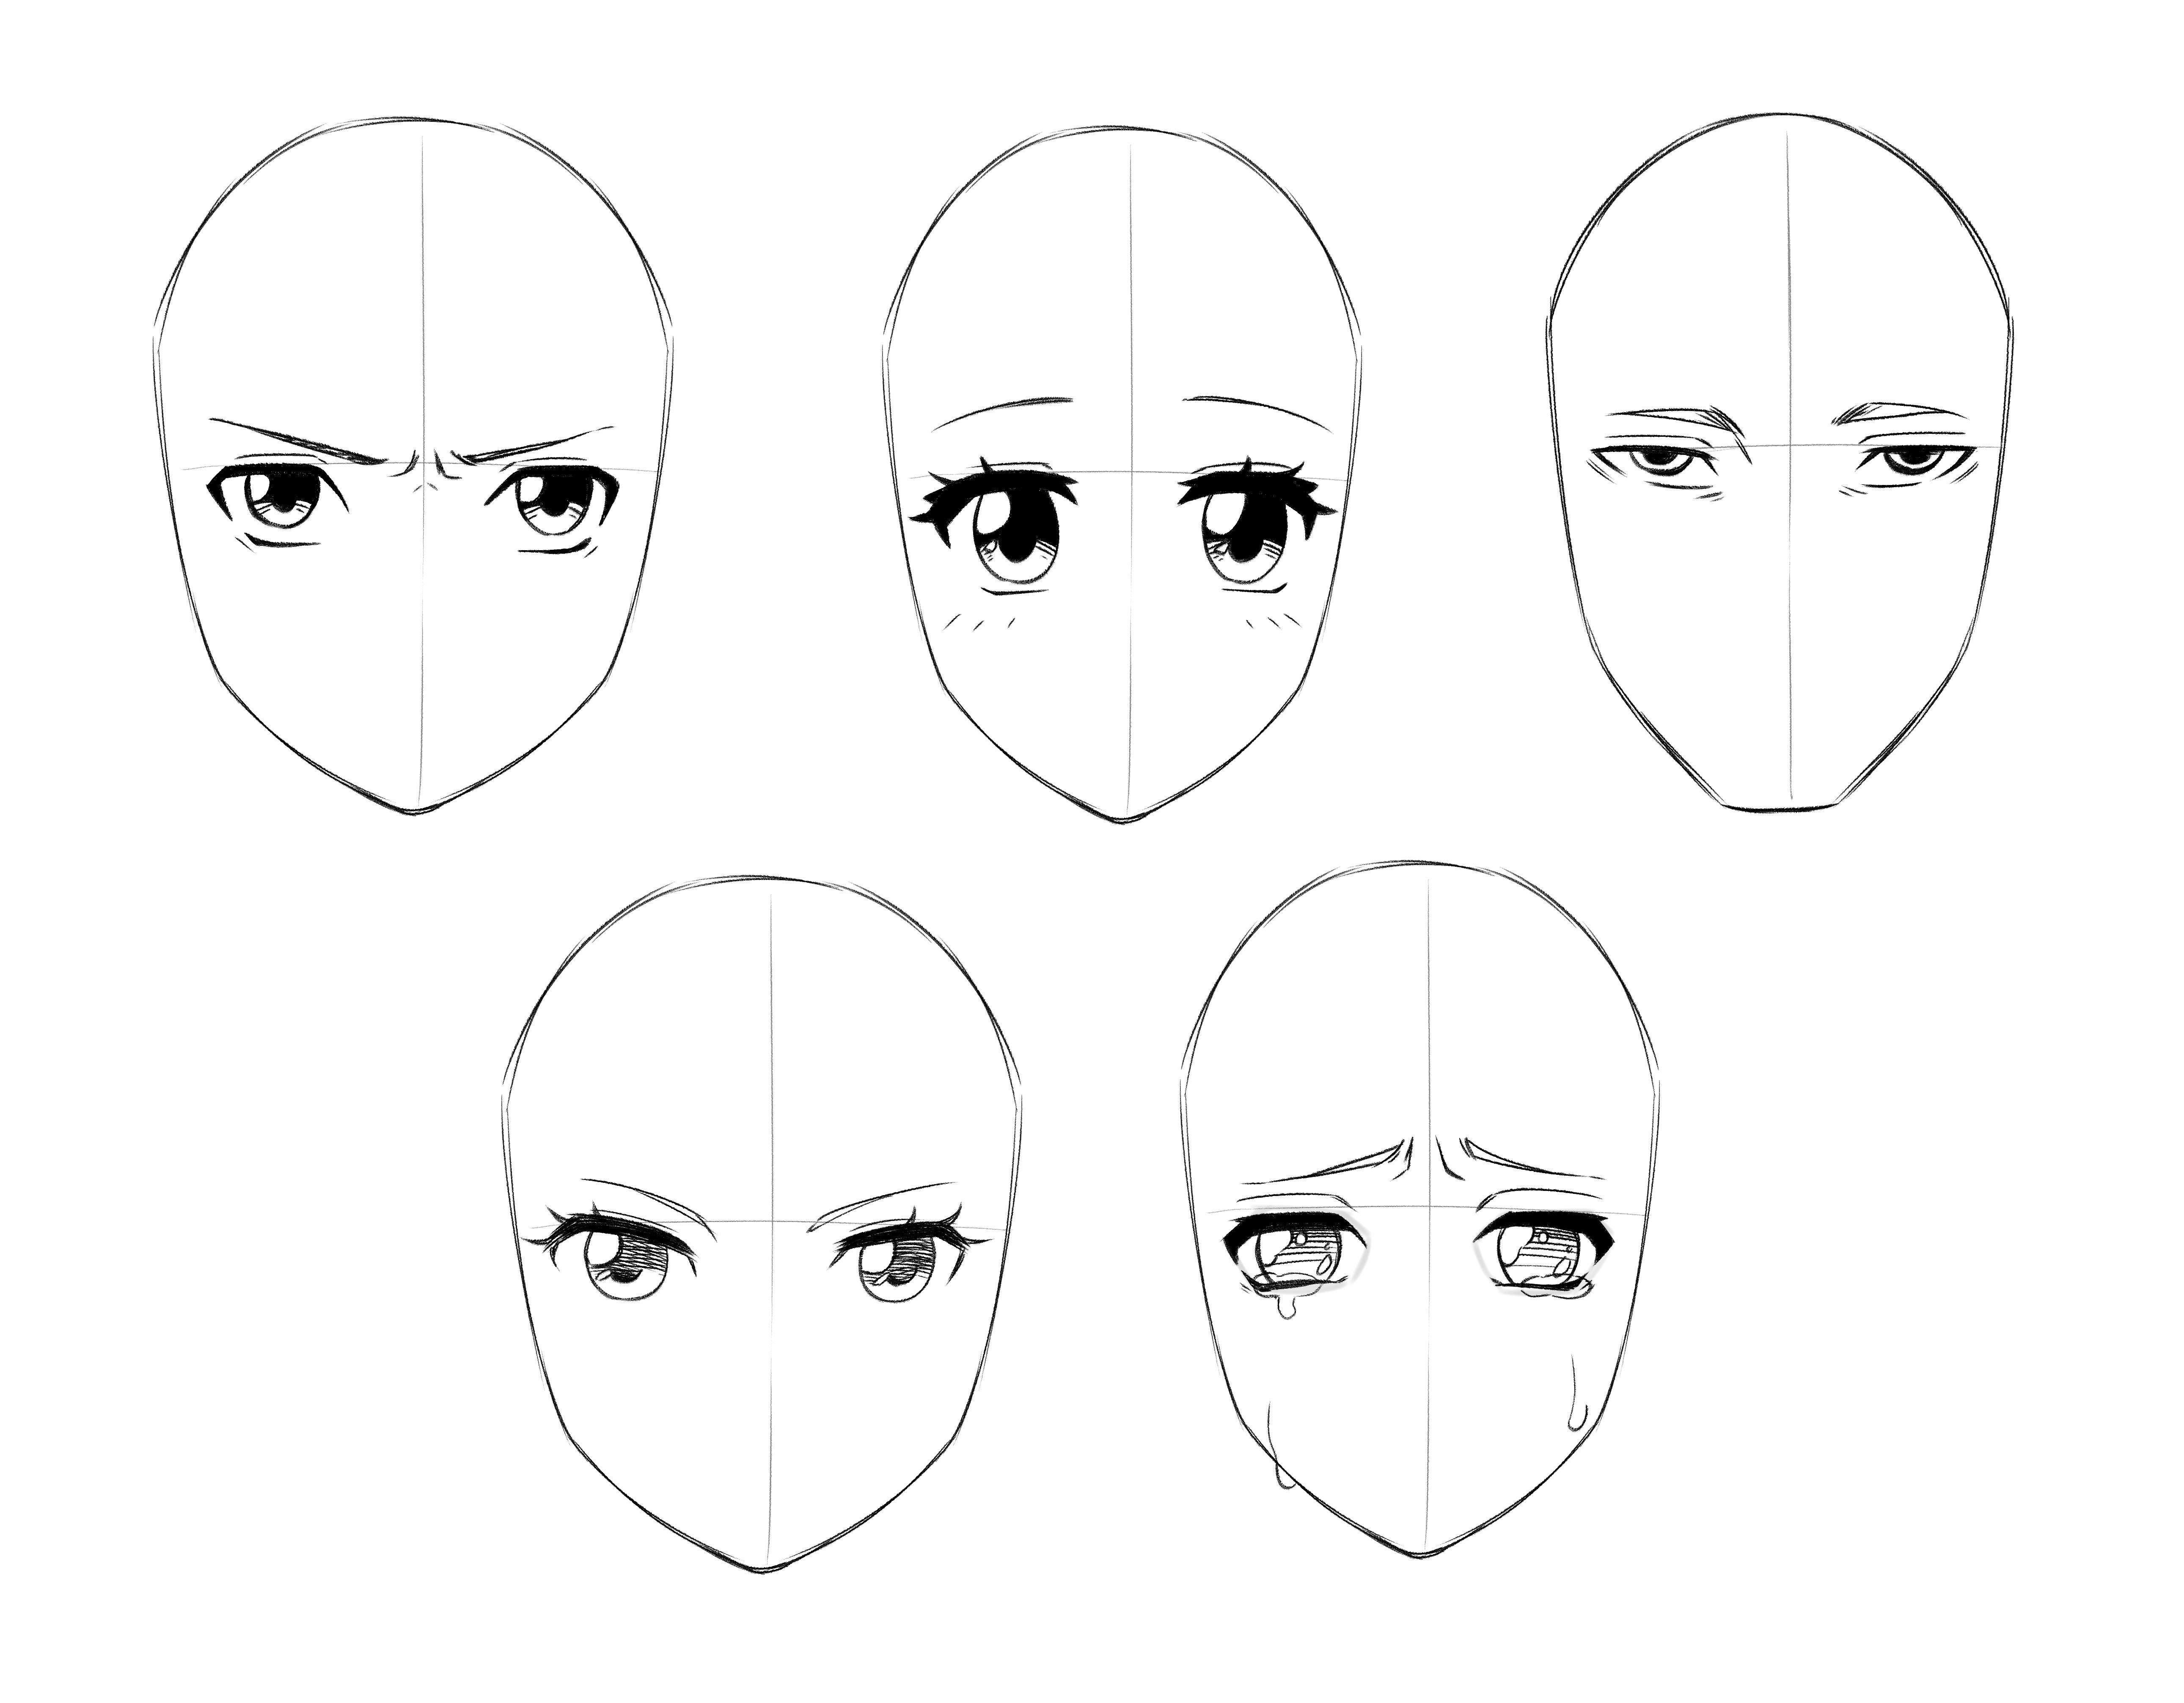
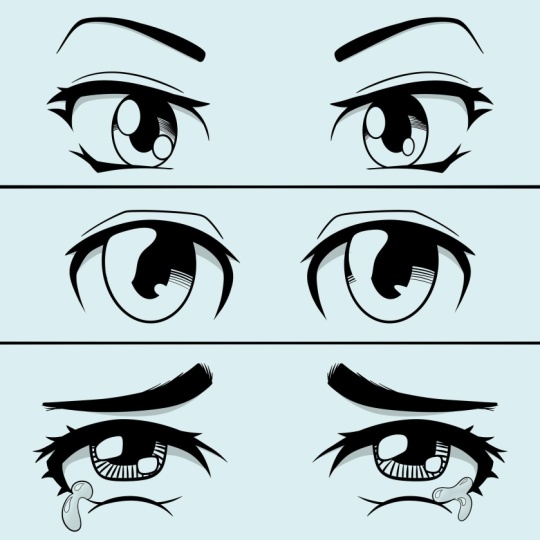
2. The base shape: Okay, So welcome to the first actual lesson of this class. This time we're just going to be going over the basic structure of drawing the enemies last month, the eyes. And of course, if you know my classes, you know that we are going to be using basic simple to draw shapes in doing that. But before we start, I have two things to say. The first thing is that anime eyes are so wary, it's so different from each other that you can draw almost any kind of AI and it can still be an NMAI. So when you are drawing your eyes for your character, just think that dust is good. And if it does, just continue on with that, You don't have to be bound by the rules of the NMAI because there aren't many rules to begin with. So be relaxed and they could easy. Don't worry too much about drawing the exact enemy eyes that you have in your mind. Just focus on drawing good eyes for your characterized characters. And that's what it is that draw from reference. Look how the real eye looks. If you want to take your skills to the next level, of course I understand that you're probably here because you exactly want to draw the anime eyes and don't want to be bothered in drawing realistic eyes. But in the future, if you feel like you want to get your skills to the next level and you want to know how the realistic works. Just look at references and drove from that. And that will immensely help you. But enough with that, let's get straight into it. First, I'm going to be throwing at you five different pairs of anime eyes. So here they are. There's one real important connecting factor with all of these. It's not the size of the eyes per say. Of course that's the important with the anime style as well. But of course there is variation there too. So some styles might draw the eyes has as small as they are in real life. And some styles might draw them so big that they almost can't feed on the face. But what's the most important connecting factor we're going to be focusing on right here is the general shape. And I'm going to show you exactly what I mean. So here's the first pair of eyes. Here's dick, Well, from my hero academia. And what I mean by saying the general shape of the eye. If you look this, I have a general shape and in this style is almost completely drawn in from each site. But that's not the case with all eyes. So if you see here, you can connect these lines just like that. And when you connect those lines, you have this general shape thrown in just like this. And that's the basics we are going to be covering in this lesson. And of course in this style, the whole shape is almost drawn completely in, except for this part right here. So let's take another example just like this here, the only things that are drawn in are the eyelashes on the top and little bit on the bottom, and of course the pupil as well. But here we can also see the channel shape that the eye is constructed from. We can draw these lines connected from here and from here. And then we have this shape right here. And if you understand this shape before you draw all the details in, it's much easier to place the eyes and not worry too much that you have placed the eyes in the wrong place on the face, because that's one part that many beginners struggle with, that they draw the eyes looking so beautiful, but they are in the wrong place on the face and they have to erase everything that I have drawn and they have to replace the eyes. So this is the general shape of the eye that we have right here. And when we understand that, everything becomes so much easier. Because when I was a beginner, I used to think that I have to draw this shape first and then this shape and then the pupil. And usually it went like this. I true that the eyelashes here. And then I had something like this going on and it didn't look good because they didn't understand the general shape that we have right here. That's why this line and this line didn't connect because I didn't understand how the eye actually worked. So let's get to the next one. Again to general shape is here. And just like with the deck one, we have almost a complete shape drawn in, but this part here has not been drawn in. But again, having that general shape down, we can do anything with this. I, we can actually stylize it even more if we want to leave some lines out, it can still look like anime I, because this is the general shape, but we can actually use only that eyelashes here. And just a little bit of indication on the bottom here and then the pupil. And it still looks like an anime I. And that's one important point because if you understand the general shape, you can stylize it as little or as much as you want. And depending of course, on the shape itself, how stylized it is. But you can see that this shape is different, differently stylized and this one here, but it's again still look almost exactly the same or keep the same expression to the character without drawing all of the same shape in. Let's go onto the next one here again, this is a perfect example of seeing the shape. You can see you can connect these lines right here, right here, and right here. And you can see the general shape. You have the beak long line on the top here and then connecting that line to here, to here, and then a curved up this, this way. And this doesn't look exactly like this because only a few of these lines are drawn in. So we can have this line here like that, and then have this line here and one line here. And when you get better, we train the animal eyes. You don't always have to draw that general shape in a part. You have to think about it in your head. So if I draw an eye, I can draw it like this. This is an I and this, and now when I know that the general shape will go like this, I can just think about it and connect these lines in my mind without drawing them in. And this of course, would go right there. So I don't have to draw these lines in at all. When I'm more at Gwen's, I imagine that general shape on the page before I draw the details in one last example, again with the same, same Method, we can see the general shape here. And using the eyelash here to connect these different lines in. And one big factor in animals less mana eyes, of course, is the pupil as well. Usually, the pupil is much bigger than in real life, and they usually not actually a circle. Maybe sometimes, like we have had a few examples of it being a circle, but sometimes and more often actually it's an oval shape. And in that one previous one here, even here it's an oval. But of course, because the IOUs and fully open, you can only see parts of the oval that would extend just like this. So these pupils here are huge, but that's the point. You have to understand something that you don't see per se. You have to understand the structure behind the eye itself. And that's the point of this lesson here. Here I have drawn some simple shapes. Reproduce ending I. I is general shapes. So here we have more realistic eye shapes. So if we wanted to draw it realistic I, but you could do this and this. And as you can see, it starts to look like an I instantly when we add the details, but don't worry about the details from now. The point is, This shape is the base that you can draw variations of. Because just like this one here, it's a little bit looking like that first I hear, but it's more stylized. I extended the eye's height a little bit and give it more structure that looks more like animates less among AI. So you can always use the realistic I as a base, but you can also go in a totally different direction and start drawing wacky I is. But if you've feels hard for you to come up with different eye shapes, you can always use the realistic IS a base and then go from there. But you can also start drawing wacky eyes test like this one that almost looks like complete circle. So practice drawing this general shapes, different shapes. And one thing to practice drawing, the shape differs from one angle. And then of course, the mirrored image of that angle B. Guess you have two eyes, usually, you have to know how to draw the general shape from, from this side and the mirror site as well. So practice doing that. And when you can do then we can move on to the details and placing the eyes and the face. So that's it for this lesson. I hope everything went fine and you'll learn something. See you in the next lesson.
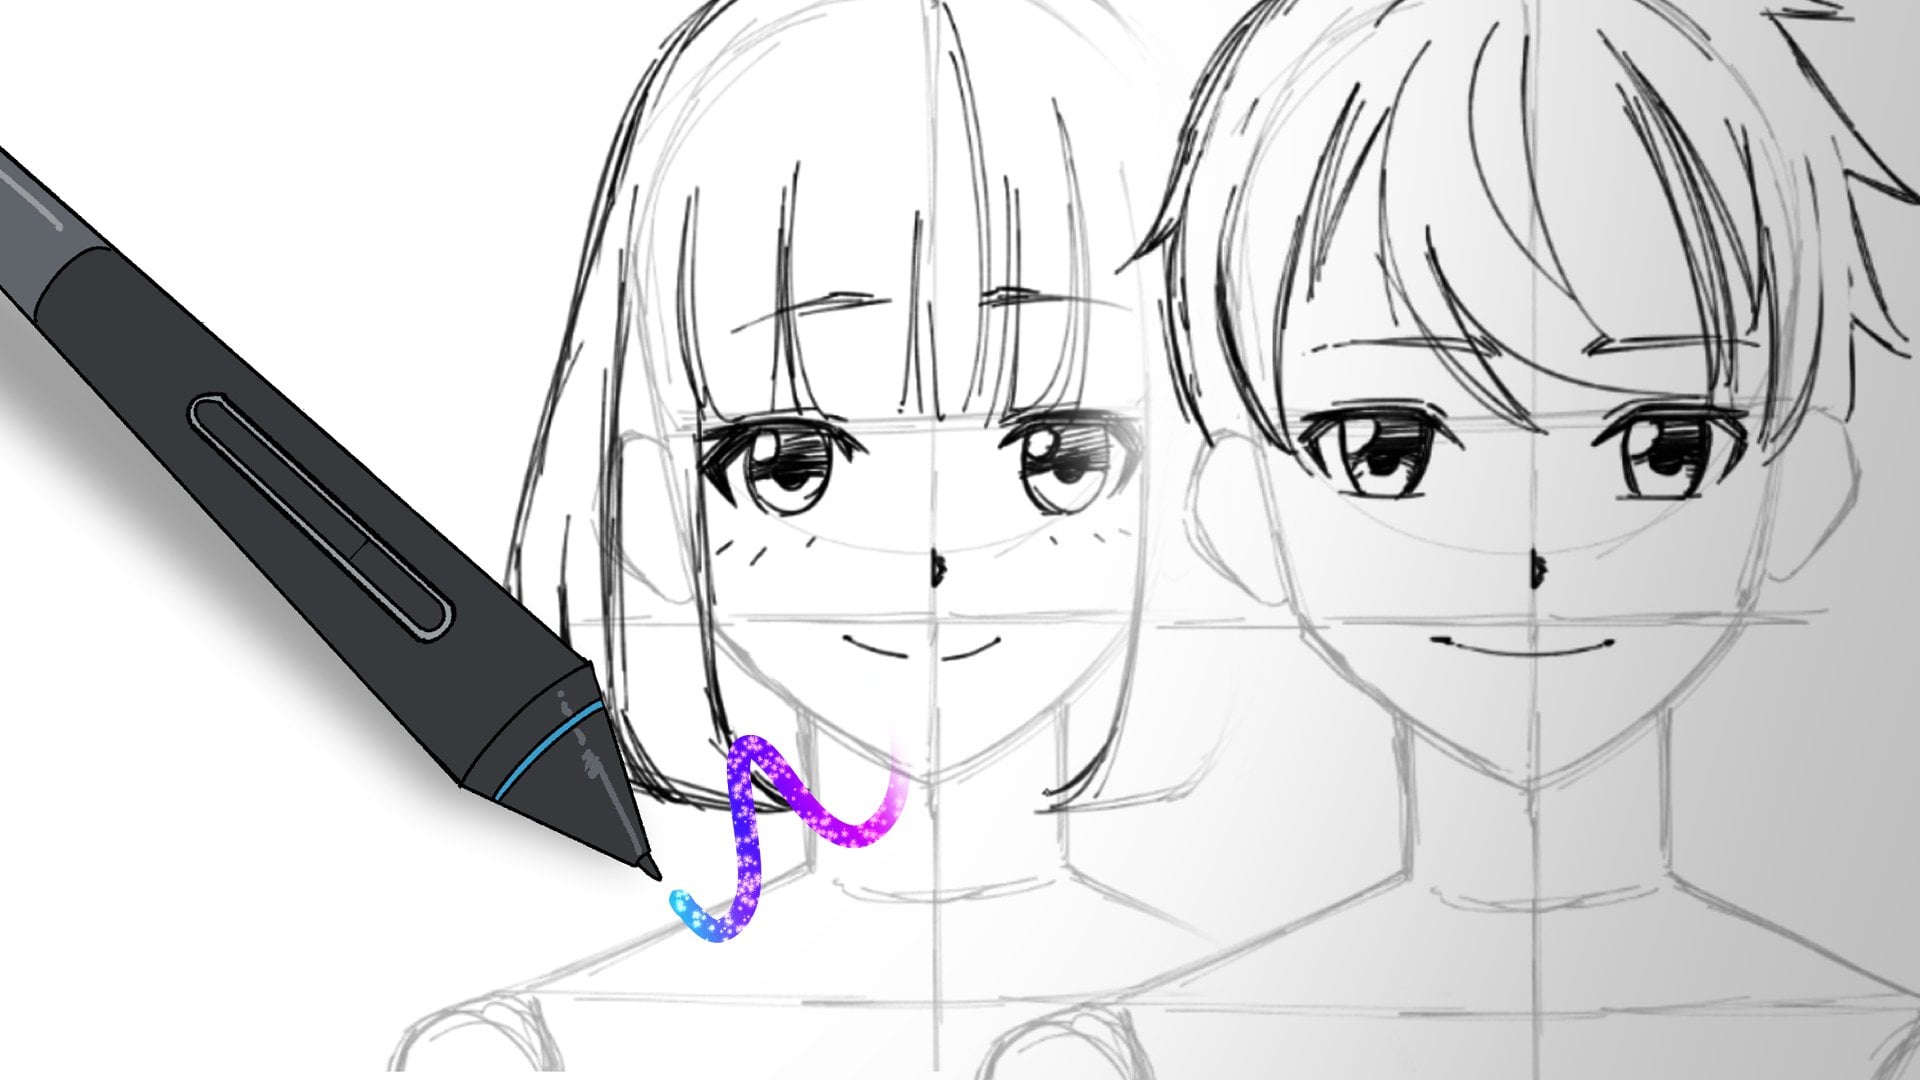
3. The placement of the eyes: Okay, so now that we have learned that basic shape of the eye, next we'll be placing the eyes on the face and why we're doing that before we're adding any details that the eyes themselves is super important because many beginners make the mistake of drawing super detailed eyes. And then afterwards realized that they have a place to eyes in the wrong place on their face. And they have to erase all of that and then place the eyes may be lower or further apart. So that's why we're focusing on placing the eyes on the phase. Now that we have learned how to draw the basic shape of the eye without all the details. So let's get into it. Here's a basic face shape where it looks kinda be going over how we got here because this tutorial is specifically upon the eyes themselves, not the face or the head shape. But if you want, you can screen kept this or I will try to provide some materials into the Materials folder so that you can use this basic shape to place the eyes and the face. But here we have to throw a few lines to place the eyes in the right place. And first is aware to call a central line right here. And it's easy because you can just measure out approximately where the center of the face or the head is and just place a straight line. It doesn't have to be completely straight, but more straight, it is easier. It will be come to draw the eyes in the right place. Next, we have to draw another line, which is also a central line, but this time it's horizontal. So just measure out approximately what's the height of the head and then take the middle point, just like I did there. And again, it's just a straight line across the face. Then we wanted to place these two lines too because you have to leave some space on the sides of the head. So the ice won't be right here, rather they will go on to the right place, more centered on the phase. So draw these lines in case you want to measure out a little bit of distance between the eyes and the edges of the face, then this might seem complicated, but I'm going to explain everything, so don't worry. So we had these alliance on the sides of the face, just like this. These two lines that we added right here and right here. They are approximately dividing this space between these two lines, two thirds. So this part here and this part here and this part here are approximately the same distance to each other. And why this is important is because there is a little space between the eyes. If you put them too close to each other, the character will look funny. So this is to measure out the space between, between the eye is, of course sometimes it isn't this much of a space like here, but instead it can be a little bit smaller space or even wider. But placing the eyes right now is easy because we have these slots that we can place them in if you want to make things even easier for yourself, you control also lie in another horizontal line indicating the bottom of the eye. Because if that seems hard to get right for poll to ice, but I usually just draw one line where the top of the eye will align and of course, the other I will go on to the other side, of course mirrored. And why this is important, having this space between these measured out as one iss width is because we can here see that usually. And this is the thumb rule that I want you to learn, is between the eye is usually is one id's with. And of course that's only the thumb rule. You can, of course, sometimes break the rule if you want and that it will fit the character. But if you want to make sure that your eyes are looking crazy on the phase, just draw one eye than one ice width of distance to the other eye. And that's the basic rule of this one. And this is the basics of the placing of the eye. So the top of the eyes will usually align with this horizontal central line here. But you can sometimes put the eyes higher or lower depending on your style and what your preferences are. But this is, again the basic rule, the thumb rule of this lesson. And then the other important thing is having the distance between the eye is being one with and also having some space between the edges of the face, right here and right here to the eyes. So this looks good to me. So I put that much there. So that's about it for this lesson. The basics of placing the eyes onto the phase in the right places. Next time we will be going over trying the details to the eyes. Finally, now that we know where to place the eyes themselves, we can add details because we know they're in the right place and we don't have to erase them later just to place them somewhere else on the face. So that's a See you next time.
4. Adding details: Okay, so now that we have learned how to draw the basic shape or structure of the animates last among the eye and how the place that basic shape onto the face, actually two of them as representing both ice. Now we're finally going to draw the details of the eye. And here's one tip that will help you immensely. And that is that you should draw both eyes simultaneously. What, and what I mean by that is, whenever you take one step forward, you should take the same step in both eyes. For example, when you're drawing the eyelashes, first, draw the eyelashes onto the left eye, the right eye, then the next step on the left to I, and then the right eye and so on and so forth. And why this is really important is because many beginners do the mistake of drawing first the left eye, super detailed. And then they start the right eye. And they quickly noticed at the right eye, so much harder to draw when you have the left I already drawn fully in. So to prevent that, we should take each step of the drawing of the eyes simultaneously so that if an error or mistake or curves, we can see immediately what that mistake is because we have only taken one step at a time. So if we draw the eyelashes and everything looks good on both eyes, it's okay. But when we draw the iris either off the eyes look weird. We know it exactly where the mistake happened in the iris of course. So that out of the way, let's start drawing in the details of the eyes. Okay, So like in my classes fashion, I teach you the basics of why things are drawn the way they are, and how to stylize those things rather than showing you one way to draw one single eye from beginning to end. Because I think this is much more beneficial for you as a beginner, okay? If you have the phase that you have drawn and their eyes placed onto the phase, you can continue in from there. I myself will show the process from a close up of one eye. But remember the rule. Always draw every single step to the left and the right eyes simultaneously. But let's get started. So first thing I usually draw, which follows the form of the basic shape of the eye is the top eyelashes, eyelash is that reside on the top of the eye and in anemia among They usually, this differs a lot in different styles, but usually it's drawn in with a thick line or a few of them. But in this case I'm just going to show you me drawing one thick line representing the eyelashes. I usually draw this line from corner to corner. And one thing to note above that line itself is that usually starts and the ends of the line will be thinner and then middle part of the line will be thicker. This rule can be applied to any, any drawing in general, but especially in the eyes. Usually it looks better if you have the starts at the ends of the line thinner than the middle part. But again, you can see that I just followed simply the form that we have drawn before, but just adding a little bit of variation that alliance with the basic shape as the base. Okay, so that's that. Then we can either draw the lower eyelashes or we can draw the iris. And this time we're going to be drawing the iris first. But you can do it either way if you want. The iris is usually the most prevalent part of the eye. Some styles even leave out every single peta of the eye out, but leave only the iris in there. And in anemia and manga, usually the iris is either a circle or an oval. In this tutorial, you can choose either one, me here, considering how narrow the I is, I want to use a circle here. Usually when I'm drawing some eyes that are taller and bigger, I usually use more oval-shaped eye receives, but if we have a little bit narrower, I like this one. I usually like to use a circle of some kind. And even though I didn't draw the whole circle in, we can still imagine there being a line connecting the circle together. So if you find it hard to draw just the half circle that we have here, you can always draw the full circle and then erase the part that is left out. Okay, so next we draw the lower eyelashes. These are mostly optional soon as many styles don't even include them, or some styles, they are thrown in just a little bit. And usually the line that represents the lower eyelashes is much smaller and much thinner than the top one, but again, following the form of the base shape underneath and leaving a little bit of breathing room between the lower and the higher eyelashes. You can always connect those two lines if you want. But in this case, because we are specifically trying to draw animates last manga ice, I'm leaving that part empty. Okay, next, I want to focus on the details and the iris. So I usually like to think about the Irish consisting of two prevalent parts that is almost always shown in anime and manga. And those are the pupil that of course, the real eye also has and the highlight. And some would probably argue that the highlight is. Bent so much on lighting. So if there wasn't the light reflecting on the eye, there wouldn't be a highlight on the eye. But still this is one of the most important and style defining things that we can see in animates last month. So that's why I wanted to include it as an essential part of drawing the eye. So first, I want you to draw the pupil, and depending on if you drew the iris as being a circle or an oval, the pupil will be the same shape as the erased. So if you drew the iris S and oval, then draw that pupil as noble as well. But because I drew the iris as a circle, I'm going to draw the pupil as a circle as well. Usually the pupil in any man among the most times is in trauma incompletely as a circle. Rather just leaving the top part of the circle out and just drawing a line of representing the bottom of the circle. Sometimes I like to connect the circle in the middle to the sides with these curved lines. That's a common way of drawing the anime eyes. And in my opinion, it really works. This line usually represents the shadow onto the eye. So the top part, including the pupil and the top part of the iris, usually be darker and the bottom will be lighter than the highlight. It depends so much on the lighting as I said previously. And of course, depending on how much light there is and how much the eye reflects that light. But in anemia among they're usually you can see one big blob, athletes of light. So leave one part completely white and usually it's a circle or you can get crazy with this because light can be in many shapes. But if you want us to be on the safe side, just draw a circle or an oval or anything like that onto the side of the eye so it doesn't look weird. You're going to also draw another highlight on the other side if you want, but it depends on what kind of lighting situation you'll want. Again, the highlight on there represents the light coming to the eye and reflecting from the surface of the eye. Okay, so now that we have drawn that in, I have a few more things to go over. The next part is really optional, but you can draw a simple line or a few lines represent the top eyelid. For me, it really depends on what mood I am mad and how much I want to draw details into the eyes. But many styles still include to top eyelid. And again, it's easy to think about it by following the forum of the eye itself and drawing a curved line following that. Okay, so that was simple. Next, I want you to draw that eyebrow. Or of course, if you are following my instructions, troll the eyebrows for both eyes. Eyebrows are so worried that you can draw either really thick and complicated eyebrows or just a simple line. So in this case, because this is a beginner friendly tutorial, I'm just going to draw a simple line, maybe add some thickness to the one end. Because even if it's just a line, you can still express character, emotion, and expression with just one line representing the eyebrows. Okay, so that was all for drawing the details into the eye. I know some people probably were expecting that we drew all the details, drawing and coloring everything in. But I just wanted to give you all the tools that you need because these are the most important things that the eye is constructed from, especially in anime. So you can use these tools in drawing any kind of AI, and you should be okay, but of course it needs practice, but that's it for this one. Next time we're going to be going over how to draw a character expression using the same rules that we have learned so far. So see you in there.
5. Showing expression through the eyes: All right, sono, you have learned how to draw the basic shape of the eye and placing that basic shape on the phase. Actually two of them for both eyes. And you have learned how to draw the details of the eye. Now I want to show you how to draw character expression and showing emotion on your character's eyes, especially and white. This is important, in my opinion, at least, is because if you understand how to draw the eyes, It's nice and all. But of course you want to show character expression, the eyes, because if you don't, you'll only have these almost like dolts that just stay put with the same expression always on their face, the histone. That's why I felt it was important that the issue how to draw character expression on your animated characters ice, especially this will be a little bit of a short one, but I will still try to give you enough well you, so that you will get started in trying character expression better and give you some examples of my own work and how I express emotions on characters. Okay, so first I want to tackle that. The obvious one that eats the eyebrows because they are the main thing that you use to show character expression. On top of, of course, the model is seeing how the character is smiling or frowning or whatever. The eyebrows are. One of the most important things in a character expression. But also I'm going to expand upon that later in this lesson so that he will learn something more than just the basic, basic rules of using the EIP process, showing expression, okay, there are two main things that you have to take into account when you're drawing the eyebrows. I'm showing expression through the eyebrows. First one is the angle of the eyebrows. This is one of the most obvious ones, but I still want to give you some more value in teaching you some nuanced expressions with the eyebrows too. So you first know how the base expression when you are just resting your phase, that eyebrow usually is curved and quite horizontal. There's no real angle to the eyebrow. But if you want to give the character a sad expression, for example, you of course know that you have to tilt it so that the part of the eyebrow point in at the middle point of the phase will get higher. And that's the basic way to show a sad expression. But if you want to make it more nuanced, you can't make that tilt a little bit more subtle. And if you want, really want to give the character like a frost rated or ashamed low key, you can make the eyebrow line almost trade. Give you a little bit of a hook on the other end and a little tilde. And that will go a long way. Also, if you want to give the character and an angry expression, you know, it's almost the exact opposite of the sad expression in how you draw the eyebrows. You take the end that is pointing at the middle and turn it in and down Lords angle, if you want to use the same kind of method and give the character more of a serious look. I'm not an angry look. And you can tilt the same way, but again, making it a little bit more subtle. So it doesn't look so much like Anner, but more seriousness. But of course there's something other than the angle of the eyebrow that decides their character's expression and that's the distance from the eyes. This is especially important when you are trying to draw a surprise to face. So when you are drawing a surprise face, just making the distance from the eyes to the eyebrows a little bit longer gives the character a more surprise to look instantly. Okay, but that was the most obvious and maybe the easy part. So what about combining the things that we learned from the eyebrows and showing expression through those combining that, we'd showing the expression through the eyes themselves. One obvious example is maybe if the character is sad, you want to make the eyes a little bit more squinted so you can squeeze the base shape of the eye and show more of the top eyelid. This is one of the most used ways of showing different emotion. If you have the sad eyebrows with this one, it looks like the character is really sad. But if you have the relaxed eyebrows with this one, it might look like the character is tired or something. So you can change the base shape of the eye itself and showing more of the eyelid to show different expressions. The other thing that I like to use, especially nowadays, is showing the lower eyelid. And this is something that many beginners overlook. And the method here that I like to use is not showing you more of the bottom eyelid because we don't usually that often show we'd begin with, but instead using the bottom eyelashes and bringing it a little bit of a upwards curve, showing that the character is using their muscles in their cheeks and their lower eyelids to cover more of the eye itself. I like to use this method when I want to show extreme emotion. Like I have a few examples from my own comics last manga series, self-understanding. You can read it on the web tune. There are few moments where I like to keep a extreme emotions of the characters seem beak moments. And usually then I want to use this method of using the lower eyelid and expressing that by changing the lower eyelashes or the line representing the lower eyelashes. Those are the basics that I like to use when I'm drawing the different expressions for my characters. But one thing to note that isn't I unrelated is ofcourse course, the mouth. Of course, depending on what the molecule looks like, you can change the character expression completely. Like if you have that sad eyebrows and you have a smiling mouth, it might look like character is flustered or embarrassed about something. Or if you have the angry eyebrows but a smiling mouth, the character may look a little bit more devious than angry. So my main point in this one is that experiment around with everything that I've laid out here. Try different things and see how these things affect the character's expression. And there isn't really a wrong answer here. So try different things out. And with that, this is the end of this lesson. Next time we're going to be going to the practice section where you can practice everything that you've learned so far. So see you there.
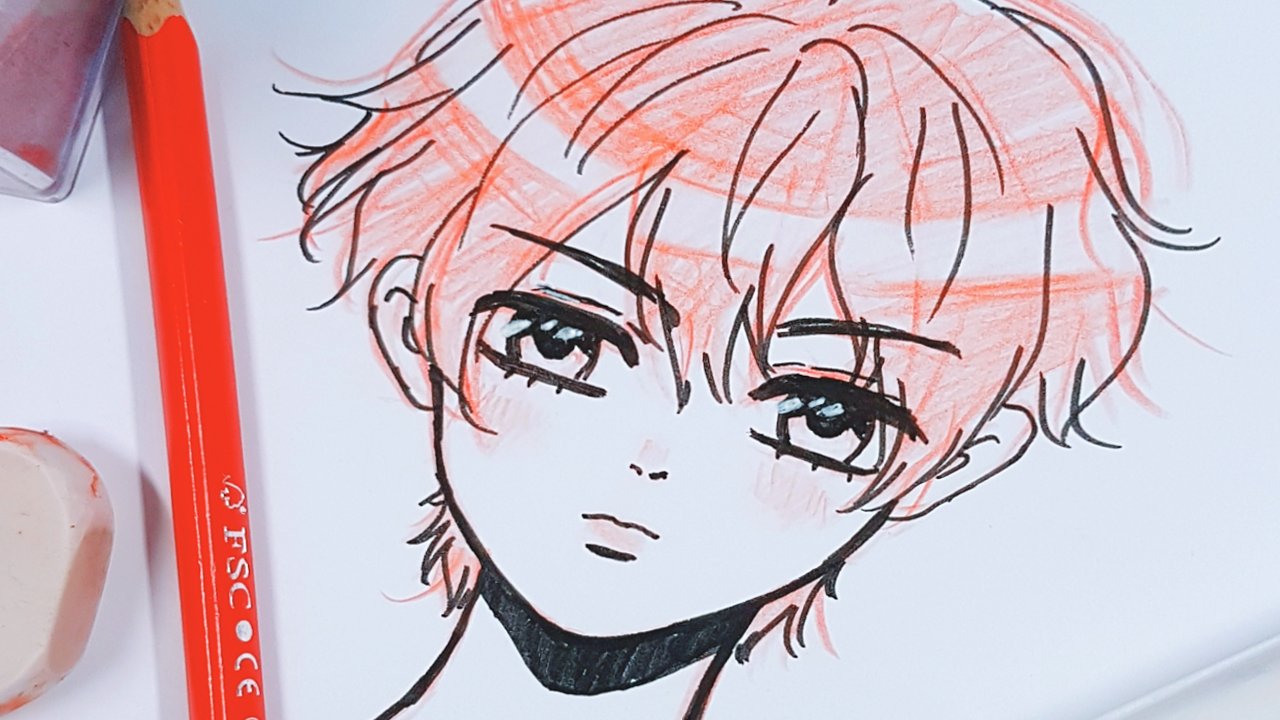
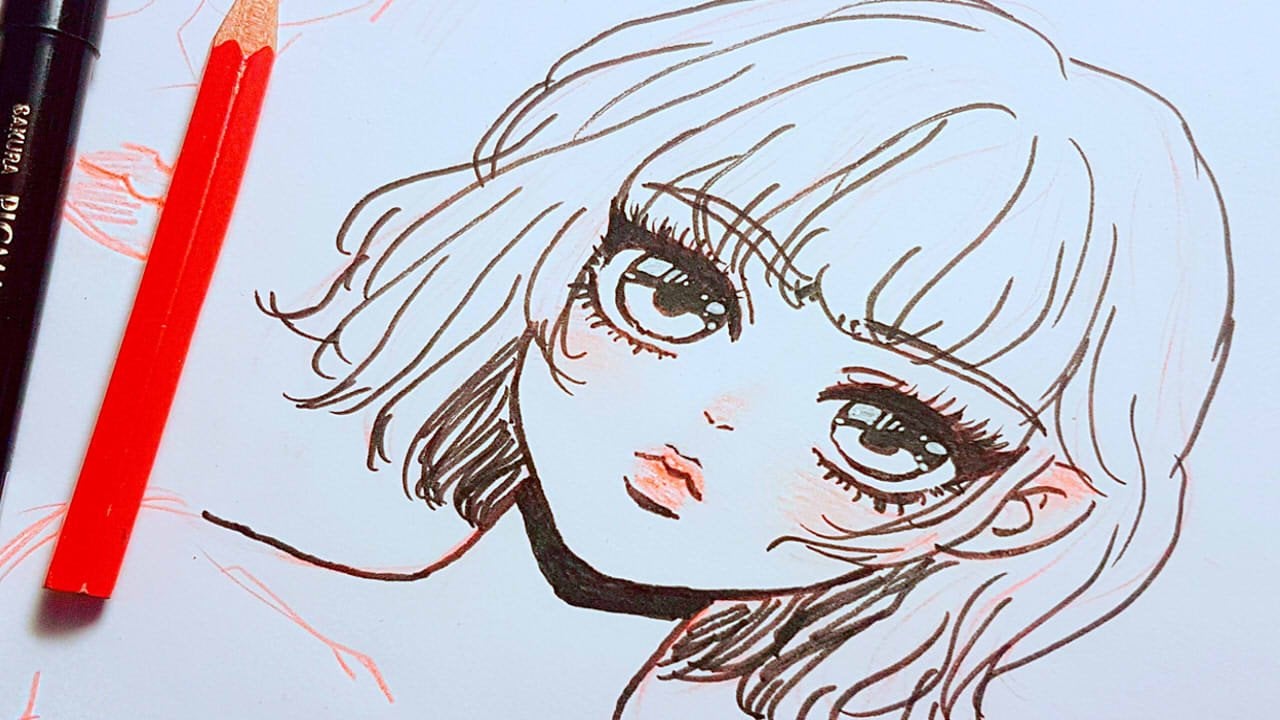
6. Practice (+ draw-along): All right, So welcome to the practice section of this lesson. This time, I'm not going to be talking that much. I'm just keeping you the instructions and the class assignment. And then, then I'm going to leave you with some footage of me drawing the eyes as well, trying to practice my own skills as well as you are practicing your skills at home. And so this part is really important probability that one of the most important things in this class, because note that we have gone over the theory and all the methods that we're going to use. Drawing eyes? No, you're finally, if you haven't already going to use those skills and tried to draw the eyes, different kinds of eyes, different shapes, different expressions, and doing all that is really important because half of the bottle is practicing and half the battle is actually no, we plot the practice. So the class assignment this time that I hope you add send is true. Any kind of pair of animation last among the eyes and don't focus on so much that if the eyes look, Annie May, or among that enough, just draw a stylized eyes using this method study you'll have learned with this class. So that's what I hope you'll do during this lesson. And of course, this lesson isn't all that long, so you can, of course, take all the time you need in drawing the enemy eyes. You can submit the class assignment to me. And if you want some help or tips or tricks, you can attach a message with your submission of your assignment. And I will most definitely comment on your drawings. And if you need some help with something, I will try to help with the best of my ability. I hope you have multiple fun withdrawing because I feel that's the most important part about learning anything new skill is having fun with learning. So just go ahead and draw. I will leave you with this footage of me drawing anime eyes. And we'll see in the last lesson where I'm just giving you a few final words and leave you at that. So see you next time. Sorry. Hi. Hi. Hello. So at this stage. This This is This right.
7. Some final thoughts: Okay, so here we are at the end of this class. We have learned so many things. So far. We have learned all the basics from, all the way, from the drawing, the basic shape of the eye, understanding how it works, and then placing the eyes and the face, then drawing the details, character expression, and then actually practicing our craft. That hasn't been fun. Actually like This is my second Skillshare class. And from the first one, I feel like I've improved. And of course, the reviews and the messages I got was so encouraging. And that's why I feel like I'm going to continue making more classes. And if you have any suggestions in which topics I'm going to do next, you can leave your suggests and that's a message to me on Skillshare or on Instagram where you can find me with that username on the screen right now, I wanted to give you one final thing to remember with drawing anime eyes or animate or among, or stylized in any way, is that don't try to limit yourself in making you think that you always have to draw what is closest to the anime style itself, because there are so many different styles, even in anime and manga, that I'd say that trust drawing to draw things that look good to you and not focus so much on drawing things so that they look. Annie, May enough, that's one of the things that I see most beginners where he up out way too much. That isn't all that important. Of course I like the anime SR drawing style. That's why I'm doing this tutorials and that's why I'm making my comic in an animated way. And that's why I'm doing most of my drawing artwork in that style. But I still understand that you shouldn't limit your skills only to think like this has to look animate enough or else it doesn't look good enough. Things can look good without it looking exactly like any Addie Mae saw. And like I said, there are so many varied style of stuff anyway, drawings that you should just focus on. Drawing style has pictures if you're like doing that. But with that, I hope this class gave you enough information to begin drawing your anime eyes. I wanted to know from you guys, if you feel I should do more of these beginner friendly lessons that I have been doing until this point? Or do you want to see more advanced lessons in drawing or anything like that? So leave your feedback either as a review, hopefully a positive one on here, Skillshare or leave me a message on Skillshare or on my Instagram account. And that's it for this, this glass I hope to see you in my future classes if you like my content here and you can follow me on Skillshare, so you will probably get a notified whenever my newest classes gets released. So keep that in mind. But that's that for me. See you next time. Bye-bye.
 Omnart