Transcripts
1. Class Introduction: What up, everybody. This is Yi. Welcome to another
step by step tutorial. Today, I'm going to
teach you how to draw Gtanks from JagubllZ. We are going to draw GTanks
in a free cods pose. We'll start by sketching, then move on to inking
using inking pens, and finally coloring
with some copic markers. By the end of this class, make sure to take a picture of the drawing you
did and submit it. I want to see your results. That's it. Let's get started.
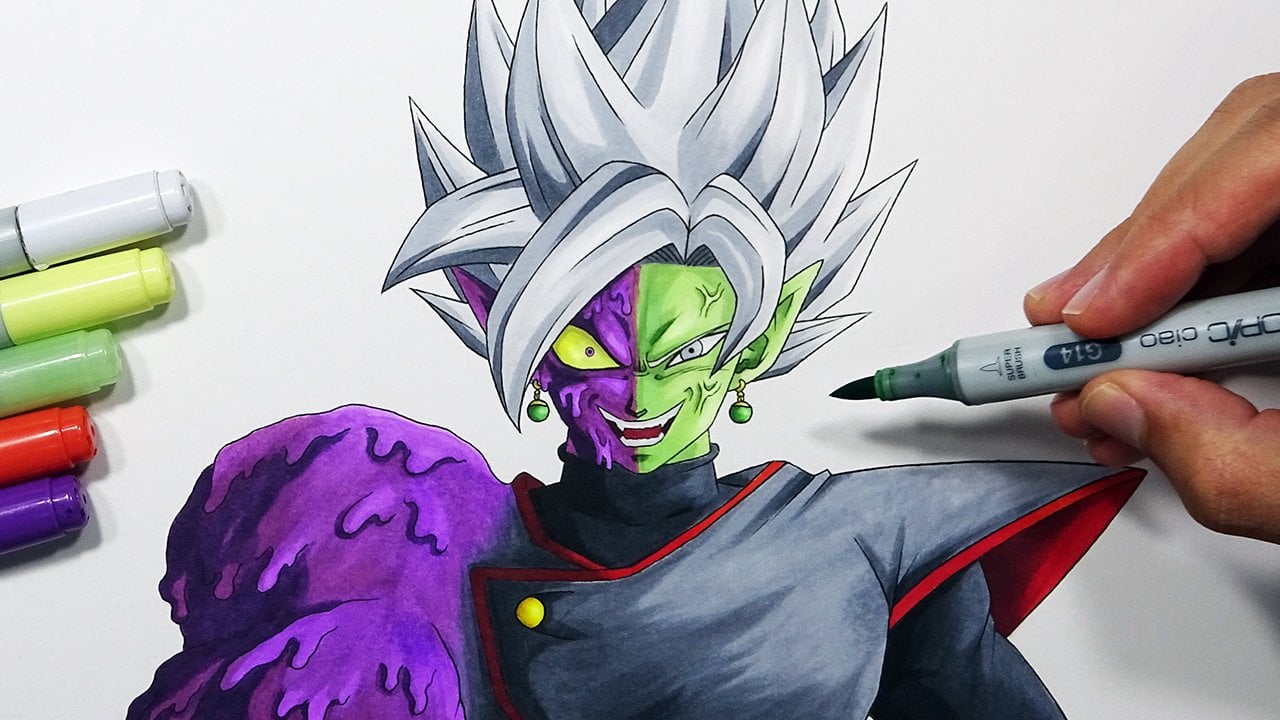
2. How to draw and color Gotenks : Okay, so today we are going
to draw the fusion result between gotten and
trunks from Jargon Z. Before we start, please
make sure to draw a perfect square each
side is 4 centimeters. But you can draw it in any size. You want to just make sure to
use a suitable paper size. So without further
ado, let's get to it. We'll start by drawing
Gotteng's face. We'll do that by
using five lines. And then we're going to use this guideline to mark
the center of the face. Next, we're going to draw the
wrinkles between the eyes. Following up with the eyebrow
and to create the eye, we use two diagonals
and a curve underneath. Next, we'll add
the cheek marks by using two lines and
three more curves. And we're going to do the same
process for the left side. But this time it will appear a bit smaller because
of the angle. We draw the bumps above
the eyes and the iris. And to create the nose,
we'll use five lines. And as you can see, I'm
still using the guideline to place the nose
in the right area. Next, we're going to
give him a cocky smile. We'll do that by using two lines and we'll indicate his chin. Next, we're going to
draw his hairline. As you can see, the side burn
is parallel to the eyebrow. And then from that point,
we're going to draw the ear. We'll start with the shape and then add the details inside. Sweet. Next, we draw the neck. Then we are going to draw two
spikes, one on each side. As you can see, I'm doing
that by using three lines. And then we're going to use this guideline to help us draw the rest of the spikes without worrying about keeping
the right proportions. And then we're going
to refine the hair by adding some lines in the
direction of the spike. Also, next, we're going
to draw the torso. We'll first start by
drawing the neck muscles. As you can see, they
are not as defined as the grown characters
like Gco and vegeta. We'll add two lines to
indicate the trap muscles. Then we're going to use
this guy line to mark the center of his torso,
and then from that point, we're going to draw
the chest muscles and the ebs right below. Next, we're going
to draw his vest. Then we're going to
draw the puffy things on top of his vest. It kind of looks
like he has a worm wrapped around his
neck, massive worm. How do you like that metaphor? And then we're going to draw the arm by drawing the shoulder, then the tricep and the bicep. And we add another
worm to this side. Next, we'll add his right arm. And then we are going to refine the worms by adding
some creases to them. Awesome. Now that it's done, we can take the black pen and
just go all over the lines. I'm usually using 0.2, that's the size of
the inking pen, but you can also use 0.1 or 0.3. Just make sure to hold the
pen closer to the tip. That way you will
have more control. And just like I'm doing, please rotate the page
so you can go with your natural hand
movement and just simply push or pull lines. Please bear in mind that inking can be very
tough at the beginning. The more you practice, you
will gain more control. Your hand muscles will get stronger and therefore you
will be more accurate. So it really takes time. Don't be so hard on yourself. Just keep at it and
you will get better. Trust Uncle Yair. Awesome. Once it's
clean and smooth, we're going to get
rid of all the lead, and then we can start
using the Copic markers. But if you don't
have copic markers, you can use color pencils
or you can use your HB two pencil and do some
shading just like I explained in the black
and white tutorials. But this time we're going
to use Copic markers. Those are alcohol based markers, which means they can
blend very well. And without further ado, we are going to start by
coloring the skin tones. For that, we're going
to use three tons. We'll start with
the darkest one, coloring the most shaded areas. Next, we're going to
use the mid tone. It's going to be YR 02, and as you can see, I'm coloring in the
direction of the shape. By adding more and more layers, I'm getting a more solid color Once we are done with
that, we're going to use the brightest tone. It's going to be e00. And just like
before, I'm coloring in the direction of the shape, adding more layers to
get more saturation, to get more color on the paper. And as you can see,
I'm not doing as much blending because I want
to get that celoid look, that cell shading look
just like in the anime. Awesome. We are going to do the same process
for those worms. Again, starting with
the darkest tone. Next, using the mid tone and
finally the brightest tone. This time, it's going
to be a dark mustard, following up with a
mi tone of yellow, and then a very bright
tone of yellow. If you want the codes,
it's going to be Y 28, then Y 13, and finally y00. Next, you're going
to color the vest. For that, you can use gray tones or a very dark purple tone. For the vest, I do want to
blend the colors just to create a very nice effect,
a gradient effect. Also, once we're done with that, we're going to use two
colors to color the eye. We start with a blue
green, and as you can see, I'm leaving a tiny blank
area on the far left side. Then we're going to use a
brighter tone of green, thus creating a very
nice transition. I like the word thus. Awesome. Now it's time to
color his glorious hair. For that, we are going to use three tones
just like before. We start with a very
dark brown and again, coloring in the
direction of the shape. After that, we are going to use a gold tone that's
going to be Y 17. That's a golden yellow. And to finish up,
we're going to use a buttercup yellow that's Y 21. Now, you don't have to use the same codes I'm
using for the copic. You can just use a bright
yellow, and you will be fine. And we are done. Everybody. This is how you draw Gtangs from DragonbollT
Les Dragon Boll Super. Please let me know how you
did in the comment section. Tell me on which
area you struggled or what area was much
easier for you guys. Share this information
with me so I can make these tutorials more understandable.
That's it for today. Thanks for watching. Keep being Awesome as always. And I'll see you on the
next video. Please.
 Yair Sasson, Artist