Transcripts
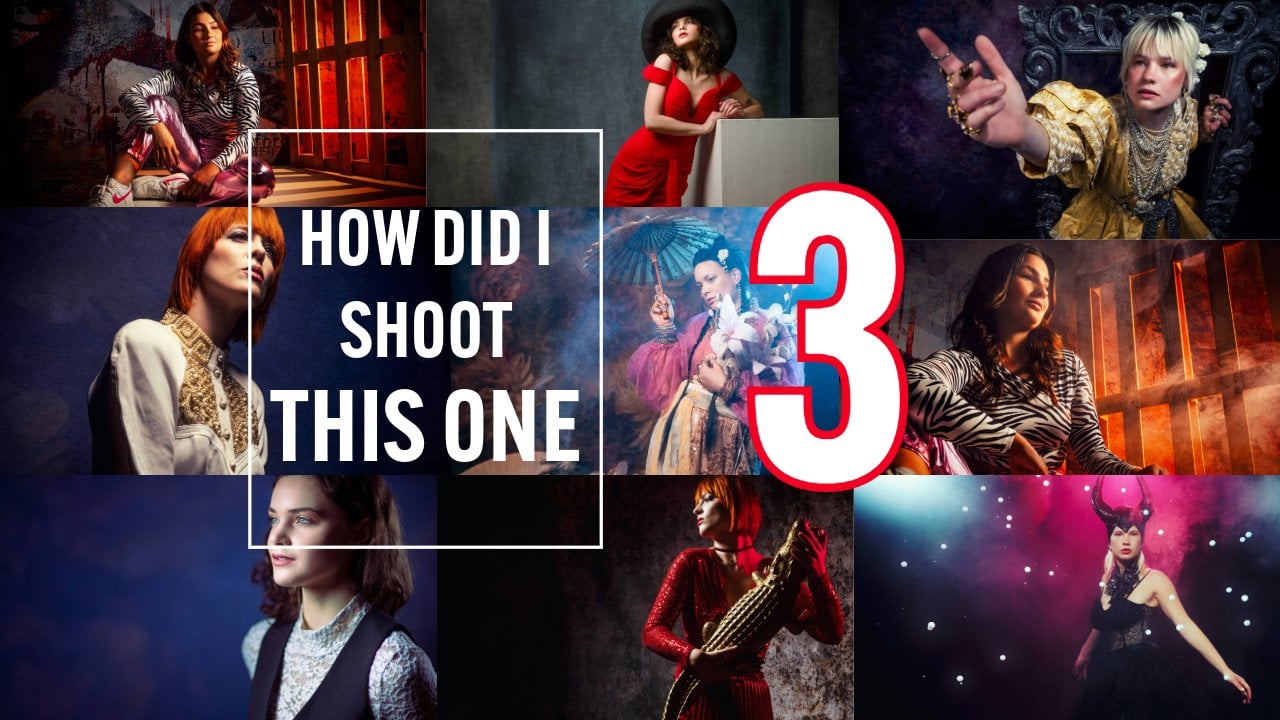
1. Introduction How Did I Shoot This One Part 2: Hey, guys, Frankie. Welcome to our studio in Emord. And I want to introduce to you our brand new video
for Skillshare. How did I shoot
this one? Part two. Now, we all know studio work and lighting and working
with models is fun, right? But how do you get the most results from
your photo shoot? How can you be creative
with lighting, with sets, with styling? This is the part that
is often overlooked. Of course, we can set
up a Rembrandt lighting or a butterfly lighting, or maybe we can use cool light
sources like the Frenll. Did you ever think about
using one of those? And you can use hybrid strokes or smaller strokes
or big strokes, but it's not about that.
It's about storytelling. We think about the history
of photography and painting, it was never about a
duck face or a selfie. It was always about telling
a story about getting a mood over to your client
or to your customer or whoever wants
to see that image. So in this series, it's, of course, about
lighting setups. It's of course about
getting the best results. But it's also about thinking
outside of the box, maybe outside of a frame. Hey, maybe do
something different with colors or lens flares
or special effects. The best way is just
to look at the video. We have several chapters with all different kinds of setups shot during the
workshops that I teach. You will see the
lighting setups, the story behind the
lighting setups, and, of course,
the final results. So join me for the
second installment of How did I shoot this one? This one is going to
be a roller coaster, you're absolutely
going to love it.
2. Shine on! : Guys, Frankie, and welcome to another episode of How
did I shoot this one? And this one, I absolutely
love the outcome. It was totally not
expected this way. Now, during the
workshops, as you know, we always try to push
my limits because, hey, let's be honest, I've been teaching workshops for so long. I can get very boring if you
always do the same stuff. So I love to work with props, different backdrops, and, of
course, different stylings. And this time, I set something up with the idea
it's going to be simple, and it totally blew my mind. It's the material. Now, when we choose our backdrops, we can, of course, choose from a lot of different backdrops
from click backdrops. Those are awesome. We have vinyl and pro fabric. You can build whole
sets from them. And otherwise, well, we
still have all the walls in our studio with custom
paints and structures, but sometimes you
want something more. And this is where party stores
are absolutely awesome. For a few bucks, you can buy
great backdrops or props. Now, in this case, we choose a background material
of holographic prints. You might wonder like, Hey,
what's holographic prints? Well, that's the same
thing that I had. When you look at it,
you can see that it all glitters and shines. I was just going
like, This would be awesome for a backdrop. But of course, it's
only a few meters wide, and sometimes you
want to shoot more. So that's why on the sides, we actually placed
some curtains. But you also want to make sure
that everything lights up, and you want to make
sure that you use that holographic material. And this is a tip I always give people when you
find new materials. For example, if you go to
a do it yourself store, take your phone and very simple, just turn on your flashlight and just hold it over the
material you want to buy. And immediately, you
will see sparkles, or it will just stay dead. Depending on the
look that you want, you can buy it or not. For me, it's always
something that has to react with my lighting. And in this case, the
holographic material is absolutely awesome. But how do you light
something like that? Well, first things first, we want to make an open
set a fun set, right? It has to emit a
certain quality of fun. So that's why we choose
two colors on the sides. On one side, I'm using
a red gel on one side, I'm using a blue gel. Now, red and blue are on the same axis of
the color triangle, and red and blue are
also emotional colors. For example, red, love and hate, both sides of the spectrum, blue, a little bit
more distance or cold. But together, they always create something
interesting and fun for me. So red on one side,
blue on the other side. And in this case, I'm
aiming the strokes down with a grid so make sure that we have a
nice beam of light. And that already emits a nice quality of
light on our model. Now on the back, I'm
using a red backdrop that's very reflective
and one extra strope with a red gel aimed
at that backdrop to create that nice flow of
light behind our model. But now the
holographic material, we want to make sure that that holographic material really shows up and starts to shine and create that
holographic look. And that's why we need stropes under an angle with a very
harsh quality of light, but I don't want a harsh
quality of light on our model. And that's where
we use the fnelle. Now, the fnelle is an
amazing light spot. First of all, you can
zoom it on your model, but it also creates a
beautiful light quality. It owes all the
characteristics of hard light, but also a lot of
the characteristics. I'm Dutch, you know, that's
a real tongue breaker. It looks very nice. Let
me put it that way. So it looks soft and it
looks hard at the same time. And that's what I love
about the fronel. Plus, of course, it's
a great tool to get some extra light out of your
strokes because it also, of course, due to the fronel
amplifies your light output. Now, when we place the furnel
under a certain angle, you can really see that that material is starting to shine. You really see those sparkles. What I didn't take into
account was that at one point, I asked my model to just spread her arms
and lean forward. And that's the image that blew my mind because because
he's leaning forward, the material scores is
wrapping around our model, and that's create a
beautiful light spectacle. And that shot the moment it came in, I was
going like, Yeah, that was not expected, but I absolutely
love the outcome. So let's go to the studio. Let's see the lighting
setup and, of course, our model, Linda, and
the final results. Now as you can see,
backdrops shouldn't be expensive and don't
have to be expensive. Just go to the party store, buy some cool stuff,
check it with your phone, and create some cool images, add some little colors, and you're done and ready. Now, you might
wonder, Hey, Frank, in the images, I didn't see the curtains.
What did you do? Yeah. Well, in the end, when I did my photoshop work, there was only a small
part with curtains, and somehow it just
took my mind off the nice and
reflective material. So this time in Photoshop, I decided to cut off
the edges and use artificial intelligence to
fill it in. Yes, I know. I'm not a big fan of
it, but in this case, I did it for a normal
fashion shoot. And let's be honest, it just helps to shut,
so no problem there.
3. Master your perspective: Welcome to another short
tip in our series. How did I shoot this one? And today, it's not really about the lighting setup. It's
about something else. Now, during the workshops, I always try to do
different things, and that can be with
modifiers, or it can be, for example, with weird
modifiers, like a Fneel. It's not really weird
one. It's an awesome one. Or maybe we use
vintage lenses with, for example, the Techart
or the Photo Dox adapter. So you have auto focus with your old lenses on
your modern camera. Yeah, if you want
to know more about that, look on our
YouTube channel. We have some videos about that. But today, it's actually
about something really simple about finding the
right angle to shoot from. Now, do you realize that a
lot of the images that you shoot especially when you start out with photography are
from ice perspective, because this is how we
see the world, right? We just look at something, we see it, and we take the picture. Now, how often does
it happen that you take the perfect
picture on your holiday, you go like, This is a prize
winner. This is the one. This is amazing.
This is perfect. And then you come home,
you look at those images, and you go like, Where's
that prize winning images? I already called
National Geographic. Where is it? And then you find this one image
where you go like, Yeah, but that's totally
not interesting. And then you realize, that's
the image that I shot. And that's because
there's a huge difference between our eyes and
our photographers eyes. When we shoot models or when
we shoot photos or video, we want to make sure that
we use different eyes. And what do I mean
with different eyes? The camera doesn't
really see depth. The only thing a camera sees
is something that's closer, it renders it bigger,
something that's further away, it renders it smaller. So when you use a Zoom lens, you compress your set, right? So everything looks
nice and tidy. Or in other words, if
you have your model, and she spreads out her arms, she fits on that
background paper. If you use a wide angle lens, it doesn't fit on that
paper. But there we go. When you use the
wide angle lens, it doesn't fit on
that paper, right? But when you use a zoom lens
or you compress, see fits. So that already proves
that both lenses gives you totally different
way of looking at a scene. And we call this perspective. Now, if you are into landscape photography or
architectural photography, you know the term leading lines. Now, leading lines are
the lines that lead the viewer into the image
or towards your subject. Now, when we use
this in combination with the wide ang lens
and model photography, we can get some amazing shots. Like, for example,
in this workshop, so the image we're
talking about today, it's a very simple setup. We're using one of
our click backdrops, already a little bit of three D, and we're using just
a very simple prop. And something on the floor. The trick is, however, how
do I position my model, but also where do I shoot from? If I shoot this
from a distance I compress everything,
it looks boring. If I make my model just sit
straight, it looks boring. But by angling my model
slightly towards the camera, choosing a very low angle, and also using a white angle, you get this beautiful
leading line starting at the
foot of the model, just going all the
way up to the model. And then, of course,
Claudia with the red hair, it really draws the attention. But there's also something else. When we look at how
we read and write, we read from the left
bottom to the sorry, from the left top to
the right bottom. So that also means that if
you as the photographer, create something
where you capture your viewer in this area, they can't leave the image. This is also why you also
see that red logo from us on the left bottom side because people start
at the right top. Sorry, at the left top,
they go all the way down and then they see our logo and they go like,
Hey, that's nice. And they go back in
the picture again. So a lot of my images, you will see my models
looking the same way. That doesn't mean I
do this all the time, but it gives you a beautiful way of using your leading lines. So let's take a look
at the lighting setup because you also want to see the lighting setup, of course. But do take notice when
you see the final shots, about the angles
that are shot at. And those shots, well, I'll give you a
different angle of view. And that's where you
can experiment with and where you can create really
creative shots with. So let's take a look at the
behind the scenes video. As you can see, a pretty simple lighting
setup, pretty simple prop, but by choosing the right angle and using your leading lines, you can create
something interesting. And this works for
product photography, landscape photography,
architecture, and, of course, model photography. I actually goes for
all photography, painting and drawing
and everything. Use those leading lines and use the distortion
of your wide angle lens. As a photographer, we have
that tool, so use it. Thank you very much for watching
4. Theatrical lighting in your studio: Today, I want to
tell you something about an amazing modifier. Now, you might wonder, there are a lot of
amazing modifiers, right, but this one
is really special. Remember those old images
from George Horrell, Richard Avidon and,
of course, Hardce. They all use one light source. That's absolutely amazing. Today, you could say
it's an oat to the fnel. So join me for how
did I shoot this one. Today we're going to
talk about this image from a workshop I did. Now, one of the light sources that I love to use
is a fnelle lens. Now, a fnelle is a
very special modifier. A softbox will make your
light softer, right? And a reflector will
give you hard light. But what if you want
something in the middle? You still want that
harsh quality of light, but you don't want
that rough quality of light or you still want nice soft quality of light for your
skin of your model, but you don't want it too soft. The frenel is
absolutely amazing. And what if I tell you you can also zoom the effect so you can make the beam smaller and
larger all with one modifier? You might wonder, Frank, why didn't you use the
frenel much more? Yeah, I actually did, but there was a huge
problem with the fnel. When I started with photography and I started to
teach on trade shows, one of my first
demos was actually with an Ellen Grom fnelle spot, and I immediately fell in love with the whole device.
It was amazing. I love the quality of light, but I also love to
include it into an image. And there was only one problem. It was horrendously expensive, way too much for me to spend on one modifier at that moment. And over the years, I
still kept my eyes out for a fnelle and they were
always expensive. There is a solution, however. If you go on Ebay or Greg's list or whatever
you have in your country, you can find theater spots. Now, I've used the
theater spot for years. The only problem is, of course, you have to take out the light, and then you have to
place a strope inside and move the strope forward and
backwards to get the effect. In all essence, yeah, it's nice to work
with the frenel, but it didn't work in practice. It was just way too much work. So I didn't use the fneles in the workshops or in
the videos because I think you should be able to recreate my images also
with a low budget. And well, that's how I
create my videos, right? Everybody should
be able to do it. This is why today, and I actually already
used it for a while, I want to give you a heads up about a really great modifier. And this one is
really affordable. This is the non light FL 20 G, and this is a full frenelns
with a bones mount, so it fits on our
Gigoto strokes and on most different strokes because the bones mount is one of
the most universal mounts. There's always a converter
for the bones mount. So what makes this
frenel so special? One, it's very affordable. It's about 150 euros. It's so affordable
that although we are not a Nanlte distributor
or even dealer, we included the fnelle on our own webshop for the
very simple reason, all the students that see
the fnel want to buy one, and then it's easier to get
it straight from us, right? So, how does the frenel work? In the front, you
have this glass, and the glass is the trick. It creates a beautiful beam
of light on your model. It's harsh, but it's
still soft. Sounds weird. I know, but that's the
magic of the fnel. But the cool thing
about the fnel is you can also zoom it. So in other words, if
you turn the dial. This is a little
bit hard because I'm now holding
it with one hand. You can see that it extends, and this focuses the
light of a beam of light. And that means that you can
really pinpoint your model. Now, you might wonder
I know those fneles, right? Yes, you're
absolutely right. These are the ones that are
also used in theaters to create that beam of light on the singer or
on the performer. So fneles have been
used in movies and theater for
many, many decades. And now, it's very affordable also for you
to use it in your studio. But we can talk
about it for hours. And let's take a look at
the behind the scenes video of a workshop we
recently did with the fn. And a nice thing about the
fnel I have to add that if you want that really old
fashioned vintage glamour look, add some excellent lighting. For example, a red gel or a blue gel or maybe
no color at all, the frenel instantly gives
you that beautiful effect. So let's take a
look at the video. As you can see, a very simple
setup and the fronel again, I can highly recommend
you guys looking one up online and highly
recommend the NNL.
5. Stepping into the light: Hey, guys, Frank, here, and welcome to another
episode of How Did I Shoot This one and this
one is really short. Now, during the workshops,
we use a lot of props. We use a lot of
materials, backdrops, lighting setup, styling,
and what not more. The workshops are always
jam packed with fun stuff, but most of all, also
educational stuff, of course. So if you are interested
in a workshop, visit photography workshops
dot U or, of course, dot NL. And if you're
English, don't worry. The workshops are
normally in Dutch, but if you let us know
a few weeks in advance, we can switch them
over to English. Now, today, as mentioned,
a really short tip. It's about a prop that
we got. It's a mirror. But without a mirror,
it's only the frame. And those are awesome
in your photo studio. Now, this was shot
during a workshop called filmic Images, where we try to
recreate images that tell a story that could
be done in a movie set. So I decided to just
create a nice backdrop, place our mirror there and let the model step out
of the mirror. I'm using a very, very nice light source
close to our model, just making sure that the
light spreads around my model, and then it's all about angles. Shoot this straight
on, doesn't look nice, shoot it under a cool angle
from the top and make your model twist.
It's a horror story. Shoot it from a lower angle, and it's more like a fairy tale. Walk around your model to
create contrast and a lot more. So let's take a look
at the studio so you can see our lighting setup
and the final results. Mm. As you can see, props are awesome. They're very cheap. You
can buy them online. Don't spend a lot
of money because you only use them a few times.
6. Overhead lighting with a round softbox: Hey, guys, Franker and
welcome to another episode of How did I shoot this one in
our digital classroom series. And today, it's
about this image, but actually about
all the images we shot during this shot because it's about
the technique. So join me for this episode
of Digital Classroom. Now, during the
workshops, we, of course, try different kinds
of modifiers because every modifier gives you
a different kind of look. And when you look
at your modifier, you can predict how the
lighting will look. Now, one of the things
that I always love to do, especially in tight spaces
is use my model against the wall and use a strip light on top because with
the strip light, I can angle the strip light and create beautiful vignettes
on the backdrop and, of course, nice
lighting on our model. Now, we did recently a video
just about that subject, and we got a lot of questions
from you guys like, Hey, can you also do this
with other light sources? And, yes, of course, just look at how the light
source is designed, and you exactly know how to place your lighting to get
the effect that you want. So of course, you can do these kinds of setups
with the strip light. But for this
workshop, we actually decided to use the quickie. Now, the strip light
is, of course, a light that projects
the light on your model, and it is longer but narrow. So that means that
you get a beautiful light quality on your model. You can still aim the light, and you don't have a
lot of spill light. Of course, you can do
it with a big softbox, and then it spills everywhere. But just to prove
the point that you can do it with any light source, we decided to use the quickie. Now, why is that so
important? Very simple. The quickie directs the light
directly down or forward, depending on where you
aim it, of course. So if you can pull it off with a smaller light source
that aims the light, including a grid, you can do it with almost
any light source. You just have to remember how
much light do you want to hit on your backdrop and how much light do you want
to hit on your model. And with the quick well, you can see it in behind
the scenes video. It's a small light source, but you create a beautiful
light quality on your model. Now, the most important
thing about lighting setups like this is don't just
shoot it straight on, but always walk
around your model. Because when you walk
around your model, you get different
contrast ratios, and you get a totally
different look. So let's take a
look at the behind the scenes video
and the results, and I will be right back. W Now, guys, I hope you saw a very
simple lighting setup, and I love using
this lighting setup. For example, on trade
shows, events, workshops, it's super simple, and it always gives you a beautiful
high contrast image. The only thing you
have to remember is the inverse square law. Light falls off
over the distance. So make sure that you don't place your light too
close on the model because then this part will be properly lit and everything
else will be totally dark. So use the distance and your Iver square to create a beautiful light fall
off on your model. And it works best, of course, with slightly lighter clothing. If you wear black,
the light falls off really fast and it
becomes a black blob. So make sure that you
take that into account. If your model is wearing black, maybe a portrait is
the best option, or maybe use a filling light, but that's for another video.
7. Maybe the best light shaper for your budget: Guys, Frank, here, and welcome
to another episode in How did I shoot this one in our
digital classroom series. Today this image. Don't you just love
that backdrop? It's the final click backdrops, and somehow this
backdrop, it looks busy. But every time when
I photograph it, it just comes to life
in the shop because I just love the lines and
the color, of course. But it's about something else. Now, when we want
to shoot images, the first thing I
always determine is what is the look that I want? Do I want something
nice and flowy, or do I want something
really harsh and edgy? You probably already
know the answer, right? I love the harsher quality of light and the more
edge he looks. Now, Claudia is standing in front of our vinyl
in this setup. And if you have a model that
stands against the backdrop, there are a few things
you have to realize. First of all, the shadows. Now, believe it or not, a
model that stands in front of the backdrop has
probably more problems with shadows than a model
that's against the backdrop. Now, in all honesty, shadows aren't a real problem in a shot. For me, it connects the
model to the backdrop, and it gives my model more
three dimensionality, or in other words, she's
in the real world because, well, shadows are part
of the real world. Now, when you have your model
in front of the backdrop, you always have to
think about lines. So follow the lines
of your stroke, and you can immediately see
where the shadows fall. So if you don't want
shadows on the backdrop, make sure that the
shadow of the head falls below the shoulders because below that, everything
will be gone. If you shoot from a lower angle, you cut off the shadows also. But if you want your
shadows in the shot, and that's something
that I always want, place your del
against the backdrop, make sure you aim
your light correctly, and you just have a shiver
of shadow on the backdrop. Move your del a
little bit forward, and you can play
with that shadow. Today, it's actually
not about the shadow. It's about something
else. It's one of my favorite light sources. And in this case,
it's the fnelle. Now, the fnelle is a
beautiful light source. You probably know it from
the old glamour photography, right, and the movie scenes. It's one of those light
sources that you can set up for harsh light or a more
softer quality of light, a real focused beam of light on your model or a more
feathered out beam of light. Now, in this case, we're using the harshest quality of light, and I'm aiming it
straight at my model. The main advantage of this
is in combination with that final backdrop is that you can now make
the colors pop out. And that's the
question we get a lot. How do we make those
colors pop out? That's the quality of light.
If you light something like this with a big softbox and then create the vignette
later in Photoshop, or according to a lot
of people can be done, you will miss that quality
of light on your colors. And we all know, right? Colors
have three coordinates, and one of those
coordinates is luminance. But when you change the
quality of that luminance, you can also get
more vibrant colors. And the fnelle that's
awesome for this. There's only one
problem with the fnel. And that's actually also a benefit for us
as photographers. It gives you a lot of light. So if you go outside and you
want to boost your strokes, for example, this is
a GT 250 from Gekoto. Let's say that with a
normal light source, it outputs maybe F 11. When you use a furnel, yeah, F 16, F 22, maybe even F 32. I'm just calling it from
the top of my head. But the furnel really focuses the light and gives you
way more light output. But that also is a
problem for the model. So when I'm using a fnel, I always lower my modeling light because you don't want your
model to look like this. Looking into the light,
it's very, very bright. And one of the tips
I can give you also, and you're going to see that
in the final results in a minute is let your
model wear sunglasses. One, they look cool, and two, they really help
because they don't have to look straight into
that light of the furnel. So let's take a look at the
behind the scenes video. As you can see, it's a super, super simple lighting setup, but I just love the
quality and the results. You don't need a lot of gear to create something like this. And so Now, as you can
see in the video, only the fnel now the cool thing about this frenel
it's the nonlte. And now, in all honesty, when I started out
with photography, the fneles were
really expensive, and nowadays, you can still
buy really expensive fernels. But this one retails
in the Netherlands for about 130, 140 euros. And that's incredibly affordable for a light source like this. So if you want to experiment with fneles and in the
back of your mind, you still have that option
like, Yeah, I love it, but they're so expensive, check out the fnelle from Nenlte. See you next time. Bye guys.
8. Creating a spot: Hey, guys, Frank, here, and
welcome to another episode in our How did I shoot this
one? And you already see it. I have a lot of modifiers
that I really like, and this is one of This is the Lindsey Adler
Westcott projector. Now, the projector I already
explained a few times, but today we did a photo shoot with just only the projector. Now, I already
explained that with the GboPjector you can put
several things in there, and it creates, for example, shadows of a window or, for example, a tree. Whatever you want
to put in there, it projects it on our
backdrop or on our model. But you can also
do something else. With this one, for example, you can use the
blades to literally create different kinds of
patterns on the backdrop. And I already used this a
few times, for example, to create a triangle
or a line of light. But you can also
buy these gobos. And these are really
interesting because it actually creates a round spot
around your model, and there's no light
source in the world except a nelle that can create something that
comes close to this one. Now, the main advantage
of a gobo projector or a snoot is that you can
literally focus this one. So you can make it super sharp, or you can make it super soft
depending on what you want. Now, we all know those
old pin up shots, right, where you have a
circle of light around your model with a beautiful
shadow on the backdrop. You go like, how did they
create something like that? Because you can never get
that roundness so sharp. Is it Photoshop? Well, there was no Photoshop at that time. So what did they use? Probably finels and
probably also something like this to create
that nice round effect. So today, with our model, we created something very
simple, a dark backdrop, our model in front
of that backdrop, and only the projector
with this round gobo. Now, in this case,
because the model is in front of the backdrop, we want it around vignette
around our model in the back, but it has to be super sharp and I want to see the shadow. Now, when you place your model, normally with a
projector like this, you have to make sure
that the model is against the backdrop for the
very simple reason because the light extends, it will create a
horrendous shadow on your model if your model is too much in front of your backdrop, or the vignette in the
back will be too large. Now, if you don't want
that shadow on your model, there's a very simple solution. Choose gobo that
has a smaller hole because now the light
spreads out less like this. But in this case, I love
the shadow on our model. I'm not shooting full body. I'm shooting three quarters. And by angling my model, I can play with the shadow. And the cool part is, if
I shoot it from the side, you can create a beautiful
shadow on the backdrop. Use your negative space, and I'm still a big supporter of using the term
negative space. Not anymore. Use the term positive space because it really adds something
to your image. So let's go to the studio. Let's see the lighting setup, and of course, the
final results. Oh Now, as you can see, the gobo projector
in combination with just an open gobo creates a beautiful
vignette around your model, but also also a real attention
grabber to your model. You can, of course, always
use the blades to create something more rectangular
or a triangle. But the gobos with round holes are absolutely amazing
for this kind of work. Again, if you don't like
the shadows on your model, use a smaller one or place your model closer
to the backdrop. In this case, it
was intentional, and I really like the
outcome of the extra shadow. It creates an extra
dimension in your image.
9. The light shaper that surprised me: Guys, Frank, here, welcome to another episode of
Digital Classroom. How did I shoot this one? During the workshops, we always experiment with light
quality and light sources. Every light modifier gives you
a different light quality. And in all honesty, when
you look at your modifier, you can already predict
what it's going to do. For example, a strip light. You know, it's narrow and
it's very, very tall. So, in other words, when
you use it horizontally, you can light your backdrop, give an accent light
on your model, and you have something
to spare in the middle. If you use it straight
on in portrait mode, you can light your
whole model and you don't have any spill
light on the backdrop. So great light source. Now, when I look at all my
light sources in the studio, I love to use grids
because I want to be able to pinpoint my light on
my model or on my subject. And somehow I just love
Rembrandt lightings, you know, maybe because I'm Dutch, but that whole lighting
from Rembrandt, a triangle, I just love it. But one of the things
that I don't like about that lighting setup is often
how the backdrops create, because let's be honest, if you do a Rembrandt lighting, your main light is
a little bit behind your model because
you want to make sure that you see that triangle. Now, because the other
side is so dark, I always choose to use some
accent lighting there. But also the excent
lighting is aiming forward. So both light sources
are aiming forward. And that means that
often the backdrop, when you aim it a little bit, you get some lighting
behind your model. But often it's dark. You see your light
side of the model. Then you see your
accent lighting, and then you see
the light backdrop. You could call it irascuro
light, dark, light, dark. But what if you don't want it and you want more light
on your backdrop? You want it more airy or flowy, whatever
you want to call it. Well, that's when we have a
really cool light source, and that's the
lantern from Gekoto. The main part that I love about this lantern is that it
still has a straight front. A lot of the lanterns
you see have actually that bow in the front, so they're aimed to hang
from the ceiling down, and then the light
is omnidirectional. This lantern does have
a straight front, and that means I
can also use it for fashion photography
and for portraits. But the main advantage
of this light source is that because it's open from the sides or translucent
from the sides, you also get light
on your backdrop. So in other words, I can now place my light even more extreme behind my model aiming forward and still
light my backdrop. That gives me two
totally different images compared to a normal sof boox. Let's just put
them side to side. This image was shot
with the lantern. As you can see, I have a lot
of light on the backdrop. I have a nice flowy
image quality. It looks nice and soft. And this image was shot with
exactly the same setup, but now with a softbox
that's closed. And as you can see here,
this is way more darker. I don't even see my
backdrop anymore. So let's see this in practice in the behind the scenes video. As you can see, two totally
different image qualities, but two totally
different light sources, same setup, same
model, same backdrop. So if you start your studio and you ask somebody like, Hey, what kind of soft boxes
should I buy for my studio, always first determine what kind of images do I want to create? Do I want to create
high contrast images where I don't see the backdrop
and I want total control. Then you use, of
course, strip lights, you use normal soft
boxes with grids, but you use something
that can steer the light. But if you are more into, Well, I want more newborn photography, I want product photography where everything is nicely lit, and I also want some
light on my backdrop, the lantern is
absolutely amazing. But also for work that I do, with all my portraits and
all the high contrast stuff, I still use the lantern a lot
for the very simple reason. If I want light on the backdrop, I can easily now get some
light on the backdrop. And if I want less light, just remember the simple rule. Move your model forward, move your lights forward,
and use the If square law. And you have total control about what happens
on your backdrop. And finally, of course, with the lantern, you can
still use feathering. So if you run out
of the distance, you can still angle the
lantern because, well, nobody tells you that
you can't example, light your model with the sides. So in our set up,
we're actually using, of course, the front of the
lantern to light our model. But if you don't like the amount of light hitting the backdrop, nobody tells you that you
can't take the lantern, turn it all the way
towards me and maybe use only a small part of
that open part on the backdrop and use the
rest to light your model. In the end, it doesn't matter
how much light is lost. It determines how
much light is hitting your model and how much light you don't see because
we crop it out. The lantern, a very,
very cool light source. And well, you can use it
in many different ways. It actually surprised me because when I saw it the
first time, I thought, This is not a light
source for me because, well, it lights everywhere. And then when you
start using it, it really grows on you, and it's now one of my
favorite modifiers. Hey, guys, thank you
so much for watching.
10. High Contrast: Y's Frank here. And today, a very short tip, but
an important one. It's all about a dis shot. Now, during the
workshops, we, of course, try to create as many different solutions
as possible because, well, let's be honest, I
love high contrast images, but sometimes your client doesn't want a high
contrast image, but something that
jumps off the screen, maybe something
with flat lighting. And I'm not a big fan
of flat lighting, but as soon as I
start doing this, yeah, that's when
I really like it. You see that red backdrop, you see the model
just jumping out. I really like this look.
So how did I do this? And what is the
intention of this video? Well, there's a lot of stuff that I want to
discuss with you guys, but we're going to
do it really fast. The first thing you have
to realize is this setup is not complicated,
but it is extensive. So I'm using one light
on the backdrop to create that nice
round light effect. I'm creating two strip lights on the side for the
accent lighting, and I'm having one light
source in the front to create a nice soft
light on our model. But we don't want it too soft. Now, my favorite
modifier for shooting something like this is
actually a ring flash. But I didn't use it today. Today, I'm using the
S 26 from Gekoto, and I want to show you
something, and that's actually part of the
video. So let me grab one. Now, when we look at a strip light or a softbox or any other light modification, you can actually see that it's
built up in several parts. So, for example, in the
front, we have the grid, and the grid steers the
light towards your model. But let's take the
grid out. Now, it doesn't look really nice now
because I took the grid out. But as you can see
here, this is what we call the front diffuser panel. Now, the front diffuser panel captures the light
and then spreads it out over the front diffuser and then actually spreads
it out over your model. This creates a nice
soft quality of light. But as you can see here,
it isn't that deep. So how can I light this whole
area with just one stroke? Well, that's the idea
behind the front diffuser. Because behind the
front diffuser, we also have the
middle diffusier. And the middle diffuser, this is where it's
all about today. For this setup, I'm just
using the middle diffuser. Now, you might
think a softbox is just one way of lighting
your model, but it's not. With the grid, we, of
course, steer the light. But with only the
front diffuser, you get a smaller
quality of light, so a harsher quality of light. So you can use just the from diffuse without the
middle diffuser. However, if you take
out the front diffusie, leave in the middle of
diffusi. Look at what happens. The light will go here,
and this will be soft, but all the sides
will get that nice, harsh quality of light. So in other words, if you're using a
smaller light source, the quality is already harsh. But if you take out
your diffusers, you can actually totally tailor made that
light to your liking. If you like it softer,
use more diffusion. If you like it harder,
use less diffusion. But also look at what happens
inside that soft box. A white soft box will totally
act differently than, for example, a silver sof box.
And that's the whole idea. We wanted to use a nice crispy light quality
on our model. And in this case,
I'm using the S 26 without the front diffuser, without the grid with
only the middle diffuser. And that gives me that little
bit of bite in the image. There's more in the image.
If you look at the setup, you can see that I'm also
using two flex on the sides. Now the reason for
this is very simple. We're using two strip lights
aimed towards the camera, and this can introduce
a lens flare. Now, sometimes you
want lens flare in the image because it gives
you a nice moody image, or it gives you some atmosphere. But sometimes you also don't want lens flare in your images. And that's when you have
to make sure that you cut off the lens flare before
it hits your lens. Now with white backdrops, we have to do that
nowadays because the cameras have way
more dynamic range. So the backdrop starts
to reflect back. It eats away all the hairs, and at that point, it
doesn't look right anymore. So that's where we
also use flags. But also when using accent
lighting and especially when you have a
filter on your camera like the black mist filter, it's very important to
use flags on the sides of your model to make sure that you don't get
any lens flares. In essence, it's a relatively simple setup
with two accent lights, one main light, and
one on the deck. But the idea behind the setup is actually a little
bit more complicated. And I hope you understand that by taking away the lens flares, you are creating a much
nicer and even backdrop. So when you are in Photoshop, it's much easier to Photoshop. And, of course, the front,
that's all up to you. If you want more contrast, you use the setup
that we use now. If you think, Hey, that's
a little bit too much, I want less, use
the front diffuser. If the light spreads out too
much, then use the grid. But hey, we can talk
about it a lot. Let's take a look at the behind the scenes video
and the results. As you can see, a
relatively simple setup, but actually a little
bit more complicated. Hey, guys, I hope you enjoyed this episode of digital
classroom. How did I shoot this?
11. I've been using this for years, movement in your shot: Hey, guys, Frank
here, and welcome to another episode of
Digital Classroom. How did I shoot this one? Yeah, I really
like those images. Now, during the workshops, one of the things
that I love to do is incorporate motion
into my shots, and you might wonder
like, Hey, why motion? It's actually pretty
simple to explain. If you shoot a portrait
and everything is static, for me, that's nice. But at one point, you also have to get your model
loose right in a set. And sometimes the models
are a little bit, well, scared and they are stiff and they don't really move nicely
in front of the camera. And I found out many
years ago that adding some motion to the shot
one loosens the model up. They get a really
kick out of it, and the images are absolutely stunning
sometimes, not always. So, in this case, we're shooting motion with our model Felisa. Now, I could have stopped
there and just said, Hey, incorporate
motion in your images. It loosens the models up, and it gets you great images.
But there's more. When you shoot motion, there's a few things you have
to take care of. The first thing is
the flesh duration. You have to make sure that
your motion is frozen. Now a lot of people wonder like, Hey, how do you do
that in the studio? Because we're shooting
on 125th of a second? Well, that's easy to explain. A stroke isn't
continuous lighting. A stroke just gives you a pulse. And within that
125th of a second, the pulse of the
stroke is like this. If you have a
really good stroke, you will have a fast
flash duration. If you have a cheaper strope, you will have a slower
flash duration. The best tip that I can
give you is take a fan, put it on the higher speed, start shooting with your
strop on the lower setting, and just build it
up stop by stop and see where the fan
is frozen the most. And that's your sweet spot to freeze motion
with your models. So that's part one, the flash
duration of your stroke, and to realize that over
the range, it varies. Sometimes it's very slow and unusable and sometimes it's
really fast and perfect. Most of the times you will
find that within the 60, 70, 80% of your stroke, that's where the sweet spot is. Another thing that you have
to realize is your aperture. When you are shooting motion, you're not going to
shoot at on 2.8. Well, be my guest
if you can do it. But most of the
times we will try to shoot on F 11 or F 16, because if the model moves
forward or backwards, we want to make sure that
she's still in focus, and you don't have any
well, out of focus images. Although with motion,
out of focus, it's allowed a little bit, of course, because, hey,
it's motion, right? So aperture, flash duration. And the other thing is cropping. I'm a huge supporter of shooting it straight
right into camera. I don't believe in
cropping afterwards. At one point, you should
just look into your camera, see the composition and shoot it and use every pixel available. But with motion, I
always try to shoot a little bit wider for
the very simple reason, you never know where
your mother's gonna go. And sometimes you
have to kill a shot, and she's extending her arm like this and it's
out of the frame. And you go like, Why? So
shoot it a little bit wider. And in all honesty,
with 60 megapixels nowadays and studio cameras, that's no problem
at all anymore. And finally, your
lighting setup. Make sure that your model
turns towards the light, but also make absolutely sure
that you have enough light hitting your model from the back to make the hair stand out and, of course, also create
something on your backdrop. In this case, it's
not always perfect, but we try to keep the
backdrop lit behind the model and then fall off
really dark on the sides. In Photoshop, you can always
enhance this a little bit, but the images I'm
going to show you now are not enhanced that way. So this is really
the light setup. So let's take a look at the
behind the scenes video. As you can see, motion
isn't that hard to do, but you have to take into
account your cropping, your flash duration, and,
of course, your aperture. Well, encoach your model. Now, if you do motion and
your model always looks like this or this
or that or weird, one final tip if you
made it to the end, make your model scream
without making sound. One, she will have a blast. Two, your ears will stay good. And three, the image
is absolutely awesome.
 Frank Doorhof, Learning with Frank