Transcripts
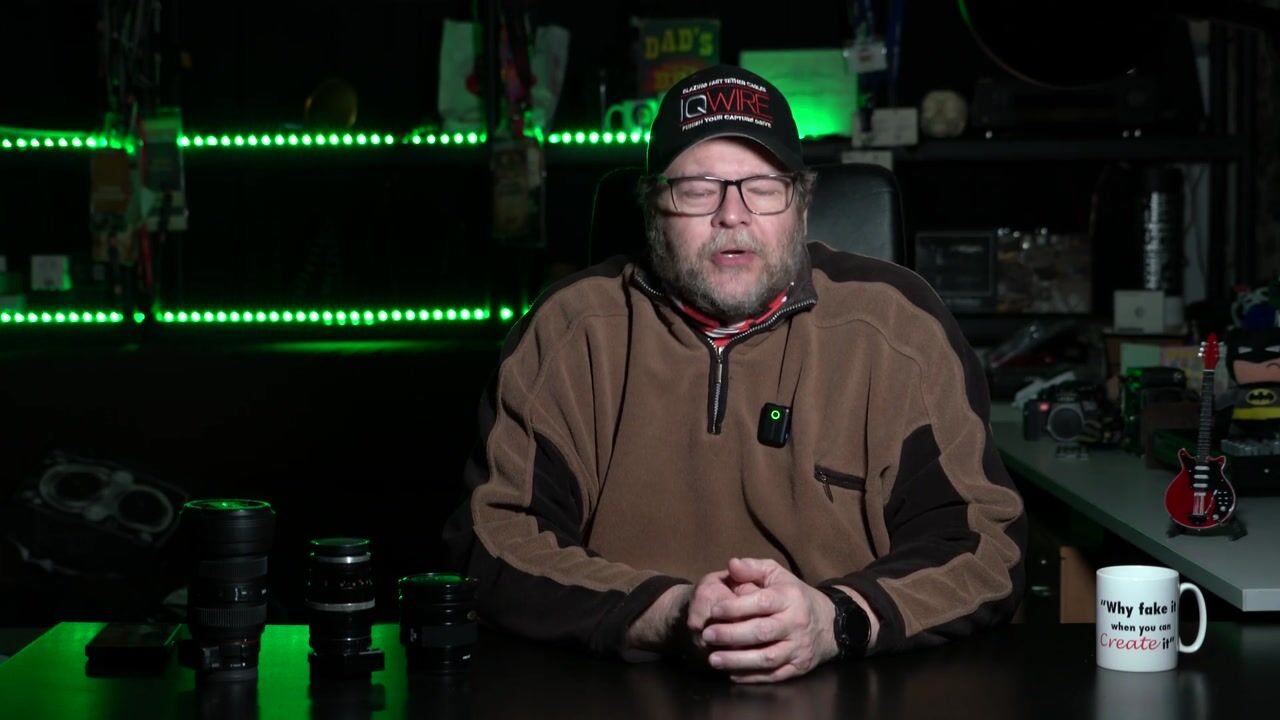
1. Introduction How Did I Shoot This One 3: Hey, guys, Franker
and welcome in our studio in Amloid as
you can see behind me, green light, as you can
see in front of me, cameras and, of course,
Batman and a guitar. You might think, like, Hey, Frank, why are you
showing all this? Well, the lighting is, of course, very important
in photography. But everything else
here in front of me actually is something
that's more important. I love playing guitar
and collecting guitars. I like Batman, but I
also like the movies of Batman because they're
dark, they're mysterious. And, of course, I like cameras. As you can see here, we
have all kinds of cameras, even when we have Christmas, we have decorations
with cameras. So in this series, they called How Did
I Shoot This One, I'm taking you behind the scenes during photoshoots that
we did and workshops. I'm explaining you
the techniques, the ideas behind it, and I'm going to show you
the final results. But there's one thing that I can't show you in the videos, and that's still very important. And that's having
passion for what you do. If you start your day with, Oh, my, I have to do
something terrible today. Let's say, for
example, we filmed a whole series of interviews and they forgot to
turn on the audio. For me, that's no
problem because I absolutely love my work, so
I'm going to do it again. And that's the same
with photoshoots. If you are doing just your work, a photoshoots becomes boring and becomes doing the same
thing over and over again. By showing you these videos, you can see that although I'm teaching workshops for many, many years and twice a week or doing trade shows
and doing tutorials, I always try to do
things differently. I never try to repeat myself. Of course, there
are lighting setups in the videos that
you will recognize. Like, Hey, I saw that
lighting setup before. But as you can see, I'm still using it in a
different kind of way. Because for me,
using lighting and cameras isn't about
getting a shot. It's about telling a story. And when we go back
to the old times, what was everything in art? It was telling stories from the cave paintings all
the way up to nowadays. Well, okay, leave
away the duck faces. Let's say a few years
before social media. The most things that we
did with photography with paintings was telling
stories or gathering news. So the next time you take your photos, think
about it like this. Try to capture the character. But most of all, try
to push yourself. If you're always
doing the same thing and you feeling a
little bit burned out, watch these videos
for new ideas and try new things in
your photoshoots. And always remember, if you try something and it doesn't
work, it's never a failure. It's one step closer to well, perfection because
now you know what you don't have to do
because it doesn't work. Hey, we can talk
about this for hours. That's actually how
I always started behind the scenes
video in this series. But let's go to our first video, and let's start with
our new series of How did I shoot this one,
especially for Skillshare.
2. Angling your props: Quick tip about what
you can do with colors. Now, we all know colors, right? We have our primary colors,
red, green, and blue, and our secondary colors
Siam magenta, and yellow. And in the middle of
the black body curve, we have our white point. Now, why do I tell
you guys this? Well, just for fun. But there is something you
have to know about colors. Colors evoke emotion,
but colors can also compliment each other
or create tension in a shot. And today, it's just
a very simple trick. One of the things that
I love to do during my lighting setup is
create mood with, of course, lens flares,
but also with colors. Now, in the setup you're
going to see today, I'm using a very
simple lighting setup. But the trick is, I'm using
a model wearing a red dress, red hair, and, of course, a red fill in light. Now, you might wonder, Frank, you've done
that many times. Why video about this? Well, it's because the
props he's holding. In the video, you're gonna
see that our model Claudia is holding a golden
crocodile or alligator. I don't know which one it
is. People from Florida. It's a crocodile
or an alligator. Let me know in the
comments below. But she's holding a golden
alligator or crocodile. And the thing is,
during the workshops, a lot of people had problems getting the light right
on the crocodile. And when you look closely
at what they're doing, they're always trying
to change the lighting. They're always trying to change their own angle because they want to make sure
that that light hits that crocodile
right, right? Because you have that accent
light coming from the site, and it will be great if
you have a red accent on that golden crocodile. But you hardly ever see somebody doing what
you should be doing. And that's angling
the crocodile itself. So when you're shooting
with a prop in your photo studio
or on location, one of the biggest
problems is reflection. Now, reflection is
easily solved by the angle of incidence is
the angle of reflection, so make sure you never shoot
under that same angle. But also shooting tattered. Because when you shoot tattered, you immediately see
all your images coming in on a big
screen so you can check. But if you have
reflections in your props, make sure you angle the props because angle of incidence
is angle of reflection. Let's take a look at the
behind the scenes video so you can also see the
lighting setup and, of course, the final results. As you can see, guys, it's
a really simple setup, but I actually love the results, and you see me
shooting full body a few times. Isn't that awesome?
3. Bubble magic meets smoke: Hey, guys, Frank,
here, and welcome to another episode of How
Did I Shoot This One? And we're still
outside because it's nice weather, so why not right? You know, I love
testing new products, and sometimes we
get stuff send in. Hey, can you try this
out? And, you know, sometimes stuff just works. But there are also instances where you get stuff
where you go like, Hey, this is something
that I didn't see before. Let's try to use
that creatively. Now, as you know, I love
high contra lighting, but I also love to use smoke
and color in my images. Now, with smoke machines in
the past, it was very simple. You have a thicker
smoke quality for those nice flumes and those
great contrasty patterns, and you had the haze. So what is the haze?
Think about this. Every movie that you watch
from Hollywood, right? If they go into the cellar and they turn on their
flashlight, what do you see? You see that beam
of light, right? And they even have it in
homes and wherever they are. Did it ever occur to you
that while you do that, that you don't see
that beam of light. So what's going on? Well, maybe there's a lot of
dust in those areas, but also in houses,
no, of course not. To create the filmic
effect, they use haze. And haze is actually smoke, but it's already cleared up. And there are still these
little particles because whatever we do with lighting and whatever we do
with our photography, we always photograph
reflections. Without reflections, we
don't have any pictures. So that means that
those particles in the air actually catch the
light and reflect that back. This is also one of
the main problems, of course, of a smoke machine. Think about it if you drive
in your car and there's a lot of fog outside when
you turn on your headlights, if you keep them low,
that's no problem. But as soon as you start
aiming at the fog, you will get a big white area and you can't see
anything anymore. And that's the same with smoke
in our photography studio. If we light it from the back, you can see all the patterns, and you can see a nice
smeared out color effect. But as soon as we
start lighting it from the front, yeah,
there's the problem. You have a white wall and you
don't see anything anymore. So that means that we
have to do a few things. First things first, let's place the light as
close as possible to our model and under an angle so we don't hit the smoke
straight on and, of course, use backlighting. Now, let's talk a little bit
about that smoke machine. So during a recent event, I saw a smoke machine
that did all the tricks, dry ice where it just
stays on the floor. You can do haze, you
can do a lot of smoke. You can do thick smoke
or all that stuff. There was one thing that
I never saw before, and that was actually
smoke bubbles, smaller ones, medium
ones, and big ones. And I immediately saw a
model turning around, hitting those smoke
bubbles and just exploding on their
bodies and all colors. And, of course, that's
great to think about, and maybe you can do it in AI. Doing it in real life,
that's a lot harder. But we decided to do
it during a workshop. So, during a workshow with
Lorena and the styling, by the way, was with Nadine, we decided to do
different setups and just see what we could
do with the smoke machine. The first thing you
will notice is that as soon as you start
blowing those bubbles, that, of course, to create
the image that I wanted, we need a lot more
of those bubbles. This is the first
point where the smoke machine actually
surprised me. The bigger bubbles
take a long time. The smaller bubbles are a little bit too small for
me with a model. The medium bubbles,
in all honesty, they were pretty fast. So I was expecting to shoot
maybe four or five images, combine them into one to make sure that all the
effects were there. But in the end, we ended
up with only two images, one for the motion
and the model, and one to get a little bit more of those extra bubbles in. So the smoke machine was
fast enough to do that. So how did we
started this setup? The first one, I just tried to get everything
right at once. And as you can see in
this image, it's okay. The model is just
holding up her hands. You can see some of
the bubbles exploding. You can see some
of the patterns. But, yeah, it's nice, you know, but it doesn't
really tell me a story. Oh, by the way, for
the lighting setup, we're using two lights
from the back and one main light source to make sure that from
the back, of course, we have the smoke lit from
the back as you should be, but also for the bubbles
to create a sense of depth and a little bit of reflection on the
little bubbles. Of course, one light
from the front. And from the front, I'm
using a smaller light source with a grid to make sure that I can focus my light on my model, and everything else is done
with the backlighting. So the first image, okay. But after that, we
started to go like, Hey, maybe we can
add some motion. And one of the cool things
about motion is that while they are hitting
the balls or the bubbles, you get a lot of
haze in your studio. So that already helps with
filling up the studio for the next set where we're using the contrasting light sources, a little bit more extreme. So I thought, when
we do the motion, let's also try one where you can just touch the bubble
and it explodes. That was a little bit
harder than I thought, but in the end, we got
one of those shots, as you can see here, it's okay, little bit on the
corner, but we manage. After that, I thought,
Let's do a lot more motion, but let's zoom in on the motion. And this is when
tetering really shines. With tetering, you connect your computer to
a larger device. So every image that you shoot, you see on the larger screen. And that also means
that details jump out. Now, I'm not going
to say to you guys that if I didn't shoot tattered, I would never shot
the next images, but it did help a lot
because when I zoomed in and I took that close up of the hand just going
through the air, hitting the bubble, I was
just going like, Wow. This almost looks
like a universe with just one planet
floating a top of her hand and one sun
just And at that moment, I thought, You know what?
I love superheroes. I love the whole
comic book genre, but also science fiction movies. Why not create the
Queen of the Galaxy? With all those bubbles,
you have planets, right? And when they hit the bubble, you have these nice patterns, almost like the nebulas
in the universe. So let's try that. For the next shot, I wanted to do the Queen
of the universe. So two accent
lights and a model, three quarter bodies
floating around. We have some bubbles
exploding on her dress. We have a nice smile because Hasy's the queen of
the universe, right? And the only thing I changed the Photoshop was actually
get a little bit of a star effect on
those bubbles to make them shine a little bit more
like almost like stars. And then we started
to think, you know, color evokes emotion. Why not add some color? And you know those pictures from the Hubble telescope and, of course, those beautiful pillars of creation
with all the colors? Yeah, let's add some red, right, because red is, for me, one of the strongest colors. Now, we started out with red from the bottom and aiming up. That didn't give the
effect that we wanted. So at that point, there was already a lot of
haze in our studio, and that means that
all the colors will spread out nicely. So we're using still those
two accent lights to create a nice dense field
of light from the sides. And then the red light on top of the model aimed
towards our camera, not to create lens flares, but to nicely spread out the light and the
color to the sides. The only thing you have to do is make sure that your
timing is correct, combine two images,
and, of course, and this is
incredibly important, change your color balance just slightly to make the sides
look a little bit bluish. And that you don't even need a blue gel or you can
do it with a blue gel. But if you just change
the color balance with a red gel and to white, you can actually manipulate the color towards a
little bit of blue. Hey, we talk a lot
about styling. We talk a lot about posing, but timing in these
kinds of setups is essential because
in all honesty, it was pretty easy to
shoot the bubbles, but to get it exactly right, yeah, that takes a lot of time. So I'm not 100% satisfied
with the images yet, because this was
the first workshop. We ever tried it. We never
worked with Lorena before, but I think she did a great job, and I actually love the images. So imagine what we can do more. Let's take a look at the
behind the scenes video so you can see the
whole setup and, of course, the final results. Oh Oh. As you can see, the smoke Nina
is one of those gear that, you know, sometimes you have
gear that just doesn't work. Like, for example, beauty dis, does it work as a beauty dish. Then you get gear where
you start to experiment, and that's one of the things
that I love, for example, about the rogue equipment with
the whole magnetic system, the snoot, you get stuff that you can use in many,
many different ways. I think the smoke Nimia for the first time is a
smoke machine that's one portable and that just
triggers me to keep shooting. Of course, with the
dry ice option, I loved it with
product photography, but for model
photography, for me, the dry ice, it's fun, but I don't use it a lot. The bubbles, I'm pretty sure you're going
to see those a lot during coming workshops because I still want to try a
lot of stuff with that.
4. Lantern: Hey, guys, Frank,
here, and welcome to another episode
in our series. How did I shoot this one? And today we're going to
take a look at this shot, and it's actually much
easier than you might think. Now, sometimes during
the workshops, we do have some time left, and I always love
to do an extra set, even if it's just 15
minutes or 20 minutes, I just love to do extra sets. And one of the sets that's
very easy to set up, but is always very cool to shoot is with the Gekoto lantern. Now, every single light shaper, if you look at the design
of the light shaper, you can predict
what it's going to. For example, if
you compare the S 26 from Dakoto with the quickie, you can see that the S 26 spreads out the light more and the quickie focuses
the light more. But if you look at
all the soft boxes, you can see that
they're all black on the side and
white on the front. And that means they don't
emit light from the sides, but just from the front, may mean you don't have
any spi light. And that's awesome, right? Because if you don't have
any spi light, well, you don't have to
flack everything, and we can really focus
your light on your model. But what if you do
newborn photography or product photography
or a fashion shot where you want the
whole set to be lit, but you can't move all the way back to create that effect, or you can't bounce
off the ceiling, or maybe you want
those shadows to run there, but you
need more light. Now, of course, you
can use an umbrella, but an umbrella it's
a great light source, but it's a little bit
limiting, of course. One of the light sources I
love to use for these kinds of setups is our brand new
Lantern from egoto. Now, the lantern from
Gigoto has a great design. You still have that flat front so you can focus your
light on your model, but the sites are totally open. This is something else than a normal lantern where you
have that round front. This is a straight front. Now, I'm using the lantern
mostly to use, for example, side lighting in a
Rembrandt setup, where you don't need any lighting on your
backdrop anymore, you place the light
slightly behind your model, and because it's
open on the side, it also spreads out
over your backdrop, creating a much nicer
setup than with previous setups where you use a softbox and excent
lighting from that site. Now, in this case, we wanted to mimic something that well, a little bit of a wink to
the old folk commercials. So a great red dress,
a big hat, and, of course, well, a little bit of an old
fashioned backdrop. I just love that backdrop from click backdrop so you can see
the three dimensionality. Lighting wise, just a
lantern only from the side, creating a little bit of shadow, but a very soft shadow, and that shadow
actually creates depth. Now, to let our
model pose against, we're using a big box that
we have in our studio, and that's actually
the whole setup, meter it and shoot it. So let's take a look at the
behind the scenes video of this very simple but very
cool lighting setup. So, now as you can see, lighting setups don't
have to be very complicated or
difficult or expensive. One light source
can go a long way. Now, of course, normally, I love the more high contrast stuff
and the more darker stuff, but in this case, well, sometimes it's just fun to
do something like this. And of course, sometimes clients
need an image like this. You can, of course,
create everything high contrast and dark
and Rmbrant like. But if your client doesn't
see anything bright and he looks for anything
bright, he won't call you. So make sure in your portfolio, you always have different
kinds of images. Thank you so very
much watching, guys. If you have any questions, feel free to leave them in
the comments below, and maybe your question will
be answered in the next
5. Out of reflection : Hey, guys, Frank here, and
welcome to new episode of How did I shoot this one in a totally different
environment? Because, hey, it's summer, it's nice weather, so
let's sit outside. Now, during the workshops, we always try different stuff, but sometimes we also
have new models. Like today, we have Lorena, and this is a totally
new model for me. We never work together, but that doesn't mean we can't
take great images. So during this workshop, all the styling was
done by Nadine, and we also did one set
with Nadine, by the way. But now let's take a
look at the first set. Now, when we set
up our lighting, we have to always take
into account a few things. The first thing, of course, is what kind of
lighting do we want? Do we want flat lighting, or do we want contrast
lighting or focus lighting? With flat lighting, we
often mean that we use a bigger softbox or an umbrella that
spreads out the light, and that actually gives
you a beautiful lid image where you can see
almost every detail. Now, as soon as we
use more focus light, you will find out that it's more difficult
to control because we are just hitting a
smaller area of our set and, of course, also
less of our model. But there's an added benefit. We get a lot more shadows,
and with shadows, we get more detail and more
grunginess in our image. So for the first setup, I'm just using the lantern
from egoto on our model. It gives you a beautiful
soft light quality. And in all essence, this is great for product photography, newborns, and, of course, to light a whole scene. But we wanted a little bit more. So we decided to use a
frame in the picture. And actually, when
you look closely, our model is standing
on a mirror. Now, you might wonder, how can a model stand on a mirror
without it breaking? Well, this is a plastic mirror. And one of the big advantages
of a plastic mirror is that you also don't have
the double reflections that you have with
a normal mirror, and it doesn't break
evenly easily. So, the model is
on the mirror and she's stepping out of
a frame from a mirror. And I thought this was a cool
idea to combine those two. You will find out
in the final images that we don't even show the
mirror in all the images. That's something you
always have to remember. Sometimes you have a great idea, but it just doesn't work
in the total image. And it doesn't really
matter as long as you get a great shot
from that setup, and maybe next time
you will shoot a full body or three
quarters, and it will work. So in this case, we have
some images with a mirror, but overall, I just like
the close ups more. So we started out
with flat lighting to actually show you what
the flat lighting does. After that, we decided to
take a different road, and this means high
contrast lighting. Smaller light source, a grid, really focusing that
light on our model, creating more harsh shadows
and more depth in the image. But sometimes it
happens that you just don't have enough light in the
shadow. So what do you do? You can open it up in light
room with a shadow slider, but then you open
up all the shadows and it just doesn't look nice. Much better solution is a so called lighting light solution. Now, in this case, we're
using the lantern on a much lower setting
than our main light. And that means that you first shoot your image, of
course, without stroke. So if a black image,
then you shoot your image with just
your main light. You look at all
the details you're missing and then use
a broad light source, for example, an umbrella or the lantern to open
up those shadows. Now, we all know dynamic
range of our cameras, so that means that when you stay about three stops
below your main light, you just have enough light
to open up those shadows. But you know the drill, we can talk about it for hours. Let's take a look at the
behind the scenes video so you can see the lighting
setup and the results. As you can see, two
totally different images, one with a lantern from
Gekoto for broad light, soft light quality, beautiful. And then, of course, high focus light with a grid and
aimed at our model. And the frame, the
expression of the model, it all works perfectly for me. There's one final tip. Of course, we can make our
model stand like, Okay, pose, take that action, and no one, two, three,
I'm going to shoot. But somehow, when
you make your model, relax and then count one, two, three, make that move. Even if it's just a small move, you will see that difference
in your final image. So my advice when you
want to do something with a little bit of motion
or the hint of motion, don't make your model just pose, but count down one, two, three, that's
actually counting up. Three to one is counting down, and then make your
mode you got it. One, two, three, and
then take the pose. It just gives you a little bit of extra tension in the muscles. You can really see it
back in the final image.
6. Overhead striplight: Hey, guys, Frank
here, and welcome to another episode of How
did I shoot this one? And today, it's so
incredibly simple. You're gonna hit yourself in the head if you never
tried this out. Today, we're gonna talk
about something that I love to do when I'm well, feeling a little bit like
I have 5 minutes left. I want to create a great
shot, and it has to be fast. It has to be great, and it
works in all locations. That's the setup of today. Now, when I started
out with photography, I love to work with backdrops, but not the way that you think. I love to work with backdrops
that were invisible. For the very simple reason, I didn't have any
control over my shadows. You probably know the problem, right? Shadows are everywhere. You have there's ugly shadows on the back, you don't
want them there. And it takes a while before you start to appreciate
those shadows before you start to realize that
shadows are the soul of a shot. Shadows glue
everything together. It's like in music, that little
synthesizer in the back. If you take it out,
it sounds horrible. But if you listen to the music, you probably don't even
hear the synthesizer. And that's because the
people that record that music know exactly where
to put that synthesizer. Exactly how loud should it be that you do hear it,
but you don't notice it. And that's the nice
thing about shadows. If you control your
shadows the right way, you can do so many
great things with it. But most of all, you can steer the viewer exactly to where
you want it to watch. Now, take a look at the shot. As you can see here, my model is standing almost straight
against the backdrop, but you can still see that we have nice lighting
on our backdrop, but also this effect. So how did I do this one? Well, it's actually
pretty simple. When you look at a light source, you can literally predict how the light source
will project your light. Just look at how
everything is built. So if a light source aims
the light like this, well, you probably already know the light is
going like this. If the light source does
something like this, you know, the light
will spread out. If you use a grid, you know, the light will be steered. But there's also something else. If you angle your light
sources, actually, the same thing that you
do with your camera, you will also
distort those lines. So lines will never go straight. They will always extend. And this is actually the
trick I'm using here. So my model is placed
against the backdrop, and I'm actually using
a strip light on top of my model aimed
slightly forward. Now, if you want more
light on the backdrop, the solution is very simple. Just angle the strip light slightly more towards
the backdrop. If you want the backdrop totally black, that's also possible. Move the model about 50,
60 centimeters forward. Also move the strip light
and angle it forward, because if there is no
light hitting a subject, it won't register on the camera. That's, of course,
also important that you have your studio really dark because if you
have a lot of light in your studio, you
have spill light. But that's why in the
studio, it's always dark. Look around me. I
can't see anything. And that's the best
way to shoot because then you can set up your
lighting perfectly. So in which situations do
these setups work great? As mentioned before, when I
started with photography, I didn't want any
shadows in my images. But I did like backdrops. So I always was in this little
competition with myself. Like, do I want to backdrop? Yes, but do I want shadows? No. So what did I do? I use seamless paper
in different colors, placed my model in front of it, use two strip lights
from the side, one on my model, and
then create a beautiful, nice vignette with light on the backdrop by using
an extra strope there. A little bit like
a pin up setup, really nice, really
fresh and cool. But no shadows. And that
means that it also looks like your model is a little bit glued on, just
doesn't look right. The moment I started using
backdrops as real backdrops, so making my model
lean against it, using the shadows the right way, that's when everything
just clicked together. Everything just moved
very nicely in the shut. But the problem is sometimes
you don't have that space. So when I'm teaching
at a trade show, I'm lucky if I have
two by 2 meters, and then I have to fit
myself in there, too. So it's very, very tight. So I don't have any room
to say to my mother, Well, let's go 2 meters
away from the backdrop. I also have no options to create something nice on the backdrop with nice backlighting because, well, my mother is almost
against the backdrop. And this is when
I started to use this technique,
and it's awesome. Just place a light source
right above your model, but make sure it's a
longer light source. So for example, the Frank
Dora flash bender in strip light configuration
or a strip light, but it has to be a longer one. And the reason is simple, we want to light both
the back of our model, but also have enough
light on the front. So it doesn't make any
sense to do it like this because no light
will hit your model. So we always have to angle it
slightly towards the model, and then you also have enough
light on your backdrop. There is only one thing in this light setup that
makes it really tricky. The model has to look
up or wear sunglasses. But if she does, well, you get some really
amazing shots. So, let's take a look at
the behind the scenes video that you can see how
incredibly easy this setup is. And well, of course,
the final results. As you can see, a setup, you can do very easily
in your own studio. You only need one strip
light, and a boom arm, by the way that also helps
because you make sure that that strip light is
on top of your model. And this is why I
love those Jicoto strops so much because
they're run on batteries, so I don't have any
problems with cables, and they are very lightweight. So I can just play
them straight above my model with a relatively
light boom stand.
7. Portrait: Guys, and welcome
to another episode of Digital Classroom. And in this series, I show you images we shot
during the workshops. And how did I shoot this one? And today, we're going
to take a look at this portrait from Jenica. Now, I love old
fashioned photography. I don't know what it
is, but new lenses are, of course, perfect,
but sometimes they miss a little
bit of character. You might wonder, What's
character? I don't know. If you put it next
to each other, I may or may not pick
out the old lens, but when you shoot
with those lenses, I don't know, something
magical happens. So that's why I love
collecting those old lenses. Now, of course, we didn't
shoot it with a Jessica. Don't you just love
these kinds of cameras? Oh, by the way, if
you take the lens cap off, it works so much better. Now, this one is awesome because it has a light meter
inside and it has, of course, a twin reflex. The problem with these kinds
of lenses, by the way, is that you look
through one lens, and you take the picture
with another one. So there's always
a little bit of a difference between what
you see and what you get. But that's so cool about
these kinds of cameras. Still use them. They awesome. Of course, we also have
the 35 mil ca R cameras, great cameras, but most of all, great lenses, if you can't
afford the M lenses. But if we go even further
back in time, we of course, have our older Pentax cameras or minota cameras
with great lenses. Now, you might wonder, Frank, where are you going with this? Well, let me tell you. As you can see here, this is a so called Zebra lens. And
here we have another one. If you see silver with black, it's often called Zebra lens. Now, those lenses
are very special, and that's also because
they have a certain name. You might wonder
what that name is. Did you ever hear the
name Jenna? Probably not. But did you ever hear
the name Zeis yeah, you probably did hear the
name Zeis, right? Zeis Jenna. Those older lenses, I kid you not, are
absolutely awesome. Now, the most lenses
I'm using are, of course, the 42 mount. Now, the 42 mount, let's
make it very simple. In the past, you, of course, Nikon, Cannon, and they
all have different mounts. And one of the
screw mounts is 42. Now, how do we fit something like this on a modern camera? Well, there are
several converters on the market,
like, for example, Photo Dox or tech art, and they make actually
converters that you can use these lenses on your camera
and you have auto focus. Believe it or not, it
works like a charm. But for this setup, I'm not using one of these older lenses. I'm actually using a
minota 8,051.8 lens, and it's an awesome lens, and it has a very,
very high quality. I think it's maybe even
better than some of the modern lenses because
it has more character. So how do I use a
lens like that, including out of focus on my
modern Sony A seven R five? Well, that's where you
need the so called LAI converters from Sony. Now, in this setup, I'm using the LA
and I hope I can pronounce it correctly,
the version five. Now, be careful when you use the minota lenses on
your A seven R five, that the four and the three
will give you some issues because they don't translate
well with an older lens. The weird thing
is on the A seven R three, everything worked fine. On the A seven R five, I really need the
converter five. So if you're into old lenses, make sure you buy version five. Now, for this setup, I'm using the lens wide open. Now, wide open gives you a very shallow depth of field, but you have
to be careful. If you want a shallow
depth of field, it can also help to shoot
from a slightly lower angle because then you get this really nice, smoothy silk focus. It's just awesome, as you can see in the final
results in a moment, and already in the image
I saw you in the start. Now there are a few things
you have to be very careful when shooting wide open. And that's, of course, make
sure that your focus is on the closest eye
and make sure you focus correctly because
one slight difference, especially when you shoot
from a lower or higher angle, will be dramatical
in your images. It will be totally unusable. So this is also one
of the things why I highly recommend
shooting tattered, because if you shoot tattered, you see the images coming in, and you can immediately check
if the focus is on the eye. But hey, how do we use our
lighting setup for this? Because I want to
shoot wide open. Now, wide open with strokes can be a problem for
the very simple reason, a strope has a lot of output. And in the studio,
we have to shoot on 125th of a second
because of the sync. So we need strokes that can go down to a very,
very low setting. Luckily, we are using our Gigoto stropes and they have something that
is, of course, well, a heritage from the
speedlight era, they can go all the way
down to 128th of an output, and that gives me very,
very low light output. And that means
they're perfect to combine with wide open lenses. Now my main light setup is the Gekoto quickie
softbox to make sure that I focus my
light on my model. But of course, we also want to open up the shadows
on the other side, give a nice accent light. And that's why I'm using an accent light on
the other side. Now, in this case, I'm
using a striplight, and I'm using a
striplight for a reason. Don't want to use the
striplight only to open up the shadows on that side
and give a nice accent. But I also want to
use the striplight to give a little bit of
light on the backdrop. And this is where the
striplight is awesome. I always tell people
the striplight you can see as three different
light sources. In the middle, you
have a very bright, harder light source,
and on the sides, it just fares away. So in this case, I'm using the sights to give the
accent on my model. I'm using the sight to
light the backdrop, and the middle part,
it just disappears a little bit between the
model and the backdrop. So it doesn't really
bother me in the shot. Also call this a sandwich
technique where you're using the outsides of the stroke
and the middle side, of course, it will
infect the image, but it doesn't
have a big impact. And the cool thing about this
setup is you can just angle your striplight to get
more light on the backdrop and a little bit
less on your model or aim it the other way, get more light on your
model, less on the backdrop. It's an awesome way to shoot. But we can talk about
it for hours and I feel like I already did
with all these nice lenses. Let's take a look at the
behind the scenes video. And As you can see, shooting wide open gives you
a totally different look. Now, it's not something I
would advise to do all the time because it can
get old very quickly, but sometimes and especially
with shots like this, it just really adds some
atmosphere to the shots. Thank you so very
much watching, guys. If you like what we do,
subscribe to our channel, leave comments below
and of course, Ms the L and bell
notification button. But most of all,
tell other people about our channels. We can grow. It helps us out enormously to
give you more free content. And by the way, if you have any questions or you want to know more about these lenses, also leave comments
below because maybe your question will be answered in the next digital classroom. Again next time. I
think I'm going to take some pictures with old
lenses and have some film, and the cameras still running. See you again next
time. Bye guys.
8. Smoke under my umbrellala: His Frank here, and welcome to another episode of How
Did I Shoot This One? During the workshops,
we have one model, and this time we
actually had two, and that's because
we had a new model, Lorena, and Nadine
did the styling. And that meant that
also for one set, I couldn't resist to ask Nadin, of course, to also be our model. And during this workshop, we were also trying out a new smoke machine, the Smoke Nina. And one of the cool
things about the smoke Nina is that it can blow
bubbles with smoke, but we didn't use
it in this setup. For this setup, Nadine had
this beautiful Asian outfit. We had a beautiful backdrop from Click Backdrops the
Botanical Garden. And, well, we had an umbrella. And I thought, you know, that mix of those is awesome. What if we just
blend them together and create more surreal image, a little bit like a movie. So we wanted to use smoke, but not in an obvious way. Like, hey, just pump some smoke and let's
see what we can do. So we decided to
do it differently. On our front light, we have our main light source, and that's a larger softbox
aimed directly at our model. This will give you a
beautiful light quality, but it doesn't give
you enough light to light the whole set and just overpower everything with light. It just gives you the
right amount of light. Now, if you need more, move
the light further away. If you need less, move the
light closer because that narrows the beam of light or
widens the beam of light. Of course, we also need
some back lighting. And in this case,
I'm using one of our ecotostropes
with a blue gel. Now, the reason I'm using
blue because in this case, I want to create a little
bit more distance. Now, red is a color
that I love to use to really draw the attention of the viewer towards the light. In this case, I don't want to draw the attention to
the viewer to the light. I just want to use
the light to create a nice dense image where everything just
seems to blend together. And blue for me in
this setup was awesome because it's very contrasting to the clothing and the backdrop. So how did we
create the effects? Well, that's actually
pretty simple. Nadine, hold the umbrella, and we just used
the smoke machine to fill up the umbrella. We waited a few
seconds. I focused. There we go. Now she moved,
and then we took the shot. Now, it doesn't look like it's
coming from the umbrella, but because we placed
it inside the umbrella, the smoke, we have a lot of control over where
we want that smoke. I didn't want it everywhere. I just want it localized. So in this case, I think the images
turned out pretty well. Also, this is a technique that you can experiment a lot with. You can do different kinds
of lighting with it. You can light it from the top. You can light it from the
bottom or from the sides. You can move around a little
bit faster or you can even hold the umbrella
and just let the light, if you back light it, just drop out of the
umbrella via the smoke. Lot of creativity. In this case, we just opted to add a
little bit of motion. Let's take a look at the behind the scenes video so you can
see the lighting setup. You can see the smoke and, of
course, the final results. Now, one of the coolest
things about photoshoots is, of course, finding creativity. You can do stuff ten
times the same way, or you can try to incorporate new methods to
shoot the same material. This is very nice to train yourself that whenever you're on a location and you
have to do a shoot for a client and the client
wants something different, you can switch very quickly. If you're always used to do the same thing and
only that thing, you are literally just
locked into that workflow. By experimenting with new
gear, like, for example, the smoke Ninja or new
lighting equipment, you will find that creativity, but also force yourself
to find that creativity. You buy a piece of gear and it says you can only
use it in the front, use it from the back
and see if it works. If it doesn't work, at least you now know that it
doesn't work from the back. But if you never tried it, maybe you lose something
what works great. So experiment and sometimes just fill up an
umbrella with smoke.
9. Visualize perspective : Hey, guys, Frank,
here, and welcome to another episode in the series
How Did I Shoot This One. And today, actually
a pretty simple one, but a very, very important tip. Now, a while ago, one of our models had a
mirror and well, the mirror broke, and he
only got the frame left. And he was going like, Hey,
do you need the frame? I'm like, Yeah, I love that. And that's the first
step, actually, when somebody has something that they don't want anymore
and it looks cool, and you have to space,
store it in your studio. And Anik is not here, but we're almost like
guppies, you know? If you put us in a bigger bowl, we just grow and grow and grow. But the cool thing about it is you always have
something to shoot. And having props in
your studio, I think, is one of the most important things because let's be honest, a model in front of a backdrop is just a model in
front of a backdrop. Maybe you can get
away with families with that for one shot. But as soon as you
start adding props, everything becomes
much more interesting. For example, if you
shoot a family and you have kids and you
give them a baseball, a baseball bed, a glove, a soccer ball, whatever, the parents will always choose the images with
one of the props. So, in other words, if
you use four props, there's a big chance the parents will actually buy four images, meaning more revenue.
But there's more. Think about the creativity
when you're using props. A prop isn't just
there to be there. It's not somebody that
just sit at a bar, drink something and
you don't hear it. Now, a prop is there
to have a function. It can create three
dimensionality. That's why we often use blocks, for example, to let the
model pose against. But it can also add
point of interest, something that draws your eyes. But at that point, it becomes really important
how you shoot this. So during the workshops,
we give a lot of attention about what does composition
do? What is a leading line? What does distortion do? And in this case, because
in this workshop, we already talked about angles, it was very important for me to throw in this one
because there's a problem when you shoot a frame like this and you let your
model pose against it. Now, in previous images, we already had a model
coming out of the frame, standing inside the frame, and at that point, the frame
becomes part with the model. So when you shoot
something perspective wise, it's all correct, right? But if we do a shot like this
one, as you can see now, this is our final shot, there's something
else that works, and as you can see
here, there's an angle. And our model is
actually further away from the frame
than the frame itself. And because you're shooting
with a wider angle, it always means that what is rendered larger is more
in front of the camera, and what is rendered
smaller is further away. In other words, when
you use a 70 mill, your distance will be
something like this. If you use a 24 mill, it becomes something like this. Just to give you a
point of perspective. If you have somebody extending her arm and you shoot
it with a wide angle, it looks like the arm is 2
meters wide, long, sorry. If you shoot somebody
with a 70 mil, it looks like the
arm is much shorter. So that's what compression does. The problem with compression
is if you start using a prop and you place the prop a little bit
too much forward, your prop will take up all the frame and your model will be very small in the back. Now, in this case, that's not really a
problem because, well, the frame is important, but I wanted to frame
as a leading line. So angling the frame
becomes really important, but also play with
your distance. Do remember the camera
doesn't see distance. So that means if
you have your model like here and the frame here, and you shoot it straight on, you might think, like, Hey, that's the proper setup, right? But what if you just
angle it slightly? It doesn't really look
different on the camera, but it will make it much
more easier to create that depth because now you are placing your model
slightly forward. The prop slightly to the back, it still looks like
that same angle, but because the model is a
little bit more forward, she will appear
larger in your frame. So play with that composition. Now, also in this image, there's another part,
and that's the dress. Now, sometimes we
use wind machines or sometimes we just let the model move around and move the dress. But in this case, we decided to do it a little bit easier. And the week is on the side of the frame, just
holding up the dress. And as soon as I say,
one, two, three, she just lets go of the dress, and that's how we
actually took that shot. So motion can be
done by using wind, can be done by motion
by a model itself, or just by holding the dress. But the most important part of this shot is I love
shooting wide angles, and the problem I
always encounter is if the prop is too close to the camera, it just
becomes too big. So in this case, just
visualize an angle, see it as a ball,
and just turn it around and just place your model slightly closer
towards the camera. The prop slightly more
away, and at that point, it looks the same, but your
composition is much better. So let's take a look behind the scenes so you can
see the lighting setup and, of course, the model
and the final results. Oh. As you can see, a pretty simple lighting setup, just one striplight with a
grid on our Gigotostrope. But the most important thing is always think about
lines for your light, but also think about a
globe for your angles. And you can move that
globe around on the image, it will look the same, but it will give you a
proper perspective. I hope you enjoyed
this little tip and see you again
for the next one.
 Frank Doorhof, Learning with Frank