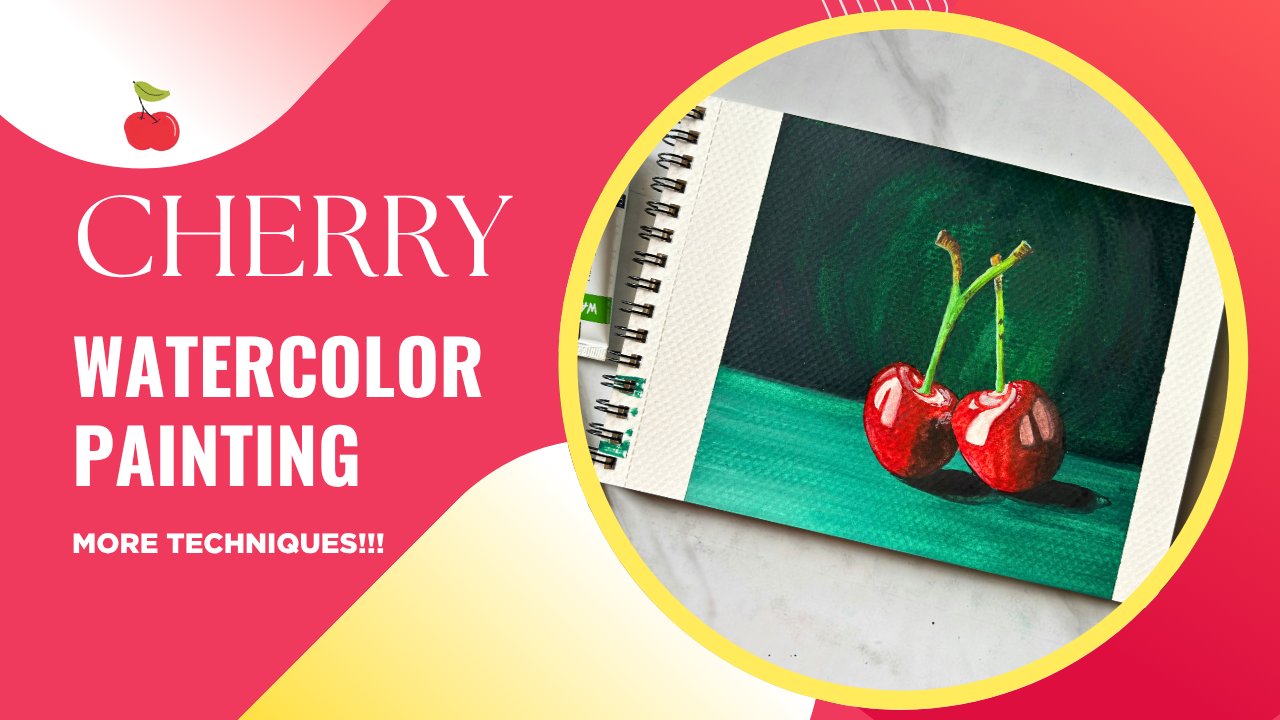
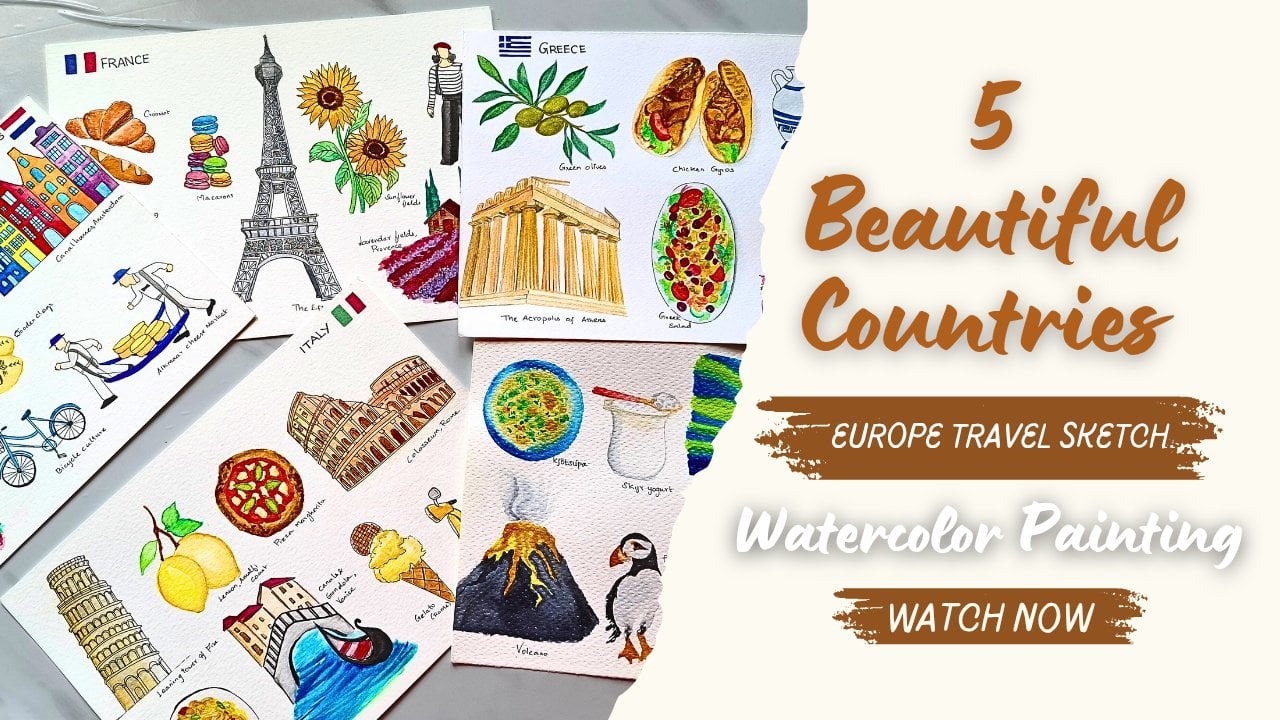
Transcripts
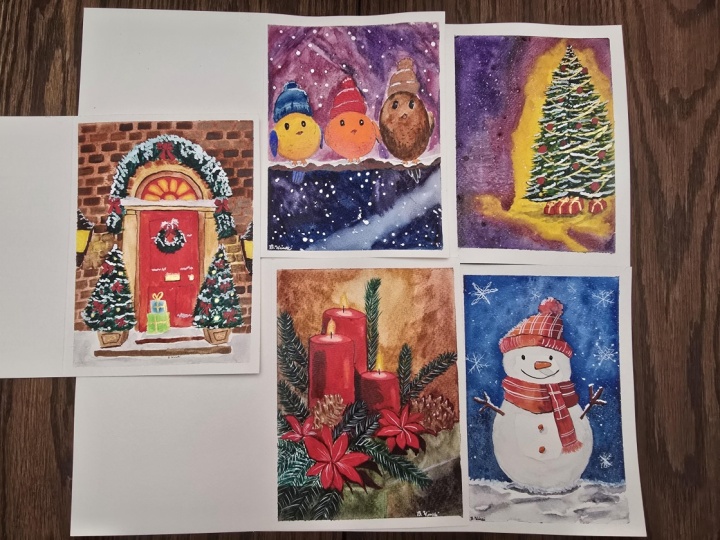
1. Welcome!!: Winter is a season
of cosy moments, soft snowfall, glowing
lights, and festive joy. Here is Srimathi an
artist, and art educator. In this class, I'll guide you step by step
through the process of creating five charming winter and Christmas themed
watercolor paintings. From a decorated Christmas door and a glowing holiday
tree to festive candles, cheerful winter birds,
and a cozy snowman. Each artwork captures
a unique piece of the holiday spirit. This class is perfect
for beginners and intermediate artists
who want to explore watercolor techniques
in a fun, relaxing way. You'll learn how to
create smooth washes, add texture for the snow, building textures
for the bricks, build depths with
layering and bring warm to your winter scenes
using color and light. By the end of this class, you'll have a beautiful
mini collection of winter inspired watercolor
artworks that you can frame, gift or use as a greeting
cards, and seasonal decor. Pick up your brushes, embrace the magic of winter, and let's start
painting it together.
2. Art Materials to get ready with!: Here we have a
little art supplies that's needed for making all these five beautiful elegant cozy
watercolor paintings for Christmas and
this now season to enjoy this now season. So here we are just going
to make with watercolors. And for that, the paper
is very necessary, and I have just come up with the Kansen 300 GSM
watercolor paper. So this is the one I'm
just going to use, and it's going to be a 51. Or if you're
comfortable with A six, you could just go
with that, too. And next is going to
be this masking fluid. For some necessary places, we can just cover
up with this fluid and make the protection
for painting it easily. So I have just
come up with this. Annex is going to be
any mechanical pencil that you have and an eraser, so to just clean up the
mistakes, if any done. Next is with the brushes here. So I have just come up with my Bristo brand brushes,
as you can see. So this is from Bristow, and it's like with
a lwttuch edition. So I'm just using this. Along with this, I have also another one brush
that comes under the palette here of
the Hini watercolor. 24 shades half pen set. So this is that I'm
just going to use. These are just simple swatches. I made it for the color
of just checking it. And it comes with a name board, so we could just
identify with a name. And this is the palette, so we could mix here and just select the paintings
paints over from here, and this is the mob
brush that comes along. This is super good. You
could use it so beautifully. So this is the one. Our next is going to be
with a masking tape. So this is necessary
to tape around, so we could get a good
border around the paper. And finally, with a spray
boter of fresh water. So I just spray and activate
the paint for dilution. So these are the stuffs
we need for now. And yeah, we just
get ready with this, and next we can
just jump on with the color palette
session. So thank you. Met you there. Bye bye.
3. Techniques & Color Palette Painting 1: Hello. So here is our very first painting
in this snowfall series. So this is a festival season. So here we celebrate with the winter, Christmas,
snow, everything. So I have just come up
with a first painting, and this is going to
be with three birds in snow and sitting on a branch. So I'll be attaching the picture
already done on the side so that we could just elaborate
making with the sketch, the techniques, and just
with the color palette too. So firstly, to make the body, I'm just going to make it very simple you can make it easily with a bird that's
not very much complicated. So three are sitting
very closer, and you can see the
left one's feather on the wing on this
right side is visible, and the other two birds is
not that quite visible. So it's easy to create. And first step, you can
just make for the bird to draw like you can just make with the oval simply starting
with a basic shape. So we could just
make with this one a good So this much broad
at least for the oval. Okay, this is the basic tape, and next is going to
be for the cap over. They have just made
with the curves. So the curves just split over the head covering like this, and you're going to
just double it up. Make a parallel line. And this is actually
a good furry one. So don't make stiff board lines. You should make a wavy line. So that is it will be realistic and visible
as it is as a cloth. And the other one
is this way goes randomly up here and there
and a pompom on the top, just randomly making
the dots like a wool Next with the eye just with a small simple
ovals here and there. Next with the peak,
so it goes like this with a semicircle
in the base, just like a semicircle, and on the top
with the triangle. So this is how the peak looks, and you have to make
it more towards the right for the very first
bird next with the wing. You could see this
feather it starts here and just extends from
the body and leaves out. So this is how it looks so this is going to
be the shape of the wing, and just feel free to
erase nothing wrong. So you can erase
it. And that's it, just make up with a feather
split designs like this. So this is quite simple, and this is how you could
build up with the bird. And here in the base, it goes with little
hairs, it's body hairs. So a little bulge on here. You could make up over
this dress you could shade in so we could color
easily with following things. So these act as a guide
when we color. That's it. And next is going
to be with a pause. So it's very simple. You could just make with
three different splits holding the branch like this. That's it. And just
leaving a little gap, the other one yeah, that's it. So you're just going
to make with a branch, just a simple branch. So this is a rough try
and you have to just do along with me so you can just get ready for the
main class project, and it'll be easy
to just go with a little fastness and you can just pick up the speed while making in the main
class project. So it's very much important to practice separately before
the main class project, and I request you to do that. So next is making with the tail. That's a cute, beautiful tail. And the wing on the other side, it just goes this way. Make a small one not completely visible because it's hidden with the other bird. So you can make
this, that's all. And just, please feel
free to try this. Body hairs here and there.
So this is the basic sketch, and this picture is mostly easy. You can do it within 1 hour, including the sketch, painting,
including everything. You can just take a time
duration of 1 hour. That's enough. And you can just simply try building
out. This is your exercise. You can just build up
with the orange and the brown bodies along
with this yellow one. And next we could jump
into the color palette. For making the background, it goes with the snowfall, so it's much with the
snow and to create that, I'll just teach you an important technique
in the class project, the main class project, and that we are not going to make it now. So we can just go with
the color palette alone now just after making
the sketch practice. So the behind background
color is Magnes violet. So you can just go with this Magnee violet color
here. You could see. So this is such a
beautiful color which relates with
the snow background. And next were going to be
with the dioxine violet. So this is the dioxin violet. And you could take in, like, with a good thick consistency
to make it more vibrant. So I have added a little dilated version
and just shaded it. So Magnus violet
is much lighter, and this is the color
consistency that works well. So these are the major
two color supplies, the basic things required
for the backgrounds, and the minor color
differences will be completely will be shared
in the main class project, and you can just elaborately
look after it there. So you can just get ready
with this two violets. So here, in case if you just go out of the Magnese
violet or danoxide violet, I have come up with a
choice that you can mix up with for Magnee violet, for that alternative,
you could just go with a queen ocydon violet or violet. So even if that versions
are not available, you could just go with any
lighter versions of violet. That's exactly available. In the set for the other one, dioxin violet, if you don't
have the exact color, you could go with
the warmer versions, the darker shades,
the darker versions of violet in your
palette if you have, or mixing up with the quinocldon magentha
and Talblue will just exactly mixing those
two colors will produce this warmer pigment
rich dioxin violet. So it also can create just like mixing with greater amount of magentha and lesser amount of blue and lesser amount of magenta and redder
amount of blue will just produce a wide
array of red and violets. So just have, like, exercise, and you can just produce
very much amount of colors. So and in the main picture, just going with the branch, we could make with the branch. Also all the three but
we could just make with the cadmium low medium
hue for the very first one. Cadmium yellow medium hue. And it goes with the
cadmium orange hue, too. So for the second bird, it's like cadmium orange hue, also with a little amount of ponsu that is the darker
version of orange. So instead of the ponsiu we could just use
with the scarlet, vermilion or any white
orange shade of color. And just for the shadow of
this yellow, the first one, it goes with the
earth yellow shade and you could just mix
up with a little amount of brown to that and
bring up the exact shade. And the last one is the
lighter version of brown mix, and the base goes with a
kind of chocolate shade. So the branch again finally
goes with this brown. So this is burn timber. And also, you could mix
of a sepia. For this. And in the blues for
making the fur caps, we could go with the Prussian
blue and a bit of sky blue. This is a sky blue and
with the Prussian blue. So this is the Prussian one. And finally, for the wings of the first one goes
with a contrast. This is ultramarine blue. And the other just
remains the same. And only the top clothing changes with
the different color, and that's with
the piral crimson. So you could just take any scarlet or red shades
for making that. And very final thing for
the third body, the cap, it goes with a bit of
white and the brown mix. So this is the shade. You could mix both the
colors to create it. So these are the shades is used for the first
painting thing. I have added with names, exact names of the
color palette, and you can just go with a reference to pick
up the colors. So next switching with
the main picture and get ady with the
masking tape just tipped on all the four
sides of the paper. And I'll be meeting you there
4. Three birdies Part 1: Hello. Welcome back. So this is our very first
main class project, and here you can just take
you can see the mask paper. I have just my pencil, and we can just start making this with a previous practice. And if you don't have watched
that previously before, or practiced before, just I
request you to redo watch it. Just make a little
practice so that you can just make the sketch
basic sketch very easy. Okay, now, you can just look within the previous
reference I just pinned up. The picture, it just
goes with the branch just splitting in the
two thirds of the paper. So it goes like this
with a depth That's it. Now, over this is like it's snowy just go with the shaky
curves not a perfect curse. So these are snow areas, and next is going
to be with a bird. So nothing to do with
the background for now. And for the bird, you can just make
a split of three sitting or leaving them
with equal spaces. This is the first body
space from here to there. And this just next to the body is going to
be the orange one. This is the second one, and
this is the third space. Okay. Now as we learned
in the previous module, it was with making good oval size just leaving a space for the pause
as it holds the branch. So the first one,
it goes like this. You can make a rough hovel. Small thinking is enough, and even you have to just
simultaneously add up with the bird hair like
this from here, this could build up the wing and next one from here
exactly opposite to this place where
it starts and from this place to the above. After making this,
we can just make up the caps, starting from here. And again, with the
wavy shaky hands, just start building up
and it ends just before the wing starts this way. And the final one on the top, it could be with a
semicircle, a dome shape, and with a wavy hands, and a pomp on the
top, that's it. Next with a pause, just elevate the curves in
three different directions, just grabbing it
firmly with a branch. Same way just leaving a
little gap and again, making with four
to five splits or three splits. That's it. Acute little ovals for the eyes and the guiding
parts for making the eyeballs Next exactly in the middle, it's going to be with
the adding up with a triangle on the top and
a base triangle this way. And that's it with
the first body. Here is the space for
making the second body, and even that just goes
with oval this match. Starting from here, just going downwards as much as possible. This is a little bigger in
the body size. And the head. This covering goes with
a layer till here and the same process as a dome on the top with a wavy hands
and a pomp on the top, just moving in some different
direction randomly. So this is going
to be with a fur. Just drawing up the hairs. And the other side
goes with the wings. The side goes with the wings. And again, with the birds eyes. And again, Peek, it just goes
with a triangle on the top, a little slightly blend
triangle also in the base. That's it. Now, here is a little task as we practiced with the first body
in the previous session. So again, if you didn't watch
with the previous model, just please go watch
there and practice that. The task is going to
be like you are just going to make the
first body here, fit in exactly with
the same thing. Just going to make
that taught lesson previously and applay it on
this main plus project here. So just after
completing the sketch, you could upload this
sketch, basic sketch, also the painted version, the complete painted version. After all the five class
projects are done, you can just upload in the class project assignment submission area so
that I could review. And yeah, please I
request to you that. This is the sketch,
completed one, and you could just pause
the video and draw it. And I'll just going with the painting section next
in the next session. So I'll be meeting you there and get ready with a color palt, Magnes violet dioxin, violet and yellows oranges and little
browns for making this. Here, just starting with the painting series of
the first class project, as I discussed in the technique practice
session of this series. So I just said like, we'll be making with some
different technique for making all the bocate behind in the background, the
snowfall effect. So I'm just going to share
that how to create on that. So I have a few little
drop of masking fluid. So I have separate
brush for this, and we should not use this paint for painting after with this fluid, working
with this fluid. So just dipping it
with the fluid, I'm just holding my
fingers over here, just tapping it little by
little here and there. Like this, taking
a good amount and holding like this,
splitting here and there. In good amount. That's it. Even you could just make it
like a big globs this way. Now, the fluid is
completely dry. We're just going to apply a little amount
of magnes violet. So just activating
that and going behind. The color washing should
not disturb the birds here. So this is the very first layer I'm applying with
the magneus violet, and this is not going
to be the final one. We need to keep on layering. Also blend with
the dioxine violet too on the sides to create
the bouquet effect. So just without disturbing
the bird's wings, the snow capped branch, we have to slowly carefully
just move around like this. So if somewhere here and there, the paint goes a little thick, we can just add a
little amount of water over and
dilute the paints. Same way in the base here, just filling with
the magnes violet. Same way here with the
little amount of violet mix. I'm just going to add a bit of Russian blue or cobal
blue, anything. So just blending both colors together and spread all over. Here a little space
in the bottom, and it's little slanting too. The colors are not that
much here pigmented. So I'm just removing with a damp wet brush and just wiping in the tissue of extra colors so that
it could become white. So we need a good spacing
of the whites here, removing all the colors, pulling off the colors from
both directions like this. And if not the color
doesn't wash off, you could just wet
the brush again, put a little amount of water, go just over that
again in this way, so the colors could
move off well. And that should blend with
the previous things and just moving around like
this all over. Cowing a bit of
little transition, adding again with the violet, the magnes violet on here. On this side it mostly
goes with the pale shade. Or if it's hard to pull
off colors with the brush, we could make with a color
pulling off using just tissue. So keeping tissue over that
will absorb excess water and colors and make it
white. That's it. Next with a little amount of dioxide violet,
just a bit amount. I'm making a straight Tingy. So this is blur and we don't want to make
it very precise. Just put up with the
colors and it will spread. If you feel the previous color
ranges or like little dry, we could add just
water over that. So the colors will
spread naturally, only if it's dry, we
could activate with the water using any flat brush. Now, just putting up here and there with the
violets like this. Like branches, and
just opposite to this, I'm adding up the line. So this is maybe like a post another thin stroke of color for the branch. Like this. Somewhere here. Only this much and let
it dry completely. We need to give a little time
so that we could peel off all the masking fluid things
to add upon the colors.
5. Three Birdies Part 2: Now you can see the picture is completely dry, all
the paints are dry. So just taking off my eraser, we could remove all
the masking fluids by rubbing over gently. So this could help the fluid just remove very
effortlessly from paper. So this is one way to remove and the other one is
like you can take any sharp thing like
this paper knife. And with that, you
can just scrap it. So it's like you have to
just peel off it from the very corner and just drag it so this works for
the larger spaces. So because if
accidentally we put much pressure to remove
it, paper may tear off. So I recommend to use paper
knife for the larger spaces, and the smaller
ones could be done with any hard so you have. So that should not
damage any pain. So we can go with a regular one that we use for academics. So after removing, you can
see the clean white things, the uncolored portions, and
that we are going to make it for the snowfall Ting like this. Throw away everything. So some maybe even over
the birds and let that be. Just take any brush.
A clean brush. You can just remove all the dust from the
workspace, make it lean. Now, after removing everything, now it's time to paint with
the branches and the birds. So here I'm just going
to firstly pick up with my I saw a color palette
with a color palette. I'm just picking my
burnt ocher here. So with this very
slightly on the edges, just paint with the burnt ocher. So this could be with a
thick consistency of paint. Just leaving the whites because we need to
cover that with a light shade of a very
light shade of a paint gray. Hold it closer with a brush, and the hairs should be upright to make it
pointy details. And not only just moving
on with burn toker. So after making the first
layer using the burn toker, we could add a very light shades of burn timber to
make a realistic. Now just taking a bit of burnt
timber, washing the brush, take a little amount
of thick consistency, going here and there this
way or with a pointed tip, just go beneath the eyes to make a shadow effect here and there. So if the previous
layer is still wet, the burnt ochet that we
are applying now sorry, the burnt timber
that we are applying now will blend evenly perfectly naturally with
the previous burnt ocher. It's painting with
the bird's body. So here at first goes
with the lighter shade of cadmium yellow medium hue and applying as far in the
base as a hair structure, you could just go
in which direction, we sketched it slowly and
just moving to the top. The eyes and leaving
that we could colour with only black with a paints it could be or we
can just go with fine liners. That's our choice, leaving
the peak. That's it. And with Earth low,
just a bit of earth, going as a shadow in the base with a pointed
structure of brush. Moving on in the corner too. And reach is still
here here and there. We could add a fine liner
and detail on the top as a thinking process
after painting. So we're going to make
it very lastly with the fine liners. That's it. So you could add a
bit of burnt ocher if you feel the shade
is a little dull, neutered and blend with the earth low to get the
shadow effect properly. Just a bit to like
this, wash off. Then slowly picking up my
orange that is cadmium orange, cadmium orange and coloring in this pause tiny cute pause. Everything goes with
the same strange. And finally, with this, moving on to the second one, taking the cadmium orange, again, filling up this way. So here, even the wings
goes with the orange, the cadmium orange
on both sides. Feeling little dry
with the breast or activating a bit of water. Be careful because the
blackness of pencil may disturb and make all the
colors mix with the blackness, and it will just mute
the color range. So be careful while
painting on that. Now taking a bit of pons and
over to that just adding on the corners and making the shadow effect again
in the base this way. So don't hurry. You could make it
very step by step and slow process to
achieve the cuteness. And that patience will make
it more beautiful with the picture. That's it. And a bit on here for the peak. Here it goes with a pons. So instead of pons if
you don't have that, you could go with any
vermilion sheets. Now moving on to the third one. The third color goes mostly with a lighter version
of burnt ocher, so just taking in with that color and applying
all over like this. And over that, I'm
going to add just a bit of earth lo and blending
it over all the places, first with a burnt tocher
even in the wings, then slowly moving on
to the or every side. Then with the earth hello, just a bit of earth o to be added everywhere and
blending the colors. Now, before it gets dry, I'm just activating
a bit of burn tumber and going in the base also below this as a shadow and wash off. So next is we have to complete making with the
wings of the first one. I'm just going to grab
the ultramarine blue for the wings here, which is more
contrast to the color of body, the words body here. Just putting on with
the second layer. Same way to the tail. Make U shapes in the bottom to define the shape
and structure. That's it. And on this side, too, next, to make the cap
for all the three, I'm picking up my
Prussian blue and just moving on with
a lighter shade, a single wash of the layer. So we can leave on the top side, so it could be
colored only on here. Colored like this and leaving on the other side a little
white, same way on here. Now, just taking again with a thick consistency
of Prussian blue. I'm going to swatch
it in the corners, onely in the corners like this, that's okay. The colors blend. And moving on to the
top and a few on here. I'm just taking one
more consistency to add these strokes like
this. That's it. And after it's completely dry, I'm going to re layer
here, one on here. Second bird goes with a color of piral crimson,
so activating that. So this is super juicy color. I love taking that. Even here, I'm just leaving
a bit of whites on the top and just painting
the other places. Add a fur texture for
the pompom on top. Final one goes with
a beige color. So to create that as I said
in the previous session, we need to mix up with the
burn talkcer plus white. So just having that color ready, first taking my white, applying it as a
base, just on here. So you can either go with a parlour mixing or this
is a very tiny space. So I'm mixing it exactly
with over on here and taking a bit of burnt umber
or burnt ocher, any color, but we need to produce
kind of a beige like this or it could take here the low And the leftover areas are like we need to fill
up with the ice. So I'm just going to make
that only with my black. So take good thick
consistency of black. So the brush here should be very dry and just carefully move around leaving the white.
You need to colour around. Same way for all the birds. So finally, one additional
thing to add on is like, I left peak here
to add the ponzu. So adding that And finally, we need to make with pins gray, taking a bit of pins gray just a bit and adding as a
shadows here and there. First adding on in the base. So next is like, with the water, I'm going to spread it, wash off the brush, pay
it with a damp brush. You can blend it, wipe the extra water or
paint from the tissue. So we are mostly done, and the very final
part is to make with the inking process and then
with repealing of the tape. So here is my fine liner, and this is size of 0.25, and you can see
with this lip size, it's like this much thin. And I'm going to make it
with this fine liner. Just starting here
with the mouth. Moving all around like this, defining with the shape. So if you have different
size, even, that's okay. And it's good to use with a waterproof fine liners for
making the illustrations. I'm just going around
here like this. And you could make with the shapes to define
the structure. Look it looks like a three D, and this is a fur texture. Even on the pom pom, it's fur. Don't go flat with a curse. Then with the pass Same way just making it for the
branch as outlined. Even just you can go with
making the different of Is. Also, the branch H and
everything is fine. That's it. Finally, I have completed with making
using the fi liners. Now the last job is
to peel off the tape, so you could just peel from
one corner and peel it off just in the outer side
like this very, very slowly. So you can see the edges. If
you drag it a little faster, the paper may, like,
they tear off. So we need to just pull
it as slowly as possible. Same way on the other side. You could feel it off on all the four sites.
Here, that's it for now. Just submit your
assignment projects and I'm waiting eagerly to watch the results and give a feedback for the class
how you felt with this. Met you in the second
class project very soon. Thank you, Tilda. Bye bye.
6. Techniques & Color Palette Painting 2: This is our second
class project, and here we are just going to make a simple
watercolor painting of a still snowman and the snowflakes just
falling from the top. And many like snow Thingi just
around, it's like around. So this is the simple thing
we are just going to make. So it has, like,
little color shades, as you can see on the side. It goes with a scarf
from the woolen thingy. For that, we have to go
with some warm shades. And the behind one
of the background, everything goes with some
cool range of colors. So we're going to create a color palette of the background, also the color tone on just
make up for the snowman. Now just starting
with the techniques. So it's easy to
make this snowman easily because you have to make up good huge circle
like this in the base. And same way just going to make a small circle in the top. That's it to make the
face and the body. This is how you can build up. And you could just make a simple woolen thinky on the top. That's it. This is just
like a simple practice. We need to make a warm
up exercise before starting any painting
work so that we could make it very easily. And the detail lings
will be like we can just make with that in
the main class project. And here goes with another
scarf thing. That's it. We need to erase this two
in. And we can make with. So this I simply made it
with a spasic sketch. Now, next, moving
on with the colors. There's no flake structure.
It's like a little easy. You could practice that
to in pencil first so that you're just going
to make with brush, any linear brush that could be a triple zero size
or 40 anything. Just build a partition like this making with eight segments. And in each segment,
we're going to make a split this way. So each snowflake pattern
will be a little different. We can make anything
with a reference, practice anything first that
you're going to create. So it's good to go with similar structure in
this snowfall area. So if you're going to create something just focusing
only on the snowflakes, it could be with
different styles of fine. So this is how we can make it. It's easy to it's good to
practice first as a pencil and next following with the last main project we
can use in the brush. Now just jumping onto
the color palette. Here, I'm just taking
a bit of blue. So halo blue here. To this blue, I'm just
going to mix a bit of medium green or halo
green. An green is fine. So just mixing those two colors. And again, more amount of blue and lesser amount of green. So with this color, we're going to make
with the background. Or if it is more vibrant, we can just add a bit of
pin gray to this color. So this is very fine. We can add a bit of pins gray to this these color
mix okay to fill for the background and
let's see how we can build up making the
snowflakes behind. So just with the color mix, I'm making a small
swatch like this. So even you can do this. And we're going to
allow this to dry. So after it's completely dry, we can make the snowflake either we can just
go with a very, very thick consistency
of watercolor paint, but that sometimes may smudge
with the previous color. So the other choices
like we could go with any white colour gel pen. So that will work good. Or we can just go with
gouache paint here. You can see. So I'm using my
Bruto brands gouache color. So this is white
colour, titanium white. And if you just take a bit of just a bit squeeze
of this white. So with this white, we could activate with a
little amount of water. And this is my
triple zero brush. So this is n triple zero brush, and the hair structure
is this thin. So you could go with
any thin hair fine line or brush you have. That's fine. Now, the background color finish just watch is completely dry, and I'm just activating a good consistency of
my gouache color here. So this should not be more watery. That will not work good. Also, very dry thick consistency will be like you cannot
make designs with that. So it should be like with
a good fluid texture. So add a bit of water and activate keep on
activating the paint. Then you will get it.
Now let's try making it. So this is how we are going to work for the snowflakes
here and there. So it's good to practice separately before
any main project. No worries if it overlaps. Just my brush, it
gets drying up. If you want to add a bit of, like, a snowfall textures, you could just take
a bit of color again and just go here
and there this way. Could add, like, a
circles or ovals, a bigger one like that.
Anything is fine. Now, this is the work we're going to make it
for the background. For snowman, the scarf dingy, and it's going to be
with warm shades. So I'm just using my
cadmium orange again. So just scratching it here
and pans you so instead, if you don't have pons, you
could go with a vermilion. And next is with
the piral crimson. So mixing all these three, I'm just going to work for
all the clothe thingy. So this and this path
should be, like, painted with these
three colours and a carrot piece for
the nose here. Next, and we're just
going to add a stick of, like, hands, pair of hands with wooden sticks
on the sides here. So that could be done with the burnt umber and burnt ocher. Bon sienna, whatever brown
shades you have that should be with lighter shades of brown, as well as with the
darker shade of the brown will be very fine. So even this is for making
the buttons on here, just adding with the shadow, so I'm just going
to make that too. So we'll be adding with orange
shades on the top as well. So this is going
to be like this. And with that just a bit of
piral crimson in the middle. Mixing all the colors
together. That's it. And for just making
the base part of the snow so that could be done with a pines
gray and a white mix. So just taking my pines
grey for making the snow. Also, the snowman body
should be painted in that. So this pines gray like this. So we can just reduce the
value by diluting it water. This is one value, and just
putting a little bit of water to that will just
reduce in its scale, and adding again with
a little amount of water will reduce it more.
Same way it goes on. So this is how we can just
go with different values. So this is a technique, and we are going to
apply it on here. And next is, like, yeah, only these rangers and white is going to be with
the papers white. We could add or if
not, that's okay. That's not that big deal. Or if you want to add white, also, some cases it
will be visible. In some cases, it will not so I'm not going
to add any white. So instead for the
body of Snowman, I'm just going to make
one a with the pine spray and blend it one with
the help of values. Get ready with all the colors, and you can just tape up with
any A five or a six sheet, watercolor sheet, mask it with a masking tape on
all the four sides, and we can just get ready with the second class project.
And see you there. Bye bye.
7. Snowman Part 1: Welcome back to the second
stage of the second project. So this is like we're going
to sketch with our pencil. So you could take
any sketching pencil of a lighter value, so that could be hb2h or yeah, that will work good.
So that's okay. And now, in this sheet, I'm just going to
partition by this surface. So let this be a space. And that should not be a line. You have to make with
little shaky hands. This is enough. Now,
over here on the top, I'm just going to make
a centered position. So the length of a snowman the height it's going
to be till here, including all the,
including the pompom essay. So this is going to be
the space for making it. And the width is like, it starts at this place
and I end at this place. So we need this much
gap on the sides. So considering this, I'm just
going to make a semicircle. So you could remember the
previous class lesson, the techniques we
learned just before. So if you skipped that, just do watch I request you to do that and
practice it there. So it'll be easy for here
to make a quick sketch. And after making the scur, we need to complete
it like a pot. And it's recommended, like we have to make
it a little flat on the base as placed
till this place is fine. And from here, I'm
just going to make a simple small curve as
a scarf for the scarf, just from here to here. And it's just wool texture. We need to make it with
little shaky curves and build up on the top here like this. So the height of this
is this much width. Even on this area, it goes this way bulgy. Okay. And next is going to be with a partition
in the middle here, just a lighter partition that should be visible to us and
we are going to paint here. Now we need to clean up this unnecessary the surface details
that we did very first. I'm just erasing
it up. That's it. Now next step is like we are going to make with the buttons. So just splitting it in the
center. This is the line. So first button is
going to be on here, and the second one on the
exact same line at this place, these are the two buttons
we are going to make. And the hands or with a stick, it just goes this way. And make a division of three. And same way on this side. That's it. Now just
building up with a face, it could be this
length of curve. Same way on the other side. This length is enough. Now, just covering it with the cap, the wooden cap, and on the
top with this much width, And it just goes a little
slanting from here. And from this place, it's like we could make a
start here and in this place, this is the fine thing,
and here goes the pompom. And we need to erase all the unnecessaries.
Just correct it. So next is adding with the
details here in the center, it's going to be
with a carat fixed. So just make with
a straight line and from the base, elevate it. And the other one here.
So next with a smile, And we can just make the
details using paints directly. Now, the sketch part
is completely done. It just took only 6
minutes to make it. So if you practice it before
in the previous episode, it will be easy for you to
make the sketch here now. So next is going to
be the painting part. Here, I have the color
paint mix ready. So we're going to mix
with for the background, we need to take Telo blue, Telo green a bit of
Thilo green is Neng and a good amount of Thilo blue and pines gray. So not
that good amount. So we need to mix all
the three colors. And in the previous episode, we might have seen
with a color swatch. So we are just going
to produce that color. And before coloring,
I'm here just going to take another empty
brush, dip in water. So with this, I'm going to
work only on the sides, just apply water only
on the sides like this. I have completely
applied with the water. Now next step is
like taking paint, and the areas here are
a little bit darker. So the colors bleed naturally,
I'm moving on here. And more darker on
this place, too. So this is the very
first layer I'm applying of the
paint background. If you feel the
colors after dry, it goes a little dull. We could add a bit
more amount of the second layer with the same color palette,
same color mix. So this is like darkest place. I'm filling there
with more pigments be careful with just fingers
painted carefully all around. So firstly, we can complete
the basic layer and then just move on covering with the edges properly.
These are the edges. We need to go like a
wool texture around All the areas around here
are also little tartar, spreading up the colors. We don't want to
leave it stagnant. Now, the second
step is going to be like we are going to
let it dry first, and by the way, on side by side, we are just going to make
it with the pine spray. So here with the pine spray, I'm just going to put up
with a light amount of, again, just wetting
the base here. So this is going
to be the surface. Now, just dripping
lightly with a pines gray here and there to build
up the snow structure, the effect of snow colors. So this is going to
be only lighter gray. So take a bit of
gray and dilute it. Well, that should not be dark and you can splatter
it here and there. And even as a shadow in the base so the shadow will
be a little darker. And here. This much is enough. And let that spread naturally, and we can just wash the brush. So there are some places
to remove the color. So here, it's spread
little in larger amount. With a damp brush, I'm just
removing the colour and wiping it in the
tissue this way. All. So next thing is, I'm going to add a bit of
pine spray again in the base. So this is going to
be the second value layering second time,
blending the color. Now finally, just adding on
the top here over the body. Just go from this place. And again, taking a bit of water to dilute to
reduce the value. And as a shadow just mimicking with the right side
of each button. Also around the scarf. And this side's pretty
good with the gray. I accidentally the color drip inside the picture,
the main frame, you could just again
with a damp paper or damp brush or tissue, you could just remove the color by pulling it off and apply with the color that
we are going to apla. So here with that mix, removing that mix, I'm just
applying with the pines gray. Now just very limited
amount of paint and water, blending here in a Giving details around. That's it. Same
way for the face. It making a little
shadow portion as light is on this side. Just keep on layering
up to make the colors visible much in a
in a good manner. Keep on adding layers so the
colors will look much good. And here on the top, it's not that good blended. So just with a damp brush
again, blending the colors. Now, for eyes and lips here, I'm just going to take my
black and put down here. I with a simple, beautiful curve. Create a smile. The color for the
background given previously is now
completely dry, and I'm just going to activate here the gouache paint
with bit of water. And with that, as
breakfast before, I'm just going to
make snowflakes. So let's see how to make that. Now, very gently, I'm just going to make a small snowflake. This much is enough. Now, next in the other place here, again with a small thing. So this structure is like practiced in the
previous technique session. So you could revisit the episode again, practice it clearly. So I have just described
it very clearly there. And so if you are watched, it'll be very helpful to make it easily along
with me now here. So if you missed
could just rewatch it and get back to
this class project. And same way. On
the other place, you could make a very
tiny small thing. Just here without much details, I'm adding only the V
shape on the top of each divisions. Again on here. As I'm doing here,
I'm just going to add a bit more here and there. So after that, I'm just
going to take a bit of paint and add like snow falling
like here and there. This will be good
or it could again, take a little amount of water, dilute it well, and just hold it like this and make this way. So it could look like
a realistic snowfall. So not that watery. You could slash it
even here more. So if the brush
size a little liner and has very little
amount of hairs, the sparkles here dropping
will be small in size. And if it has good
amount of hairs, it will be with a
bigger sparkles. So that's a tip, and you could change
your brush if needed. Here and there, I'm just adding randomly directly with
a brush of a big size. Now, after making all
the snowflake thing, next with the same guash, I'm just going to add a bit of dots here and there
like this, just a bit. So we need to make it
like a snowfall thing. Same way on the other side. Just you could dab
with a shin brush with a good consistency
of white paint. And in the base here. I
8. Snowman Part 2: The task is to make coloring
work for this button, scarf cloth and the top one. So firstly, we can
focus on this, and this is going to be
side away from the light, and this is a little
closer to the light. So this is dioxine violet. And with this color,
onely on the top here, I'm just making underpainting. So this is with a
basic first color tone for making it look
little darker opposite. And here and there
over this combo, I'm just making with the
dioxane violet like this. Same way on here, just for the scarf. Our next is going to be
with some place like this, on the other side is
going to be like this. Just a bit here and
there. I'm adding with the details like this. Now, the underpainting
thing is done. Next, I'm just going to take the second color
of making it over. So this is going to be red. So with the red,
just covering over. Making with the
first layer of red. And most area on here, it covers with the
red and orange. And some parts here. Just activating Ponso. As well as here with a Ponso, Now, over this, I'm
adding a bit of orange. And then here again
with the orange. Wash the brush, well, and just with the orange, blending on the right,
sorry, very left. A Now, with a bit of red, I'm just making with
a base color on here. Now to the base here
for the border, I'm just making the red. I'm just leaving a little space. Now with the orange with the red, I'm just
elevating here. In the middle, it should
be colored with just orange or ponceo.
That would be fine. So I'm taking my cadmium orange again on just going over the red and blending it same way, just moving on with
the orange over here. Now, we need to
allow this to dry. Meanwhile, I'm just going
to take a bit of mia red. With thick consistency,
it would be good. We just with a pointed thing, lift off the excess color by
removing the excess water from the tissue and
next is going to be with the detailing process. A Now, on the top here, I'm just going to make
again with a red. So just take up a bit of red, remove excess water
completely. And with that. So we can just make details
again on the top this way. Also, we are just
going to make it with a gouache and even here over the scarf, it's going to be with the
details just like this. Yeah. And just red, making with the details
again in the middle. Now finally, we need to
switch with the other brush, the linear brush we used
for snowflakes thing. And with the Ponso color, I'm just activating that
color with thick consistency. So just elevate making
the thread hanging Now, with just orange, cadmium orange is fine
to make a carrot. You're going to
color the carrot. And adding orange at this place. Now activating
Ponso in the base. So this is what we practiced in the previous technique session. We are applying the
same concept here. Now, just with burnt
sienna and burnt umber. You could take it,
take the colors, and fill in for the stick here. Base color is going to
be with a burnt toker Over here, top, I'm just
going to add the highlights like this for the nose and just a bit of
snow ping on here. Just you could dab with a
linear breast. That's fine. Or just add the highlights
this way with this gouache. Next is going to
be finishing it. On the top side, just tabbing
here and there is enough. And fine details, not completing it exactly with a pure red all over
is not that good. So I'm adding a bit of whites. Just dabbing to show
the snowfall effect. Now, here it's going to
be with over the sticks. I'm just adding
snow settled down. Show the depth and details. I'm just making it this
way, trying it this way. Now we can just slowly peel
off the tape from outside. Artes it well. Just share your completed assignment to the class project in your
page so that I could review, and it will help me to just improvise and add more
classes to Skillshare. So that's it, and meet you in the third class
project. Bye bye.
9. Techniques & Color Palette Painting 3: Come to the third episode here for sketching
the main project. And here we're just going to make with the techniques before starting into the class project, third main class project. And the topic that
we're going to focus with Christmas season is like
candles and winter flows. So let's just make with a basic sketch on how you can
just make with the candles. Just practice that before
getting into the class project. So I'm just going to make
with three cylinder shapes. So this is going to be the first candle in the very front. So just cover, close
up the cylinders. So next is going to be
the overlapped one. So let that after
one fourth place, let it be and it ends here. So we're going to just place three different
heights of candles. So from this part,
I'm just going to make with the third one. So this is how a very quick
sketch of candle can be, and I'm just going to
make it a little broader. So yeah, we can expand till this place and just
extending from here to here, here will be the wix that's it. So this is the basic sketch, and this is the
placement that we are going to make for
the main project. So just have your any
rough sketch book and a pencil so that
we can practice it easy and get into the main
project without any stress. And next is going to
be winter flowers. So we're going to
make a basic sketch of winter flowers
here and a cons. So for winter flowers, it's going to be
with eight petals, so to make a flow anyway
with any kinds of petals. Like this is eight petals, and I'm just going to make
cross this way, just across. So this is like considering with four petals in the center. So from here, I'm just
going to make it like this. And from this place, it's going to be so we're going to make four
different petals, keeping the separation. Now, even in between
all the flowers, I'm just going to put up
with extensions of petals. So that will be like this. So it's just beneath. This is how we can make the Christmas flower,
the winter flowers. And each floor, this is the main it's like facing to us a front
view of the winter flower. So if it's little tilted, some petals will not be
visible and some may like oh lab that is like it's
hidden behind the main floor. So the placements may differ, but the task, how to make it like it's
going to be this way. So considering with
another example, if it's going to be little
like placed horizontally, this is like in a sleeping
phase placed over the surface. So let's consider
it's like this way, we can make four different
skeletons like this divisions. And from here, we can just
go create with petals. And this is how it looks. Now, there are three to four
flows in the main picture. You're going to add only
three to four flowers. There are three to four main flowers in
the class project. So this including this and this will be in
the class project, so it will be easy
for you to make it in there if you practice
it here thoroughly. So just give a
hands on practice, just a small practice for this. Now, next is going
to be for cons. Sorry with a little confusion, I was capped on
saying with acons. So it's just with a pine cone. So here, making the pinecone, there will be one or two
placed in different positions. So for that, firstly, we can just make with the base. This is going to
be a small base. And from here, we could extend just connect
in the middle. Same way just from extension and connecting in the middle, just leaving a gap a
bit in the middle. Next is going to be making
with a little curve. So it will be this way. It will just tend this way. And next again, keep on
overlapping with this shape. So it's like from here, just put up on this place, and again, a curve
and from this place, just go back till here. Next again with a curve
from here to here. So it keeps on just
increasing with the size, again with a small curve. So when it reaches the tops, it just goes like a cone. The patterns are going
to be a repetitive ones. This cone is going to be with different positions again in the picture original picture. Now next moving on to
the color palette, it's going to be with
a minimal warm shades. So I'll introduce
all the colours that you're going to
use for the project. Here for the color
palette background one, I'm just going to
use the Earth low. For the wall behind, first color is going to
be a mix of earth low. And second color is
with the burned tumber and third color is going to
be with a burn talker mix. So these are the three
colors major leaf that we are going to use
for background wall. Also, the candle berets placed below all the portions
that we're going to use only the colors here
and just a bit of a medium green mix
with the earth allow. So you're going to
use these colors. So we're going to combine
this color with that. Unshaded. As a shed, I'll show you that in
the main class project. For making the candles and
next with winter flowers, I'm just going to
make a shade of red. So good consistency of red. And for the leaves, I'm just going to again use with a medium green and
a bit of olives. Just a light sheade
of olive is fine. And for the candle, the
light is going to be with a cadmium low medium hue
and a bit of lemon low. Next for pine cones, again, I'm just going to take with the browns first with the sepia. Next color is going
to be with black, just a light shade of black. And next in the brown it's going to be with a burnt ocher and
burn tumber again. So this is burned tumble. And finally with burn Tucker. So these are the things we're going to use for our painting. So just get ready
handy with the colors. These are the color
sets that we need for our next class project, so get ready with all
the color palettes. So let's just get started. Mask the tape with 300 Jason watercolor paper
on all the four sides, and I'll be meeting
you there bye bye.
10. Candles Part 1: Here, I'm just ready with the masking tape on
all the four sides. So next step is we need
to build up making with the basement so
we can just start with a basement on here,
just from this place. I'm just splitting up till here. And just extend from this place, we need to extend
it till this place. So here with leaving
a little gap, this is where our candles, all the subjects are placed. So on this spot, I'm just going to
make with a flour, starting with a flour. As I said in the
previous session, just check if missed
and practice. So this is going to be
with the winter flour. As I said before, it's going to be with intermediate spaces, the gaps, we need to fill
that with the petals. That's it. Next other flower,
it's going to be on here. So it's like in
inverted position, so I'm just going
to make a curve this way and the other
one in a V shape. So keeping this as a skeleton and just
going to build up with the petals the second one is
done perfectly. Next is the third
one is going to be on this place exactly. Again, here just to build up
the skeleton, make a cross. So the cross it's
going to be this way. Like this, we can make with
six portions, six divisions. And from here, I'm just going to build up from this place, make a petal on the second one. This is going to
be the third one. So for all the skeletons
I have covered up making with the buttals next
in the intermediates here, I'm just going to make it like the petals little
facing downwards. And the one egg here,
it's going to be exactly opposite
to the other side. So we could leave this to empty or if you want
to fill something, even that's fine.
You could make it. And the next thing is going
to be making with pine cones. So pine cone is exactly
placed here in between the two flours we need to
make with a cone shape. So this is a rough cone shape. So we're going to fill inside
this with the pine shape. So as we practiced before, it's going to be with a curve. From the outer side,
just keep on building with connecting to
the inner side. Also, it should converge
when it reaches the top. And one on the top here with
a little close rectangles. This is the very first
pine cone. We are done. Now the second pine
cone is going to be here just starts from this place and this way. So this is the basic rough
sketch, and it's horizontal. So from here, I'm just
going to make a curve. And from outer
side, it's getting connected towards the
inner the same procedure, but the opposite direction
we're going to draw that this is the horizontal one. This is a little
a bit tilted one. Next is the main job. So here, we're going to
make with the leaves, too, but we're not going to
sketch that instead of just going to make that exactly
darkly with the paint. The very final thing is, like we have to build
up with the candle. So from this place, I'm just going to measure
with the height till here. Also, it ends from this part. Extending and making
a oval on the top. And the second one
is going to be just near to this leaving
a very tiny gap, the one we practiced before. So its height is still this
and we can extend till here, complete with the oval on top. The very final candle
is going to be from this place and
extends till here. Just cover up on the
top and lifting with a wig it That's
it with a sketch. Now it's time to paint. Here I'm ready with all
the background colors as we discussed previous with the background color palette, and here is my flat
brrush number nine. So with this, I'm just holding good amount of water and just going to a play for
the background, leaving all the candles, leaves, everything, the pine cones, everything,
everything we have to put up the water around. So just check whether
the water dries. Need to put enough
amount of water. Next step is adding with the
water in the basement here. Just also on here. That's it. Now just switching
to my mob brush. Starting with the
lights here of shape, I'm just going to fill it gently on here, leaving the leaves. Just a gentle pull is enough. Now, next switching to
the burn timber here. Just the colors
naturally bleed and with a burnt ocher, Bn temper again. Now, next color is going to be like you have to
clean up the brush, take a bit of earth lo and let the colors blend
naturally all over. See the portions around is going to be mostly
with the earth hellos. And closer to the candles
will be again with the Earth los showing up the
light shadow difference. Now with a dam wet brush, I'm just going to lift
off the colors on here and wipe in the tissue. Now, genus, next jumping
into the basement on here, it's aligned with a good
amount of as I said before, it's going to be with
a medium green mix, too, and a very lesser
amount of earth allow. So firstly, we can fill
with a sepia on here. Just a sepia mix and
a bit of pines gray. And from this side, it's
going to be a mix of a bit of This is burned tumber, clean up the brush
and taking a bit of medium green, mixing together. So this is the exact color we need and just
painting it on here. And adding a bit of pin spray to the last and let
the colors blend. And with this color,
I'm just going to make a small drip
here and there. Hold on here, just with the
base effect. As a shadows. Next, finally, it's going
to be with the earth low and putting that on here. Unbind on this side
with the earth low and blending with the
previous mixed colors. Now just, again,
cleaning up my brush. So with a damp wet brush, I'm just lifting the
colors here to make a highlight and show
the difference. So here after completing
with the background, next step is going to
be making a mix of red and black colors to create a shadow effect just below the flowers and here and
there in the candles. So here I have my black ready, and next is going
to be with the red. Take a good amount of
red and mix it with the black and just again with a mix of black. I'm just spraying
small amount of water. So with this, I'm just going
to focus only on the shadows first and make it to here this much. In the second one, this one is going to be with the same black effect
in the middle here. And the third one is going
to be only on the edge. I see. So this is with the
blacks over the candle. Now next is to just move into the flower basements
and the pine cones. So pine cone here is completely a red reflection on the
spot or painted red, and here it's going
to be brown shade. So for this one, I'm
just going to make a shadow beneath, like this. Just you need to keep
your brush holding a little closer to make
very precious details. This is for the shadow
and between each and every curve cuts like this, it's going to be On here. Between each thing, Now, next is here, I'm just going to pick my color. Just add the basement just
below the flowers here. Shadows of the flowers like
reflecting over the flow. That's it. Now just moving
on to the other side here for the pine cone and
just giving the shadows, the basis just here and there, not as the before previous one. Now here, the next
step is going to be filling with the red. So taking good amount of red and just paint it over the
previous colored area too. Li the colors blend well. So holding my breast a
little nearer to the has just moving on slowly. Next thirdly, painting
with the last tall candle. Here taking the color. Now, next step is like we can just lift off the color from here and wipe it in the tissue. I Now, just taking a very
light shade of red and adding water to that. Just making the top layer
with only that light shade. Same way on all the three. Now, again, with the
damp wet tissue. We're going to remove
the colors onely in the center just below the wick
11. Candles Part 2: Next step is just filling
again with the red for the winter flowers
and pine cones. Only the pine cone on here. Now, just moving on
to the pine cone. We can add a highlights later. Now, next up is like
we have to paint with brown colors and Earth o here, starting with the burnt
umber in the very base, next moving up with earth ellow and let the colors blending with the
previous brown. Now, very finally,
I'm just going to add with the highlights just taking my white color in
thick consistency with a tip to add with the highlights and in the base with
the white paint. Just rub with the
finger and extend. Even on the pine cone, just adding highlights
here and there. Or so the process like adding with a little
highlights here and there is done and just covering up
with a white paint on here. Now, next step is to
add with the leaves. So here, I'm just
making the leaves just randomly adding
it from here. So this is our medium
green palo green, so we can just have
the darkest of the greens and just extend with the veins like this. Now, next making up
it from this place. Just leave a little bit of
spaces in middle and can fill with the cactus
using the leaves. So now switching to the
medium green on here. Same way just on
here, little upright. Then in the behind. Just adding teal
green here and there. So like this, I'm just going
to put up at this place, cover this place and show you the result. So this is a task. You could just
cover up the space here, adding the leaves. Now it's completed with all leaves and next is
going to be with light. So I'm just going to take a bit of cadmium Mlllow medium hue and just paint it
around like this in all the places around and
a bit on here and smudge. So next just on the top, I'm going to use my lemonalo. So with that in the center, blend with the outer colors and leave the middle
space little white. On the side, just
applying a bit of water, so it will give some little blurry effect,
smudged effect. And to this, after drying,
we could add with a wix. And before that, just
grabbing my white to make the highlights on all the
leaves just here and there. So it's not like we should take a little watery diluted amount. It's with a good
thick consistency. Also putting it in
the middle this way. Just randomly here and there, not all the places. Same way on here. Most of the places I have
covered with the highlights. And finally, just
adding more details to show up the whites here. Just in the corner spots. Finally, affect the black
color to add it for wick, and it's good to add
after the colors are dry, the light colors are dry. Now next step is to
just peel it off. Gently peeling it off. And I hope you love this video, this session of third thing
in winter season painting. So just submit your
assignment project in the class project
submission area so that I could review the
painting works done by you and give a feedback or
review to get improved. And we'll meeting in
the fourth painting, see you there, bye bye.
12. Techniques & Color Palette Painting 4: This is going to be our
fourth project class project, and we're going to
make a background with little evening
tones, warm shades. So I'll be introducing
the colors that we're going to use
for background now. And before that, we
need to practice, like, how we can just build up with the Christmas tree easily
and very perfectly. So just grab your pencil, and this is the
technique session, not the class project one. So first, we're going
to just get ready with our color palette
that going to use on the project and practice a little handy things like
the Christmas tree and little painting tricks to make the fairy lights and with
our Christmas gifts, so just drawing a gift box. So I'll be teaching one
these simple things. Okay, now, you have
to grab your pencil. And in this, I'm just
going to teach you how to build up with the
Christmas tree. So just elevate a straight line. Always, we have to make with a top should be
very smaller in portion. So it grows like one
lith this much upwards, just a bit upwards. And when it just touches, like, it reaches after the top one, so after making the
small portions, we have to start building up with little lengthier things. So it goes expanded
white on both the sides. Like this and not a
continuous one we could just make
with a small gaps. So this is only the structure and not the exact
thing because we need to paint there with
the greens and little snowfall over
all the leaves. So it's going to be completely
different after painting. So this is a skeleton
that I'm making. Just go widespread on the upwards a little
here one there. So it's like focusing just growing on all
the four directions. So when it reaches
down, it just goes with different shapes and
extends with the length. This is how the skeleton of
every pine tree will be, but little different
only in the foliage. Now, some just hanging
in the base like this. A small one, a larger one. Just go with a free hand. That's it. So this is how we can build up
with the tree skeleton. But here, we're just going to make it directly with the paint. We're going to make
one simple skeleton with a pencil in
the main project. And next, it's like, I'm just going to show you up how we can make with
the Christmas gift box. So to make the box, it should be with two
different shapes. It could be with a
cuboid or cubex lengthy, that's going to be a three
dimension of rectangle, and three dimension of squared
is going to be a cube. For very beginners, I'm
just explaining all these. So we could just make
a square piece first. And with that, we can just
make with any direction. So on the top, making two parallel lines
and connecting behind. So everything
should be parallel. And here, I'm just going to as we made the top
line this way, we need to extend on this side. The views on that side. So just adding the
ribbon and bow around everything in
parallel, just like this. And next, it's going
to be with a cuboid. So we can just make
a lengthy thing. Now, here I'm just making on
the opposite direction with the two slanting parallels
connecting on the top. Just here, I'm making a face of length extension
on the other side. But in the previous one, the upper line was on the opposite side and I
extended to the left side. Here it's exactly opposite. And we could just
make with the ribbon and bows again parallel. So this is just a basic sketch
like how you could make with the boxes. That's it. And next it's going to be
with the painting techniques. For making the background,
as I said before, we're just going to use three different colors
for background, so I introduce the color palette
and make the techniques. So first is going to
be dioxin violet. And next color is going
to be the magnes violet. Just cleaning my brush, pick up a bit of mags violet. So next color is going to be
cadmium mellow medium hue. So these are the
three colors we're going to use for our painting. Now, firstly, I'm just going to teach you how we can make
with the background effect. So we need to just take our flat brush or um
size ten or nine. So here, I'm just going
with a ten size and applying water like this. And to this in the center, I'm going to put
a bit of yellow, let that spread naturally and
just cleaning up my brush. This is the
background technique, taking the magnes violet, adding around So if the
colors blending with yellow, the mags violet
and yellow blends, it's not a problem. Let that blend add good amount
of magnes violet to this. So this like I'm making the techniques like
how we can use. This is not the original thing. And finally, with the dioxin violet in
the corners like this, just a bit on here. So the subject Christmas tree is going to be exactly in the
mid portion of yellow, and these are shadow around. And this much dioxin will
be only on the corners. And we're going to move the subject little more
towards the right side. So if you want to change
to the left side of that, even that's okay. We
can go with that. For making the Christmas tree, we need the color of To green and black mix or
medium green and black mix. So this is going
to be the color. And next is going to be
just with the to green. This is just the green
cleaning of my brush, and next with just medium green. So these are the three
colors we are going to use for the leaf
section of the tree. And for making the
chrismal bells, that's going to be with red. And for fairy lights, I'm going to use guache colors. So I have three
guache colors here. So that's going to be like
it's from Brostro brand. You can use any brand. I
have from like lemon lo, middle low, and titanium white. So all the three
colors. These are the color palthrop for
making the main subject. And next is going to be like we're going to add
up fiery lights. So using watercolor, like, yellow color is a lighter
shade comparing the greens. So watercolor will not be that bright using over the
previous layer of watercolor. I have guache colors.
I have chosen that. Now we can just take with the medium green or tallo green. Let's go with the
halo green and just add with leaf
structures like this, let's consider this is
going to be the tree. So I'm just making with techniques, this is
not the proper thing. You're going to learn
only the techniques. So you can just go with the same technique practice before we just get into
the main class project. Now, over this, we'll be
adding with the yellows. So first, after it's
completely dry, we're going to put
up with a yellow. To this to create
the fairy lights, we could add a bit
of lemon los here and there in a good consistency. And we can just connect them. So we can do that
connection with triple zero like linear brushes, any linear brushes will be fine. So this is the techniques. I have just taken it out. So these are the techniques
we're going to applay in the upcoming fourth
class project. We can use it there and just
practice all the techniques and get ready with
the Pala Palat for the next session and be
meeting there. Bye bye.
13. Glowing Tree Part 1: I have kept all the
paper masking tapes ready just to
protect the corners. Now, with a pencil, we're
just going to make one leaf with the sketch of Christmas
tree and gift boxes. So we need to start
it exactly here, and the base this place will be filled with the Christmas
rins and from here, it's going to be
with the tree till the end on the top here. So just extend
with the line like this to the top.
Just a light line. And from here, as I described, with the practice technique session in the previous session, we need to start building like this for the leaves
on both the sides. Slowly, when just moving
down reaches down, you have to expand
it from V shape to expanded V shape curves. So it should be a
mix of stretchers. So this is just a skeleton. I'm making it a little faster as we have breakfast in
the previous session. So you can just go
on moving this way. I have done with
the Christmas tree, and next is going to be
with presents at here. So just make with the cubes. We're making with a square
piece for front face, and the top view is going
to be right side parallel. So extend in the right side. So all the basic
sketch works are done next with painting
the background. And before that, we
are just going to add with the bells
here and there. Now, here I'm just going to seal all the bells with
the masking fluid. And I'll show you the
result after making it. You could just make the
tree draw a tree skeleton, then add with the
bells here and there, not much that good
spacious, also that clumsy. So just here and there, we need to keep the bells. As I did, Annex, we can just seal it protection. We need to use a separate brush for the masking
fluid to use this. After it's dry, we can
work with the background. So we need to allow it to dry. Now, after everything is dry, I have my flat brush ready. This is number 11 size. So just fill that in water and you're going to
create the background. So just from the
top to the base, I'm just spreading water
all over the paper. Make it in a good amount. Now, just activating the pain, so they are going
to be with a manes Villet and dioxin violet, and finally with cadmium
mellow medium hue. So all the three colors
and with a mop brush. Started with the cadmium
medium hue, just around So these are reflections and just making that move
down for the reflections. Next is going to be
with the Magnes violet. Even Magness violet spreads
here in the surface. Dioxin violet on the edges. Now, again with the Magnese
volet I'm just going to make a balance level
in the middle. Okay. Then finally with a bit of cadmium below
medium hue to be painted in the
corner so the colors would blend again well.
There's a second layer. So now we need to
allow this to dry and we need to paint
with the emin subject. And finally, we are going to use just remove all the muskin flavor and paint for the bells. So very firstly, I'm
just going to add one the black in
the center here. Now, next step is
like we are going to make with the leaves. So I have my colour philo
green and black mixed ready. So with this color, I'm just going to
make in the top, just holding very
near to the brush. Adding a bit of green to this. Making movements only in the upper direction
for the top portion. So as we practice in
the technique session, it should be like the
straight lens can be just straight at some
places, a little curvy. So it depends on our hand, the free movement it goes. Just make it with much patience. So randomly just move from basement to the top
in all directions. To the depth, we
need to add a mix of P green and black mix
only in the base. So for the base layer, I'm just going to add
only with the Palo green. Again, just moving from
the top to bottom. Now the next step is like
we are going to make a shadow effect with a
plow green and black mix. Sure. To show the depth, we have to make it
in the very base.
14. Glowing Tree Part 2: Here I'm just going to activate the white color, dilute a bit, and I'm just going to create a little Christmas the
pine trees behind. So it's like just hidden
in the mist in the snow. So just going only with the
traces the sil out in whites. Nothing much is visible there. Me the details. Same way, I'm just going to add the second small tree here. These tree effects
are enough for this. We need to allow the main
subject to dry completely. And next step is like, I'm
just going to squeeze a bit of gate titanium white guash. So with that number
one round brush. So that's not a mob brush,
just a brown brush. I'm going to add with the
snow over each leaf sections. So just spray over that and with my number
one round brush, dilute in good consistency. So it should be creamy, not much watery
and too dry thick. With this right consistency here I'm going to
add on the top. Make with as much as
patients possible. So only the top portion of each leaf should be
covered with the snow. If you're working on
some bigger paper, it's good to use with a
larger sized round brush. So this is a fi sized, so I'm just going with number one round brrush that's uh fna After adding up all the
snhing over all the leaves, I'm just making a bit
watery, just a bit watery. And with the same
number one roundrush we're going to create this snowfall effect as we
did in the previous painting. So we need to keep the
breast nittle fur and just tap slightly
with a gouache paint, or you can just go with
any white watercolors, but in a thick consistency. I'm just making all over the
paper from top to bottom. Here I have two lows, middle low and the
lemon lo ready, so I'm just going
to spray over that. And with my round rush,
number one, again, we can just activate with
the middle of first in a creamy texture as we made for the snow with titanium white. So with this creamy texture, I'm going to add with the
fiery lights like this, starting from a small one. Just take a good
creamy consistency, the consistency of paint and adding all over the Christmas tree from
the top to the bottom. So previous the
first base colour is going to be with mid yellow. This single one color will
not be that attractive. So we are going to add the
second layer with lemon low in the middle of mid lobe
base layer in each faylt. So it will become like
a bouquet effect. Here, the colors for the
fairy lights are done. Next is we're going to make
them with a little hanging. So I have my triple zero brush, and with that, so I'm just going to again
activate lemon low. Just we need to make
a wire connection very lightly here
and there across. The wire hanging over
the tree is done. So it's much good if you have a very linear
brush of five, zero sized one, even
that's just good. Next is like, I'm going to take my mob brush and take the red. So with the red, we're just
going to color all the bells. So I have just peeled off all the masking tape things,
masking fluid thing. So inn that we can
fill with the red Now, with the next step, I'm just going to paint
red for the boxes. Sprinkling again with
good amount of bites. Here, one step is
missing that we have to make with the ribbons
around the gift as a wrap. So again, just activated
with my mid low guash, and triple zero size brush. So any linear brush
would be fine. And with this, I'm
making a stride in both the horizontal and
vertical directions as a wrap. Let it dry, we can make
with a second layer. Same way on this place. Now, after it's completely dry, we can just add up with a second layer of
thick consistency. Each presence just below that, we're going to make
with shadow portions. So I'm making this with a
magnes violet and Wabush. And again with the
dioxin violet. So it's very just near. I'm going to with
the dioxin violet. Now, over this to add a bow. You can just go randomly
with infinite structure. I now it's time to
peel off the tape. Just try this out with
the fourth project, and just one project is remaining for the
next painting to complete this winter season
special painting series. So I'm very happy to see all the paintings
done by your side, so that which
encourages me to do more stuff not only with
a watercolor medium, so I'll bring out with colour pencils and brush pens
and many mediums in future. So I hope you'll
be just uploading all the completed courses in the assignment
project session. And yeah, meet you in
the next painting.
15. Decorated Door Part 1: This is our very
last painting in the winter painting series, and we're going to
just skip a technique for the last series last episode because we
are just going to, like, use the same
color palette. So the red, everything that we used in the
previous session. So we're going to have
all that colors ready. And if you have not watched all the previous
color palettetechniques, or previous just
techniques you can just go through to just have
your color palette ready. And yeah, now I'm just going
to start with a sketch. So we're going to
make a painting of a door and a wreath and Christmas tree on this side with a little wall
textures, everything. So this is a simple thing
we are just going to make. And to do that, I'm just going to
start with a sketch. So we need to make a measurement of how and where to
start with a door. Here, I'm just going to make a center position with a base. So this is going to be
a step like a star, a small wooden star
and just build it. Now, over here, I'm
just going to make with a placement of two
Christmas trees in the front here and here. So from this place,
it's going to be a grown well grown Christmas
leaves, the tree leaves. So we're going to
simply just make with a triangle of this height. So in to this, we need to hang little
ornaments of bells. Just these are enough, and I'm going to just make
with the bells here and there, just small round circles. And in the middle in the gaps, I'm just going to
make with a bow. You have to make
with a center oval and two rectangles on both
sides and extensions. Same way, we have to make
it here and there all over the tree in
different directions. A So in the middle here, I'm just going to place with the leaves and a little
snowfall over that. So we need spacing to make it. And same way with the
same alignment and heights we are just going to make other tree on this side. So this is height
for the basement and the complete height of a
tree to make a triangle. And from this place just extend with on the opposite side. Some small workouts in the pot. And next on this place, it's going to be with the free. Again, similarly with
the bow structures, add with small bell
hangings here and there. These are enough. And next step is like, I'm
just going to make with a presents the gift boxes
just like placed over. The first one is
going to be on here, and the second one ends here. So it starts exactly
here and there is another star, the wooden star. This is the first present, making it as a cube shape. And on the top one, it's going
to be with a small piece. So this is what with the present and the bow Now, just making with a door, it starts here and goes
straight to this place. So the height should be just
leaving this much like, at least a quarter
portion from the top. So we're going to make arc just for the ventilation
thing to draw that. So I'm just going to leave like one fourth of the
part from the top. So just before that,
the doorway ends. So just making up a
straight line like this. This much height is fine. Making a rough straight
line and from here, extend with a door extends and complete it on this place. So this is the door. And here we are going
to make a wreath. So wreath inner circle and the outer circle next
again with a bow on top, making with square
partitions as a design. We can just make a
rough imaginary line, a very thin line that's not visible completely
for the viewers. So we're going to partition two lines on this
side and leaving a little space in
the middle and make another lines, again, a pair. Okay, so this are
our guiding lines. So keeping this as our
guiders we're going to make with a square
box on the top here. Same way with the same length, need to fill it on this play. Now, next is going to be with a rectangle just leaving
a little space from here and till this place. Same way to the other side. Now making a small
rectangle in the middle. A large one as we did on
the top, and it ends here. A nod Now, outer to this, like from here, we need
to make extensions. And another pillar thing
on both the sides, building with the same
measurements on both sides. I'm just adding up
with the pillars. Now, on top here, just
elevate and make with the complete slab
like structure. And on the top here,
just elevate and complete the door top face. And over here to make
a little elevation, I'm just going to make
a small rectangle. Again, it's a little
bit covered with snow, so just adding random
curvy lines on here. So just after
completing this step, next is going to be making
with the ventilations. So from here, I'm just going to make with the
starting and ending points. It's easy to calculate, we have to just make it from this place on the top and
ending place here on the top. So keeping this as the first one semicircle,
create an arc. Now, next one is going to be
with this place and on here, making a parallel
arc to the previous to this, the third extension
is going to be from here, this point and this place. Each arc should be
parallel to one another. Now the next step is going to be making with the glass pieces. So the center portion
can be measured from this point of
the inner rectangle, both the rectangles, keeping
this as a center position. And from here, I'm
just going to make a small semicircle argon. Starting we are just
going to make divisions of six complete ovals, like a petal shape, and just one half of that
petal is visible. So from this portion, we need to make line. So these are two lines. The third line, fourth, one, fifth and sixth. So from here, we need
to just make with the outer small semicircle
because we need to keep this as a base and
from here, we can make it After this step next
we're going to add the winter leaves on
the top as a decker. So just going out with
very simple curves. This is fine. And a little bit of leaves just hands on here. This way, our next is
going to be with making a bow h and one centered
here on the top. The very last thing is going
to be adding with the lamps on both sides just after the tree ends. This
place is fine. So it's like we have to make
with a base and making with a triangle shape like this. Add with a second and over
here with little designs. So with the same alignments
from this place, just measuring with
the lines opposite, we have to elevate the design. So keeping the two parts and
making the extensions on a little double line from this just adding up
with the top portions. So this is the
very basic sketch, and in the next part,
we'll be painting this. So I'll be seeing you there. Get ready with the
color palette with all the previous technique
and colour classes. So majorly, it's
going to be with the browns and burn sienna, burn tumber sepia and in
the green variations, it's going to be again with the repetitions,
like medium green, hlo green and red for all the bows door And yellow is going
to be again with a lemon low and medium
cadmium low medium so these are the
colors that what we used exactly for
the previous episodes. And finally, for the wall, it's going to be
again with a brown and a little bit
of earth alum mix. And just in the base here, I'm just going to add a bit of pines gray to snow
effect. That's it. C. Now, in the second part here, we are going to make with
a watercolor painting. So before we get started
with the painting work, it's necessary to remove all the blackness of the
pencil that's previously done. So I have my needed eraser here. So this can be shaped
into any form we need. So this is like, so far
with a needed name. And so with this, I'm just going to remove
all the excess black marks. So if you don't
have needed eraser, you could just go with
a regular eraser, even that is fine. Slowly just dabbing around. It does not produce any
dust while erasing. Slowly removes only
the blackness. And we need this sketch mark, so we should not remove all
the blackness thoroughly. So just dabbing a bit. Here all the colors, the blackness all are removed, and it's ready for painting. So just have your
color palatia that we introduced in all the four paintings in the
technique session. So with this, I'm just going
to start with a mob brush. I'm going to use mob
brush and linear brush for this work. Yeah,
let's get started.
16. Decorated Door Part 2: Yeah, firstly, we can
just start with the door. And for that, I have
picked up my burn talker, red, and Pirl crimson,
all the three colors. So with this, I'm just
going to spray a bit. And to that, with a mob brush, we have to make a basic layer of red color over here on the door. So it just starts in this place, and you can just go
towards the top all around without disturbing any
other different elements. Going around only in
the shape of the door, like how it's directed
to make a sketch. In the same way, I'm just
following the guiding lines. So leaving all the squares
and rectangle first, I'm just going to cover
only the outer part, then fill inside all the shapes. So we could even
just cover this bow. We can just take our yellow
wash and make it for the bow. So this is a little greater
in the painting work and we can just make it with the use of the
previous techniques. Regularly painting inside all these shapes
that we made first. With the spiral crimson, I'm just going to take
a bit and add it in the corners to make the
shape elevate like this. Same way, finishing it
up for all the edges. Next, again with the red, I'm just going to
cover here on the top, just leaving all the segments we need to carefully
fill inside. Covering all the borders
first with the red. Just hold your brush very closer to the hairs,
the bristles, so we can get a good grip
to make the fine points. This is how we need to complete. And next is like switching with the colors for making all
the side wood and dingy. So I'm just going
to switch to Earth hello and have your
burnt umber or burnt up ready for making the darker portions and Earth
allow for the base potions. For this, the outer, the outer wooden thing, I'm just taking a bit of earth hello just spreading
it around here slowly. And on the top, this is the base layer with earth
allow same way on here. Now, with a bit of earth
allow and burnt ocher mix, I'm just going to add
the layer of here. So lighter slight improvement in the darkness of the brown. Also, same way, we
need to fill on here. Now, just exactly
opposite on this place, we need to fill with
the burnt ocher again. Out to this place, we are going to fill
it with Earth hello. I think second layer here with Earth hello again to darken it. We need to make
with the segments, splitting up on here like this. Make a small split and
on the top same way, So with this splits,
we're going to fill in with stone structures. So crave it like a
stone with a brush. So we need to create
the texture of a stone. So leaving a little gap, I'm just making a
little dab with a marked points and filling with a burnt
Our inner to that. Just leave a little space in
every gap after every gap. So I'm just leaving a space, just a small space after
each line and just dabbing it to make it look
like a stone texture and leaving again with a gap. So this is the texture
of stone, and it's done. Next is, like, highlighting
with the sepia. So the darkest of brown,
I have chosen that. And with tip of the brush, just collecting a paint a
bit Tres a little amount. And with this, we need to keep
on creating the highlight. So segment separation
is done with the dark color sepia here. So it is like we can just
go with a mob brush of number one or zero sized or we can just go
with a linear brush. Anyway, we need to make
it look like very thin. Same way just making with the same color and just
highlighting here. Now, the second step
is like we are going to make the backgrounds. So the behind wall
should be completely wetted with number 12 round
brush or any flat brush. So round brrush is easy
to go here because we can work along inside the subjects,
between the subjects. So I have chosen this
roundbush and we need to keep on wetting it. We're going to use wet
on wet technique here. After all the wetting
work is done, net is like we have to take
a bit of burn talker again, we're going to make it
all around and fill it. So this is burn talker. Going to take good amount of colour and just
apply it all over. I so we need to allow this to dry a bit. And over that, we're
going to create, again, a stone effect stone textures with a different
little higher grade. So we can just use burnt
umber to make that. And with the round brush or any flat number two minimal
length brush is fine. So here I'm just going
to use the round brush again to make these
stone textures. And before that, we need
to allow this to dry. At the same time, we need
to just with a damp brush, remove all the colors on here and just wipe
it in the tissue. So we need to just
make the reflection of a yellow shade over here and
blend it with the browns. Just this much off lift
is enough. Same on here.
17. Decorated Door Part 3: The next step is we have
to add a stone texture. With the more brush,
I'm just going to make it horizontally with a little gaps in between
each of the brick. We can make it this way. Now the second row is going to be exactly in the
middle portion, so I'm just going
to start up here and end it exactly in the
middle and the same way, we need to keep on
building the next bricks. This series of sets, we are going to continue
till this end here. So this is the technique to
make the bricks arrangement. O ly on here after
the application, we need to just lift the
color to apply yellows. This is how the
completed version of pre arrangement with
burnt umber looks. So I have just halfway completed with the
recording process, and this is a task
to practice for you. So you could just make a
practice on your own with the previous guidance and
complete the process. Okay, this previous
thing is done. And next is, like,
we are going to switch to the colors of yellow. So it's good to have near with a lemon low and
cadmium low medium hue and just a bit of
cadmium orange. So instead, if you don't have
cadmium mellow medium hue, you can just go with
some a deep ellow. That version looks great
for the light shades. And next is going to be
like for cadmium orange, we can just go with
any light orange. That shade is fine to go. Now, just activating the colors and making it ready for
next painting session. So here with the
mob brush again, I'm just going to take a
bit of cadmium orange, just a light bit of cadmium orange and just going
to make it around here. Now, just cleaning up my brush
to change with the color, and that's going to be
cadmium mellow medium hue. And with that
shade, you're going to make it in the
middle portion here. So that could be a blend with
the previous orange shade. Next step is like, I'm just
going to lift a little bit, very tiny bit of
cadmium medium hue in the middle here just to apply
a bit of lemonlo to that. And the mid portion should
be covered with the lemonlo Again, with the cadmium
allow a bit mix. So I'm just going to
fill in the place here. Same way to the
knob. To the base, I'm just giving with the cadmium low and in the middle place, it should be filled
with lemon alumic. And the cadmium yellow
color can be just switched painting on this area. The outer side should be
just made with cadmium low, medium hue and the
inner thing should be with the lemon alumix now just cleaning up my
brush with a lemonlo mix blending with the
cadmium. Same way on here. Now with the remaining colors, just a making with a
simple light wash and spreading the colour
from this place to show the light
spreading effect. And same way with the lemon
again. From this place, Now, next, I'm spinter
switch with green. So it's going to be with halo
green and the medium green for coloring all the
leaves and the tree. So starting up with
the lightest green, so we can just go
with a medium green. And with that, just
randomly making with Christmas leaves,
or the winter leaves. So we need to just keep on
making with a straight lines, not exactly in a vertical way. So it should just go
in all directions. So it's better good
to keep on dabbing, also stretching a bit
to make the lines and curve effects and add with a
thick consistency of paint. So this is the base layer
done with a medium green. And same way, we're going to
complete it for tree below. So here we need to just
go in the direction of the pine leaves this way, leaving all the ornaments So this is just the basic of application with a medium
green and same way, it's going to be here. Next with the tallo
green on the top, we are just going to take the consistency of paint and add the darkest portions to make it look like
a three D thing. Same way here in the tree, we need to add just
with the consistency, and it's good to go in a pine direction just leaving a medium
green here and there. And at some places just making
with the leave structures. Pine tree structure is like practiced in the
previous classes. So if you have missed any
classes or techniques lesson, so you can just go
revisit and watch the video practice and just get back to this to make
it more easier. So this is just a kind request on how you should
not miss anything, and it would just go rewatch it or practice it
beautifully separately. And you can just get back
to this lesson again. Now, here we are just
going to color here for the pot and the stack is
the wooden thing here. So we need again with a brown, so I'm just going to pick up my burnt talker and burnt
umber, both the colors. So burn talker shade
is for the mid range. So I'm just going
to pick that color. So with this, we can just
fill in the base here. The upper case here is going
to be with a burn timber. Now for the pot, again, with the burn talker, just coloring it
with a base coat. And as we did for the door, the dark portions
and highlights, every detail should be filled
with sepia or burn timber. Just cleaning my brush
and with the Sepia. Just adding the details. Coloring red for all the bows. And to make it
more look three D, we can just add a bit of
pyro crimson as we did for the door or black
outline effects. Next with adding for the bells with mix of
colors, yellows and reds. Now, here I have three
different shades ready. So this is like burnt umber, sepia, and pine gray. The burnt umpire should
be used for, like, I'm just going to paint
it here on the lamp. So just making with the effects, everything, so I'm just going
to make it for the lamp. And over this, I'm just
going to add a dark layer, the second layer with sepia
and a bit of black lo. This adds beauty to
the picture more. We need to make it in a
good thick consistency. So let's just leave a little time so that the
colours would settle. And same way, painting
it on the other side. Now with sepia, I'm just
going to add it on the sides. For the gift boxes in the base, I'm just going to for
the one on the top, it's going to be with the
blue shades and the base one going to be kind of white. So just for the blue, I'm just taking my Prussian
blue and applying it. Same way lightly on this side, leaving a little space for highlight and to
show the separation. And for the base
one, instead of, like, white, you can just go
with any of your favorites. So I'm just going to make
with a bit of light green. So this is yellow green. In my set, you can
go with any grass green or lightest
shade of green. Now, just activating the
pines gray because we have to make up for all
the snow formations, taking a bit of pines gray
and in the base here, adding a little bit here and there and just here
with good amount. So just clean the brush again. Now with the application here, I'm just going to drag and make it spread all over
and remove excess color, wiping it in the tissue slowly. Just removing colours here
and there, wiping it up. These whites are with
snow formations. The color gradation, like
we have to leave that. At some places, we need
to make it little white. Again, with the gray here as
a shadow cleaning my brush. So with a wet damp brush, spreading it here and
there. Cleaning again. Adding just a bit of pain
scregin here and there. I'm just providing with the shadow formations just
below the wood then part here. Coloring work portions
are completely done, and the final thing to be added here is with the
white wash paint. So I have Brucho Brad
titanium white color here. So just squeezing this a bit, and we are going to make like a snowfall effect as we did
in the previous painting. Same way, we're going
to make it on here. We need to mix up this
paint a little creamy. So watery effect for the gouache paint will
not work that better. Here, I'm just using my
number six round brush. Just adding the
top snow effects. Just again going here
over the wreath. Simply just supplying for
the other side of the tree, adding a bit of
whites even here. This is the finished thing, and before that to complete, we have little
highlights to be added. That is, for the gift wrappers, I'm just going to
make with above. And here we need to add little details to make it
more highlight and perfect. So I'm just going to use
with the acrylic markers. You can just go
with gouache colors or if you have ultradic marker, you
can just go with that. I'm using the y brand
acrylic market. So with this, we are just
going to add with the details. For the bow, I'm just using the red and making
it more highlight. So acrylic works well over
any medium and any base. I'm using this. Here, with the yellow, I'm just going to add a bow. We are done with the
painting, and we can just slowly peel the tapes off. Here we have the very last painting, the completed version. Hope you just enjoyed
making this process and just take your own time
to create this if not done. And after making the project, you can just request
to submit in the project assignment area
so that I could review and get feedbacks of
the coaching lesson from your side, so
expecting for that. And yeah, I'll be meeting you in the next
class project session, the last video of this series.
18. Winding up!!: So we completed successfully with five beautiful
different paintings, and that's like we
started with making three beautiful birds
sitting on a tree like this. And that was very
funny creating it, and that was easy to allow
making all the projects. And this is my one of the
favorite things Snowman. So we did this and we
learned more techniques in making with using of a
fluid, the masking fluid. Here's with a candle one
with a Christmas tree, and finally here with purvey and the Christmas gift presents. So all these paintings are
like, successfully done. And for class project, if
you're interested to make with some different Christmas
festive season drawings, you can just make any of
your own unique style. So with the lessons that is shared in the techniques
of this class. So you can just make
use of that ideas and put it in your own painting
in your creativeness, and just share that to the class project session so
that I could review that and hope you enjoyed
this series really well and you learn so many
things from Since I shad, drop your feedback, and I'm so happy to come up
with more techniques. So next upcoming boutique
color pencil session. So I'll be meeting
you there. Bye bye.
 Srimathi, Artistcastlebysri - Art Educator