Transcripts
1. Introduction: M Hi there. I'm Julie Ray, a textile artist and natural dyer based
in Portland, Oregon. And I'm so happy that you've decided to join me for
this special class, making your own heirloom
quilted holiday stocking. If you're like me, perhaps
you've become a little disheartened by how commercial the holiday season has become. I find one of the best ways
to counter the trend of consumerism is by embracing
the slow practices of making. A handmade quilted
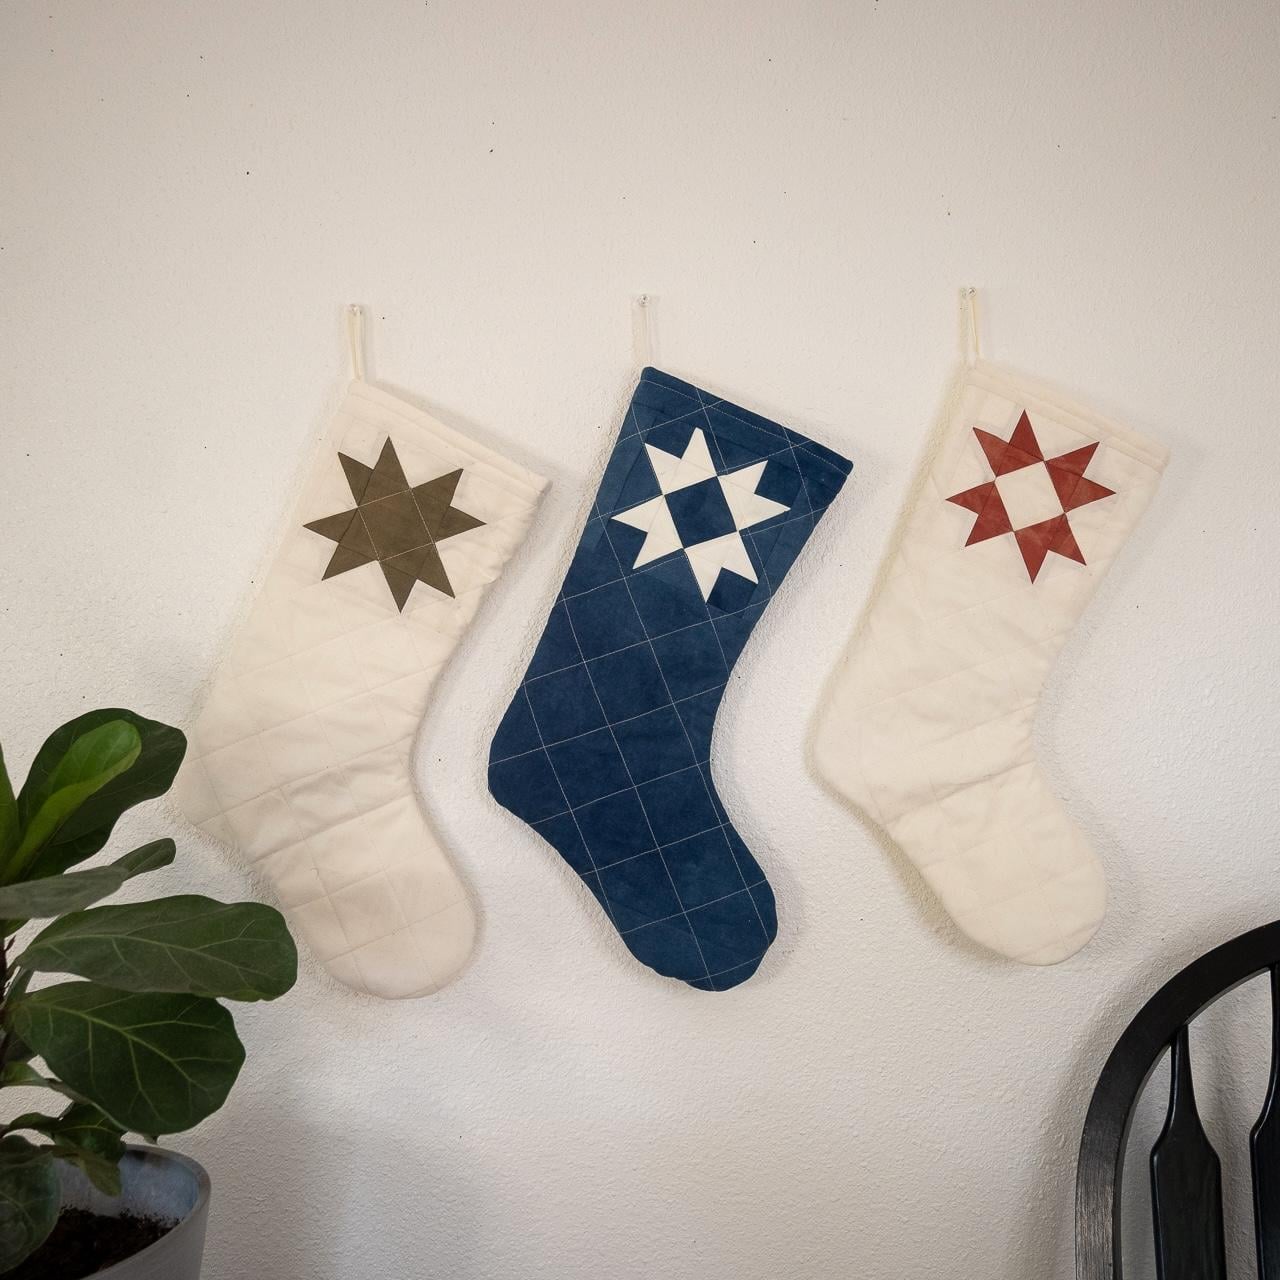
holiday stocking is the perfect way to
slow down from the rush, to push back against the
consumerist culture, and to create something
meaningful and beautiful that will be cherished for
years, perhaps even decades. Imagine adorning your
home or the home of a loved one with something that was made with
intention and love. That is the true
spirit of this season. In this class, I'll
guide you through the whole process of creating
a quilted holiday stocking. If you're new to
quilting, no worries. I've structured this class to make it friendly
for beginners. And if you're a more
experienced quilter, there's lots of
opportunities to bring your skills to create
something new and beautiful. This course, you'll learn how to create a ribbon star block, some basic piecing and
quilting techniques, how to add a lining
to your stocking, and how to finish
your stocking with some beautiful details such as a hanging ribbon
and top stitching. We're going to have a lot of
fun. And the next lesson, we'll talk about
the class project, as well as some options for
personalizing your stocking.
2. Class Project: For this class, you'll be creating your own quilted
holiday stocking. I'll be creating the
original version as described in the pattern, which features a ribbon star
block as the main design. However, I encourage you to personalize your
stocking by choosing your own color or even by varying the quilt
block that you use. On page 12 of the quilted
holiday stocking pattern, which can be found in the resources section
of this course, I offer several options for customizing the
design of this block. If you're a more experienced
quilter or perhaps you have a specific quilt block that you'd like featured
on your stocking, that will work great, too. You can use any quilt block of your choice in place of
the ribbon star block. The unfinished block size
should measure 5.5 " by 5.5 ". So as long as your quilt block meets those measurement
requirements, you can swap it out, no problem. Be sure to take a picture of your finished project and upload it to the
resources section. I'd love to see the
beautiful work you create. In the next lesson, we'll talk about some of the materials and supplies you'll need for this course. I'll see you there.
3. Materials and Supplies: In this lesson, we'll
talk about some of the materials and supplies you'll want to gather
for this project. If you've been sewing for a while or if you've
made a quilt, you should have most
of these on hand. First of all, you'll of course need a working sewing machine. You don't need anything fancy. Anything that can do a
basic straight stitch will be sufficient
for this class. Here are some of
the notions you'll want to be sure to have
on hand for this project. You'll, of course, need
thread for sewing. I like using a 50
weight cotton thread for both piecing
and for quilting. You'll need straight pins. In addition to straight pins, I also like to use
binding clips. I find these to
be really useful. These are optional if
you don't have them. Straight pins will work fine. However, I would say these are a very worthwhile investment if you plan to do a
lot more quilting. For basting the quilt, you will need pins for
sting or a basting spray, a seam ripper, of course, for, you know, the little mistakes that we tend to
make along the way. You'll want some kind
of marking tool. This is a air and water
soluble disappearing ink pen. You could also use chalk or a marker or something to
use for marking fabric. There are three different
kinds of presser feet that I will be using
for this project. For piecing, a quarter inch presser foot is really useful. This has a quarter inch guide to help us make sure we have
a consistent seam allowance. A standard presser foot, which is useful for some of the final steps when we're
piecing our stocking together. And I highly recommend a
walking foot for quilting. Some of the cutting
supplies that we'll need are a self healing cutting mat, which I have underneath here, fabric scissors and
a rotary cutter. I recommend changing out the
blade of your rotary cutter. If you've used it recently, it's always nice to have a
fresh blade for a new project. You also need a cutting ruler. If you don't have an
acrylic cutting ruler, this is a staple for quilting. If you only get one, I
recommend this large one. It's 6 " by 24 ", and this is by far the most versatile and the
one you'll use the most. If you have the means to
invest in a second ruler, I'll be using the six
by six inch ruler to cut out some of
our smaller pieces. All right. You will also need two
pieces of batting. I'm using cotton batting, and these two pieces
should measure about 14.5 " by 20.5 ". And finally, you'll need
some kind of ribbon, and we'll be attaching this to the stocking so that
you can hang it. I'm actually using
a piece I cut from the salvage of the fabric that I'm using as the
background fabric, but you can use any
ribbon that you have. Lastly, and perhaps most
importantly, you'll need fabric. I recommend working
with quilting cotton, especially if you're newer
to sewing and quilting. This fabric is going to be
the easiest to work with. Thankfully, there
are no shortage of options when it comes
to quilting cotton. There is a wide array of colors in both solids and in prints. This is the fabric that
I am choosing to use. For fabric A, which is
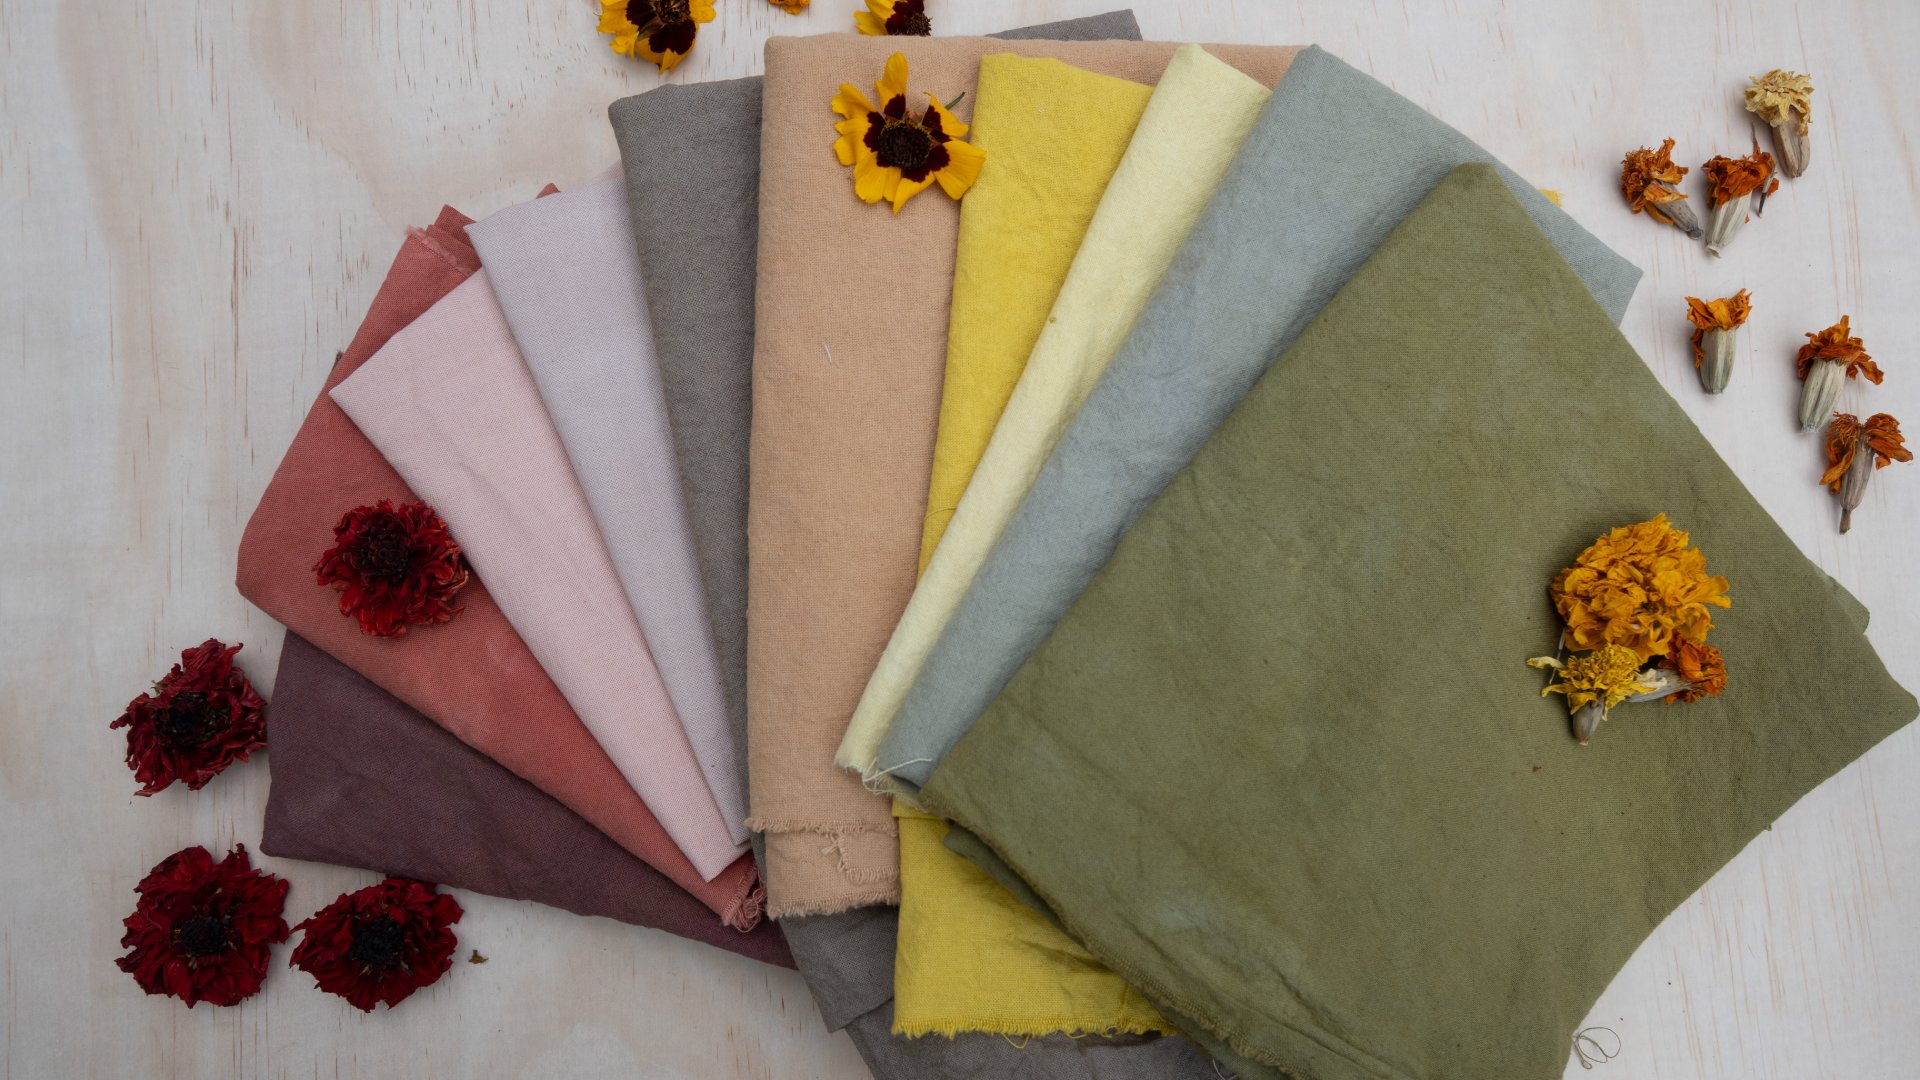
the color of the star, I'm using this green that I naturally dyed with
marigold and iron. We're going to be cutting
small pieces from this. So a quarter yard or a fat quarter of fabric
A will be sufficient. For the background fabric or the main color
of my stocking, I'm going to use
this natural linen. Linen is trickier to
work with than cotton. So as I mentioned before, if you're new,
stick with cotton, I'm going to be going with
linen because I kind of want this very natural
look to my stocking. You'll need about a yard
of the background fabric, which is listed as
fabric B in the pattern. You'll also need
about a half yard of fabric for the lining. This is going to be on the
inside of your stocking. You could certainly
use the same fabric that you're using
for the background. I'm going to use this off white solid quilting cotton
for the lining. So these fabric
requirements are for the main variation of this pattern, which
looks like this. If you are planning on making another variation
of this pattern, check page 12 of
the PDF download of the pattern for
fabric requirements for the other variations. If you're planning on making
your own quilt block, go ahead and make that
as you wish and make sure that the unfinished
size is 5.5 " square. And then we'll be
able to use that in place of the star in the
pattern, no problem. While we're here, you will also need a copy of the pattern, and you'll also need a copy of the template that
accompanies this pattern. We'll discuss that more
in the next lesson.
4. Pattern and Template: So in this lesson, we're going
to take a closer look at the quilted holiday
stocking quilt pattern that's included in this course. If you haven't already, go ahead to the resources
section of this course and download a copy of the quilted holiday
stocking pattern so that you can follow along. You're welcome to print
this pattern out, but if you're comfortable
looking at it on a screen, that's fine, too. The only part of this
pattern that we'll need to print will
be the template. And we'll talk about
that when we get there. I always recommend
reading through an entire quilt pattern to familiarize yourself with the
process before beginning. So let's take a
moment to do that. This page offers an
overview of the pattern, talks about some
of the techniques and blocks that are used. Here are some notes to read
through before beginning. This section talks about the fabric yardage and
materials that are required. This table shows the
cutting instructions for each of the
pieces of fabric. The first step in creating our stocking will be to make the
ribbon star block. And this page provides some
diagrams and instructions for creating that and
it continues on. This next part describes how we will be piecing the
stalking front together. After that, we will baste and quilt our stalking front
and stocking back. This page talks about how
to assemble our template, and we'll be talking about
that in a few minutes. Then we get into
assembling our stocking. And attaching our hanging
ribbon, and then we're done. On page 12, you'll find some design variations to help you personalize your
holiday stocking. If you choose to use one
of these variations, there's a little description about how the cutting
instructions will differ from the table we saw at the beginning
of the pattern. There's a coloring page
for you to kind of play around with different
colors that you might want to use
for your stocking. So pages 14 through 17 are the pages you'll need
to print for the template? Because the stocking is bigger than a standard piece of paper, the template spans
over four pieces. I'm going to show
you how to print this out and piece it together. So I'm going to go
up to File Print. And I don't need to print
off the whole pattern. So I am going to only
print out pages 14 to 17. I don't need to print
these in color. So the most important
thing to check before you print your
template is the scale. My printer
automatically defaults to this option scale to fit, and this will print the template smaller
than we want it to be. We actually want to
print this at 100%. So I'm going to
select scale 100%. Your printer options might
not look exactly like this. So make sure before
you hit Print, that the pages are
scaled to print at 100%. And then you can go
ahead and hit Print. Alright, so I have my template
pieces printed out here, and I don't have
the best printer. It looks like my nozzle
needs to be cleaned, but this will be fine
for our purposes. The first page of the
template will have a one by 1 " square here. This is intended to be
used as a reference to be sure that this was
printed correctly. If you chose to print it
at full size or at 100%, this should measure 1 " square. And I always like to
check just to be sure, and that looks perfect. Great. Now that we have
our pieces printed out, we're going to lay them
out in the proper order. You'll notice these grade
out triangles that will match a number on a
corresponding pattern piece. So the one and the
one will match up. And in order to get
these to fit together, you'll cut off one edge. Be sure to use your
paper scissors for this and not your
precious fabric scissors. And you can line these up
and tape them together. And then I'll do the same
for these two pieces, matching the four and
the four together. Make sure those are lined up. Oops. Then taping
those in place. And finally, we'll put
these two pieces together. And if you've lined up
the first two properly, you should have the
twos and the threes. And just like before,
I'll cut off one edge. And you have your full stocking. And when you tape
these together, you only have to
worry about taping inside the line of the stocking. All of this part on the
outside will get discarded. So don't worry about taping
outside of the stocking. Once you have your four pieces
of paper taped together, you can go ahead and cut
out the stocking shape. Just some things to note
on the pattern piece, it has the name of
the pattern on it. It has the cutting instructions, and we'll talk more
about this when we get to actually using the template to cut out
our stocking pieces. We'll use this for
both the outside of the stocking and
for the lining. And most pattern pieces will have an indication
of the grain line. The grain line is the direction
in which the threads run. And so this just indicates
that you want to line this up along either
the warp or the weft, either the vertical or
the horizontal threads, as opposed to diagonally, as that could cause the fabric
to stretch and distort. So now that we have a big picture overview
of the pattern, and we have our template pieced
together and ready to go, we're ready to get started. Join me in the next lesson where we will make our
ribbon star block.
5. Ribbon Star Block Part 1: Square in a Square Block: All right, let's get started. For a ribbon star block, you'll need fabric
A and fabric B. The ribbon star block is constructed of two
basic sub blocks, a square and a square block, surrounded by four flying geese. Let's begin by making our
square and a square block. To make our square
on a square block, we'll need the three inch
square of fabric B and 41 and three quarter
inch squares of fabric A. I've already
cut out my squares. If you need a little
bit of a refresher on how to cut out fabric
pieces for a quilt. You can go ahead and
watch the cutting lesson in my quilting for
beginners course. I've gone ahead and linked
that in the resources section. We're going to start with
the smaller squares, the one and three quarter
inch squares of fabric A. We can lay those out. And you'll notice one of mine
is not a perfect square. The corner got cut off. And because I know that
as I'm constructing this, I'm not going to need
this whole corner. I left that as is. You'll see what I mean
as we put this together. So what we need to begin is a straight edge and a
fabric marking tool. I'm using this disappearing
ink marking pen. We're going to mark a
diagonal line from one corner to another on each of
these four squares. So I'll line up
my straight edge, so it goes from
corner to corner. Take my pen. And mark a line. I'll do that for
all four squares. Next I'm going to take my three inch square two of the squares of fabric
A that I just marked, and I'm going to pin them
to opposite corners. I don't know if
you're able to see, but I want to make
sure that the line I marked goes from the center of one side of the
square to the center of the other side rather than
coming from the corner. I have the line I
marked going this way, almost like it's cutting off that corner of the
three inch square. And once I line
both of these up, the two lines that I marked are going to be
parallel to each other. Once I have those in place, I'm going to use some of my
straight pins to hold these. I want to make sure that I have the raw edges lined
up on each side. Okay. And once I have
those pinned in place, I'm going to take this to the sewing machine
and sew a line of stitching right on each of those lines that I marked
in the first step. So I'm at my sewing machine, and I have just my
standard presser foot placed on here right now. We're not using a quarter
inch seam at this moment, so I decided to just keep
my standard foot on. Remember, we're going to be
sewing a line of stitching right on the line that we
marked in the first step. Before I begin,
though, I do want to make note of
my stitch length. I generally put my
stitch length down to 1.8 or 2.0 when I'm piecing. Especially for smaller
blocks like this, I like to have a
shorter stitch length. So I'm going to line this up right on that
line that we marked. And right now, we don't need to worry about backstitching
or locking in the stitch, since all of these
stitches will be locked in by other stitches from the blocks we
add in the future. So There is my first line of stitching. And I'll flip this around. And there's my second
line of stitching. As you can see, I like
to place the pins parallel to each other
so that I can stitch right in between them
without having to remove them while I'm sewing. Now that I have those
stitches secured, I can take my pins out, and I'm going to bring this
back to my cutting mat. So I'm back at my cutting mat, and before I go ahead
and press these, I'm going to trim off the
excess from these corners. I'm just going to use
my rotary cutter, and about a quarter inch from that line of stitching,
I'm just going to trim. You can use a ruler, but I don't find that it's necessary
to be that precise. Just make sure it's about
a quarter of an inch. Flip it around, do
the same thing here. And this is what your
piece should look like. I'm going to bring this
to the pressing mat and press these triangles open. Okay, so I'm at my pressing mat, and I'm going to go ahead
and press these open, so I'll flip this around. And I like to press
my seams open, so I'm going to place my finger kind of in the seam
to flatten it out. And I have my hot iron Place
that over the seam to. Press that flat. Flip it around and do the
same thing over here. Finger pressing that seam open. And I'm placing the iron
on it to flatten that out. Flip it around to the
front and give it a good press from the front. And there you have half of
a square in a square block. We are going to repeat all of those steps for the
other two corners. Alright, so I'm back
at my cutting mat, and I have the other two
squares that I'm going to place in opposite corners. And just as I did before, I want to ensure
that these two lines are parallel to each other and not meeting up with the corner where I
placed the square. This is that funny one that
had a little part cut off. And because I know
I'm going to be cutting this corner
off as excess, I'm going to place
this part over here. So you're going to notice
this edge isn't going to line up with the raw edge
over here, and that's okay. I am still going to line
everything else up, so I have a little bit of
this edge here to line up. And this bottom edge, I can line up, so I know
it's in the right place. And then I'll use my pins. And then just as I did before, I'm going to take this to the sewing machine
and sew a line of stitching right on
each of these lines. So I'm back at my cutting mat. I just sewed a line of stitching along
the two marked lines. And just as I did before, I'm going to cut the excess
from the two corners. I my rotary cutter. Go to roughly cut about a quarter inch from
the line of stitching. And I'm going to take this to
my pressing mat and press. These two seems open. And there is my final
square in a square block. So your block, which is
considered unfinished because it has raw edges and it's
not sewn into anything yet, the unfinished size
should be 3 " by 3 ". Let's move on to making
our flying geese.
6. Ribbon Star Block Part 2: Flying Geese Blocks: All right, so I'm going to set my square and a square
block aside for now. And I've cut out
the pieces that I need for my four
flying geese blocks. You will need four, 2.5 inch squares of fabric A. Remember this is the fabric
that will be the star. And you'll need
four inch square of fabric B. Um the method
that I am going to show you for creating flying
geseblocks four at a time is a little bit different
than the method that I describe in the quilt pattern. I have since started making my flying geseblocks a
little bit different. It's not quite as efficient, but I find the results
are a little bit better. The method that I show you in the pattern results in some of the flying Geaseblocks having a funny little tab that's kind of tucked in at the corner. If you do try that method, you'll see what
I'm talking about. And this method, while it's
not quite as efficient, this one, in my opinion, produces a cleaner result. So I'm going to show
you this method. We start with the same pieces. But what we're
going to do, rather than sewing these
pieces together, we're actually going to
cut them apart first. So with the four
pieces of fabric A, we are going to use our ruler or straight edge and
rotary cutter to cut these in half
on the diagonal. And you can do that
one at a time. Or if you feel confident, you can stack them and
cut all four at once. Or you can cut two at a time. I actually think I'm going
to do two at a time. Four seems like a lot. I'm going to place my ruler so that it is angled
corner to corner. And I am going to cut. So, this gives me
four triangles, and then we'll cut this
on the diagonal as well. This um I'll scoot those up. This larger background piece, we're actually going to
cut into four pieces. We're going to cut on the
diagonal in this direction, and in this direction. So I'm gonna place my ruler and cut from corner to corner. And then without
moving any fabric, I'm going to turn my ruler. You're welcome to mark
these lines before you cut if you're worried about
things shifting or moving. And then I'll cut a line
from corner to corner, like. So, now we're going to arrange these into our four
flying geese blocks. So this triangle is going
to be the center fabric. Maybe I'll do it like that. And then these smaller
triangles that we cut from fabric A are going to
go in the corners. So you'll notice on
these triangles hoops, there are kind of
two short edges and one long edge at the base. This long edge will match up with the side edge of
the larger triangle. Like, so. And you notice that
they don't fit perfectly. That is because we need
to account for seamouns. Make sure I have all
the pieces that I need. So you can kind of visualize our four flying geese blocks. Let's start with one of these. We're going to sew one
side on at a time. And so what I'm going to do is I'm going
to kind of center this along that edge. And if I've done all my
measurements correctly, you should have about
a quarter inch of the fabric A sticking out
on each side of this edge. From here, I'm going to flip this along the
edge of stitching. So we're going to be
sewing this here, and I'm going to flip this over so that these are
right sides together. Like sew. You're welcome
to place a pin there. And when I flip this over, again, you're gonna notice that things aren't lining up
properly, that's okay. So I'm going to
bring this over to the sewing machine now, and we're going to sew with a quarter
inch seam allowance. Okay, so I'm back at
my sewing machine. I still have my stitch
length set to 2.0. But before I begin sewing, I am going to switch
out my presser foot from my kind of standard
default presser foot. To my quarter inch foot. Because for these blocks, we are going to be sewing using that quarter inch guide. Oops. There we go. And now I am going to sew a line of
stitching right along here, where my pin is using a
quarter inch seam allowance. And there's my
line of stitching. Now I'm going to
take this over to the pressing mat and
press my piece open. So I have half of my
flying yest block done. Now we're going to
repeat that same process for this other corner. I'm going to take my piece of fabric A and line
it up on this edge. I'm going to center
this so that I have about a quarter
inch sticking out from this side and
from this side. And then I'm going to take
this piece of fabric A and flip it over this diagonal edge. And I can place a pin. Make sure those raw edges are lined up. Now I'm going to bring
this to my sewing machine. I'm going to sew a
line of stitching, a quarter inch from
this raw edge. So I have my line of
stitching sewn here, and now we're going
to press this open. And there is my first
flying geese block. I am going to repeat
this process three more times to create a total of
four flying geese blocks. Alright, so I have all four of my flying geese
blocks sewn together, and these need to be trimmed. Trimming flying geese
blocks can be a little bit tricky because there are
a few different things that we need to keep in mind. We need to trim them
all to the same size. In this case, they
are going to be 3 " by one and three
quarter inches. One of the things we need
to make sure of is that this point is a quarter inch from the raw edge that
we trim up on top. That way, when we sew this
block into the next block, the line of stitching won't cut off that tip or
won't leave a gap. The other thing
that we need to be mindful of is ensuring that this point is centered
between the two edges. So we can't simply take our ruler and just
trim to the size. We have to be mindful
of this point. And I'm going to show you
my process for trimming flying geese blocks to help keep all of those
factors in mind. So I always begin by
trimming the top. As I mentioned before, we need to make sure we have a quarter inch seam allowance between the point
and the raw edge. So I always start there. I am going to take my ruler
and place it along this edge. And I'm going to find some point along this quarter inch marking
to align with the point. And then I'm going to kind of square everything else
up the best I can. I'm kind of looking
at this bottom edge and at the side edges. They might not be
perfectly square. They may have gotten
a little askew from sewing, and that's okay. Just square the rest
up as best as you can. And then I'm going
to trim the rest of the excess from the top. Alright, that's done. Now, I am going to use this top edge as a reference
for everything else. The next thing I'm going
to do is trim the bottom, which in this case, is one
and three quarter inches. So I'm going to line up my one and three
quarter inch mark with the top edge
that I just trimmed, and now I can trim the
excess off the bottom. All right. It's looking better. Now, we just need
to trim the sides. And as I mentioned
before, we want to make sure that this point
stays centered. According to the pattern, I want the width of this
block to be 3 ", which means this point would be halfway between 3 " or at 1.5 ". So I'm going to use the top and bottom edges as reference points to
square this edge. And then I'm going to place the point of the
triangle at the 1.5 inch mark. And then I'm going to trim
the excess from this edge. It doesn't matter if you
start with the right or left. Since that is going
to be centered, you can start with either one. And now I just have
this left edge to do. I'll flip this
around, and this is the easiest one because if I've measured
everything else correctly, I should be able to line the three inch mark here
and trim off that excess. Make sure this is all square. I'm checking that point
is still at the 1.5 inch mark, and I'm
going to trim. So there is my final
flying geese block. Go ahead and trim your other three
flying geese blocks and coat back here
at the cutting mat, and we'll put all
of these pieces together to create our
ribbon star block.
7. Ribbon Star Block Part 3: Putting it all Together: Okay, so I have all of my
blocks that I've created, my square in a square block, and the four flying
geese blocks. And the other piece that
you'll need or pieces are your 41 and three
quarter inch squares of fabric B of the
background fabric. These are going to
become the corners of your ribbon star block. So let's start to
put this together. In order to create a star, the square in a square
block will be the center, and the flying geese
will become the points. So we're going to place these
at the top and the bottom, kind of mirroring
each other like so to create two points. And then we'll take these
other two flying geese blocks on either side, like so. And these one and three
quarter inch squares of the background fabric
will go in the corners. There it is. So in order
to sew this together, we're going to sew
together three rows. We can start here. I'm going to take this piece
of fabric and this one, and I'm going to flip this over the line of stitching so that we have right
sides together. Take this to my
sewing machine and sew using a quarter
inch seam allowance. I have this sewn. I haven't pressed it yet. We're gonna press all of
the seams after we've sewn them because we're gonna
press them strategically. And you'll see why
when we get there. But for now, just leave
the seams unpressed. Now I'm going to sew this
piece of fabric to this end, and I always like to
lay everything out, so I know everything is oriented in the way
that I want it. I'm going to flip
this edge over here. Make sure these two
raw edges line up. You're welcome to pin these together if you're worried
about them shifting, and I'm going to
sew another line of stitching right here. Alright. So I've got those
two pieces sewn together. I'm going to do the same
thing for this bottom row, sewing this piece to here, and then sewing this
piece to this side. All right. So we have our top and our bottom rows
pieced together. Now we're going to work
on the centerpiece. And the part that is a
little bit trickier. I'm actually just going to
set these aside for now. A little trickier
about this is ideally, in a perfect world,
these points, once these are sewn
together, we meet. That doesn't always
work out perfectly. Even as long as
I've been sewing, my points aren't always perfect. We are creating
something by hand, and while we aim for accuracy, we also want to embrace
the imperfections that make handmade
things beautiful. But let me show you
what I do to help increase the chances of getting
these points to match up. So we have them
oriented how we want. And just like before, we're going to flip this
over so that we have our right sides together
along this raw edge. And in a perfect world, we've measured
everything you know, so accurately that we could
just sew this together, and those points
will be perfect. We don't live in
a perfect world, and so that rarely happens. So what I'm going to do is
I'm going to kind of open these up where the
seam allowance is. And I kind of want to find those two points and get them to meet up as closely as I can. And then I'm going
to take a pin. And I'm going to place a pin
right at the point here. And I'm going to come through, and I'm going to open up again. And I want this pin to intersect the point of this
other piece of fabric. And then once I have those
two pieces and I can even check from both sides, Ooh. And I can see mine got a
little off as the pin turned. There we go. That's better.
That looks really good. Now that I have that in place, I'm going to secure my pin and take this
to my sewing machine. And while I am going to use a quarter
inch seam allowance, I'm going to pay extra
close attention to where the thread or where
the seam intersects. And I want to be
sure that the seam intersects right where
I inserted the pin, since I know that's where
both of my points are. So let's bring this over
to the sewing machine. Alright, so I'm here
at my sewing machine. I've got my blocks
pinned together, and I'm going to use my quarter inch presser foot
to sew a line of stitching. And I'm gonna go really slowly. This is not a time for speed. This is not a race, and
I'm gonna pull my pin out. Moment of truth.
Let's see how I did. Oh, not too bad. Not too bad. You can see that my quarter
inch seam allowance got a little off because there
is a little bit of a gap between those two points, but I'm not going to get
too nitpicky about it. If your points are very off, that's what your
seam ripper is for. Go ahead and take out that line of stitching and try again. If you're like me and not
aiming for perfection, you can grab your other
flying geese block, flip it over this edge, pin right where those
two points meet. And so, let's bring this
to our pressing mat, and I'll show you how we will deal with pressing these seams. Okay, so I have our
three rows here. Let's get the setup, how they will look in hoops when our block is
completely assembled. And now we're going
to up the level of complication just
slightly because now not only do we have these
points to match up, but we have these
seams to match up. And again, not aiming
for perfection here, but let me show you how to increase your degree
of accuracy with this. So, I like to press my seams strategically to help them nest. So what I'm going to do is for the top and the bottom row, I'm going to press the seams
toward the outer edge. Let's do that. So I'm
going to kind of not pull, but I just want to tug to be sure that these
pieces don't get, like, caught and folded
under as I'm pressing. So you just kind of
want to give it a very gentle tug to make sure everything is pulled
out from underneath. Take my iron and press. And again, I'll press
on the back and then flip it over and give it a little press from
the front as well. And I'm kind of lifting my
iron and pressing it down. Especially since I'm
working with linen. I really want to be
careful not to move my iron on top of the fabric in a way
that would shift it. Quilting cotton is a little
bit more durable in that way, but linen, especially
is really shifty. And I'm gonna do the
same with this one. I'm gonna kind of
finger press those down and take my iron and press. And you can feel when you press your seams to one side
rather than open. When you run your finger over
the seam, it's not flat. One side of the seam is
raised a little bit. And we're going to use that as a way to help us
line our seams up. You'll kind of see what
I mean in a moment. So these two rows we press to the seam
toward the outside. We're going to do the
opposite for this one. For this row that's
in the center, we're going to press the
seam towards the center. So just like I did before,
I'm going to take it, kind of hold it along
the whole width and give it again,
just a gentle tug. Make sure we don't have any fabric kind of
tucked underneath. I'm going to press this
seam toward the center. Now, let's pin these together. I guess we'll start
with these two rows. So I'm going to first start
by pinning these two points just like we did when we
sewed this row together. We're going to place a pin right where those
two points meet. I'm going to flip the
right sides together and place my pin right
at that point. And once I have that
pinned in place, find one of the seams. And you're going to notice that this bottom one is kind
of bulkier on one side. That will allow you
to kind of nest right where those seams. If you hold it like this, you
can kind of see those seams will kind of nestle right
in with each other. Once you have that in place, you can pin and then do the same thing
with this other seam. We're going to kind of nestle these right in with each other, and you may find I notice that I have my fabric
is bulging a little bit, so I may need to kind of ease that in or maybe stretch
one side slightly. You don't want to
do too much because that's really I don't
know if you can see how much extra fabric I have on this bottom layer
when I nest my seams, and I'm not willing to stretch
my fabric quite that much. So I'm actually going to
compromise a little bit. So my seam won't be
perfectly aligned, but I will have a little
bit more even fabric there. And sometimes we just
have to make those calls. I'll pin that together. It's going to be close enough. Now I'm going to take this
to my sewing machine and sew along this edge with a
quarter inch seam allowance. All right. So I just finished sewing my
line of stitching. I opened it up. This
actually looks really great. That point looks really nice. That seam looks really nice. This is the side where I had to fudge that seam a little bit, so those don't
match up perfectly. But when you stand back, it's hardly noticeable, especially to somebody
who's not a quilter. At this point, you can press this seam in any
way that makes sense. It's starting to get
a little bit bulky. I think I'm going to
opt for pressing this open just to reduce
some of that bulk. I also get a little
tricky pressing open at this point because there
are multiple layers. Okay. Who. Almost there. I am going to now
as my final step, sew this top row here using
the same process I just did, flip it over right
sides together, placing a pin here at the
point and then nesting those seams and pinning before I sew with my quarter
inch seam allowance. Alright, so I'm back
from my sewing machine. I have my line of
stitching sewed. And I'm gonna press
that seam open. Here is my ribbon star block. Your block should measure at
this point 5.5 " by 5.5 ". If you have any weird
little spots that are kind of sticking out funny,
go ahead and trim them. Be mindful, though,
about these points. Just like when we trimmed
our flying geese blocks, and we wanted to leave a quarter
inch seam allowance from the point to the raw
edge of the block. You want to make sure you
have that here as well. So don't trim these
too much because you don't want to lose
this seam allowance. Otherwise, you'll end up sewing
off a point of your star. I can see a couple
places like here. I don't really have much
seam allowance there. So in this case, I
will end up with a little bit of the
point of that star cut. That your ribbon star
block is complete, we can go ahead and assemble the rest of our stocking front. We'll do that in
the next lesson.
8. Piecing the Stocking Front: In the last lesson, we worked on creating
our ribbon star block, which you should have ready. If you are using another quilt block as part
of your design, you can bring that over
to your table now. I've also gone ahead and cut out the other four pieces that we'll need to assemble
the stocking front. These two smaller pieces
measure 3 " by 5.5 ". This top piece
measures 3 " by 11 ", and this bottom piece
measures 12 " by 14.5 ". The longer side of this
big piece will attach to the bottom of these
assembled pieces. Go ahead and sew these together. I'm going to begin by sewing
these smaller pieces, one to each side
of my quilt block. So I'm going to
take one of these, flip it so that these are
right sides together, matching the raw edges along
the side and along the top. You can go ahead and pin
that in place, if you like. I'm going to sew this, making sure I have a quarter
inch seam allowance, and then I'm going to
press this seam open. Alright, so I have
my first piece here sewn onto the quilt block. I went ahead and I pressed
that seam towards the outside. These corners were getting
a little bit bulky. So rather than pressing it open, I decided to press the
seam toward the outside. I'm going to go ahead
and do the same thing with these two pieces. Alright, so here I have those side pieces sewn
to my quilt block. Next, I'm going to
attach this top strip. So I have all of these
pieces ready to go, and you might notice
that this longer strip doesn't quite match
up with the edge. Don't worry about that.
This is all going to be cut out using the
template eventually. So if these edges
don't match up, don't worry about
that at this point. Now, our last step is to attach this bottom piece
to the top piece. Remember, this is
the longer edge of this rectangle that we cut. And you might notice
that these don't seem to match up at all.
That's intentional. What we're going to do is
we're actually going to align these two pieces
along the left edge. And this will allow
for the stocking to be cut out and leave room here for the toe. Let me
show you what I mean. Once we have this
basted and quilted, we're going to be using
our template that we had assembled in an earlier
lesson to cut this out. This whole piece is going to
be cut out into this shape. Just to kind of help you
visualize where this is going. I'm actually going to turn this. And we want to make
sure this is lined up along the left edge. Then I can take this top part, flip it over so that we
have right sides together. I'm going to match
all these edges up. And I'm going to take this
to my sewing machine, sew using a quarter
inch seam allowance, and press this open. Alright, so here is my
completed stalking front. I'm going to turn it sideways so that you can see
it in the full shot. So this piece is ready to go. Before we move on, let's get our stalking back piece ready. The stocking back is just
a plain piece of fabric. So what we're gonna do is
we're gonna cut out a piece of fabric that is 14 " by 20.5 ". I'm going to show you
how I would go about cutting a piece of
fabric this size. It is likely that you
don't have a ruler that is 14.5 by 20.5 ". I certainly don't
I'm going to show you what I do when I'm cutting out a large
piece like this. Let's see. I'm going
to find I have some kind of random
bits cut out. I think I'm going to use
this piece of my fabric. You can see I've got some
little odd bits here. I'll probably clean that up. And I'm going to use this
to cut out my piece. The first thing I'm
going to do is kind of clean up this corner and this edge so that I have a nice square corner to work from. So I might start here
and line up my ruler. And I know that I need a
piece that is 20.5 " long, so I'm just going to at least
cut to that measurement. There we go. And then let's
clean up this corner, and I want to make sure that
I have it nice and square. So I'm going to line up
this edge with one of the straight line measurements
on my ruler and cut. And again, I know that this
measurement needs to be 14.5, so I'm just going
to make sure I make my straight edge at
least that long. Next, I'm going to
fold this in half and actually cut this
fabric doubled up. Because 20.5 " is
my longest side, that's the direction,
I'm going to fold it. So this requires a
little bit of math. Half of 20.5 " is ten
and a quarter inches. So I'm going to fold
this fabric in half. And I'm going to measure this to be ten
and a quarter inches, which is half of the
full length that I need. I actually have this ruler, which measures 10.5 ", which is almost exactly
the size I need. I'm going to use this ruler. It is useful to have
a variety of rulers. As you get more into quilting, you can begin to build
your collection. So I'm going to use
this as my guide. And this measurement doesn't
need to be 100% accurate. I wouldn't go any smaller. But remember, this
piece just needs to be big enough to be able to
cut out our stocking shape. So we have a little
bit of wiggle room. Alright, so I have
this at 10.5 ", which, again, is slightly
larger than I need, but I'm not going to
worry about that. And in this direction, I need it to be 14.5 ". This ruler is only 10.5 " wide, so I somehow need
to extend this. I'm gonna rotate my fabric. I'll show you how I use a second ruler to
act as an extension. So this is the fold. This measures 10.5 ", which means when I unfold this, I'll have a 20 1 " piece, again, slightly larger than
what I need. That's okay. And I need the measurement in this direction to be 14.5 ". This is 10.5 ". It means I need four more inches to reach the desired
measurement. I'm going to use
this second ruler to help me add four more inches. So I'm going to slide this over. And I'm going to line this edge with the four
inch mark of this ruler. When I put these two
rulers together, I will have a measurement
that is 14.5 ". This is 10.5 " plus 4 ". Then I can actually
slide this ruler up so that this
bottom edge aligns, and I can cut this piece
using these two rulers. There's my piece.
Before I move on, I'm just gonna grab my template and do a quick check and make sure that that fits.
Yeah, it looks great. Bring your completed
stocking front and stocking back to the
next lesson where we will baste and quilt our pieces.
9. Basting: In the last lesson, we assembled our stalking front, and we cut out our
stocking back. In this lesson, we are going to baste these with
a piece of batting. So what you need
is your stocking front and stocking back. Be sure these are really well pressed before we begin basting. And you'll also need your 214.5 inch by 20.5 inch
pieces of batting. I'm going to be demonstrating two different
methods for basting, and you can choose which
one you prefer based on the materials that you
have and your preferences. The first method, and
this is the one that I use the most is spray basting. And I'll do this with
the stocking back. So I'll take my stocking back and one of my pieces of batting. I've gone ahead
and put some paper down to protect my surface. The adhesive spray that I use for spray basting
can be a little tacky, so it's nice to
protect your surface. So what I'm going to do
is I'm going to start by laying my piece of batting
down nice and flat. And then I'll smooth the
stocking back on top of it. If your fabric has a
right and a wrong side, you'll want the wrong
side facing down. So the wrong side of the
fabric touches the batting, and the nice or the right side of the
fabric is facing you. I'm going to smooth
this out as best I can. So I'm using this
temporary adhesive spray that I bought at my
local quilt shop. It's really easy to use,
and it works really well. I'm going to start
at one edge and just kind of pull the
fabric back halfway. Going to get my spray ready, and I'm going to hold it about a foot away
from the surface. A little bit of this
goes a long way, so you really just
need a gentle touch. So I'm just going to do
a quick little spray. Place that fabric down, and then starting in the center, I'm going to smooth
out towards the edge. All right. And then I'm going to do
the same to this side. I'm going to lift up
this edge, pull it back. And you should feel a little tug where the fabric is adhered
to the batting already. So I'll stop there and
do the same thing. Just a couple really light
sprays are all you need. I'll fold this back over and starting always from
the center towards the outer edge. I'm going
to smooth that out. So I have this
piece ready to go. I'm planning to just quilt these two pieces
of fabric together. If you're worried
about this batting, creating too much lint
in your sewing machine, you are welcome to baste another piece of fabric
over the top of this. Whatever fabric you use on
the side of the batting will be hidden inside your
stocking, so it won't be seen. So you could use
an old bed sheet or some other piece
of scrap fabric if you would like to cover this side of the
batting before you quilt it. I'm going to leave it and just know that after
this project is done, I'm going to give
my sewing machine a really thorough cleaning it will create some extra lint. I'm going to show you how I
would base this using pins. Pins are a really great option because unlike the
adhesive spray, which is consumable, which
means you'll use it, and it will eventually be used up and you have
to purchase more. Basting pins are a
one time purchase, and you can use them
over and over again. So if you are mindful of what
you use and what you waste, pins can be a
really good option. It is a little bit
more time consuming, but for a project this small, definitely not a big deal. So I'm going to
start the same way. Again, if you are
planning to put another piece of fabric on
this side of the batting, start with that piece
of fabric down first. And then you'll lay the
batting on top of that. This is the quilt sandwich, which if you've made
a quilt before, you should be familiar with. So place your batting down or place another piece
of fabric down first with the batting
on top of that. And then place your
quilt stocking or your stocking front on top of the piece of batting and smooth it out as best you can. Really, the better and flatter you can get your
fabric at this stage, the better your quilting
results will be. So these are my basting pins. I generally store them
in here open like this. The little bit of time
that's saved from not having to open each
one really adds up. So I just have to be careful
when I'm reaching in, knowing that I've got lots
of shark points in here. Basting pins are different from regular safety pins because they have, I don't
know if you can see, they have a slight curve here, which helps them enter into the fabric and
exit out really easily. So when I'm basting with pins, I start I always start in the middle and work my
way towards the outside. And that way I can smooth
out any bubbles or any places where the fabric might be a little
bit bunched up. So I'm just going to
start in the middle. And I'm not too strategic
about where I place the pins. Whoops. I've got this
paper underneath, which I don't want to
catch in the pins. And I like to place my
pins every 4 " or so. I'm actually going to remove. This paper so that I don't
catch that in my pins. So I'm just gonna place my pins, working from the center towards the outside and kind
of smoothing as I go. You don't need to be too precise about your
pin placement. The most important
is just to make sure your fabric is
nice and smooth, and that you have enough
pins to feel like your fabric isn't gonna
shift while you're quilting. All right. That looks great. The next step before
we move to quilting is to mark our quilting lines. And I'm going to start
with the stocking front since I have that here. For this piece, I actually
think I'm going to make diagonal lines that kind of
mimic the shape of the star. So to begin, I'm actually
going to start by finding a diagonal line in the star and using that to help me
mark my first line. So I've got a straight edge. You'll also need a marking tool. You could use the same
marking tool that you used when we were making our
square in a square block. For marking my quilting lines, my preferred tool is a a marker. And what this tool
does is it creates a small crease line
in the fabric. That essentially disappears once the line of stitching
is created, but it's visible enough
to use as a guide. A non serted butterknife would also work
really well for this. Just make sure it doesn't have the little
ridges that it's not serrated because the ridges
will tear up your fabric. You could also use chalk or tape or anything else that will allow you to create a temporary
marking on your fabric. So I have my ruler kind of lined up with this
diagonal line on the star. I'm gonna use my herro
marker to extend that line. Since I used pins here, there are some places where the pins interfere with the line. I just kind of skip over them, and when I'm quilting, I'll remove this pin
and continue that line. The next quilt line, I
want to be here because I also want to kind
of mimic this line. So I'm going to use
that as my spacing. Looking at my ruler, these lines are going to be one and
three quarter inches apart. So I'm going to use that
as my spacing measurement. So I'm going to line this up
along this diagonal line. I'm also kind of looking
to make sure that these two diagonal
lines are parallel. And then I'll use
my marking tool. Ooh to mark here. Now that I have those
two lines drawn, I am just going to
continue marking my lines at kind of
regular intervals. I'm using one and three
quarter inches as my mark all the way along
the whole stocking front. And Alright, so I have all the quilt lines marked on my stocking front. I'm going to move to my stocking back and do the same thing. I have my stocking front and
stocking back both pasted, and I have the quilting lines
marked and planned out. I will meet you in
the next lesson where we will quilt these
pieces together.
10. Quilting: So I'm over at my
sewing machine, and I have both of my prepared
basted stocking pieces. The first thing I'm
going to do is set up my sewing machine
for quilting. First of all, I want to make sure my stitch length is
a little bit longer than what I use for piecing
because we are sewing multiple layers of fabric together and it's
a little bit thicker. I increase my stitch length
to about 3.0, sometimes 3.5. That's kind of up to your
personal preference. So go ahead and make
sure that is set. And the next thing
I'm going to do is actually switch out
my presser foot. I still have my quarter
inch foot on here, and I am going to
switch this out for my fancy walking foot. If you have never used a walking foot before,
they're really great. It's not anything to
be intimidated by. Let me take my other
presser foot off. Generally, when you're sewing, you have these feed
dogs that lift and grab the fabric and help move
it through the machine. What a walking foot does is
it syncs with the movement of the needle to grab the fabric
not only from the bottom, but also from the top, which is really
important when you have multiple layers of
fabric moving through. You can imagine if you have two or three layers of fabric, and they're only being pulled
through on the bottom, but that fabric can begin to
shift and become misaligned. The walking foot helps
prevent this by moving both the top and
the bottom layers of fabric through evenly. So I highly recommend if you don't have a walking
foot, acquiring one. They're not very expensive, and you can get universal ones
that will fit any machine. The most important
thing when you are installing a
pressor foot is, you'll notice that there's
this little lever. That's what helps
the feed dogs on the walking foot sync up with the feed dogs
on your sewing machine. So you want to make sure that this little lever hooks onto the pin where your
needle goes up and down. Um let's see if I can move lift my sewing machine
so that you can see. There's this little bar that is connected to the mechanism that lifts and lowers your needle, the little lever from
your walking foot. Hooks should hook
right onto there. That's kind of the easiest
thing to miss when you're installing a walking foot. And if you are new to
using walking foot, I recommend maybe taking some scrap fabric and baste
it to a piece of batting, and running a couple test
stitches on it so that you can get used to the
movement and make sure the tension is correct. Now I'm going to quilt. So I'm going to start
with my stocking front. Whenever I quilt, I
always start with a line in the center rather than moving from one end to the other. I always start with the
center and work my way out. That way, again, if
there are any bubbles or any fabric that isn't
completely taut, those puckers and wrinkles will hopefully work
themselves out as we move to the end rather than become amplified as they all
move in towards the center. So I'm going to
start about here. Quilting is not a race, so it is good to go slowly. And I'm using this
line that I marked as my guide and trying to keep
my stitch right on that line. When I get to the seam, I'm going to try to
stitch in the ditch, which means I'm going to try
to keep that needle right in the space where those
two fabrics meet. All right, let me
take that out and see how that looks. That
looks really great. I'm happy with the tension. I'm gonna continue sewing on all of my quilt
lines this way, working from the
center to the outside. Once I do all the diagonal
lines in one direction, I'll flip my stocking
and do the same thing, starting in the center, working my way towards the end. If you did opt for pin basting, if there's a pin that's kind
of between two quilt lines, I'll leave it and take
it out when I'm done. If there is a pin that intersects
where a quilt line is, I'll just kind of
take it out as I go. I'm going to quilt both
my stocking front and my stocking back, and
you can do the same. And I will meet you when I'm done to see the final results. Alright, so I'm back
at my cutting table. I have my stocking front and
my stocking back quilted. Probably a little
hard to see the line. Since the thread kind of
blends in with the stocking, I love kind of that subtle
look where the quilting gives some texture to it without taking
away from the design. I will meet you in the next
lesson where we will use our templates to cut the stalking shape
out of these pieces.
11. Cutting Out the Stocking Pieces: Alright, if you've been
following along with me, you should have your
stocking front and stocking back quilted
and ready to go. We are going to work on
using our template to cut out the stalking shape
from both of these pieces, as well as from our lining. And I'm actually
going to begin with my lining fabric because I
have that here underneath. In the quilt pattern, it tells you to cut out a
couple of rectangles from the lining fabric that are
the same measurements as the quilt backing
14.5 " by 20.5 ". I'm actually going to skip that. It's not entirely necessary. That size requirement
is just to make sure that your template will fit on the piece of
fabric that you have. I'm actually just going to
keep my yardage as it is. I have a piece that
is quite a bit larger than the template, and so I'm just going
to leave it as it is. And I'm actually keeping
my fabric folded in half so that I can cut
two pieces out at once. You only two pieces cut out from the template
using the lining fabric. Now, if you are using
a printed fabric, this is solid, so the right
and wrong sides are the same. But if you are using
a printed fabric that has an obvious right
or wrong side, you'll need to make sure that
the pieces are mirrored. If you fold your fabric in
half and cut them at once, you'll end up with
two mirrored pieces. If you're using a lining fabric that doesn't have a
right or wrong side, you don't need to worry
about that at this point. So I'm going to place
my stocking template right on my fabric, getting it as close
to the edge as I can. I'm going to give myself
a little bit of space. And I'm going to hold this
down if you like to use pattern weights or something to hold that template
in place you can. These are my basting pins that
I happened to have handy. And there's a couple
of ways you can cut this out depending on
your personal preference. You can use a marking tool
and trace along the edge of the template and then use a fabric scissors to cut it out. Or with the template here, if you feel comfortable moving around the shape
with a rotary cutter, you can just take a
rotary cutter and trace along the shape of
the stocking with that. And that's exactly
what I'm going to do. I'm going to
start at the top. And I want to try not
to trim into the paper because I'm going to need to use this template
to cut out my other pieces. So I'm gonna very slowly and carefully trace around the
shape with my rotary cutter. Really helps to have a
nice sharp blade for this. And you might need to move
around the table. There we go. And there I have my two stocking
pieces from the lining. As a note, I didn't
mention this earlier, but the stocking template
includes the seam allowance. So you can go ahead and cut
this template out as is and trust that the math has already been factored
in to the template. I'm going to set those aside, and I'm going to grab
my stocking front. And I'm going to do
this one first because I know which way
this needs to go. Because this edge kind of
sticks out a little bit more, I know that this makes room
for the toe of the stocking. And the other thing
I need to keep in mind when I'm cutting
out is I want this design to be centered
at the top of the stocking. So in order to do that,
I'm going to use my ruler. And I'm going to measure
about an inch and a half from the edge of my quilt block
to the edge of the stocking. Now, you can see this side is at a little bit of an angle. These two edges aren't
perfectly parallel, so it's not going to be a
perfect inch and a half. As long as you get close, your design will
appear centered. The stlking is going to
be three dimensional. So if it's off by a quarter inch or so, not that big of a deal. So I'm going to line my
ruler up with the top of the ribbon star block. And then I'm going to
move the stalking so that this top edge of the template meets at
an inch and a half. I am actually going to use these to kind of
hold that in place. Now I'm going to look
from side to side, and I want to make sure
the side edge measures about an inch and a half out
to the edge of the template. Place my ruler there,
and that's pretty close. I'm gonna check this side. I have a little less space on this side than on this side, so my design is a
little bit off center. I'm going to shift my
template that way. Let's see. That gets me about an
inch and a half there. And I think I overcompensated
just a little bit. So I'm gonna move
it over slightly. That looks pretty good. If you are uncertain about
the placement of the design, I would highly recommend
using some kind of temporary marking tool, such as chalk or disappearing ink to trace around
the design so that you can check and see that
you like the placement of the quilt block before you cut. Oh, yeah, that looks perfect. For the stocking back, we need to make sure that this
is a mirror image of this. Since I used the template face up to cut out
my stocking front, I need to flip this this way to cut out
the stocking back. So for this one, I'll
just place it somewhere in the middle and cut. Ala. So you now have your
four stocking pieces, two of the outer fabric, and two lining pieces. In the next lesson, we will begin to put these pieces together to
assemble our stocking.
12. Assembling the Stocking: Alright. In the previous lesson, we cut out our lining pieces and our stocking front
and back pieces. So let's begin with
the exterior pieces. We are going to sew
these together. And so I'm going to flip
these right sides together. I'm going to match up the edges, and I'm going to pin
all along this edge. The top we're going
to leave open. You can use straight
pins, if you like. Because we're going
through multiple layers, I'm going to opt for
my my binding clips, my clips all along here. And then I'm going to bring this over to my sewing machine. Alright, so I'm over
at my sewing machine, and I still have my walking
foot on my sewing machine. I'm actually going
to leave that on for this step because I am sewing
multiple layers together. One thing I am going
to change, though, from my quilting
settings is right now my stitch length is 3.0. I'm going to shorten that
just slightly to 2.5. All right. So I have my
exterior stocking pieces here pinned right
sides together. I'm going to start at
the top on one edge. And I'm looking for a
half inch seam allowance. And if you're unsure of
exactly what that looks like, I recommend grabbing your ruler. And measuring from
the center where your needle is to the
edge, a half inch. I have this line right here on my sewing machine that lines up right with where
that half inch mark is. So I can use that as a guide. And for this step, I do recommend backstitching. A back stitch is just a
couple stitches forward, a couple of stitches back
before you begin your seam. And that just helps lock in the stitches so that
they won't come apart. So I'm going to do a couple
of stitches forward, a couple of stitches back. And then sew when you
get to the curves, just slow down trying to maintain that half
inch seam allowance as you go around the curve. All right. And when
you get to the end, you can finish with
another backstitch. So a couple stitches forward, a couple of stitches backward, and a couple stitches
forward again. All right. That side's
done. All right. So we're going to
do the same thing with our lining pieces, placing them right
sides together. And so we're going to pin
these together just as we did with our exterior pieces. The only difference this
time is we're going to leave a six inch gap here kind of where the
sole of the foot would be. And so I'm actually going to
use my marking pen just to make a little mark
there. And there. You don't need to measure 6 ", but leave yourself a
nice, generous space. We're actually going
to be using this space to turn our stocking
right side out. Now I'm going to pin all around. And since I just have
these two layers, I am actually just going
to use my straight pins. I have my lining pieces
pinned together, and I'm going to bring this
over to the sewing machine. All right. So I'm back at my sewing machine with my lining pieces I've
pinned together. And I'm going to sew this
exactly the same way I did my exterior pieces using a half inch seam allowance and backstitching at the
beginning and the end. The only difference is I need to keep in mind that I'm going to leave this gap open
at the sole of the foot. So when I get to this point that I marked, I'm
going to stop. I'm going to back stitch
and then cut my thread, and then I'm going to start again where I made
this other mark. Make a backstitch, and then finish around the
rest of the stocking. All right. So here I have
my lining and my exterior. Before I move on, the first
thing I'm going to do is snip wherever I
see a tight curve, whether it's a
concave curve like this one or a convex
curve like the toe. I'm just going to take
my scissors and very carefully Snip within
the seam allowance. You want to be really careful not to snip the
line of stitching, or you will end up with a hole. And this is just
going to help it'll help reduce the bulk
because the fabric will have a little
bit of space to either kind of settle in with
each other or spread out. As you can kind of
see I just made some little snips right
there in that tighter curve. I'm going to come around and do the same kind of
all around the toe. So I have those snipped, and I'm going to do the same
thing to the lining pieces. Snipping in the seam allowance right around those
tighter curves. Alright. This is the fun part. Going to flip the
exterior part of our stocking right side out. So we're gonna just reach in. And I like to stick
my hand inside and really get into all of the little crevices
to kind of push out the heel and the toe. All right. Now what we're gonna do is we are
going to place our lining and our exterior
right sides together. So to do that, right
now, on my exterior, the right side is facing out, and on my lining, the right side is
inside the lining. So what we're going to do is
insert the exterior part of the stocking into the
lining, just like this. It helps if you can kind
of get your hand in there. This is one of the
reasons we back stitched so that if there is any pulling or tugging
at these edges, hopefully those stitches are locked in place and
won't come undone. And so I have my exterior
inside of the lining. I'm now going to match
the raw edge at the top. Before we pin these, the last thing you'll
need is your ribbon. This is a 5.5 inch
piece of ribbon. I actually using a
piece of the salvage. I thought that would be kind
of a fun little accent, but use whatever ribbon you
have on hand or can find. I'm going to fold
the ribbon in half, and I'm going to pin it to the
heel side of the stocking. And so I'm going to kind of
pull this out a little bit. So this is the toe, right? This is the heel. And so I'm going to come
up the heel side, and I'm going to pin the ribbon to the exterior piece kind
of right on the seam line. I'm going to use a binding clip just because that's
what I have handy. And this ribbon is going to
go in between the two layers. So it's going to go inside. And now I'm going to
pin the seam from the lining right over the
ribbon that I just attached. Right at this seam, you
actually have three layers. You have the exterior piece, the ribbon, and then the
lining piece on the outside. Next, I'm going to come
over to the other seam, and I'm going to line these up. Again, these don't need
to be lined up perfectly. It won't be that obvious
and pin or clip. And then I'm just going to clip along the rest of this raw edge, just to be sure all of these pieces of
fabric stay in place. Now, I'm going to take
this to my sewing machine, and I'm going to sew the lining and the exterior
pieces together at the top. Okay, so I'm back at my sewing
machine with my stocking. This is kind of a tight space. It's a little tricky
to sew together. Um, one thing you can do
if your sewing machine has kind of this little storage compartment
that can be removed. That can be helpful
'cause now I can put this right
through like that. If your sewing machine doesn't
have something like that, I recommend sewing it with
the lining facing down. So I would go
insert it like this and sew from the inside where the batting is,
if that makes sense. I'm gonna sew it like this.
It's a little bit easier. And we're again going to use a half inch seam allowance and backstitch at the
beginning and the end. When you get to the place
where your ribbon is, just make extra certain that the ribbon is down
and kind of out of the way so that the loop of your ribbon doesn't get
sewn into the seam. And once I get back to
the place where I began, I'll come to meet the
starting point backstitch. I will meet you in the next
lesson where we will do the grand reveal and
finish our stocking.
13. Finishing the Stocking: All right. In the last lesson, we sewed our lining and
exterior pieces together, and then we sewed those to each other along the
top of our stocking. Let's open this up
and see how it looks. If you remember, we left
this gap in the lining, and I said, we'll be using this to turn our whole
stocking right side out. So through this hole,
we're going to grab the exterior piece and pull. And as you do that, you can flip your lining piece so that
it is also right side out. You can check your loop. Your ribbon should be attached
there right at the seam. I'm going to kind of
stick my hand into the lining so that I can get
my fingers into the toe. And so this is what it
should look like now. Before we stuff the
lining into the stocking, we want to close up this seam. So I'm actually
going to bring this over to my pressing mat. All right. I have
my stocking over at the pressing mat and right
now I'm focusing on this gap. The first thing
I'm going to do is press these raw edges of the gap in to create a half
inch seam allowance. Then once you have those
folded inwards and lined up, go ahead and give it a
good press with your iron. Even take a couple pins
to hold those together, and then we're going
to bring this to the sewing machine and just stitch really close to the
edge to close up that gap. If you prefer a cleaner look, you're welcome to
take some thread and hand stitch this together. Since this is on the inside of the stocking and won't be seen, I'm usually okay having a little seam on the outside
of the bottom of the lining. Alright, so I brought this
over to my sewing machine, and I am just going to put
this under my presser foot, and I'm just sewing a line of stitching kind of as close to the edge of
that fold as I can. I want to make sure
that I'm catching all of the layers in the stitch and that I backstitch at the
beginning and at the end. For this, I'm just using my
2.5 stitch length, the same stitch
length that I used to sew the rest of the
stocking together. We'll backstitch at the end. I should look
something like that. So I'm back up my pressing mat, and we're ready to finish. So I'm going to kind of
open up my stocking and stuff the lining down
into the exterior. And again, kind of
getting your fingers in there to really push out the toe and it's going to feel a little bunched up in there, but it's okay. Nobody's going to see in there. And it'll provide a
little cushion for whatever treats you
stuff these with. And the last thing that we need to do to give this a nice, clean finish is
reinforce this seam line so that the lining doesn't shift and kind of pop out
and become visible. So I'm kind of folding
over the exterior, so it comes over the lip
and that the seam where it meets the lining is
inside of the stocking, it's about a quarter inch. And that way, the lining
won't be visible. From the outside
of the stocking. Once you have that where you
like it, kind of fold it in. Take your iron and press and kind of open it up and press from the
inside all the way around. You're welcome to place
some clips around the edge. The final stitch that
we're going to make is a top stitch all the way
along this outer edge. And that's going to hold the
lining in place and prevent it from shifting and coming
out of the stocking. So I'm at my sewing machine. And because I still have my little storage
compartment off, I'm going to use this kind of narrower part of
my sewing machine to place my stocking in. Again, if you don't have a
sewing machine that allows you to kind of make a
little narrower base here, you're welcome to put this underneath and sew from the lining side all
the way around. But because I have this
space, I'm going to use it. I'm actually going to start
from the back of my stocking, and we're going to be sewing a half inch from the top edge. So I'm going to put
my presser foot down. I have my sewing machine
set to a 2.5 stitch length. You're welcome to lengthen
that a little bit to 3.0 since we are going
through multiple layers. If your sewing machine
is having a hard time, increase your stitch
length a little bit. I'm going to start
with a couple stitches forward and a backstitch. And then I'm going to sew
around this whole top edge. Make sure your ribbon
stays out of the way. You don't want to sew that
down onto your stocking. And your stocking is complete.
14. Final Thoughts: You've done it. If you've been following along
with this class, by now, you should have
a beautiful stocking to use this holiday season. And I hope you have
the confidence to continue making many more. I'd love to see the beautiful
stockings you create. If you haven't already,
be sure to take a photo of your finished
stocking and upload it to the resources section so
that we can celebrate the beautiful creative work
of everyone in the community. If you loved this class, I would really appreciate it
if you would leave a review. Reviews will help
others find this class, and your valuable
feedback will help me continue to create quality
courses in the future. If you're interested in learning more advanced
quilting techniques, be sure to check out some of my other course
offerings on Skillshare. You can also follow
me to ensure you don't miss any new
classes that I make. And if there's any classes
that you're really curious about and want
me to create, reach out. I love to know. Thank
you so much for letting me be part of your quilting
journey. Bye for now.
 Juli Rae Vignola, Quilt artist, natural fabric dyer