Transcripts
1. Handstand intro: Welcome to handstand class. The goal of this class is to teach a hand scenes using nothing more than a bed and a wall. My name didn't like ask I haven't I've been traveling in Acrobat for about a decade now. It's one of my favorite ways to express yourself. I just like using the body as an art form. Now, perhaps that's why you want to take this class or perhaps use one more pose options for your social media. Either way, it's fine. Welcome. I like learning handsets is one of the basics because it teaches you body alignment or just trying to find a line in general, which is, I found a lot harder to find than you think. Just because our bodies in daily life just doesn't move in that way are required at any point in time. So some of the prerequisites that you're going to need for this class, however, is I'm going to assume there's a certain degree of strength you already have. So I teaching this with the assumption in mind that you can hold a plank for a good amount of time or at least sustain all, if not most, your body weight without collapsing on yourself. So that's what we don't want any sort of collapsing if you don't have that strength, I would recommend just more conditioning before going to certain points. But otherwise, if you have that stick around and as long as you also have a bed and a wall, we should be fine. So we're gonna be learning. It says in the privacy of your own room.
2. Warming up: First we're going to start with a little warm-up and were sort with their hands since we're gonna be on our risks a lot. So we're going to go back and forth, swarm whenever real quick. And then after about a minute of this, I want you to go ahead and do some circles back and forth. And we're gonna go out, out, out, out. And then what we're gonna do is we're gonna get on our hands like so. I just want you to push, push, push, push, push, push. And then gone the top portions of the hands go sideways for you guys here, know, sideways then turn around. And we're just going to alternate. Yep. And the next portion as well, we're here on all fours. Roberta, go ahead and go into this a lot people call it was it the cat, cow? I've always just call it Happy Cat, scary cat. So you can go into scary cat position and then go into your happy cat position. Scared cat, happy cat. We're going to want to remember the scary kept position in particular, what's happening to the body here you want that hollow back right here. This position is something you want to record in your brain. Know what, Remember what this feels like. And happy cat, get happy kit. Good. And I were to go ahead and do the sides. It's like a sad cause, just going back and forth. And it let's go ahead and combine those together. We're gonna crest of a site, then blend it into a scary cat, and then go back to the side and then into a happy cat all the way around. And let's go the other way. Wonderful. What we finished, we're going to go into a slight straddle, the pike. And I'm where I want you to do is we're going to loosen up the blue area over here. You can bend this leg and then shift your weight over. And as you get in, re-start straightening this leg and shift the way over to the other side and do the same thing. Should feel like a bit of a stretch on the outer glutes. You'll know if you're doing it right, if your hands and that going in this figure eight type motion sort of on their own if you just sort of relax them. Bend your knees or wellness possession after going straight up two towels, straight now, hills down, families up to toes, straight minis, down hills. And the nice towns means heels, means toes, knees, hills, knees, toes, knees, heels. Needs toes, knees, hills. Nice terms. Here we go. Right there. Okay, cool. Next we're going to learn body positioning map. So we're gonna go into that.
3. Find your line : Okay, so before we get started, I thought I'd go into body positioning. And we're going to lay down and we're going to find the pen stand position on the ground first before we even have to take it out. So to start off, we're going to lay down and we're going to reach above our heads like so. When we reach above our heads, just sort of casually and non Chuang, I can relax emotion. Record what your body's doing. First thing I've noticed right off the bat and it's most common is the chest flares up. And then that means your lower back is going to arch just like that. So we've gotta get rid of this arch here first. In order to get rid of that arch, we're gonna do the scarcity kept position. We just did. So as I'm reaching up and looking up, I want to put my chest in obscurity, cap position. If I locked my knees, my legs are gonna come up just like that. Now, this isn't exactly the handstand position we're looking for. But we did get we did get rid of that arch in the back. Now, in order to get rid of to get the legs down, I can't just arch back with the legs down. So to keep that arts from happening again, I need a squeeze my butt and that brings my legs down. And as I looked up, you'll notice my body's now fallen in line. And that's what we're going to ultimately be looking for in our handstand. Notice, I'm kinda shaking in my voice because this isn't a comfortable position. Pedal. But try to keep this as hollows possible, legs down as much as possible using the, it's a contradiction. The contradiction of the motions with the scary cat and the squeezed but causes this to line up. Yeah, sweet peas. If you're doing this, corrected should feel miserable. And notice not just what you do see when you're looking up, but notice what you don't see in this case. I don't really see my hands. In this position. We should be able to just if someone came by, took me in a straight board and I held on in that position and that your book, they put me in a handset and I should be able to, for the most part hold it. So we're gonna take this position and we want to apply it to the side of the bed.
4. Safe mistakes : So we're going to have a fed and we're going to have our walk before we can get started on just learning how to get the handstand working. We need to learn how we are going to fail first in the safest manner. So first we're going to get half of her body on the bed. Once half the body's own the bed. You're gonna put your hands down probably in the middle of the aisle and you're going start lifting your leg and or no, not start with, they're then going to start doing that scat arcs, the scary cat position. And we're gonna go hollow. And as we're going along, we're going to bring our torso are but over our shoulders, so we almost want 90 degrees as close as possible. Now we're not going to go for a handsome in this case, what I want you to do is feel the wall behind you. Just have this pressure here. If he tried to enhance any fall, it's just the wall behind you and then come back, push right back. So we're just going to come up, feel it, and come back. We're just practicing what happens in the event we fail. And we want to do to save as possible. And back just like that. So we just want, these are two planes and positions we want to come to. So get use to this sort of transfer. And beck Yep.
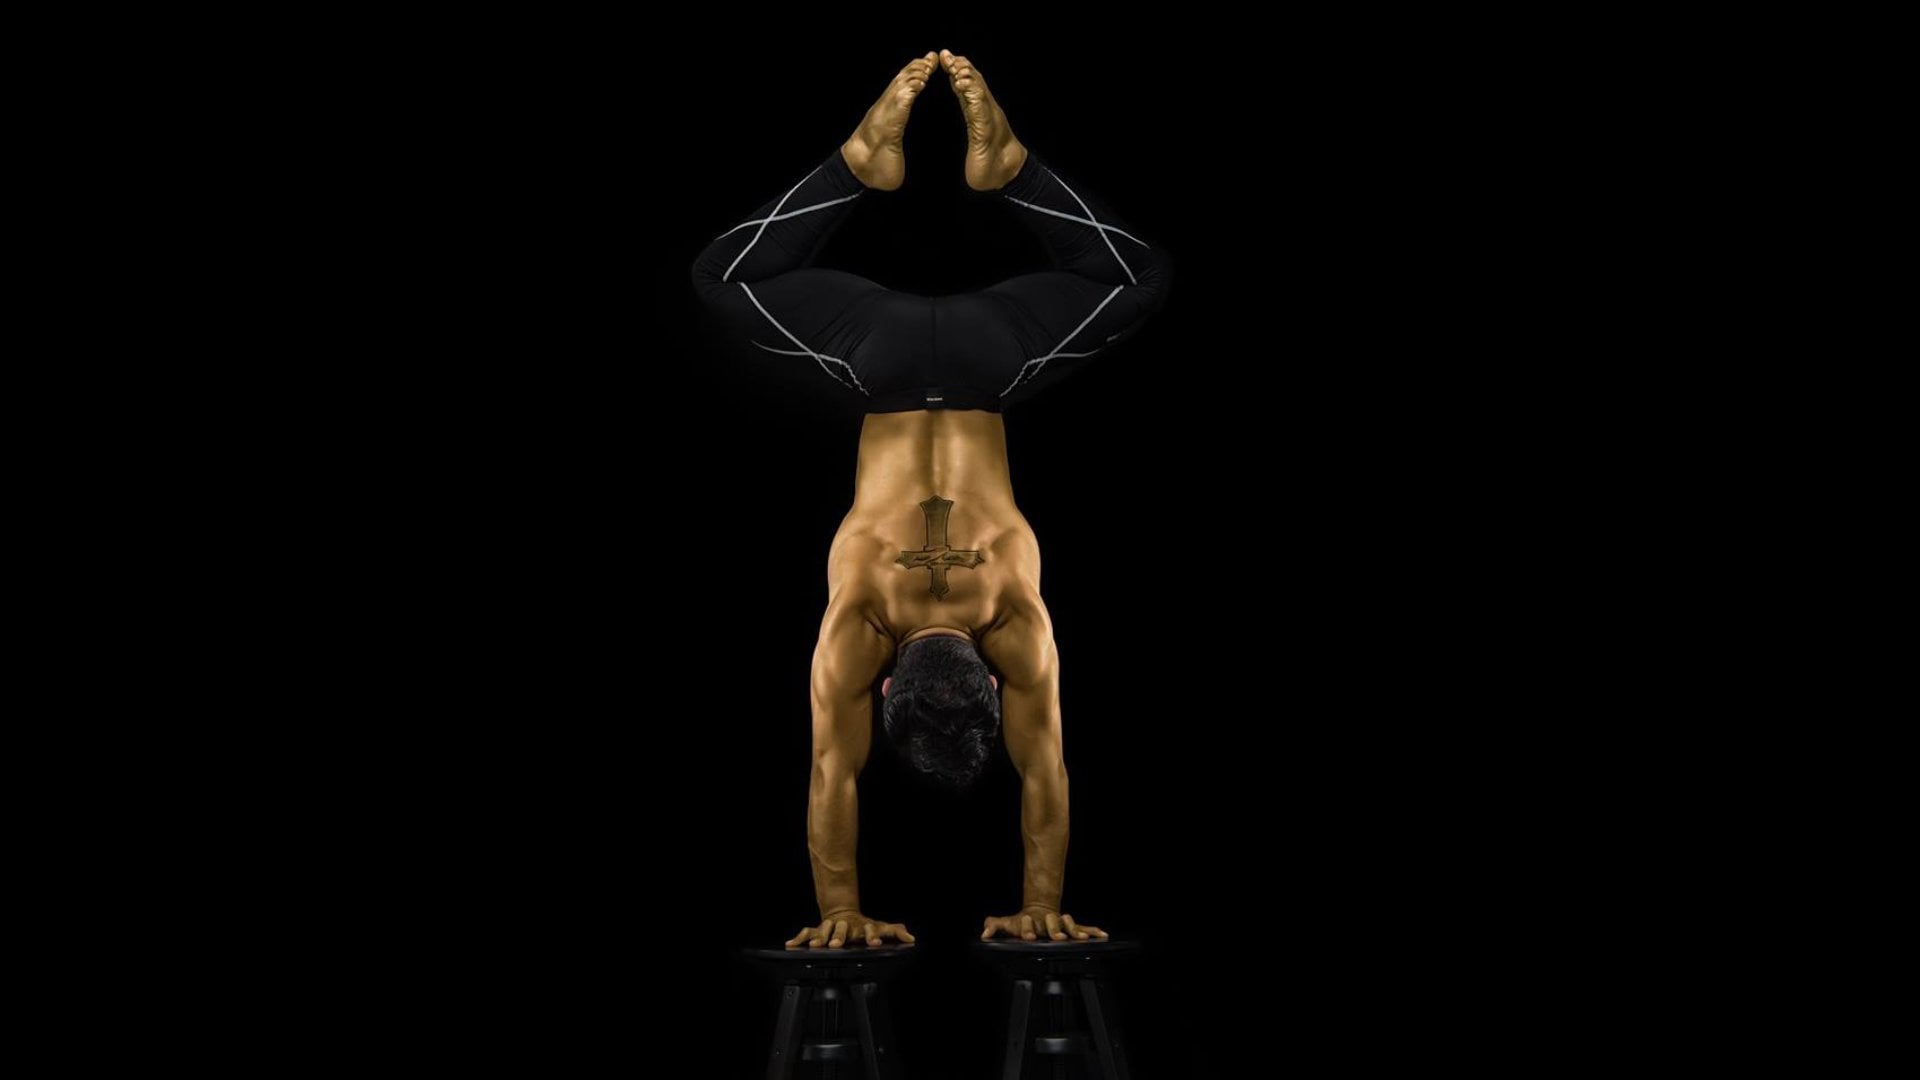
5. Handstand time : So we're gonna go for the handstand now Yao Su, back on. Here we go. So the goal here is we're going to want to line up the receipts to the shoulders and then the shoulders to the hips yet so really get on the same way, has a V8 together or at home, not to get it but inlined. And we're going to bring our council up in obscurity cat position. And you want your hips to come over your shoulders as close as possible. And we're going to start squeezing the bot to bring one leg up. The other's gonna slowly line yourself up. So you have the singh I line and what you see is the same as before. Now you can see how my hips are already falling back that we got and squeeze. And then we're going to reach Region. The trick here is going through the shoulders. That's what's gonna help a lot. Yeah. Now notice what's very tempting is when we come up, are lower back wants to arch and that sends us backwards. That's really scared. He kept position comes in and then you want to squeeze your butt. It's hard to. Now, I recommend recording yourself from the side to see where your shoulders and hips line up. This way you can spot if you're arching your back too much or need to go through your shoulders more. Adjust these slowly as quick movements create unbound. As you work through this phase, share your snapshots here to showcase your alignment progress. I want not only for your progress to be seen in shown, but also I wanted to I wanted to help showcase your knowledge and what you need to fix. So this way it's not just me teaching you how to do Hansen, but it's you also learning how to teach yourself how to do a handstand.
6. Hand attention : Now what you can see something I'm gonna do a Hansen here with my hands. And even though we've learned how to do the body position itself and like really reach up with her toes and all that. There's still a section with the hands that you need to get down. Because once you hold the position, just having it isn't enough, you know, it looks something a little bit like you'll get it and then you'll fall. Now, we need to look at the hand. So what's going to happen with the hands? You've got to imagine like there's an imaginary sort of little like balance ball that kind of goes back and forth. See you soon get closer here. And when you're in your Hanson, you're gonna feel your body shipped a little forward and and you want to use your fingers to push it back just little bit, not too much. You not trying to get yourself to fall or anything. But if I go in, you're going to see how my hands and see how they're using to be pushed a little forward and then come back for him back. And you can feel your weight shift in your fingertips. And you need to play with that little balance. But you can see how my fingers were working. I got these like spider fingers too. And so that little balanced boggling back and forth. You don't want to go too far over your fingertips. Otherwise you fall over yourself. And you don't want to fall too far back either, otherwise, you're going to bring your feet to the ground. So you ultimately want that little ball to bounce back and forth along, like I imagine a little band here. And it's along the along the knuckle line in a way. It's like this part about this wide. And he's kinda want it bouncing right in there.
7. Stomach to wall: Okay, so the next bit. Now we've done all the parts and you know how to generally fine tune your handstand. We're going to move on to switching sides. So what we're gonna do, rather than having a back to the law, would have switches our stomach is to the wall. And this way, all it'll happen to be your feet are flexed and you put them, you should be able to keep your line. You can do like this sort of half cut wood, but I like to put my hands I've got first and in walked myself here. And when you hear you're gonna do your lineup just like before. And notice my feet are flexed, our body squeeze and then flex Earth's point. Let me go ahead and there'll be some fine tuning. But you've got the safety of a wall here. And stretched restaurants. Restaurants. Good. He can fall forward. Can you fall back because you've got the bed here. 2v.
8. Kick up: So here I'm demonstrating a lunge approach into the handstand. I'm going to reach as far forward as I can't even keep reaching for it. I'm going to check on this next section right here, and bam, hit the wall to see where my limits are. And then finally, just like before, we're essentially just taking away the bed and that's it and adding the lunch. So remember, it's a deep link like a far lunch and then far reach and unstressed stressed stretch just like we've been doing the entire time. And you should be able to manage a Hansen here. And the more you get used to this, the more you can use the wall less. But you have it there just for a backup. And then when we come out, you're going to push everything for to the fee coming down just like that.
9. Take away: That's a sense. At this point, you should be able to start having, at the very least, these nice little floaty moments. It's just working on the adjustments with your hands and the adjustments between the shoulders and the hips. Keeping that hollow body position is going to help while you squeeze your butt and stretch. I don't think I stressed the stretch too much but even if you are just standing up normally, like on your feet and you just sort of slouch and go to your tip toes, you're going to lose your balance a bit. But if you stretch up using your torso and your fingers, you're going to find it a lot easier to stand on your tiptoes. So the same thing. It's going to be with the hand. So I'd say that's a huge takeaway that I didn't get the stress, but I'll stress now. But please, please share your progress, share your successes down below posterior handstand moments because as these lines get better and better, you'll see your alignment between your shoulders and your hips. Yeah. Good luck you guys. I I hope to see you lots of cool posts from you. And now when you start getting better and better at it, I feel like I should make another course. I want to make like another course regarding like hints, like different, like off-kilter hand stands and crocs and baling. Because when you get to get into bailing too much, but this is almost a fine line. So if you're interested in that, feel free to let me know. But in the meantime, I look forward to seeing your hands dance. Thanks for coming and joining this classy guys.
 Enrique Escajeda