Transcripts
1. Introduction: Hello, everyone. My name
is Jessica and I love watercolor and I love sketchbooks and I
love art journaling. Therefore, I really
love handmade books. The art of making books is an ancient one and it's
a wonderful pastime, wonderful creative endeavor
to turn nothing basically, into a substantial something. Everybody loves books and
everybody loves handmade books. But a lot of people
back off from the idea of making
them because some of the binding stitches
formulas and so on are a little
intimidating if you're not a lover of math and precision. In this class, we're going to learn how to create
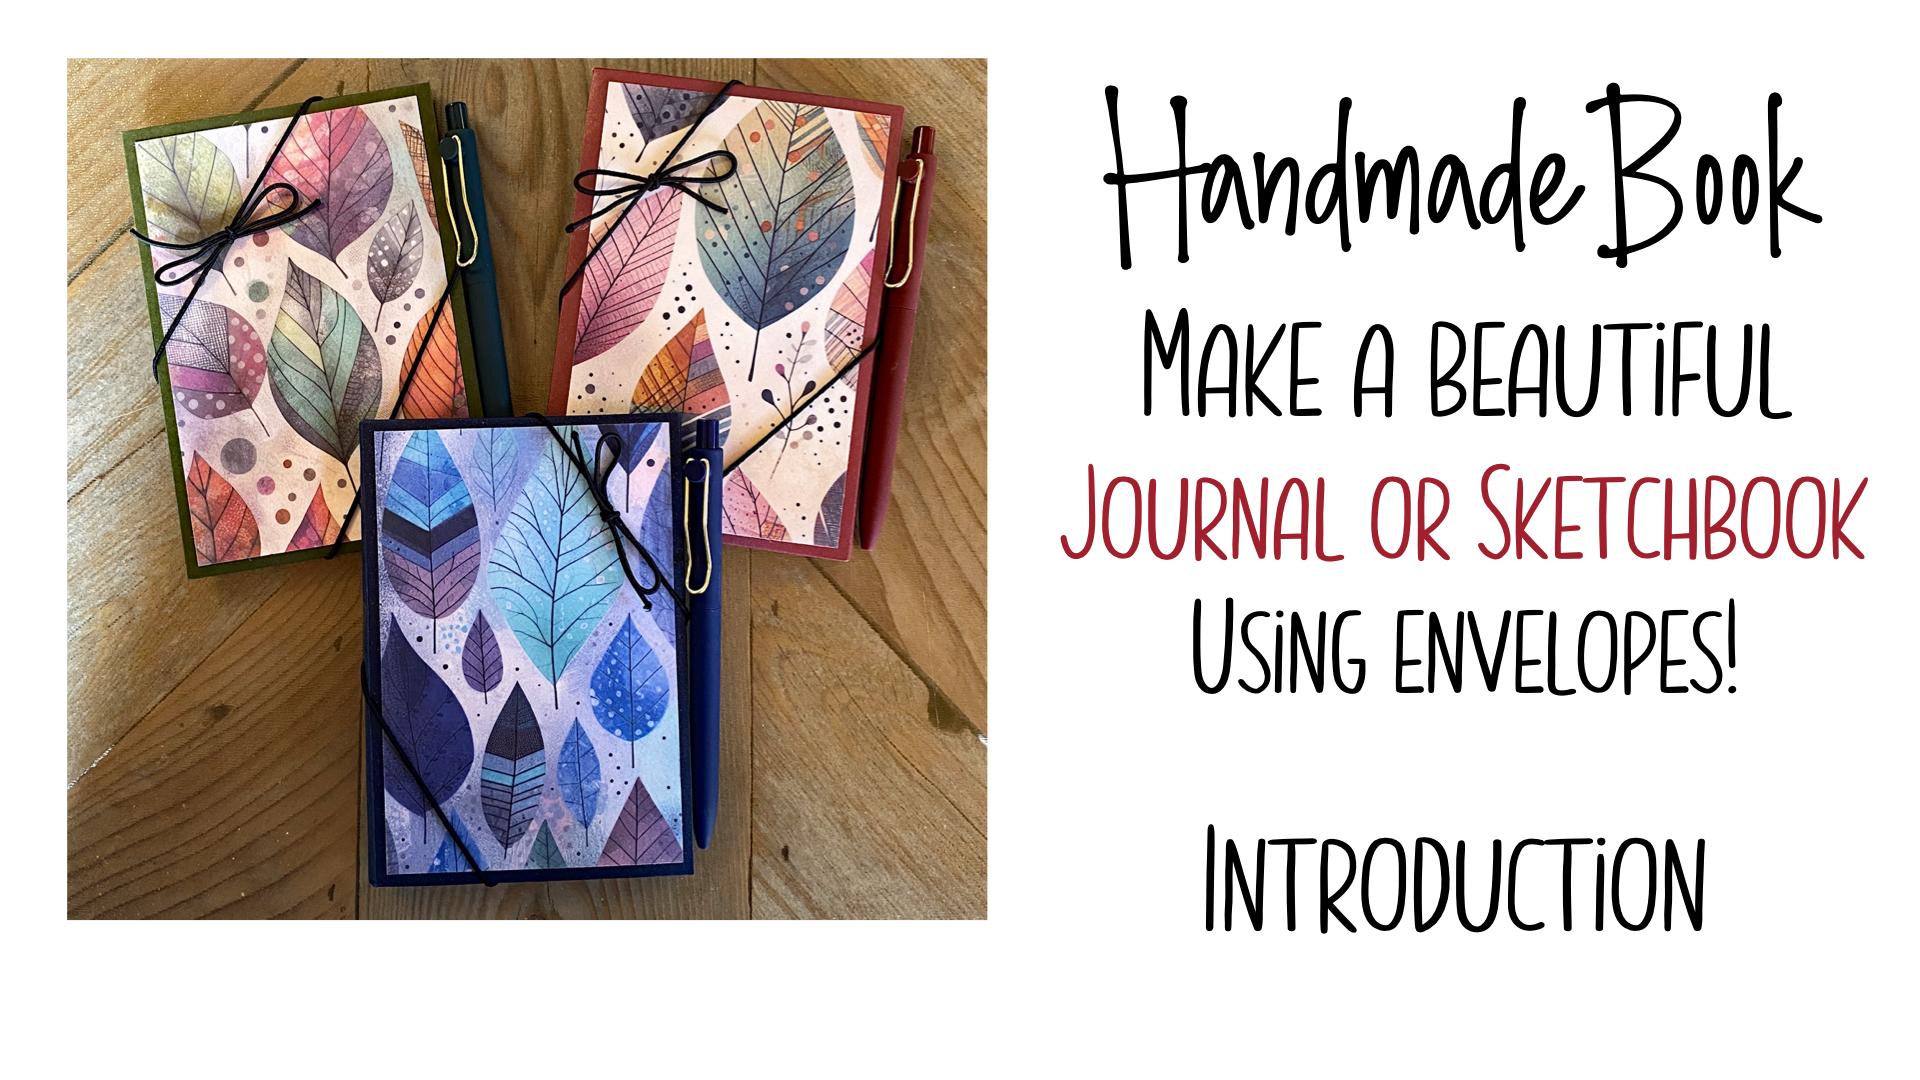
beautiful books like these. Our book is going to be based on a common everyday
thing, envelopes. It's going to take
seven envelopes and we are going to put them together in a structure on which we can base pages
of any kind that we want. Let's take a look at
a couple of varieties of these so that you get the idea of what we
might be able to do. I have a little
elastic around it. It will stay shut by itself, but I have an elastic around it with the gift idea in mind. This particular
one is a journal, and it has pages that
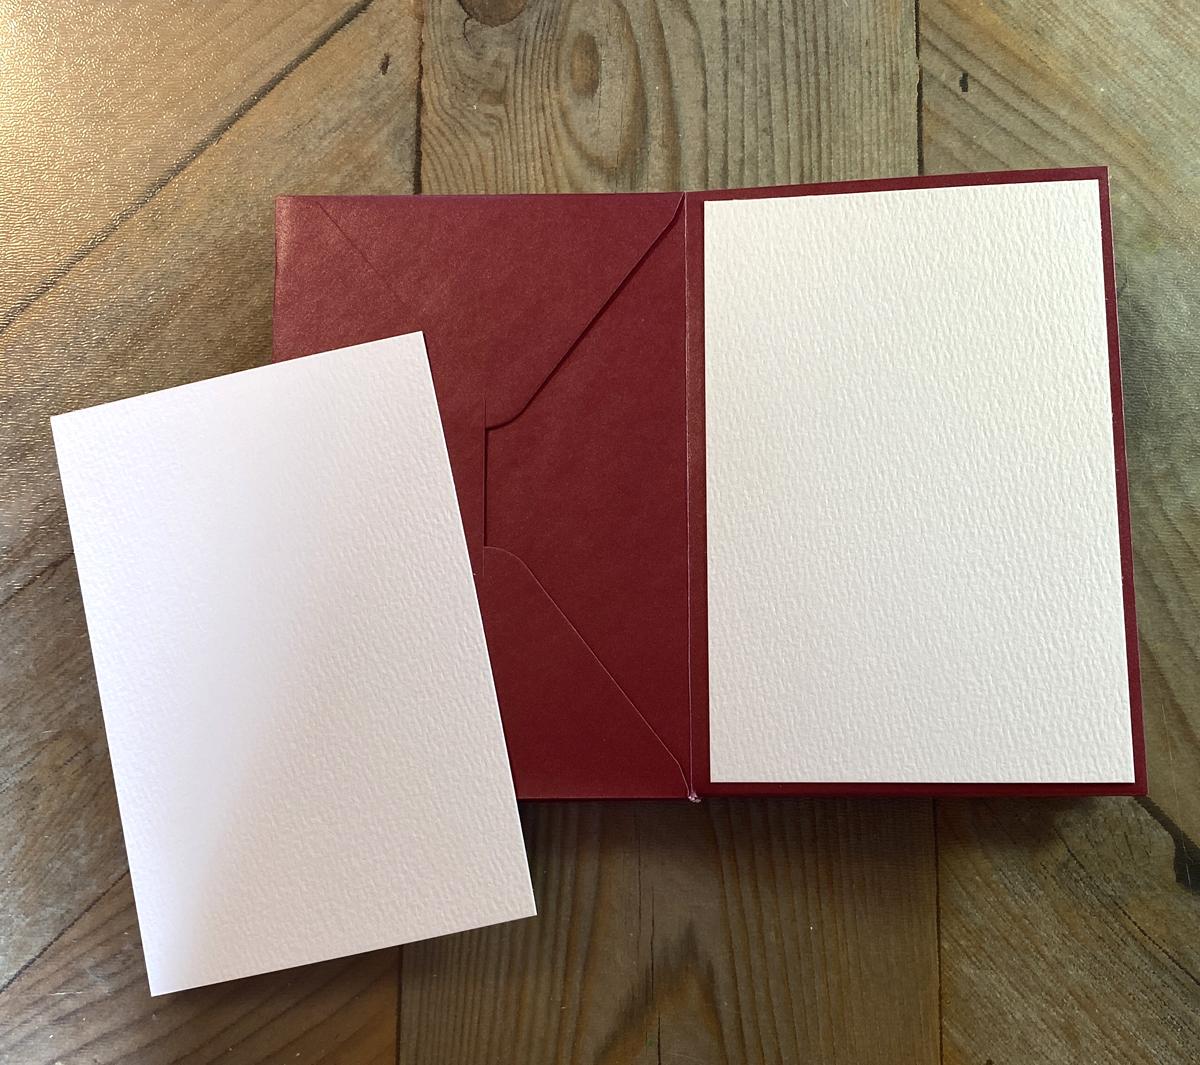
are lined to write with, and it has six pages like that, and it has another six
pages that are tucked away in this pocket and they can be taken out and
written on both sides. It's basically a
12 page journal. But the lovely part is that every spread has a place to put extra photos and tickets and ephem of any
kind that you like. The journal is one possibility this other one is a
watercolor sketchbook. Now, it can be any kind of sketchbook depending on the
paper that you put in it. But what we used was 140 pound watercolor paper and
did the same thing, it has 12 pieces of
watercolor paper, and the one that is kept in the pocket can be
painted on both sides. Really there are 18
painting possibilities. You get the idea of what
the end book will be like, but you'll be shocked at
how easy it is to make. Classes for everybody. You don't need any skills
at all to make these books. But if you have skills, you can still be really
excited about not having to work too hard to
make a very beautiful result. I hope you will join me in making these together
and sharing them with each other in the project
section and giving them to our friends and
bringing smiles to faces.
2. Supplies: Our supply list isn't very
much of a list at all. The first basic
thing we're going to need is seven envelopes. Now, the size does not matter. They can be larger This is a larger a seven
size envelope here. In a cream colored, they can be a smaller size or many sizes of
envelopes available. Chose the A four size
because they're available on Amazon and a very nice
quality in a host of colors. But any envelope
with the V flap, this is not going to work as well with what's called
an announcement envelope. That's the one that has the rectangular flap
that goes like this. It just doesn't do it. Doesn't leave us
the pocket we want, makes it harder to
work with, and so on. These are very, very common
but make sure that you have a V flap on the
envelopes you choose. We're going to need
a bone folder. This happens to be a Teflon, which I love because it
never snags on anything, but they're often plastic and
they're often made of bone. And if you don't
have a bone folder, anything that will serve
as a burnisher to flatten creases and to stick things
to things will work. Back of a spoon will even work, but sometimes it will
make marks on your paper. If you have a bone folder or
you can get ahold of one, they're very
inexpensive on Amazon, or if you have any
other burnisher around, that's
going to work fine. We need a couple of
kinds of adhesive. One is going to work
on the flap and I use a rolling double stick
tape you can use a manual one. You could honestly use the stickum that's on
the envelope already. I don't do that for
a lot of reasons. I don't want to lick
things, but also, you can use little sponge
deal just barely damp. Instead of that, but I
don't like introducing the moisture to the procedure because you're
always playing with a little too much
moisture making you a problem with warping and I just didn't want
to deal with that. I use a double stick adhesive
and I get them on Amazon. I use them for a lot of things, and I'm not advertising
Amazon here. I'm just letting you know that these things are
readily available. The other thing is a roll of
double stick tape and these come they have a paper protector and you cut the piece you want, put it on the paper
and burnish it, and then you can
remove this protector and you have a very
strong adhesive. We use this to attach
the pages that we choose to the
inside of our book. The pages that we choose
are going to be up to you and up to the book
that you're making. So as I showed you
in the introduction, one of these books is a watercolor sketchbook
and one of them is a journal that
difference only happened because of what I chose to
use for my internal pages. And so that's going
to be up to you too. It can be any paper
that you can write on. I would suggest a
little heavier paper like a cover stock or an index weight paper just because it gives more
strength to the book. Flimsier paper is going to
be a little flimsier book. That wraps it up on
the supply list and let's go ahead and start
making our book structure.
3. Building the Structure: I building our structure is very simple,
but it's exacting. At this point, you're
going to establish your edges being straight and being together
as much as possible. This is a handmade
book and so it isn't going to be perfection
that a machine could do. But the first thing that I do
is I take my entire pile of seven envelopes and I
run my bone folder over all of the sides like this with some pressure
because the idea is I want to enhance
where these folds are, flatten them a little bit. It's just a little
starting precaution. There's sometimes
when the gluing in the making of the envelope
gets messed up a little bit, the envelope will
have some torque. If your envelope is
like that at all, individually take
them and go over all the seams until it
wants to behave for you. We're going to start
with two of our envelope and there's a part of the right brain that
doesn't like turning things around and being
logical and methodical. But we're going to force it. If you mess this up, you might want to
run through without adhesive first and get
the feeling for things. But if you mess it up,
grab another envelope. Anyway, we're going to
start with two envelopes, we're going to turn one of them backwards with
the flap to the left. Okay. Then we're going to basically open that
envelope this way. The arrows pointing
to the right and we're going to
take this envelope and we're going to turn it over. So they're opposite. To remind yourself, they're opposite. This is back down, this is up. The idea is that we're going to slide this flap
into this pocket. I hope you can see
this seem okay. You can, I think. The idea is to come right
up with this fold to this top of the pocket on both sides and to do that
just as evenly as possible. Do it again before we put the adhesive on and
get the feeling. I find that if I pick the envelopes up and
lift the pocket a little bit and then just gently do this and do
it top and bottom, do a little rock and roll
there just to work it in. That gives me my best result. Let's try that with
adhesive on that. Again, let's leave that
sitting where it is. We're going to turn
this over and see, here's where you could actually lick the adhesive,
who wants to do that? I run some double stick tape along the adhesive on two sides. I don't go the whole way. Sometimes these rollers don't even do the thing
you want them to do. But this is put adhesive down
a little bit here and here and don't go near either corner. And you don't have to go
along this whole thing. Basically, you want
a little bit of adhesive here and a little bit here and there you're going
to stop because otherwise, when you are going in with this, you're going to stick it
before you want to stick it. The nice thing about
these is they're removable pretty much
for a few minutes anyway until you really burnish them down and you
might have to move them. So if you want to practice
with some creepy envelopes first to see how you can
do it, that's a good idea. But these were not
even expensive. They're beautiful, but they
weren't even expensive. Now I have adhesive on my flap, but I'm going to just
work it in like I did. Now it's in there, but
it's not stuck down. But I like my measurement
here and be careful. Don't go on top of
this because you can catch this top and mangle it. You don't want that.
Go inside with your bone folder and just
burnish where that adhesive is. And now we have the
beginning of our book. Now, to keep your orientation, this flap is always going to be loose back
here at the back. After I put each
page in like this, I fold it over and I
burnish this fold. I do that because this is folded against
how it was scored. If you remember, this flap was scored to fold
over that way. And so when we did this, we're reversing that fold, and if you burnish
this at this point, you're going to really help your alignment on your
book stay together well. Flap later is going to
be scored to come up over these envelopes and
basically close the deal. You don't want to do
anything with them as far as folding it over
and scoring it at this point because
it won't fit later. What we have is we have
created our first spread, and now we're going to go for our second spread to
know that you're in the right place
because oddly you can and ask me how
I know this too. Oddly, you can end up putting more pages in here because
you're not thinking. Then the whole thing
is cattywampus, and it's not going to work. Anyway, when you are going
to put your next page in, you are going to see this flap if you're in the place that
you're supposed to be. My next envelope and I put
the adhesive on this side, and in this place, I'm going to lift
again and try to get that envelope in there as
perfectly as possible. Don't let that seam right
there go under the flap. It's got to be just right there. Then again, we're
going to do this. And turn the page and you
see as you build this up, this is going to be
just a little bulkier and it might fight
you a little bit, but we do have this
in here perfectly. What I'm going to do is I'm
going to turn that page, line up my corners
here and I'm going to burnish this crease. It squished it into submission
there, if you will. This helps because if
there is something that's cadiwampus true most things. Even if it's little
as things build, they build on the
cadiwampus and you end up with a real
problem in the end. Once again, we are open with that back
flap thing showing. We're in the right
place. Now you might wonder why don't I reverse this fold right
now when I could do it? Because there's something
about this that allows us to hold the envelope with a bit of a curve
and it's pretty steady and it really helps us with this insertion business. Again, we're going to run a little adhesive
on those sides. And pick the flap up, make sure that you're
not like this, that you like this
and work this in. What's happening here,
if that adhesive you put on just
grab a little bit, put your finger in
behind it like I just did and get it on grabbed until we have this and this exactly
where we want it. Now we want our adhesive to grab and we go in
and do our busing. Now I could continue to the
end and bore you to pieces. But if you need to
see more of it, just back up and watch
these two things, these two demos that we did, and then it'll be
the same thing as me going ahead to the end. Now, I am going to turn the camera off and be back when I am on my last page. I am burnishing the spine again to force these guys
to want to align. I have just put in my
second to last envelope. The reason I'm back with
you here is because I want to point out that I know
that this happens by now. Now you've got a little stack. This book is infinite. I mean, you can keep adding
envelopes until forever, but you are going to
fight a little more of this the higher the stack gets. What this is, is this
trying to make the bend. And for some reason it finds it more difficult.
I don't know. But again, you take the corners and make them
line up with everybody else, and then you come back and you force that fold into submission. And this is going to also
be true or our final one. I again, make sure that
this flap is always sitting there so that you know you're in the right place and
you're not putting another internal page in there. That does make a
mess. Again, I'm going to lift this and
you find that it's a little less Easy to get precise when you're
higher in this pile. But that's about as close
as I'm going to get. This is the final
envelope that we're using in this particular
book, seventh envelope. I bring this page
over and again, it's going to want to
fight me on the spine. So I'm going to
flatten that. Okay. Now, you might think that
it's time for us to do this, but it isn't reason it isn't is because without
the pages in here, the book is not as
thick as it will be. This guy has got
to come up as far as the body of the book does and then we'll be scoring
it so it'll fold over. It's not going to go back
in here very neatly, but it doesn't
matter because we're going to put covers on. Let's look at pages
in the next lesson.
4. Choosing Pages: Believe it or not,
the hardest part of our bookmaking is done. We're going to set
this lovely guy over here and talk about what kind of pages
we're going to put in. What I have here, I
printed out the PDF that I put in resources for you and it's printed on
a letter size sheet, but you can adjust easily
for A four with this. So anyway, this would be
if you wanted a journal with lines to write
in what I used here is called an
index weight paper. Not quite cover stock. Well, it's 110 pound. Again, I purchased this
from Amazon, and um, I'm going to suggest that you print out and
I don't care what you print this first page
on just a piece of copy paper so that you can make the notes like I'm
going to make right now, but where your cuts
are going to be, you can use a guillotine
paper cutter for that or a rolling one or you can use
exacto knife and a ruler, however you like to do it. But this is based on a
four by six page size, which is based on the fact that I used
an A four envelope. An A four envelope is about four and a quarter by
about six and a quarter. I choose my paper
with the idea of, let's look inside a spread hair. The idea that I'm going to leave a tiny little border of
the color of the envelope, in this case, just because
it looks nice to do that. And so I set this up
to create basically index cards with the lines running this way instead of usually you buy
them like this. You could do that if
you want. You could just have be a horizontal book, but I didn't want, so
I created this and I gave it to you in the
resources section. Right now, what
we're going to do is we're just going to mark on a test copy that you print where the cuts
are going to happen. This is a letter size sheet, which means this is
8.5 and I want to cut. My width is eight, not 8.5. Now on an A four, you're going to have to cut off a little more than a
quarter of an inch. On a letter size sheet, you're going to cut half
an inch off of this side. It's 8.5, so you're going
to cut half an inch. Here. That's going to give you cut it off the whole sheet. That's going to give you
an eight inch wide piece of printing here for
lack of a better word. We're going to cut that
in half to get our four. Now what we need
here is our six, and we're going to cut this letter sheet at the
six inch mark from the top. Then we're going to
cut this in half. That is going to give us two
pages that are 4 " by 6 ". A four people, you just have to switch to inches
for me because I'm a mess at anything else. I'm even a mess at inches. But anyway, that's the
way I'm going to speak. Once you trim your A four
differently than we do, then you're going to
be in the same place to use inches idea. Okay, let's say this is now
gone because you cut it off. What we have left is
this piece right here, which gives us a third page, but we had to turn
it sideways to fit. This cuts already there for you. You could have done
this cut down here in the very beginning when you
did this one if you want. What has to come
off the bottom of a letter size sheet is 1 ". We're going to cut
this at 10 " here. If you do that first, when you cut this half inch off here and an inch off here, this is going to be easier. I forgot to mention it and I'm sorry because then you're
going to be left with the right width
on this piece and you're only going to
have to cut it at six. Those of you with a better
logic brain than I have are going to realize
that we now have three pages of lined
journal type pages when these cuts are done. Obviously, if you
have a dozen pages, you're going to print four of these four times three is 12. Just keep this guide sheet around to remind you
where the cuts are. I'm going to just put on here
that this is 4 " by 6 ". You can just shove that in your desk drawer or whatever for when you
need it for reference, so you can just memorize it because it's no problem, right? So that is what I
did in order to get index card weight pages to put in here at the
size that I wanted. Obviously, using a
different size envelope, you would be making
different size pages. Maybe you'd have to
only do two pages on a letter or an A
four piece of paper. Okay. So that is for a journal, and instead of cutting that up, I'm going to show you
I'm going to make this a sketchbook and I'm going to make it a watercolor sketchbook.
5. Mounting Your Pages: So again, I am going for
a four by six size page, and here I have 140
pound watercolor paper, which has some ph. With this and the index page, you're going for adding a
little strength to your book. You can go get your favorite
sketchbook paper and cut 12 pieces that are four by six you can go get your
favorite watercolor paper, a sheet off of a block or from a sketchbook or
however you get it, you can cut with your paper cut or you can cut four by six. The other thing you can do
is they're still available. I hope they remain available. But on Amazon, I
was able to find pre cut pieces of
four by six water colored paper and it happened
to be the right weight. I did that I wanted to
make a number of these, and so I thought, that'll be easier to do. Let's look at how we
put pages in our book. That's going to involve this
little more heavy duty, kind of double stick tape. You don't want the
pages coming up. As people turn these pages, you don't want these
pages coming stuck. This also came from Amazon. I hate to say this, but every time I
need a weird thing, somehow it's there
and it comes to my door so there you go. I take advantage of that. But this was not expensive. It was inexpensive
for four rolls, and it is real tough, adhesive, maybe a little
too tough for me sometimes. But it does hold
pages in the book. There are all kinds of sizes and everything and
this is an inch. You can use a three quarter inch it's interesting that these
particular envelopes, if you find them, they come with a real skinny version of
this that you could use. I don't because I want to be
heavy duty, but all right, so let's go to our first fold, and we're going to put
in a watercolor page. First one is super easy because it's going to go
into our pocket. No way. It can come out. It can be painted on both sides. And other we we're
going to mount to the facing page and this is going to give
strength to the book. Both of these are going to
give strength to the book. I'm turning this over. This is the way I do it because I don't like getting
stuck to this, but I have little scissors. This happens to be a teflon one I still gets sticky you
can see what I mean. I just peel back a piece of this and I don't
go edge to edge, but let's see, this
is the way I'd do it. Because I am right handed. I just do something like this. Then I take the scissors and I just poke it straight
down and cut. That way, it doesn't
come away stuck to that. You put that as close to the edges you can and you
don't want any overlap. I'm going to do
that one more time. See what I mean
about the sticks. But this will hold that
page in there forever. The downside is that you have to be real careful
when you're placing it because it's very hard to get it back up and
not ruin the envelope. Carefulness and placement,
then this should pick up. I burnished it with my bone
folder. You notice that? T should pick up. And now
comes the scary part. But I'll show you how I do it. I take a piece of white
paper that I have around and I put
it under the page. The reason I do that is so I can see the actual
edges of this page really well rather than picking up a visual of pages that
might be sticking out there. That's because I want to
place this correctly. I turn this over.
I hold this down with my little finger
while I do this. I try to guide by right here. It's about where can you see it. You're going for about
an eighth of an inch, but the important
part is that you want to be straight. I do that. I'm not letting the rest of
the page down quite yet. When I do I do it very lightly, but I have really eyeballed that to be a straight even line. Now, luckily, because
the different pages do come out a little bit, if you screw it up a little,
it's not going to show. But don't do any
burnishing until you check that this is fine. Then I just burnish right
over the watercolor paper. And that's never coming
off of that page. But the other thing
that it's done is it's really strengthened that page. Now when we turn
it over and we're adding another page
to the back here, we have double
strengthened that. This is making a
very strong book that's reason it's nice to use paper inserts pages
with some weight to them. You continue with
your 12 pages in exactly that way
until they're all in, and then I'll show
you where we go next.
6. Adding the Covers: I that was a little
time consuming but fun. Now what we have is an
almost finished book. If you've been doing
your burnishing and aligning it probably
will be pretty good. But what it's going to be
also is thicker than it was. Now it's almost as thick as
a first bend in the flat, but your envelope could
be different than this. What we want to do is take something we're going
to be able to see pen. We're going to stand
our book up like this. We're going to trace a line doesn't have to go
all the way across, but that we can see
on our back flap. That's the thickness. This is okay because it's
going to be covered over. That's the thickness
of our spine. We want this flap to
fold right there. We're going to score that flap. Now, you can use your
bone folder and a ruler. You'd have to turn it this way, so the ruler could be here,
and then you have to see. I do have a wonderful tool
and you can still get these. They're discontinued, but
they're on eBay still and they're not very
expensive either. It's called a Scor
was real big in the scrapbooking and
rubber stamping industry. Years ago. They have them now
available too for scoring everything that you want
and they're made of plastic and they have groove
lines and stuff. But I just love this. It has a centering ruler. This works just like a
professional scoring machine. Anyway, I recommend
it if you can find SCOR yikes. Yeah, it. And I've seen them from $5 to $20 on eBay.
It works like this. Is got this one scoring
thing and it's got a scoring tool with a groove. So you make the score that way. If you didn't know it,
when you make a score, you have a mountain on one side and you have a
valley on the other side. You should always
make the scores so that you're going to
fold over the mountain. And that doesn't
make sense logical. You'd think, well,
there's a thing and I'm going to fold it
that way, but no, because it won't fold
flat, it's weird, but that's the way it goes, I promise, you're going to
fold over the mountain. Now we want to basically do this in as smooth
a way as we can. Before I bring it up over, I'm going to try to pre
fold on my score line. I don't have anything rounded. We don't round it. In that way, you see what
happens. There's your spine. Now, if you just wet that and stuck it
down, that'd be one thing, but it's not a truly know it's
going to stay there thing. I'm going to put a couple pieces of this really tough tape, and I mean small pieces
because there's going to be another way that this flap is
going to be held in place. But I am just going to stick a couple of
random squares on there. And I know when that
flap goes down, it's going to stay down. You always got to burnish this stuff for the paper
to come off of it. I'm coming up, holding my score against my spine and
bringing that flap down. Now that's not going anywhere. This is a beautiful book. What we have left to do, A is choose our
wonderful covers. Now, this can be anything, a creative thing that it can be, say that you're giving this to an artist friend or you're
keeping it for yourself. You can use a piece of the four by six watercolor
paper as a cover and paint it. That's one thing. You
got to have two covers though because this has got
to be taken care of here. I'll show you what I did. Okay. Any decorative paper, scrapbook paper or
paper that you get in printables online or patterns that you make yourself
ipcreate or that you purchase, anything that you like that has coordination
with the color of your cover because your cover is still going to be like this. I actually purchased
this and I love this paper and it
was a printable on Etsy and I couldn't tell you where my
life depended on it. But if you go down
a rabbit hole, you go to EtS and you look for printables that are also called junk journaling pages because
those are collage things and they're lots and
lots of choices. You might never come
on in there for hours. Anyway, I liked this and what I did was I
printed the printable and I didn't even print it
on thick paper because a lot of people have an
ink jet and it will print thick paper
without jamming up. Instead, I printed it
and I laminated it. You want your covers to be
protected and waterproof, hopefully, and tough because they're going to get
a lot of handling. That's how the book
gets picked up and opened and used and
everything else. And so it can't be
anything frail here. Now, I have a laminator because I have a
greeting card company, so I just happen to have one, but if you don't have one, Um, you can go to any
local print shop or Office Depot or all those
places that do printing, they have a laminator and
they'll laminate a sheet of paper for you very
inexpensively. They usually only have shiny
lamination. Because pouches. But I will give you another
clue that TM Scotch makes a matte surface pouch for laminating if you
have your own laminator. It's just beautiful.
It's satiny and velvety, but it's still plastic
and it's still protecting the design
and protecting the book. Now my book, I made it well
enough this time and it's not always the case that it doesn't need anything
to close it at all. But you can do that. You
can create a belly band for it to keep it closed and you
can do that with fabric. You can do that with paper. That's a really nice look. I am currently making these
for sale at a local gallery. Therefore, what I'm
doing is gifting it a little bit with one of those elastics that you put
around card boxes and so on.
7. Final Words: That's it. That's
your beautiful book. From here, Well, from here, you can go anywhere with
your creativity because, you can do your own
painting on the front, you can leave it blank and give it to a watercolor artist, and they can paint the cover. You can do the collage thing. You can put ribbons around it. You can make it any
size that you want. It's just a beautiful basis for a whole lot of creativity. And so I would love to see
what you do with this in the project section
and we can share ideas and comment on
each other's books. I hope you enjoyed the class.
 Jessica Wesolek, Artist/Teacher