Transcripts
1. Welcome & Intro: Have you been wanting
to try hand embroidery or maybe you'd like to
unplug with mindful hobby? Do you love giving custom
gifts in the holidays? If any of this
resonates with you, I hope you'll join me today. Let's get started creating some adorable tiny ornaments
for you or a loved one. Hi, I'm Kathleen Lyons. I'm an artist and
digital marketer based in Nashville, Tennessee. I graduated from Audubine
University with my BA in art and started my career as a graphic designer working
outside of Chicago. Today, I spend my nine to five in the digital marketing space, and I spend my
nights and weekends pursuing my creative career. My journey into embroidery began when I was pregnant
with my daughter Ella. We had a ton of gender neutral
clothes from my son Kaden, and I wanted to find a way
to make them uniquely hers. It turned out to be easier
than I thought and so satisfying to take something gray and make it
sweet and girly. Having embroidery breathe
new life into fabrics. So I love doing
that. I still do it. But I also found other ways. So you can embroidery a hoop and leave it there,
and then it's an art piece. You can create other
little goodies like we'll be doing today, and it's such a fun
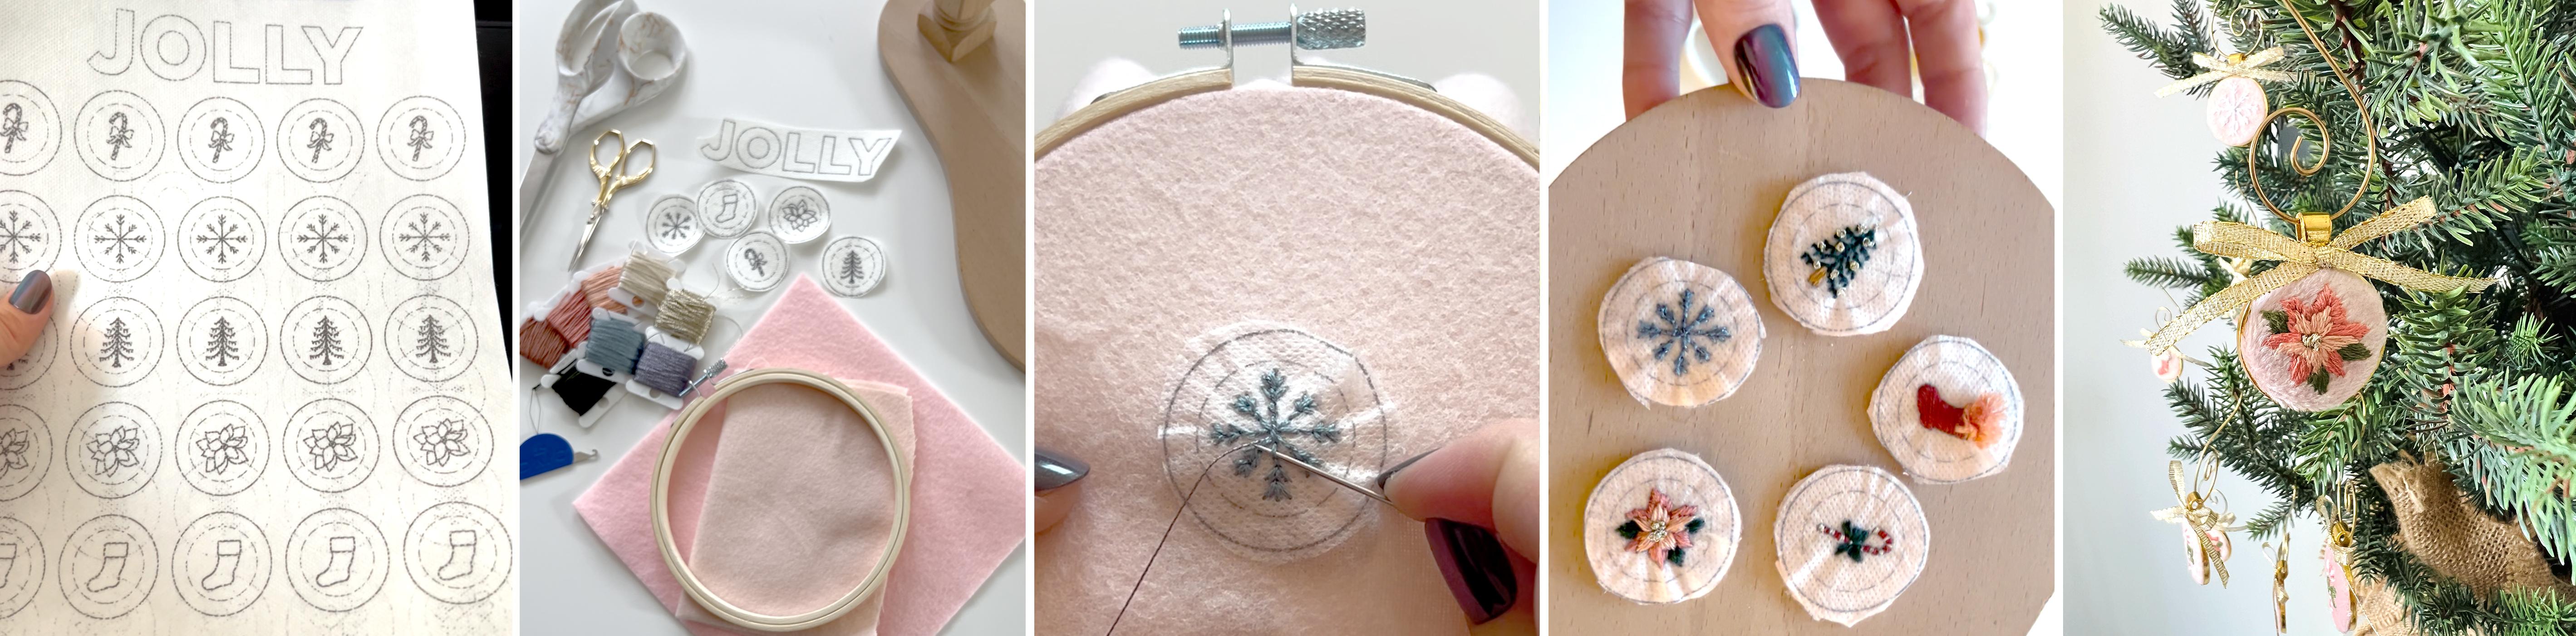
and unique expression of your style and taste. Today we'll be learning how to make five different
embroidery designs. They're all behind here.
They'll be simple stitches. This is totally
open for beginners. Some of my advanced
diggers may want to jump into the projects and
just grab the pattern. Either way, I'm so excited
to start stitching with you. What are we waiting for?
Let's start stitching.
2. Class Project: Class Project time. Your
class assignment is to stitch any of the five designs and create your own
pendant ornament. You'll need a few
items to get started, so make sure that you
review the PDF guide provided and also watch the next lesson to learn
more about the supplies. In a nutshell, we'll
print our pattern, cut it out, stick, stitch, wash it away, and assemble. You can add a
ribbon for a little more flare but
totally up to you. Lastly, I'd love for you to
share your final projects. If you're online, use hash tag RT stitches and
if you're on Skill Share, please make sure
that you upload to the project and resources
section so we can all see your unique take on these suit holiday
ornament designs. Feel free to include any behind the scenes as well
or process shots. I love seeing those. If you need help, feel
free to reach out. I am always happy to
respond. Happy stitching.
3. Supply Recommendations: We're going to walk
through some supplies. First things first, you're
going to need some fabric. There's a sampler piece,
so you may want a couple. I'll start with felt when we
walk through the stitches, and then I have
this nice flannel. You're going to want
something a little bit lighter to go
into the pendant. So nothing too thick, but this has been
working really well. So make sure you
have some fabric. So we'll have our water
soluble stabilizer. So you can get this off
Amazon print on it directly. So the file that I'll be giving you will have
patterns on it. You'll print it straight
onto this, cut them out, and then we'll just
be able to peel, stick, and stitch
right over top. So you just rinse
it with water and it comes right
off. It's amazing. If not, you can always
free hand and draw it. There are heat erasable
pens and markers, so feel free to get creative if you want to make
your own design. Don't let that stop you.
You will also need needles. I have a few different
packs. I just grab this one. Basically, you need
something small for this one, but in general, you want the needle to match whatever thread and fabric
you're working with. So check those out. We'll
also be needing some floss. I have lots of different
colors that I'll be using. Make sure that you pick
colors that you like. Obviously, I'm trending
towards pink and greens and blush.
Those are just colors. I like, make sure that
you're making it either for yourself or if you're
making it for a loved one, make sure you're choosing
colors that speak to them. So this always feels silly, but I do have fabric scissors
when I cut out my fabric, and then I have these teeny, tiny embroidery scissors, which
I love and I travel with. So again, check that out. If you're ever traveling, I
think it's like under 4 ". You can stitch on a plane. I told you, it's the
best mindful hobby. I love it. Okay. And
then you'll need a hoop. So any size, these I mean, you can do one of these on here. If you want to do
a bunch at once, I would get a little bit larger. There are packs that
have various sizes. So just feel it out. Whatever you want
to work with, you can get a variety pack or if you know you want
a specific size, go ahead and grab those. They have them at the
craft store. They also have them on Amazon. I have everything linked in the guide for you if you'd
like to grab it from there. And lastly, we'll need our
actual ornament pieces. So I have a pendant here. And again, you can use
this as an ornament. This class is also
great you can make this and you could
create a necklace. So you could literally just
add that onto a chain, and now you've made a cute
little holiday pendant, or you can even put
it on a key chain. Have these linked. You're going to just scroop those
through there. And so that is our
little ornament piece. I do have ribbon on
mine, totally optional. I just grabbed one of these. Oops, sorry. It's an
eighth of an inch. It's pretty tiny, and I
just tie those on there. Just to give it a little more I am assembling these with glue. So apologies. This
is a little beat up. But it's that E 6,000.
This is serious stuff. So if you have kids at home, make sure you have
this out of the way. I'm sure there's other
ones that will work. Just make sure that if
you're gluing something, it's meant for metal and fabric. This pretty much glues anything, so take your pick. I'll link this in the
supplies as well. Two more things,
I almost forgot. You will need some kind
of little hole punch or you can draw a 1 "
circle and cut it out. These are great.
Saves a lot of time. But I use that to back my stitch before I put
it on the pendant. And I've been using
this watercolor paper. It's multimedia. Anything
multimedia would be fine. But you can also use anything that's like a
really thin cardboard, like a cereal box
and cut those out. So it's just a 1 " circle. You'll modify it a
little bit based on your fabric to get it to
fit into the pendant. But keep that in mind, you'll either want a hole punch. It's like 1 " or you
can cut them out. So that does it
for our supplies, and I just want you
to keep in mind. Most of these are suggestions. If you find different versions, feel free to swap in or out, choose the colors that
you like that's going to make it feel like you or
look like your recipient. So go ahead and get
all your stuff. We're going to get started.
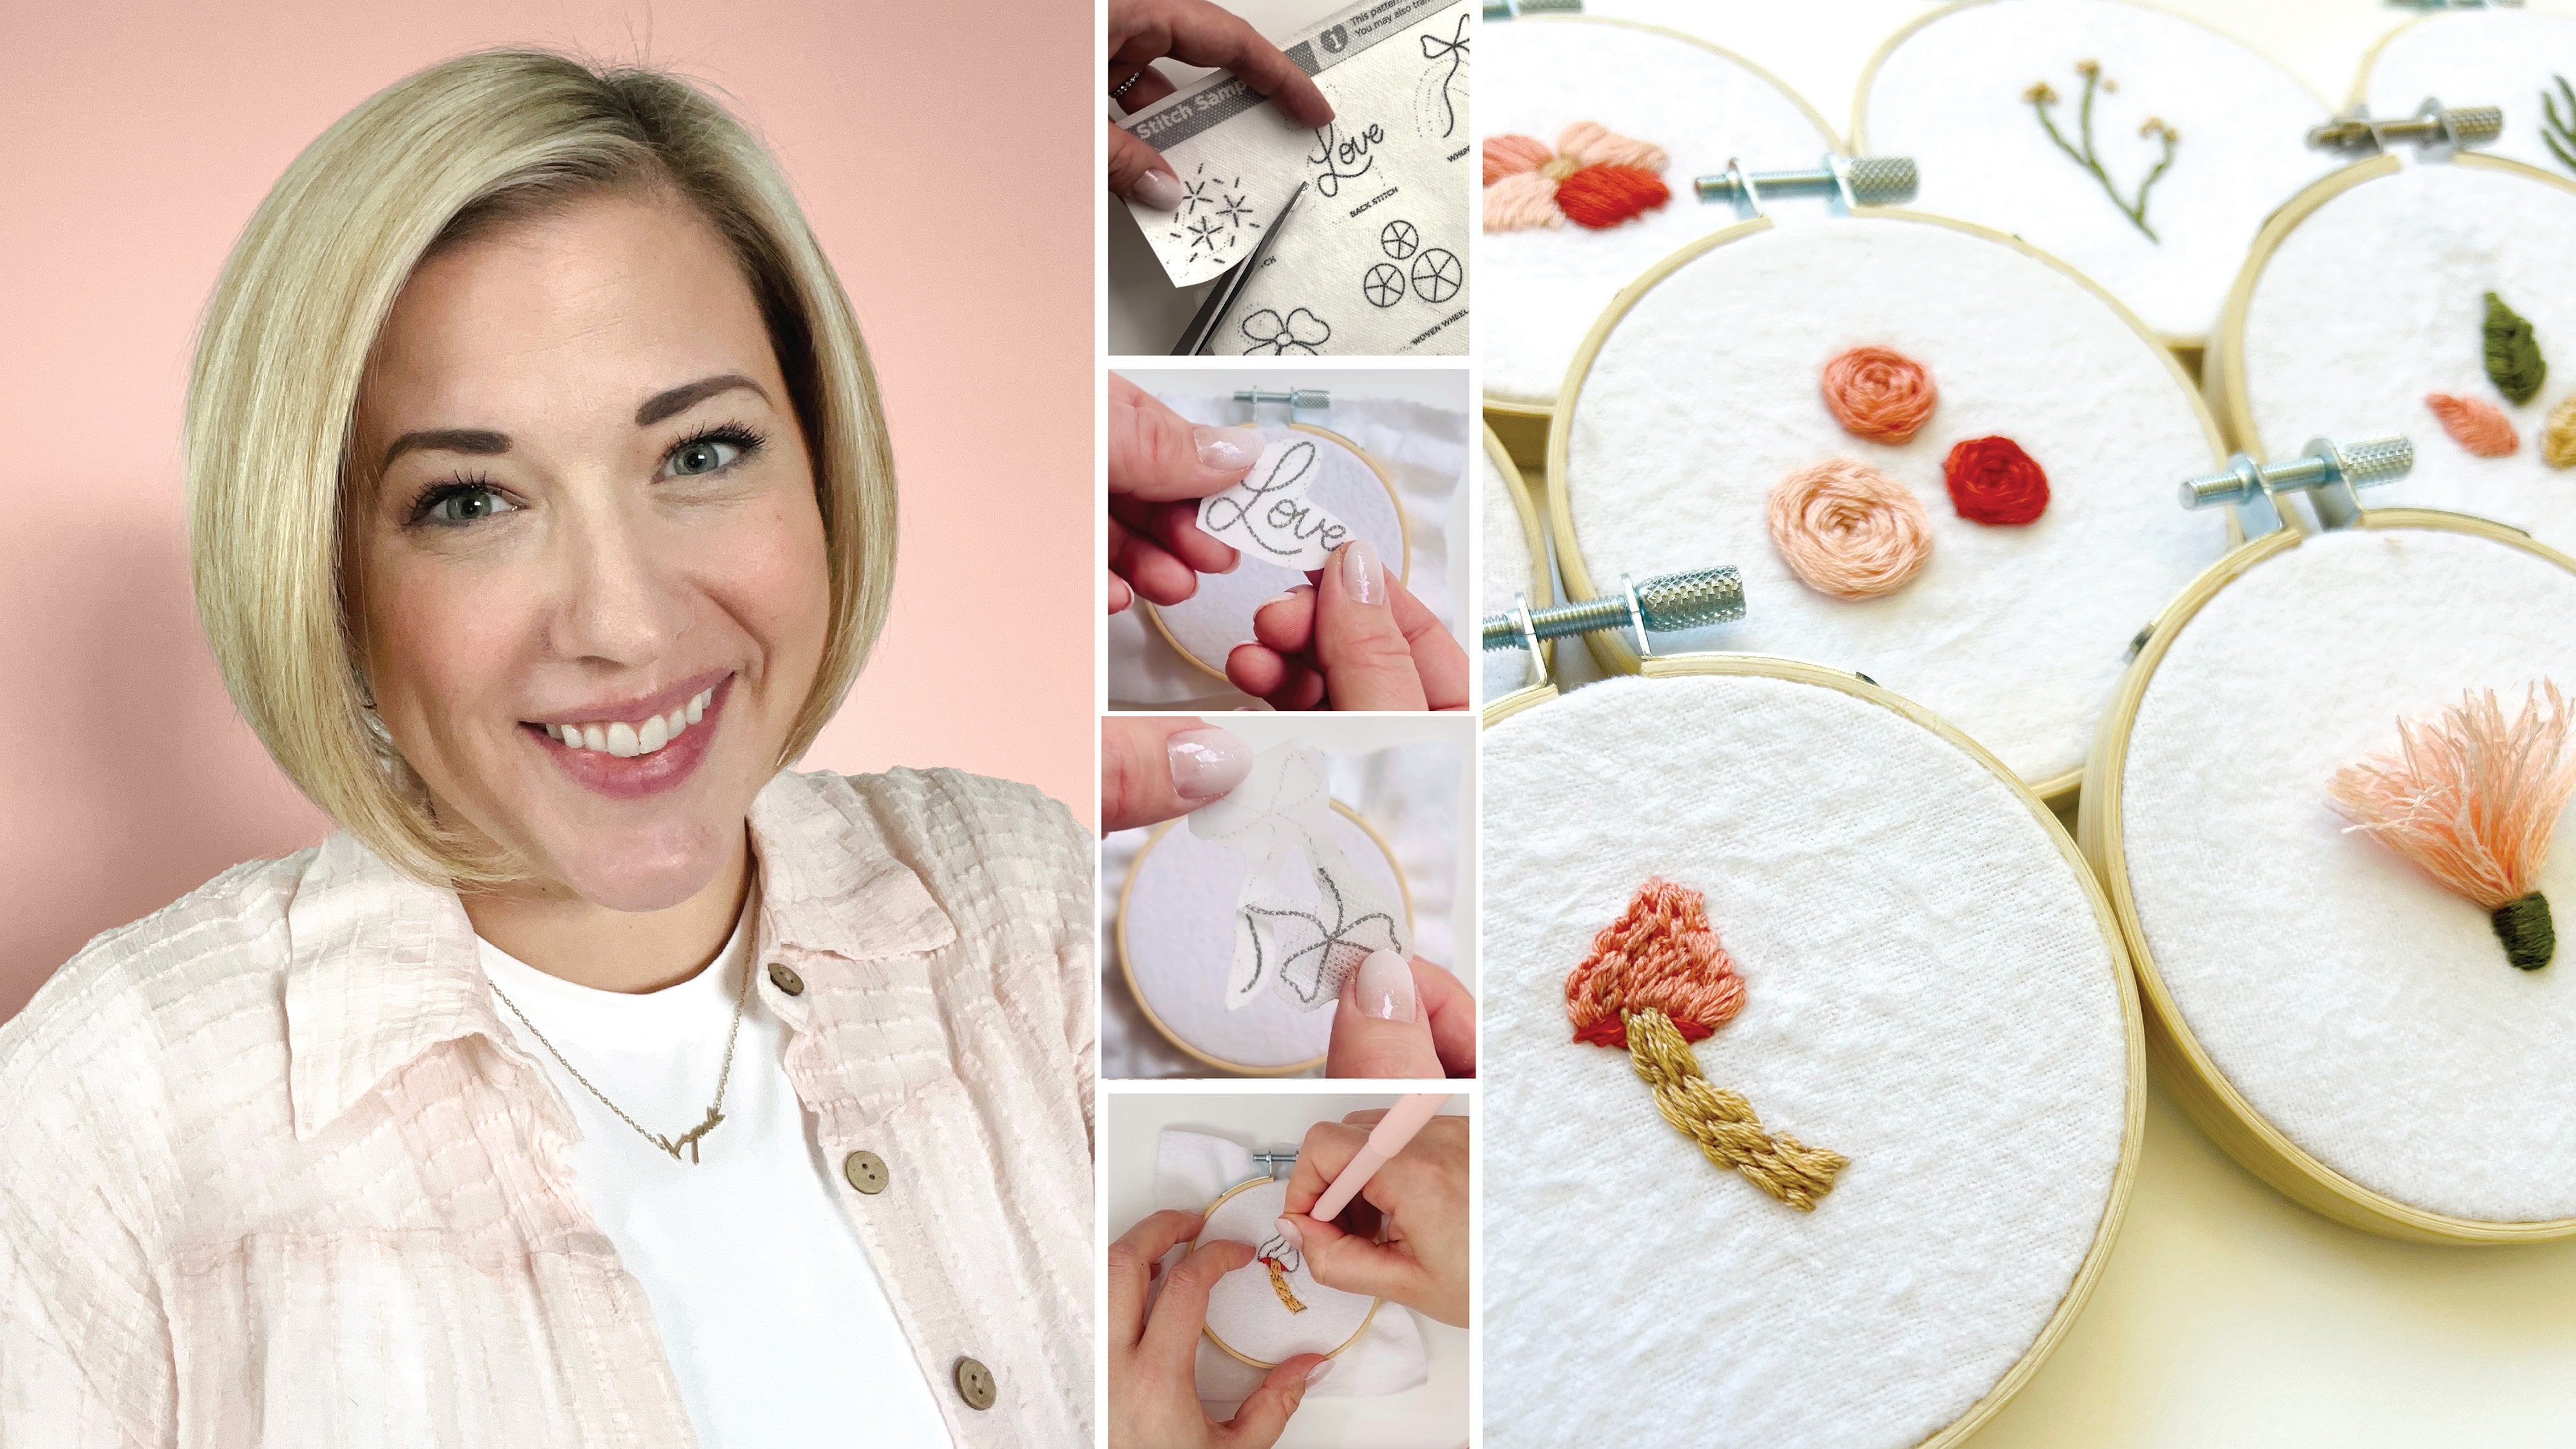
4. Stitch Practice: And this lesson,
we're going to take the next 10 minutes or so to learn the simple
stitches that we'll be using for all
of the patterns. So you'll learn six stitches and be able to do all
five of the patterns. If you're just starting, please
be patient with yourself. Some of these can be challenging looking at you French knot. But once you've
got some reps in, they'll start coming
more naturally to you. We'll ease them with the easier stitches
and then we'll get a little more complex towards
the end. So stay with me. The sampler pattern in your
pack can be used on anything. So I'm going to be
doing a piece of felt but legimately you
could put this on a shirt. This could be like
your first gift. So keep that in mind. I can go on felt fabric. I could go on a
sweatshirt, a t shirt. Whatever fabric you
want to test on, you can even put
it on a tee towel, grab that, and
we'll get started. We're going to jump
right in by starting with our measuring our flos. So I usually go from the
tip of my middle finger to my elbow, and then
we're going to split that. So the floss comes
in six strands. I'm splitting this to two
and then dding it off. Then we're going to thread
it through the needle. So there's just
two strands there. And we're gonna come
up through the back. This is going to
be our backstitch. We start it with a
straight stitch. So up through the back,
down through the front, that's your straight stitch, and that is how we're going
to start our back stitch. Now, these are a little small. I would advise going
a little bit bigger, but just trying to maintain
a consistent stitch size. It doesn't really matter
how big or how small. We're going to come back up
about a stitch length out, and then back down in the last
hole of our first stitch. And that is your back stitch. So we're going to continue
that around this J, and we're going to outline it, and then we're
going to come back through with a straight stitch, some seed stitches
to fill it in. So again, going back
down in the whole of my last stitch and then
we're going to speed this up, I do get a little bit
bigger with my stitches. So again, sometimes it's
good to have a warm up, and I think this was it for me. Okay, now we're going
to start filling in, I mentioned straight stitches,
so that's just coming up through the back and
down through the front. These are also referred
to as seed stitches. It's just a way for us
to fill in this J here. So we outlined with
the backstitch, and we are filling in
with our seed stitch. So I'll wrap this up real quick, and we'll move on to our backstitch and our
whipped backstitch for the O. Okay, starting in the O, we are going to do
another backstitch, so we're going to outline the inner circle and
the outer circle. So again, coming up through the back, down
through the front, and then up again, about a stitch length ahead, and then back down into that last hole of
the first stitch. That is our backstitch. This is typically
used for outlining and for hand littering.
It's great here. I use that a lot,
too. I'll outline, and then I'll come back and
fill in with Satin, as well. So keep that in mind
as you're going. You can make some match
stitches wherever you'd like. So we'll go ahead and
finish this one up. I'm going to speed up. But again, this is
just our backstitch outlining this inner circle. Okay. Then we're going to do the same thing for
the adder circle. So up through the back
down through the front, and then we'll go
up a stitch length, come up through the back, and then back down through that last hole of
your first stitch. And we'll continue that around, and then we'll be ready for
the whipped back stitch. So we're going to
come up now that we finish that in the inner circle, and we're gonna come
through that hole and then just wrap around. We're gonna go under
that first stitch, wrap it, that's it. We're just going to keep
wrapping around these. You don't go back down until you're finished with this shape. So we'll continue this outline. You just wrap
around each stitch. So as you follow along here, just wrapping each of these. And then when I finish, I just come back down
through the fabric from the front to the back
where I started. So this just gives a smooth
look. I really like this one. You can also use two colors, so I'm going to do the top here and come through,
wrap this again. But if you did your
base as, like, a white or red, and
then you flip flopped, you would make kind of a
candy cane style or well, I guess they have
holidays on the brain, but yes, candy cane, you
would just see two different. Sometimes you can add
some sparkle that way if you outline in white, and then you come back
through with, like, a metallic, it's another
great way to kind of add some shine and just some
interest into your pieces. So keep that in mind,
too. Feel free to mix up your threads as
we're going through this. And as we move over to the L, we're going to be working
on our satin stitch. So we're going to
come up through one side and then
back down the fabric. It's a straight stitch and
then we're going to repeat that side by side by
side all the way down. So these are going to run
parallel to each other. This is how you would
fill in any shape, whether it's a circle
or a heart or a star, you're going to start
and then just have those next to each
other running parallel. So from one end of the
object to the other end, you'll see later that I actually
split my petals a lot of times because I'm
trying to keep it symmetrical and make sure
that I have a very even. I have a tendency to
get a little wonky. Especially in a straight
line like this. So if you're seeing that, don't worry. It
happens to all of us. You'll be able to straighten it out and make
adjustments as you go. But we're really just
coming up one side, down through the other and
coloring this in with thread. And once we've
finished the first L, we're going to move
to the next one, and this is going to be
our French knot. So you're going to come
up through the back, wrap it two to three times, and then push it back down, not in the same hole,
but really close to it. And while you're letting
that come through, you're going to hold the
other thread in your hand. So let's see that one more time. Gonna come up through the back. Going to wrap it, I think
I'm doing three times here. And then right back down
as close as you can. And then I'm holding
that other thread. I have one hand on the needle, one on the thread to try to help it stay taut
as it goes down. We'll do it one more time slow, and then I'll speed this up. These take time. Please
be patient with yourself. French knots are notorious, but they're also such
a great texture. So, see, I just scoped up again. So wrap it two to three times, push it back through,
pull while you're holding onto the other
thread. And there you go. So I'm going to fill
this in. I would encourage you to fill in this whole with French knots. You can
just do the dots. But if you have the time and you have the will to practice
that many times, it would be a really
great texture to fill it all the way in with
those French knots. And then, lastly, we're going to be doing our turkey work. So this one is different
in the fact that I'm not going to knot the end
of it. So see here. I'm going to come in
through the front, and I'm going to leave just a
little piece of fringe out. Now, later we're
gonna trim this down, but for right now, I want
to leave it a little long. I'm going to come up
to the left of it, and I'm going to make
a straight stitch. This is I'm going to refer to this as, like, a lock stitch. So it's really locking
that fringe in place. And so I'm going to
do another stitch length and come back down. And then when I come back up, I'm going to come back up in the same hole where
that fringe piece is, except this time, I'm
going to make a loop. So similar to Lazy Daisy,
if you're familiar. And then I'm going to come ahead a stitch length
from that fringe. Go back down, but I'm not going to go all
the way through. I'm going to let
that loop happen. And then I'm going to
come back, similar to the backstitch into that last hole from
my first lock stitch, and then I'm going to
secure this next loop. So that is also going
to be a lock stitch. I don't know if it's called
that, but that's what I call it in my mind. So we're gonna lock this down, and then I'm going
to do one more loop. I'm doing about three
on each of these, so I'm going to
come through where that loop is in the same hole, and I'm going to make another loop I'm going to go back down, but not all the way through, and then I'll come up again in that last hole of my
most recent lock stitch. And then we're gonna
lock this one. We're gonna get pretty
close to the edge there. We're gonna lock
that in. And then I'm going to move
down through this Y. Now, the more you have, the bigger your piles gonna be. So I only use two or
three strands here. If you really want
this to be chunky, use six. Use the whole floss. That's what I use in
the stocking wilts we get back to the lessons. And then if you are wanting to work this in
an even bigger pile, you can go side by
side with these. I have these spaced out
more so for practice. If you were really wanting to create a pile, you
would go closer. The closer and the more thread you use, the bulkier
it's going to be. But if you go close,
like, side by side, try to layer it like a brick, where you're like, offsetting
where your loops are. That's going to make it
really full and fluffy. But for practice, I
think this makes it a little bit cleaner
and easier to see. So I'm going to
wrap this one up. It's going to take a little bit. And then we're going to
give it a little shave. So the most fun of the turkey work is
actually cutting it down. So once we've made
all of these loops, we're actually going to cut all of them. You can
do it one by one. I think I end up,
yeah getting him grabbing it and just
shaving it all at once. Just keep in mind, you can never go longer. You
can always go shorter. So I start conservative, and then I trim it
down from there. I'm just going to give this
bad boy a few more clips. And then that is
our turkey work. So it makes it really
fun for the top. If you end up not wanting to do that for the
stock and keep in mind, you could always
use a French knot or a satin stitch for the top. So I know that one's a
little more challenging, but it has such a fun look. We're all done. We're
gonna take it out of the hoop. That's very jolly. We're gonna take it
out of the hoop and wash off this stabilizer. So to do that, I'm literally
just gonna plug this up. I can rinse it off this
way. I can let it soak. To be honest, the
most effective way is your sprayer and
your kitchen sink. So however you do it, just make sure all
of the adhesive is off and you're all set. Happy stitching. I'll see
you in the next lesson.
5. Snowflake Ornament : In this lesson,
we're going to be stitching the
snowflake design using a backstitch and then
a whipped backstitch. So let's get started. We're gonna jump in. I have already printed and
cut out my snowflake, so I'm going to put that on here, we're just
going to stick it on. We're going to stitch
right into this. So I'm going to separate
my thread again. I mentioned I only
use about two. These ornaments are very
delicate and small. So the less thread, the
better your floss has six, so I'm just using two
of those strands. I'm gonna thread this and knot
it. So keep that in mind. As we work through
the other lessons, I'll always be
using two strands. We're gonna come up
through the mac. We're gonna be using
the backstitch for this one and our
whipped backstitch. I'm gonna come down
through the front. And I like to do these
little arms as I'm going. There's no wrong way
to approach this. So if you want to do your
straight lines first and then come back in and do your little snowflake arms, that's fine. I like to do them as I'm going. And again, if they're not exactly on the
pattern, that's okay. That's what they say
about a snowflake, right? No, two or, like, so feel free to get
creative there, as well. If you want to make them longer, if you want to add
some, get creative. This is ultimately
your snowflake. So I'm gonna continue
going through here. Again, this is just
our backstitch. And then once we get
that layer down, we'll come back through and do a whipped backstitch with a little bit of metallic thread. So stay tuned. I'm going to
go through a couple more, and then I'll speed
this up for all. Now that we have all
our back stitches in, we're gonna come up, and I
just do the straightaway. I don't worry about the little
arms of the snowflakes, we're gonna do our
whipped backstitch. So I'm gonna come up
and then go under that first stitch and
pull that through. So it's wrapping around your stitch and then continue
that all the way down, and then I'll just rotate around the snowflake and do
each of those lines. So I am using one of
the metallic threads. This is probably the
easiest way to use it. Some of these are pretty unruly, but I really love
this one. It's a DMC. It just adds a little
bit of sparkle and gives it a little bit of a smooth look with the wrapping. So try it out. If you don't like it, you
don't have to do this step. You can just leave
it as a backstitch. So, in which case, you're done. Congrats. You've done
your first ornament. But you're welcome
to leave it as a backstitch or add
in this whip stitch, and you can use the same
color or you can add an accent color or
maybe a little sparkle. And once you're done, you
just come back through. So I'm gonna come up
on the other side and continue rotating
around this snowflake. You can see I'm just
going one by one, wrapping them around, and then finishing it off by
each of those lines. There we go. Key takeaways. The backstitch is perfect for outlining or hand lettering. Adding the web gives
the backstitch a more cohesive and
smooth appearance. Adding a little sparkle is always encouraged
but not mandatory. I'll see you the next lesson.
6. Candy Cane Ornament: In this lesson, we're going to stitch the candy cane
with a little bow, and we'll be using the satin stitch for this one.
So let's jump in. Okay, so I've gotten ahead here. I have my pattern already
stuck to my fabric, and I'm going to come
up through the back. We're gonna be doing
our satin stitch. So really, it starts
with a straight stitch. And then we're going to come
up right next to that one and start filling in the
white of this candy cane. Now, please pick the
colors you like. So I have white and red, I'm going pretty
traditional here. But this is just filling
in with a satin stitch. So keep that in mind. Again,
we are coloring with thread. And each of these sections, I'm doing two to three stitches,
and you can come back. Like at the end, I kind of look at it. If I need more somewhere,
you can always come back. So if you're feeling a
little thin somewhere, finish it out and then
come back and look at it. Don't get too hung up on what you're doing
when you get started. I'm going to speed
this up. And again, I'm just going through all
the white sections here, so I'm using one thread color. Then I'm going to come back
through with my second color. Again, you can use two colors, three colors. You
know, candy canes. They come in all
sorts of colors. So pick the colors to speak
to you and get started. So we have the white
down. And like I said, you can always make adjustments. So if you're seeing
something a little wonky, just just wait until we
get the other colors in there and then go back through
it and make adjustments. So, again, we're going up
through the back down through the front and creating those satin stitches that
are side by side by side. And we're going to fill
this in pretty quickly. So that's the other benefit of these being such tiny ornaments. They're pretty
quick to get done. So I've got my second
stitch in here, and then I'm going to
speed this up for you all. Now that we have the
candy king colors done, we're going to do my
favorite part, which is this little tiny bow. So, again, I'm still sticking with pretty traditional colors. I'm gonna go with a green bow, but feel free to
get creative here, and I'm just going
to start on either end of this and then fill in that centerpiece and then
do the other outer pieces. So I like to a lot
with shapes like this. I like to either
outline or divide them I just want to make
a consistent feel, and part of that is making
sure that it's symmetrical, when it needs to be,
making sure that I have clear outlines when I
want that specific shape. I'll do the same with
some of the bow pieces. So when I actually get
out to the ribbon piece, I like to make sure that
I have a structure there. So I'll speed this
up after I get the centerpiece done, but
just keep that in mind. And there is no wrong way. So as long as you're
filling it in with thread, you are good. So take your time,
fill these in, make sure you're picking
the colors that you like, and I'll meet you
on the other side. Key takeaways. The
satin stitch allows you to quickly and
easily fill in shapes. Keep in mind, the
more strands you use, the bulkier the appearance. And remember, feel free to get creative. Switch
up the colors. This is ultimately
your creation. I'll see you the next lesson.
7. Poinsettia Ornament: And this lesson, we'll be stitching our point Zeta design. We'll be using the satin
stitch and the French knot, so hang in there, buckle up. Let's get started.
Jumping in again, I have my pattern on my fabric and I'm going to
come up through the back. We are going to be
starting with a satin stitch for this one. So I'm going to
come up. Again, I do like to split some
of these shapes. So I'm going to
start and fill in one side of my petal and
then move to the other. We're going up through the back, down through the front side by side by side for
the satin stitch. Now, again, I am still using
two strands of the floss. As a reminder, there are
six strands in your floss. I'm using two here. I like to keep these a little less bulky. And I'm just gonna fill this in. Make sure that you're choosing
colors that you like. This one is a little
less traditional. I like the pink on pink, but obviously poin
senders are more red, so feel free to get
literal or get creative. So I'm gonna fill this petal and then I'll speed things
up a little bit. I do separate these
by color by layers, so my inner layer is
a little bit lighter, and then kind of to
signify a shadow, my second layer is a
little bit darker, and then I'm going to go
with a green for the leaves. So I'm gonna speed this
up, and I'll meet you back here when we start
our French knots. Now that we're done with
the petals and greenery, I'm going to start in the middle here, I'm going to come
up through the back. We're gonna do a French knot. So I have two strands
of this gold. I do not recommend if
you're just starting out, and just the metallic thread can be a little
difficult to work with, but it adds such a sweet
little bit of sparkle. If you're ready for it, you can also mix it in with
a regular floss, and it becomes a little bit easier to manage if you're
wanting some of that sparkle. But if you want to
go big, go big. I don't want to
discourage anyone, but it is difficult, and on
top of it, the French knot. So I'm coming up
through the back, I'm wrapping it two
to three times, and then coming back down
right next to it and trying to hold on to these little
pieces of thread. So I'm going to fill
this all the way in you can make this
as full as you want. I really love the French knot as the center here
because it's just adding more texture
to this flour that's otherwise pretty smooth
with a satin stitch. And so I'm going to fill
this in as full as I can, and then we'll be done
with our poinsea. Key takeaways. The
satin stitch is still the best for
filling in shapes. The French knot center gives more texture and
contrast to the piece, and please remember to
practice, practice, practice. I promise they will become
more easy with time. Happy stitching. I'll see
you in the next lesson.
8. Tree Ornament: In this lesson, we'll be
stitching the Christmas tree. I know, this one is my favorite, but we'll be using a
straight or seed stitch, backstitch, and a French knot. So let's get started. Go pulling it back here, just
as a reminder. I already have these
cut out. I've been peeling these and sticking
them straight on. So we're gonna do that and
position my tree right here. And then we're going to
start with a backstitch. So I'm gonna come up through the back and actually start that out with
a straight stitch. So down through the front, and then I'll come back up into the last hole of
that initial stitch, and that is going to
start my tree branches. Now, please keep in mind these
do not have to be exact. So I have little
tick marks here. Those are kind of our seed
stitches, straight stitches. Those are just going to give the tree a little more texture. So I'm going to come
up right here. You can work those under
your back stitches. You can work them into the same hole where your
stitches are connecting. This is really meant to
just give the tree texture, so there's no right or wrong. Just add those in
where you see fit, where it feels good, and
they're going to make your tree just have a little
more character to it. So I'm going to continue
that on the other side. Again, this is
mostly a backstitch, and then I'm doing there
straight stitches, but they're also kind
of seed stitches. It's just it's a little
bit of a mix here. And then we'll come back
through once we have this base. So I'm going to do
all of my branches, and I'm going to do all
those little offshoots, and then I'm going to come
back through and do the base. So the base is
actually going to be a satin stitch for the trunk, and then we'll wrap it up with a French knot for the ornaments. So I'm gonna finish this off, and then I'll speed
it up for you and meet you at the
trunk of the tree. She's looking
pretty good. So now that we've wrapped up the tree, we're going to finish
off the trunk with a satin stitch and then we're going to move
into ornament. So again, those are going
to be our French knots. So we're going to come
up through the back, wrap it two to three times, and then go down
through the front. And now I'm holding one hand. I have the needle, and on the other hand,
I'm holding that thread, trying to help it go through
as evenly as possible. The metallic thread is
difficult to work with. So when you're
working with that, kudos, but it is
difficult to work with. So I would recommend
if you're just starting to mix it
with a regular floss. And also, this would be so cute, even with a regular floss, especially like
multicolored lights. I may have to do a
virgin like that, too. Either way, choose the
ornament colors that you like. And again, these I'm just kind of peppering in
where I like them. There's no right or wrong here. You could also do a straight
stitch and add some garland. Feel free to get creative here. You could also add beads. This is ultimately
your creation. So have fun with it, and I'll meet you back
in a little bit. Key takeaways. The back stitch is great for outlining
and giving structure. The straight stitch
in this piece gives more interest and
texture to the tree. The French not adds additional texture with the
metallic thread, a little bit of shine.
But please please. If you're new to this, do
not feel like you have to do the metallic it is
difficult to work with. I promise you, it will be just as charming with
a regular floss. I'll see you in the next lesson.
9. Stocking Ornament: In this lesson,
we'll be stitching the stocking design using the satin stitch
and turkey work. Alternatively, if you're
loving the French now, you want more practice, you
could also use that one. So let's jump in. Okay, we're jumping in again. I have my pattern
down on my fabric, and I'm going to start with the easy part of the stocking. So we're going to fill
in with a satin stitch. I'm going to start with
my straight stitch here, go all the way across my shape, and then I just
going to continue that all the way down
through the stocking. So coming up through the back, down through the front,
side by side by side. So I like using the
satin stitch for this one because it's
quick to fill in shapes. You could also use
it for the top if you're not feeling
the French knot, if you don't want to
do the turkey work, it is totally fine to just fill that in
with a satin stitch. Maybe go the opposite direction just to give it a little
more visual variety. But there's nothing wrong with just going satin
stitch on this one. Or if you're really
liking the French knot, or you need practice, go ahead and fill it in on
the top for that one, too. I would really encourage
you to experiment, but I do love the
turkey work, too. So I'm going to speed this up, and then I will meet you back for the top of the stocking. I am going to do some turkey
work. So I'll see you there. Okay, tiki work coming
in through the front, go to leave that
little fringe up. And then I'm going to be doing
my little lock stitches. And here, I guess I
decided to go backwards. So however you do your
lock stitch is fine. You're going to lock those in, come up through where the
fringe is or you're a loop. Make another loop,
another lock stitch. Essentially, that is the
rhythm of the stitch. So I'm going to do
this a few times, so I'm going to come up. I'm
going to make that loop. And I'm going to go about
a stitch length ahead of where that loop is coming out and go back down
through the fabric. And then to lock that in, I'm going to do a backstitch
or straight stitch. Ultimately, I'm calling
it a lock stitch into that last lock
stitch so that I'm locking that loop in place. Ultimately, that's
what we're doing. We're doing stitches to lock our loops and then
stitches to create our loops. So I'm going to come
through, I'm going to make another loop and
then go back down, and then I'll come back up
and lock that loop in place. So finish this last one and then I'll
speed this up for you. Again, I'm using all of
the floss for this one, because the more you use, the bigger your pile is gonna be, the fluffier
it's gonna be. And you can come back
in and do a second row. Try to offset them
so they're more like a brick layer so that you're
offsetting your loops, that'll make it
really fluffy, too. Or if you don't
want it too fluffy, there's nothing wrong with
going in the same direction. It's just however you want
that end result to be. So keep that in mind. I do recommend using all
six of the floss, all strands, if you want to
get that kind of puffy look. So I'm going to
speed this up, and I will meet you on
the other side. It's getting a little wild. So you can see I'm still
making those same offsets. I'm making the loops,
I'm locking them in. And it's getting pretty hairy. So I think it's about
ready for a trim, and I'm just going
to take my scissors. You can literally
go loop by loop, or you can grab them
like I normally do and just go to town. So again, keep in mind, you can never go longer.
You can always go shorter. So I recommend starting a little long and
then shaping it up. And I would still even leave
it a little long before you rinse the piece out, like rinse off the stabilizer cause you may want to
puff it up a little bit after it's been rinsed or shorten it,
shape it a little bit. So leave a little
extra for after. There we go. Look pre kid. Almost ready to assemble. Key takeaways. Satin stitches are great for quickly
filling in shapes. Be sure to pick the thread volume that works best for you. The turkey work gives more dimension and texture
to the piece, but you may also use the
French knot as a substitute. Happy stitching. I'll see
you in the next lesson.
10. Ornament Assembly: In this lesson,
we're going to be assembling our ornament.
So let's jump in. First things first,
we're going to take these out of the hoop, and we're going to cut out
each of these individually. So you have two rings here. The one that is a dash line is how big your pendant
is going to be. That's going to be
the visible area. So it's really that outer
dark line that I want to make sure I give
enough clearance for us to be able to
finish these off. So go ahead and cut those out. We're going to cut out
all five of these, and then we'll rinse
them all at once, and I'll show you how to
assemble one of them, and you can continue
the same for the other four. So I'm going
to speed this up. Again, I'm just
cutting this out. Please make sure that you
leave enough clearance. We're gonna need it
in the next step. Okay, now we have all
five of these cut out. We're going to move
over to the sink. Remember, this is water soluble. So however you want to remove the stabilizer is up to you. This is already
peeling. So you can see this is going to
come off pretty easily. I have used them in the sink. I've let them soaked overnight. Ultimately, if I'm in a hurry, I will use the kitchen sprayer. Those come off the fastest. I just want to make sure you
have all the residue off so that all that's left is
your fabric and your thread. So I'm going to clean these off, and then I'm going
to show you how they look after they're all rinsed. So these are looking
pretty good. Gonna let them dry and then I'll meet you back
for the next step. So here we're going to start with our pendant and the paper, whatever backing you're using. So I have the watercolor paper, and it's just a little
too big for the pendant. So I've done so many of these. I think I've pretty
much dialed this in. I'm just giving it the
thinnest little shave so that it will fit
directly into my pendant. You may have to work with a
couple of different times. It's going to depend on the
paper backing you're using, the cardboard,
whatever piece you're using, and your fabric. So if your fabric is
a little bit thicker, a little bit thinner, you may not have to make as much or you may have to make
more of an adjustment. So I got that one pretty good. Like I said, I've done a few of these, so I'm getting
better at it. So now that that
fits my pendant, I'm going to go ahead and start stitching my actual
ornament piece. So the stabilizer is gone. I'm going to come up
through the back, and I'm just going to be these are essentially
straight stitches. I can't get too
close to the end, but I want to get
as close as I can, because I don't want it to
rip through the fabric. But I'm just going
to be doing straight stitches all the way around. So I guess this is
a running stitch. So I'm going through in and out in and out,
pretty close together. This is going to allow me
at the end to pull it so that it's going to close over
top of that circle piece. So I'm going to speed this up. But again, we're just
going in and out. We're doing a running
stitch all along the border of our
ornament piece. So now that I have
that on there, I'm going to bring
up that cardboard piece and place it on the back. And this is the most
satisfying part. You just pull, and it
cinches around that circle. And then I go a
couple extra steps. So you could just knot
this off and be done. I put a couple extra
stitches in just because I want to make sure it's secure and it
doesn't go anywhere. I like to do these a
little bit tighter, and then I'm going to
not it off and cut off. So I've knotted it off here. I'm just cutting off the thread. And then we are all
done with that piece, and we're ready to glue it in. So I'm going to grab my pendant, make sure that this fits
just one last check. And then we're going to
move on to the glue. So this glue will glue anything, so please be careful. I am going to just
do a few dots. There are some, if you were doing beads or hindstones, there's pieces
that come with it. I'm going to use those for this because it's not that delicate. So I'm just going to
put in a.in the middle, and then I'm going to go
around the outside of this pendant just to make sure that I'm really
gluing it down well. I don't want this
to go anywhere. And then I usually put a little bit on the back
of my stitching, too. Yeah. So maybe one or
two dots on the back, and then I just kind of
wipe it off on there, too to help clean
off my glue tip. So now that I have the
glue, I'm gonna be really, really careful not
to glue my fingers together or to the pendant, and I'm just going to lay this down straight onto the pendant. And then I just hold
it for a little bit, and honestly, it
adheres pretty quickly. So I'm going to give that
a little bit of pressure, and then we're going
to be all done. So that is our ornament. Give that a little
more time. That's it. And I'm going to show
you one other one. So again, ribbons totally
optional. Like, this is done. Ribbon is totally optional. I do love those. I'm gonna
show you one of those, too. Yeah, so there's one and
one without the ribbon. So feel free to get creative
there could be any color. I cannot wait to see
what you guys have made. Key takeaways. Be
careful with the glue. It comes out fast at times
and it is a serious adhesive. The 1 " circle is flexible. Be sure to adjust as needed with your fabric to
fit the pendant. Cereal boxes are a
great alternative too. The ribbon is optional, but gives a little more
flare to your gift. I'll see you the next lesson.
11. Final Thoughts: Thank you so much for
following along today. I hope you enjoyed our class
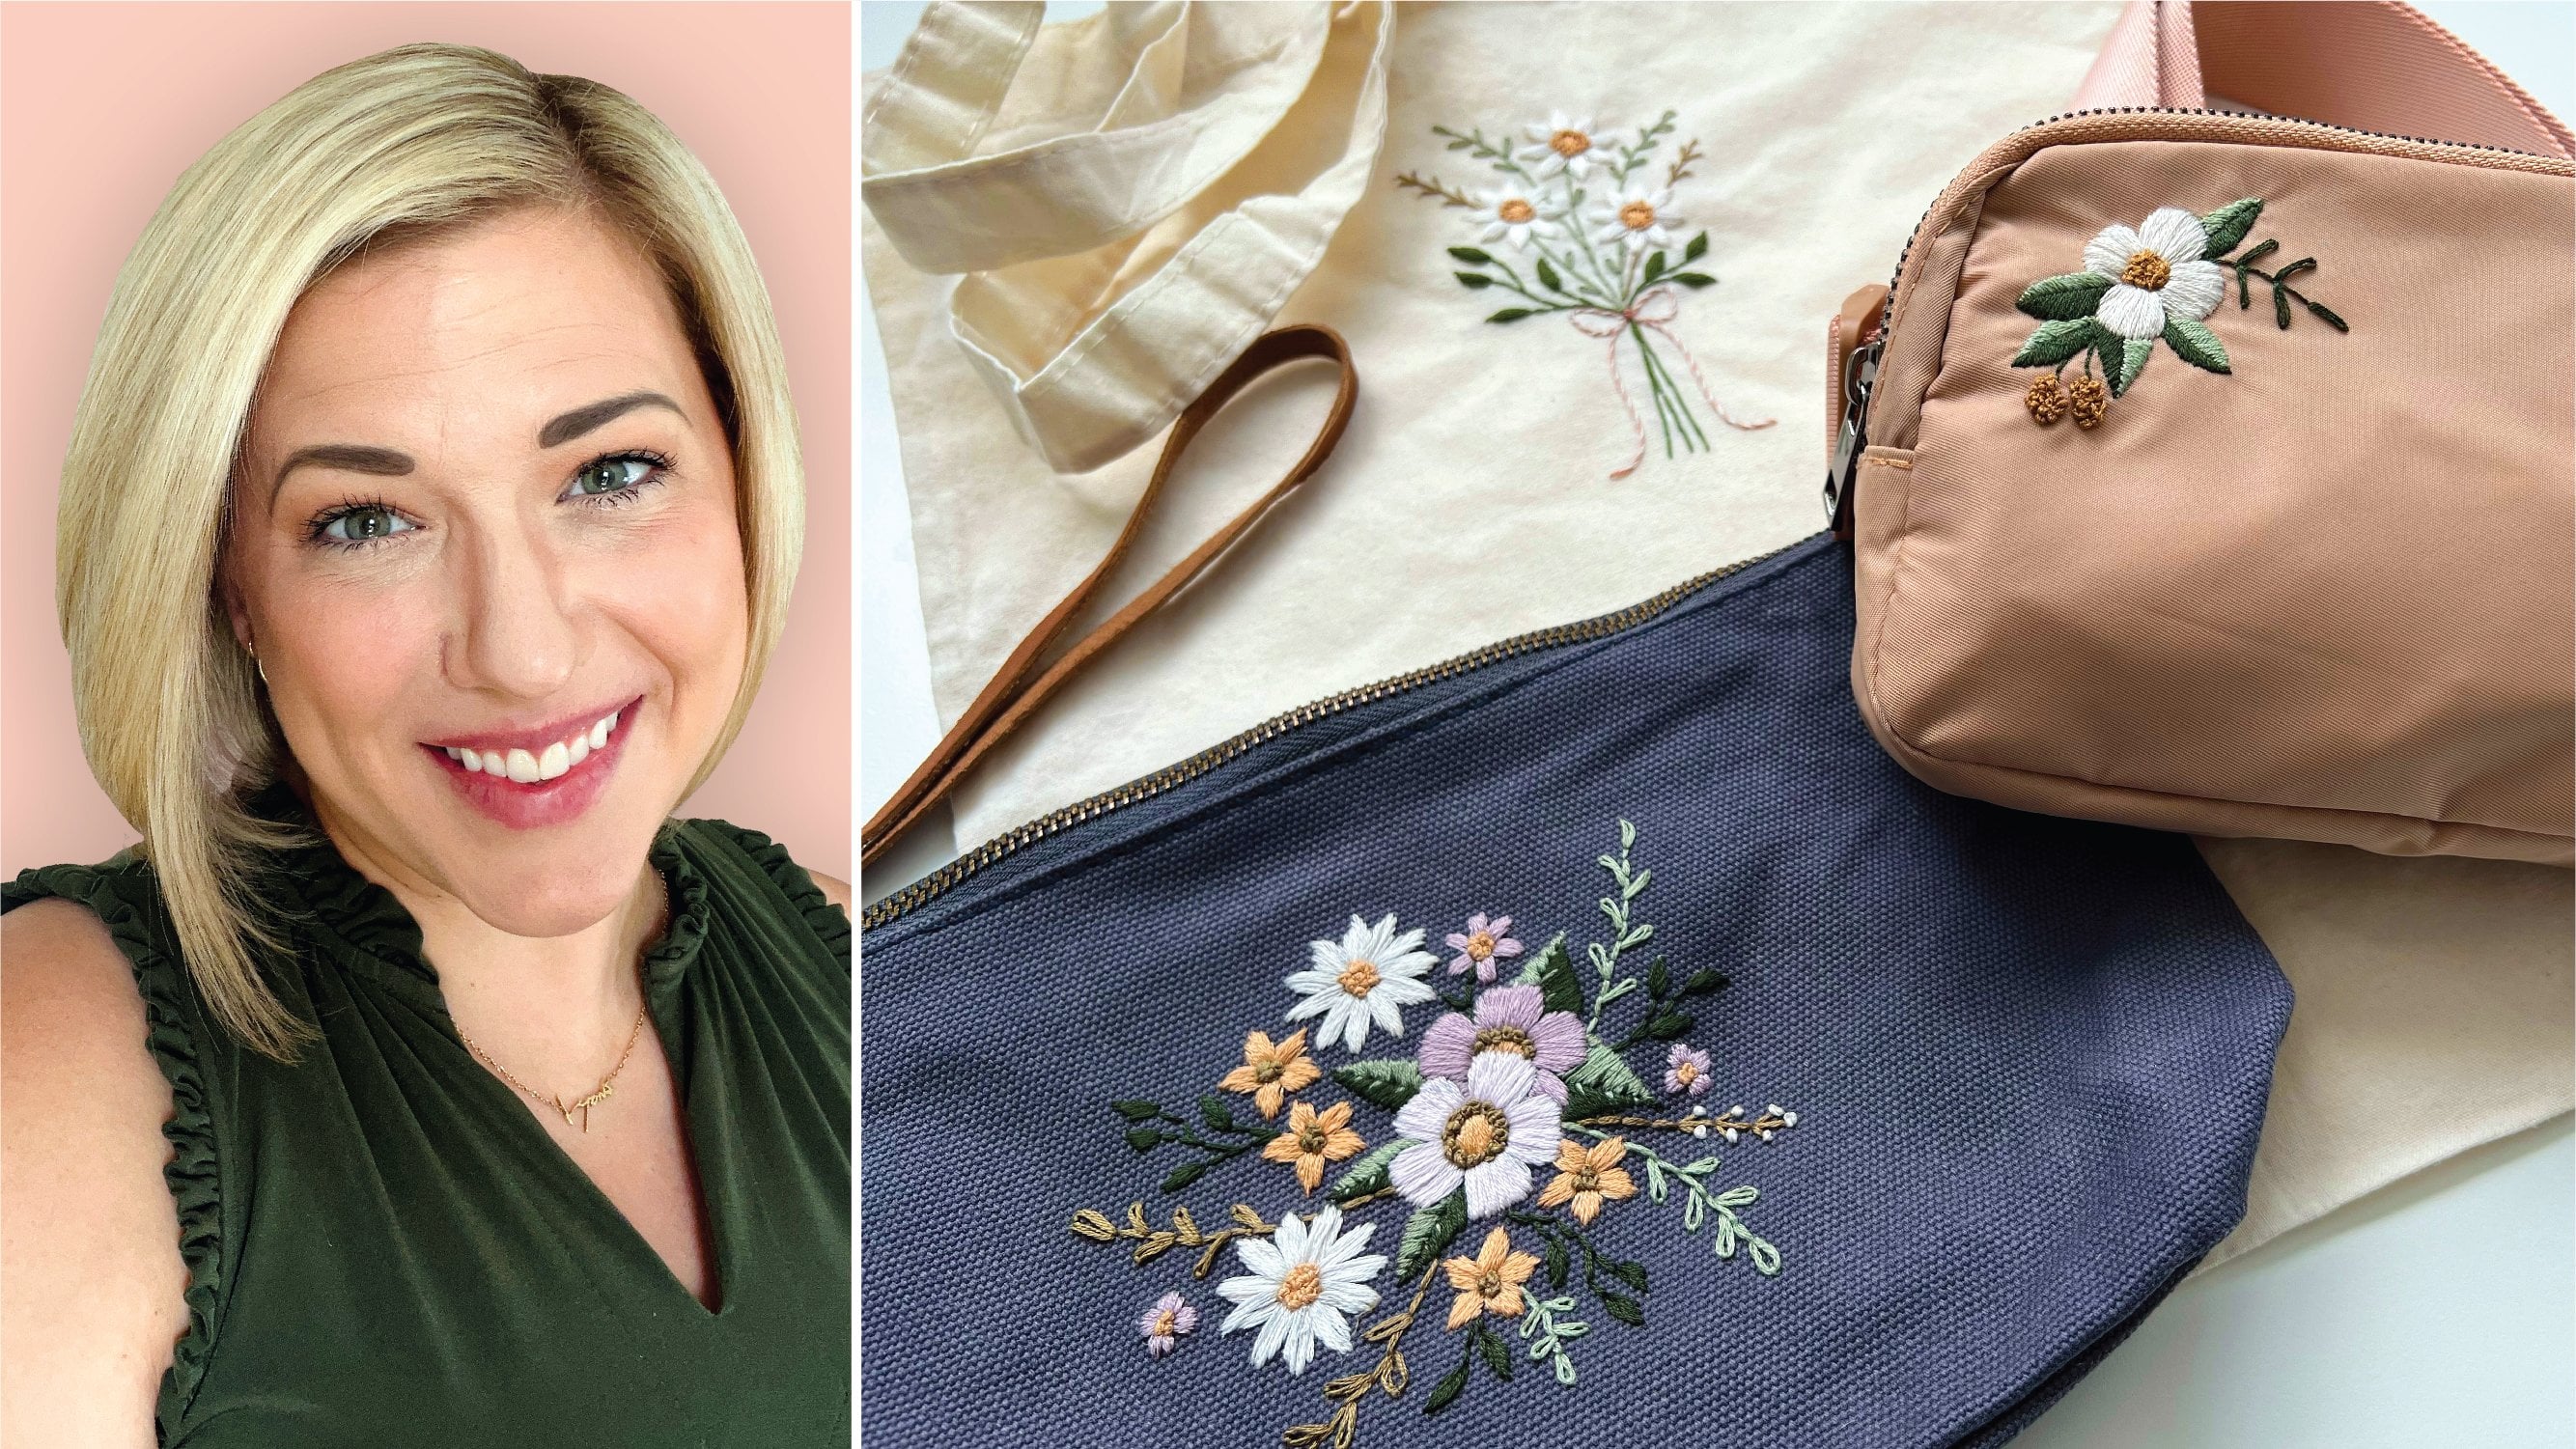
and you're able to share the holiday spirit through your own ornaments or pendants, or sharing it with a loved one. Embroidery is such
a great way to unwind and bring some
mindfulness back to your life. If you like more, I have a couple more classes
on Skill Share. I am also working on a class
that's launching in January. If you're interested,
please shoot me a DM or email me at Kathleen
at artlions.com. I'm also rsions on
all of the platforms. Be sure to post
your final pieces or better yet a video
of you giving it away. I would love to see
that. But if you have anything that you can
share online, please tag me. I'd love to see what
y'all are making. Also, if you have
time, I would so appreciate a review
here on Skill Share. I'd love to hear
your feedback and any suggestions
for things you're seeing out there that
you'd like to learn too. I'm always looking
for class ideas to help you learn more
about embroidery. Until next time,
keep on stitching.
 Kat Lyons, Artist + Educator + Entrepreneur